App Service Web
0 likes54 views

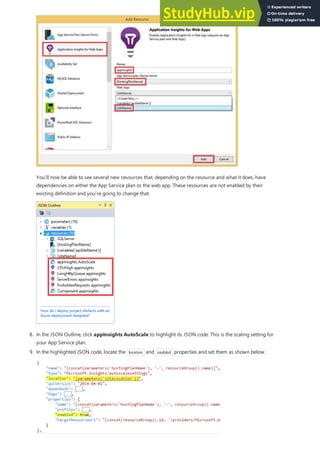
The document provides an overview of different options for hosting web applications on Azure, including App Service (Web Apps), Cloud Services (Web Roles), Virtual Machines, and Service Fabric. It compares key features of each option and provides recommendations for common scenarios. App Service is generally the best choice for most web apps due to its ease of use, auto-scaling capabilities, and integration with other Azure services. Service Fabric is recommended for microservices architectures, while Virtual Machines require more management but provide more control over infrastructure.


![Counting objects:23, done.
Delta compression using up to 4threads.
Compressing objects:100% (21/21), done.
Writing objects:100% (23/23), 3.71KiB| 0bytes/s, done.
Total23(delta 8), reused 7(delta 1)
remote:Updating branch 'master'.
remote:Updating submodules.
remote:Preparing deployment for commit id 'bf114df591'.
remote:Generating deployment script.
remote:Generating deployment script for node.js Web Site
remote:Generated deployment script files
remote:Running deployment command...
remote:Handling node.js deployment.
remote:Kudu sync from:'/home/site/repository' to:'/home/site/wwwroot'
remote:Copying file:'.gitignore'
remote:Copying file:'LICENSE'
remote:Copying file:'README.md'
remote:Copying file:'index.js'
remote:Copying file:'package.json'
remote:Copying file:'process.json'
remote:Deleting file:'hostingstart.html'
remote:Ignoring:.git
remote:Using start-up script index.js frompackage.json.
remote:Node.js versions available on the platformare:4.4.7, 4.5.0, 6.2.2, 6.6.0, 6.9.1.
remote:Selected node.js version 6.9.1. Use package.json file to choose a different version.
remote:Selected npmversion 3.10.8
remote:Finished successfully.
remote:Running post deployment command(s)...
remote:Deployment successful.
To https://<app_name>.scm.azurewebsites.net:443/<app_name>.git
* [newbranch] master -> master
Browse to the app
http://<app_name>.azurewebsites.net
Updating and Deploying the Code
response.end("Hello Azure!");
git commit -am"updated output"
git push azure master
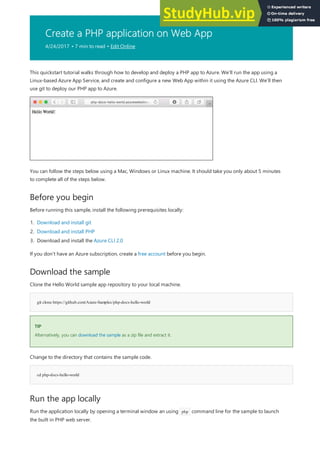
Browse to the deployed application using your web browser.
This time, the page that displays the Hello World message is running using our Node.js code running as an Azure
App Service web app.
Using a local text editor, open the index.js file within the Node.js app, and make a small change to the text within
the call to response.end :
Commit your changes in git, then push the code changes to Azure.
Once deployment has completed, switch back to the browser window that opened in the Browse to the app step,
and hit refresh.](https://image.slidesharecdn.com/appserviceweb-230806184930-59dcfe26/85/App-Service-Web-31-320.jpg)


![{
"clientAffinityEnabled":true,
"defaultHostName":"<app_name>.azurewebsites.net",
"enabled":true,
"enabledHostNames":[
"<app_name>.azurewebsites.net",
"<app_name>.scm.azurewebsites.net"
],
"hostNames":[
"<app_name>.azurewebsites.net"
],
"id":"/subscriptions/00000000-0000-0000-0000-
000000000000/resourceGroups/myResourceGroup/providers/Microsoft.Web/sites/<app_name>",
"kind":"app",
"location":"North Europe",
"outboundIpAddresses":"13.69.190.80,13.69.191.239,13.69.186.193,13.69.187.34",
"resourceGroup":"myResourceGroup",
"serverFarmId":"/subscriptions/00000000-0000-0000-0000-
000000000000/resourceGroups/myResourceGroup/providers/Microsoft.Web/serverfarms/quickStartPlan",
"state":"Running",
"type":"Microsoft.Web/sites",
}
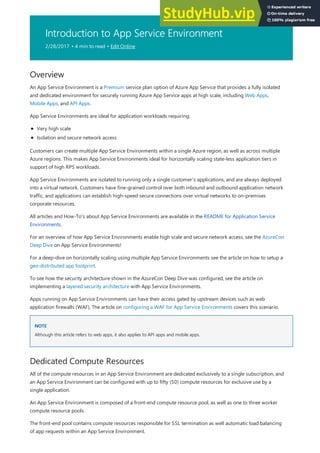
http://<app_name>.azurewebsites.net
Configure to use Python
TIP
TIP
Browse to the site to see your newly created Web App.
We’ve now created an empty new Web App in Azure. Let’s now configure our Web App to use Python and deploy
our app to it.
Use the az appservice web config update command to configure the Web App to use Python version 3.4 .
Setting the Python version this way uses a default container provided by the platform, if you would like to use your own
container refer to the CLI reference for the az appservice web config container update command.](https://image.slidesharecdn.com/appserviceweb-230806184930-59dcfe26/85/App-Service-Web-60-320.jpg)

![Counting objects:18, done.
Delta compression using up to 4threads.
Compressing objects:100% (16/16), done.
Writing objects:100% (18/18), 4.31KiB| 0bytes/s, done.
Total18(delta 4), reused 0(delta 0)
remote:Updating branch 'master'.
remote:Updating submodules.
remote:Preparing deployment for commit id '44e74fe7dd'.
remote:Generating deployment script.
remote:Generating deployment script for python Web Site
remote:Generated deployment script files
remote:Running deployment command...
remote:Handling python deployment.
remote:KuduSync.NET from:'D:homesiterepository' to:'D:homesitewwwroot'
remote:Deleting file:'hostingstart.html'
remote:Copying file:'.gitignore'
remote:Copying file:'LICENSE'
remote:Copying file:'main.py'
remote:Copying file:'README.md'
remote:Copying file:'requirements.txt'
remote:Copying file:'virtualenv_proxy.py'
remote:Copying file:'web.2.7.config'
remote:Copying file:'web.3.4.config'
remote:Detected requirements.txt. You can skip Python specific steps with a .skipPythonDeployment file.
remote:Detecting Python runtime fromsite configuration
remote:Detected python-3.4
remote:Creating python-3.4virtualenvironment.
remote:.................................
remote:Pip installrequirements.
remote:Successfully installed Flaskclickitsdangerous Jinja2Werkzeug MarkupSafe
remote:Cleaning up...
remote:.
remote:Overwriting web.config with web.3.4.config
remote: 1file(s) copied.
remote:Finished successfully.
remote:Running post deployment command(s)...
remote:Deployment successful.
To https://<app_name>.scm.azurewebsites.net/<app_name>.git
* [newbranch] master -> master
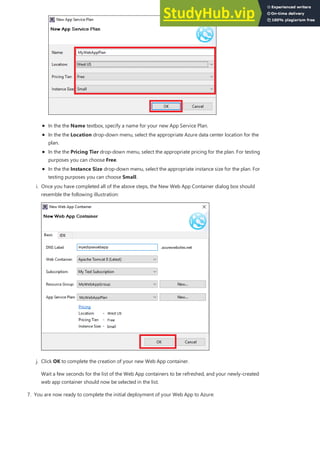
Browse to the app
http://<app_name>.azurewebsites.net
Updating and Deploying the Code
return 'Hello, Azure!'
Browse to the deployed application using your web browser.
This time, the page that displays the Hello World message is running using our Python code running as an Azure
App Service web app.
![]()
Using a local text editor, open the main.py file within the Python app, and make a small change to the text within
the string next to return statement:
Commit your changes in git, then push the code changes to Azure.](https://image.slidesharecdn.com/appserviceweb-230806184930-59dcfe26/85/App-Service-Web-62-320.jpg)


![Use the new property
Use the new property
public ActionResult Create([Bind(Include = "id,Description,CreatedDate,Done")] Todo todo)
<div class="form-group">
@Html.LabelFor(model=> model.Done, htmlAttributes:new{ @class = "control-labelcol-md-2" })
<div class="col-md-10">
<div class="checkbox">
@Html.EditorFor(model=> model.Done)
@Html.ValidationMessageFor(model=> model.Done, "", new{ @class = "text-danger" })
</div>
</div>
</div>
<th>
@Html.DisplayNameFor(model=> model.Done)
</th>
<td>
@Html.DisplayFor(modelItem=> item.Done)
</td>
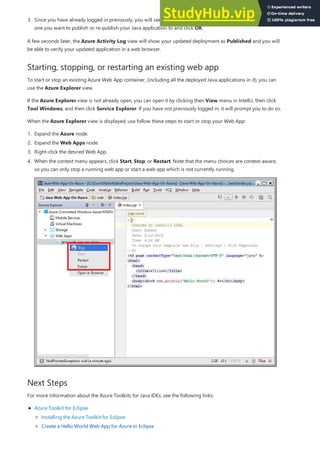
Enable Code First Migrations in Azure
Enable Code First Migrations in Azure
If the application loads without errors, then Code First Migrations has succeeded. However, your page still looks the
same because your application logic is not using this new property yet.
Lets make some changes in your code to use the Done property. For simplicity in this tutorial, you're only going to
change the Index and Create views to see the property in action.
Open ControllersTodosController.cs .
Find the Create() method and add Done to the list of properties in the Bind attribute. When you're done, your
Create() method signature should look like this:
Open ViewsTodosCreate.cshtml .
In the Razor code, you should see a <div class="form-group"> tag that uses model.Description , and then another
<div class="form-group"> tag that uses model.CreatedDate . Immediately following these two tags, add another
<div class="form-group"> tag that uses model.Done , like this:
Open ViewsTodosIndex.cshtml .
Search for the empty <th></th> tag. Just above this tag, add the following Razor code:
Find the <td> tag that contains the Html.ActionLink() helper methods. Just above this tag, add the following Razor
code:
That's all you need to see the changes in the Index and Create views.
Type F5 again to run the application.
You should be able now to add a to-do item and check Done. Then it should show up in your homepage as a
completed item. Remember that this is all you can do for now because you didn't change the Edit view.
Now that your code change works, including database migration, you publish it to your Azure web app and update
your SQL Database with Code First Migrations too.](https://image.slidesharecdn.com/appserviceweb-230806184930-59dcfe26/85/App-Service-Web-76-320.jpg)


![TIP
TIP
Application:2017-04-06T23:30:41 PID[8132] Verbose GET /Todos/Index
Application:2017-04-06T23:30:43 PID[8132] Verbose GET /Todos/Create
Application:2017-04-06T23:30:53 PID[8132] Verbose POST /Todos/Create
Application:2017-04-06T23:30:54 PID[8132] Verbose GET /Todos/Index
Stop log streaming
Stop log streaming
Manage your Azure web app
You can experiment with different trace levels to see what types of messages is displayed for each level. For example, the
Information level includes all logs created by Trace.TraceInformation() , Trace.TraceWarning() , and
Trace.TraceError() , but not logs created by Trace.WriteLine() .
In your browser, try clicking around the to-do list application in Azure. The trace messages are now streamed to the
Output window in Visual Studio.
To stop the log-streaming service, click the Stop monitoring button in the Output window.
Go to the Azure portal to see the web app you created.
To do this, sign in to https://portal.azure.com.
From the left menu, click App Service, then click the name of your Azure web app.
You have landed in your web app's blade (a portal page that opens horizontally).
By default, your web app's blade shows the Overview page. This page gives you a view of how your app is doing.
Here, you can also perform basic management tasks like browse, stop, start, restart, and delete. The tabs on the left
side of the blade show the different configuration pages you can open.](https://image.slidesharecdn.com/appserviceweb-230806184930-59dcfe26/85/App-Service-Web-80-320.jpg)


![{
"databaseAccountOfferType":"Standard",
"documentEndpoint":"https://<documentdb_name>.documents.azure.com:443/",
"id":"/subscriptions/00000000-0000-0000-0000-000000000000/resourceGroups/myResourceGroup/providers/Microsoft.Document
DB/databaseAccounts/<documentdb_name>",
"kind":"MongoDB",
"location":"West Europe",
"name":"<documentdb_name>",
"readLocations":[
...
],
"resourceGroup":"myResourceGroup",
"type":"Microsoft.DocumentDB/databaseAccounts",
"writeLocations":[
...
]
}
Connect your Node.js application to the database
Retrieve the database key
Retrieve the database key
azdocumentdb list-keys --name <documentdb_name> --resource-group myResourceGroup
{
"primaryMasterKey":"RUayjYjixJDWG5xTqIiXjC...",
"primaryReadonlyMasterKey":"...",
"secondaryMasterKey":"...",
"secondaryReadonlyMasterKey":"..."
}
Configure the connection string in your Node.js application
Configure the connection string in your Node.js application
db:{
uri:'mongodb://<documentdb_name>:<primary_maste_key>@<documentdb_name>.documents.azure.com:10250/mean?
ssl=true&sslverifycertificate=false',
...
},
In this step, you connect your MEAN.js sample application to the DocumentDB database you just created, using a
MongoDB connection string.
To connect to the DocumentDB database, you need the database key. Use the az documentdb list-keys command to
retrieve the primary key.
The Azure CLI outputs information similar to the following example:
Copy the value of primaryMasterKey to a text editor. You need this information in the next step.
In your MEAN.js repository, open config/env/production.js .
In the db object, replace the value of uri as show in the following example. Be sure to also replace the two
<documentdb_name> placeholders with your DocumentDB database name, and the <primary_maste_key> placeholder
with the key you copied in the previous step.](https://image.slidesharecdn.com/appserviceweb-230806184930-59dcfe26/85/App-Service-Web-85-320.jpg)


![NOTE
NOTE
azappservice web deployment user set --user-name <specify-a-username> --password <mininum-8-char-captital-lowercase-number>
azappservice web source-controlconfig-local-git --name <app_name> --resource-group myResourceGroup
https://<username>@<app_name>.scm.azurewebsites.net:443/<app_name>.git
Push to Azure from Git
Push to Azure from Git
git remote add azure <paste_copied_url_here>
git push azure master
Counting objects:5, done.
Delta compression using up to 4threads.
Compressing objects:100% (5/5), done.
Writing objects:100% (5/5), 489bytes | 0bytes/s, done.
Total5(delta 3), reused 0(delta 0)
remote:Updating branch 'master'.
remote:Updating submodules.
remote:Preparing deployment for commit id '6c7c716eee'.
remote:Running customdeployment command...
remote:Running deployment command...
remote:Handling node.js deployment.
.
.
.
remote:Deployment successful.
To https://<app_name>.scm.azurewebsites.net/<app_name>.git
* [newbranch] master -> master
A deployment user is required for FTP and Local Git deployment to App Service. This deployment user is account-level. As
such, it is different from your Azure subscription account. You only need to configure this deployment user once.
Use the az appservice web source-control config-local-git command to configure local Git access to the Azure web
app.
When the deployment user is configured, the Azure CLI shows the deployment URL for your Azure web app in the
following format:
Copy the output from the terminal as it will be used in the next step.
Add an Azure remote to your local Git repository.
Push to the Azure remote to deploy your Node.js application. You will be prompted for the password you supplied
earlier as part of the creation of the deployment user.
During deployment, Azure App Service communicates its progress with Git.](https://image.slidesharecdn.com/appserviceweb-230806184930-59dcfe26/85/App-Service-Web-89-320.jpg)


![Move an app to a different App Service plan
IMPORTANT
IMPORTANT
To create an App Service plan, click [+] Create New, type the App Service plan name, and then select an
appropriate Location. Click Pricing tier, and then select an appropriate pricing tier for the service. Select View all
to view more pricing options, such as Free and Shared. After you have selected the pricing tier, click the Select
button.
You can move an app to a different App Service plan in the Azure portal. You can move apps between plans as
long as the plans are in the same resource group and geographical region.
To move an app to another plan:
Navigate to the app that you want to move.
In the Menu, look for the App Service Plan section.
Select Change App Service plan to start the process.
Change App Service plan opens the App Service plan selector. At this point, you can pick an existing plan to
move this app into.
Only valid plans (in the same resource group and geographical location) are shown.](https://image.slidesharecdn.com/appserviceweb-230806184930-59dcfe26/85/App-Service-Web-123-320.jpg)


![Authenticate with on-premises Active Directory in
your Azure app
2/28/2017 • 1 min to read • Edit Online
Authenticate through Azure Active Directory
Authenticate through an on-premises STS
This article shows you how to authenticate with on-premises Active Directory (AD) in Azure App Service. An Azure
app is hosted in the cloud, but there are ways to authenticate on-premises AD users securely.
An Azure Active Directory tenant can be directory-synced with an on-premises AD. This approach enables AD users
to access your App from the internet and authenticate using their on-premises credentials. Furthermore, Azure App
Service provides a turn-key solution for this method. With a few clicks of a button, you can enable authentication
with a directory-synced tenant for your Azure app. This approach has the following advantages:
Does not require any authentication code in your app. Let App Service do the authentication for you and spend
your time on providing functionality in your app.
Azure AD Graph API enables access to directory data from your Azure app.
Provides SSO to all applications supported by Azure Active Directory, including Office 365, Dynamics CRM
Online, Microsoft Intune, and thousands of non-Microsoft cloud applications.
Azure Active Directory supports role-based access control. You can use the [Authorize(Roles="X")] pattern with
minimal changes to your code.
To see how to write a line-of-business Azure app that authenticates with Azure Active Directory, see Create a line-
of-business Azure app with Azure Active Directory authentication.
If you have an on-premises secure token service (STS) like Active Directory Federation Services (AD FS), you can use
that to federate authentication for your Azure app. This approach is best when company policy prohibits AD data
from being stored in Azure. However, note the following:
STS topology must be deployed on-premises, with cost and management overhead.
Only AD FS administrators can configure relying party trusts and claim rules, which may limit the developer's
options. On the other hand, it is possible to manage and customize claims on a per-application basis.
Access to on-premises AD data requires a separate solution through the corporate firewall.
To see how to write a line-of-business Azure app that authenticates with an on-premises STS, see Create a line-of-
business Azure app with AD FS authentication.](https://image.slidesharecdn.com/appserviceweb-230806184930-59dcfe26/85/App-Service-Web-133-320.jpg)


![NOTE
NOTE
Run the app in Azure
app is located.
git remote add azure [URLfor remote repository]
git config credential.helper store
git push -u azure master
remote:Deployment successful.
To https://user@testsite.scm.azurewebsites.net/testsite.git
[newbranch] master -> master
7. Create a remote reference for pushing updates to your web app by using the Git URL (ending in ".git") that
you copied earlier.
8. Configure Git to save your credentials locally so that they will be automatically appended to your push
commands generated from VS Code.
9. Push your changes to Azure by entering the following command. After this initial push to Azure, you will be
able to do all the push commands from VS Code.
You are prompted for the password you created earlier in Azure. Note: Your password will not be visible.
The output from the above command ends with a message that deployment is successful.
If you make changes to your app, you can republish directly in VS Code using the built-in Git functionality by selecting the
Commit All option followed by the Push option. You will find the Push option available in the drop-down menu next to the
Commit All and Refresh buttons.
If you need to collaborate on a project, you should consider pushing to GitHub in between pushing to Azure.
Now that you have deployed your web app, let's run the app while hosted in Azure.
This can be done in two ways:
http://SampleWebAppDemo.azurewebsites.net
In the Azure Portal, locate the web app blade for your web app, and click Browse to view your app
in your default browser.
Open a browser and enter the name of your web app as follows.](https://image.slidesharecdn.com/appserviceweb-230806184930-59dcfe26/85/App-Service-Web-145-320.jpg)


![azure site restart [sitename]
NOTE
NOTE
Accessing logs
npminstallazure-cli-g
FTP
FTP
NOTE
NOTE
Zip archive
Zip archive
azure site log download [sitename]
If the Azure Command-Line Tools are installed in your development environment, you can use the following
command to restart the web app:
While loggingEnabled and devErrorsEnabled are the most commonly used IISNode.yml configuration options for capturing
diagnostic information, IISNode.yml can be used to configure a variety of options for your hosting environment. For a full list
of the configuration options, see the iisnode_schema.xml file.
Diagnostic logs can be accessed in three ways; Using the File Transfer Protocol (FTP), downloading a Zip archive, or
as a live updated stream of the log (also known as a tail). Downloading the Zip archive of the log files or viewing
the live stream require the Azure Command-Line Tools. These can be installed by using the following command:
Once installed, the tools can be accessed using the 'azure' command. The command-line tools must first be
configured to use your Azure subscription. For information on how to accomplish this task, see the How to
download and import publish settings section of the How to Use The Azure Command-Line Tools article.
To access the diagnostic information through FTP, visit the Azure Portal, select your web app, and then select the
DASHBOARD. In the quick links section, the FTP DIAGNOSTIC LOGS and FTPS DIAGNOSTIC LOGS links
provide access to the logs using the FTP protocol.
If you have not previously configured user name and password for FTP or deployment, you can do so from the Quickstart
management page by selecting Set up deployment credentials.
The FTP URL returned in the dashboard is for the LogFiles directory, which will contain the following sub-
directories:
Deployment Method - If you use a deployment method such as Git, a directory of the same name will be
created and will contain information related to deployments.
nodejs - Stdout and stderr information captured from all instances of your application (when loggingEnabled is
true.)
To download a Zip archive of the diagnostic logs, use the following command from the Azure Command-Line
Tools:
This will download a diagnostics.zip in the current directory. This archive contains the following directory](https://image.slidesharecdn.com/appserviceweb-230806184930-59dcfe26/85/App-Service-Web-170-320.jpg)
![Live stream (tail)
Live stream (tail)
azure site log tail[sitename]
Next Steps
What's changed
NOTE
NOTE
structure:
deployments - A log of information about deployments of your application
LogFiles
Deployment method - If you use a deployment method such as Git, a directory of the same name will be
created and will contain information related to deployments.
nodejs - Stdout and stderr information captured from all instances of your application (when
loggingEnabled is true.)
To view a live stream of diagnostic log information, use the following command from the Azure Command-Line
Tools:
This will return a stream of log events that are updated as they occur on the server. This stream will return
deployment information as well as stdout and stderr information (when loggingEnabled is true.)
In this article you learned how to enable and access diagnostics information for Azure. While this information is
useful in understanding problems that occur with your application, it may point to a problem with a module you
are using or that the version of Node.js used by App Service Web Apps is different than the one used in your
deployment environment.
For information in working with modules on Azure, see Using Node.js Modules with Azure Applications.
For information on specifying a Node.js version for your application, see Specifying a Node.js version in an Azure
application.
For more information, see also the Node.js Developer Center.
For a guide to the change from Websites to App Service see: Azure App Service and Its Impact on Existing Azure
Services
If you want to get started with Azure App Service before signing up for an Azure account, go to Try App Service, where you
can immediately create a short-lived starter web app in App Service. No credit cards required; no commitments.](https://image.slidesharecdn.com/appserviceweb-230806184930-59dcfe26/85/App-Service-Web-171-320.jpg)


![public static void main(String[] args)
throws IOException, URISyntaxException, ServiceException,
ParserConfigurationException, SAXException, Exception {
// Create web app
createWebApp();
} // end of main()
} // end of WebAppCreator class
Run the application and verify web app creation
Run the application and verify web app creation
----------
Web app created - HTTP response 200
----------
Name of web app created:WebDemoWebApp
----------
Deploying an Application to the Web App
Create a JSP Hello World application
Create a JSP Hello World application
Create the application
Create the application
Finally, call createWebApp from main :
To verify that your application runs, click Run > Run. When the application completes running, you should see the
following output in the Eclipse console:
Log into the Azure classic portal and click Web Apps. The new web app should appear in the Web Apps list within a
few minutes.
After you have run AzureWebDemo and created the new web app, log into the classic portal, click Web Apps, and
select WebDemoWebApp in the Web Apps list. In the web app's dashboard page, click Browse (or click the URL,
webdemowebapp.azurewebsites.net ) to navigate to it. You will see a blank placeholder page, because no content has been
published to the web app yet.
Next you will create a "Hello World" application and deploy it to the web app.
In order to demonstrate how to deploy an application to the web, the following procedure shows you how to create
a simple "Hello World" Java application and upload it to the App Service Web App that your application created.
1. Click File > New > Dynamic Web Project. Name it JSPHello . You do not need to change any other settings
in this dialog. Click Finish.](https://image.slidesharecdn.com/appserviceweb-230806184930-59dcfe26/85/App-Service-Web-205-320.jpg)


![To find your SendGrid credentials
To find your SendGrid credentials
![manage][manage]
For more information on sending emailthrough SendGrid, visit the [EmailAPI Overview][EmailAPI Overview].
Reference the SendGrid .NET Class Library
NOTE
NOTE
5. Your API will be displayed at this point one time. Please be sure to store it safely.
2. The password is the one you chose at setup. You can select Change password or Reset password to make any
changes.
1. Click the key icon to find your Username.
To manage your email deliverability settings, click the Manage button. This will redirect to your SendGrid
dashboard.
The SendGrid NuGet package is the easiest way to get the SendGrid API and to configure your application with all
dependencies. NuGet is a Visual Studio extension included with Microsoft Visual Studio 2015 and above that makes
it easy to install and update libraries and tools.
To install NuGet if you are running a version of Visual Studio earlier than Visual Studio 2015, visit http://www.nuget.org, and
click the Install NuGet button.
To install the SendGrid NuGet package in your application, do the following:
1. Click on New Project and select a Template.](https://image.slidesharecdn.com/appserviceweb-230806184930-59dcfe26/85/App-Service-Web-230-320.jpg)


![Use PM2 configuration for Node.js in Web Apps on
Linux
2/28/2017 • 1 min to read • Edit Online
{
"name" :"worker",
"script" :"/bin/server.js",
"instances" :1,
"merge_logs" :true,
"log_date_format" :"YYYY-MM-DDHH:mmZ",
"watch":["/bin/server.js", "foo.txt"],
"watch_options":{
"followSymlinks":true,
"usePolling" :true,
"interval" :5
}
}
If you set the application stack to Node.js for Web Apps on Linux, you get the option to set a Node.js startup file as
shown in the following image:
You can use this option to do one of the following tasks:
Specify the startup script for your Node.js app (for example: /bin/server.js).
NOTE
NOTE
Specify the PM2 configuration file to use for your Node.js app (for example: /foo/process.json).
If you want your Node.js processes to restart automatically when certain files are modified, use the PM2 configuration.
Otherwise, your application won't restart when it receives change notifications (for example, when your application
code changes).
You can check the Node.js process file documentation for all the options, but following is a sample of what you can
use as your process.json file:
Important things to note in this configuration are:
The "script" property specifies your application's start script.
The "instances" property specifies how many instances of the node process to launch. If you are running your
application on larger VMs that have multiple cores, it's a good idea to maximize your resources by setting a](https://image.slidesharecdn.com/appserviceweb-230806184930-59dcfe26/85/App-Service-Web-244-320.jpg)


![def wsgi_app(environ, start_response):
status = '200OK'
response_headers = [('Content-type', 'text/plain')]
start_response(status, response_headers)
response_body = 'Hello World'
yield response_body.encode()
if __name__ == '__main__':
fromwsgiref.simple_server import make_server
httpd = make_server('localhost', 5555, wsgi_app)
httpd.serve_forever()
Virtual Environment
Package Management
azure==0.8.4
Python Version
WSGI is a Python standard described by PEP 3333 defining an interface between the web server and Python. It
provides a standardized interface for writing various web applications and frameworks using Python. Popular
Python web frameworks today use WSGI. Azure App Service Web Apps gives you support for any such frameworks;
in addition, advanced users can even author their own as long as the custom handler follows the WSGI specification
guidelines.
Here's an example of an app.py that defines a custom handler:
You can run this application locally with python app.py , then browse to http://localhost:5555 in your web browser.
Although the example app above doesn't require any external packages, it is likely that your application will require
some.
To help manage external package dependencies, Azure Git deployment supports the creation of virtual
environments.
When Azure detects a requirements.txt in the root of the repository, it automatically creates a virtual environment
named env . This only occurs on the first deployment, or during any deployment after the selected Python runtime
has changed.
You will probably want to create a virtual environment locally for development, but don't include it in your Git
repository.
Packages listed in requirements.txt will be installed automatically in the virtual environment using pip. This happens
on every deployment, but pip will skip installation if a package is already installed.
Example requirements.txt :
Azure will determine the version of Python to use for its virtual environment with the following priority:
1. version specified in runtime.txt in the root folder
2. version specified by Python setting in the web app configuration (the Settings > Application Settings blade
for your web app in the Azure Portal)
3. python-2.7 is the default if none of the above are specified](https://image.slidesharecdn.com/appserviceweb-230806184930-59dcfe26/85/App-Service-Web-247-320.jpg)


![# ############################################################################
#
# Copyright (c) Microsoft Corporation.
#
# This source code is subject to terms and conditions of the Apache License, Version 2.0. A
# copy of the license can be found in the License.htmlfile at the root of this distribution. If
# you cannot locate the Apache License, Version 2.0, please send an emailto
# vspython@microsoft.com. By using this source code in any fashion, you are agreeing to be bound
# by the terms of the Apache License, Version 2.0.
#
# You must not remove this notice, or any other, fromthis software.
#
# ###########################################################################
import datetime
import os
import sys
import traceback
if sys.version_info[0] == 3:
def to_str(value):
return value.decode(sys.getfilesystemencoding())
def execfile(path, global_dict):
"""Execute a file"""
with open(path, 'r') as f:
code = f.read()
code = code.replace('rn', 'n') + 'n'
exec(code, global_dict)
else:
def to_str(value):
return value.encode(sys.getfilesystemencoding())
def log(txt):
"""Logs fatalerrors to a log file if WSGI_LOGenv var is defined"""
log_file = os.environ.get('WSGI_LOG')
if log_file:
f = open(log_file, 'a+')
try:
f.write('%s:%s' % (datetime.datetime.now(), txt))
finally:
f.close()
ptvsd_secret = os.getenv('WSGI_PTVSD_SECRET')
if ptvsd_secret:
log('Enabling ptvsd ...n')
try:
import ptvsd
try:
ptvsd.enable_attach(ptvsd_secret)
log('ptvsd enabled.n')
except:
log('ptvsd.enable_attach failedn')
except ImportError:
log('error importing ptvsd.n')
def get_wsgi_handler(handler_name):
if not handler_name:
raise Exception('WSGI_ALT_VIRTUALENV_HANDLERenv var must be set')
if not isinstance(handler_name, str):
handler_name = to_str(handler_name)
module_name, _, callable_name = handler_name.rpartition('.')
should_call= callable_name.endswith('()')
callable_name = callable_name[:-2] if should_callelse callable_name
name_list = [(callable_name, should_call)]
handler = None](https://image.slidesharecdn.com/appserviceweb-230806184930-59dcfe26/85/App-Service-Web-251-320.jpg)
![handler = None
last_tb = ''
while module_name:
try:
handler = __import__(module_name, fromlist=[name_list[0][0]])
last_tb = ''
for name, should_callin name_list:
handler = getattr(handler, name)
if should_call:
handler = handler()
break
except ImportError:
module_name, _, callable_name = module_name.rpartition('.')
should_call= callable_name.endswith('()')
callable_name = callable_name[:-2] if should_callelse callable_name
name_list.insert(0, (callable_name, should_call))
handler = None
last_tb = ':' + traceback.format_exc()
if handler is None:
raise ValueError('"%s" could not be imported%s' % (handler_name, last_tb))
return handler
activate_this = os.getenv('WSGI_ALT_VIRTUALENV_ACTIVATE_THIS')
if not activate_this:
raise Exception('WSGI_ALT_VIRTUALENV_ACTIVATE_THIS is not set')
def get_virtualenv_handler():
log('Activating virtualenv with %sn' % activate_this)
execfile(activate_this, dict(__file__=activate_this))
log('Getting handler %sn' % os.getenv('WSGI_ALT_VIRTUALENV_HANDLER'))
handler = get_wsgi_handler(os.getenv('WSGI_ALT_VIRTUALENV_HANDLER'))
log('Got handler:%rn' % handler)
return handler
def get_venv_handler():
log('Activating venv with executable at %sn' % activate_this)
import site
sys.executable = activate_this
old_sys_path, sys.path = sys.path, []
site.main()
sys.path.insert(0, '')
for itemin old_sys_path:
if itemnot in sys.path:
sys.path.append(item)
log('Getting handler %sn' % os.getenv('WSGI_ALT_VIRTUALENV_HANDLER'))
handler = get_wsgi_handler(os.getenv('WSGI_ALT_VIRTUALENV_HANDLER'))
log('Got handler:%rn' % handler)
return handler
Customize Git deployment
Azure will determine that your application uses Python if both of these conditions are true:
requirements.txt file in the root folder
any .py file in the root folder OR a runtime.txt that specifies python
When that's the case, it will use a Python specific deployment script, which performs the standard synchronization
of files, as well as additional Python operations such as:](https://image.slidesharecdn.com/appserviceweb-230806184930-59dcfe26/85/App-Service-Web-252-320.jpg)


![Other configuration tasks
SSL
SSL
Domain names
Domain names
Deployments
Deployments
Monitoring
Monitoring
NOTE
NOTE
Next steps
In Basic or Standard mode, you can upload SSL certificates for a custom domain. For more information, see [Enable
HTTPS for a web app].
To view your uploaded certificates, click All Settings > Custom domains and SSL.
Add custom domain names for your web app. For more information, see [Configure a custom domain name for a
web app in Azure App Service].
To view your domain names, click All Settings > Custom domains and SSL.
Set up continuous deployment. See Using Git to deploy Web Apps in Azure App Service.
Deployment slots. See Deploy to Staging Environments for Web Apps in Azure App Service.
To view your deployment slots, click All Settings > Deployment slots.
In Basic or Standard mode, you can test the availability of HTTP or HTTPS endpoints, from up to three geo-
distributed locations. A monitoring test fails if the HTTP response code is an error (4xx or 5xx) or the response
takes more than 30 seconds. An endpoint is considered available if the monitoring tests succeed from all the
specified locations.
For more information, see How to: Monitor web endpoint status.
If you want to get started with Azure App Service before signing up for an Azure account, go to Try App Service, where you
can immediately create a short-lived starter web app in App Service. No credit cards required; no commitments.
Configure a custom domain name in Azure App Service
Enable HTTPS for an app in Azure App Service
Scale a web app in Azure App Service
Monitoring basics for Web Apps in Azure App Service](https://image.slidesharecdn.com/appserviceweb-230806184930-59dcfe26/85/App-Service-Web-259-320.jpg)


![To rollback a production app after swap
Custom warm-up before swap
<applicationInitialization>
<add initializationPage="/" hostName="[app hostname]" />
<add initializationPage="/Home/About" hostname="[app hostname]" />
</applicationInitialization>
To delete a deployment slot
Azure PowerShell cmdlets for deployment slots
NOTE
NOTE
3. Execute a code push to that deployment slot. Auto Swap will happen after a short time and the update will be
reflected at your target slot's URL.
To test Auto Swap for your app, you can first select a non-production target slot in Auto Swap Slot to become
familiar with the feature.
If any errors are identified in production after a slot swap, roll the slots back to their pre-swap states by
swapping the same two slots immediately.
Some apps may require custom warm-up actions. The applicationInitialization configuration element in web.config
allows you to specify custom initialization actions to be performed before a request is received. The swap
operation will wait for this custom warm-up to complete. Here is a sample web.config fragment.
In the blade for a deployment slot, open the deployment slot's blade, click Overview (the default page), and
click Delete in the command bar.
Azure PowerShell is a module that provides cmdlets to manage Azure through Windows PowerShell, including
support for managing deployment slots in Azure App Service.](https://image.slidesharecdn.com/appserviceweb-230806184930-59dcfe26/85/App-Service-Web-282-320.jpg)
![Create a web app
Create a web app
New-AzureRmWebApp -ResourceGroupName [resource group name] -Name [app name] -Location [location] -AppServicePlan [app service
plan name]
Create a deployment slot
Create a deployment slot
New-AzureRmWebAppSlot -ResourceGroupName [resource group name] -Name [app name] -Slot [deployment slot name] -AppServicePlan
[app service plan name]
Initiate a swap with review (multi-phase swap) and apply destination slot configuration to source slot
Initiate a swap with review (multi-phase swap) and apply destination slot configuration to source slot
$ParametersObject = @{targetSlot = "[slot name – e.g. “production”]"}
Invoke-AzureRmResourceAction -ResourceGroupName [resource group name] -ResourceType Microsoft.Web/sites/slots -ResourceName
[app name]/[slot name] -Action applySlotConfig -Parameters $ParametersObject -ApiVersion 2015-07-01
Cancel a pending swap (swap with review) and restore source slot configuration
Cancel a pending swap (swap with review) and restore source slot configuration
Invoke-AzureRmResourceAction -ResourceGroupName [resource group name] -ResourceType Microsoft.Web/sites/slots -ResourceName
[app name]/[slot name] -Action resetSlotConfig -ApiVersion 2015-07-01
Swap deployment slots
Swap deployment slots
$ParametersObject = @{targetSlot = "[slot name – e.g. “production”]"}
Invoke-AzureRmResourceAction -ResourceGroupName [resource group name] -ResourceType Microsoft.Web/sites/slots -ResourceName
[app name]/[slot name] -Action slotsswap -Parameters $ParametersObject -ApiVersion 2015-07-01
Delete deployment slot
Delete deployment slot
Remove-AzureRmResource -ResourceGroupName [resource group name] -ResourceType Microsoft.Web/sites/slots –Name [app name]/[slot
name] -ApiVersion 2015-07-01
Azure Command-Line Interface (Azure CLI) commands for
Deployment Slots
NOTE
NOTE
For information on installing and configuring Azure PowerShell, and on authenticating Azure PowerShell
with your Azure subscription, see How to install and configure Microsoft Azure PowerShell.
The Azure CLI provides cross-platform commands for working with Azure, including support for managing App
Service deployment slots.
For instructions on installing and configuring the Azure CLI, including information on how to connect Azure
CLI to your Azure subscription, see Install and Configure the Azure CLI.
To list the commands available for Azure App Service in the Azure CLI, call azure site -h .
For Azure CLI 2.0 commands for deployment slots, see az appservice web deployment slot.](https://image.slidesharecdn.com/appserviceweb-230806184930-59dcfe26/85/App-Service-Web-283-320.jpg)


![Troubleshooting
git push azure master
git push azure master
git config --globalhttp.postBuffer 524288000
The following are errors or problems commonly encountered when using Git to publish to an App Service app in
Azure:
Symptom: Unable to access '[siteURL]': Failed to connect to [scmAddress]
Cause: This error can occur if the app is not up and running.
Resolution: Start the app in the Azure Portal. Git deployment will not work unless the app is running.
Symptom: Couldn't resolve host 'hostname'
Cause: This error can occur if the address information entered when creating the 'azure' remote was incorrect.
Resolution: Use the git remote -v command to list all remotes, along with the associated URL. Verify that the URL
for the 'azure' remote is correct. If needed, remove and recreate this remote using the correct URL.
Symptom: No refs in common and none specified; doing nothing. Perhaps you should specify a branch such as
'master'.
Cause: This error can occur if you do not specify a branch when performing a git push operation, and have not
set the push.default value used by Git.
Resolution: Perform the push operation again, specifying the master branch. For example:
Symptom: src refspec [branchname] does not match any.
Cause: This error can occur if you attempt to push to a branch other than master on the 'azure' remote.
Resolution: Perform the push operation again, specifying the master branch. For example:
Symptom: RPC failed; result=22, HTTP code = 502.
Cause: This error can occur if you attempt to push a large git repository over HTTPS.
Resolution: Change the git configuration on the local machine to make the postBuffer bigger
Symptom: Error - Changes committed to remote repository but your web app not updated.
Cause: This error can occur if you are deploying a Node.js app containing a package.json file that specifies
additional required modules.
Resolution: Additional messages containing 'npm ERR!' should be logged prior to this error, and can provide
additional context on the failure. The following are known causes of this error and the corresponding 'npm ERR!'
message:
Malformed package.json file: npm ERR! Couldn't read dependencies.
Native module that does not have a binary distribution for Windows:](https://image.slidesharecdn.com/appserviceweb-230806184930-59dcfe26/85/App-Service-Web-288-320.jpg)
![Additional Resources
npm ERR! [modulename@version] preinstall: `make || gmake`
npm ERR! `cmd "/c" "node-gyp rebuild"` failed with 1
OR
Git documentation
Project Kudu documentation
Continous Deployment to Azure App Service
How to use PowerShell for Azure
How to use the Azure Command-Line Interface](https://image.slidesharecdn.com/appserviceweb-230806184930-59dcfe26/85/App-Service-Web-289-320.jpg)


![Resources
Resources
App Service plan
App Service plan
NOTE
NOTE
SQL Server
SQL Server
Take a look at the parameters section to see that most of these parameters are what the Deploy to Azure button
prompts you to input. The site behind the Deploy to Azure button populates the input UI using the parameters
defined in azuredeploy.json. These parameters are used throughout the resource definitions, such as resource
names, property values, etc.
In the resources node, you can see that 4 top-level resources are defined, including a SQL Server instance, an App
Service plan, and two web apps.
Let’s start with a simple root-level resource in the JSON. In the JSON Outline, click the App Service plan named
[hostingPlanName] to highlight the corresponding JSON code.
Note that the type element specifies the string for an App Service plan (it was called a server farm a long, long
time ago), and other elements and properties are filled in using the parameters defined in the JSON file, and this
resource doesn’t have any nested resources.
Note also that the value of apiVersion tells Azure which version of the REST API to use the JSON resource definition with,
and it can affect how the resource should be formatted inside the {} .
Next, click on the SQL Server resource named SQLServer in the JSON Outline.](https://image.slidesharecdn.com/appserviceweb-230806184930-59dcfe26/85/App-Service-Web-294-320.jpg)
![Web app
Web app
Root resource
Root resource
App settings
App settings
Note the following about the highlighted JSON code:
The use of parameters ensures that the created resources are named and configured in a way that makes them
consistent with one another.
The SQLServer resource has two nested resources, each has a different value for type .
NOTE
NOTE
The effect of the dependsOn element is that Azure Resource Manager can know which resources can be created
in parallel and which resources must be created sequentially.
The nested resources inside “resources”:[…] , where the database and the firewall rules are defined, have a
dependsOn element that specifies the resource ID of the root-level SQLServer resource. This tells Azure
Resource Manager, “before you create this resource, that other resource must already exist; and if that other
resource is defined in the template, then create that one first”.
For detailed information on how to use the resourceId() function, see Azure Resource Manager Template
Functions.
Now, let’s move on to the actual web apps themselves, which are more complicated. Click the
[variables(‘apiSiteName’)] web app in the JSON Outline to highlight its JSON code. You’ll notice that things are
getting much more interesting. For this purpose, I’ll talk about the features one by one:
The web app depends on two different resources. This means that Azure Resource Manager will create the web
app only after both the App Service plan and the SQL Server instance are created.
The app settings are also defined as a nested resource.](https://image.slidesharecdn.com/appserviceweb-230806184930-59dcfe26/85/App-Service-Web-295-320.jpg)
![Connection strings
Connection strings
TIP
TIP
Source control
Source control
In the properties element for config/appsettings , you have two app settings in the format “<name>” :“<value>” .
PROJECT is a KUDU setting that tells Azure deployment which project to use in a multi-project Visual Studio
solution. I will show you later how source control is configured, but since the ToDoApp code is in a multi-
project Visual Studio solution, we need this setting.
clientUrl is simply an app setting that the application code uses.
The connection strings are also defined as a nested resource.
In the properties element for config/connectionstrings , each connection string is also defined as a name:value pair,
with the specific format of “<name>” :{“value”:“…”, “type”:“…”} . For the type element, possible values are MySql ,
SQLServer , SQLAzure , and Custom .
For a definitive list of the connection string types, run the following command in Azure PowerShell:
[Enum]::GetNames("Microsoft.WindowsAzure.Commands.Utilities.Websites.Services.WebEntities.DatabaseType")
The source control settings are also defined as a nested resource. Azure Resource Manager uses this resource to
configure continuous publishing (see caveat on IsManualIntegration later) and also to kick off the deployment of
application code automatically during the processing of the JSON file.
RepoUrl and branch should be pretty intuitive and should point to the Git repository and the name of the branch
to publish from. Again, these are defined by input parameters.
Note in the dependsOn element that, in addition to the web app resource itself, sourcecontrols/web also depends on](https://image.slidesharecdn.com/appserviceweb-230806184930-59dcfe26/85/App-Service-Web-296-320.jpg)


![Investigate: Instrument your client app for monitoring/metrics
You have set up the production app. Now, let's imagine that you receive feedback that usability is poor for the app.
So you decide to investigate. You're going to instrument your app to give you feedback.
1. Open <repository_root>srcMultiChannelToDo.sln in Visual Studio.
2. Restore all Nuget packages by right-clicking solution > Manage NuGet Packages for Solution > Restore.
3. Right-click MultiChannelToDo.Web > Add Application Insights Telemetry > Configure Settings >
Change resource group to ToDoApp<your_suffix> > Add Application Insights to Project.
4. In the Azure Portal, open the blade for the MultiChannelToDo.Web Application Insight resource. Then in the
Application health part, click Learn how to collect browser page load data > copy code.
<script type="text/javascript">
var appInsights=window.appInsights||function(config){
function s(config){t[config]=function(){var i=arguments;t.queue.push(function(){t[config].apply(t,i)})}}var t=
{config:config},r=document,f=window,e="script",o=r.createElement(e),i,u;for(o.src=config.url||"//az416426.vo.msecnd.net/scripts/a/ai.0.js
",r.getElementsByTagName(e)[0].parentNode.appendChild(o),t.cookie=r.cookie,t.queue=[],i=
["Event","Exception","Metric","PageView","Trace"];i.length;)s("track"+i.pop());return config.disableExceptionTracking||
(i="onerror",s("_"+i),u=f[i],f[i]=function(config,r,f,e,o){var s=u&&u(config,r,f,e,o);return s!==!0&&t["_"+i](config,r,f,e,o),s}),t
}({
instrumentationKey:"<your_unique_instrumentation_key>"
});
window.appInsights=appInsights;
appInsights.trackPageView();
</script>
5. Add the copied JS instrumentation code to <repository_root>srcMultiChannelToDo.WebappIndex.cshtml,
just before the closing <heading> tag. It should contain the unique instrumentation key of your Application
Insight resource.
6. Send custom events to Application Insights for mouse clicks by adding the following code to the bottom of
body:](https://image.slidesharecdn.com/appserviceweb-230806184930-59dcfe26/85/App-Service-Web-317-320.jpg)


![Investigate: Add slot-specific tags to your client app metrics
completeness you will set up the server-side app.
1. Right-click MultiChannelToDo > Add Application Insights Telemetry > Configure Settings > Change
resource group to ToDoApp<your_suffix> > Add Application Insights to Project.
git add -A :/
git commit -m"add AI configuration for server app"
git push origin master
2. In Git Shell, commit and push your changes to your fork in GitHub. Then, wait for clients to refresh browser.
3. Swap the deployed app changes to production:
.swap –Name ToDoApp
That's it!
In this section, you will configure the different deployment slots to send slot-specific telemetry to the same
Application Insights resource. This way, you can compare telemetry data between traffic from different slots
(deployment environments) to easily see the effect of your app changes. At the same time, you can separate the
production traffic from the rest so you can continue to monitor your production app as needed.
Since you're gathering data on client behavior, you will add a telemetry initializer to your JavaScript code in
index.cshtml. If you want to test server-side performance, for example, you can also do similarly in your server code
(see Application Insights API for custom events and metrics.
window.appInsights = appInsights;
// Begin newcode
appInsights.queue.push(function () {
appInsights.context.addTelemetryInitializer(function (envelope) {
var telemetryItem= envelope.data.baseData;
telemetryItem.properties = telemetryItem.properties || {};
telemetryItem.properties["Environment"] = "@System.Configuration.ConfigurationManager.AppSettings["environment"]";
});
});
// End newcode
appInsights.trackPageView();
$app = Get-AzureWebsite -Name todoapp<your_suffix> -Slot production
$app.AppSettings.Add("environment", "Production")
$app.SlotStickyAppSettingNames.Add("environment")
$app | Set-AzureWebsite -Name todoapp<your_suffix> -Slot production
1. First, add the code bewteen the two // comments below in the JavaScript block that you added to the
<heading> tag earlier.
This initializer code causes the appInsights object to add the a custom property called Environment to every
piece of telemetry it sends.
2. Next, add this custom property as a slot setting for your web app in Azure. To do this, run the following
commands in your Git Shell session.
The Web.config in your project already defines the environment app setting. With this setting, when you test
the app locally, your metrics will be tagged with VS Debugger . However, when you push your changes to](https://image.slidesharecdn.com/appserviceweb-230806184930-59dcfe26/85/App-Service-Web-320-320.jpg)

![Update: Set up your beta branch
namespace MultiChannelToDo
{
...
// Begin newcode
public class ConfigInitializer
:ITelemetryInitializer
{
void ITelemetryInitializer.Initialize(ITelemetry telemetry)
{
telemetry.Context.Properties["Environment"] = System.Configuration.ConfigurationManager.AppSettings["environment"];
}
}
// End newcode
}
using Microsoft.ApplicationInsights.Channel;
using Microsoft.ApplicationInsights.Extensibility;
TelemetryConfiguration.Active.TelemetryInitializers.Add(newConfigInitializer());
git add -A :/
git commit -m"add environment property to AI events for server app"
git push origin master
2. Correct the name resolution errors by adding the using statements below to the beginning of the file:
3. Add the code below to the beginning of the Application_Start() method:
4. Commit and push your code changes to your fork on GitHub, and then wait for your users to use the new
app (need to refresh the browser). It takes about 15 minutes for the new property to show up in your
Application Insights MultiChannelToDo resource.
1. Open <repository_root>ARMTemplatesProdAndStagetest.json and find the appsettings resources (search for
"name":"appsettings" ). There are 4 of them, one for each slot.
3. In the same file, find the slotconfignames resources (search for "name":"slotconfignames" ). There are 2 of them, one
for each app.
2. For each appsettings resource, add an "environment":"[parameters('slotName')]" app setting to the end of the
properties array. Don't forget to end the previous line with a comma.
You have just added the environment app setting to all the slots in the template.](https://image.slidesharecdn.com/appserviceweb-230806184930-59dcfe26/85/App-Service-Web-322-320.jpg)


![For more examples of howto use XMLDocument Transformations with your website, see [Transformyour Microsoft Azure Web Site]
(http://blogs.msdn.com/b/waws/archive/2014/06/17/transform-your-microsoft-azure-web-site.aspx).
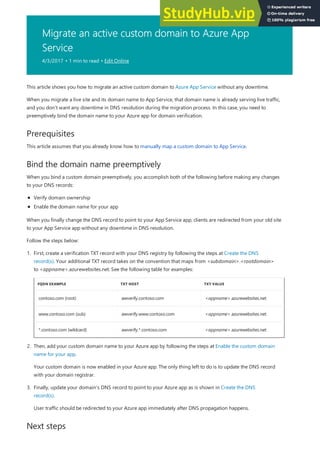
How to use the Web Apps Migration Assistant
Other components like SharePoint, front page server extensions (FPSE), FTP, SSL certificates will not be
migrated.
This section steps through an example to to migrate a few websites that use a SQL Server database and running on
an on-premise Windows Server 2003 R2 (IIS 6.0) machine:
2. Install Web Apps Migration Assistant by clicking on the Dedicated IIS Server button. More options will be
options in the near future.
NOTE
NOTE
1. On the IIS server or your client machine navigate to https://www.movemetothecloud.net/
3. Click the Install Tool button to install Web Apps Migration Assistant on your machine.
You can also click Download for offline install to download a ZIP file for installing on servers not connected to the
internet. Or, you can click Upload an existing migration readiness report, which is an advanced option to work
with an existing migration readiness report that you previously generated (explained later).
4. In the Application Install screen, click Install to install on your machine. It will also install corresponding
dependencies like Web Deploy, DacFX, and IIS, if needed.](https://image.slidesharecdn.com/appserviceweb-230806184930-59dcfe26/85/App-Service-Web-357-320.jpg)


![NOTE
NOTE
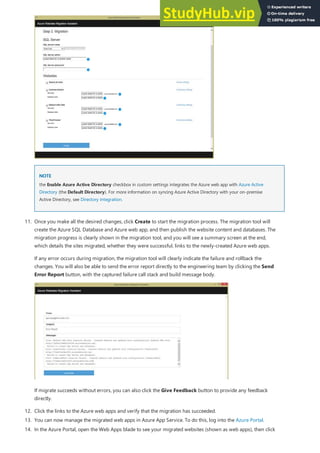
Pricing details
Troubleshooting
Tools
Tools
nameresolver.exe hostname [optional:DNS Server]
work though you may need to update your on premise VPN gateway with the routes for your Point to Site IP
range. When the Site to Site VPN is first set up then the scripts used to configure it should set up routes including
your Point to Site VPN. If you add the Point to Site VPN after your create your Site to Site VPN then you will need
to update the routes manually. Details on how to do that will vary per gateway and are not described here.
While the VNET Integration feature will work with a Site to Site VPN to access on premise resources it currently will not work
with an ExpressRoute VPN to do the same. This is true when integrating with either a Classic or Resource Manager VNET. If
you need to access resources through an ExpressRoute VPN then you can use an ASE which can run in your VNET.
There are a few pricing nuances that you should be aware of when using the VNET Integration feature. There are 3
related charges to the use of this feature:
ASP pricing tier requirements
Data transfer costs
VPN Gateway costs.
For your apps to be able to use this feature, they need to be in a Standard or Premium App Service Plan. You can
see more details on those costs here: App Service Pricing.
Due to the way Point to Site VPNs are handled, you always have a charge for outbound data through your VNET
Integration connection even if the VNET is in the same data center. To see what those charges are take a look here:
Data Transfer Pricing Details.
The last item is the cost of the VNET gateways. If you don't need the gateways for something else such as Site to
Site VPNs then you are paying for gateways to support the VNET Integration feature. There are details on those
costs here: VPN Gateway Pricing.
While the feature is easy to set up that doesn't mean that your experience will be problem free. Should you
encounter problems accessing your desired endpoint there are some utilities you can use to test connectivity from
the app console. There are two console experiences you can use. One is from the Kudu console and the other is the
console that you can reach in the Azure Portal. To get to the Kudu console from your app go to Tools -> Kudu. This
is the same as going to [sitename].scm.azurewebsites.net. Once that opens simply go to the Debug console tab. To
get to the Azure portal hosted console then from your app go to Tools -> Console.
The tools ping, nslookup and tracert won’t work through the console due to security constraints. To fill the void
there have been two separate tools added. In order to test DNS functionality we added a tool named
nameresolver.exe. The syntax is:
You can use nameresolver to check the hostnames that your app depends on. This way you can test if you have
anything mis-configured with your DNS or perhaps don't have access to your DNS server.
The next tool allows you to test for TCP connectivity to a host and port combination. This tool is called tcpping.exe
and the syntax is:](https://image.slidesharecdn.com/appserviceweb-230806184930-59dcfe26/85/App-Service-Web-395-320.jpg)
![tcpping.exe hostname [optional:port]
Debugging access to VNET hosted resources
Debugging access to VNET hosted resources
This tool will tell you if you can reach a specific host and port but will not perform the same task you get with the
ICMP based ping utility. The ICMP ping utility will tell you if your host is up. With tcpping you find out if you can
access a specific port on a host.
There are a number of things that can prevent your app from reaching a specific host and port. Most of the time it
is one of three things:
There is a firewall in the way If you have a firewall in the way then you will hit the TCP timeout. That is 21
seconds in this case. Use the tcpping tool to test connectivity. TCP timeouts can be due to many things beyond
firewalls but start there.
DNS is not accessible The DNS timeout is 3 seconds per DNS server. If you have 2 DNS servers that is 6
seconds. Use nameresolver to see if DNS is working. Remember you can't use nslookup as that does not use
the DNS your VNET is configured with.
Invalid P2S IP range The point to site IP range needs to be in the RFC 1918 private IP ranges (10.0.0.0-
10.255.255.255 / 172.16.0.0-172.31.255.255 / 192.168.0.0-192.168.255.255) If the range uses IPs outside of
that then things won't work.
If those items don't answer your problem, look first for the simple things like:
Does the Gateway show as being up in the Portal?
Do certificates show as being in sync?
Did anybody change the network configuration without doing a "Sync Network" in the affected ASPs?
If your gateway is down then bring it back up. If your certificates are out of sync then go to the ASP view of your
VNET Integration and hit "Sync Network". If you suspect that there has been a change made to your VNET
configuration and it wasn't sync'd with your ASPs then go to the ASP view of your VNET Integration and hit "Sync
Network" Just as a reminder, this will cause a brief outage with your VNET connection and your apps.
If all of that is fine then you need to dig in a bit deeper:
Are there any other apps using VNET Integration to reach resources in the same VNET?
Can you go to the app console and use tcpping to reach any other resources in your VNET?
If either of the above are true then your VNET Integration is fine and the problem is somewhere else. This is where
it gets to be more of a challenge because there is no simple way to see why you can't reach a host:port. Some of
the causes include:
you have a firewall up on your host preventing access to the application port from your point to site IP range.
Crossing subnets often requires Public access.
your target host is down
your application is down
you had the wrong IP or hostname
your application is listening on a different port than what you expected. You can check this by going onto that
host and using "netstat -aon" from the cmd prompt. This will show you what process ID is listening on what
port.
your network security groups are configured in such a manner that they prevent access to your application host
and port from your point to site IP range
Remember that you don't know what IP in your Point to Site IP range that your app will use so you need to allow
access from the entire range.
Additional debug steps include:](https://image.slidesharecdn.com/appserviceweb-230806184930-59dcfe26/85/App-Service-Web-396-320.jpg)


![Login-AzureRmAccount
Select-AzureRmSubscription –SubscriptionName [WebAppSubscriptionName]
Select-AzureRmSubscription –SubscriptionId [WebAppSubscriptionId]
Variables used in this article
Variables used in this article
$Configuration = @{}
$Configuration.WebAppResourceGroup = "[Your web app resource group]"
$Configuration.WebAppName = "[Your web app name]"
$Configuration.VnetSubscriptionId = "[Your vnet subscription id]"
$Configuration.VnetResourceGroup = "[Your vnet resource group]"
$Configuration.VnetName = "[Your vnet name]"
$Configuration.WebAppLocation = "[Your web app Location]"
$Configuration.GeneratedCertificatePath = "[C:PathToCertificate.cer]"
> $Configuration
Name Value
---- -----
GeneratedCertificatePath C:vnetcert.cer
VnetSubscriptionId efc239a4-88f9-2c5e-a9a1-3034c21ad496
WebAppResourceGroup vnetdemo-rg
VnetResourceGroup testase1-rg
VnetName TestNetwork
WebAppName vnetintdemoapp
WebAppLocation centralus
Declare the virtual netw ork to the app
Declare the virtual netw ork to the app
That command will open a prompt to get your Azure credentials. After you sign in, use either of the following
commands to select the subscription that you want to use. Make sure that you are using the subscription that your
virtual network and App Service plan are in.
or
To simplify commands, we will set a $Configuration PowerShell variable with the specific configuration.
Set a variable as follows in PowerShell with the following parameters:
The app location should be the location without any spaces. For example, West US is westus.
The next item is where the certificate should be written. It should be a writable path on your local computer. Make
sure to include .cer at the end.
To see what you set, type $Configuration.
The rest of this section assumes that you have a variable created as just described.
Use the following command to tell the app that it will be using this particular virtual network. This will cause the
app to generate necessary certificates:](https://image.slidesharecdn.com/appserviceweb-230806184930-59dcfe26/85/App-Service-Web-400-320.jpg)
![$vnet = New-AzureRmResource -Name "$($Configuration.WebAppName)/$($Configuration.VnetName)" -ResourceGroupName
$Configuration.WebAppResourceGroup -ResourceType "Microsoft.Web/sites/virtualNetworkConnections" -PropertyObject
@{"VnetResourceId" =
"/subscriptions/$($Configuration.VnetSubscriptionId)/resourceGroups/$($Configuration.VnetResourceGroup)/providers/Microsoft.ClassicNetwor
k/virtualNetworks/$($Configuration.VnetName)"} -Location $Configuration.WebAppLocation -ApiVersion 2015-07-01
Upload the w eb app certificate to the virtual netw ork
Upload the w eb app certificate to the virtual netw ork
$certBytes = [System.Convert]::FromBase64String($vnet.Properties.certBlob)
[System.IO.File]::WriteAllBytes("$($Configuration.GeneratedCertificatePath)", $certBytes)
Get the point-to-site package
Get the point-to-site package
If this command succeeds, $vnet should have a Properties variable in it. The Properties variable should contain
both a certificate thumbprint and the certificate data.
A manual, one-time step is required for each subscription and virtual network combination. That is, if you are
connecting apps in Subscription A to Virtual Network A, you will need to do this step only once regardless of how
many apps you configure. If you are adding a new app to another virtual network, you'll need to do this again. The
reason for this is that a set of certificates is generated at a subscription level in Azure App Service, and the set is
generated once for each virtual network that the apps will connect to.
The certificates will have already been set if you followed these steps or if you integrated with the same virtual
network by using the portal.
The first step is to generate the .cer file. The second step is to upload the .cer file to your virtual network. To
generate the .cer file from the API call in the earlier step, run the following commands.
The certificate will be found in the location that $Configuration.GeneratedCertificatePath specifies.
To upload the certificate manually, use the Azure portal and Browse Virtual Network (classic) > VPN
connections > Point-to-site > Manage certificates. From here, upload your certificate.
The next step in setting up a virtual network connection on a web app is to get the point-to-site package and
provide it to your web app.
Save the following template to a file called GetNetworkPackageUri.json somewhere on your computer, for example,
C:AzureTemplatesGetNetworkPackageUri.json.](https://image.slidesharecdn.com/appserviceweb-230806184930-59dcfe26/85/App-Service-Web-401-320.jpg)
![{
"$schema":"http://schema.management.azure.com/schemas/2014-04-01-preview/deploymentTemplate.json#",
"contentVersion":"1.0.0.0",
"parameters":{
"certData":{
"type":"string"
},
"certThumbprint":{
"type":"string"
},
"networkName":{
"type":"string"
}
},
"variables":{
"legacyVnetName":"[concat('Group ', resourceGroup().name, ' ', parameters('networkName'))]"
},
"resources":[
],
"outputs" :{
"PackageUri" :
{
"value" :"[listPackage(resourceId('Microsoft.ClassicNetwork/virtualNetworks/gateways/clientRootCertificates', parameters('networkName'),
'primary', parameters('certThumbprint')), '2014-06-01').packageUri]", "type" :"string"
}
}
}
$parameters = @{"certData" = $vnet.Properties.certBlob ;
certThumbprint = $vnet.Properties.certThumbprint ;
"networkName" = $Configuration.VnetName }
$output = New-AzureRmResourceGroupDeployment -Name unused -ResourceGroupName $Configuration.VnetResourceGroup -
TemplateParameterObject $parameters -TemplateFile C:PATHTOGetNetworkPackageUri.json
Upload the point-to-site package to your app
Upload the point-to-site package to your app
$vnet = New-AzureRmResource -Name "$($Configuration.WebAppName)/$($Configuration.VnetName)/primary" -ResourceGroupName
$Configuration.WebAppResourceGroup -ResourceType "Microsoft.Web/sites/virtualNetworkConnections/gateways" -ApiVersion 2015-07-01-
PropertyObject @{"VnetName" = $Configuration.VnetName ; "VpnPackageUri" = $($output.Outputs.packageUri).Value } -Location
$Configuration.WebAppLocation
SET WEBSITE_
Set input parameters:
Call the script:
The variable $output.Outputs.packageUri will now contain the package URI to be given to your web app.
The final step is to provide the app with this package. Simply run the next command:
If a message asks you to confirm that you are overwriting an existing resource, make sure to allow it.
After this command succeeds, your app should now be connected to the virtual network. To confirm success, go to
your app console, and type the following:
If there is an environment variable called WEBSITE_VNETNAME that has a value that matches the name of the
target virtual network, all configurations have succeeded.](https://image.slidesharecdn.com/appserviceweb-230806184930-59dcfe26/85/App-Service-Web-402-320.jpg)
![Update classic VNet integration information
Update classic VNet integration information
Disconnect your app from a classic VNet
Disconnect your app from a classic VNet
$vnet = Remove-AzureRmResource -Name "$($Configuration.WebAppName)/$($Configuration.VnetName)" -ResourceGroupName
$Configuration.WebAppResourceGroup -ResourceType "Microsoft.Web/sites/virtualNetworkConnections" -ApiVersion 2015-07-01
Resource Manager virtual networks
Resource Manager VNet App Service integration script
Resource Manager VNet App Service integration script
function ReadHostWithDefault($message, $default)
{
$result = Read-Host "$message [$default]"
if($result -eq "")
{
$result = $default
}
return $result
}
function PromptCustom($title, $optionValues, $optionDescriptions)
{
Write-Host $title
Write-Host
$a = @()
for($i= 0; $i-lt $optionValues.Length; $i++){
Write-Host "$($i+1))" $optionDescriptions[$i]
}
Write-Host
while($true)
{
Write-Host "Choose an option:"
$option = Read-Host
$option = $option -as [int]
if($option -ge 1-and $option -le $optionValues.Length)
To update or resync your information, simply repeat the steps that you followed when you created the integration
in the first place. Those steps are:
1. Define your configuration information.
2. Declare the virtual network to the app.
3. Get the point-to-site package.
4. Upload the point-to-site package to your app.
To disconnect the app, you need the configuration information that was set during virtual network integration.
Using that information, there is then one command to disconnect your app from your virtual network.
Resource Manager virtual networks have Azure Resource Manager APIs, which simplify some processes when
compared with classic virtual networks. We have a script that will help you complete the following tasks:
Create a Resource Manager virtual network and integrate your app with it.
Create a gateway, configure point-to-site connectivity in a preexisting Resource Manager virtual network, and
then integrate your app with it.
Integrate your app with a preexisting Resource Manager virtual network that has a gateway and point-to-site
connectivity enabled.
Disconnect your app from your virtual network.
Copy the following script and save it to a file. If you don’t want to use the script, feel free to learn from it to see how
to set things up with a Resource Manager virtual network.](https://image.slidesharecdn.com/appserviceweb-230806184930-59dcfe26/85/App-Service-Web-403-320.jpg)
![if($option -ge 1-and $option -le $optionValues.Length)
{
return $optionValues[$option-1]
}
}
}
function PromptYesNo($title, $message, $default = 0)
{
$yes = New-Object System.Management.Automation.Host.ChoiceDescription "&Yes", ""
$no = New-Object System.Management.Automation.Host.ChoiceDescription "&No", ""
$options = [System.Management.Automation.Host.ChoiceDescription[]]($yes, $no)
$result = $host.ui.PromptForChoice($title, $message, $options, $default)
return $result
}
function CreateVnet($resourceGroupName, $vnetName, $vnetAddressSpace, $vnetGatewayAddressSpace, $location)
{
Write-Host "Creating a newVNET"
$gatewaySubnet = New-AzureRmVirtualNetworkSubnetConfig -Name "GatewaySubnet" -AddressPrefix$vnetGatewayAddressSpace
New-AzureRmVirtualNetwork-Name $vnetName -ResourceGroupName $resourceGroupName -Location $location -AddressPrefix
$vnetAddressSpace -Subnet $gatewaySubnet
}
function CreateVnetGateway($resourceGroupName, $vnetName, $vnetIpName, $location, $vnetIpConfigName, $vnetGatewayName,
$certificateData, $vnetPointToSiteAddressSpace)
{
$vnet = Get-AzureRmVirtualNetwork-Name $vnetName -ResourceGroupName $resourceGroupName
$subnet=Get-AzureRmVirtualNetworkSubnetConfig -Name "GatewaySubnet" -VirtualNetwork$vnet
Write-Host "Creating a public IP address for this VNET"
$pip = New-AzureRmPublicIpAddress -Name $vnetIpName -ResourceGroupName $resourceGroupName -Location $location -AllocationMethod
Dynamic
$ipconf = New-AzureRmVirtualNetworkGatewayIpConfig -Name $vnetIpConfigName -Subnet $subnet -PublicIpAddress $pip
Write-Host "Adding a root certificate to this VNET"
$root = New-AzureRmVpnClientRootCertificate -Name "AppServiceCertificate.cer" -PublicCertData $certificateData
Write-Host "Creating Azure VNET Gateway. This may take up to an hour."
New-AzureRmVirtualNetworkGateway -Name $vnetGatewayName -ResourceGroupName $resourceGroupName -Location $location -
IpConfigurations $ipconf -GatewayType Vpn -VpnType RouteBased -EnableBgp $false -GatewaySku Basic -VpnClientAddressPool
$vnetPointToSiteAddressSpace -VpnClientRootCertificates $root
}
function AddNewVnet($subscriptionId, $webAppResourceGroup, $webAppName)
{
Write-Host "Adding a newVnet"
Write-Host
$vnetName = Read-Host "Specify a name for this VirtualNetwork"
$vnetGatewayName="$($vnetName)-gateway"
$vnetIpName="$($vnetName)-ip"
$vnetIpConfigName="$($vnetName)-ipconf"
# VirtualNetworksettings
$vnetAddressSpace="10.0.0.0/8"
$vnetGatewayAddressSpace="10.5.0.0/16"
$vnetPointToSiteAddressSpace="172.16.0.0/16"
$changeRequested = 0
$resourceGroupName = $webAppResourceGroup
while($changeRequested -eq 0)
{
Write-Host
Write-Host "Currently, I willcreate a VNET with the following settings:"
Write-Host
Write-Host "VirtualNetworkName:$vnetName"
Write-Host "Resource Group Name: $resourceGroupName"
Write-Host "Gateway Name:$vnetGatewayName"](https://image.slidesharecdn.com/appserviceweb-230806184930-59dcfe26/85/App-Service-Web-404-320.jpg)


![Write-Host "Vnet IP name:$vnetIpName"
Write-Host "Vnet IP config name: $vnetIpConfigName"
Write-Host "Address Space:$($vnet.AddressSpace.AddressPrefixes)"
Write-Host "Gateway Address Space:$vnetGatewayAddressSpace"
Write-Host "Point-To-Site Address Space: $vnetPointToSiteAddressSpace"
Write-Host
$changeRequested = PromptYesNo "" "Do you wish to change these settings?" 1
if($changeRequested -eq 0)
{
$vnetGatewayName = ReadHostWithDefault "Vnet Gateway Name" $vnetGatewayName
$vnetIpName = ReadHostWithDefault "Vnet IP name" $vnetIpName
$vnetIpConfigName = ReadHostWithDefault "Vnet IP configuration name" $vnetIpConfigName
$vnetGatewayAddressSpace = ReadHostWithDefault "Vnet Gateway Address Space" $vnetGatewayAddressSpace
$vnetPointToSiteAddressSpace = ReadHostWithDefault "Vnet Point-to-site Address Space" $vnetPointToSiteAddressSpace
}
}
$ErrorActionPreference = "Stop";
Write-Host "Creating App association to VNET"
$propertiesObject = @{
"vnetResourceId" =
"/subscriptions/$($subscriptionId)/resourceGroups/$($vnet.ResourceGroupName)/providers/Microsoft.Network/virtualNetworks/$($vnetName)"
}
$virtualNetwork= New-AzureRmResource -Location $location -Properties $PropertiesObject -ResourceName
"$($webAppName)/$($vnet.Name)" -ResourceType "Microsoft.Web/sites/virtualNetworkConnections" -ApiVersion 2015-08-01-
ResourceGroupName $resourceGroupName -Force
# If there is no gateway subnet, we need to create one.
if($gatewaySubnet -eq $null)
{
$gatewaySubnet = New-AzureRmVirtualNetworkSubnetConfig -Name "GatewaySubnet" -AddressPrefix$vnetGatewayAddressSpace
$vnet.Subnets.Add($gatewaySubnet);
Set-AzureRmVirtualNetwork-VirtualNetwork$vnet
}
CreateVnetGateway $vnet.ResourceGroupName $vnetName $vnetIpName $location $vnetIpConfigName $vnetGatewayName
$virtualNetwork.Properties.CertBlob $vnetPointToSiteAddressSpace
$gateway = Get-AzureRmVirtualNetworkGateway -ResourceGroupName $vnet.ResourceGroupName -Name $vnetGatewayName
}
else
{
$uriParts = $gatewaySubnet.IpConfigurations[0].Id.Split('/')
$gatewayResourceGroup = $uriParts[4]
$gatewayName = $uriParts[8]
$gateway = Get-AzureRmVirtualNetworkGateway -ResourceGroupName $vnet.ResourceGroupName -Name $gatewayName
# validate gateway types, etc.
if($gateway.GatewayType -ne "Vpn")
{
Write-Error "This gateway is not of the Vpn type. It cannot be joined to an App."
return
}
if($gateway.VpnType -ne "RouteBased")
{
Write-Error "This gateways Vpn type is not RouteBased. It cannot be joined to an App."
return
}
if($gateway.VpnClientConfiguration -eq $null-or $gateway.VpnClientConfiguration.VpnClientAddressPool-eq $null)
{
Write-Host "This gateway does not have a Point-to-site Address Range. Please specify one in CIDRnotation, e.g. 10.0.0.0/8"
$pointToSiteAddress = Read-Host "Point-To-Site Address Space"
Set-AzureRmVirtualNetworkGatewayVpnClientConfig -VirtualNetworkGateway $gateway.Name -VpnClientAddressPool
$pointToSiteAddress](https://image.slidesharecdn.com/appserviceweb-230806184930-59dcfe26/85/App-Service-Web-407-320.jpg)

![Write-Host "Please Login"
Login-AzureRmAccount
# Choose subscription. If there's only one we willchoose automatically
$subs = Get-AzureRmSubscription
$subscriptionId = ""
if($subs.Length -eq 0)
{
Write-Error "No subscriptions bound to this account."
return
}
if($subs.Length -eq 1)
{
$subscriptionId = $subs[0].SubscriptionId
}
else
{
$subscriptionChoices = @()
$subscriptionValues = @()
foreach($subscription in $subs){
$subscriptionChoices += "$($subscription.SubscriptionName) ($($subscription.SubscriptionId))";
$subscriptionValues += ($subscription.SubscriptionId);
}
$subscriptionId = PromptCustom"Choose a subscription" $subscriptionValues $subscriptionChoices
}
Select-AzureRmSubscription -SubscriptionId $subscriptionId
$resourceGroup = Read-Host "Please enter the Resource Group of your App"
$appName = Read-Host "Please enter the Name of your App"
$options = @("Add a NEW VirtualNetworkto an App", "Add an EXISTINGVirtualNetworkto an App", "Remove a VirtualNetworkfroman
App");
$optionValues = @(0, 1, 2)
$option = PromptCustom"What do you want to do?" $optionValues $options
if($option -eq 0)
{
AddNewVnet $subscriptionId $resourceGroup $appName
}
if($option -eq 1)
{
AddExistingVnet $subscriptionId $resourceGroup $appName
}
if($option -eq 2)
{
RemoveVnet $subscriptionId $resourceGroup $appName
}
Save a copy of the script. In this article, it is called V2VnetAllinOne.ps1, but you can use another name. There are no
arguments for this script. You simply run it. The first thing the script will do is prompt you to sign in. After you sign
in, the script gets details about your account and returns a list of subscriptions. Not counting the request for your
credentials, the initial script execution looks like this:](https://image.slidesharecdn.com/appserviceweb-230806184930-59dcfe26/85/App-Service-Web-409-320.jpg)
![PS C:UsersccompyDocumentsVNET> .V2VnetAllInOne.ps1
Please Login
Environment :AzureCloud
Account :ccompy@microsoft.com
TenantId :722278f-fef1-499f-91ab-2323d011db47
SubscriptionId :af5358e1-acac-2c90-a9eb-722190abf47a
CurrentStorageAccount :
Choose a subscription
1) Demo Subscription (af5358e1-acac-2c90-a9eb-722190abf47a)
2) MS Test (a5350f55-dd5a-41ec-2ddb-ff7b911bb2ef)
3) Purple Demo Subscription (2d4c99a4-57f9-4d5e-a0a1-0034c52db59d)
Choose an option:
3
Account :ccompy@microsoft.com
Environment :AzureCloud
Subscription :2d4c99a4-57f9-4d5e-a0a1-0034c52db59d
Tenant :722278f-fef1-499f-91ab-2323d011db47
Please enter the Resource Group of your App:hcdemo-rg
Please enter the Name of your App:v2vnetpowershell
What do you want to do?
1) Add a NEW VirtualNetworkto an App
2) Add an EXISTINGVirtualNetworkto an App
3) Remove a VirtualNetworkfroman App
Create a Resource Manager VNet and integrate with it
Create a Resource Manager VNet and integrate with it
VirtualNetworkName: v2pshell
Resource Group Name: hcdemo-rg
Gateway Name: v2pshell-gateway
Vnet IP name: v2pshell-ip
Vnet IP config name: v2pshell-ipconf
Address Space: 10.0.0.0/8
Gateway Address Space: 10.5.0.0/16
Point-To-Site Address Space: 172.16.0.0/12
Do you wish to change these settings?
[Y] Yes [N] No [?] Help (default is "N"):
The rest of this section explains each of those three options.
To create a new virtual network that uses the Resource Manager deployment model and integrate it with your app,
select 1) Add a NEW Virtual Network to an App. This will prompt you for the name of the virtual network. In my
case, as you can see in the following settings, I used the name, v2pshell.
The script gives the details about the virtual network that's being created. If I want, I can change any of the values. In
this example execution, I created a virtual network that has the following settings:
If you want to change any of the values, type Y and make the changes. When you are happy with the virtual
network settings, type N or simply press Enter when prompted about changing the settings. From there on until
completion, the script will tell you some of what it' i's doing until it starts to create the virtual network gateway.
That step can take up to an hour. There is no progress indicator during this phase, but the script will let you know
when the gateway has been created.
When the script finishes, it will say Finished. At this point, you will have a Resource Manager virtual network that
has the name and settings that you selected. This new virtual network will also be integrated with your app.](https://image.slidesharecdn.com/appserviceweb-230806184930-59dcfe26/85/App-Service-Web-410-320.jpg)
![Integrate your app with a preexisting Resource Manager VNet
Integrate your app with a preexisting Resource Manager VNet
Select a VNET to integrate with
1) v2demonetwork
2) v2pshell
3) v2vnetintdemo
4) v2asenetwork
5) v2pshell2
Choose an option:
5
This VirtualNetworkhas no gateway. I willneed to create one.
Your VNET is in the address space 172.16.0.0/16, with the following Subnets:
default:172.16.0.0/24
Please choose a GatewaySubnet address space:172.16.1.0/26
VirtualNetworkName: v2pshell2
Resource Group Name: vnetdemo-rg
Gateway Name: v2pshell2-gateway
Vnet IP name: v2pshell2-ip
Vnet IP config name: v2pshell2-ipconf
Address Space: 172.16.0.0/16
Gateway Address Space: 172.16.1.0/26
Point-To-Site Address Space: 172.16.0.0/12
Do you wish to change these settings?
[Y] Yes [N] No [?] Help (default is "N"):
Creating App association to VNET
Disconnect your app from a Resource Manager VNet
Disconnect your app from a Resource Manager VNet
When you're integrating with a preexisting virtual network, if you provide a Resource Manager virtual network that
doesn’t have a gateway or point-to-site connectivity, the script will set that up. If the VNET already has those things
set up, the script goes straight to the app integration. To start this process, simply select 2) Add an EXISTING
Virtual Network to an App.
This option works only if you have a preexisting Resource Manager virtual network that is in the same subscription
as your app. After you select the option, you will be presented with a list of your Resource Manager virtual
networks.
Simply select the virtual network that you want to integrate with. If you already have a gateway that has point-to-
site connectivity enabled, the script will simply integrate your app with your virtual network. If you do not have a
gateway, you will need to specify the gateway subnet. Your gateway subnet must be in your virtual network
address space, and it cannot be in any other subnet. If you have a virtual network without a gateway and run this
step, things look like this:
In this example, I created a virtual network gateway that has the following settings:
If you want to change any of those settings, you can do so. Otherwise, press Enter and the script will create your
gateway and attach your app to your virtual network. The gateway creation time is still an hour, though, so make
sure you keep that in mind. When everything is finished, the script will say Finished.
Disconnecting your app from your virtual network does not take down the gateway or disable point-to-site
connectivity. You might, after all, be using it for something else. It also does not disconnect it from any other apps
other than the one you provided. To perform this action, select 3) Remove a Virtual Network from an App.
When you do so, you will see something like this:](https://image.slidesharecdn.com/appserviceweb-230806184930-59dcfe26/85/App-Service-Web-411-320.jpg)
![Currently connected to VNET v2pshell
Confirm
Are you sure you want to delete the following resource:
/subscriptions/edcc99a4-b7f9-4b5e-a9a1-3034c51db496/resourceGroups/hcdemo-rg/providers/Microsoft.Web/sites/v2vnetpowers
hell/virtualNetworkConnections/v2pshell
[Y] Yes [N] No [S] Suspend [?] Help (default is "Y"):
Although the script says delete, it does not delete the virtual network. It’s just removing the integration. After you
confirm that this is what you want to do, the command is processed quite quickly and tells you True when it is
done.](https://image.slidesharecdn.com/appserviceweb-230806184930-59dcfe26/85/App-Service-Web-412-320.jpg)


![using System;
using System.Collections.Generic;
using System.Linq;
using System.Web;
using MongoDB.Bson.Serialization.Attributes;
using MongoDB.Bson.Serialization.IdGenerators;
using MongoDB.Bson;
namespace MyTaskListApp.Models
{
public class MyTask
{
[BsonId(IdGenerator = typeof(CombGuidGenerator))]
public Guid Id { get; set; }
[BsonElement("Name")]
public string Name { get; set; }
[BsonElement("Category")]
public string Category { get; set; }
[BsonElement("Date")]
public DateTime Date { get; set; }
[BsonElement("CreatedDate")]
public DateTime CreatedDate { get; set; }
}
}
Add the data access layer
using System;
using System.Collections.Generic;
using System.Linq;
using System.Web;
using MyTaskListApp.Models;
using MongoDB.Driver;
using MongoDB.Bson;
using System.Configuration;
namespace MyTaskListApp
{
public class Dal:IDisposable
{
private MongoServer mongoServer = null;
private booldisposed = false;
// To do:update the connection string with the DNS name
// or IP address of your server.
//For example, "mongodb://testlinux.cloudapp.net"
private string connectionString = "mongodb://mongodbsrv20151211.cloudapp.net";
// This sample uses a database named "Tasks" and a
//collection named "TasksList". The database and collection
//willbe automatically created if they don't already exist.
private string dbName = "Tasks";
private string collectionName = "TasksList";
TaskModel.cs, replace the existing code with the following code:
In Solution Explorer, right-click the MyTaskListApp project and Add a New Folder named DAL. Right-click the
DAL folder and Add a new Class. Name the class file Dal.cs. In Dal.cs, replace the existing code with the following
code:](https://image.slidesharecdn.com/appserviceweb-230806184930-59dcfe26/85/App-Service-Web-420-320.jpg)

![}
}
this.disposed = true;
}
# endregion
}
}
Add a controller
using System;
using System.Collections.Generic;
using System.Linq;
using System.Web;
using System.Web.Mvc;
using MyTaskListApp.Models;
using System.Configuration;
namespace MyTaskListApp.Controllers
{
public class HomeController :Controller, IDisposable
{
private Daldal= newDal();
private booldisposed = false;
//
// GET:/MyTask/
public ActionResult Index()
{
return View(dal.GetAllTasks());
}
//
// GET:/MyTask/Create
public ActionResult Create()
{
return View();
}
//
// POST:/MyTask/Create
[HttpPost]
public ActionResult Create(MyTasktask)
{
try
{
dal.CreateTask(task);
return RedirectToAction("Index");
}
catch
{
return View();
}
}
public ActionResult About()
{
return View();
}
# region IDisposable
Open the ControllersHomeController.cs file in Solution Explorer and replace the existing code with the following:](https://image.slidesharecdn.com/appserviceweb-230806184930-59dcfe26/85/App-Service-Web-422-320.jpg)


![How to configure your App Service application to
use Google login
3/8/2017 • 2 min to read • Edit Online
Register your application with Google
Add Google information to your application
This topic shows you how to configure Azure App Service to use Google as an authentication provider.
To complete the procedure in this topic, you must have a Google account that has a verified email address. To
create a new Google account, go to accounts.google.com.
1. Log on to the Azure portal, and navigate to your application. Copy your URL, which you use later to configure
your Google app.
2. Navigate to the Google apis website, sign in with your Google account credentials, click Create Project,
provide a Project name, then click Create.
3. Under Social APIs click Google+ API and then Enable.
4. In the left navigation, Credentials > OAuth consent screen, then select your Email address, enter a Product
Name, and click Save.
5. In the Credentials tab, click Create credentials > OAuth client ID, then select Web application.
6. Paste the App Service URL you copied earlier into Authorized JavaScript Origins, then paste your redirect
URI into Authorized Redirect URI. The redirect URI is the URL of your application appended with the path,
/.auth/login/google/callback. For example, https://contoso.azurewebsites.net/.auth/login/google/callback . Make sure that
you are using the HTTPS scheme. Then click Create.
7. On the next screen, make a note of the values of the client ID and client secret.
[AZURE.IMPORTANT] The client secret is an important security credential. Do not share this secret with
anyone or distribute it within a client application.
1. Back in the Azure portal, navigate to your application. Click Settings, and then Authentication /
Authorization.
2. If the Authentication / Authorization feature is not enabled, turn the switch to On.
3. Click Google. Paste in the App ID and App Secret values which you obtained previously, and optionally
enable any scopes your application requires. Then click OK.](https://image.slidesharecdn.com/appserviceweb-230806184930-59dcfe26/85/App-Service-Web-434-320.jpg)

![How to configure your App Service application to
use Microsoft Account login
3/8/2017 • 2 min to read • Edit Online
Register your app with Microsoft Account
Add Microsoft Account information to your App Service application
This topic shows you how to configure Azure App Service to use Microsoft Account as an authentication provider.
1. Log on to the Azure portal, and navigate to your application. Copy your URL, which later you use to configure
your app with Microsoft Account.
2. Navigate to the My Applications page in the Microsoft Account Developer Center, and log on with your
Microsoft account, if required.
3. Click Add an app, then type an application name, and click Create application.
4. Make a note of the Application ID, as you will need it later.
5. Under "Platforms," click Add Platform and select "Web".
NOTE
NOTE
6. Under "Redirect URIs" supply the endpoint for your application, then click Save.
Your redirect URI is the URL of your application appended with the path, /.auth/login/microsoftaccount/callback.
For example, https://contoso.azurewebsites.net/.auth/login/microsoftaccount/callback .
Make sure that you are using the HTTPS scheme.
7. Under "Application Secrets," click Generate New Password. Make note of the value that appears. Once
you leave the page, it will not be displayed again.
[AZURE.IMPORTANT] The password is an important security credential. Do not share the password with
anyone or distribute it within a client application.
1. Back in the Azure portal, navigate to your application, click Settings > Authentication / Authorization.
2. If the Authentication / Authorization feature is not enabled, switch it On.
3. Click Microsoft Account. Paste in the Application ID and Password values which you obtained previously,
and optionally enable any scopes your application requires. Then click OK.](https://image.slidesharecdn.com/appserviceweb-230806184930-59dcfe26/85/App-Service-Web-436-320.jpg)


![Authenticate with on-premises Active Directory in
your Azure app
2/28/2017 • 1 min to read • Edit Online
Authenticate through Azure Active Directory
Authenticate through an on-premises STS
This article shows you how to authenticate with on-premises Active Directory (AD) in Azure App Service. An Azure
app is hosted in the cloud, but there are ways to authenticate on-premises AD users securely.
An Azure Active Directory tenant can be directory-synced with an on-premises AD. This approach enables AD users
to access your App from the internet and authenticate using their on-premises credentials. Furthermore, Azure App
Service provides a turn-key solution for this method. With a few clicks of a button, you can enable authentication
with a directory-synced tenant for your Azure app. This approach has the following advantages:
Does not require any authentication code in your app. Let App Service do the authentication for you and spend
your time on providing functionality in your app.
Azure AD Graph API enables access to directory data from your Azure app.
Provides SSO to all applications supported by Azure Active Directory, including Office 365, Dynamics CRM
Online, Microsoft Intune, and thousands of non-Microsoft cloud applications.
Azure Active Directory supports role-based access control. You can use the [Authorize(Roles="X")] pattern with
minimal changes to your code.
To see how to write a line-of-business Azure app that authenticates with Azure Active Directory, see Create a line-
of-business Azure app with Azure Active Directory authentication.
If you have an on-premises secure token service (STS) like Active Directory Federation Services (AD FS), you can
use that to federate authentication for your Azure app. This approach is best when company policy prohibits AD
data from being stored in Azure. However, note the following:
STS topology must be deployed on-premises, with cost and management overhead.
Only AD FS administrators can configure relying party trusts and claim rules, which may limit the developer's
options. On the other hand, it is possible to manage and customize claims on a per-application basis.
Access to on-premises AD data requires a separate solution through the corporate firewall.
To see how to write a line-of-business Azure app that authenticates with an on-premises STS, see Create a line-of-
business Azure app with AD FS authentication.](https://image.slidesharecdn.com/appserviceweb-230806184930-59dcfe26/85/App-Service-Web-440-320.jpg)


![Step 1. Get an SSL certificate
Get a certificate using Certreq.exe
Get a certificate using Certreq.exe
Because CAs provide the various SSL certificate types at different price points, you should start by deciding what
type of SSL certificate to buy. To secure a single domain name (www.contoso.com), you just need a basic
certificate. To secure multiple domain names (contoso.com and www.contoso.com and mail.contoso.com),
you need either a wildcard certificate or a certificate with Subject Alternate Name ( subjectAltName ).
Once you know which SSL certificate to buy, you submit a Certificate Signing Request (CSR) to a CA. When you get
requested certificate back from the CA, you then generate a .pfx file from the certificate. You can perform these
steps using the tool of your choice. Here are instructions for the common tools:
Certreq.exe steps - the Windows utility for creating certificate requests. It has been part of Windows since
Windows XP/Windows Server 2000.
IIS Manager steps - The tool of choice if you're already familiar with it.
OpenSSL steps - an open-source, cross-platform tool. Use it to help you get an SSL certificate from any platform.
subjectAltName steps using OpenSSL - steps for getting subjectAltName certificates.
If you want to test the setup in App Service before buying a certificate, you can generate a self-signed certificate.
This tutorial gives you two ways to generate it:
Self-signed certificate, Certreq.exe steps
Self-signed certificate, OpenSSL steps
[NewRequest]
Subject = "CN=<your-domain>" ; E.g. "CN=www.contoso.com", or "CN=*.contoso.com" for a wildcard certificate
Exportable = TRUE
KeyLength = 2048 ; Required minimumis 2048
KeySpec = 1
KeyUsage = 0xA0
MachineKeySet = FALSE
ProviderName = "Microsoft RSA SChannelCryptographic Provider"
ProviderType = 12
HashAlgorithm= SHA256
[EnhancedKeyUsageExtension]
OID=1.3.6.1.5.5.7.3.1 ; Server Authentication
certreq -newmyrequest.txt myrequest.csr
1. Create a file (e.g. myrequest.txt), and copy into it the following text, and save it in a working directory.
Replace the <your-domain> placeholder with the custom domain name of your app.
For more information on the options in the CSR, and other available options, see the Certreq reference
documentation.
2. In a command prompt, CD into your working directory and run the following command to create the CSR:
myrequest.csr is now created in your current working directory.
3. Submit myrequest.csr to a CA to obtain an SSL certificate. You either upload the file, or copy its content
from a text editor into a web form.
For a list of CAs trusted by Microsoft, see Microsoft Trusted Root Certificate Program: Participants.
4. Once the CA has responded to you with a certificate (.CER) file, save it in your working directory. Then, run
the following command to complete the pending CSR.](https://image.slidesharecdn.com/appserviceweb-230806184930-59dcfe26/85/App-Service-Web-448-320.jpg)


![Get a certificate using OpenSSL
Get a certificate using OpenSSL
certificate.
opensslreq -sha256-new-nodes -keyout myserver.key -out server.csr -newkey rsa:2048
Country Name (2letter code)
State or Province Name (fullname) []:Washington
Locality Name (eg, city) []:Redmond
Organization Name (eg, company) []:Microsoft
OrganizationalUnit Name (eg, section) []:Azure
Common Name (eg, YOURname) []:www.microsoft.com
EmailAddress []:
Please enter the following 'extra' attributes to be sent with your certificate request
A challenge password []:
3. Submit your CSR to a CA to get an SSL certificate. For a list of CAs trusted by Microsoft, see Microsoft Trusted
Root Certificate Program: Participants.
-----BEGINCERTIFICATE-----
MIIDJDCCAgwCCQCpCY4o1LBQuzANBgkqhkiG9w0BAQUFADBUMQswCQYDVQQGEwJV
UzELMAkGA1UECBMCV0ExEDAOBgNVBAcTB1JlZG1vbmQxEDAOBgNVBAsTB0NvbnRv
c28xFDASBgNVBAMTC2NvbnRvc28uY29tMB4XDTE0MDExNjE1MzIyM1oXDTE1MDEx
NjE1MzIyM1owVDELMAkGA1UEBhMCVVMxCzAJBgNVBAgTAldBMRAwDgYDVQQHEwdS
ZWRtb25kMRAwDgYDVQQLEwdDb250b3NvMRQwEgYDVQQDEwtjb250b3NvLmNvbTCC
ASIwDQYJKoZIhvcNAQEBBQADggEPADCCAQoCggEBAN96hBX5EDgULtWkCRK7DMM3
enae1LT9fXqGlbA7ScFvFivGvOLEqEPD//eLGsf15OYHFOQHK1hwgyfXa9sEDPMT
3AsF3iWyF7FiEoR/qV6LdKjeQicJ2cXjGwf3G5vPoIaYifI5r0lhgOUqBxzaBDZ4
xMgCh2yv7NavI17BHlWyQo90gS2X5glYGRhzY/fGp10BeUEgIs3Se0kQfBQOFUYb
ktA6802lod5K0OxlQy4Oc8kfxTDf8AF2SPQ6BL7xxWrNl/Q2DuEEemjuMnLNxmeA
Ik2+6Z6+WdvJoRxqHhleoL8ftOpWR20ToiZXCPo+fcmLod4ejsG5qjBlztVY4qsC
AwEAATANBgkqhkiG9w0BAQUFAAOCAQEAVcM9AeeNFv2li69qBZLGDuK0NDHD3zhK
Y0nDkqucgjE2QKUuvVSPodz8qwHnKoPwnSrTn8CRjW1gFq5qWEO50dGWgyLR8Wy1
F69DYsEzodG+shv/G+vHJZg9QzutsJTB/Q8OoUCSnQS1PSPZP7RbvDV9b7Gx+gtg
7kQ55j3A5vOrpI8N9CwdPuimtu6X8Ylw9ejWZsnyy0FMeOPpK3WTkDMxwwGxkU3Y
lCRTzkv6vnHrlYQxyBLOSafCB1RWinN/slcWSLHADB6R+HeMiVKkFpooT+ghtii1
A9PdUQIhK9bdaFicXPBYZ6AgNVuGtfwyuS5V6ucm7RE6+qf+QjXNFg==
-----ENDCERTIFICATE-----
opensslpkcs12-export -out myserver.pfx-inkey myserver.key -in myserver.crt
1. In a command-line terminal, CD into a working directory generate a private key and CSR by running the
following command:
2. When prompted, enter the appropriate information. For example:
When finished, you should have two files in your working directory: myserver.key and server.csr. The
server.csr contains the CSR, and you need myserver.key later.
4. Once the CA sends you the requested certificate, save it to a file named myserver.crt in your working
directory. If your CA provides it in a text format, simply copy the content into myserver.crt in a text editor
and save it. Your file should look like the following:
5. In the command-line terminal, run the following command to export myserver.pfx from myserver.key and
myserver.crt:
When prompted, define a password to secure the .pfx file.](https://image.slidesharecdn.com/appserviceweb-230806184930-59dcfe26/85/App-Service-Web-453-320.jpg)
![Get a SubjectAltName certificate using OpenSSL
Get a SubjectAltName certificate using OpenSSL
NOTE
NOTE
If your CA uses intermediate certificates, you must include them with the -certfile parameter. They usually come
as a separate download from your CA, and in several formats for different web server types. Select the version with
the .pem extension.
Your openssl -export command should look like the following example, which creates a .pfx file that includes the
intermediate certificates from the intermediate-cets.pem file:
openssl pkcs12 -chain -export -out myserver.pfx -inkey myserver.key -in myserver.crt -certfile
intermediate-cets.pem
You are now ready to upload the exported PFX file to App Service. See Step 2. Upload and bind the custom SSL
certificate.
# -------------- BEGINcustomsancert.cnf -----
HOME= .
oid_section = new_oids
[ new_oids ]
[ req ]
default_days = 730
distinguished_name = req_distinguished_name
encrypt_key = no
string_mask= nombstr
req_extensions = v3_req # Extensions to add to certificate request
[ req_distinguished_name ]
countryName = Country Name (2letter code)
countryName_default =
stateOrProvinceName = State or Province Name (fullname)
stateOrProvinceName_default =
localityName = Locality Name (eg, city)
localityName_default =
organizationalUnitName = OrganizationalUnit Name (eg, section)
organizationalUnitName_default =
commonName = Your common name (eg, domain name)
commonName_default = www.mydomain.com
commonName_max= 64
[ v3_req ]
subjectAltName=DNS:ftp.mydomain.com,DNS:blog.mydomain.com,DNS:*.mydomain.com
# -------------- ENDcustomsancert.cnf -----
subjectAltName=DNS:sales.contoso.com,DNS:support.contoso.com,DNS:fabrikam.com
opensslreq -sha256-new-nodes -keyout myserver.key -out server.csr -newkey rsa:2048-config sancert.cnf
1. Create a file named sancert.cnf, copy the following text into it, and save it in a working directory:
In the line that begins with subjectAltName , replace the value with all domain names you want to secure (in
addition to commonName ). For example:
You do not need to change any other field, including commonName . You will be prompted to specify them in
the next few steps.
2. In a command-line terminal, CD into your working directory and run the following command:
3. When prompted, enter the appropriate information. For example:](https://image.slidesharecdn.com/appserviceweb-230806184930-59dcfe26/85/App-Service-Web-454-320.jpg)
![Generate a self-signed certificate using Certreq.exe
Generate a self-signed certificate using Certreq.exe
Country Name (2letter code) []:US
State or Province Name (fullname) []:Washington
Locality Name (eg, city) []:Redmond
OrganizationalUnit Name (eg, section) []:Azure
Your common name (eg, domain name) []:www.microsoft.com
4. Submit your CSR to a CA to get an SSL certificate. For a list of CAs trusted by Microsoft, see Microsoft Trusted
Root Certificate Program: Participants.
-----BEGINCERTIFICATE-----
MIIDJDCCAgwCCQCpCY4o1LBQuzANBgkqhkiG9w0BAQUFADBUMQswCQYDVQQGEwJV
UzELMAkGA1UECBMCV0ExEDAOBgNVBAcTB1JlZG1vbmQxEDAOBgNVBAsTB0NvbnRv
c28xFDASBgNVBAMTC2NvbnRvc28uY29tMB4XDTE0MDExNjE1MzIyM1oXDTE1MDEx
NjE1MzIyM1owVDELMAkGA1UEBhMCVVMxCzAJBgNVBAgTAldBMRAwDgYDVQQHEwdS
ZWRtb25kMRAwDgYDVQQLEwdDb250b3NvMRQwEgYDVQQDEwtjb250b3NvLmNvbTCC
ASIwDQYJKoZIhvcNAQEBBQADggEPADCCAQoCggEBAN96hBX5EDgULtWkCRK7DMM3
enae1LT9fXqGlbA7ScFvFivGvOLEqEPD//eLGsf15OYHFOQHK1hwgyfXa9sEDPMT
3AsF3iWyF7FiEoR/qV6LdKjeQicJ2cXjGwf3G5vPoIaYifI5r0lhgOUqBxzaBDZ4
xMgCh2yv7NavI17BHlWyQo90gS2X5glYGRhzY/fGp10BeUEgIs3Se0kQfBQOFUYb
ktA6802lod5K0OxlQy4Oc8kfxTDf8AF2SPQ6BL7xxWrNl/Q2DuEEemjuMnLNxmeA
Ik2+6Z6+WdvJoRxqHhleoL8ftOpWR20ToiZXCPo+fcmLod4ejsG5qjBlztVY4qsC
AwEAATANBgkqhkiG9w0BAQUFAAOCAQEAVcM9AeeNFv2li69qBZLGDuK0NDHD3zhK
Y0nDkqucgjE2QKUuvVSPodz8qwHnKoPwnSrTn8CRjW1gFq5qWEO50dGWgyLR8Wy1
F69DYsEzodG+shv/G+vHJZg9QzutsJTB/Q8OoUCSnQS1PSPZP7RbvDV9b7Gx+gtg
7kQ55j3A5vOrpI8N9CwdPuimtu6X8Ylw9ejWZsnyy0FMeOPpK3WTkDMxwwGxkU3Y
lCRTzkv6vnHrlYQxyBLOSafCB1RWinN/slcWSLHADB6R+HeMiVKkFpooT+ghtii1
A9PdUQIhK9bdaFicXPBYZ6AgNVuGtfwyuS5V6ucm7RE6+qf+QjXNFg==
-----ENDCERTIFICATE-----
opensslpkcs12-export -out myserver.pfx-inkey myserver.key -in myserver.crt
NOTE
NOTE
Once finished, you should have two files in your working directory: myserver.key and server.csr. The
server.csr contains the CSR, and you need myserver.key later.
5. Once the CA sends you the requested certificate, save it to a file named myserver.crt. If your CA provides it
in a text format, simply copy the content into myserver.crt in a text editor and save it. The file should look
like the following:
6. In the command-line terminal, run the following command to export myserver.pfx from myserver.key and
myserver.crt:
When prompted, define a password to secure the .pfx file.
If your CA uses intermediate certificates, you must include them with the -certfile parameter. They usually come
as a separate download from your CA, and in several formats for different web server types. Select the version with
the .pem extension).
Your openssl -export command should look like the following example, which creates a .pfx file that includes the
intermediate certificates from the intermediate-cets.pem file:
openssl pkcs12 -chain -export -out myserver.pfx -inkey myserver.key -in myserver.crt -certfile
intermediate-cets.pem
You are now ready to upload the exported PFX file to App Service. See Step 2. Upload and bind the custom SSL
certificate.](https://image.slidesharecdn.com/appserviceweb-230806184930-59dcfe26/85/App-Service-Web-455-320.jpg)
![IMPORTANT
IMPORTANT
Self-signed certificates are for test purposes only. Most browsers return errors when visiting a website that's secured by a
self-signed certificate. Some browsers may even refuse to navigate to the site.
[NewRequest]
Subject = "CN=<your-domain>" ; E.g. "CN=www.contoso.com", or "CN=*.contoso.com" for a wildcard certificate
Exportable = TRUE
KeyLength = 2048 ; KeyLength can be 2048, 4096, 8192, or 16384(required minimumis 2048)
KeySpec = 1
KeyUsage = 0xA0
MachineKeySet = True
ProviderName = "Microsoft RSA SChannelCryptographic Provider"
ProviderType = 12
HashAlgorithm= SHA256
RequestType = Cert ; Self-signed certificate
ValidityPeriod = Years
ValidityPeriodUnits = 1
[EnhancedKeyUsageExtension]
OID=1.3.6.1.5.5.7.3.1 ; Server Authentication
certreq -newmycert.txt mycert.crt
1. Create a text file (e.g. mycert.txt), copy into it the following text, and save the file in a working directory.
Replace the <your-domain> placeholder with the custom domain name of your app.
The important parameter is RequestType = Cert , which specifies a self-signed certificate. For more information
on the options in the CSR, and other available options, see the Certreq reference documentation.
2. In the command prompt, CD to your working directory and run the following command:
Your new self-signed certificate is now installed in the certificate store.
3. To export the certificate from the certificate store, press Win + R and run certmgr.msc to launch Certificate
Manager. Select Personal > Certificates. In the Issued To column, you should see an entry with your
custom domain name, and the CA you used to generate the certificate in the Issued By column.
4. Right-click the certificate and select All Tasks > Export. In the Certificate Export Wizard, click Next, then
select Yes, export the private key, and then click Next again.](https://image.slidesharecdn.com/appserviceweb-230806184930-59dcfe26/85/App-Service-Web-456-320.jpg)


![IMPORTANT
IMPORTANT
Step 2. Upload and bind the custom SSL certificate
Self-signed certificates are for test purposes only. Most browsers return errors when visiting a website that's secured by a
self-signed certificate. Some browsers may even refuse to navigate to the site.
[ req ]
default_bits = 2048
default_keyfile = privkey.pem
distinguished_name = req_distinguished_name
attributes = req_attributes
x509_extensions = v3_ca
[ req_distinguished_name ]
countryName = Country Name (2letter code)
countryName_min = 2
countryName_max = 2
stateOrProvinceName = State or Province Name (fullname)
localityName = Locality Name (eg, city)
0.organizationName = Organization Name (eg, company)
organizationalUnitName = OrganizationalUnit Name (eg, section)
commonName = Common Name (eg, your app's domain name)
commonName_max = 64
emailAddress = EmailAddress
emailAddress_max = 40
[ req_attributes ]
challengePassword = A challenge password
challengePassword_min = 4
challengePassword_max = 20
[ v3_ca ]
subjectKeyIdentifier=hash
authorityKeyIdentifier=keyid:always,issuer:always
basicConstraints = CA:false
keyUsage=nonRepudiation, digitalSignature, keyEncipherment
extendedKeyUsage = serverAuth
opensslreq -sha256-x509-nodes -days 365-newkey rsa:2048-keyout myserver.key -out myserver.crt -config serverauth.cnf
opensslpkcs12-export -out myserver.pfx-inkey myserver.key -in myserver.crt
1. Create a text file named serverauth.cnf, then copy the following content into it, and then save it in a working
directory:
2. In a command-line terminal, CD into your working directory and run the following command:
This command creates two files: myserver.crt (the self-signed certificate) and myserver.key (the private
key), based on the settings in serverauth.cnf.
3. Export the certificate to a .pfx file by running the following command:
When prompted, define a password to secure the .pfx file.
You are now ready to upload the exported PFX file to App Service. See Step 2. Upload and bind the custom SSL
certificate.](https://image.slidesharecdn.com/appserviceweb-230806184930-59dcfe26/85/App-Service-Web-459-320.jpg)


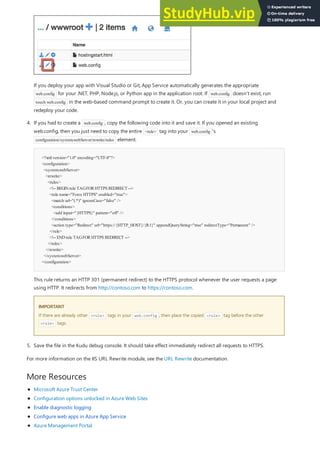

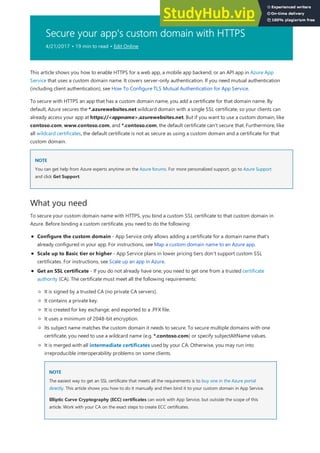
![Step 1. Get an SSL certificate
Get a certificate using Certreq.exe
Get a certificate using Certreq.exe
Because CAs provide the various SSL certificate types at different price points, you should start by deciding what
type of SSL certificate to buy. To secure a single domain name (www.contoso.com), you just need a basic
certificate. To secure multiple domain names (contoso.com and www.contoso.com and mail.contoso.com),
you need either a wildcard certificate or a certificate with Subject Alternate Name ( subjectAltName ).
Once you know which SSL certificate to buy, you submit a Certificate Signing Request (CSR) to a CA. When you
get requested certificate back from the CA, you then generate a .pfx file from the certificate. You can perform these
steps using the tool of your choice. Here are instructions for the common tools:
Certreq.exe steps - the Windows utility for creating certificate requests. It has been part of Windows since
Windows XP/Windows Server 2000.
IIS Manager steps - The tool of choice if you're already familiar with it.
OpenSSL steps - an open-source, cross-platform tool. Use it to help you get an SSL certificate from any
platform.
subjectAltName steps using OpenSSL - steps for getting subjectAltName certificates.
If you want to test the setup in App Service before buying a certificate, you can generate a self-signed certificate.
This tutorial gives you two ways to generate it:
Self-signed certificate, Certreq.exe steps
Self-signed certificate, OpenSSL steps
[NewRequest]
Subject = "CN=<your-domain>" ; E.g. "CN=www.contoso.com", or "CN=*.contoso.com" for a wildcard certificate
Exportable = TRUE
KeyLength = 2048 ; Required minimumis 2048
KeySpec = 1
KeyUsage = 0xA0
MachineKeySet = FALSE
ProviderName = "Microsoft RSA SChannelCryptographic Provider"
ProviderType = 12
HashAlgorithm= SHA256
[EnhancedKeyUsageExtension]
OID=1.3.6.1.5.5.7.3.1 ; Server Authentication
certreq -newmyrequest.txt myrequest.csr
1. Create a file (e.g. myrequest.txt), and copy into it the following text, and save it in a working directory.
Replace the <your-domain> placeholder with the custom domain name of your app.
For more information on the options in the CSR, and other available options, see the Certreq reference
documentation.
2. In a command prompt, CD into your working directory and run the following command to create the CSR:
myrequest.csr is now created in your current working directory.
3. Submit myrequest.csr to a CA to obtain an SSL certificate. You either upload the file, or copy its content
from a text editor into a web form.
For a list of CAs trusted by Microsoft, see Microsoft Trusted Root Certificate Program: Participants.
4. Once the CA has responded to you with a certificate (.CER) file, save it in your working directory. Then, run](https://image.slidesharecdn.com/appserviceweb-230806184930-59dcfe26/85/App-Service-Web-465-320.jpg)


![Get a certificate using OpenSSL
Get a certificate using OpenSSL
certificate.
opensslreq -sha256-new-nodes -keyout myserver.key -out server.csr -newkey rsa:2048
Country Name (2letter code)
State or Province Name (fullname) []:Washington
Locality Name (eg, city) []:Redmond
Organization Name (eg, company) []:Microsoft
OrganizationalUnit Name (eg, section) []:Azure
Common Name (eg, YOURname) []:www.microsoft.com
EmailAddress []:
Please enter the following 'extra' attributes to be sent with your certificate request
A challenge password []:
3. Submit your CSR to a CA to get an SSL certificate. For a list of CAs trusted by Microsoft, see Microsoft Trusted
Root Certificate Program: Participants.
-----BEGINCERTIFICATE-----
MIIDJDCCAgwCCQCpCY4o1LBQuzANBgkqhkiG9w0BAQUFADBUMQswCQYDVQQGEwJV
UzELMAkGA1UECBMCV0ExEDAOBgNVBAcTB1JlZG1vbmQxEDAOBgNVBAsTB0NvbnRv
c28xFDASBgNVBAMTC2NvbnRvc28uY29tMB4XDTE0MDExNjE1MzIyM1oXDTE1MDEx
NjE1MzIyM1owVDELMAkGA1UEBhMCVVMxCzAJBgNVBAgTAldBMRAwDgYDVQQHEwdS
ZWRtb25kMRAwDgYDVQQLEwdDb250b3NvMRQwEgYDVQQDEwtjb250b3NvLmNvbTCC
ASIwDQYJKoZIhvcNAQEBBQADggEPADCCAQoCggEBAN96hBX5EDgULtWkCRK7DMM3
enae1LT9fXqGlbA7ScFvFivGvOLEqEPD//eLGsf15OYHFOQHK1hwgyfXa9sEDPMT
3AsF3iWyF7FiEoR/qV6LdKjeQicJ2cXjGwf3G5vPoIaYifI5r0lhgOUqBxzaBDZ4
xMgCh2yv7NavI17BHlWyQo90gS2X5glYGRhzY/fGp10BeUEgIs3Se0kQfBQOFUYb
ktA6802lod5K0OxlQy4Oc8kfxTDf8AF2SPQ6BL7xxWrNl/Q2DuEEemjuMnLNxmeA
Ik2+6Z6+WdvJoRxqHhleoL8ftOpWR20ToiZXCPo+fcmLod4ejsG5qjBlztVY4qsC
AwEAATANBgkqhkiG9w0BAQUFAAOCAQEAVcM9AeeNFv2li69qBZLGDuK0NDHD3zhK
Y0nDkqucgjE2QKUuvVSPodz8qwHnKoPwnSrTn8CRjW1gFq5qWEO50dGWgyLR8Wy1
F69DYsEzodG+shv/G+vHJZg9QzutsJTB/Q8OoUCSnQS1PSPZP7RbvDV9b7Gx+gtg
7kQ55j3A5vOrpI8N9CwdPuimtu6X8Ylw9ejWZsnyy0FMeOPpK3WTkDMxwwGxkU3Y
lCRTzkv6vnHrlYQxyBLOSafCB1RWinN/slcWSLHADB6R+HeMiVKkFpooT+ghtii1
A9PdUQIhK9bdaFicXPBYZ6AgNVuGtfwyuS5V6ucm7RE6+qf+QjXNFg==
-----ENDCERTIFICATE-----
opensslpkcs12-export -out myserver.pfx-inkey myserver.key -in myserver.crt
1. In a command-line terminal, CD into a working directory generate a private key and CSR by running the
following command:
2. When prompted, enter the appropriate information. For example:
When finished, you should have two files in your working directory: myserver.key and server.csr. The
server.csr contains the CSR, and you need myserver.key later.
4. Once the CA sends you the requested certificate, save it to a file named myserver.crt in your working
directory. If your CA provides it in a text format, simply copy the content into myserver.crt in a text editor
and save it. Your file should look like the following:
5. In the command-line terminal, run the following command to export myserver.pfx from myserver.key
and myserver.crt:
When prompted, define a password to secure the .pfx file.](https://image.slidesharecdn.com/appserviceweb-230806184930-59dcfe26/85/App-Service-Web-470-320.jpg)
![Get a SubjectAltName certificate using OpenSSL
Get a SubjectAltName certificate using OpenSSL
NOTE
NOTE
If your CA uses intermediate certificates, you must include them with the -certfile parameter. They usually come
as a separate download from your CA, and in several formats for different web server types. Select the version with
the .pem extension.
Your openssl -export command should look like the following example, which creates a .pfx file that includes the
intermediate certificates from the intermediate-cets.pem file:
openssl pkcs12 -chain -export -out myserver.pfx -inkey myserver.key -in myserver.crt -certfile
intermediate-cets.pem
You are now ready to upload the exported PFX file to App Service. See Step 2. Upload and bind the custom SSL
certificate.
# -------------- BEGINcustomsancert.cnf -----
HOME= .
oid_section = new_oids
[ new_oids ]
[ req ]
default_days = 730
distinguished_name = req_distinguished_name
encrypt_key = no
string_mask= nombstr
req_extensions = v3_req # Extensions to add to certificate request
[ req_distinguished_name ]
countryName = Country Name (2letter code)
countryName_default =
stateOrProvinceName = State or Province Name (fullname)
stateOrProvinceName_default =
localityName = Locality Name (eg, city)
localityName_default =
organizationalUnitName = OrganizationalUnit Name (eg, section)
organizationalUnitName_default =
commonName = Your common name (eg, domain name)
commonName_default = www.mydomain.com
commonName_max= 64
[ v3_req ]
subjectAltName=DNS:ftp.mydomain.com,DNS:blog.mydomain.com,DNS:*.mydomain.com
# -------------- ENDcustomsancert.cnf -----
subjectAltName=DNS:sales.contoso.com,DNS:support.contoso.com,DNS:fabrikam.com
opensslreq -sha256-new-nodes -keyout myserver.key -out server.csr -newkey rsa:2048-config sancert.cnf
1. Create a file named sancert.cnf, copy the following text into it, and save it in a working directory:
In the line that begins with subjectAltName , replace the value with all domain names you want to secure (in
addition to commonName ). For example:
You do not need to change any other field, including commonName . You will be prompted to specify them in
the next few steps.
2. In a command-line terminal, CD into your working directory and run the following command:
3. When prompted, enter the appropriate information. For example:](https://image.slidesharecdn.com/appserviceweb-230806184930-59dcfe26/85/App-Service-Web-471-320.jpg)
![Generate a self-signed certificate using Certreq.exe
Generate a self-signed certificate using Certreq.exe
Country Name (2letter code) []:US
State or Province Name (fullname) []:Washington
Locality Name (eg, city) []:Redmond
OrganizationalUnit Name (eg, section) []:Azure
Your common name (eg, domain name) []:www.microsoft.com
4. Submit your CSR to a CA to get an SSL certificate. For a list of CAs trusted by Microsoft, see Microsoft Trusted
Root Certificate Program: Participants.
-----BEGINCERTIFICATE-----
MIIDJDCCAgwCCQCpCY4o1LBQuzANBgkqhkiG9w0BAQUFADBUMQswCQYDVQQGEwJV
UzELMAkGA1UECBMCV0ExEDAOBgNVBAcTB1JlZG1vbmQxEDAOBgNVBAsTB0NvbnRv
c28xFDASBgNVBAMTC2NvbnRvc28uY29tMB4XDTE0MDExNjE1MzIyM1oXDTE1MDEx
NjE1MzIyM1owVDELMAkGA1UEBhMCVVMxCzAJBgNVBAgTAldBMRAwDgYDVQQHEwdS
ZWRtb25kMRAwDgYDVQQLEwdDb250b3NvMRQwEgYDVQQDEwtjb250b3NvLmNvbTCC
ASIwDQYJKoZIhvcNAQEBBQADggEPADCCAQoCggEBAN96hBX5EDgULtWkCRK7DMM3
enae1LT9fXqGlbA7ScFvFivGvOLEqEPD//eLGsf15OYHFOQHK1hwgyfXa9sEDPMT
3AsF3iWyF7FiEoR/qV6LdKjeQicJ2cXjGwf3G5vPoIaYifI5r0lhgOUqBxzaBDZ4
xMgCh2yv7NavI17BHlWyQo90gS2X5glYGRhzY/fGp10BeUEgIs3Se0kQfBQOFUYb
ktA6802lod5K0OxlQy4Oc8kfxTDf8AF2SPQ6BL7xxWrNl/Q2DuEEemjuMnLNxmeA
Ik2+6Z6+WdvJoRxqHhleoL8ftOpWR20ToiZXCPo+fcmLod4ejsG5qjBlztVY4qsC
AwEAATANBgkqhkiG9w0BAQUFAAOCAQEAVcM9AeeNFv2li69qBZLGDuK0NDHD3zhK
Y0nDkqucgjE2QKUuvVSPodz8qwHnKoPwnSrTn8CRjW1gFq5qWEO50dGWgyLR8Wy1
F69DYsEzodG+shv/G+vHJZg9QzutsJTB/Q8OoUCSnQS1PSPZP7RbvDV9b7Gx+gtg
7kQ55j3A5vOrpI8N9CwdPuimtu6X8Ylw9ejWZsnyy0FMeOPpK3WTkDMxwwGxkU3Y
lCRTzkv6vnHrlYQxyBLOSafCB1RWinN/slcWSLHADB6R+HeMiVKkFpooT+ghtii1
A9PdUQIhK9bdaFicXPBYZ6AgNVuGtfwyuS5V6ucm7RE6+qf+QjXNFg==
-----ENDCERTIFICATE-----
opensslpkcs12-export -out myserver.pfx-inkey myserver.key -in myserver.crt
NOTE
NOTE
Once finished, you should have two files in your working directory: myserver.key and server.csr. The
server.csr contains the CSR, and you need myserver.key later.
5. Once the CA sends you the requested certificate, save it to a file named myserver.crt. If your CA provides it
in a text format, simply copy the content into myserver.crt in a text editor and save it. The file should look
like the following:
6. In the command-line terminal, run the following command to export myserver.pfx from myserver.key
and myserver.crt:
When prompted, define a password to secure the .pfx file.
If your CA uses intermediate certificates, you must include them with the -certfile parameter. They usually come
as a separate download from your CA, and in several formats for different web server types. Select the version with
the .pem extension).
Your openssl -export command should look like the following example, which creates a .pfx file that includes the
intermediate certificates from the intermediate-cets.pem file:
openssl pkcs12 -chain -export -out myserver.pfx -inkey myserver.key -in myserver.crt -certfile
intermediate-cets.pem
You are now ready to upload the exported PFX file to App Service. See Step 2. Upload and bind the custom SSL
certificate.](https://image.slidesharecdn.com/appserviceweb-230806184930-59dcfe26/85/App-Service-Web-472-320.jpg)
![IMPORTANT
IMPORTANT
Self-signed certificates are for test purposes only. Most browsers return errors when visiting a website that's secured by a
self-signed certificate. Some browsers may even refuse to navigate to the site.
[NewRequest]
Subject = "CN=<your-domain>" ; E.g. "CN=www.contoso.com", or "CN=*.contoso.com" for a wildcard certificate
Exportable = TRUE
KeyLength = 2048 ; KeyLength can be 2048, 4096, 8192, or 16384(required minimumis 2048)
KeySpec = 1
KeyUsage = 0xA0
MachineKeySet = True
ProviderName = "Microsoft RSA SChannelCryptographic Provider"
ProviderType = 12
HashAlgorithm= SHA256
RequestType = Cert ; Self-signed certificate
ValidityPeriod = Years
ValidityPeriodUnits = 1
[EnhancedKeyUsageExtension]
OID=1.3.6.1.5.5.7.3.1 ; Server Authentication
certreq -newmycert.txt mycert.crt
1. Create a text file (e.g. mycert.txt), copy into it the following text, and save the file in a working directory.
Replace the <your-domain> placeholder with the custom domain name of your app.
The important parameter is RequestType = Cert , which specifies a self-signed certificate. For more
information on the options in the CSR, and other available options, see the Certreq reference
documentation.
2. In the command prompt, CD to your working directory and run the following command:
Your new self-signed certificate is now installed in the certificate store.
3. To export the certificate from the certificate store, press Win + R and run certmgr.msc to launch
Certificate Manager. Select Personal > Certificates. In the Issued To column, you should see an entry with
your custom domain name, and the CA you used to generate the certificate in the Issued By column.
4. Right-click the certificate and select All Tasks > Export. In the Certificate Export Wizard, click Next, then
select Yes, export the private key, and then click Next again.](https://image.slidesharecdn.com/appserviceweb-230806184930-59dcfe26/85/App-Service-Web-473-320.jpg)


![IMPORTANT
IMPORTANT
Step 2. Upload and bind the custom SSL certificate
Self-signed certificates are for test purposes only. Most browsers return errors when visiting a website that's secured by a
self-signed certificate. Some browsers may even refuse to navigate to the site.
[ req ]
default_bits = 2048
default_keyfile = privkey.pem
distinguished_name = req_distinguished_name
attributes = req_attributes
x509_extensions = v3_ca
[ req_distinguished_name ]
countryName = Country Name (2letter code)
countryName_min = 2
countryName_max = 2
stateOrProvinceName = State or Province Name (fullname)
localityName = Locality Name (eg, city)
0.organizationName = Organization Name (eg, company)
organizationalUnitName = OrganizationalUnit Name (eg, section)
commonName = Common Name (eg, your app's domain name)
commonName_max = 64
emailAddress = EmailAddress
emailAddress_max = 40
[ req_attributes ]
challengePassword = A challenge password
challengePassword_min = 4
challengePassword_max = 20
[ v3_ca ]
subjectKeyIdentifier=hash
authorityKeyIdentifier=keyid:always,issuer:always
basicConstraints = CA:false
keyUsage=nonRepudiation, digitalSignature, keyEncipherment
extendedKeyUsage = serverAuth
opensslreq -sha256-x509-nodes -days 365-newkey rsa:2048-keyout myserver.key -out myserver.crt -config serverauth.cnf
opensslpkcs12-export -out myserver.pfx-inkey myserver.key -in myserver.crt
1. Create a text file named serverauth.cnf, then copy the following content into it, and then save it in a
working directory:
2. In a command-line terminal, CD into your working directory and run the following command:
This command creates two files: myserver.crt (the self-signed certificate) and myserver.key (the private
key), based on the settings in serverauth.cnf.
3. Export the certificate to a .pfx file by running the following command:
When prompted, define a password to secure the .pfx file.
You are now ready to upload the exported PFX file to App Service. See Step 2. Upload and bind the custom SSL
certificate.](https://image.slidesharecdn.com/appserviceweb-230806184930-59dcfe26/85/App-Service-Web-476-320.jpg)


![Accessing the Client Certificate From Your Web App
Special Considerations for Certificate Validation
using System;
using System.Collections.Specialized;
using System.Security.Cryptography.X509Certificates;
using System.Web;
namespace ClientCertificateUsageSample
{
public partialclass cert :System.Web.UI.Page
{
public string certHeader = "";
public string errorString = "";
private X509Certificate2certificate = null;
public string certThumbprint = "";
public string certSubject = "";
public string certIssuer = "";
public string certSignatureAlg = "";
public string certIssueDate = "";
public string certExpiryDate = "";
public boolisValidCert = false;
//
// Read the certificate fromthe header into an X509Certificate2object
// Display properties of the certificate on the page
//
protected void Page_Load(object sender, EventArgs e)
{
NameValueCollection headers = base.Request.Headers;
certHeader = headers["X-ARR-ClientCert"];
if (!String.IsNullOrEmpty(certHeader))
{
try
{
byte[] clientCertBytes = Convert.FromBase64String(certHeader);
certificate = newX509Certificate2(clientCertBytes);
certSubject = certificate.Subject;
certIssuer = certificate.Issuer;
certThumbprint = certificate.Thumbprint;
certSignatureAlg = certificate.SignatureAlgorithm.FriendlyName;
certIssueDate = certificate.NotBefore.ToShortDateString() + " " + certificate.NotBefore.ToShortTimeString();
certExpiryDate = certificate.NotAfter.ToShortDateString() + " " + certificate.NotAfter.ToShortTimeString();
}
catch (Exception ex)
{
errorString = ex.ToString();
}
finally
{
isValidCert = IsValidClientCertificate();
if (!isValidCert) Response.StatusCode = 403;
else Response.StatusCode = 200;
}
If you are using ASP.NET and configure your app to use client certificate authentication, the certificate will be
available through the HttpRequest.ClientCertificate property. For other application stacks, the client cert will be
available in your app through a base64 encoded value in the "X-ARR-ClientCert" request header. Your application
can create a certificate from this value and then use it for authentication and authorization purposes in your
application.
The client certificate that is sent to the application does not go through any validation by the Azure Web Apps
platform. Validating this certificate is the responsibility of the web app. Here is sample ASP.NET code that validates
certificate properties for authentication purposes.](https://image.slidesharecdn.com/appserviceweb-230806184930-59dcfe26/85/App-Service-Web-482-320.jpg)
![}
}
else
{
certHeader = "";
}
}
//
// This is a SAMPLEverification routine. Depending on your application logic and security requirements,
// you should modify this method
//
private boolIsValidClientCertificate()
{
// In this example we willonly accept the certificate as a valid certificate if allthe conditions beloware met:
// 1. The certificate is not expired and is active for the current time on server.
// 2. The subject name of the certificate has the common name nildevecc
// 3. The issuer name of the certificate has the common name nildevecc and organization name Microsoft Corp
// 4. The thumbprint of the certificate is 30757A2E831977D8BD9C8496E4C99AB26CB9622B
//
// This example does NOT test that this certificate is chained to a Trusted Root Authority (or revoked) on the server
// and it allows for self signed certificates
//
if (certificate == null|| !String.IsNullOrEmpty(errorString)) return false;
// 1. Checktime validity of certificate
if (DateTime.Compare(DateTime.Now, certificate.NotBefore) < 0|| DateTime.Compare(DateTime.Now, certificate.NotAfter) > 0) return false;
// 2. Checksubject name of certificate
boolfoundSubject = false;
string[] certSubjectData = certificate.Subject.Split(newchar[] { ',' }, StringSplitOptions.RemoveEmptyEntries);
foreach (string s in certSubjectData)
{
if (String.Compare(s.Trim(), "CN=nildevecc") == 0)
{
foundSubject = true;
break;
}
}
if (!foundSubject) return false;
// 3. Checkissuer name of certificate
boolfoundIssuerCN= false, foundIssuerO= false;
string[] certIssuerData = certificate.Issuer.Split(newchar[] { ',' }, StringSplitOptions.RemoveEmptyEntries);
foreach (string s in certIssuerData)
{
if (String.Compare(s.Trim(), "CN=nildevecc") == 0)
{
foundIssuerCN= true;
if (foundIssuerO) break;
}
if (String.Compare(s.Trim(), "O=Microsoft Corp") == 0)
{
foundIssuerO= true;
if (foundIssuerCN) break;
}
}
if (!foundIssuerCN|| !foundIssuerO) return false;
// 4. Checkthumprint of certificate
if (String.Compare(certificate.Thumbprint.Trim().ToUpper(), "30757A2E831977D8BD9C8496E4C99AB26CB9622B") != 0) return false;
// If you also want to test if the certificate chains to a Trusted Root Authority you can uncomment the code below
//
//X509Chain certChain = newX509Chain();
//certChain.Build(certificate);
//boolisValidCertChain = true;](https://image.slidesharecdn.com/appserviceweb-230806184930-59dcfe26/85/App-Service-Web-483-320.jpg)


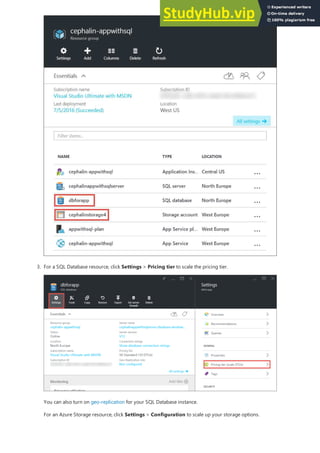


![[AZURE.NOTE] Once your CDN endpoint is created, the Endpoint blade will show you its CDN URL and
the origin domain that it's integrated with. However, it can take a while for the new CDN endpoint's
configuration to be fully propagated to all the CDN node locations.
11. Back in the Endpoint blade, click the name of the CDN endpoint you just created.
12. Click the Configure button. In the Configure blade, select Cache every unique URL in Query string
caching behavior dropdown, then click the Save button.](https://image.slidesharecdn.com/appserviceweb-230806184930-59dcfe26/85/App-Service-Web-509-320.jpg)


![You have a simple Index action that allows the customers to specify the superlatives in the image, then generates
the meme once they post to the action. Since it's Chuck Norris, you would expect this page to become wildly
popular globally. This is a good example of serving semi-dynamic content with Azure CDN.
Follow the steps above to setup this controller action:
using System;
using System.Collections.Generic;
using System.Diagnostics;
using System.Drawing;
using System.IO;
using System.Net;
using System.Web.Hosting;
using System.Web.Mvc;
using System.Web.UI;
namespace cdnwebapp.Controllers
{
public class MemeGeneratorController :Controller
{
static readonly Dictionary<string, Tuple<string ,string>> Memes = newDictionary<string, Tuple<string, string>>();
public ActionResult Index()
{
return View();
}
[HttpPost, ActionName("Index")]
public ActionResult Index_Post(string top, string bottom)
{
var identifier = Guid.NewGuid().ToString();
if (!Memes.ContainsKey(identifier))
{
Memes.Add(identifier, newTuple<string, string>(top, bottom));
}
return Content("<a href="" + Url.Action("Show", new{id = identifier}) + "">here's your meme</a>");
}
1. In the Controllers folder, create a new .cs file called MemeGeneratorController.cs and replace the content
with the following code. Substitute your file path for ~/Content/chuck.bmp and your CDN name for
yourCDNName .](https://image.slidesharecdn.com/appserviceweb-230806184930-59dcfe26/85/App-Service-Web-513-320.jpg)
![[OutputCache(VaryByParam= "*", Duration = 1, Location = OutputCacheLocation.Downstream)]
public ActionResult Show(string id)
{
Tuple<string, string> data = null;
if (!Memes.TryGetValue(id, out data))
{
return newHttpStatusCodeResult(HttpStatusCode.NotFound);
}
if (Debugger.IsAttached) // Preserve the debug experience
{
return Redirect(string.Format("/MemeGenerator/Generate?top={0}&bottom={1}", data.Item1, data.Item2));
}
else // Get content fromAzure CDN
{
return Redirect(string.Format("http://<yourCDNName>.azureedge.net/MemeGenerator/Generate?top={0}&bottom={1}", data.Item1,
data.Item2));
}
}
[OutputCache(VaryByParam= "*", Duration = 3600, Location = OutputCacheLocation.Downstream)]
public ActionResult Generate(string top, string bottom)
{
string imageFilePath = HostingEnvironment.MapPath("~/Content/chuck.bmp");
Bitmap bitmap = (Bitmap)Image.FromFile(imageFilePath);
using (Graphics graphics = Graphics.FromImage(bitmap))
{
SizeF size = newSizeF();
using (Font arialFont = FindBestFitFont(bitmap, graphics, top.ToUpperInvariant(), newFont("ArialNarrow", 100), out size))
{
graphics.DrawString(top.ToUpperInvariant(), arialFont, Brushes.White, newPointF(((bitmap.Width - size.Width) / 2), 10f));
}
using (Font arialFont = FindBestFitFont(bitmap, graphics, bottom.ToUpperInvariant(), newFont("ArialNarrow", 100), out size))
{
graphics.DrawString(bottom.ToUpperInvariant(), arialFont, Brushes.White, newPointF(((bitmap.Width - size.Width) / 2),
bitmap.Height - 10f - arialFont.Height));
}
}
MemoryStreamms = newMemoryStream();
bitmap.Save(ms, System.Drawing.Imaging.ImageFormat.Png);
return File(ms.ToArray(), "image/png");
}
private Font FindBestFitFont(Image i, Graphics g, String text, Font font, out SizeF size)
{
// Compute actualsize, shrinkif needed
while (true)
{
size = g.MeasureString(text, font);
// It fits, backout
if (size.Height < i.Height &&
size.Width < i.Width) { return font; }
// Try a smaller font (90% of old size)
Font oldFont = font;
font = newFont(font.Name, (float)(font.Size * .9), font.Style);
oldFont.Dispose();
}
}
}
}
2. Right-click in the default Index() action and select Add View.](https://image.slidesharecdn.com/appserviceweb-230806184930-59dcfe26/85/App-Service-Web-514-320.jpg)

![[OutputCache(VaryByParam= "*", Duration = 1, Location = OutputCacheLocation.Downstream)]
public ActionResult Show(string id)
{
Tuple<string, string> data = null;
if (!Memes.TryGetValue(id, out data))
{
return newHttpStatusCodeResult(HttpStatusCode.NotFound);
}
if (Debugger.IsAttached) // Preserve the debug experience
{
return Redirect(string.Format("/MemeGenerator/Generate?top={0}&bottom={1}", data.Item1, data.Item2));
}
else // Get content fromAzure CDN
{
return Redirect(string.Format("http://<yourCDNName>.azureedge.net/MemeGenerator/Generate?top={0}&bottom={1}", data.Item1,
data.Item2));
}
}
http://<yourCDNName>.azureedge.net/MemeGenerator/Generate?top=<formInput>&bottom=<formInput>
http://<yourSiteName>.azurewebsites.net/cdn/MemeGenerator/Generate?top=<formInput>&bottom=<formInput>
http://<yourSiteName>.azurewebsites.net/MemeGenerator/Generate?top=<formInput>&bottom=<formInput>
[OutputCache(VaryByParam= "*", Duration = 3600, Location = OutputCacheLocation.Downstream)]
Integrate ASP.NET bundling and minification with Azure CDN
If your local debugger is attached, then you will get the regular debug experience with a local redirect. If it's running
in the Azure web app, then it will redirect to:
Which corresponds to the following origin URL at your CDN endpoint:
After URL rewrite rule previously applied, the actual file that gets cached to your CDN endpoint is:
You can then use the OutputCacheAttribute attribute on the Generate method to specify how the action result should
be cached, which Azure CDN will honor. The code below specify a cache expiration of 1 hour (3,600 seconds).
Likewise, you can serve up content from any controller action in your Azure web app through your Azure CDN, with
the desired caching option.
In the next section, I will show you how to serve the bundled and minified scripts and CSS through Azure CDN.
Scripts and CSS stylesheets change infrequently and are prime candidates for the Azure CDN cache. Serving the
entire web app through your Azure CDN is the easiest way to integrate bundling and minification with Azure CDN.
However, as you may elect against this approach for the reasons described in Integrate an Azure CDN endpoint
with your Azure web app and serve static content in your Web pages from Azure CDN, I will show you how to do it
while preserving the desired develper experience of ASP.NET bundling and minification, such as:
Great debug mode experience
Streamlined deployment
Immediate updates to clients for script/CSS version upgrades](https://image.slidesharecdn.com/appserviceweb-230806184930-59dcfe26/85/App-Service-Web-516-320.jpg)

![public static void RegisterBundles(BundleCollection bundles)
{
bundles.UseCdn = true;
var version = System.Reflection.Assembly.GetAssembly(typeof(Controllers.HomeController))
.GetName().Version.ToString();
var cdnUrl= "http://<yourCDNName>.azureedge.net/{0}?" + version;
bundles.Add(newScriptBundle("~/bundles/jquery", string.Format(cdnUrl, "bundles/jquery")).Include(
"~/Scripts/jquery-{version}.js"));
bundles.Add(newScriptBundle("~/bundles/jqueryval", string.Format(cdnUrl, "bundles/jqueryval")).Include(
"~/Scripts/jquery.validate*"));
// Use the development version of Modernizr to develop with and learn from. Then, when you're
// ready for production, use the build toolat http://modernizr.comto pickonly the tests you need.
bundles.Add(newScriptBundle("~/bundles/modernizr", string.Format(cdnUrl, "bundles/modernizr")).Include(
"~/Scripts/modernizr-*"));
bundles.Add(newScriptBundle("~/bundles/bootstrap", string.Format(cdnUrl, "bundles/bootstrap")).Include(
"~/Scripts/bootstrap.js",
"~/Scripts/respond.js"));
bundles.Add(newStyleBundle("~/Content/css", string.Format(cdnUrl, "Content/css")).Include(
"~/Content/bootstrap.css",
"~/Content/site.css"));
}
newScriptBundle("~/bundles/jquery", string.Format(cdnUrl, "bundles/jquery"))
newScriptBundle("~/bundles/jquery", string.Format(cdnUrl, "http://<yourCDNName>.azureedge.net/bundles/jquery?<W.X.Y.Z>"))
[assembly:AssemblyVersion("1.0.0.*")]
Be sure to replace <yourCDNName> with the name of your Azure CDN.
In plain words, you are setting bundles.UseCdn = true and added a carefully crafted CDN URL to each bundle.
For example, the first constructor in the code:
is the same as:
This constructor tells ASP.NET bundling and minification to render individual script files when debugged
locally, but use the specified CDN address to access the script in question. However, note two important
characteristics with this carefully crafted CDN URL:
The origin for this CDN URL is http://<yourSiteName>.azurewebsites.net/bundles/jquery?<W.X.Y.Z> , which is actually
the virtual directory of the script bundle in your Web application.
Since you are using CDN constructor, the CDN script tag for the bundle no longer contains the
automatically generated version string in the rendered URL. You must manually generate a unique
version string every time the script bundle is modified to force a cache miss at your Azure CDN. At the
same time, this unique version string must remain constant through the life of the deployment to
maximize cache hits at your Azure CDN after the bundle is deployed.
2. The query string <W.X.Y.Z> pulls from PropertiesAssemblyInfo.cs in your ASP.NET project. You can have a
deployment workflow that includes incrementing the assembly version every time you publish to Azure. Or,
you can just modify PropertiesAssemblyInfo.cs in your project to automatically increment the version string
every time you build, using the wildcard character '*'. For example, change AssemblyVersion as shown below:](https://image.slidesharecdn.com/appserviceweb-230806184930-59dcfe26/85/App-Service-Web-518-320.jpg)


![5. Publish to your Azure web app again and access the home page.
...
<linkhref="http://az673227.azureedge.net/Content/css?1.0.0.25474" rel="stylesheet"/>
<script>(function() {
var loadFallback,
len = document.styleSheets.length;
for (var i= 0; i< len; i++) {
var sheet = document.styleSheets[i];
if (sheet.href.indexOf('http://az673227.azureedge.net/Content/css?1.0.0.25474') !== -1) {
var meta = document.createElement('meta');
meta.className = 'sr-only';
document.head.appendChild(meta);
var value = window.getComputedStyle(meta).getPropertyValue('width');
document.head.removeChild(meta);
if (value !== '1px') {
document.write('<linkhref="/Content/css" rel="stylesheet" type="text/css" />');
}
}
}
return true;
}())||document.write('<script src="/Content/css"></script>');</script>
<script src="http://az673227.azureedge.net/bundles/modernizer?1.0.0.25474"></script>
<script>(window.Modernizr)||document.write('<script src="/bundles/modernizr"></script>');</script>
...
<script src="http://az673227.azureedge.net/bundles/jquery?1.0.0.25474"></script>
<script>(window.jquery)||document.write('<script src="/bundles/jquery"></script>');</script>
<script src="http://az673227.azureedge.net/bundles/bootstrap?1.0.0.25474"></script>
<script>($.fn.modal)||document.write('<script src="/bundles/bootstrap"></script>');</script>
...
}())||document.write('<script src="/Content/css"></script>');</script>
This new extension method uses the same idea to inject script in the HTML to check the DOM for the a
matching class name, rule name, and rule value defined in the CSS bundle, and falls back to the origin Web
server if it fails to find the match.
6. View the HTML code for the page. You should find injected scripts similar to the following:
Note that injected script for the CSS bundle still contains the errant remnant from the CdnFallbackExpression
property in the line:
But since the first part of the || expression will always return true (in the line directly above that), the
document.write() function will never run.
7. To test whether the fallback script is working, go back to the your CDN endpoint's blade and click Stop.](https://image.slidesharecdn.com/appserviceweb-230806184930-59dcfe26/85/App-Service-Web-521-320.jpg)


!["cacheSKUName":{
"type":"string",
"allowedValues":[
"Basic",
"Standard"
],
"defaultValue":"Basic",
"metadata":{
"description":"The pricing tier of the newAzure Redis Cache."
}
},
cacheSKUFamily
cacheSKUFamily
"cacheSKUFamily":{
"type":"string",
"allowedValues":[
"C"
],
"defaultValue":"C",
"metadata":{
"description":"The family for the sku."
}
},
cacheSKUCapacity
cacheSKUCapacity
"cacheSKUCapacity":{
"type":"int",
"allowedValues":[
0,
1,
2,
3,
4,
5,
6
],
"defaultValue":0,
"metadata":{
"description":"The size of the newAzure Redis Cache instance. "
}
}
redisCacheLocation
redisCacheLocation
The template defines the values that are permitted for this parameter (Basic or Standard), and assigns a default
value (Basic) if no value is specified. Basic provides a single node with multiple sizes available up to 53 GB. Standard
provides two-node Primary/Replica with multiple sizes available up to 53 GB and 99.9% SLA.
The family for the sku.
The size of the new Azure Redis Cache instance.
The template defines the values that are permitted for this parameter (0, 1, 2, 3, 4, 5 or 6), and assigns a default
value (1) if no value is specified. Those numbers correspond to following cache sizes: 0 = 250 MB, 1 = 1 GB, 2 = 2.5
GB, 3 = 6 GB, 4 = 13 GB, 5 = 26 GB, 6 = 53 GB
The location of the Redis Cache. For best performance, use the same location as the app to be used with the cache.](https://image.slidesharecdn.com/appserviceweb-230806184930-59dcfe26/85/App-Service-Web-531-320.jpg)
!["redisCacheLocation":{
"type":"string"
}
existingDiagnosticsStorageAccountName
existingDiagnosticsStorageAccountName
"existingDiagnosticsStorageAccountName":{
"type":"string"
}
enableNonSslPort
enableNonSslPort
"enableNonSslPort":{
"type":"bool"
}
diagnosticsStatus
diagnosticsStatus
"diagnosticsStatus":{
"type":"string",
"defaultValue":"ON",
"allowedValues":[
"ON",
"OFF"
]
}
Resources to deploy
Redis Cache
Redis Cache
The name of the existing storage account to use for diagnostics.
A boolean value that indicates whether to allow access via non-SSL ports.
A value that indicates whether diagnostics is enabled. Use ON or OFF.
Creates the Azure Redis Cache.](https://image.slidesharecdn.com/appserviceweb-230806184930-59dcfe26/85/App-Service-Web-532-320.jpg)
![{
"apiVersion":"2015-08-01",
"name":"[parameters('redisCacheName')]",
"type":"Microsoft.Cache/Redis",
"location":"[parameters('redisCacheLocation')]",
"properties":{
"enableNonSslPort":"[parameters('enableNonSslPort')]",
"sku":{
"capacity":"[parameters('redisCacheCapacity')]",
"family":"[parameters('redisCacheFamily')]",
"name":"[parameters('redisCacheSKU')]"
}
},
"resources":[
{
"apiVersion":"2015-07-01",
"type":"Microsoft.Cache/redis/providers/diagnosticsettings",
"name":"[concat(parameters('redisCacheName'), '/Microsoft.Insights/service')]",
"location":"[parameters('redisCacheLocation')]",
"dependsOn":[
"[concat('Microsoft.Cache/Redis/', parameters('redisCacheName'))]"
],
"properties":{
"status":"[parameters('diagnosticsStatus')]",
"storageAccountName":"[parameters('existingDiagnosticsStorageAccountName')]"
}
}
]
}
Commands to run deployment
PowerShell
PowerShell
New-AzureRmResourceGroupDeployment -TemplateUrihttps://raw.githubusercontent.com/Azure/azure-quickstart-templates/master/101-redis-
cache/azuredeploy.json -ResourceGroupName ExampleDeployGroup -redisCacheName ExampleCache
Azure CLI
Azure CLI
azure group deployment create --template-urihttps://raw.githubusercontent.com/Azure/azure-quickstart-templates/master/101-redis-
cache/azuredeploy.json -g ExampleDeployGroup
To deploy the resources to Azure, you must be logged in to your Azure account and you must use the Azure
Resource Manager module. To learn about using Azure Resource Manager with either Azure PowerShell or Azure
CLI, see:
Using Azure PowerShell with Azure Resource Manager
Using the Azure CLI for Mac, Linux, and Windows with Azure Resource Management.
The following examples assume you already have a resource group in your account with the specified name.](https://image.slidesharecdn.com/appserviceweb-230806184930-59dcfe26/85/App-Service-Web-533-320.jpg)

![Use the Session Object in Code
string strValue = "yourvalue";
Session.Add("yourkey", strValue);
object objValue = Session["yourkey"];
if (objValue != null)
strValue = (string)objValue;
NOTE
NOTE
What's changed
<system.web>;
<customErrors mode="Off" />;
<authentication mode="None" />;
<compilation debug="true" targetFramework="4.5" />;
<httpRuntime targetFramework="4.5" />;
<sessionState mode="Custom" customProvider="RedisSessionProvider">;
<providers>;
<!--<add name="RedisSessionProvider"
host = "127.0.0.1" [String]
port = "" [number]
accessKey = "" [String]
ssl= "false" [true|false]
throwOnError = "true" [true|false]
retryTimeoutInMilliseconds = "0" [number]
databaseId = "0" [number]
applicationName = "" [String]
/>;-->;
<add name="RedisSessionProvider"
type="Microsoft.Web.Redis.RedisSessionStateProvider"
port="6380"
host="movie2.redis.cache.windows.net"
accessKey="m7PNV60CrvKpLqMUxosC3dSe6kx9nQ6jP5del8TmADk="
ssl="true" />;
<!--<add name="MySessionStateStore" type="Microsoft.Web.Redis.RedisSessionStateProvider" host="127.0.0.1" accessKey=""
ssl="false" />;-->;
</providers>;
</sessionState>;
</system.web>;
The final step is to begin using the Session object in your ASP.NET code. You add objects to session state by using
the Session.Add method. This method uses key-value pairs to store items in the session state cache.
The following code retrieves this value from session state.
You can also use the Redis Cache to cache objects in your web app. For more info, see MVC movie app with Azure
Redis Cache in 15 minutes. For more details about how to use ASP.NET session state, see ASP.NET Session State
Overview.
If you want to get started with Azure App Service before signing up for an Azure account, go to Try App Service, where you
can immediately create a short-lived starter web app in App Service. No credit cards required; no commitments.
For a guide to the change from Websites to App Service see: Azure App Service and Its Impact on Existing
Azure Services](https://image.slidesharecdn.com/appserviceweb-230806184930-59dcfe26/85/App-Service-Web-535-320.jpg)


![Streaming with Azure Command-Line Interface
Streaming with Azure Command-Line Interface
azure site log tailwebappname
azure site log tailwebappname --filter Error
azure site log tailwebappname --path http
NOTE
NOTE
How to: Understand diagnostics logs
Application diagnostics logs
Application diagnostics logs
{Date} PID[{process id}] {event type/level} {message}
2014-01-30T16:36:59 PID[3096] Error Fatalerror on the page!
To stream logging information, open a new command prompt, PowerShell, Bash, or Terminal session and enter
the following command:
This will connect to the web app named 'webappname' and begin streaming information to the window as log
events occur on the web app. Any information written to files ending in .txt, .log, or .htm that are stored in the
/LogFiles directory (d:/home/logfiles) will be streamed to the local console.
To filter specific events, such as errors, use the --Filter parameter. For example:
To filter specific log types, such as HTTP, use the --Path parameter. For example:
If you have not installed the Azure Command-Line Interface, or have not configured it to use your Azure Subscription, see
How to Use Azure Command-Line Interface.
Application diagnostics stores information in a specific format for .NET applications, depending on whether you
store logs to the file system, table storage, or blob storage. The base set of data stored is the same across all three
storage types - the date and time the event occurred, the process ID that produced the event, the event type
(information, warning, error,) and the event message.
File system
Each line logged to the file system or received using streaming will be in the following format:
For example, an error event would appear similar to the following:
Logging to the file system provides the most basic information of the three available methods, providing only the
time, process id, event level, and message.
Table storage
When logging to table storage, additional properties are used to facilitate searching the data stored in the table as
well as more granular information on the event. The following properties (columns) are used for each entity (row)
stored in the table.](https://image.slidesharecdn.com/appserviceweb-230806184930-59dcfe26/85/App-Service-Web-547-320.jpg)


![NOTE
NOTE
How backups are stored
The below steps show how you would exclude these files from the backup.
D:homesitewwwrootLogs
D:homeLogFiles
D:homesitewwwrootImages2013
D:homesitewwwrootImages2014
D:homesitewwwrootImagesbrand.png
3. Upload this file to the D:homesitewwwroot directory of your site using ftp or any other method. If you wish,
you can create the file directly in http://{yourapp}.scm.azurewebsites.net/DebugConsole and insert the content there.
4. Run backups the same way you would normally do it, manually or automatically.
1. Go to http://{yourapp}.scm.azurewebsites.net/DebugConsole and identify the folders that you want to exclude from
your backups. In this example, you would want to exclude the following files and folders shown in that UI:
[AZURE.NOTE] The last line shows that you can exclude individuals files as well as folders.
2. Create a file called _backup.filter and put the list above in the file, but remove D:home . List one directory or
file per line. So the content of the file should be:
sitewwwrootLogs LogFiles sitewwwrootImages2013 sitewwwrootImages2014
sitewwwrootImagesbrand.png
Now, any files and folders that are specified in _backup.filter will be excluded from the backup. In this example, the
log files and the 2013 and 2014 image files will no longer be backed up, as well as brand.png.
You restore partial backups of your site the same way you would restore a regular backup. The restore process will do the
right thing.
When a full backup is restored, all content on the site is replaced with whatever is in the backup. If a file is on the site but
not in the backup it gets deleted. But when a partial backup is restored, any content that is located in one of the blacklisted
directories, or any blacklisted file, is left as is.
After you have made one or more backups for your app, the backups will be visible on the Containers blade of
your storage account, as well as your app. In the storage account, each backup consists of a .zip file that contains
the backup data and an .xml file that contains a manifest of the .zip file contents. You can unzip and browse these](https://image.slidesharecdn.com/appserviceweb-230806184930-59dcfe26/85/App-Service-Web-562-320.jpg)


![Backup an app on demand
{
"properties":
{
"storageAccountUrl":“https://account.blob.core.windows.net/backups?sv=2015-02-
21&sr=c&sig=DzlkBl7h32C8qCv%2BifdBRxE63r4iv0kZ9L7E0qP16sY%3D&se=2016-09-15T22%3A46%3A54Z&sp=rwdl”,
“databases”:[
{
“databaseType”:“SqlAzure”,
“name”:“MyDatabase1”,
"connectionString":"<your database connection string>"
}
]
}
}
For the complete documentation of the API, including several optional parameters that can be included in the HTTP
request, see the Azure Resource Explorer.
To back up an app immediately, send a POST request to
https://management.azure.com/subscriptions/{subscription-id}/resourceGroups/{resource-group-
name}/providers/Microsoft.Web/sites/{name}/backup/.
Here is what the URL looks like using our example website.
https://management.azure.com/subscriptions/00001111-2222-3333-4444-
555566667777/resourceGroups/Default-Web-
WestUS/providers/Microsoft.Web/sites/backuprestoreapiexamples/backup/
Supply a JSON object in the body of your request to specify which storage account to use to store the backup. The
JSON object must have a property named storageAccountUrl, which holds a SAS URL granting write access to
the Azure Storage container that holds the backup blob. If you want to back up your databases, you must also
supply a list containing the names, types, and connection strings of the databases to be backed up.
A backup of the app begins immediately when the request is received. The backup process may take a long time to
complete. The HTTP response contains an ID that you can use in another request to see the status of the backup.
Here is an example of the body of the HTTP response to our backup request.](https://image.slidesharecdn.com/appserviceweb-230806184930-59dcfe26/85/App-Service-Web-568-320.jpg)
![{
"id":"/subscriptions/00001111-2222-3333-4444-555566667777/resourceGroups/Default-Web-
WestUS/providers/Microsoft.Web/sites/backuprestoreapiexamples",
"name":" backuprestoreapiexamples ",
"type":"Microsoft.Web/sites",
"location":"WestUS",
"properties": {
"id":1,
"storageAccountUrl":“https://account.blob.core.windows.net/backups?sv=2015-02-
21&sr=c&sig=DzlkBl7h32C8qCv%2BifdBRxE63r4iv0kZ9L7E0qP16sY%3D&se=2016-09-15T22%3A46%3A54Z&sp=rwdl”,
"blobName":“backup_201509291825.zip”,
"name":"backup_201509291825",
"status":4,
"sizeInBytes":0,
"created":"2015-09-29T18:25:26.3992707Z",
"log":null,
"databases":[
{
"databaseType":"SqlAzure",
"name":"MyDatabase1",
"connectionString":"<your database connection string>"
}
],
"scheduled":false,
"correlationId":"ea730f4d-dd06-4f7f-a090-9aa09k662h36",
}
}
NOTE
NOTE
Schedule automatic backups
Set up a new automatic backup schedule
Set up a new automatic backup schedule
Error messages can be found in the log property of the HTTP response.
In addition to backing up an app on demand, you can also schedule a backup to happen automatically.
To set up a backup schedule, send a PUT request to
https://management.azure.com/subscriptions/{subscription-id}/resourceGroups/{resource-group-
name}/providers/Microsoft.Web/sites/{name}/config/backup.
Here is what the URL looks like for our example website.
https://management.azure.com/subscriptions/00001111-2222-3333-4444-
555566667777/resourceGroups/Default-Web-
WestUS/providers/Microsoft.Web/sites/backuprestoreapiexamples/config/backup
The request body must have a JSON object that specifies the backup configuration. Here is an example with all the
required parameters.](https://image.slidesharecdn.com/appserviceweb-230806184930-59dcfe26/85/App-Service-Web-569-320.jpg)


![{
"location":"WestUS",
"properties":
{
"blobName":"backup_201509280431.zip",
"databases":[ // Not required unless you’re restoring databases
{
“databaseType”:“SqlAzure”,
“name”:“MyDatabase1”
}],
"overwrite":"true",
"storageAccountUrl":"https://account.blob.core.windows.net/backups?sv=2015-02-
21&sr=c&sig=DzlkBl7h32C8qCv%2BifdBRxE63r4iv0kZ9L7E0qP16sY%3D&se=2016-09-15T22%3A46%3A54Z&sp=rwdl" // SAS URLto storage
container containing your website backup
}
}
Restore to a new app
Restore to a new app
Delete an app backup
Manage a backup’s SAS URL
{
"properties":
{
"storageAccountUrl":"https://account.blob.core.windows.net/backups?sv=2015-02-
21&sr=c&sig=DzlkBl7h32C8qCv%2BifdBRxE63r4iv0kZ9L7E0qP16sY%3D&se=2016-09-15T22%3A46%3A54Z&sp=rwdl"
}
}
Sometimes you might want to create a new app when you restore a backup, instead of overwriting an already
existing app. To do this, change the request URL to point to the new app you want to create, and change the
overwrite property in the JSON to false.
If you would like to delete a backup, send a DELETE request to the URL
https://management.azure.com/subscriptions/{subscription-id}/resourceGroups/{resource-group-
name}/providers/Microsoft.Web/sites/{name}/backups/{backup-id}.
Here is what the URL looks like for our example website.
https://management.azure.com/subscriptions/00001111-2222-3333-4444-
555566667777/resourceGroups/Default-Web-
WestUS/providers/Microsoft.Web/sites/backuprestoreapiexamples/backups/1
Azure App Service will attempt to delete your backup from Azure Storage using the SAS URL that was provided
when the backup was created. If this SAS URL is no longer valid, the backup cannot be deleted through the REST
API. However, you can update the SAS URL associated with a backup by sending a POST request to the URL
https://management.azure.com/subscriptions/{subscription-id}/resourceGroups/{resource-group-
name}/providers/Microsoft.Web/sites/{name}/backups/{backup-id}/list.
Here is what the URL looks like for our example website.
https://management.azure.com/subscriptions/00001111-2222-3333-4444-
555566667777/resourceGroups/Default-Web-
WestUS/providers/Microsoft.Web/sites/backuprestoreapiexamples/backups/1/list
In the request body, send a JSON object that contains the new SAS URL. Here is an example.](https://image.slidesharecdn.com/appserviceweb-230806184930-59dcfe26/85/App-Service-Web-572-320.jpg)


![Frequently the easiest way to find the cause of the error is to enable detailed error messages, which the first of the
preceding screenshots explains how to do. That requires a change in the deployed Web.config file. You could edit
the Web.config file in the project and redeploy the project, or create a Web.config transform and deploy a debug
build, but there's a quicker way: in Solution Explorer you can directly view and edit files in the remote web app
by using the remote view feature.
1. In Server Explorer, expand Azure, expand App Service, expand the resource group that your web app is
located in, and then expand the node for your web app.
You see nodes that give you access to the web app's content files and log files.
2. Expand the Files node, and double-click the Web.config file.
Visual Studio opens the Web.config file from the remote web app and shows [Remote] next to the file name
in the title bar.
3. Add the following line to the system.web element:
<customErrors mode="Off"></customErrors>](https://image.slidesharecdn.com/appserviceweb-230806184930-59dcfe26/85/App-Service-Web-590-320.jpg)


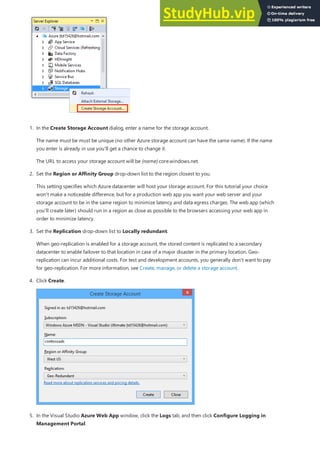


.](https://image.slidesharecdn.com/appserviceweb-230806184930-59dcfe26/85/App-Service-Web-671-320.jpg)


App Service Web
- 1. Table of Contents Table of Contents Web Apps Documentation Overview About Web Apps Compare hosting options Quickstart Create .NET app Create Node.js app Create PHP app Create Java app Create Python app Create static HTML site Tutorials 1 - .NET with SQL DB 1 - Node.js with MongoDB 2 - Map Custom Domain 3 - Bind SSL Certificate Samples Azure CLI PowerShell Concepts How App Service works App Service plans App Service Environments Authentication and authorization Authentication with on-premises AD How-To guides Develop your app ASP.NET PHP
- 2. Node.js Java Python Send emails with SendGrid Configure runtime Configure application Deploy to Azure Deploy via FTP Deploy via cloud sync Deploy continuously Deploy to staging Deploy from local Git Deploy with template Agile deployment Beta testing Set deployment credentials Map custom domain Migrate from IIS Test in production Add functionality to web app Connect to DB/resources Connect to on-premises data Connect to Azure VNet Connect to Azure VNet with PowerShell Connect to MongoDB on Azure VM Secure app Authenticate users Assign custom SSL Enforce HTTPS Configure TLS mutual authentication Scale app Scale up
- 3. Scale out Load-balance with Traffic Manager High-scale with App Service Environments Use Azure CDN for global reach Connect to Redis Cache via Memcache Create a Redis Cache Manage session state with Azure Redis cache Monitor Monitor apps Enable logs Stream logs Back up content Back up your app Restore your app from backup Backup with REST API Manage app resources Clone app with PowerShell Clone app with portal Move resources Use Azure Resource Manager with PowerShell Manage apps using Azure Automation Reference CLI 2.0 PowerShell REST API Resources Troubleshooting Troubleshoot with Visual Studio Troubleshoot Node.js app Troubleshoot HTTP 502 & 503 Troubleshoot performance issues Pricing
- 4. Quota Information Service Updates & Release Notes Best practices Samples Videos Cookbooks Reference Architectures Deployment Scripts
- 5. Web Apps Documentation 5-Minute Quickstarts .NET Node.js PHP Java Python HTML Step-by-Step Tutorials Free PluralSight Video Training Azure Web Apps enables you to build and host web applications in the programming language of your choice without managing infrastructure. It offers auto-scaling and high availability, supports both Windows and Linux, and enables automated deployments from GitHub, Visual Studio Team Services, or any Git repo. Learn how to use Azure Web Apps with our quickstarts, tutorials, and samples. Create a Web App with Node.js and Azure App Service. (2:41) Learn how to deploy your first application to the cloud using Web Apps: Learn how to deploy, manage, and monitor secure web applications on Azure 1. Create an application using .NET with Azure SQL DB or Node.js with MongoDB 2. Map an existing custom domain to your application 3. Bind an existing SSL certificate to your application Developing with .NET Developing with Node.js
- 6. Samples Reference Find scripts to manage common tasks. Azure CLI Azure PowerShell Command-Line Command-Line Languages Languages REST REST Azure PowerShell Azure CLI 2.0 .NET Java REST API
- 7. Web Apps overview 4/5/2017 • 3 min to read • Edit Online What is a web app in App Service? Why use Web Apps? App Service Web Apps is a fully managed compute platform that is optimized for hosting websites and web applications. This platform-as-a-service (PaaS) offering of Microsoft Azure lets you focus on your business logic while Azure takes care of the infrastructure to run and scale your apps. The following 5-minute video introduces Azure App Service Web Apps. In App Service, a web app is the compute resources that Azure provides for hosting a website or web application. The compute resources may be on shared or dedicated virtual machines (VMs), depending on the pricing tier that you choose. Your application code runs in a managed VM that is isolated from other customers. Your code can be in any language or framework that is supported by Azure App Service, such as ASP.NET, Node.js, Java, PHP, or Python. You can also run scripts that use PowerShell and other scripting languages in a web app. For examples of typical application scenarios that you can use Web Apps for, see Web app scenarios and the Scenarios and recommendations section of Azure App Service, Virtual Machines, Service Fabric, and Cloud Services comparison. Here are some key features of App Service that apply to Web Apps: Multiple languages and frameworks - App Service has first-class support for ASP.NET, Node.js, Java, PHP, and Python. You can also run PowerShell and other scripts or executables on App Service VMs. DevOps optimization - Set up continuous integration and deployment with Visual Studio Team Services, GitHub, or BitBucket. Promote updates through test and staging environments. Perform A/B testing. Manage your apps in App Service by using Azure PowerShell or the cross-platform command-line interface (CLI). Global scale with high availability - Scale up or out manually or automatically. Host your apps anywhere in Microsoft's global datacenter infrastructure, and the App Service SLA promises high availability. Connections to SaaS platforms and on-premises data - Choose from more than 50 connectors for enterprise systems (such as SAP, Siebel, and Oracle), SaaS services (such as Salesforce and Office 365), and internet services (such as Facebook and Twitter). Access on-premises data using Hybrid Connections and Azure Virtual Networks. Security and compliance - App Service is ISO, SOC, and PCI compliant. Application templates - Choose from an extensive list of application templates in the Azure Marketplace that let you use a wizard to install popular open-source software such as WordPress, Joomla, and Drupal. Visual Studio integration - Dedicated tools in Visual Studio streamline the work of creating, deploying, and debugging.
- 8. Getting started NOTE NOTE In addition, a web app can take advantage of features offered by API Apps (such as CORS support) and Mobile Apps (such as push notifications). For more information about app types in App Service, see Azure App Service overview. Besides Web Apps in App Service, Azure offers other services that can be used for hosting websites and web applications. For most scenarios, Web Apps is the best choice. For microservice architecture, consider Service Fabric, and if you need more control over the VMs that your code runs on, consider Azure Virtual Machines. For more information about how to choose between these Azure services, see Azure App Service, Virtual Machines, Service Fabric, and Cloud Services comparison. To get started by deploying sample code to a new web app in App Service, follow one of the tutorials in the following dropdown box. You'll need a free Azure account. You can Try App Service without an Azure account. Create a starter app and play with it for up to an hour--no credit card required, no commitments.
- 9. Azure App Service, Virtual Machines, Service Fabric, and Cloud Services comparison 3/23/2017 • 12 min to read • Edit Online Overview Feature Comparison FEATURE APP SERVICE (WEB APPS) CLOUD SERVICES (WEB ROLES) VIRTUAL MACHINES SERVICE FABRIC NOTES Azure offers several ways to host web sites: Azure App Service, Virtual Machines, Service Fabric, and Cloud Services. This article helps you understand the options and make the right choice for your web application. Azure App Service is the best choice for most web apps. Deployment and management are integrated into the platform, sites can scale quickly to handle high traffic loads, and the built-in load balancing and traffic manager provide high availability. You can move existing sites to Azure App Service easily with an online migration tool, use an open-source app from the Web Application Gallery, or create a new site using the framework and tools of your choice. The WebJobs feature makes it easy to add background job processing to your App Service web app. Service Fabric is a good choice if you’re creating a new app or re-writing an existing app to use a microservice architecture. Apps, which run on a shared pool of machines, can start small and grow to massive scale with hundreds or thousands of machines as needed. Stateful services make it easy to consistently and reliably store app state, and Service Fabric automatically manages service partitioning, scaling, and availability for you. Service Fabric also supports WebAPI with Open Web Interface for .NET (OWIN) and ASP.NET Core. Compared to App Service, Service Fabric also provides more control over, or direct access to, the underlying infrastructure. You can remote into your servers or configure server startup tasks. Cloud Services is similar to Service Fabric in degree of control versus ease of use, but it’s now a legacy service and Service Fabric is recommended for new development. If you have an existing application that would require substantial modifications to run in App Service or Service Fabric, you could choose Virtual Machines in order to simplify migrating to the cloud. However, correctly configuring, securing, and maintaining VMs requires much more time and IT expertise compared to Azure App Service and Service Fabric. If you are considering Azure Virtual Machines, make sure you take into account the ongoing maintenance effort required to patch, update, and manage your VM environment. Azure Virtual Machines is Infrastructure-as-a-Service (IaaS), while App Service and Service Fabric are Platform-as-a-Service (Paas). The following table compares the capabilities of App Service, Cloud Services, Virtual Machines, and Service Fabric to help you make the best choice. For current information about the SLA for each option, see Azure Service Level Agreements.
- 10. Near-instant deployment X X Deploying an application or an application update to a Cloud Service, or creating a VM, takes several minutes at least; deploying an application to a web app takes seconds. Scale up to larger machines without redeploy X X Web server instances share content and configuration, which means you don't have to redeploy or reconfigure as you scale. X X Multiple deployment environments (production and staging) X X X Service Fabric allows you to have multiple environments for your apps or to deploy different versions of your app side-by-side. Automatic OS update management X X Automatic OS updates are planned for a future Service Fabric release. Seamless platform switching (easily move between 32 bit and 64 bit) X X Deploy code with GIT, FTP X X FEATURE APP SERVICE (WEB APPS) CLOUD SERVICES (WEB ROLES) VIRTUAL MACHINES SERVICE FABRIC NOTES
- 11. Deploy code with Web Deploy X X Cloud Services supports the use of Web Deploy to deploy updates to individual role instances. However, you can't use it for initial deployment of a role, and if you use Web Deploy for an update you have to deploy separately to each instance of a role. Multiple instances are required in order to qualify for the Cloud Service SLA for production environments. WebMatrix support X X Access to services like Service Bus, Storage, SQL Database X X X X Host web or web services tier of a multi-tier architecture X X X X Host middle tier of a multi-tier architecture X X X X App Service web apps can easily host a REST API middle tier, and the WebJobs feature can host background processing jobs. You can run WebJobs in a dedicated website to achieve independent scalability for the tier. The preview API apps feature provides even more features for hosting REST services. FEATURE APP SERVICE (WEB APPS) CLOUD SERVICES (WEB ROLES) VIRTUAL MACHINES SERVICE FABRIC NOTES
- 12. Integrated MySQL-as-a- service support X X X Cloud Services can integrate MySQL-as-a- service through ClearDB's offerings, but not as part of the Azure Portal workflow. Support for ASP.NET, classic ASP, Node.js, PHP, Python X X X X Service Fabric supports the creation of a web front-end using ASP.NET 5 or you can deploy any type of application (Node.js, Java, etc) as a guest executable. Scale out to multiple instances without redeploy X X X X Virtual Machines can scale out to multiple instances, but the services running on them must be written to handle this scale-out. You have to configure a load balancer to route requests across the machines, and create an Affinity Group to prevent simultaneous restarts of all instances due to maintenance or hardware failures. Support for SSL X X X X For App Service web apps, SSL for custom domain names is only supported for Basic and Standard mode. For information about using SSL with web apps, see Configuring an SSL certificate for an Azure Website. FEATURE APP SERVICE (WEB APPS) CLOUD SERVICES (WEB ROLES) VIRTUAL MACHINES SERVICE FABRIC NOTES
- 13. Visual Studio integration X X X X Remote Debugging X X X Deploy code with TFS X X X X Network isolation with Azure Virtual Network X X X X See also Azure Websites Virtual Network Integration Support for Azure Traffic Manager X X X X Integrated Endpoint Monitoring X X X Remote desktop access to servers X X X Install any custom MSI X X X Service Fabric allows you to host any executable file as a guest executable or you can install any app on the VMs. Ability to define/execute start-up tasks X X X Can listen to ETW events X X X FEATURE APP SERVICE (WEB APPS) CLOUD SERVICES (WEB ROLES) VIRTUAL MACHINES SERVICE FABRIC NOTES Scenarios and recommendations Here are some common application scenarios with recommendations as to which Azure web hosting option might be most appropriate for each. I need a web front end with background processing and database backend to run business applications integrated with on premise assets. I need a reliable way to host my corporate website that scales well and offers global reach. I have an IIS6 application running on Windows Server 2003. I'm a small business owner, and I need an inexpensive way to host my site but with future growth in mind. I'm a web or graphic designer, and I want to design and build web sites for my customers. I'm migrating my multi-tier application with a web front-end to the Cloud.
- 14. I need a web front end with background processing and database backend to run business applications I need a web front end with background processing and database backend to run business applications integrated with on premise assets. integrated with on premise assets. I need a reliable way to host my corporate website that scales well and offers global reach. I need a reliable way to host my corporate website that scales well and offers global reach. I have an IIS6 application running on Windows Server 2003. I have an IIS6 application running on Windows Server 2003. I'm a small business owner, and I need an inexpensive way to host my site but with future growth in mind. I'm a small business owner, and I need an inexpensive way to host my site but with future growth in mind. My application depends on highly customized Windows or Linux environments and I want to move it to the cloud. My site uses open source software, and I want to host it in Azure. I have a line-of-business application that needs to connect to the corporate network. I want to host a REST API or web service for mobile clients. Azure App Service is a great solution for complex business applications. It lets you develop apps that scale automatically on a load balanced platform, are secured with Active Directory, and connect to your on-premises resources. It makes managing those apps easy through a world-class portal and APIs, and allows you to gain insight into how customers are using them with app insight tools. The Webjobs feature lets you run background processes and tasks as part of your web tier, while hybrid connectivity and VNET features make it easy to connect back to on-premises resources. Azure App Service provides three 9's SLA for web apps and enables you to: Run your applications reliably on a self-healing, auto-patching cloud platform. Scale automatically across a global network of datacenters. Back up and restore for disaster recovery. Be ISO, SOC2, and PCI compliant. Integrate with Active Directory Azure App Service is a great solution for hosting corporate websites. It enables web apps to scale quickly and easily to meet demand across a global network of datacenters. It offers local reach, fault tolerance, and intelligent traffic management. All on a platform that provides world-class management tools, allowing you to gain insight into site health and site traffic quickly and easily. Azure App Service provides three 9's SLA for web apps and enables you to: Run your websites reliably on a self-healing, auto-patching cloud platform. Scale automatically across a global network of datacenters. Back up and restore for disaster recovery. Manage logs and traffic with integrated tools. Be ISO, SOC2, and PCI compliant. Integrate with Active Directory Azure App Service makes it easy to avoid the infrastructure costs associated with migrating older IIS6 applications. Microsoft has created easy to use migration tools and detailed migration guidance that enable you to check compatibility and identify any changes that need to be made. Integration with Visual Studio, TFS, and common CMS tools makes it easy to deploy IIS6 applications directly to the cloud. Once deployed, the Azure Portal provides robust management tools that enable you to scale down to manage costs and up to meet demand as necessary. With the migration tool you can: Quickly and easily migrate your legacy Windows Server 2003 web application to the cloud. Opt to leave your attached SQL database on-premise to create a hybrid application. Automatically move your SQL database along with your legacy application. Azure App Service is a great solution for this scenario, because you can start using it for free and then add more capabilities when you need them. Each free web app comes with a domain provided by Azure (your_company.azurewebsites.net), and the platform includes integrated deployment and management tools as well as an application gallery that make it easy to get started. There are many other services and scaling options that allow the site to evolve with increased user demand. With Azure App Service, you can:
- 15. I'm a web or graphic designer, and I want to design and build websites for my customers I'm a web or graphic designer, and I want to design and build websites for my customers I'm migrating my multi-tier application with a web front-end to the Cloud I'm migrating my multi-tier application with a web front-end to the Cloud My application depends on highly customized Windows or Linux environments and I want to move it to the My application depends on highly customized Windows or Linux environments and I want to move it to the cloud. cloud. My site uses open source software, and I want to host it in Azure My site uses open source software, and I want to host it in Azure I have a line-of-business application that needs to connect to the corporate network I have a line-of-business application that needs to connect to the corporate network Begin with the free tier and then scale up as needed. Use the Application Gallery to quickly set up popular web applications, such as WordPress. Add additional Azure services and features to your application as needed. Secure your web app with HTTPS. For web developers and designers, Azure App Service integrates easily with a variety of frameworks and tools, includes deployment support for Git and FTP, and offers tight integration with tools and services such as Visual Studio and SQL Database. With App Service, you can: Use command-line tools for automated tasks. Work with popular languages such as .Net, PHP, Node.js, and Python. Select three different scaling levels for scaling up to very high capacities. Integrate with other Azure services, such as SQL Database, Service Bus and Storage, or partner offerings from the Azure Store, such as MySQL and MongoDB. Integrate with tools such as Visual Studio, Git, WebMatrix, WebDeploy, TFS, and FTP. If you’re running a multi-tier application, such as a web server that connects to a database, Azure App Service is a good option that offers tight integration with Azure SQL Database. And you can use the WebJobs feature for running backend processes. Choose Service Fabric for one or more of your tiers if you need more control over the server environment, such as the ability to remote into your server or configure server startup tasks. Choose Virtual Machines for one or more of your tiers if you want to use your own machine image or run server software or services that you can't configure on Service Fabric. If your application requires complex installation or configuration of software and the operating system, Virtual Machines is probably the best solution. With Virtual Machines, you can: Use the Virtual Machine gallery to start with an operating system, such as Windows or Linux, and then customize it for your application requirements. Create and upload a custom image of an existing on-premises server to run on a virtual machine in Azure. If your open source framework is supported on App Service, the languages and frameworks needed by your application are configured for you automatically. App Service enables you to: Use many popular open source languages, such as .NET, PHP, Node.js, and Python. Set up WordPress, Drupal, Umbraco, DNN, and many other third-party web applications. Migrate an existing application or create a new one from the Application Gallery. If your open source framework is not supported on App Service, you can run it on one of the other Azure web hosting options. With Virtual Machines, you install and configure the software on the machine image, which can be Windows or Linux-based. If you want to create a line-of-business application, your website might require direct access to services or data on the corporate network. This is possible on App Service, Service Fabric, and Virtual Machines using the Azure Virtual Network service. On App Service you can use the VNET integration feature, which allows your Azure applications to run as if they were on your corporate network.
- 16. I want to host a REST API or web service for mobile clients I want to host a REST API or web service for mobile clients NOTE NOTE Next Steps HTTP-based web services enable you to support a wide variety of clients, including mobile clients. Frameworks like ASP.NET Web API integrate with Visual Studio to make it easier to create and consume REST services. These services are exposed from a web endpoint, so it is possible to use any web hosting technique on Azure to support this scenario. However, App Service is a great choice for hosting REST APIs. With App Service, you can: Quickly create a mobile app or API app to host the HTTP web service in one of Azure’s globally distributed datacenters. Migrate existing services or create new ones. Achieve SLA for availability with a single instance, or scale out to multiple dedicated machines. Use the published site to provide REST APIs to any HTTP clients, including mobile clients. If you want to get started with Azure App Service before signing up for an account, go to https://trywebsites.azurewebsites.net, where you can immediately create a short-lived starter app in Azure App Service for free. No credit card required, no commitments. For more information about the three web hosting options, see Introducing Azure. To get started with the option(s) you choose for your application, see the following resources: Azure App Service Azure Cloud Services Azure Virtual Machines Service Fabric
- 17. Create your first ASP.NET web app in Azure in five minutes 4/21/2017 • 5 min to read • Edit Online Before you begin Create an ASP.NET web app This Quickstart helps you deploy your first ASP.NET web app to Azure App Service in just a few minutes. When you're finished, you'll have a simple web app up and running in the cloud. This tutorial demonstrates how to use Visual Studio 2017 to build and deploy an ASP.NET web app to Azure. If you don’t already have Visual Studio 2017 installed, you can download and use the free Visual Studio 2017 Community Edition. Make sure that you enable Azure development during the Visual Studio setup. If you don't have an Azure subscription, create a free account before you begin. In Visual Studio, create a new project with Ctrl + Shift + N . In the New Project dialog, click Visual C# > Web > ASP.NET Web Application (.NET Framework). Name the application myFirstAzureWebApp, and then click OK.
- 18. Publish to Azure You can deploy any type of ASP.NET web app to Azure. For this tutorial, select the MVC template, and make sure authentication is set to No Authentication. Click OK. In the Solution Explorer, right-click your myFirstAzureWebApp project and select Publish.
- 19. Sign in to Azure Make sure that Microsoft Azure App Service is selected and click Publish. This opens the Create App Service dialog, which helps you create all the Azure resources you need to run your ASP.NET web app in Azure. In the Create App Service dialog, click Add an account, and then sign in to your Azure subscription. If you're already signed into a Microsoft account, make sure that account holds your Azure subscription. If the signed-in Microsoft account doesn't have your Azure subscription, click it to add the correct account.
- 20. Create a resource group NOTE NOTE Create an App Service plan NOTE NOTE Once signed in, you're ready to create all the resources you need for your Azure web app in this dialog. First, you need a resource group. A resource group is a logical container into which Azure resources like web apps, databases and storage accounts are deployed and managed. Next to Resource Group, click New. Name your resource group myResourceGroup and click OK. Your Azure web app also needs an App Service plan. An App Service plan represents the collection of physical resources used to host your apps. All apps assigned to an App Service plan share the resources defined by it, which enables you to save cost when hosting multiple apps. App Service plans define: Region (North Europe, East US, Southeast Asia) Instance Size (Small, Medium, Large) Scale Count (one, two or three instances, etc.) SKU (Free, Shared, Basic, Standard, Premium) Next to App Service Plan, click New.
- 21. Create and publish the web app In the Configure App Service Plan dialog, configure the new App Service plan with the following settings: App Service Plan: Type myAppServicePlan. Location: Choose West Europe, or any other region you like. Size: Choose Free, or any other pricing tier you like. Click OK. The only thing left to do now is to name your web app. In Web App Name, type a unique app name. This name will be used as part of the default DNS name for your app ( <app_name>.azurewebsites.net ), so it needs to be unique across all apps in Azure. You can later map a custom domain name to your app before you expose it to your users. You can also accept the automatically generated name, which is already unique. Click Create to start creating the Azure resources.
- 22. Update the app and redeploy Once the wizard finishes creating the Azure resources, it automatically publishes your ASP.NET web app to Azure for the first time, and then launches the published Azure web app in your default browser. The URL uses the web app name that you specified earlier, with the format http://<app_name>.azurewebsites.net . Congratulations, your first ASP.NET web app is running live in Azure App Service. It's very easy to update and redeploy to Azure. Let's make an update to the homepage. From the Solution Explorer, open ViewsHomeIndex.cshtml.
- 23. <div class="jumbotron"> <h1>ASP.NET in Azure!</h1> <p class="lead">This is a simple app that we’ve built that demonstrates howto deploy a .NET app to Azure App Service.</p> </div> Manage your new Azure web app Find the <div class="jumbotron"> HTML tag near the top, and replace the entire tag with the following code: To redeploy to Azure, right-click youre myFirstAzureWebApp project in Solution Explorer and select Publish. In the publish page, click Publish. When Visual Studio is finished, it launches the updated Azure web app in your browser. Go to the Azure portal to take a look at the web app you just created. To do this, sign in to https://portal.azure.com. From the left menu, click App Services, then click the name of your Azure web app. You have landed in your web app's blade (a portal page that opens horizontally).
- 24. Clean up resources By default, your web app's blade shows the Overview page. This page gives you a view of how your app is doing. Here, you can also perform basic management tasks like browse, stop, start, restart, and delete. The tabs on the left side of the blade shows the different configuration pages you can open. These tabs in the blade show the many great features you can add to your web app. The following list gives you just a few of the possibilities: Map a custom DNS name Bind a custom SSL certificate Configure continuous deployment Scale up and out Add user authentication To delete your first Azure web app, you can click Delete in the Overview page. However, there's a better way to delete everything that you created in this quick start. From your web app's Overview page, click the resource group to open its blade. In the resource group blade, you can see both the App Service plan and the App Service app that Visual Studio
- 25. Next steps created for you. At the top of the blade, click Delete. In the confirmation blade, confirm by typing the resource group name myResourceGroup into the text box and click Delete. Explore pre-created Web apps PowerShell scripts.
- 26. Create a Node.js Application on Web App 4/24/2017 • 7 min to read • Edit Online Before you begin Download the sample git clone https://github.com/Azure-Samples/nodejs-docs-hello-world TIP TIP cd nodejs-docs-hello-world Run the app locally This quickstart tutorial walks through how to develop and deploy a Node.js app to Azure. We’ll run the app using a Linux-based Azure App Service, and create and configure a new Web App within it using the Azure CLI. We’ll then use git to deploy our Node.js app to Azure. You can follow the steps below using a Mac, Windows or Linux machine. It should take you only about 5 minutes to complete all of the steps below. Before running this sample, install the following prerequisites locally: 1. Download and install git 2. Download and install Node.js and NPM 3. Download and install the Azure CLI 2.0 If you don't have an Azure subscription, create a free account before you begin. Clone the Hello World sample app repository to your local machine. Alternatively, you can download the sample as a zip file and extract it. Change to the directory that contains the sample code. Run the application locally by opening a terminal window and using the npmstart script for the sample to launch the built in Node.js http server.
- 27. npmstart http://localhost:1337 Log in to Azure azlogin Configure a Deployment User NOTE NOTE azappservice web deployment user set --user-name <username> --password <password> Create a resource group Open a web browser, and navigate to the sample. You can see the Hello World message from the sample app displayed in the page. In your terminal window, press Ctrl+C to exit the web server. We are now going to use the Azure CLI 2.0 in a terminal window to create the resources needed to host our Node.js app in Azure. Log in to your Azure subscription with the az login command and follow the on-screen directions. For FTP and local Git it is necessary to have a deployment user configured on the server to authenicate your deployment. Creating a deployment user is a one time configuration, take a note of the username and password as they will be used in a step below. A deployment user is required for FTP and Local Git deployment to a Web App. The username and password are account-level, as such, are different from your Azure Subscription credentials. These credentials are only required to be created once. Use the az appservice web deployment user set command to create your account-level credentials. Create a resource group with the az group create. An Azure resource group is a logical container into which Azure resources like web apps, databases and storage accounts are deployed and managed.
- 28. azgroup create --name myResourceGroup --location westeurope Create an Azure App Service NOTE NOTE azappservice plan create --name quickStartPlan --resource-group myResourceGroup --sku S1--is-linux { "id":"/subscriptions/00000000-0000-0000-0000- 000000000000/resourceGroups/myResourceGroup/providers/Microsoft.Web/serverfarms/quickStartPlan", "kind":"linux", "location":"West Europe", "sku":{ "capacity":1, "family":"S", "name":"S1", "tier":"Standard" }, "status":"Ready", "type":"Microsoft.Web/serverfarms" } Create a web app azappservice web create --name <app_name> --resource-group myResourceGroup --plan quickStartPlan Create a Linux-based App Service Plan with the az appservice plan create command. An App Service plan represents the collection of physical resources used to host your apps. All applications assigned to an App Service plan share the resources defined by it allowing you to save cost when hosting multiple apps. App Service plans define: Region (North Europe, East US, Southeast Asia) Instance Size (Small, Medium, Large) Scale Count (one, two or three instances, etc.) SKU (Free, Shared, Basic, Standard, Premium) The following example creates an App Service Plan on Linux Workers named quickStartPlan using the Standard pricing tier. When the App Service Plan has been created, the Azure CLI shows information similar to the following example. Now that an App Service plan has been created, create a Web App within the quickStartPlan App Service plan. The web app gives us a hosting space to deploy our code as well as provides a URL for us to view the deployed application. Use the az appservice web create command to create the Web App. In the command below substitute your own unique app name where you see the <app_name> placeholder. The <app_name> will be used as the default DNS site for the web app, and so the name needs to be unique across all apps in Azure. You can later map any custom DNS entry to the web app before you expose it to your users. When the Web App has been created, the Azure CLI shows information similar to the following example.
- 29. { "clientAffinityEnabled":true, "defaultHostName":"<app_name>.azurewebsites.net", "id":"/subscriptions/00000000-0000-0000-0000- 000000000000/resourceGroups/myResourceGroup/providers/Microsoft.Web/sites/<app_name>", "isDefaultContainer":null, "kind":"app", "location":"West Europe", "name":"<app_name>", "repositorySiteName":"<app_name>", "reserved":true, "resourceGroup":"myResourceGroup", "serverFarmId":"/subscriptions/00000000-0000-0000-0000- 000000000000/resourceGroups/myResourceGroup/providers/Microsoft.Web/serverfarms/quickStartPlan", "state":"Running", "type":"Microsoft.Web/sites", } http://<app_name>.azurewebsites.net Configure to use Node.js Browse to the site to see your newly created Web App. We’ve now created an empty new Web App in Azure. Let’s now configure our Web App to use Node.js and deploy our app to it. Use the az appservice web config update command to configure the Web App to use Node.js version 6.9.3 .
- 30. TIP TIP azappservice web config update --linux-fx-version "NODE|6.9.3" --startup-file process.json --name <app_name> --resource-group myResourceGroup Configure local git deployment azappservice web source-controlconfig-local-git --name <app_name> --resource-group myResourceGroup --query url--output tsv https://<username>@<app_name>.scm.azurewebsites.net:443/<app_name>.git Push to Azure from Git git remote add azure <paste-previous-command-output-here> git push azure master Setting the node.js version this way uses a default container provided by the platform, if you would like to use your own container refer to the CLI reference for the az appservice web config container update command. You can deploy to your Web App in a variety of ways including FTP, local Git as well as GitHub, Visual Studio Team Services and Bitbucket. Use the az appservice web source-control config-local-git command to configure local git access to the Web App. Copy the output from the terminal as it will be used in the next step. Add an Azure remote to your local Git repository. Push to the Azure remote to deploy your application. You will be prompted for the password you supplied earlier as part of the creation of the deployment user. During deployment, Azure App Service will communicate it's progress with Git.
- 31. Counting objects:23, done. Delta compression using up to 4threads. Compressing objects:100% (21/21), done. Writing objects:100% (23/23), 3.71KiB| 0bytes/s, done. Total23(delta 8), reused 7(delta 1) remote:Updating branch 'master'. remote:Updating submodules. remote:Preparing deployment for commit id 'bf114df591'. remote:Generating deployment script. remote:Generating deployment script for node.js Web Site remote:Generated deployment script files remote:Running deployment command... remote:Handling node.js deployment. remote:Kudu sync from:'/home/site/repository' to:'/home/site/wwwroot' remote:Copying file:'.gitignore' remote:Copying file:'LICENSE' remote:Copying file:'README.md' remote:Copying file:'index.js' remote:Copying file:'package.json' remote:Copying file:'process.json' remote:Deleting file:'hostingstart.html' remote:Ignoring:.git remote:Using start-up script index.js frompackage.json. remote:Node.js versions available on the platformare:4.4.7, 4.5.0, 6.2.2, 6.6.0, 6.9.1. remote:Selected node.js version 6.9.1. Use package.json file to choose a different version. remote:Selected npmversion 3.10.8 remote:Finished successfully. remote:Running post deployment command(s)... remote:Deployment successful. To https://<app_name>.scm.azurewebsites.net:443/<app_name>.git * [newbranch] master -> master Browse to the app http://<app_name>.azurewebsites.net Updating and Deploying the Code response.end("Hello Azure!"); git commit -am"updated output" git push azure master Browse to the deployed application using your web browser. This time, the page that displays the Hello World message is running using our Node.js code running as an Azure App Service web app. Using a local text editor, open the index.js file within the Node.js app, and make a small change to the text within the call to response.end : Commit your changes in git, then push the code changes to Azure. Once deployment has completed, switch back to the browser window that opened in the Browse to the app step, and hit refresh.
- 32. Manage your new Azure web app Go to the Azure portal to take a look at the web app you just created. To do this, sign in to https://portal.azure.com. From the left menu, click App Services, then click the name of your Azure web app. You have landed in your web app's blade (a portal page that opens horizontally). By default, your web app's blade shows the Overview page. This page gives you a view of how your app is doing. Here, you can also perform basic management tasks like browse, stop, start, restart, and delete. The tabs on the left side of the blade shows the different configuration pages you can open.
- 33. Clean up resources azgroup delete --name myResourceGroup Next steps These tabs in the blade show the many great features you can add to your web app. The following list gives you just a few of the possibilities: Map a custom DNS name Bind a custom SSL certificate Configure continuous deployment Scale up and out Add user authentication Congratulations! You've deployed your first Node.js app to App Service. To remove all the resources created by this QuickStart, run the following command: Explore pre-created Web Apps CLI scripts.
- 34. Create a PHP application on Web App 4/24/2017 • 7 min to read • Edit Online Before you begin Download the sample git clone https://github.com/Azure-Samples/php-docs-hello-world TIP TIP cd php-docs-hello-world Run the app locally This quickstart tutorial walks through how to develop and deploy a PHP app to Azure. We’ll run the app using a Linux-based Azure App Service, and create and configure a new Web App within it using the Azure CLI. We’ll then use git to deploy our PHP app to Azure. You can follow the steps below using a Mac, Windows or Linux machine. It should take you only about 5 minutes to complete all of the steps below. Before running this sample, install the following prerequisites locally: 1. Download and install git 2. Download and install PHP 3. Download and install the Azure CLI 2.0 If you don't have an Azure subscription, create a free account before you begin. Clone the Hello World sample app repository to your local machine. Alternatively, you can download the sample as a zip file and extract it. Change to the directory that contains the sample code. Run the application locally by opening a terminal window an using php command line for the sample to launch the built in PHP web server.
- 35. php -S localhost:8080 http://localhost:8080 Log in to Azure azlogin Configure a Deployment User NOTE NOTE azappservice web deployment user set --user-name <username> --password <password> Create a resource group azgroup create --name myResourceGroup --location westeurope Open a web browser, and navigate to the sample. You can see the Hello World message from the sample app displayed in the page. In your terminal window, press Ctrl+C to exit the web server. We are now going to use the Azure CLI 2.0 in a terminal window to create the resources needed to host our PHP app in Azure. Log in to your Azure subscription with the az login command and follow the on-screen directions. For FTP and local Git it is necessary to have a deployment user configured on the server to authenicate your deployment. Creating a deployment user is a one time configuration, take a note of the username and password as they will be used in a step below. A deployment user is required for FTP and Local Git deployment to a Web App. The username and password are account-level, as such, are different from your Azure Subscription credentials. These credentials are only required to be created once. Use the az appservice web deployment user set command to create your account-level credentials. Create a resource group with the az group create. An Azure resource group is a logical container into which Azure resources like web apps, databases and storage accounts are deployed and managed.
- 36. Create an Azure App Service NOTE NOTE azappservice plan create --name quickStartPlan --resource-group myResourceGroup --sku S1--is-linux { "id":"/subscriptions/00000000-0000-0000-0000- 000000000000/resourceGroups/myResourceGroup/providers/Microsoft.Web/serverfarms/quickStartPlan", "kind":"linux", "location":"West Europe", "sku":{ "capacity":1, "family":"S", "name":"S1", "tier":"Standard" }, "status":"Ready", "type":"Microsoft.Web/serverfarms" } Create a web app azappservice web create --name <app_name> --resource-group myResourceGroup --plan quickStartPlan Create a Linux-based App Service Plan with the az appservice plan create command. An App Service plan represents the collection of physical resources used to host your apps. All applications assigned to an App Service plan share the resources defined by it allowing you to save cost when hosting multiple apps. App Service plans define: Region (North Europe, East US, Southeast Asia) Instance Size (Small, Medium, Large) Scale Count (one, two or three instances, etc.) SKU (Free, Shared, Basic, Standard, Premium) The following example creates an App Service Plan on Linux Workers named quickStartPlan using the Standard pricing tier. When the App Service Plan has been created, the Azure CLI shows information similar to the following example. Now that an App Service plan has been created, create a Web App within the quickStartPlan App Service plan. The web app gives us a hosting space to deploy our code as well as provides a URL for us to view the deployed application. Use the az appservice web create command to create the Web App. In the command below please substitute your own unique app name where you see the placeholder. The will be used as the default DNS site for the web app, and so the name needs to be unique across all apps in Azure. You can later map any custom DNS entry to the web app before you expose it to your users. When the Web App has been created, the Azure CLI shows information similar to the following example.
- 37. { "clientAffinityEnabled":true, "defaultHostName":"<app_name>.azurewebsites.net", "id":"/subscriptions/00000000-0000-0000-0000- 000000000000/resourceGroups/myResourceGroup/providers/Microsoft.Web/sites/<app_name>", "isDefaultContainer":null, "kind":"app", "location":"West Europe", "name":"<app_name>", "repositorySiteName":"<app_name>", "reserved":true, "resourceGroup":"myResourceGroup", "serverFarmId":"/subscriptions/00000000-0000-0000-0000- 000000000000/resourceGroups/myResourceGroup/providers/Microsoft.Web/serverfarms/quickStartPlan", "state":"Running", "type":"Microsoft.Web/sites", } http://<app_name>.azurewebsites.net Configure to use PHP TIP TIP Browse to the site to see your newly created Web App. We’ve now created an empty new Web App in Azure. Let’s now configure our Web App to use PHP and deploy our app to it. Use the az appservice web config update command to configure the Web App to use PHP version 7.0.x . Setting the PHP version this way uses a default container provided by the platform, if you would like to use your own container refer to the CLI reference for the az appservice web config container update command.
- 38. azappservice web config update --linux-fx-version "PHP|7.0" --name <app_name> --resource-group myResourceGroup Configure local git deployment azappservice web source-controlconfig-local-git --name <app_name> --resource-group myResourceGroup --query url--output tsv https://<username>@<app_name>.scm.azurewebsites.net:443/<app_name>.git Push to Azure from Git git remote add azure <paste-previous-command-output-here> git push azure master Counting objects:2, done. Delta compression using up to 4threads. Compressing objects:100% (2/2), done. Writing objects:100% (2/2), 352bytes | 0bytes/s, done. Total2(delta 1), reused 0(delta 0) remote:Updating branch 'master'. remote:Updating submodules. remote:Preparing deployment for commit id '25f18051e9'. remote:Generating deployment script. remote:Running deployment command... remote:Handling Basic Web Site deployment. remote:Kudu sync from:'/home/site/repository' to:'/home/site/wwwroot' remote:Copying file:'.gitignore' remote:Copying file:'LICENSE' remote:Copying file:'README.md' remote:Copying file:'index.php' remote:Ignoring:.git remote:Finished successfully. remote:Running post deployment command(s)... remote:Deployment successful. To https://<app_name>.scm.azurewebsites.net/<app_name>.git cc39b1e..25f1805 master -> master Browse to the app You can deploy to your Web App in a variety of ways including FTP, local Git as well as GitHub, Visual Studio Team Services and Bitbucket. Use the az appservice web source-control config-local-git command to configure local git access to the Web App. Copy the output from the terminal as it will be used in the next step. Add an Azure remote to your local Git repository. Push to the Azure remote to deploy your application. You will be prompted for the password you supplied earlier as part of the creation of the deployment user. During deployment, Azure App Service will communicate it's progress with Git. Browse to the deployed application using your web browser.
- 39. http://<app_name>.azurewebsites.net Updating and Deploying the Code echo "Hello Azure!"; git commit -am"updated output" git push azure master Manage your new Azure web app This time, the page that displays the Hello World message is running using our PHP code running as an Azure App Service web app. Using a local text editor, open the index.php file within the PHP app, and make a small change to the text within the string next to echo : Commit your changes in git, then push the code changes to Azure. Once deployment has completed, switch back to the browser window that opened in the Browse to the app step, and hit refresh. Go to the Azure portal to take a look at the web app you just created. To do this, sign in to https://portal.azure.com. From the left menu, click App Services, then click the name of your Azure web app. You have landed in your web app's blade (a portal page that opens horizontally). By default, your web app's blade shows the Overview page. This page gives you a view of how your app is doing.
- 40. Clean up resources azgroup delete --name myResourceGroup Next steps Here, you can also perform basic management tasks like browse, stop, start, restart, and delete. The tabs on the left side of the blade shows the different configuration pages you can open. These tabs in the blade show the many great features you can add to your web app. The following list gives you just a few of the possibilities: Map a custom DNS name Bind a custom SSL certificate Configure continuous deployment Scale up and out Add user authentication Congratulations! You've deployed your first PHP app to App Service. To remove all the resources created by this QuickStart, run the following command: Explore pre-created Web Apps CLI scripts.
- 41. Create your first Java web app in Azure in five minutes 4/21/2017 • 6 min to read • Edit Online Before you begin NOTE NOTE Create a Dynamic Web Project in Eclipse This Quickstart helps you deploy your first Java web app to Azure App Service in just a few minutes. When you are finished with this tutorial, you'll have a simple Java-based web web app up and running in the cloud. This tutorial demonstrates how to use Eclipse IDE for Java EE Devlopers to build and deploy a Java web app to Azure. If you don't already have Eclipse installed, you can download it for free from http://www.eclipse.org/. In order to simplify the process of publishing Java web apps to Azure, the steps in this tutorial will use the Azure Toolkit for Eclipse. For instructions on how to install the toolkit, see Installing the Azure Toolkit for Eclipse. You could also use IntelliJ IDEA from JetBrains to complete the steps in this tutorial. A few of the steps might be slightly different for that development environment, although there is also an Azure Toolkit for IntelliJ which you can use to simplify your publishing process for that IDE. You will also need an Azure subscription to complete the steps in this tutorial. If you don't already have an Azure subscription, you can activate your MSDN subscriber benefits or sign up for a free Azure account. In the Eclipse IDE, click File, then New, then Dynamic Web Project.
- 42. NOTE NOTE When the Dynamic Web Project dialog box appears, name the application MyFirstJavaOnAzureWebApp, and then click Finish. If you have a local runtime environment such as Apache Tomcat installed, you can specify that in the Target runtime field. After your dynamic web project has been created, add a new JSP page by expanding your project in the Project Explorer, right-clicking the WebContent folder, clicking New, and then clicking JSP File.
- 43. When the New JSP File dialog box appears, name the file index.jsp, keep the parent folder as MyFirstJavaOnAzureWebApp/WebContent, and then click Next. On the second page of the New JSP File dialog box appears, name the file index.jsp, keep the parent folder as MyFirstJavaOnAzureWebApp/WebContent, and then click Finish.
- 44. <body> <h1><% out.println("Java on Azure!"); %></h1> </body> Publish your web app to Azure When your new page opens in Eclipse, replace the existing <body></body> section with the following code: Save your changes to the page. In order to deploy your web app to Azure, you will take advantage of several features provided by the Azure Toolkit for Eclipse. To being the publishing process, use one of the following methods: Right-click your project in the Eclipse Project Explorer, then click Azure, and then click Publish as Azure Web App.
- 45. Click the Publish icon on the Eclipse toolbar, and then click Publish as Azure Web App. If you have not already signed into your Azure account, you will be prompted to sign in. To do so, use the following steps: 1. There are two different options for signing in to your Azure account; for this tutorial, choose Interactive.
- 46. 2. Enter your Azure credentials, and then click Sign in. 3. Choose your Azure subscriptions, and then click Select.
- 47. NOTE NOTE Detailed instructions about Interactive and Automated sign-ins are available in the Azure Sign In Instructions for the Azure Toolkit for Eclipse article. Once you have been signed into your Azure account, the Deploy Web App dialog box will be displayed. You should see no App Services listed if this is your first time publishing a web app to Azure. If that is the case, or if you want to create a new App Service, then your next step will be to create a new App Service. To do so, click Create. When the Create App Service dialog box is displayed, the initial data which you need to provide is: A unique name for your web app, which will become the DNS address for your web app; for example:
- 48. MyJavaWebApp will be myjavawebapp.azurewebsites.net. Which web container your web app will use; for example: Newest Tomcat 8.5. Your Azure subscription. If you do not have any existing App Service Plans, or if you would like to create a new service plan, then you will need to provide the following information: A unique name for your new service plan; this name will show up when you publish web apps in the future using the Azure Toolkit, and it will be listed in the Azure Portal when you are managing your account. The geographic location where you service plan will be created. The pricing tier for your service plan.
- 49. Next, click the Resource group tab. If you do not have any existing Resource Groups, or if you would like to create a new one, then you will need to provide a unique name for your new resource group; otherwise, choose an existing resource group from the drop-down menu. Lastly, click the JDK tab. There are several options listed which allow developers to specify third-party or custom Java Developer Kits (JDKs), but for this tutorial you should choose the Default, and then click Create. The Azure Toolkit will begin creating your new app service and display a progress dialog box while it is processing.
- 50. When your new app service has been created, the last option which you need to choose is whether to deploy your web app to the root of your new website. For example, if you have an app service at wingtiptoys.azurewebsites.net and you do not deploy to the root, then your web app named MyFirstJavaOnAzureWebApp will be deployed to wingtiptoys.azurewebsites.net/MyFirstJavaOnAzureWebApp. After you have finished all of the preceding steps, click Deploy to publish your web app to Azure.
- 51. Updating your web app Congratulations! You have successfully deployed your web app to Azure! You can now preview your web app on the Azure website: Once you have successfully published your web app to Azure, updating your web app is a much simpler process, and the following steps will walk you through the process of publishing changes to your web app. First, change the sample JSP code from earlier so that the title is replaced by today's date:
- 52. <%@ page language="java" contentType="text/html; charset=ISO-8859-1" pageEncoding="ISO-8859-1" import="java.text.SimpleDateFormat" import="java.util.Date" %> <!DOCTYPEhtmlPUBLIC"-//W3C//DTDHTML4.01Transitional//EN" "http://www.w3.org/TR/html4/loose.dtd"> <html> <head> <meta http-equiv="Content-Type" content="text/html; charset=ISO-8859-1"> <% SimpleDateFormat date = newSimpleDateFormat("yyyy/MM/dd"); %> <title><% out.println(date.format(newDate())); %></title> </head> <body> <h1><% out.println("Java on Azure!"); %></h1> </body> </html> After you have saved your changes to the page, right-click your project in the Eclipse Project Explorer, then click Azure, and then click Publish as Azure Web App.
- 53. When the Deploy Web App dialog box is displayed, your app service from earlier will be listed. To update your web app, all that you need to do is highlight your app service and click Deploy to publish your changes.
- 54. NOTE NOTE Deleting your web app If you are deploying your web app to the root of your app service, you will need to recheck Deploy to root each time that you publish your changes. After you have published your changes, you will notice that the page title has changed to today's date in your browser. To delete a web app, you can use the Azure Explorer, which is part of the Azure Toolkit. If the Azure Explorer view is not already visible in Eclipse, use the following steps to display it: 1. Click Window, then click Show View, and then click Other. 2. When the Show View dialog box appears, select Azure Explorer and click OK.
- 55. Next Steps To delete your web app from the Azure Explorer, you need expand the Web Apps node, then right-click your web app and select Delete. When prompted to delete your web app, click OK. For more information about the Azure Toolkits for Java IDEs, see the following links: Azure Toolkit for Eclipse (This Article) Azure Toolkit for IntelliJ What's New in the Azure Toolkit for Eclipse Installing the Azure Toolkit for Eclipse Sign In Instructions for the Azure Toolkit for Eclipse What's New in the Azure Toolkit for IntelliJ Installing the Azure Toolkit for IntelliJ Sign In Instructions for the Azure Toolkit for IntelliJ For more information about using Azure with Java, see the Azure Java Developer Center and the Java Tools for
- 56. Visual Studio Team Services.
- 57. Create a Python application on Web App 4/25/2017 • 7 min to read • Edit Online Before you begin Download the sample git clone https://github.com/Azure-Samples/python-docs-hello-world TIP TIP cd Python-docs-hello-world Run the app locally python main.py This quickstart tutorial walks through how to develop and deploy a Python app to Azure. We’ll run the app using Azure App Service, and create and configure a new Web App within it using the Azure CLI. We’ll then use git to deploy our Python app to Azure. You can follow the steps below using a Mac, Windows or Linux machine. It should take you only about 5 minutes to complete all of the steps below. Before running this sample, install the following prerequisites locally: 1. Download and install git 2. Download and install Python 3. Download and install the Azure CLI 2.0 Clone the Hello World sample app repository to your local machine. Alternatively, you can download the sample as a zip file and extract it. Change to the directory that contains the sample code. Run the application locally by opening a terminal window an using Python command line for the sample to launch the built in Python web server. Open a web browser, and navigate to the sample.
- 58. http://localhost:5000 Log in to Azure azlogin Configure a Deployment User NOTE NOTE azappservice web deployment user set --user-name <username> --password <password> Create a resource group azgroup create --name myResourceGroup --location westeurope Create an Azure App Service You can see the Hello World message from the sample app displayed in the page. In your terminal window, press Ctrl+C to exit the web server. We are now going to use the Azure CLI 2.0 in a terminal window to create the resources needed to host our Python app in Azure. Log in to your Azure subscription with the az login command and follow the on-screen directions. For FTP and local Git it is necessary to have a deployment user configured on the server to authenicate your deployment. Creating a deployment user is a one time configuration, take a note of the username and password as they will be used in a step below. A deployment user is required for FTP and Local Git deployment to a Web App. The username and password are account-level, as such, are different from your Azure Subscription credentials. These credentials are only required to be created once. Use the az appservice web deployment user set command to create your account-level credentials. Create a resource group with the az group create. An Azure resource group is a logical container into which Azure resources like web apps, databases and storage accounts are deployed and managed. Create a Linux-based App Service Plan with the az appservice plan create command.
- 59. NOTE NOTE azappservice plan create --name quickStartPlan --resource-group myResourceGroup --sku FREE { "appServicePlanName":"quickStartPlan", "geoRegion":"North Europe", "id":"/subscriptions/00000000-0000-0000-0000- 000000000000/resourceGroups/myResourceGroup/providers/Microsoft.Web/serverfarms/quickStartPlan", "kind":"app", "location":"North Europe", "maximumNumberOfWorkers":1, "name":"quickStartPlan", "provisioningState":"Succeeded", "resourceGroup":"myResourceGroup", "sku":{ "capacity":0, "family":"F", "name":"F1", "size":"F1", "tier":"Free" }, "status":"Ready", "type":"Microsoft.Web/serverfarms", } Create a web app azappservice web create --name <app_name> --resource-group myResourceGroup --plan quickStartPlan An App Service plan represents the collection of physical resources used to host your apps. All applications assigned to an App Service plan share the resources defined by it allowing you to save cost when hosting multiple apps. App Service plans define: Region (North Europe, East US, Southeast Asia) Instance Size (Small, Medium, Large) Scale Count (one, two or three instances, etc.) SKU (Free, Shared, Basic, Standard, Premium) The following example creates an App Service Plan on Linux Workers named quickStartPlan using the FREE pricing tier. When the App Service Plan has been created, the Azure CLI shows information similar to the following example. Now that an App Service plan has been created, create a Web App within the quickStartPlan App Service plan. The web app gives us a hosting space to deploy our code as well as provides a URL for us to view the deployed application. Use the az appservice web create command to create the Web App. In the command below please substitute your own unique app name where you see the <app_name> placeholder. The <app_name> will be used as the default DNS site for the web app, and so the name needs to be unique across all apps in Azure. You can later map any custom DNS entry to the web app before you expose it to your users. When the Web App has been created, the Azure CLI shows information similar to the following example.
- 60. { "clientAffinityEnabled":true, "defaultHostName":"<app_name>.azurewebsites.net", "enabled":true, "enabledHostNames":[ "<app_name>.azurewebsites.net", "<app_name>.scm.azurewebsites.net" ], "hostNames":[ "<app_name>.azurewebsites.net" ], "id":"/subscriptions/00000000-0000-0000-0000- 000000000000/resourceGroups/myResourceGroup/providers/Microsoft.Web/sites/<app_name>", "kind":"app", "location":"North Europe", "outboundIpAddresses":"13.69.190.80,13.69.191.239,13.69.186.193,13.69.187.34", "resourceGroup":"myResourceGroup", "serverFarmId":"/subscriptions/00000000-0000-0000-0000- 000000000000/resourceGroups/myResourceGroup/providers/Microsoft.Web/serverfarms/quickStartPlan", "state":"Running", "type":"Microsoft.Web/sites", } http://<app_name>.azurewebsites.net Configure to use Python TIP TIP Browse to the site to see your newly created Web App. We’ve now created an empty new Web App in Azure. Let’s now configure our Web App to use Python and deploy our app to it. Use the az appservice web config update command to configure the Web App to use Python version 3.4 . Setting the Python version this way uses a default container provided by the platform, if you would like to use your own container refer to the CLI reference for the az appservice web config container update command.
- 61. azappservice web config update --python-version 3.4--name <app-name> --resource-group myResourceGroup Configure local git deployment azappservice web source-controlconfig-local-git --name <app_name> --resource-group myResourceGroup --query url--output tsv https://<username>@<app_name>.scm.azurewebsites.net:443/<app_name>.git Push to Azure from Git git remote add azure <paste-previous-command-output-here> git push azure master You can deploy to your Web App in a variety of ways including FTP, local Git as well as GitHub, Visual Studio Team Services and Bitbucket. Use the az appservice web source-control config-local-git command to configure local git access to the Web App. Copy the output from the terminal as it will be used in the next step. Add an Azure remote to your local Git repository. Push to the Azure remote to deploy your application. You will be prompted for the password you supplied earlier as part of the creation of the deployment user. During deployment, Azure App Service will communicate it's progress with Git.
- 62. Counting objects:18, done. Delta compression using up to 4threads. Compressing objects:100% (16/16), done. Writing objects:100% (18/18), 4.31KiB| 0bytes/s, done. Total18(delta 4), reused 0(delta 0) remote:Updating branch 'master'. remote:Updating submodules. remote:Preparing deployment for commit id '44e74fe7dd'. remote:Generating deployment script. remote:Generating deployment script for python Web Site remote:Generated deployment script files remote:Running deployment command... remote:Handling python deployment. remote:KuduSync.NET from:'D:homesiterepository' to:'D:homesitewwwroot' remote:Deleting file:'hostingstart.html' remote:Copying file:'.gitignore' remote:Copying file:'LICENSE' remote:Copying file:'main.py' remote:Copying file:'README.md' remote:Copying file:'requirements.txt' remote:Copying file:'virtualenv_proxy.py' remote:Copying file:'web.2.7.config' remote:Copying file:'web.3.4.config' remote:Detected requirements.txt. You can skip Python specific steps with a .skipPythonDeployment file. remote:Detecting Python runtime fromsite configuration remote:Detected python-3.4 remote:Creating python-3.4virtualenvironment. remote:................................. remote:Pip installrequirements. remote:Successfully installed Flaskclickitsdangerous Jinja2Werkzeug MarkupSafe remote:Cleaning up... remote:. remote:Overwriting web.config with web.3.4.config remote: 1file(s) copied. remote:Finished successfully. remote:Running post deployment command(s)... remote:Deployment successful. To https://<app_name>.scm.azurewebsites.net/<app_name>.git * [newbranch] master -> master Browse to the app http://<app_name>.azurewebsites.net Updating and Deploying the Code return 'Hello, Azure!' Browse to the deployed application using your web browser. This time, the page that displays the Hello World message is running using our Python code running as an Azure App Service web app. ![]() Using a local text editor, open the main.py file within the Python app, and make a small change to the text within the string next to return statement: Commit your changes in git, then push the code changes to Azure.
- 63. git commit -am"updated output" git push azure master Manage your new Azure web app Once deployment has completed, switch back to the browser window that opened in the Browse to the app step, and hit refresh. Go to the Azure portal to take a look at the web app you just created. To do this, sign in to https://portal.azure.com. From the left menu, click App Services, then click the name of your Azure web app. You have landed in your web app's blade (a portal page that opens horizontally). By default, your web app's blade shows the Overview page. This page gives you a view of how your app is doing. Here, you can also perform basic management tasks like browse, stop, start, restart, and delete. The tabs on the left side of the blade shows the different configuration pages you can open.
- 64. Clean up resources azgroup delete --name myResourceGroup Next steps These tabs in the blade show the many great features you can add to your web app. The following list gives you just a few of the possibilities: Map a custom DNS name Bind a custom SSL certificate Configure continuous deployment Scale up and out Add user authentication Congratulations! You've deployed your first Python app to App Service. To remove all the resources created by this QuickStart, run the following command: Explore pre-created Web Apps CLI scripts.
- 65. Create a static HTML web app in Azure in five minutes 3/17/2017 • 1 min to read • Edit Online Log in to Azure azlogin Create a resource group azgroup create --location "West Europe" --name myResourceGroup Create an App Service plan azappservice plan create --name my-free-appservice-plan --resource-group myResourceGroup --sku FREE Create a web app azappservice web create --name <app_name> --resource-group myResourceGroup --plan my-free-appservice-plan Deploy sample application azappservice web source-controlconfig --name <app_name> --resource-group myResourceGroup --repo-url"https://github.com/Azure-Samples/app-service-web-html-get-started.git" --branch master --manual-integration Browse to web app This Quickstart helps you deploy a simple HTML+CSS site to Azure App Service in just a few minutes. Before you start, make sure that the Azure CLI has been installed. For more information, see Azure CLI installation guide. Log in to Azure by running azlogin and following the on-screen directions. Create a resource group. This is where you put all the Azure resources that you want to manage together, such as the web app and its SQL Database back end. To see what possible values you can use for ---location , use the azappservice list-locations Azure CLI command. Create a "FREE" App Service plan. Create a web app with a unique name in <app_name> . Deploy a sample HTML site from GitHub.
- 66. azappservice web browse --name <app_name> --resource-group myResourceGroup Clean up resources azgroup delete --name myResourceGroup Next steps To see your app running live in Azure, run this command. Congratulations, your first static HTML site is running live in Azure App Service. To remove all the resources created by this QuickStart, run the following command: Explore pre-created Web apps CLI scripts.
- 67. Create an ASP.NET app in Azure with SQL Database 4/22/2017 • 10 min to read • Edit Online Before you begin Download the sample Get the sample project Get the sample project TIP TIP git clone https://github.com/Azure-Samples/dotnet-sqldb-tutorial.git Run the application Run the application This tutorial shows you how to develop a data-driven ASP.NET web app in Azure, connect it to Azure SQL Database, and enable your data-driven functionality. When you're finished, you'll have a ASP.NET application running in Azure App Service and connected to SQL Database. Before running this sample, download and install the free Visual Studio 2017 Community Edition. Make sure that you enable Azure development during the Visual Studio setup. If you don't have an Azure subscription, create a free account before you begin. In this step, you download a sample ASP.NET application. Download the samples project by clicking here. Extract the downloaded dotnet-sqldb-tutorial-master.zip into a working directory. You can get the same sample project by cloning the GitHub repository: This sample project contains a simple ASP.NET MVC CRUD (create-read-update-delete) application built on Entity Framework Code First.
- 68. Publish to Azure with SQL Database From the extracted directory, launch dotnet-sqldb-tutorial-masterDotNetAppSqlDb.sln in Visual Studio 2017. Once the sample solution is opened, type F5 to run it in the browser. You should see a simple to-do list in the homepage. Try to add a few to-dos to the empty list. Your database context uses a connection string called MyDbConnection . This connection string is defined in Web.config and referenced in ModelsMyDatabaseContext.cs . The connection string name is all you will need later when connecting your Azure web app to Azure SQL Database. In the Solution Explorer, right-click your DotNetAppSqlDb project and select Publish. Make sure that Microsoft Azure App Service is selected and click Publish.
- 69. Sign in to Azure Sign in to Azure Create a resource group Create a resource group NOTE NOTE This opens the Create App Service dialog, which helps you create all the Azure resources you need to run your ASP.NET web app in Azure. In the Create App Service dialog, click Add an account, and then sign in to your Azure subscription. If you're already signed into a Microsoft account, make sure that account holds your Azure subscription. If the signed-in Microsoft account doesn't have your Azure subscription, click it to add the correct account. Once signed in, you're ready to create all the resources you need for your Azure web app in this dialog. First, you need a resource group. A resource group is a logical container into which Azure resources like web apps, databases, and storage accounts are deployed and managed.
- 70. Create an App Service plan Create an App Service plan NOTE NOTE Configure the web app name Configure the web app name Next to Resource Group, click New. Name your resource group myResourceGroup and click OK. Your Azure web app also needs an App Service plan. An App Service plan represents the collection of physical resources used to host your apps. All apps assigned to an App Service plan share the resources defined by it, which enables you to save cost when hosting multiple apps. App Service plans define: Region (North Europe, East US, Southeast Asia) Instance Size (Small, Medium, Large) Scale Count (one, two, or three instances, etc.) SKU (Free, Shared, Basic, Standard, Premium) Next to App Service Plan, click New. In the Configure App Service Plan dialog, configure the new App Service plan with the following settings: App Service Plan: Type myAppServicePlan. Location: Choose West Europe, or any other region you like. Size: Choose Free, or any other pricing tier you like. Click OK. In Web App Name, type a unique app name. This name will be used as part of the default DNS name for your app
- 71. Create a SQL Server instance Create a SQL Server instance ( <app_name>.azurewebsites.net ), so it needs to be unique across all apps in Azure. You can later map a custom domain name to your app before you expose it to your users. You can also accept the automatically generated name, which is already unique. To prepare for the next step, click Explore additional Azure services. In the Services tab, click the + icon next to SQL Database. In the Configure SQL Database dialog, click New next to SQL Server. In Server Name, type a unique name. This name will be used as part of the default DNS name for your database server ( <server_name>.database.windows.net ), so it needs to be unique across all SQL Server instances in Azure. Configure the rest of the fields as you like and click OK.
- 72. Configure the SQL Database Configure the SQL Database Create and publish the web app Create and publish the web app In Database Name, type myToDoAppDb , or any name you like. In Connection String Name, type MyDbConnection . This name must match the connection string that is referenced in ModelsMyDatabaseContext.cs .
- 73. Access the SQL Database locally Create a database connection Create a database connection Configure the database connection Configure the database connection Click Create. Once the wizard finishes creating the Azure resources, it automatically publishes your ASP.NET application to Azure for the first time, and then launches the published Azure web app in your default browser. Try to add a few to-do items to the empty list. Congratulations! Your data-driven ASP.NET application is running live in Azure App Service. Visual Studio lets you explorer and manage your new SQL Database easily in the SQL Server Object Explorer. Open SQL Server Object Explorer by typing Ctrl + , Ctrl + S . At the top of SQL Server Object Explorer, click the Add SQL Server button. In the Connect dialog, expand the Azure node. All your SQL Databases in Azure are listed here. Select the SQL Database that you created earlier. The connection you used earlier are automatically filled at the bottom. Type the database administrator password you used earlier and click Connect.
- 74. Allow client connection from your computer Allow client connection from your computer The Create a new firewall rule dialog is opened. By default, your SQL Server instance only allows connections from Azure services, such as your Azure web app. To connect to your database directly from Visual Studio, you need to create a firewall rule in the SQL Server instance to allow the public IP address of your local computer. This is easy in Visual Studio. The dialog is already filled with your computer's public IP address. Make sure that Add my client IP is selected and click OK. Once Visual Studio finishes creating the firewall setting for your SQL Server instance, your connection shows up in SQL Server Object Explorer. Here, you can perform the most common database operations, such as run queries, create views and stored procedures, and more. The following example shows you how to view database data.
- 75. Update app with Code First Migrations Update your data model Update your data model public boolDone { get; set; } Run Code First Migrations locally Run Code First Migrations locally Enable-Migrations Add-Migration AddProperty Update-Database In this step, you'll use Code First Migrations in Entity Framework to make a change to your database schema and publish it to Azure. Open ModelsTodo.cs in the code editor. Add the following property to the ToDo class: Next, run a few commands to make updates to your localdb database. From the Tools menu, click NuGet Package Manager > Package Manager Console. The console is usually opened in the bottom window. Enable Code First Migrations like this: Add a migration like this: Update the localdb database like this: Test your changes by running the application with F5 .
- 76. Use the new property Use the new property public ActionResult Create([Bind(Include = "id,Description,CreatedDate,Done")] Todo todo) <div class="form-group"> @Html.LabelFor(model=> model.Done, htmlAttributes:new{ @class = "control-labelcol-md-2" }) <div class="col-md-10"> <div class="checkbox"> @Html.EditorFor(model=> model.Done) @Html.ValidationMessageFor(model=> model.Done, "", new{ @class = "text-danger" }) </div> </div> </div> <th> @Html.DisplayNameFor(model=> model.Done) </th> <td> @Html.DisplayFor(modelItem=> item.Done) </td> Enable Code First Migrations in Azure Enable Code First Migrations in Azure If the application loads without errors, then Code First Migrations has succeeded. However, your page still looks the same because your application logic is not using this new property yet. Lets make some changes in your code to use the Done property. For simplicity in this tutorial, you're only going to change the Index and Create views to see the property in action. Open ControllersTodosController.cs . Find the Create() method and add Done to the list of properties in the Bind attribute. When you're done, your Create() method signature should look like this: Open ViewsTodosCreate.cshtml . In the Razor code, you should see a <div class="form-group"> tag that uses model.Description , and then another <div class="form-group"> tag that uses model.CreatedDate . Immediately following these two tags, add another <div class="form-group"> tag that uses model.Done , like this: Open ViewsTodosIndex.cshtml . Search for the empty <th></th> tag. Just above this tag, add the following Razor code: Find the <td> tag that contains the Html.ActionLink() helper methods. Just above this tag, add the following Razor code: That's all you need to see the changes in the Index and Create views. Type F5 again to run the application. You should be able now to add a to-do item and check Done. Then it should show up in your homepage as a completed item. Remember that this is all you can do for now because you didn't change the Edit view. Now that your code change works, including database migration, you publish it to your Azure web app and update your SQL Database with Code First Migrations too.
- 77. Publish your changes Publish your changes Just like before, right-click your project and select Publish. Click Settings to open the publish wizard. In the wizard, click Next. Make sure that the connection string for your SQL Database is populated in MyDatabaseContext (MyDbConnection). You may need to select the myToDoAppDb database from the dropdown. Select Execute Code First Migrations (runs on application start), then click Save. Now that you enabled Code First Migrations in your Azure web app, just publish your code changes. In the publish page, click Publish.
- 78. NOTE NOTE Stream application logs Open Server Explorer Open Server Explorer Enable log streaming Enable log streaming Try creating new to-do items again and select Done, and they should show up in your homepage as a completed item. Note that all your existing to-do items are still displayed. When you republish your ASP.NET application, existing data in your SQL Database is not lost. Also, Code First Migrations only changes the data schema and leaves your existing data intact. You can stream tracing messages directly from your Azure web app to Visual Studio. Open ControllersTodosController.cs . Note that each action starts with a Trace.WriteLine() method. This code is added to show you how easy it is to add trace messages to your Azure web app. You can configure logging for your Azure web app in Server Explorer. To open it, type Ctrl + Alt + S . In Server Explorer, expand Azure > App Service. Expand the myResourceGroup resource group, you created when you first created the Azure web app. Right-click your Azure web app and select View Streaming Longs.
- 79. Change trace levels Change trace levels The logs are now streamed into the Output window. However, you won't see any of the trace messages yet. That's because when you first select View Streaming Logs, your Azure web app sets the trace level to Error , which only logs error events (with the Trace.TraceError() method). To change the trace levels to output other trace messages, go back to Server Explorer. Right-click your Azure web app again and select Settings. In the Application Logging (File System) dropdown, select Verbose. Click Save.
- 80. TIP TIP Application:2017-04-06T23:30:41 PID[8132] Verbose GET /Todos/Index Application:2017-04-06T23:30:43 PID[8132] Verbose GET /Todos/Create Application:2017-04-06T23:30:53 PID[8132] Verbose POST /Todos/Create Application:2017-04-06T23:30:54 PID[8132] Verbose GET /Todos/Index Stop log streaming Stop log streaming Manage your Azure web app You can experiment with different trace levels to see what types of messages is displayed for each level. For example, the Information level includes all logs created by Trace.TraceInformation() , Trace.TraceWarning() , and Trace.TraceError() , but not logs created by Trace.WriteLine() . In your browser, try clicking around the to-do list application in Azure. The trace messages are now streamed to the Output window in Visual Studio. To stop the log-streaming service, click the Stop monitoring button in the Output window. Go to the Azure portal to see the web app you created. To do this, sign in to https://portal.azure.com. From the left menu, click App Service, then click the name of your Azure web app. You have landed in your web app's blade (a portal page that opens horizontally). By default, your web app's blade shows the Overview page. This page gives you a view of how your app is doing. Here, you can also perform basic management tasks like browse, stop, start, restart, and delete. The tabs on the left side of the blade show the different configuration pages you can open.
- 81. Next steps These tabs in the blade show the many great features you can add to your web app. The following list gives you just a few of the possibilities: Map a custom DNS name Bind a custom SSL certificate Configure continuous deployment Scale up and out Add user authentication Explore pre-created Web apps PowerShell scripts.
- 82. Build a Node.js and MongoDB web app in Azure 4/22/2017 • 17 min to read • Edit Online Before you begin Test local MongoDB database mongo Create local Node.js application This tutorial shows you how to create a Node.js web app in Azure and connect it to a MongoDB database. When you are done, you will have a MEAN application (MongoDB, Express, AngularJS, and Node.js) running on Azure App Service Web Apps. Before running this sample, install the following prerequisites locally: 1. Download and install git 2. Download and install Node.js and NPM 3. Download, install, and run MongoDB Community Edition. 4. Download and install the Azure CLI 2.0 If you don't have an Azure subscription, create a free account before you begin. In this step, you make sure that your local MongoDB database is running. Open the terminal window and CD to the bin directory of your MongoDB installation. Run mongo in the terminal to connect to your local MongoDB server. If your connection is successful, then your MongoDB database is already running. If not, make sure that your local MongoDB database is started by following the steps at Download, install, and run MongoDB Community Edition. When you are done testing your MongoDB database, type Ctrl + C in the terminal.
- 83. Clone the sample application Clone the sample application git clone https://github.com/Azure-Samples/meanjs.git Run the application Run the application cd meanjs npminstall npmstart -- MEAN.JS - Development Environment Environment: development Server: http://0.0.0.0:3000 Database: mongodb://localhost/mean-dev App version: 0.5.0 MEAN.JS version:0.5.0 -- In this step, you set up the local Node.js project. Open the terminal window and CD to a working directory. Run the following commands to clone the sample repository. This sample repository contains a MEAN.js application. Install the required packages and start the application. When the app is fully loaded, you should see something similar to the following message: Navigate to http://localhost:3000 in a browser. Click Sign Up in the top menu and try to create a dummy user. The MEAN.js sample application stores user data in the database. If you are successful and MEAN.js automatically signs into the created user, then your app is writing data to the local MongoDB database. Try clicking Admin > Manage Articles to add some articles. To stop Node.js at anytime, type Ctrl + C in the terminal.
- 84. Create a production MongoDB database Log in to Azure Log in to Azure azlogin Create a resource group Create a resource group azgroup create --name myResourceGroup --location "West Europe" Create a DocumentDB account Create a DocumentDB account azdocumentdb create --name <documentdb_name> --resource-group myResourceGroup --kind MongoDB In this step, you create a MongoDB database in Azure. When your app is deployed to Azure, it uses this database for its production workload. For MongoDB, this tutorial uses Azure DocumentDB, which can support MongoDB client connections. In other words, your Node.js application only knows that it's connecting to a MongoDB database. The fact that the connection is backed by a DocumentDB database is transparent to the application. You are now going to use the Azure CLI 2.0 in a terminal window to create the resources needed to host your Node.js application in Azure App Service. Log in to your Azure subscription with the az login command and follow the on-screen directions. Create a resource group with the az group create. An Azure resource group is a logical container into which Azure resources like web apps, databases, and storage accounts are deployed and managed. The following example creates a resource group in the West Europe region: To see what possible values you can use for --location , use the azappservice list-locations Azure CLI command. Create a DocumentDB account with the az documentdb create command. In the following command, substitute your own unique DocumentDB name where you see the <documentdb_name> placeholder. This unique name will be used as the part of your DocumentDB endpoint ( https://<documentdb_name>.documents.azure.com/ ), so the name needs to be unique across all DocumentDB accounts in Azure. The --kind MongoDB parameter enables MongoDB client connections. When the DocumentDB account is created, the Azure CLI shows information similar to the following example:
- 85. { "databaseAccountOfferType":"Standard", "documentEndpoint":"https://<documentdb_name>.documents.azure.com:443/", "id":"/subscriptions/00000000-0000-0000-0000-000000000000/resourceGroups/myResourceGroup/providers/Microsoft.Document DB/databaseAccounts/<documentdb_name>", "kind":"MongoDB", "location":"West Europe", "name":"<documentdb_name>", "readLocations":[ ... ], "resourceGroup":"myResourceGroup", "type":"Microsoft.DocumentDB/databaseAccounts", "writeLocations":[ ... ] } Connect your Node.js application to the database Retrieve the database key Retrieve the database key azdocumentdb list-keys --name <documentdb_name> --resource-group myResourceGroup { "primaryMasterKey":"RUayjYjixJDWG5xTqIiXjC...", "primaryReadonlyMasterKey":"...", "secondaryMasterKey":"...", "secondaryReadonlyMasterKey":"..." } Configure the connection string in your Node.js application Configure the connection string in your Node.js application db:{ uri:'mongodb://<documentdb_name>:<primary_maste_key>@<documentdb_name>.documents.azure.com:10250/mean? ssl=true&sslverifycertificate=false', ... }, In this step, you connect your MEAN.js sample application to the DocumentDB database you just created, using a MongoDB connection string. To connect to the DocumentDB database, you need the database key. Use the az documentdb list-keys command to retrieve the primary key. The Azure CLI outputs information similar to the following example: Copy the value of primaryMasterKey to a text editor. You need this information in the next step. In your MEAN.js repository, open config/env/production.js . In the db object, replace the value of uri as show in the following example. Be sure to also replace the two <documentdb_name> placeholders with your DocumentDB database name, and the <primary_maste_key> placeholder with the key you copied in the previous step.
- 86. NOTE NOTE Test the application in production mode Test the application in production mode gulp prod NODE_ENV=production node server.js -- MEAN.JS Environment: production Server: http://0.0.0.0:8443 Database: mongodb://<documentdb_name>:<primary_maste_key>@<documentdb_name>.documents.azure.com:10250/mean? ssl=true&sslverifycertificate=false App version: 0.5.0 MEAN.JS version:0.5.0 Deploy the Node.js application to Azure Create an App Service plan Create an App Service plan The ssl=true option is important because Azure DocumentDB requires SSL. Save your changes. Like some other Node.js applications, MEAN.js uses gulp prod to minify and bundle scripts for the production environment. This generates the files needed by the production environment. Run gulp prod now. Next, run the following command to use the connection string you configured in config/env/production.js . NODE_ENV=production sets the environment variable that tells Node.js to run in the production environment, and node server.js starts the Node.js server with server.js in your repository root. This is how your Node.js application is loaded in Azure. When the app is loaded, check to make sure that it's running in production: Navigate to http://localhost:8443 in a browser. Click Sign Up in the top menu and try to create a dummy user just like before. If you are successful, then your app is writing data to the DocumentDB database in Azure. In this step, you deploy your MongoDB-connected Node.js application to Azure App Service. Create an App Service plan with the az appservice plan create command.
- 87. NOTE NOTE azappservice plan create --name myAppServicePlan --resource-group myResourceGroup --sku FREE { "id":"/subscriptions/00000000-0000-0000-0000- 000000000000/resourceGroups/myResourceGroup/providers/Microsoft.Web/serverfarms/myAppServicePlan", "kind":"app", "location":"West Europe", "sku":{ "capacity":0, "family":"F", "name":"F1", "tier":"Free" }, "status":"Ready", "type":"Microsoft.Web/serverfarms" } Create a web app Create a web app azappservice web create --name <app_name> --resource-group myResourceGroup --plan myAppServicePlan An App Service plan represents the collection of physical resources used to host your apps. All applications assigned to an App Service plan share the resources defined by it allowing you to save cost when hosting multiple apps. App Service plans define: Region (North Europe, East US, Southeast Asia) Instance Size (Small, Medium, Large) Scale Count (one, two, or three instances, etc.) SKU (Free, Shared, Basic, Standard, Premium) The following example creates an App Service plan named myAppServicePlan using the FREE pricing tier: When the App Service plan is created, the Azure CLI shows information similar to the following example: Now that an App Service plan has been created, create a web app within the myAppServicePlan App Service plan. The web app gives you a hosting space to deploy your code and provides a URL for you to view the deployed application. Use the az appservice web create command to create the web app. In the following command, substitute <app_name> placeholder with your own unique app name. This unique name will be used as the part of the default domain name for the web app, so the name needs to be unique across all apps in Azure. You can later map any custom DNS entry to the web app before you expose it to your users. When the web app has been created, the Azure CLI shows information similar to the following example:
- 88. { "clientAffinityEnabled":true, "defaultHostName":"<app_name>.azurewebsites.net", "id":"/subscriptions/00000000-0000-0000-0000- 000000000000/resourceGroups/myResourceGroup/providers/Microsoft.Web/sites/<app_name>", "isDefaultContainer":null, "kind":"app", "location":"West Europe", "name":"<app_name>", "repositorySiteName":"<app_name>", "reserved":true, "resourceGroup":"myResourceGroup", "serverFarmId":"/subscriptions/00000000-0000-0000-0000- 000000000000/resourceGroups/myResourceGroup/providers/Microsoft.Web/serverfarms/myAppServicePlan", "state":"Running", "type":"Microsoft.Web/sites", } Configure an environment variable Configure an environment variable azappservice web config appsettings update --name <app_name> --resource-group myResourceGroup --settings MONGODB_URI="mongodb://<documentdb_name>:<primary_maste_key>@<documentdb_name>.documents.azure.com:10250/mean?ssl=true" git checkout -- . db:{ uri:... || process.env.MONGODB_URI || ..., ... }, Configure local git deployment Configure local git deployment Earlier in the tutorial, you hardcoded the database connection string in config/env/production.js . In keeping with security best practice, you want to keep this sensitive data out of your Git repository. For your app running in Azure, you will use an environment variable instead. In App Service, you set environment variables as app settings by using the az appservice web config appsettings update command. The following example lets you configure a MONGODB_URI app setting in your Azure web app. Be sure to replace the placeholders like before. In Node.js code, you access this app setting with process.env.MONGODB_URI , just like you would access any environment variable. Now, undo your changes to config/env/production.js with the following command: Open config/env/production.js again. Note that the default MEAN.js app is already configured to use the MONGODB_URI environment variable that you just created. You can deploy your application to Azure App Service in various ways including FTP, local Git, GitHub, Visual Studio Team Services, and BitBucket. For FTP and local Git, it is necessary to have a deployment user configured on the server to authenticate your deployment. Use the az appservice web deployment user set command to create your account-level credentials.
- 89. NOTE NOTE azappservice web deployment user set --user-name <specify-a-username> --password <mininum-8-char-captital-lowercase-number> azappservice web source-controlconfig-local-git --name <app_name> --resource-group myResourceGroup https://<username>@<app_name>.scm.azurewebsites.net:443/<app_name>.git Push to Azure from Git Push to Azure from Git git remote add azure <paste_copied_url_here> git push azure master Counting objects:5, done. Delta compression using up to 4threads. Compressing objects:100% (5/5), done. Writing objects:100% (5/5), 489bytes | 0bytes/s, done. Total5(delta 3), reused 0(delta 0) remote:Updating branch 'master'. remote:Updating submodules. remote:Preparing deployment for commit id '6c7c716eee'. remote:Running customdeployment command... remote:Running deployment command... remote:Handling node.js deployment. . . . remote:Deployment successful. To https://<app_name>.scm.azurewebsites.net/<app_name>.git * [newbranch] master -> master A deployment user is required for FTP and Local Git deployment to App Service. This deployment user is account-level. As such, it is different from your Azure subscription account. You only need to configure this deployment user once. Use the az appservice web source-control config-local-git command to configure local Git access to the Azure web app. When the deployment user is configured, the Azure CLI shows the deployment URL for your Azure web app in the following format: Copy the output from the terminal as it will be used in the next step. Add an Azure remote to your local Git repository. Push to the Azure remote to deploy your Node.js application. You will be prompted for the password you supplied earlier as part of the creation of the deployment user. During deployment, Azure App Service communicates its progress with Git.
- 90. NOTE NOTE Browse to the Azure web app Browse to the Azure web app http://<app_name>.azurewebsites.net Update data model and redeploy Update the data model Update the data model You may notice that the deployment process runs Gulp after npm install . App Service does not run Gulp or Grunt tasks during deployment, so this sample repository has two additional files in its root directory to enable it: .deployment - This file tells App Service to run bash deploy.sh as the custom deployment script. deploy.sh - The custom deployment script. If you review the file, you will see that it runs gulp prod after npm install and bower install . You can use this approach to add any step to your Git-based deployment. Note that if you restart your Azure web app at any point, App Service doesn't rerun these automation tasks. Browse to the deployed web app using your web browser. Click Sign Up in the top menu and try to create a dummy user. If you are successful and the app automatically signs into the created user, then your MEAN.js app in Azure has connectivity to the MongoDB (DocumentDB) database. Try clicking Admin > Manage Articles to add some articles. Congratulations! You're running a data-driven Node.js app in Azure App Service. In this step, you make some changes to the article data model and publish your changes to Azure. Open modules/articles/server/models/articles.server.controller.js . In ArticleSchema , add a String type called comment . When you're done, your schema code should look like this:
- 91. var ArticleSchema = newSchema({ ..., user:{ type:Schema.ObjectId, ref:'User' }, comment:{ type:String, default:'', trim:true } }); Update the articles code Update the articles code exports.update = function (req, res) { var article = req.article; article.title = req.body.title; article.content = req.body.content; article.comment = req.body.comment; ... }; <p class="lead" ng-bind="vm.article.comment"></p> <p class="list-group-item-text" ng-bind="article.comment"></p> <p class="list-group-item-text" data-ng-bind="article.comment"></p> You are done with the model changes. Next, update the rest of your articles code to use comment . In all, there are five (5) files you need to modify, the server controller and the four client views. First, open modules/articles/server/controllers/articles.server.controller.js . In the update function, add an assignment for article.comment . When you're done, your update function should look like this: Next, open modules/client/views/view-article.client.view.js . Just above the closing </section> tag, add the following line to display comment along with the rest of the article data: Next, open modules/client/views/list-articles.client.view.js . Just above the closing </a> tag, add the following line to display comment along with the rest of the article data: Next, open modules/client/views/admin/list-articles.client.view.js . Inside the <div class="list-group"> tag and just above the closing </a> tag, add the following line to display comment along with the rest of the article data: Finally, open modules/client/views/admin/list-articles.client.view.js .
- 92. <div class="form-group"> <button type="submit" class="btn btn-default">{{vm.article._id ? 'Update' :'Create'}}</button> </div> <div class="form-group"> <labelclass="control-label" for="comment">Comment</label> <textarea name="comment" data-ng-model="vm.article.comment" id="comment" class="form-control" cols="30" rows="10" placeholder="Comment"></textarea> </div> Test your changes locally Test your changes locally gulp prod NODE_ENV=production node server.js NOTE NOTE Find the <div class="form-group"> tag that contains the submit button, which looks like this: Just above this tag, add another <div class="form-group"> tag that lets people edit the comment field. Your new tag should look like this: Save all your changes. Test your changes in production mode again. Remember that your config/env/production.js has been reverted, and the MONGODB_URI environment variable is only set in your Azure web app and not on your local machine. If you take a look at the config file, you find that the production configuration defaults to use a local MongoDB database. This makes sure that you don't touch production data when you test your code changes locally. Navigate to http://localhost:8443 in a browser and make sure that you're signed in. Click Admin > Manage Articles, then add an article by clicking the + button. You should see the new Comment textbox now.
- 93. Publish changes to Azure Publish changes to Azure git commit -am"added article comment" git push azure master NOTE NOTE Stream diagnostic logs azappservice web log tail--name <app_name> --resource-group myResourceGroup Manage your Azure web app Commit your changes in git, then push the code changes to Azure. Once the git push is complete, navigate to your Azure web app and try out the new functionality again. If you added any articles earlier, you still can see them. Existing data in your DocumentDB is not lost. Also, your updates to the data schema and leaves your existing data intact. While your Node.js application runs in Azure App Service, you can get the console logs piped directly to your terminal. That way, you can get the same diagnostic messages to help you debug application errors. To start log streaming, use the az appservice web log tail command. Once log streaming has started, refresh your Azure web app in the browser to get some web traffic. You should now see console logs piped to your terminal. To stop log streaming at anytime, type Ctrl + C . Go to the Azure portal to see the web app you created.
- 94. More resources To do this, sign in to https://portal.azure.com. From the left menu, click App Service, then click the name of your Azure web app. You have landed in your web app's blade (a portal page that opens horizontally). By default, your web app's blade shows the Overview page. This page gives you a view of how your app is doing. Here, you can also perform basic management tasks like browse, stop, start, restart, and delete. The tabs on the left side of the blade show the different configuration pages you can open. These tabs in the blade show the many great features you can add to your web app. The following list gives you just a few of the possibilities: Map a custom DNS name Bind a custom SSL certificate Configure continuous deployment Scale up and out Add user authentication
- 95. Map an existing custom DNS name to Azure Web Apps 4/21/2017 • 8 min to read • Edit Online NOTE NOTE Before you begin NOTE NOTE Prepare your app This tutorial shows you how to map an existing custom DNS name to Azure Web Apps. This tutorial shows three common scenarios of mapping two DNS names to an app in App Service: www.contoso.com - a subdomain of contoso.com . You'll use a CNAME record to map it to the app. contoso.com - a root domain. You'll use an A record to map it to the app. *.contoso.com - a wildcard domain. You'll use a CNAME record to map it to the app. You can use either a CNAME record or an A record to map a custom DNS name to App Service. We recommend that you use a CNAME for all custom DNS names except a root domain (e.g contoso.com). To complete this tutorial, you need access to your DNS registry for your domain provider (such as GoDaddy), and the permissions to edit the configuration for your domain. For example, to add DNS entries for contoso.com and www.contoso.com , you must have access to configure the DNS settings for the contoso.com root domain. If you don't have an existing domain name, consider following the App Service domain tutorial to purchase a domain using the Azure portal. To map a custom DNS name, your App Service plan must be a paid tier (Shared, Basic, Standard, or Premium). In
- 96. Sign in to Azure Sign in to Azure Navigate to your app Navigate to your app Check the pricing tier Check the pricing tier this step, you make sure that your App Service app is in the supported pricing tier. Open the Azure portal. To do this, sign in to https://portal.azure.com with your Azure account. From the left menu, click App Services, then click the name of your app. You have landed in the management blade of your App Service app (blade: a portal page that opens horizontally). In the left-hand navigation of your app blade, scroll to the Settings section and select Scale up (App Service plan). Check to make sure that your app is not in the Free tier. Your app's current tier is highlighted by a dark blue box. Custom DNS is not supported in the Free tier. If you need to scale up, follow the next section. Otherwise, close the
- 97. Scale up your App Service plan Scale up your App Service plan Map a CNAME record Access DNS records with domain provider Access DNS records with domain provider Choose your pricing tier blade and skip to Map a CNAME record or Map an A record. Select any of the non-free tiers (Shared, Basic, Standard, or Premium). Click Select. When you see the notification below, the scale operation is complete. In the tutorial example, you want to add a CNAME record for the www subdomain ( www.contoso.com ). First, sign in to the website of your domain provider. Find the page for managing DNS records. Every domain provider has its own DNS records interface, so you should consult your provider's documentation. Look for links or areas of the site labeled Domain Name, DNS, or Name Server Management. Often, you can find the link by viewing your account information, and then looking for a link such as My domains. Then look for a link that lets you manage DNS records. This link might be named Zone file, DNS Records, or Advanced configuration. The following screenshot is an example of a DNS records page:
- 98. NOTE NOTE Create the CNAME record Create the CNAME record Enable the CNAME record mapping in your app Enable the CNAME record mapping in your app In the example screenshot, you click Add to create a record. Some providers have different links to add different record types. Again, consult your provider's documentation. For certain providers, such as GoDaddy, changes to DNS records don't become effective until you click a separate Save Changes link. Add a CNAME record to map a subdomain to your app's default hostname ( <app_name>.azurewebsites.net ). For the www.contoso.com domain example, your CNAME record should point the name www to <app_name>.azurewebsites.net . Your DNS records page show look like the following screenshot: You're now ready to add your configured DNS name to your app. In the left-hand navigation of your app blade, click Custom domains. In the Custom domains blade of your app, you need to add the fully-qualified custom DNS name ( www.contoso.com ) to the list. Click the + icon next to Add hostname.
- 99. Type the fully qualified domain name for which you configured the CNAME record earlier (e.g. www.contoso.com ), then click Validate. Otherwise, the Add hostname button is activated. Make sure that Hostname record type is set to CNAME record (example.com). Click Add hostname to add the DNS name to your app. It might take some time for the new hostname to be reflected in your app's Custom domains page. Try refreshing the browser to update the data. If you missed a step or made a typo somewhere earlier, you see a verification error at the bottom of the page.
- 100. Map an A record Copy your app's IP address Copy your app's IP address Access DNS records with domain provider Access DNS records with domain provider In the tutorial example, you want to add an A record for the root domain, contoso.com . To map an A record, you need your app's external IP address. You can find this IP address in the Custom domains blade. In the left-hand navigation of your app blade, click Custom domains. In the Custom domains page, copy the app's IP address. First, sign in to the website of your domain provider. Find the page for managing DNS records. Every domain provider has its own DNS records interface, so you should consult your provider's documentation. Look for links or areas of the site labeled Domain Name, DNS, or Name Server Management. Often, you can find the link by viewing your account information, and then looking for a link such as My domains. Then look for a link that lets you manage DNS records. This link might be named Zone file, DNS Records, or Advanced configuration.
- 101. NOTE NOTE Create the A record Create the A record RECORD TYPE HOST VALUE A @ IP address from Copy your app's IP address TXT @ <app_name>.azurewebsites.net Enable the A record mapping in your app Enable the A record mapping in your app The following screenshot is an example of a DNS records page: In the example screenshot, you click Add to create a record. Some providers have different links to add different record types. Again, consult your provider's documentation. For certain providers, such as GoDaddy, changes to DNS records don't become effective until you click a separate Save Changes link. To map an A record to your app, App Service actually requires two DNS records: An A record to map to your app's IP address. A TXT record to map to your app's default hostname <app_name>.azurewebsites.net . This record lets App Service verify that you own the custom domain you want to map. For the www.contoso.com domain example, create the A and TXT records according to the following table ( @ typically represents the root domain). Your DNS records page should look like the following screenshot: You are now ready to add your configured DNS name to your app.
- 102. Back in your app's Custom domains page in the Azure portal, you need to add the fully-qualified custom DNS name ( contoso.com ) to the list. Click the + icon next to Add hostname. Type the fully qualified domain name for which you configured the A record earlier (for example, contoso.com ), then click Validate. Otherwise, the Add hostname button is activated. Make sure that Hostname record type is set to A record (example.com). Click Add hostname to add the DNS name to your app. It might take some time for the new hostname to be reflected in your app's Custom domains page. Try refreshing the browser to update the data. If you missed a step or made a typo somewhere earlier, you see a verification error at the bottom of the page.
- 103. Map a wildcard domain Access DNS records with domain provider Access DNS records with domain provider NOTE NOTE Create the CNAME record Create the CNAME record You can also map a wildcard DNS (for example, *.contoso.com ) to your App Service app. The steps here show you how to map the wildcard domain *.contoso.com using a CNAME record. First, sign in to the website of your domain provider. Find the page for managing DNS records. Every domain provider has its own DNS records interface, so you should consult your provider's documentation. Look for links or areas of the site labeled Domain Name, DNS, or Name Server Management. Often, you can find the link by viewing your account information, and then looking for a link such as My domains. Then look for a link that lets you manage DNS records. This link might be named Zone file, DNS Records, or Advanced configuration. The following screenshot is an example of a DNS records page: In the example screenshot, you click Add to create a record. Some providers have different links to add different record types. Again, consult your provider's documentation. For certain providers, such as GoDaddy, changes to DNS records don't become effective until you click a separate Save Changes link. Add a CNAME record to map a wildcard name to your app's default hostname ( <app_name>.azurewebsites.net ). For the *.contoso.com domain example, your CNAME record should point the name * to <app_name>.azurewebsites.net . Your DNS records page show look like the following screenshot:
- 104. Enable the CNAME record mapping in your app Enable the CNAME record mapping in your app You can now add any subdomain that matches your wildcard name. For the *.contoso.com wildcard example, you can now add sub1.contoso.com and sub2.contoso.com . In the left-hand navigation of your app blade, click Custom domains. Click the + icon next to Add hostname. Type the fully qualified domain name for a subdomain that matches your wildcard domain (for example, sub1.contoso.com ), then click Validate. Otherwise, the Add hostname button is activated. Make sure that Hostname record type is set to CNAME record (example.com). Click Add hostname to add the DNS name to your app.
- 105. Test in browser Automate with scripts Azure CLI Azure CLI It might take some time for the new hostname to be reflected in your app's Custom domains page. Try refreshing the browser to update the data. You can click the + icon again to add another hostname that matches your wildcard domain. For example, add sub2.contoso.com using the same steps above. In your browser, browse to the DNS name(s) that you configured earlier ( contoso.com and www.contoso.com ). You can automate management of custom domains with scripts, using the Azure CLI or Azure PowerShell. The following command adds a configured custom DNS name to an App Service app.
- 106. azappservice web config hostname add --webapp <app_name> --resource-group <resourece_group_name> --name <fully_qualified_domain_name> Azure PowerShell Azure PowerShell Set-AzureRmWebApp -Name <app_name> -ResourceGroupName <resourece_group_name> ` -HostNames @(<fully_qualified_domain_name>,"<app_name>.azurewebsites.net") More resources For more information, see Map a custom domain to a web app The following command adds a configured custom DNS name to an App Service app. For more information, see Assign a custom domain to a web app. Configure an App Service domain in Azure App Service
- 107. Bind an existing custom SSL certificate to Azure Web Apps 4/22/2017 • 6 min to read • Edit Online TIP TIP Before you begin Requirements for your SSL certificate Requirements for your SSL certificate NOTE NOTE This tutorial shows you how to bind a custom SSL certificate that you purchased from a trusted certificate authority to Azure Web Apps. When you're finished, you'll be able to access your web app at the HTTPS endpoint of your custom DNS domain. If you need to get a custom SSL certificate, you can get one in the Azure portal directly and bind it to your web app. Follow the App Service Certificates tutorial. Before following this tutorial, make sure that you have done the following: Create an App Service app Map a custom DNS name to your web app Acquire an SSL certificate from a trusted certificate authority To use your certificate in App Service, your certificate must meet all the following requirements: Signed by a trusted certificate authority Exported as a password-protected PFX file Contains private key at least 2048 bits long Contains all intermediate certificates in the certificate chain Elliptic Curve Cryptography (ECC) certificates can work with App Service, but outside the scope of this article. Work with your certificate authority on the exact steps to create ECC certificates.
- 108. Prepare your web app Log in to Azure Log in to Azure Navigate to your web app Navigate to your web app Check the pricing tier Check the pricing tier To bind a custom SSL certificate to your web app, your App Service plan must be in the Basic, Standard, or Premium tier. In this step, you make sure that your web app is in the supported pricing tier. Open the Azure portal. To do this, sign in to https://portal.azure.com with your Azure account. From the left menu, click App Services, then click the name of your web app. You have landed in the management blade of your web app (blade: a portal page that opens horizontally). In the left-hand navigation of your web app blade, scroll to the Settings section and select Scale up (App Service plan). Check to make sure that your web app is not in the Free or Shared tier. Your web app's current tier is highlighted by a dark blue box.
- 109. Scale up your App Service plan Scale up your App Service plan Bind your SSL certificate Export certificate to PFX Export certificate to PFX Custom SSL is not supported in the Free and Shared tier. If you need to scale up, follow the next section. Otherwise, close the Choose your pricing tier blade and skip to Upload and bind your SSL certificate. Select one of the Basic, Standard, or Premium tiers. Click Select. When you see the notification below, the scale operation is complete. You are ready to upload your SSL certificate to your web app. You must export your custom SSL certificate with the private key that your certificate request was generated with. If you generated your certificate request using OpenSSL, then you have created a private key. To export your certificate to PFX, run the following command:
- 110. opensslpkcs12-export -out myserver.pfx-inkey myserver.key -in myserver.crt Upload your SSL certificate Upload your SSL certificate Bind your SSL certificate Bind your SSL certificate If you used IIS or Certreq.exe to generate your certificate request, then first install your certificate to your local machine, then export it to PFX by following the steps at Export a Certificate with the Private Key. To upload your SSL certificate, click SSL certificates in the left-hand navigation of your web app. Click Upload Certificate. In PFX Certificate File, select your PFX file that. In Certificate password, type the password that you created when exporting the PFX file. Click Upload. When App Service finishes uploading your certificate, it appears in the SSL certificates page. You should now see your uploaded certificate back in the SSL certificate page. In the SSL bindings section, click Add binding. In the Add SSL Binding blade, use the dropdowns to select the domain name to secure, and the certificate to use. In SSL Type, select whether to use Server Name Indication (SNI) or IP-based SSL. SNI based SSL - Multiple SNI-based SSL bindings may be added. This option allows multiple SSL certificates to
- 111. Remap A record for IP SSL secure multiple domains on the same IP address. Most modern browsers (including Internet Explorer, Chrome, Firefox, and Opera) support SNI (find more comprehensive browser support information at Server Name Indication). IP based SSL - Only one IP-based SSL binding may be added. This option allows only one SSL certificate to secure a dedicated public IP address. To secure multiple domains, you must secure them all using the same SSL certificate. This is the traditional option for SSL binding. Click Add Binding. When App Service finishes uploading your certificate, it appears in the SSL bindings sections. If you don't use IP-based SSL in your web app, skip to Test HTTPS for your custom domain. By default, your web app uses a shared public IP address. As soon as you bind a certificate with IP-based SSL, App Service creates a new, dedicated IP address for your web app. If you have mapped an A record to your web app, update your domain registry with this new, dedicated IP address.
- 112. Test HTTPS NOTE NOTE Enforce HTTPS NOTE NOTE Your web app's Custom domain page is updated with the new, dedicated IP address. Copy this IP address, then remap the A record to this new IP address. All that's left to do now is to make sure that HTTPS works for your custom domain. In various browsers, browse to https://<your.custom.domain> to see that it serves up your web app. If your web app gives you certificate validation errors, you're probably using a self-signed certificate. If that's not the case, you may have left out intermediate certificates when you export your certificate to the PFX file. If you still want to allow HTTP access to your web app, skip this step. App Service does not enforce HTTPS, so anyone can still access your web app using HTTP. To enforce HTTPS for your web app, you can define a rewrite rule in the web.config file for your web app. App Service uses this file, regardless of the language framework of your web app. There is language-specific redirection of requests. ASP.NET MVC can use the RequireHttps filter instead of the rewrite rule in web.config (see Deploy a secure ASP.NET MVC 5 app to a web app). If you're a .NET developer, you should be relatively familiar with this file. It is in the root of your solution. Alternatively, if you develop with PHP, Node.js, Python, or Java, there is a chance we generated this file on your behalf in App Service. Connect to your web app's FTP endpoint by following the instructions at Deploy your app to Azure App Service using FTP/S. This file should be located in /home/site/wwwroot . If not, create a web.config in this folder with the following XML:
- 113. <?xmlversion="1.0" encoding="UTF-8"?> <configuration> <system.webServer> <rewrite> <rules> <!-- BEGINrule TAGFORHTTPS REDIRECT --> <rule name="Force HTTPS" enabled="true"> <match url="(.*)" ignoreCase="false" /> <conditions> <add input="{HTTPS}" pattern="off" /> </conditions> <action type="Redirect" url="https://{HTTP_HOST}/{R:1}" appendQueryString="true" redirectType="Permanent" /> </rule> <!-- ENDrule TAGFORHTTPS REDIRECT --> </rules> </rewrite> </system.webServer> </configuration> Automate with scripts Azure CLI Azure CLI thumprint=$(azappservice web config sslupload --certificate-file <path_to_PFX_file> --certificate-password <PFX_password> --name <app_name> --resource-group <resource_group_name> --query thumbprint --output tsv) azappservice web config sslbind --certificate-thumbprint $thumbprint --ssl-type SNI --name <app_name> --resource-group <resource_group_name> Azure PowerShell Azure PowerShell New-AzureRmWebAppSSLBinding -WebAppName <app_name> -ResourceGroupName <resource_group_name> -Name <dns_name> ` -CertificateFilePath <path_to_PFX_file> -CertificatePassword <PFX_password> -SslState SniEnabled More Resources For an existing web.config , you just need to copy the entire <rule> tag into your web.config 's configuration/system.webServer/rewrite/rules element. If there are other <rule> tags in your web.config , then place the copied <rule> tag before the other <rule> tags. This rule returns an HTTP 301 (permanent redirect) to the HTTPS protocol whenever the user makes an HTTP request to your web app. For example, it redirects from http://contoso.com to https://contoso.com . For more information on the IIS URL Rewrite module, see the URL Rewrite documentation. You can automate SSL bindings for your web app with scripts, using the Azure CLI or Azure PowerShell. The following command uploads an exported PFX file and gets the thumbprint. The following command adds an SNI based SSL binding, using the thumbprint from the previous command. The following command uploads an exported PFX file and adds an SNI based SSL binding. Microsoft Azure Trust Center Configuration options unlocked in Azure Web Sites Enable diagnostic logging
- 114. Configure web apps in Azure App Service
- 115. Azure CLI Samples 3/30/2017 • 1 min to read • Edit Online Create app Create a web app and deploy code from GitHub Creates an Azure web app and deploys code from a public GitHub repository. Create a web app with continuous deployment from GitHub Creates an Azure web app with continuous publishing from a GitHub repository you own. Create a web app and deploy code from a local Git repository Creates an Azure web app and configures code push from a local Git repository. Create a web app and deploy code to a staging environment Creates an Azure web app with a deployment slot for staging code changes. Create an ASP.NET Core web app in a Docker container Creates an Azure web app on Linux and loads a Docker image from Docker Hub. Configure app Map a custom domain to a web app Creates an Azure web app and maps a custom domain name to it. Bind a custom SSL certificate to a web app Creates an Azure web app and binds the SSL certificate of a custom domain name to it. Scale app Scale a web app manually Creates an Azure web app and scales it across 2 instances. Scale a web app worldwide with a high-availability architecture Creates two Azure web apps in two different geographical regions and makes them available through a single endpoint using Azure Traffic Manager. Connect app to resources Connect a web app to a SQL Database Creates an Azure web app and a SQL database, then adds the database connection string to the app settings. Connect a web app to a storage account Creates an Azure web app and a storage account, then adds the storage connection string to the app settings. Connect a web app to a redis cache Creates an Azure web app and a redis cache, then adds the redis connection details to the app settings.) The following table includes links to bash scripts built using the Azure CLI.
- 116. Connect a web app to a documentdb Creates an Azure web app and a documentdb, then adds the documentdb connection details to the app settings. Monitor app Monitor a web app with web server logs Creates an Azure web app, enables logging for it, and downloads the logs to your local machine.
- 117. Azure PowerShell Samples 4/5/2017 • 1 min to read • Edit Online Create app Create a web app with deployment from GitHub Creates an Azure web app which pulls code from GitHub. Create a web app with continuous deployment from GitHub Creates an Azure web app which continuously deploys code from GitHub. Create a web app and deploy code with FTP Creates an Azure web app and upload files from a local directory using FTP. Create a web app and deploy code from a local Git repository Creates an Azure web app and configures code push from a local Git repository. Create a web app and deploy code to a staging environment Creates an Azure web app with a deployment slot for staging code changes. Configure app Map a custom domain to a web app Creates an Azure web app and maps a custom domain name to it. Bind a custom SSL certificate to a web app Creates an Azure web app and binds the SSL certificate of a custom domain name to it. Scale app Scale a web app manually Creates an Azure web app and scales it across 2 instances. Scale a web app worldwide with a high-availability architecture Creates two Azure web apps in two different geographical regions and makes them available through a single endpoint using Azure Traffic Manager. Connect app to resources Connect a web app to a SQL Database Creates an Azure web app and a SQL database, then adds the database connection string to the app settings. Connect a web app to a storage account Creates an Azure web app and a storage account, then adds the storage connection string to the app settings. Monitor app Monitor a web app with web server logs Creates an Azure web app, enables logging for it, and downloads the logs to your local machine. The following table includes links to bash scripts built using the Azure PowerShell.
- 119. How App Service works 2/24/2017 • 2 min to read • Edit Online NOTE NOTE Videos Next steps Azure App Service is a cloud service that's designed to solve the practical problems that engineers face today. App Service focuses on providing superior developer productivity without compromising on the need to deliver applications at cloud scale. App Service also provides the features and frameworks that are necessary for creating enterprise line-of-business applications. App Service lets you develop apps in most popular development languages, including Java, PHP, Node.js, Python, and the Microsoft .NET languages. With App Service, you can: Build highly scalable web apps. Quickly build Mobile Apps back ends with a set of easy-to-use mobile capabilities such as data back ends, user authentication, and push notifications. Implement, deploy, and publish APIs with API Apps. Tie business applications together into workflows and transform data with Logic Apps. You can now try Azure App Service on Linux. For more information, see getting started guide. All app types rely on the scalable and flexible Web Apps platform, which enables developers to have an optimized full lifecycle experience from app design to app maintenance. The lifecycle capabilities enable the following: Quick app creation. Start from scratch or pick an operational support system (OSS) package from the Azure Marketplace. Continuous deployment. Automatically deploy new code from popular source control solutions such as TFS, GitHub, and Bitbucket, and sync content from online storage services such as OneDrive and Dropbox. Test in production. Smoothly create pre-production environments and manage the amount of traffic that's going to them. Debug in the cloud when needed, and roll back when issues are found. Running asynchronous tasks and batch jobs. Run code in a background process or activate your code based on events (such as messages landing in an Azure Storage queue) and scheduled times (CRON). Scaling the app. Use one of many options to automatically scale your service horizontally and vertically based on traffic and resource utilization. Configure private environments that are dedicated to your apps. Maintaining the app. Use many of the debugging and diagnostics features to stay ahead of problems and to efficiently resolve them either in real time (with features such as auto-healing and live debugging) or after the fact by analyzing logs and memory dumps. As a whole, App Service capabilities enable developers to focus on their code and quickly reach a stable and highly scalable production state. With the API Apps and Logic Apps features, developers can build real-world enterprise applications that bridge barriers between business solutions and on-premises to cloud integration. Azure App Service Architecture Learn more about App Service in one of the following topics:
- 120. What is Azure App Service? Azure App Service Architecture (presentation) Azure App Service, Cloud Services, and Virtual Machines comparison Understanding App Service Plans Introduction to App Service Environment Azure App Service Development Stacks Support Web App Mobile App API App Exercise: Create an App Service Environment
- 121. Azure App Service plans in-depth overview 4/18/2017 • 6 min to read • Edit Online IMPORTANT IMPORTANT Apps and App Service plans App Service plans represent the collection of physical resources used to host your apps. App Service plans define: Region (West US, East US, etc.) Scale count (one, two, three instances, etc.) Instance size (Small, Medium, Large) SKU (Free, Shared, Basic, Standard, Premium) Web Apps, Mobile Apps, API Apps, Function Apps (or Functions), in Azure App Service all run in an App Service plan. Apps in the same subscription, region, and resource group can share an App Service plan. All applications assigned to an App Service plan share the resources defined by it. This sharing saves money when hosting multiple apps in a single App Service plan. Your App Service plan can scale from Free and Shared SKUs to Basic, Standard, and Premium SKUs giving you access to more resources and features along the way. If your App Service plan is set to Basic SKU or higher, then you can control the size and scale count of the VMs. For example, if your plan is configured to use two "small" instances in the standard service tier, all apps that are associated with that plan run on both instances. Apps also have access to the standard service tier features. Plan instances on which apps are running are fully managed and highly available. The SKU and Scale of the App Service plan determines the cost and not the number of apps hosted in it. This article explores the key characteristics, such as tier and scale, of an App Service plan and how they come into play while managing your apps. An app in App Service can be associated with only one App Service plan at any given time. Both apps and plans are contained in a resource group. A resource group serves as the lifecycle boundary for every resource that's within it. You can use resource groups to manage all the pieces of an application together. Because a single resource group can have multiple App Service plans, you can allocate different apps to different physical resources. For example, you can separate resources among dev, test, and production environments. Having separate environments for production and dev/test lets you isolate resources. In this way, load testing against a new version of your apps does not compete for the same resources as your production apps, which are serving real customers. When you have multiple plans in a single resource group, you can also define an application that spans geographical regions. For example, a highly available app running in two regions includes at least two plans, one for each region, and
- 122. Create an App Service plan or use existing one Create an App Service plan TIP TIP one app associated with each plan. In such a situation, all the copies of the app are then contained in a single resource group. Having a resource group with multiple plans and multiple apps makes it easy to manage, control, and view the health of the application. When you create an app, you should consider creating a resource group. On the other hand, if this app is a component for a larger application, create it within the resource group that's allocated for that larger application. Whether the app is an altogether new application or part of a larger one, you can choose to use an existing plan to host it or create a new one. This decision is more a question of capacity and expected load. We recommend isolating your app into a new App Service plan when: App is resource-intensive. App has different scaling factors from the other apps hosted in an existing plan. App needs resource in a different geographical region. This way you can allocate a new set of resources for your app and gain greater control of your apps. If you have an App Service Environment, you can review the documentation specific to App Service Environments here: Create an App Service plan in an App Service Environment You can create an empty App Service plan from the App Service plan browse experience or as part of app creation. In the Azure portal, click New > Web + mobile, and then select Web App or other App Service app kind. You can then select or create the App Service plan for the new app.
- 123. Move an app to a different App Service plan IMPORTANT IMPORTANT To create an App Service plan, click [+] Create New, type the App Service plan name, and then select an appropriate Location. Click Pricing tier, and then select an appropriate pricing tier for the service. Select View all to view more pricing options, such as Free and Shared. After you have selected the pricing tier, click the Select button. You can move an app to a different App Service plan in the Azure portal. You can move apps between plans as long as the plans are in the same resource group and geographical region. To move an app to another plan: Navigate to the app that you want to move. In the Menu, look for the App Service Plan section. Select Change App Service plan to start the process. Change App Service plan opens the App Service plan selector. At this point, you can pick an existing plan to move this app into. Only valid plans (in the same resource group and geographical location) are shown.
- 124. Clone an app to a different App Service plan IMPORTANT IMPORTANT Scale an App Service plan Each plan has its own pricing tier. For example, moving a site from a Free tier to a Standard tier, enables all apps assigned to it to use the features and resources of the Standard tier. If you want to move the app to a different region, one alternative is app cloning. Cloning makes a copy of your app in a new or existing App Service plan in any region. You can find Clone App in the Development Tools section of the menu. Cloning has some limitations that you can read about at Azure App Service App cloning using Azure portal. There are three ways to scale a plan: Change the plan’s pricing tier. A plan in the Basic tier can be converted to Standard, and all apps assigned to it to use the features of the Standard tier. Change the plan’s instance size. As an example, a plan in the Basic tier that uses small instances can be changed to use large instances. All apps that are associated with that plan now can use the additional memory and CPU resources that the larger instance size offers. Change the plan’s instance count. For example, a Standard plan that's scaled out to three instances can be scaled to 10 instances. A Premium plan can be scaled out to 20 instances (subject to availability). All apps that are associated with that plan now can use the additional memory and CPU resources that the larger instance count offers. You can change the pricing tier and instance size by clicking the Scale Up item under settings for either the app or the App Service plan. Changes apply to the App Service plan and affect all apps that it hosts.
- 125. App Service plan cleanup IMPORTANT IMPORTANT Summary What's changed App Service plans that have no apps associated to them still incur charges since they continue to reserve the compute capacity. To avoid unexpected charges, when the last app hosted in an App Service plan is deleted, the resulting empty App Service plan is also deleted. App Service plans represent a set of features and capacity that you can share across your apps. App Service plans give you the flexibility to allocate specific apps to a set of resources and further optimize your Azure resource utilization. This way, if you want to save money on your testing environment, you can share a plan across multiple apps. You can also maximize throughput for your production environment by scaling it across multiple regions and plans. For a guide to the change from Websites to App Service, see: Azure App Service and Its Impact on Existing Azure Services
- 126. Introduction to App Service Environment 2/28/2017 • 4 min to read • Edit Online Overview NOTE NOTE Dedicated Compute Resources An App Service Environment is a Premium service plan option of Azure App Service that provides a fully isolated and dedicated environment for securely running Azure App Service apps at high scale, including Web Apps, Mobile Apps, and API Apps. App Service Environments are ideal for application workloads requiring: Very high scale Isolation and secure network access Customers can create multiple App Service Environments within a single Azure region, as well as across multiple Azure regions. This makes App Service Environments ideal for horizontally scaling state-less application tiers in support of high RPS workloads. App Service Environments are isolated to running only a single customer's applications, and are always deployed into a virtual network. Customers have fine-grained control over both inbound and outbound application network traffic, and applications can establish high-speed secure connections over virtual networks to on-premises corporate resources. All articles and How-To's about App Service Environments are available in the README for Application Service Environments. For an overview of how App Service Environments enable high scale and secure network access, see the AzureCon Deep Dive on App Service Environments! For a deep-dive on horizontally scaling using multiple App Service Environments see the article on how to setup a geo-distributed app footprint. To see how the security architecture shown in the AzureCon Deep Dive was configured, see the article on implementing a layered security architecture with App Service Environments. Apps running on App Service Environments can have their access gated by upstream devices such as web application firewalls (WAF). The article on configuring a WAF for App Service Environments covers this scenario. Although this article refers to web apps, it also applies to API apps and mobile apps. All of the compute resources in an App Service Environment are dedicated exclusively to a single subscription, and an App Service Environment can be configured with up to fifty (50) compute resources for exclusive use by a single application. An App Service Environment is composed of a front-end compute resource pool, as well as one to three worker compute resource pools. The front-end pool contains compute resources responsible for SSL termination as well automatic load balancing of app requests within an App Service Environment.
- 127. Virtual Network Support Getting started What's changed Each worker pool contains compute resources allocated to App Service Plans, which in turn contain one or more Azure App Service apps. Since there can be up to three different worker pools in an App Service Environment, you have the flexibility to choose different compute resources for each worker pool. For example, this allows you to create one worker pool with less powerful compute resources for App Service Plans intended for development or test apps. A second (or even third) worker pool could use more powerful compute resources intended for App Service Plans running production apps. For more details on the quantity of compute resources available to the front-end and worker pools, see How To Configure an App Service Environment. For details on the available compute resource sizes supported in an App Service Environment, consult the App Service Pricing page and review the available options for App Service Environments in the Premium pricing tier. An App Service Environment can be created in either an Azure Resource Manager virtual network, or a classic deployment model virtual network (more info on virtual networks). Since an App Service Environment always exists in a virtual network, and more precisely within a subnet of a virtual network, you can leverage the security features of virtual networks to control both inbound and outbound network communications. An App Service Environment can be either Internet facing with a public IP address, or internal facing with only an Azure Internal Load Balancer (ILB) address. You can use network security groups to restrict inbound network communications to the subnet where an App Service Environment resides. This allows you to run apps behind upstream devices and services such as web application firewalls, and network SaaS providers. Apps also frequently need to access corporate resources such as internal databases and web services. A common approach is to make these endpoints available only to internal network traffic flowing within an Azure virtual network. Once an App Service Environment is joined to the same virtual network as the internal services, apps running in the environment can access them, including endpoints reachable via Site-to-Site and Azure ExpressRoute connections. For more details on how App Service Environments work with virtual networks and on-premises networks consult the following articles on Network Architecture, Controlling Inbound Traffic, and Securely Connecting to Backends. To get started with App Service Environments, see How To Create An App Service Environment All articles and How-To's for App Service Environments are available in the README for Application Service Environments. For more information about the Azure App Service platform, see Azure App Service. For an overview of the App Service Environment network architecture, see the Network Architecture Overview article. For details on using an App Service Environment with ExpressRoute, see the following article on Express Route and App Service Environments. For a guide to the change from Websites to App Service see: Azure App Service and Its Impact on Existing Azure Services
- 128. NOTE NOTE If you want to get started with Azure App Service before signing up for an Azure account, go to Try App Service, where you can immediately create a short-lived starter web app in App Service. No credit cards required; no commitments.
- 129. Authentication and authorization in Azure App Service 1/20/2017 • 9 min to read • Edit Online What is App Service Authentication / Authorization? How authentication works in App Service Mobile authentication with a provider SDK Mobile authentication with a provider SDK App Service Authentication / Authorization is a feature that provides a way for your application to sign in users so that you don't have to change code on the app backend. It provides an easy way to protect your application and work with per-user data. App Service uses federated identity, in which a third-party identity provider stores accounts and authenticates users. The application relies on the provider's identity information so that the app doesn't have to store that information itself. App Service supports five identity providers out of the box: Azure Active Directory, Facebook, Google, Microsoft Account, and Twitter. Your app can use any number of these identity providers to provide your users with options for how they sign in. To expand the built-in support, you can integrate another identity provider or your own custom identity solution. If you want to get started right away, see one of the following tutorials: Add authentication to your iOS app (or Android, Windows, Xamarin.iOS, Xamarin.Android, Xamarin.Forms, or Cordova) User authentication for API Apps in Azure App Service Get started with Azure App Service - Part 2 In order to authenticate by using one of the identity providers, you first need to configure the identity provider to know about your application. The identity provider will then provide IDs and secrets that you provide to App Service. This completes the trust relationship so that App Service can validate user assertions, such as authentication tokens, from the identity provider. To sign in a user by using one of these providers, the user must be redirected to an endpoint that signs in users for that provider. If customers are using a web browser, you can have App Service automatically direct all unauthenticated users to the endpoint that signs in users. Otherwise, you will need to direct your customers to {your App Service base URL}/.auth/login/<provider> , where <provider> is one of the following values: aad, facebook, google, microsoft, or twitter. Mobile and API scenarios are explained in sections later in this article. Users who interact with your application through a web browser will have a cookie set so that they can remain authenticated as they browse your application. For other client types, such as mobile, a JSON web token (JWT), which should be presented in the X-ZUMO-AUTH header, will be issued to the client. The Mobile Apps client SDKs will handle this for you. Alternatively, an Azure Active Directory identity token or access token may be directly included in the Authorization header as a bearer token. App Service will validate any cookie or token that your application issues to authenticate users. To restrict who can access your application, see the Authorization section later in this article. After everything is configured on the backend, you can modify mobile clients to sign in with App Service. There are two approaches here: Use an SDK that a given identity provider publishes to establish identity and then gain access to App Service.
- 130. TIP TIP Mobile authentication without a provider SDK Mobile authentication without a provider SDK Service-to-service authentication Service-to-service authentication IMPORTANT IMPORTANT How authorization works in App Service Use a single line of code so that the Mobile Apps client SDK can sign in users. Most applications should use a provider SDK to get a more consistent experience when users sign in, to use refresh support, and to get other benefits that the provider specifies. When you use a provider SDK, users can sign in to an experience that integrates more tightly with the operating system that the app is running on. This also gives you a provider token and some user information on the client, which makes it much easier to consume graph APIs and customize the user experience. Occasionally on blogs and forums, you will see this referred to as the "client flow" or "client-directed flow" because code on the client signs in users, and the client code has access to a provider token. After a provider token is obtained, it needs to be sent to App Service for validation. After App Service validates the token, App Service creates a new App Service token that is returned to the client. The Mobile Apps client SDK has helper methods to manage this exchange and automatically attach the token to all requests to the application backend. Developers can also keep a reference to the provider token if they so choose. If you do not want to set up a provider SDK, you can allow the Mobile Apps feature of Azure App Service to sign in for you. The Mobile Apps client SDK will open a web view to the provider of your choosing and sign in the user. Occasionally on blogs and forums, you will see this referred to as the "server flow" or "server-directed flow" because the server manages the process that signs in users, and the client SDK never receives the provider token. Code to start this flow is included in the authentication tutorial for each platform. At the end of the flow, the client SDK has an App Service token, and the token is automatically attached to all requests to the application backend. Although you can give users access to your application, you can also trust another application to call your own API. For example, you could have one web app call an API in another web app. In this scenario, you use credentials for a service account instead of user credentials to get a token. A service account is also known as a service principal in Azure Active Directory parlance, and authentication that uses such an account is also known as a service-to-service scenario. Because mobile apps run on customer devices, mobile applications do not count as trusted applications and should not use a service principal flow. Instead, they should use a user flow that was detailed earlier. For service-to-service scenarios, App Service can protect your application by using Azure Active Directory. The calling application just needs to provide an Azure Active Directory service principal authorization token that is obtained by providing the client ID and client secret from Azure Active Directory. An example of this scenario that uses ASP.NET API apps is explained by the tutorial, Service principal authentication for API Apps. If you want to use App Service authentication to handle a service-to-service scenario, you can use client certificates or basic authentication. For information about client certificates in Azure, see How To Configure TLS Mutual Authentication for Web Apps. For information about basic authentication in ASP.NET, see Authentication Filters in ASP.NET Web API 2. Service account authentication from an App Service logic app to an API app is a special case that is detailed in Using your custom API hosted on App Service with Logic apps.
- 131. Working with user identities in your application Documentation and additional resources Identity providers Identity providers You have full control over the requests that can access your application. App Service Authentication / Authorization can be configured with any of the following behaviors: Allow only authenticated requests to reach your application. If a browser receives an anonymous request, App Service will redirect to a page for the identity provider that you choose so that users can sign in. If the request comes from a mobile device, the returned response is an HTTP 401 Unauthorized response. With this option, you don't need to write any authentication code at all in your app. If you need finer authorization, information about the user is available to your code. Allow all requests to reach your application, but validate authenticated requests, and pass along authentication information in the HTTP headers. This option defers authorization decisions to your application code. It provides more flexibility in handling anonymous requests, but you have to write code. Allow all requests to reach your application, and take no action on authentication information in the requests. In this case, the Authentication / Authorization feature is off. The tasks of authentication and authorization are entirely up to your application code. The previous behaviors are controlled by the Action to take when request is not authenticated option in the Azure portal. If you choose Log in with provider name **, all requests have to be authenticated. **Allow request (no action) defers the authorization decision to your code, but it still provides authentication information. If you want to have your code handle everything, you can disable the Authentication / Authorization feature. App Service passes some user information to your application by using special headers. External requests prohibit these headers and will only be present if set by App Service Authentication / Authorization. Some example headers include: X-MS-CLIENT-PRINCIPAL-NAME X-MS-CLIENT-PRINCIPAL-ID X-MS-TOKEN-FACEBOOK-ACCESS-TOKEN X-MS-TOKEN-FACEBOOK-EXPIRES-ON Code that is written in any language or framework can get the information that it needs from these headers. For ASP.NET 4.6 apps, the ClaimsPrincipal is automatically set with the appropriate values. Your application can also obtain additional user details through an HTTP GET on the /.auth/me endpoint of your application. A valid token that's included with the request will return a JSON payload with details about the provider that's being used, the underlying provider token, and some other user information. The Mobile Apps server SDKs provide helper methods to work with this data. For more information, see How to use the Azure Mobile Apps Node.js SDK, and Work with the .NET backend server SDK for Azure Mobile Apps. The following tutorials show how to configure App Service to use different authentication providers: How to configure your app to use Azure Active Directory login How to configure your app to use Facebook login
- 132. Web applications Web applications Mobile applications Mobile applications API applications API applications How to configure your app to use Google login How to configure your app to use Microsoft Account login How to configure your app to use Twitter login If you want to use an identity system other than the ones provided here, you can also use the preview custom authentication support in the Mobile Apps .NET server SDK, which can be used in web apps, mobile apps, or API apps. The following tutorials show how to add authentication to a web application: Get started with Azure App Service - Part 2 The following tutorials show how to add authentication to your mobile clients by using the server-directed flow: Add authentication to your iOS app Add Authentication to your Android app Add Authentication to your Windows app Add authentication to your Xamarin.iOS app Add authentication to your Xamarin.Android app Add authentication to your Xamarin.Forms app Add Authentication to your Cordova app Use the following resources if you want to use the client-directed flow for Azure Active Directory: Use the Active Directory Authentication Library for iOS Use the Active Directory Authentication Library for Android Use the Active Directory Authentication Library for Windows and Xamarin Use the following resources if you want to use the client-directed flow for Facebook: Use the Facebook SDK for iOS Use the following resources if you want to use the client-directed flow for Twitter: Use Twitter Fabric for iOS Use the following resources if you want to use the client-directed flow for Google: Use the Google Sign-In SDK for iOS The following tutorials show how to protect your API apps: User authentication for API Apps in Azure App Service Service principal authentication for API Apps in Azure App Service
- 133. Authenticate with on-premises Active Directory in your Azure app 2/28/2017 • 1 min to read • Edit Online Authenticate through Azure Active Directory Authenticate through an on-premises STS This article shows you how to authenticate with on-premises Active Directory (AD) in Azure App Service. An Azure app is hosted in the cloud, but there are ways to authenticate on-premises AD users securely. An Azure Active Directory tenant can be directory-synced with an on-premises AD. This approach enables AD users to access your App from the internet and authenticate using their on-premises credentials. Furthermore, Azure App Service provides a turn-key solution for this method. With a few clicks of a button, you can enable authentication with a directory-synced tenant for your Azure app. This approach has the following advantages: Does not require any authentication code in your app. Let App Service do the authentication for you and spend your time on providing functionality in your app. Azure AD Graph API enables access to directory data from your Azure app. Provides SSO to all applications supported by Azure Active Directory, including Office 365, Dynamics CRM Online, Microsoft Intune, and thousands of non-Microsoft cloud applications. Azure Active Directory supports role-based access control. You can use the [Authorize(Roles="X")] pattern with minimal changes to your code. To see how to write a line-of-business Azure app that authenticates with Azure Active Directory, see Create a line- of-business Azure app with Azure Active Directory authentication. If you have an on-premises secure token service (STS) like Active Directory Federation Services (AD FS), you can use that to federate authentication for your Azure app. This approach is best when company policy prohibits AD data from being stored in Azure. However, note the following: STS topology must be deployed on-premises, with cost and management overhead. Only AD FS administrators can configure relying party trusts and claim rules, which may limit the developer's options. On the other hand, it is possible to manage and customize claims on a per-application basis. Access to on-premises AD data requires a separate solution through the corporate firewall. To see how to write a line-of-business Azure app that authenticates with an on-premises STS, see Create a line-of- business Azure app with AD FS authentication.
- 134. Edit Online 1 min to read •
- 135. Create an ASP.NET 5 web app in Visual Studio Code 2/28/2017 • 9 min to read • Edit Online Overview NOTE NOTE NOTE NOTE Prerequisites Install ASP.NET 5 and DNX This tutorial shows you how to create an ASP.NET 5 web app using Visual Studio Code (VS Code) and deploy it to Azure App Service. Although this article refers to web apps, it also applies to API apps and mobile apps. ASP.NET 5 is a significant redesign of ASP.NET. ASP.NET 5 is a new open-source and cross-platform framework for building modern cloud-based web apps using .NET. For more information, see Introduction to ASP.NET 5. For information about Azure App Service web apps, see Web Apps Overview. If you want to get started with Azure App Service before signing up for an Azure account, go to Try App Service, where you can immediately create a short-lived starter web app in App Service. No credit cards required; no commitments. Install VS Code. Install Node.js - Node.js is a platform for building fast and scalable server applications using JavaScript. Node is the runtime (Node), and npm is the Package Manager for Node modules. You will use npm to scaffold an ASP.NET 5 web app in this tutorial. Install Git - You can install it from either of these locations: Chocolatey or git-scm.com. If you are new to Git, choose git-scm.com and select the option to Use Git from the Windows Command Prompt. Once you install Git, you'll also need to set the Git user name and email as it's required later in the tutorial (when performing a commit from VS Code). ASP.NET 5/DNX (the .NET Execution Environment) is a lean .NET stack for building modern cloud and web apps that run on OS X, Linux, and Windows. It has been built from the ground up to provide an optimized development framework for apps that are either deployed to the cloud or run on-premises. It consists of modular components with minimal overhead, so you retain flexibility while constructing your solutions. This tutorial is designed to get you started building applications with the latest development versions of ASP.NET 5 and DNX. The following instructions are specific to Windows. For more detailed installation instructions for OS X, Linux, and Windows, see Installing ASP.NET 5 and DNX. @powershell-NoProfile -ExecutionPolicy unrestricted -Command "&{$Branch='dev';iex((new-object net.webclient).DownloadString('https://raw.githubusercontent.com/aspnet/Home/dev/dnvminstall.ps1'))}" 1. To install .NET Version Manager (DNVM) in Windows, open a command prompt, and run the following command.
- 136. NOTE NOTE where dnvm dnvmupgrade dnvmlist dnvmuse 1.0.0-update1–p This will download the DNVM script and put it in your user profile directory. 2. Restart Windows to complete the DNVM installation. After you have restarted Windows, you can open the command prompt to verify the location of DNVM by entering the following: The command prompt will show a path similar to the following. 3. Now that you have DNVM, you must use it to download DNX to run your applications. Run the following at the command prompt: Verify your DNVM, and view the active runtime by entering the following at the command prompt: The command prompt will show the details of the active runtime. If more than one DNX runtime is listed, you can choose to enter the following (or a more recent version) at the command prompt to set the active DNX runtime. Set it to the same version that is used by the ASP.NET 5 generator when you create your web app later in this tutorial. You may not need to change the active runtime if it is set to the latest available. For more detailed installation instructions for OS X, Linux, and Windows, see Installing ASP.NET 5 and DNX.
- 137. Create the web app This section shows you how to scaffold a new app ASP.NET web app. You will use the node package manager (npm) to install Yeoman (application scaffolding tool - the VS Code equivalent of the Visual Studio File > New Project operation), Grunt (JavaScript task runner), and Bower (client side package manager). 1. Open a command prompt with Administrator rights and navigate to the location where you want to create your ASP.NET project. For instance, create a vscodeprojects directory at the root of C:. npminstall-g yo grunt-cligenerator-aspnet bower NOTE NOTE yo aspnet 5. Set the name of your new ASP.NET web app to SampleWebApp. As this name is used throughout the tutorial, if you select a different name, you'll need to substitute it for each occurrence of SampleWebApp. When you press <Enter>, Yeoman will create a new folder named SampleWebApp and the necessary files for your new app. cd SampleWebApp 2. Enter the following at the command prompt to install Yeoman and the supporting tools. You may get a warning suggesting that your npm version is out of date. This warning should not affect this tutorial. 3. Enter the following at the command prompt to create the project folder and scaffold the app. 4. Use the arrow keys to select the Web Application Basic type from the ASP.NET 5 generator menu, and press <Enter>. 6. At the command prompt, change directories to your new project folder: 7. Also at the command prompt, to install the necessary NuGet packages to run the application, enter the following command:
- 138. Run the web app locally dnu restore code . 8. Open VS Code by entering the following at the command prompt: Now that you have created the web app and retrieved all the NuGet packages for the app, you can run the web app locally. dnx:Run Command NOTE NOTE dnxweb - (SampleWebApp) NOTE NOTE 1. From the Command Palette in VS Code, enter the following to show the available run command options: If the Omnisharp server is not currently running, it will start up. Re-enter the above command. Next, select the following command to run your web app: The command window will display that the application has started. If the command window doesn't display this message, check the lower left corning of VS Code for errors in your project. Issuing a command from the Command Palette requires a > character at the beginning of the command line. You can view the details related to the web command in the project.json file. If the command does not appear or is not available, you may need to install the C# extension. Run >Extensions: Install Extension and ext install c# to install the C# extensions. 2. Open a browser and navigate to the following URL. http://localhost:5000 The default page of the web app will appear as follows.
- 139. Create a web app in the Azure Portal 3. Close your browser. In the Command Window, press Ctrl+C to shut down the application and close the Command Window. The following steps will guide you through creating a web app in the Azure Portal. 1. Log in to the Azure Portal. 2. Click NEW at the top left of the Portal. 3. Click Web Apps > Web App.
- 140. 4. Enter a value for Name, such as SampleWebAppDemo. Note that this name needs to be unique, and the portal will enforce that when you attempt to enter the name. Therefore, if you select a enter a different value, you'll need to substitute that value for each occurrence of SampleWebAppDemo that you see in this tutorial. 5. Select an existing App Service Plan or create a new one. If you create a new plan, select the pricing tier, location, and other options. For more information on App Service plans, see the article, Azure App Service plans in-depth overview.
- 141. Enable Git publishing for the new web app 6. Click Create. Git is a distributed version control system that you can use to deploy your Azure App Service web app. You'll store the code you write for your web app in a local Git repository, and you'll deploy your code to Azure by pushing to a remote repository. 1. Log into the Azure Portal. 2. Click Browse. 3. Click Web Apps to view a list of the web apps associated with your Azure subscription.
- 142. 4. Select the web app you created in this tutorial. 6. Click Choose Source > Local Git Repository. 5. In the web app blade, click Settings > Continuous deployment. 7. Click OK. 8. If you have not previously set up deployment credentials for publishing a web app or other App Service app,
- 143. Publish your web app to Azure App Service 9. In your web app's blade, click Settings > Properties. The URL of the remote Git repository that you'll deploy to is shown under GIT URL. set them up now: Click Settings > Deployment credentials. The Set deployment credentials blade will be displayed. Create a user name and password. You'll need this password later when setting up Git. Click Save. 10. Copy the GIT URL value for later use in the tutorial. In this section, you will create a local Git repository and push from that repository to Azure to deploy your web app to Azure. 1. In VS Code, select the Git option in the left navigation bar.
- 144. git config core.autocrlf false 6. Change back to the Command Window where the command prompt points to the directory where your web 2. Select Initialize git repository to make sure your workspace is under git source control. 3. Open the Command Window and change directories to the directory of your web app. Then, enter the following command: This command prevents an issue about text where CRLF endings and LF endings are involved. 4. In VS Code, add a commit message and click the Commit All check icon. 5. After Git has completed processing, you'll see that there are no files listed in the Git window under Changes.
- 145. NOTE NOTE Run the app in Azure app is located. git remote add azure [URLfor remote repository] git config credential.helper store git push -u azure master remote:Deployment successful. To https://user@testsite.scm.azurewebsites.net/testsite.git [newbranch] master -> master 7. Create a remote reference for pushing updates to your web app by using the Git URL (ending in ".git") that you copied earlier. 8. Configure Git to save your credentials locally so that they will be automatically appended to your push commands generated from VS Code. 9. Push your changes to Azure by entering the following command. After this initial push to Azure, you will be able to do all the push commands from VS Code. You are prompted for the password you created earlier in Azure. Note: Your password will not be visible. The output from the above command ends with a message that deployment is successful. If you make changes to your app, you can republish directly in VS Code using the built-in Git functionality by selecting the Commit All option followed by the Push option. You will find the Push option available in the drop-down menu next to the Commit All and Refresh buttons. If you need to collaborate on a project, you should consider pushing to GitHub in between pushing to Azure. Now that you have deployed your web app, let's run the app while hosted in Azure. This can be done in two ways: http://SampleWebAppDemo.azurewebsites.net In the Azure Portal, locate the web app blade for your web app, and click Browse to view your app in your default browser. Open a browser and enter the name of your web app as follows.
- 146. Summary In this tutorial, you learned how to create a web app in VS Code and deploy it to Azure. For more information about VS Code, see the article, Why Visual Studio Code? For information about App Service web apps, see Web Apps Overview.
- 147. Edit Online 1 min to read •
- 148. Configure PHP in Azure App Service Web Apps 4/26/2017 • 6 min to read • Edit Online Introduction NOTE NOTE How to: Change the built-in PHP version Azure Portal Azure Portal This guide will show you how to configure the built-in PHP runtime for Web Apps in Azure App Service, provide a custom PHP runtime, and enable extensions. To use App Service, sign up for the free trial. To get the most from this guide, you should first create a PHP web app in App Service. Although this article refers to web apps, it also applies to API apps and mobile apps. By default, PHP 5.5 is installed and immediately available for use when you create an App Service web app. The best way to see the available release revision, its default configuration, and the enabled extensions is to deploy a script that calls the phpinfo() function. PHP 5.6 and PHP 7.0 versions are also available, but not enabled by default. To update the PHP version, follow one of these methods: 1. Browse to your web app in the Azure Portal and click on the Settings button. 2. From the Settings blade select Application Settings and choose the new PHP version.
- 149. Azure PowerShell (Windows) Azure PowerShell (Windows) Azure Command-Line Interface (Linux, Mac, Windows) Azure Command-Line Interface (Linux, Mac, Windows) 3. Click the Save button at the top of the Web app settings blade. PS C:> Login-AzureRmAccount PS C:> Set-AzureWebsite -PhpVersion {5.5| 5.6| 7.0} -Name {app-name} PS C:> Get-AzureWebsite -Name {app-name} | findstr PhpVersion 1. Open Azure PowerShell, and login to your account: 2. Set the PHP version for the web app. 3. The PHP version is now set. You can confirm these settings: To use the Azure Command-Line Interface, you must have Node.js installed on your computer. azure login azure site set --php-version {5.5| 5.6| 7.0} {app-name} 1. Open Terminal, and login to your account. 2. Set the PHP version for the web app.
- 150. NOTE NOTE azlogin azappservice web config update --php-version {5.5| 5.6| 7.0} -g {resource-group-name} -n {app-name} azappservice web config show-g {resource-group-name} -n {app-name} How to: Change the built-in PHP configurations Changing PHP_INI_USER, PHP_INI_PERDIR, PHP_INI_ALL configuration settings Changing PHP_INI_USER, PHP_INI_PERDIR, PHP_INI_ALL configuration settings Changing PHP_INI_SYSTEM configuration settings Changing PHP_INI_SYSTEM configuration settings azure site show{app-name} 3. The PHP version is now set. You can confirm these settings: The Azure CLI 2.0 commands that are equivalent to the above are: For any built-in PHP runtime, you can change any of the configuration options by following the steps below. (For information about php.ini directives, see List of php.ini directives.) 1. Add a .user.ini file to your root directory. ; Example Settings display_errors=On upload_max_filesize=10M ; OPTIONAL:Turn this on to write errors to d:homeLogFilesphp_errors.log ; log_errors=On 3. Deploy your web app. 4. Restart the web app. (Restarting is necessary because the frequency with which PHP reads .user.ini files is governed by the user_ini.cache_ttl setting, which is a system level setting and is 300 seconds (5 minutes) by default. Restarting the web app forces PHP to read the new settings in the .user.ini file.) 2. Add configuration settings to the .user.ini file using the same syntax you would use in a php.ini file. For example, if you wanted to turn the display_errors setting on and set upload_max_filesize setting to 10M, your .user.ini file would contain this text: As an alternative to using a .user.ini file, you can use the ini_set() function in scripts to set configuration options that are not system-level directives. 1. Add an App Setting to your Web App with the key PHP_INI_SCAN_DIR and value d:homesiteini 2. Create an settings.ini file using Kudu Console (http://<site-name>.scm.azurewebsite.net) in the d:homesiteini directory. ; Example Settings curl.cainfo="%ProgramFiles(x86)%Gitbincurl-ca-bundle.crt" wincache.maxfilesize=512 4. Restart your Web App to load the changes. 3. Add configuration settings to the settings.ini file using the same syntax you would use in a php.ini file. For example, if you wanted to point the curl.cainfo setting to a *.crt file and set 'wincache.maxfilesize' setting to 512K, your settings.ini file would contain this text:
- 151. How to: Enable extensions in the default PHP runtime Configure via ini settings Configure via ini settings Configure via App Setting Configure via App Setting As noted in the previous section, the best way to see the default PHP version, its default configuration, and the enabled extensions is to deploy a script that calls phpinfo(). To enable additional extensions, follow the steps below: 1. Add a ext directory to the d:homesite directory. 2. Put .dll extension files in the ext directory (for example, php_xdebug.dll ). Make sure that the extensions are compatible with default version of PHP and are VC9 and non-thread-safe (nts) compatible. 3. Add an App Setting to your Web App with the key PHP_INI_SCAN_DIR and value d:homesiteini 4. Create an ini file in d:homesiteini called extensions.ini . ; Enable Extensions extension=d:homesiteextphp_mongo.dll zend_extension=d:homesiteextphp_xdebug.dll 6. Restart your Web App to load the changes. 5. Add configuration settings to the extensions.ini file using the same syntax you would use in a php.ini file. For example, if you wanted to enable the MongoDB and XDebug extensions, your extensions.ini file would contain this text: 1. Add a bin directory to the root directory. 2. Put .dll extension files in the bin directory (for example, php_xdebug.dll ). Make sure that the extensions are compatible with default version of PHP and are VC9 and non-thread-safe (nts) compatible. 3. Deploy your web app. 5. From the Settings blade select Application Settings and scroll to the App settings section. 4. Browse to your web app in the Azure Portal and click on the Settings button. 6. In the App settings section, create a PHP_EXTENSIONS key. The value for this key would be a path relative to website root: binyour-ext-file.
- 152. How to: Use a custom PHP runtime 7. Click the Save button at the top of the Web app settings blade. Zend extensions are also supported by using a PHP_ZENDEXTENSIONS key. To enable multiple extensions, include a comma-separated list of .dll files for the app setting value. Instead of the default PHP runtime, App Service Web Apps can use a PHP runtime that you provide to execute PHP scripts. The runtime that you provide can be configured by a php.ini file that you also provide. To use a custom PHP runtime with Web Apps, follow the steps below. 1. Obtain a non-thread-safe, VC9 or VC11 compatible version of PHP for Windows. Recent releases of PHP for Windows can be found here: http://windows.php.net/download/. Older releases can be found in the archive here: http://windows.php.net/downloads/releases/archives/. 2. Modify the php.ini file for your runtime. Note that any configuration settings that are system-level-only directives will be ignored by Web Apps. (For information about system-level-only directives, see List of php.ini directives). 3. Optionally, add extensions to your PHP runtime and enable them in the php.ini file. 4. Add a bin directory to your root directory, and put the directory that contains your PHP runtime in it (for example, binphp ). 5. Deploy your web app. 6. Browse to your web app in the Azure Portal and click on the Settings button.
- 153. How to: Enable Composer automation in Azure NOTE NOTE 7. From the Settings blade select Application Settings and scroll to the Handler mappings section. Add *.php to the Extension field and add the path to the php-cgi.exe executable. If you put your PHP runtime in the bin directory in the root of you application, the path will be D:homesitewwwrootbinphpphp-cgi.exe . 8. Click the Save button at the top of the Web app settings blade. By default, App Service doesn't do anything with composer.json, if you have one in your PHP project. If you use Git deployment, you can enable composer.json processing during git push by enabling the Composer extension. You can vote for first-class Composer support in App Service here! 1. In your PHP web app's blade in the Azure portal, click Tools > Extensions. 2. Click Add, then click Composer.
- 154. Next steps 3. Click OK to accept legal terms. Click OK again to add the extension. The Installed extensions blade will now show the Composer extension. 4. Now, perform git add , git commit , and git push like in the previous section. You'll now see that Composer is installing dependencies defined in composer.json. For more information, see the PHP Developer Center.
- 155. NOTE NOTE If you want to get started with Azure App Service before signing up for an Azure account, go to Try App Service, where you can immediately create a short-lived starter web app in App Service. No credit cards required; no commitments.
- 156. Convert WordPress to Multisite in Azure App Service 4/26/2017 • 6 min to read • Edit Online Overview Allow Multisite /* Multisite */ define( 'WP_ALLOW_MULTISITE', true ); Network Setup By Ben Lobaugh, Microsoft Open Technologies Inc. In this tutorial, you will learn how to take an existing WordPress web app created through the gallery in Azure and convert it into a WordPress Multisite install. Additionally, you will learn how to assign a custom domain to each of the subsites within your install. It is assumed that you have an existing installation of WordPress. If you do not, please follow the guidance provided in Create a WordPress web site from the gallery in Azure. Converting an existing WordPress single site install to Multisite is generally fairly simple, and many of the initial steps here come straight from the Create A Network page on the WordPress Codex. Let's get started. You first need to enable Multisite through the wp-config.php file with the WP_ALLOW_MULTISITE constant. There are two methods to edit your web app files: the first is through FTP, and the second through Git. If you are unfamiliar with how to setup either of these methods, please refer to the following tutorials: PHP web site with MySQL and FTP PHP web site with MySQL and Git Open the wp-config.php file with the editor of your choosing and add the following above the /* That's all, stop editing! Happy blogging. */ line. Be sure to save the file and upload it back to the server! Log in to the wp-admin area of your web app and you should see a new item under the Tools menu called Network Setup. Click Network Setup and fill in the details of your network.
- 157. Enable the Network Adding custom domains Enable domain mapping to the web app This tutorial uses the Sub-directories site schema because it should always work, and we will be setting up custom domains for each subsite later in the tutorial. However, it should be possible to setup a subdomain install if you map a domain through the Azure Portal and setup wildcard DNS properly. For more information on sub-domain vs sub-directory setups see the Types of multisite network article on the WordPress Codex. The network is now configured in the database, but there is one remaining step to enable the network functionality. Finalize the wp-config.php settings and ensure web.config properly routes each site. After clicking the Install button on the Network Setup page, WordPress will attempt to update the wp-config.php and web.config files. However, you should always check the files to ensure the updates were successful. If not, this screen will present you with the necessary updates. Edit and save the files. After making these updates you will need to log out and log back into the wp-admin dashboard. There should now be an additional menu on the admin bar labeled My Sites. This menu allows you to control your new network through the Network Admin dashboard. The WordPress MU Domain Mapping plugin makes it a breeze to add custom domains to any site in your network. In order for the plugin to operate properly, you need to do some additional setup on the Portal, and also at your domain registrar. The Free App Service plan mode does not support adding custom domains to Web Apps. You will need to switch to Shared or Standard mode. To do this: Log in to the Azure Portal and locate your web app. Click on the Scale up tab in Settings. Under General, select either SHARED or STANDARD Click Save
- 158. Verify your domain Add the domain to the web app Setup the domain A record You may receive a message asking you to verify the change and acknowledge your web app may now incur a cost, depending upon usage and the other configuration you set. It takes a few seconds to process the new settings, so now is a good time to start setting up your domain. Before Azure Web Apps will allow you to map a domain to the site, you first need to verify that you have the authorization to map the domain. To do so, you must add a new CNAME record to your DNS entry. Log in to your domain's DNS manager Create a new CNAME awverify Point awverify to awverify.YOUR_DOMAIN.azurewebsites.net It may take some time for the DNS changes to go into full effect, so if the following steps do not work immediately, go make a cup of coffee, then come back and try again. Return to your web app through the Azure Portal, click Settings, and then click Custom domains and SSL. When the SSL settings are displayed, you will see the fields where you will input all the domains which you wish to assign to your web app. If a domain is not listed here, it will not be available for mapping inside WordPress, regardless of how the domain DNS is setup. After typing your domain into the text box, Azure will verify the CNAME record you created previously. If the DNS has not fully propagated, a red indicator will show. If it was successful, you will see a green checkmark. Take note of the IP Address listed at the bottom of the dialog. You will need this to setup the A record for your domain. If the other steps were successful, you may now assign the domain to your Azure web app through a DNS A record. It is important to note here that Azure web apps accept both CNAME and A records, however you must use an A record to enable proper domain mapping. A CNAME cannot be forwarded to another CNAME, which is what Azure created for you with YOUR_DOMAIN.azurewebsites.net. Using the IP address from the previous step, return to your DNS manager and setup the A record to point to that IP.
- 159. Install and setup the plugin Map the domain Do it again NOTE NOTE What's changed WordPress Multisite currently does not have a built-in method to map custom domains. However, there is a plugin called WordPress MU Domain Mapping that adds the functionality for you. Log in to the Network Admin portion of your site and install the WordPress MU Domain Mapping plugin. After installing and activating the plugin, visit Settings > Domain Mapping to configure the plugin. In the first textbox, Server IP Address, input the IP Address you used to setup the A record for the domain. Set any Domain Options you desire (the defaults are often fine) and click Save. Visit the Dashboard for the site you wish to map the domain to. Click on Tools > Domain Mapping and type the new domain into the textbox and click Add. By default, the new domain will be rewritten to the autogenerated site domain. If you want to have all traffic sent to the new domain, check the Primary domain for this blog box before saving. You can add an unlimited number of domains to a site, but only one can be primary. Azure Web Apps allow you to add an unlimited number of domains to a web app. To add another domain you will need to execute the Verify your domain and Setup the domain A record sections for each domain. If you want to get started with Azure App Service before signing up for an Azure account, go to Try App Service, where you can immediately create a short-lived starter web app in App Service. No credit cards required; no commitments. For a guide to the change from Websites to App Service see: Azure App Service and Its Impact on Existing Azure Services
- 160. Deploy a Sails.js web app to Azure App Service 4/5/2017 • 7 min to read • Edit Online CLI versions to complete the task Prerequisites NOTE NOTE Step 1: Create and configure a Sails.js app locally This tutorial shows you how to deploy a Sails.js app to Azure App Service. In the process, you can glean some general knowledge on how to configure your Node.js app to run in App Service. Here, you will learn useful skills like: Configure a Sails.js app run in App Service. Deploy an app to App Service from the command line. Read stderr and stdout logs to troubleshoot any deployment issues. Store environment variables outside of source control. Access Azure environment variables from your app. Connect to a database (MongoDB). You should have working knowledge of Sails.js. This tutorial is not intended to help you with issues related to running Sail.js in general. You can complete the task using one of the following CLI versions: Azure CLI 1.0 – our CLI for the classic and resource management deployment models Azure CLI 2.0 - our next generation CLI for the resource management deployment model Node.js Sails.js Git Azure CLI 2.0 Preview A Microsoft Azure account. If you don't have an account, you can sign up for a free trial or activate your Visual Studio subscriber benefits. You can Try App Service without an Azure account. Create a starter app and play with it for up to an hour--no credit card required, no commitments. First, quickly create a default Sails.js app in your development environment by following these steps: 1. Open the command-line terminal of your choice and CD to a working directory. sails new<app_name> cd <app_name> sails lift 2. Create a Sails.js app and run it:
- 161. Step 2: Create an Azure app and deploy Sails.js loggingEnabled:true logDirectory:iisnode module.exports = { // Use process.env.port to handle web requests to the default HTTP port port:process.env.port, // Increase hooks timout to 30seconds // This avoids the Sails.js error documented at https://github.com/balderdashy/sails/issues/2691 hookTimeout:30000, ... }; "engines":{ "node":"6.9.1" }, git init git add . git commit -m"<your commit message>" Make sure you can navigate to the default home page at http://localhost:1377. 3. Next, enable logging for Azure. In your root directory, create a file called iisnode.yml and add the following two lines: Logging is now enabled for the iisnode server that Azure App Service uses to run Node.js apps. For more information on how this works, see How to debug a Node.js web app in Azure App Service. 4. Next, configure the Sails.js app to use Azure environment variables. Open config/env/production.js to configure your production environment, and set port and hookTimeout : You can find documentation for these configuration settings in the Sails.js Documentation. 5. Next, hardcode the Node.js version you want to use. In package.json, add the following engines property to set the Node.js version to one that we want. 6. Finally, initialize a Git repository and commit your files. In the application root (where package.json is), run the following Git commands: Your code is ready to be deployed. Next, create the App Service resource in Azure and deploy your Sails.js app to it. azlogin 1. log in to Azure like so: Follow the prompt to continue the login in a browser with a Microsoft account that has your Azure subscription. 2. Set the deployment user for App Service. You will deploy code using these credentials later.
- 162. Step 3: Configure and deploy your Sails.js app azappservice web deployment user set --user-name <username> --password <password> azgroup create --location "<location>" --name my-sailsjs-app-group azappservice plan create --name my-sailsjs-appservice-plan --resource-group my-sailsjs-app-group --sku FREE azappservice web create --name <app_name> --resource-group my-sailsjs-app-group --plan my-sailsjs-appservice-plan 3. Create a resource group with a name. For this PHP tutorial, you don't really need to know what it is. To see what possible values you can use for <location> , use the azappservice list-locations CLI command. 4. Create a "FREE" App Service plan with a name. For this PHP tutorial, just know that you won't be charged for web apps in this plan. 5. Create a new web app with a unique name in <app_name> . azappservice web source-controlconfig-local-git --name <app_name> --resource-group my-sailsjs-app-group { "url":"https://<deployment_user>@<app_name>.scm.azurewebsites.net/<app_name>.git" } git remote add azure https://<deployment_user>@<app_name>.scm.azurewebsites.net/<app_name>.git git push azure master azappservice web browse --name <app_name> --resource-group my-sailsjs-app-group 1. Configure local Git deployment for your new web app with the following command: You will get a JSON output like this, which means that the remote Git repository is configured: 2. Add the URL in the JSON as a Git remote for your local repository (called azure for simplicity). 3. Deploy your sample code to the azure Git remote. When prompted, use the deployment credentials you configured earlier. 4. Finally, just launch your live Azure app in the browser: You should now see the same Sails.js home page.
- 163. Troubleshoot your deployment .-..-. Sails <| .-..-. v0.12.11 | /|. / || ,' |' .-'.-==|/_--' `--'-------' __---___--___---___--___---___--___ ____---___--___---___--___---___--___-__ Server lifted in `D:homesitewwwroot` To see your app, visit http://localhost:.pipec775303c-0ebc-4854-8ddd-2e280aabccac To shut down Sails, press <CTRL> + Cat any time. Connect to a database in Azure If your Sails.js application fails for some reason in App Service, find the stderr logs to help troubleshoot it. For more information, see How to debug a Node.js web app in Azure App Service. If the app has started successfully, the stdout log should show you the familiar message: You can control granularity of the stdout logs in the config/log.js file. To connect to a database in Azure, you create the database of your choice in Azure, such as Azure SQL Database, MySQL, MongoDB, Azure (Redis) Cache, etc., and use the corresponding datastore adapter to connect to it. The steps in this section show you how to connect to MongoDB by using an Azure DocumentDB database, which can support MongoDB client connections. 1. Create a DocumentDB account with MongoDB protocol support. 2. Create a DocumentDB collection and database. The name of the collection doesn't matter, but you need the name of the database when you connect from Sails.js. 3. Find the connection information for your DocumentDB database. 4. From your command-line terminal, install the MongoDB adapter:
- 164. npminstallsails-mongo --save docDbMongo:{ adapter:'sails-mongo', user:process.env.dbuser, password:process.env.dbpassword, host:process.env.dbhost, port:process.env.dbport, database:process.env.dbname, ssl:true }, NOTE NOTE azappservice web config appsettings update --settings dbuser="<database user>" --name <app_name> --resource-group my-sailsjs-app- group azappservice web config appsettings update --settings dbpassword="<database password>" --name <app_name> --resource-group my- sailsjs-app-group azappservice web config appsettings update --settings dbhost="<database hostname>" --name <app_name> --resource-group my- sailsjs-app-group azappservice web config appsettings update --settings dbport="<database port>" --name <app_name> --resource-group my-sailsjs-app- group azappservice web config appsettings update --settings dbname="<database name>" --name <app_name> --resource-group my-sailsjs- app-group connections:{ docDbMongo:{ user:"<database user>", password:"<database password>", host:"<database hostname>", database:"<database name>", ssl:true }, }, 5. Open config/connections.js and add the following connection object to the list: The ssl: true option is important because Azure DocumentDB requires it. 6. For each environment variable ( process.env.* ), you need to set it in App Service. To do this, run the following commands from your terminal. Use the connection information for your DocumentDB database. Putting your settings in Azure app settings keeps sensitive data out of your source control (Git). Next, you will configure your development environment to use the same connection information. 7. Open config/local.js and add the following connections object: This configuration overrides the settings in your config/connections.js file for the local environment. This file is excluded by the default .gitignore in your project, so it will not be stored in Git. Now, you are able to connect to your DocumentDB (MongoDB) database both from your Azure web app and from your local development environment. 8. Open config/env/production.js to configure your production environment, and add the following models object:
- 165. More resources models:{ connection:'docDbMongo', migrate:'safe' }, models:{ connection:'docDbMongo', migrate:'alter' }, sails generate apimywidget sails lift http://localhost:1337/mywidget/create {"id":1,"createdAt":"2016-09-23T13:32:00.000Z","updatedAt":"2016-09-23T13:32:00.000Z"} git add . git commit -m"<your commit message>" git push azure master azappservice web browse --name <app_name> --resource-group my-sailsjs-app-group http://<appname>.azurewebsites.net/mywidget/create 9. Open config/env/development.js to configure your development environment, and add the following models object: migrate:'alter' lets you use database migration features to create and update database collections or tables easily. However, migrate:'safe' is used for your Azure (production) environment because Sails.js does not allow you to use migrate:'alter' in a production environment (see Sails.js Documentation). 10. From the terminal, generate a Sails.js blueprint API like you normally would, then run sails lift to create the database with Sails.js database migration. For example: The mywidget model generated by this command is empty, but we can use it to show that we have database connectivity. When you run sails lift , it creates the missing collections and tables for the models your app uses. 11. Access the blueprint API you just created in the browser. For example: The API should return the created entry back to you in the browser window, which means that your collection is created successfully. 12. Now, push your changes to Azure, and browse to your app to make sure it still works. 13. Access the blueprint API of your Azure web app. For example: If the API returns another new entry, then your Azure web app is talking to your DocumentDB (MongoDB) database.
- 166. Get started with Node.js web apps in Azure App Service Using Node.js Modules with Azure applications
- 167. How to use io.js with Azure App Service Web Apps 4/26/2017 • 2 min to read • Edit Online Using a Deployment Script NOTE NOTE Using Manual Installation nodeProcessCommandLine:"D:homesitewwwrootbiniojsiojs.exe" Next Steps NOTE NOTE The popular Node fork io.js features various differences to Joyent's Node.js project, including a more open governance model, a faster release cycle and a faster adoption of new and experimental JavaScript features. While Azure App Service Web Apps has many Node.js versions preinstalled, it also allows for an user-provided Node.js binary. This article discusses two methods enabling the use of io.js on App Service Web Apps: The use of an extended deployment script, which automatically configures Azure to use the latest available io.js version, as well as the manual upload of a io.js binary. Upon deployment of a Node.js app, App Service Web Apps runs a number of small commands to ensure that the environment is configured properly. Using a deployment script, this process can be customized to include the download and configuration of io.js. The io.js Deployment Script is available on GitHub. To enable io.js on your web app, simply copy .deployment, deploy.cmd and IISNode.yml to the root of your application folder and deploy to Web Apps. The first file, .deployment, instructs Web Apps to run deploy.cmd upon deployment. This script runs all the usual steps for a Node.js application, but also downloads the latest version of io.js. Finally, IISNode.yml configures Web Apps to use just the downloaded io.js binary instead of a pre-installed Node.js binary. To update the used io.js binary, just redeploy your application - the script will download a new version of io.js every single time the application is deployed. The manual installation of a custom io.js version includes only two steps. First, download the win-x64 binary directly from the io.js distribution. Required are two files - iojs.exe and iojs.lib. Save both files to a folder inside your web app, for example in bin/iojs. To configure Web Apps to use iojs.exe instead of a pre-installed Node version, create a IISNode.yml file at the root of your application and add the following line. In this article you learned how to use io.js with App Service Web Apps, using both provided deployment scripts as well as manual installation. io.js is in heavy development and updated more frequently than Node.js. A number of Node.js modules might not work with io.js - please consult io.js on GitHub for troubleshooting.
- 168. What's changed NOTE NOTE For a guide to the change from Websites to App Service see: Azure App Service and Its Impact on Existing Azure Services If you want to get started with Azure App Service before signing up for an Azure account, go to Try App Service, where you can immediately create a short-lived starter web app in App Service. No credit cards required; no commitments.
- 169. How to debug a Node.js web app in Azure App Service 4/26/2017 • 5 min to read • Edit Online Enable logging loggingEnabled:true devErrorsEnabled:true NOTE NOTE NOTE NOTE Azure provides built-in diagnostics to assist with debugging Node.js applications hosted in Azure App Service Web Apps. In this article, you will learn how to enable logging of stdout and stderr, display error information in the browser, and how to download and view log files. Diagnostics for Node.js applications hosted on Azure is provided by IISNode. While this article discusses the most common settings for gathering diagnostics information, it does not provide a complete reference for working with IISNode. For more information on working with IISNode, see the IISNode Readme on GitHub. By default, an App Service web app only captures diagnostic information about deployments, such as when you deploy a web app using Git. This information is useful if you are having problems during deployment, such as a failure when installing a module referenced in package.json, or if you are using a custom deployment script. To enable the logging of stdout and stderr streams, you must create an IISNode.yml file at the root of your Node.js application and add the following: This enables the logging of stderr and stdout from your Node.js application. The IISNode.yml file can also be used to control whether friendly errors or developer errors are returned to the browser when a failure occurs. To enable developer errors, add the following line to the IISNode.yml file: Once this option is enabled, IISNode will return the last 64K of information sent to stderr instead of a friendly error such as "an internal server error occurred". While devErrorsEnabled is useful when diagnosing problems during development, enabling it in a production environment may result in development errors being sent to end users. If the IISNode.yml file did not already exist within your application, you must restart your web app after publishing the updated application. If you are simply changing settings in an existing IISNode.yml file that has previously been published, no restart is required. If your web app was created using the Azure Command-Line Tools or Azure PowerShell Cmdlets, a default IISNode.yml file is automatically created. To restart the web app, select the web app in the Azure Portal, and then click RESTART button:
- 170. azure site restart [sitename] NOTE NOTE Accessing logs npminstallazure-cli-g FTP FTP NOTE NOTE Zip archive Zip archive azure site log download [sitename] If the Azure Command-Line Tools are installed in your development environment, you can use the following command to restart the web app: While loggingEnabled and devErrorsEnabled are the most commonly used IISNode.yml configuration options for capturing diagnostic information, IISNode.yml can be used to configure a variety of options for your hosting environment. For a full list of the configuration options, see the iisnode_schema.xml file. Diagnostic logs can be accessed in three ways; Using the File Transfer Protocol (FTP), downloading a Zip archive, or as a live updated stream of the log (also known as a tail). Downloading the Zip archive of the log files or viewing the live stream require the Azure Command-Line Tools. These can be installed by using the following command: Once installed, the tools can be accessed using the 'azure' command. The command-line tools must first be configured to use your Azure subscription. For information on how to accomplish this task, see the How to download and import publish settings section of the How to Use The Azure Command-Line Tools article. To access the diagnostic information through FTP, visit the Azure Portal, select your web app, and then select the DASHBOARD. In the quick links section, the FTP DIAGNOSTIC LOGS and FTPS DIAGNOSTIC LOGS links provide access to the logs using the FTP protocol. If you have not previously configured user name and password for FTP or deployment, you can do so from the Quickstart management page by selecting Set up deployment credentials. The FTP URL returned in the dashboard is for the LogFiles directory, which will contain the following sub- directories: Deployment Method - If you use a deployment method such as Git, a directory of the same name will be created and will contain information related to deployments. nodejs - Stdout and stderr information captured from all instances of your application (when loggingEnabled is true.) To download a Zip archive of the diagnostic logs, use the following command from the Azure Command-Line Tools: This will download a diagnostics.zip in the current directory. This archive contains the following directory
- 171. Live stream (tail) Live stream (tail) azure site log tail[sitename] Next Steps What's changed NOTE NOTE structure: deployments - A log of information about deployments of your application LogFiles Deployment method - If you use a deployment method such as Git, a directory of the same name will be created and will contain information related to deployments. nodejs - Stdout and stderr information captured from all instances of your application (when loggingEnabled is true.) To view a live stream of diagnostic log information, use the following command from the Azure Command-Line Tools: This will return a stream of log events that are updated as they occur on the server. This stream will return deployment information as well as stdout and stderr information (when loggingEnabled is true.) In this article you learned how to enable and access diagnostics information for Azure. While this information is useful in understanding problems that occur with your application, it may point to a problem with a module you are using or that the version of Node.js used by App Service Web Apps is different than the one used in your deployment environment. For information in working with modules on Azure, see Using Node.js Modules with Azure Applications. For information on specifying a Node.js version for your application, see Specifying a Node.js version in an Azure application. For more information, see also the Node.js Developer Center. For a guide to the change from Websites to App Service see: Azure App Service and Its Impact on Existing Azure Services If you want to get started with Azure App Service before signing up for an Azure account, go to Try App Service, where you can immediately create a short-lived starter web app in App Service. No credit cards required; no commitments.
- 172. Create a basic Azure web app using Eclipse 4/26/2017 • 9 min to read • Edit Online Prerequisites To create a Hello World application This tutorial shows how to create and deploy a basic Hello World application to Azure as a Web App by using the Azure Toolkit for Eclipse. A basic JSP example is shown for simplicity, but similar steps would be appropriate for a Java servlet, as far as Azure deployment is concerned. When you have completed this tutorial, your application will look similar to the following illustration when you view it in a web browser: A Java Developer Kit (JDK), v 1.8 or later. Eclipse IDE for Java EE Developers, Luna or later. This can be downloaded from http://www.eclipse.org/downloads/. A distribution of a Java-based web server or application server, such as Apache Tomcat or Jetty. An Azure subscription, which can be acquired from https://azure.microsoft.com/free/ or http://azure.microsoft.com/pricing/purchase-options/. The Azure Toolkit for Eclipse. For information about installing the Azure Toolkit, see Installing the Azure Toolkit for Eclipse. First, we'll start off with creating a Java project. 1. Start Eclipse, and at the menu click File, click New, and then click Dynamic Web Project. (If you don't see Dynamic Web Project listed as an available project after clicking File and New, then do the following: click File, click New, click Project..., expand Web, click Dynamic Web Project, and click Next.) 2. For purposes of this tutorial, name the project MyWebApp. Your screen will appear similar to the following:
- 173. To deploy your application to an Azure Web App Container 3. Click Finish. 4. Within Eclipse's Project Explorer view, expand MyWebApp. Right-click WebContent, click New, and then click JSP File. 5. In the New JSP File dialog box, name the file index.jsp, keep the parent folder as MyWebApp/WebContent, and then click Next. 6. In the Select JSP Template dialog box, for purposes of this tutorial select New JSP File (html), and then click Finish. 8. Save index.jsp. 7. When your index.jsp file opens in Eclipse, add in text to dynamically display Hello World! within the existing <body> element. Your updated <body> content should resemble the following example: <body><b><% out.println("Hello World!"); %></b></body> There are several ways by which you can deploy a Java web application to Azure. This tutorial describes one of the simplest: your application will be deployed to an Azure Web App Container - no special project type nor additional tools are needed. The JDK and the web container software will be provided for you by Azure, so there is no need to upload your own; all you need is your Java Web App. As a result, the publishing process for your application will take seconds, not minutes. 1. In Eclipse's Project Explorer, right-click MyWebApp. 2. In the context menu, select Azure, then click Publish as Azure Web App...
- 174. Alternatively, while your web application project is selected in the Project Explorer, you can click the Publish dropdown button on the toolbar and select Publish as Azure Web App from there: 3. If you have not already signed into Azure from Eclipse, you will be prompted to sign into your Azure account: If you have multiple Azure accounts, some of the prompts during the sign in process may be shown more than once, even if they appear to be the same. When this happens, continue following the sign in instructions. 4. After you have successfully signed into your Azure account, the Manage Subscriptions dialog box will display a list of subscriptions that are associated with your credentials. If there are multiple subscriptions listed and you want to work with only a specific subset of them, you may optionally uncheck the ones you do want to use. When you have selected your subscriptions, click Close.
- 175. 5. When the Deploy to Azure Web App Container dialog box appears, it will display any Web App containers that you have previously created; if you have not created any containers, the list will be empty. 6. If you have not created an Azure Web App Container before, or if you would like to publish your application to a new container, use the following steps. Otherwise, select an existing Web App Container and skip to step 7 below. a. Click New... b. The New Web App Container dialog box will be displayed:
- 176. c. Enter a DNS Label for your Web App Container; this will form the leaf DNS label of the host URL for your web application in Azure. (Note that the name must be available and conform to Azure Web App naming requirements.) e. In the Subscription drop-down menu, select the subscription you want to use for this deployment. d. In the Web Container drop-down menu, select the appropriate software for your application. Currently, you can choose from Tomcat 8, Tomcat 7 or Jetty 9. A recent distribution of the selected software will be provided by Azure, and it will run on a recent distribution of JDK 8 created by Oracle and provided by Azure. f. In the Resource Group drop-down menu, select the Resource Group with which you want to associate your Web App. (Azure Resource Groups allow you to group related resources together so that, for example, they can be deleted together.) You can select an existing Resource Group (if you have any) and skip to step g below, or use the following these steps to create a new Resource Group: Click New... In the the Name textbox, specify a name for your new Resource Group. In the the Region drop-down menu, select the appropriate Azure data center location for your The New Resource Group dialog box will be displayed:
- 177. g. Click OK. Resource Group. OPTIONAL: By default, a recent distribution of Java 8 will be deployed by Azure automatically to your web app container as your JVM. However, you can specify a different version and distribution of the JVM if your Web App requires it. To specify the JDK for your Web App, click the JDK tab, and select one of the following options: Deploy the default JDK offered by Azure Web Apps service: This option will deploy a recent distribution of Java 8. Deploy a 3rd party JDK available on Azure: This option allows you to choose from the list of JDKs which are provided by Microsoft Azure. Deploy my own JDK from this download location: This option allows you to specify your own JDK distribution, which must be packaged as a ZIP file and uploaded to either a publicly available download location or an Azure storage account for which you have access. h. The App Service Plan drop-down menu lists the app service plans that are associated with the Resource Group that you selected. (App Service Plans specify information such as the location of your Web App, the pricing tier and the compute instance size. A single App Service Plan can be used for multiple Web Apps, which is why it is maintained separately from a specific Web App deployment.) You can select an existing App Service Plan (if you have any) and skip to step h below, or use the following these steps to create a new App Service Plan: Click New... The New App Service Plan dialog box will be displayed:
- 178. In the the Name textbox, specify a name for your new App Service Plan. In the the Location drop-down menu, select the appropriate Azure data center location for the plan. In the the Pricing Tier drop-down menu, select the appropriate pricing for the plan. For testing purposes you can choose Free. In the the Instance Size drop-down menu, select the appropriate instance size for the plan. For testing purposes you can choose Small. i. Once you have completed all of the above steps, the New Web App Container dialog box should resemble the following illustration: j. Click OK to complete the creation of your new Web App container. Wait a few seconds for the list of the Web App containers to be refreshed, and your newly-created web app container should now be selected in the list. 7. You are now ready to complete the initial deployment of your Web App to Azure:
- 179. Updating your web app Starting, stopping, or restarting an existing web app Click OK to deploy your Java application to the selected Web App container. By default, your application will be deployed as a subdirectory of the application server. If you want it to be deployed as the root application, check the Deploy to root checkbox before clicking OK. 8. Next, you should see the Azure Activity Log view, which will indicate the deployment status of your Web App. The process of deploying your Web App to Azure should take only a few seconds to complete. When your application ready, you will see a link named Published in the Status column. When you click the link, it will take you to your deployed Web App's home page. Updating an existing running Azure Web App is a quick and easy process, and you have two options for updating: You can update the deployment of an existing Java Web App. You can publish an additional Java application to the same Web App Container. In either case, the process is identical and takes only a few seconds: 1. In the Eclipse project explorer, right-click the Java application you want to update or add to an existing Web App Container. 2. When the context menu appears, select Azure and then Publish as Azure Web App... 3. Since you have already logged in previously, you will see a list of your existing Web App containers. Select the one you want to publish or re-publish your Java application to and click OK. A few seconds later, the Azure Activity Log view will show your updated deployment as Published and you will be able to verify your updated application in a web browser. To start or stop an existing Azure Web App container, (including all the deployed Java applications in it), you can
- 180. Next Steps NOTE NOTE use the Azure Explorer view. If the Azure Explorer view is not already open, you can open it by clicking then Window menu in Eclipse, then click Show View, then Other..., then Azure, and then click Azure Explorer. If you have not previously logged in, it will prompt you to do so. When the Azure Explorer view is displayed, use follow these steps to start or stop your Web App: 1. Expand the Azure node. 2. Expand the Web Apps node. 3. Right-click the desired Web App. 4. When the context menu appears, click Start, Stop, or Restart. Note that the menu choices are context-aware, so you can only stop a running web app or start a web app which is not currently running. For more information about the Azure Toolkits for Java IDEs, see the following links: Azure Toolkit for Eclipse Azure Toolkit for IntelliJ Installing the Azure Toolkit for Eclipse Create a Hello World Web App for Azure in Eclipse (This Article) What's New in the Azure Toolkit for Eclipse Installing the Azure Toolkit for IntelliJ Create a Hello World Web App for Azure in IntelliJ What's New in the Azure Toolkit for IntelliJ For more information about using Azure with Java, see the Azure Java Developer Center. For additional information about creating Azure Web Apps, see the Web Apps Overview. If you want to get started with Azure App Service before signing up for an Azure account, go to Try App Service, where you can immediately create a short-lived starter web app in App Service. No credit cards required; no commitments.
- 181. Create a basic Azure web app in IntelliJ 4/26/2017 • 10 min to read • Edit Online Prerequisites To create a Hello World application This tutorial shows how to create and deploy a basic Hello World application to Azure as a Web App by using the Azure Toolkit for IntelliJ. A basic JSP example is shown for simplicity, but similar steps would be appropriate for a Java servlet, as far as Azure deployment is concerned. When you have completed this tutorial, your application will look similar to the following illustration when you view it in a web browser: A Java Developer Kit (JDK), v 1.8 or later. IntelliJ IDEA Ultimate Edition. This can be downloaded from https://www.jetbrains.com/idea/download/index.html. A distribution of a Java-based web server or application server, such as Apache Tomcat or Jetty. An Azure subscription, which can be acquired from https://azure.microsoft.com/free/ or http://azure.microsoft.com/pricing/purchase-options/. The Azure Toolkit for IntelliJ. For information about installing the Azure Toolkit, see Installing the Azure Toolkit for IntelliJ. First, we'll start off with creating a Java project. 1. Start IntelliJ and click the File menu, then click New, and then click Project.
- 182. 2. In the New Project dialog box, select Java, then Web Application, and then click New to add a Project SDK.
- 183. 3. In the Select Home Directory for JDK dialog box, select the folder where your JDK is installed, and then click OK. Click Next in the New Project dialog box to continue.
- 184. 4. For purposes of this tutorial, name the project Java-Web-App-On-Azure, and then click Finish. 5. Within IntelliJ's Project Explorer view, expand Java-Web-App-On-Azure, then expand web, and then double-click index.jsp.
- 185. To deploy your application to an Azure Web App Container 7. Save index.jsp. 6. When your index.jsp file opens in IntelliJ, add in text to dynamically display Hello World! within the existing <body> element. Your updated <body> content should resemble the following example: <body><b><% out.println("Hello World!"); %></b></body> There are several ways by which you can deploy a Java web application to Azure. This tutorial describes one of the simplest: your application will be deployed to an Azure Web App Container - no special project type nor additional tools are needed. The JDK and the web container software will be provided for you by Azure, so there is no need to upload your own; all you need is your Java Web App. As a result, the publishing process for your application will take seconds, not minutes. Before you publish your application, you first need to configure your module settings. To do so, use the following steps: 1. In IntelliJ's Project Explorer, right-click the Java-Web-App-On-Azure project. When the context menu appears, click Open Module Settings.
- 186. 2. When the Project Structure dialog box appears: a. Click Artifacts in the list of Project Settings. b. Change the artifact name in the Name box so that it doesn't contain whitespace or special characters; this is necessary since the name will be used in the Uniform Resource Identifier (URI). c. Change the Type to Web Application: Archive. d. Click OK to close the Project Structure dialog box.
- 187. When you have configured your module settings, you can publish your application to Azure by using the following steps: 1. In IntelliJ's Project Explorer, right-click the Java-Web-App-On-Azure project. When the context menu appears, select Azure, and then click Publish as Azure Web App...
- 188. 2. If you have not already signed into Azure from IntelliJ, you will be prompted to sign into your Azure account. (If you have multiple Azure accounts, some of the prompts during the sign in process may be shown more than once, even if they appear to be the same. When this happens, continue to follow the sign in instructions.)
- 189. 3. After you have successfully signed into your Azure account, the Manage Subscriptions dialog box will display a list of subscriptions that are associated with your credentials. (If there are multiple subscriptions listed and you want to work with only a specific subset of them, you may optionally uncheck the subscriptions you don't want to use.) When you have selected your subscriptions, click Close.
- 190. 4. When the Deploy to Azure Web App Container dialog box appears, it will display any Web App containers that you have previously created; if you have not created any containers, the list will be empty. 5. If you have not created an Azure Web App Container before, or if you would like to publish your application to a new container, use the following steps. Otherwise, select an existing Web App Container and skip to step 6 below. a. Click +
- 191. c. Enter a DNS Label for your Web App Container; this will form the leaf DNS label of the host URL for your web application in Azure. Note that the name must be available and conform to Azure Web App naming requirements. e. In the Subscription drop-down menu, select the subscription you want to use for this deployment. b. The New Web App Container dialog box will be displayed, which will be used for the next several steps. d. In the Web Container drop-down menu, select the appropriate software for your application. Currently, you can choose from Tomcat 8, Tomcat 7 or Jetty 9. A recent distribution of the selected software will be provided by Azure, and it will run on a recent distribution of JDK 8 created by Oracle and provided by Azure. f. In the Resource Group drop-down menu, select the Resource Group with which you want to associate your Web App. (Azure Resource Groups allow you to group related resources together so that, for example, they can be deleted together.) You can select an existing Resource Group (if you have any) and skip to step g below, or use the following steps to create a new Resource Group:
- 192. Select << Create new Resource Group >> in the Resource Group drop-down menu. In the the Name textbox, specify a name for your new Resource Group. In the the Region drop-down menu, select the appropriate Azure data center location for your Resource Group. Click OK. The New Resource Group dialog box will be displayed: g. The App Service Plan drop-down menu lists the app service plans that are associated with the Resource Group that you selected. (An App Service Plan specifies information such as the location of your Web App, the pricing tier and the compute instance size. A single App Service Plan can be used for multiple Web Apps, which is why it is maintained separately from a specific Web App deployment.) You can select an existing App Service Plan (if you have any) and skip to step h below, or use the following steps to create a new App Service Plan: Select << Create new App Service Plan >> in the App Service Plan drop-down menu. In the the Name textbox, specify a name for your new App Service Plan. In the the Location drop-down menu, select the appropriate Azure data center location for the plan. In the the Pricing Tier drop-down menu, select the appropriate pricing for the plan. For testing purposes you can choose Free. In the the Instance Size drop-down menu, select the appropriate instance size for the plan. For testing purposes you can choose Small. Click OK. The New App Service Plan dialog box will be displayed: h. (Optional) By default, a recent distribution of Java 8 will be automatically deployed as your JVM by
- 193. Azure to your web app container. However, you can select a different version and distribution of the JVM. To do so, use the following steps: Click the JDK tab in the New Web App Container dialog box. You can choose from one of the following options: Deploy the default JDK which is offered by Azure Deploy a 3rd party JDK from a drop-down list of additional JDKs which are available on Azure Deploy a custom JDK, which must be packaged as a ZIP file and either publicly available or in your Azure storage account i. Once you have completed all of the above steps, the New Web App Container dialog box should resemble the following illustration:
- 194. j. Click OK to complete the creation of your new Web App container. Wait a few seconds for the list of the Web App containers to be refreshed, and your newly-created web app container should now be selected in the list. 6. You are now ready to complete the initial deployment of your Web App to Azure; click OK to deploy your Java application to the selected Web App container. By default, your application will be deployed as a subdirectory of the application server. If you want it to be deployed as the root application, check the Deploy to root checkbox before clicking OK. 7. Next, you should see the Azure Activity Log view, which will indicate the deployment status of your Web App. The process of deploying your Web App to Azure should take only a few seconds to complete. When your
- 195. Browsing to your Web App on Azure Updating your web app application ready, you will see a link named Published in the Status column. When you click the link, it will take you to your deployed Web App's home page, or you can use the steps in the following section to browse to your web app. To browse to your Web App on Azure, you can use the Azure Explorer view. If the Azure Explorer view is not already open, you can open it by clicking then View menu in IntelliJ, then click Tool Windows, and then click Service Explorer. If you have not previously logged in, it will prompt you to do so. When the Azure Explorer view is displayed, use follow these steps to browse to your Web App: 1. Expand the Azure node. 2. Expand the Web Apps node. 3. Right-click the desired Web App. 4. When the context menu appears, click Open in Browser. Updating an existing running Azure Web App is a quick and easy process, and you have two options for updating: You can update the deployment of an existing Java Web App. You can publish an additional Java application to the same Web App Container. In either case, the process is identical and takes only a few seconds: 1. In the IntelliJ project explorer, right-click the Java application you want to update or add to an existing Web App Container. 2. When the context menu appears, select Azure and then Publish as Azure Web App...
- 196. Starting, stopping, or restarting an existing web app Next Steps 3. Since you have already logged in previously, you will see a list of your existing Web App containers. Select the one you want to publish or re-publish your Java application to and click OK. A few seconds later, the Azure Activity Log view will show your updated deployment as Published and you will be able to verify your updated application in a web browser. To start or stop an existing Azure Web App container, (including all the deployed Java applications in it), you can use the Azure Explorer view. If the Azure Explorer view is not already open, you can open it by clicking then View menu in IntelliJ, then click Tool Windows, and then click Service Explorer. If you have not previously logged in, it will prompt you to do so. When the Azure Explorer view is displayed, use follow these steps to start or stop your Web App: 1. Expand the Azure node. 2. Expand the Web Apps node. 3. Right-click the desired Web App. 4. When the context menu appears, click Start, Stop, or Restart. Note that the menu choices are context-aware, so you can only stop a running web app or start a web app which is not currently running. For more information about the Azure Toolkits for Java IDEs, see the following links: Azure Toolkit for Eclipse Installing the Azure Toolkit for Eclipse Create a Hello World Web App for Azure in Eclipse
- 197. See Also NOTE NOTE Azure Toolkit for IntelliJ What's New in the Azure Toolkit for Eclipse Installing the Azure Toolkit for IntelliJ Create a Hello World Web App for Azure in IntelliJ (This Article) What's New in the Azure Toolkit for IntelliJ For more information about using Azure with Java, see the Azure Java Developer Center. For additional information about creating Azure Web Apps, see the Web Apps Overview. If you want to get started with Azure App Service before signing up for an Azure account, go to Try App Service, where you can immediately create a short-lived starter web app in App Service. No credit cards required; no commitments.
- 198. Create a Web App in Azure App Service using the Azure SDK for Java 2/28/2017 • 21 min to read • Edit Online Overview Prerequisites Software Installations Software Installations Create and Configure Cloud Resources in Azure Create and Configure Cloud Resources in Azure Create an Active Directory (AD) in Azure Create an Active Directory (AD) in Azure Create a Management Certificate for Azure Create a Management Certificate for Azure This walkthrough shows you how to create an Azure SDK for Java application that creates a Web App in Azure App Service, then deploy an application to it. It consists of two parts: Part 1 demonstrates how to build a Java application that creates a web app. Part 2 demonstrates how to create a simple JSP "Hello World" application, then use an FTP client to deploy code to App Service. The AzureWebDemo application code in this article was written using Azure Java SDK 0.7.0, which you can install using the Web Platform Installer (WebPI). In addition, make sure to use the latest version of the Azure Toolkit for Eclipse. After you install the SDK, update the dependencies in your Eclipse project by running Update Index in Maven Repositories, then re-add the latest version of each package in the Dependencies window. You can verify the version of your installed software in Eclipse by clicking Help > Installation Details; you should have at least the following versions: Package for Microsoft Azure Libraries for Java 0.7.0.20150309 Eclipse IDE for Java EE Developers 4.4.2.20150219 Before you begin this procedure, you need to have an active Azure subscription and set up a default Active Directory (AD) on Azure. If you do not already have an Active Directory (AD) on your Azure subscription, log into the Azure classic portal with your Microsoft account. If you have multiple subscriptions, click Subscriptions and select the default directory for the subscription you want to use for this project. Then click Apply to switch to that subscription view. 1. Select Active Directory from the menu at left. Click New > Directory > Custom Create. 2. In Add Directory, select Create New Directory. 3. In Name, enter a directory name. 4. In Domain, enter a domain name. This is a basic domain name that is included by default with your directory; it has the form <domain_name>.onmicrosoft.com . You can name it based on the directory name or another domain name that you own. Later, you can add another domain name that your organization already uses. 5. In Country or region, select your locale. For more information on AD, see What is an Azure AD directory? The Azure SDK for Java uses management certificates to authenticate with Azure subscriptions. These are X.509 v3 certificates you use to authenticate a client application that uses the Service Management API to act on behalf of the subscription owner to manage subscription resources.
- 199. Create a certificate Create a certificate <java-install-dir>/bin/keytool-genkey -alias <keystore-id> -keystore <cert-store-dir>/<cert-file-name>.pfx-storepass <password> -validity 3650-keyalg RSA -keysize 2048-storetype pkcs12 -dname "CN=Self Signed Certificate 20141118170652" <java-install-dir>/bin/keytool-export -alias <keystore-id> -storetype pkcs12-keystore <cert-store-dir>/<cert-file-name>.pfx -storepass <password> -rfc -file <cert-store-dir>/<cert-file-name>.cer Upload the certificate Upload the certificate Convert the PFX file into JKS Convert the PFX file into JKS The code in this procedure uses a self-signed certificate to authenticate with Azure. For this procedure, you need to create a certificate and upload it to the Azure classic portal beforehand. This involves the following steps: Generate a PFX file representing your client certificate and save it locally. Generate a management certificate (CER file) from the PFX file. Upload the CER file to your Azure subscription. Convert the PFX file into JKS, because Java uses that format to authenticate using certificates. Write the application's authentication code, which refers to the local JKS file. When you complete this procedure, the CER certificate will reside in your Azure subscription and the JKS certificate will reside on your local drive. For more information on management certificates, see Create and Upload a Management Certificate for Azure. To create your own self-signed certificate, open a command console on your operating system and run the following commands. Note: The computer on which you run this command must have the JDK installed. Also, the path to the keytool depends on the location in which you install the JDK. For more information, see Key and Certificate Management Tool (keytool) in the Java online docs. To create the .pfx file: To create the .cer file: where: <java-install-dir> is the path to the directory in which you installed Java. <keystore-id> is the keystore entry identifier (for example, AzureRemoteAccess ). <cert-store-dir> is the path to the directory in which you want to store certificates (for example C:/Certificates ). <cert-file-name> is the name of the certificate file (for example AzureWebDemoCert ). <password> is the password you choose to protect the certificate; it must be at least 6 characters long. You can enter no password, although this is not recommended. <dname> is the X.500 Distinguished Name to be associated with alias, and is used as the issuer and subject fields in the self-signed certificate. For more information, see Create and Upload a Management Certificate for Azure. To upload a self-signed certificate to Azure, go to the Settings page in the classic portal, then click the Management Certificates tab. Click Upload at the bottom of the page and navigate to the location of the CER file you created. In the Windows Command Prompt (running as admin), cd to the directory containing the certificates and run the
- 200. <java-install-dir>/bin/keytool.exe -importkeystore -srckeystore <cert-store-dir>/<cert-file-name>.pfx -destkeystore <cert-store-dir>/<cert-file-name>.jks -srcstoretype pkcs12-deststoretype JKS Build a Web App creation application Create the Eclipse Workspace and Maven Project Create the Eclipse Workspace and Maven Project following command, where <java-install-dir> is the directory in which you installed Java on your computer: 1. When prompted, enter the destination keystore password; this will be the password for the JKS file. 2. When prompted, enter the source keystore password; this is the password you specified for the PFX file. The two passwords do not have to be the same. You can enter no password, although this is not recommended. In this section you create a workspace and a Maven project for the web app creation application, named AzureWebDemo. 1. Create a new Maven project. Click File > New > Maven Project. In New Maven Project, select Create a simple project and Use default workspace location. 3. Open the new project's pom.xml file in Project Explorer. Select the Dependencies tab. As this is a new project, no packages are listed yet. 4. Open the Maven Repositories view. Click Window > Show View > Other > Maven > Maven Repositories and click OK. The Maven Repositories view will appear at the bottom of the IDE. 2. On the second page of New Maven Project, specify the following: Group ID: com.<username>.azure.webdemo Artifact ID: AzureWebDemo Version: 0.0.1-SNAPSHOT Packaging: jar Name: AzureWebDemo Click Finish. 5. Open Global Repositories, right-click the central repository, and select Rebuild Index. This step can take several minutes depending on the speed of your connection. When the index rebuilds, you should see the Microsoft Azure packages in the central Maven repository. 6. In Dependencies, click Add. In Enter Group ID... enter azure-management . Select the packages for base
- 201. Writing Java Code to Create a Web App by Calling the Azure SDK Writing Java Code to Create a Web App by Calling the Azure SDK Calling the Azure API to Create an App Service Web App Calling the Azure API to Create an App Service Web App Add necessary imports Add necessary imports com.microsoft.azure azure-management com.microsoft.azure azure-management-websites management and App Service Web Apps management: Note: If you are updating the dependencies after a new version release, you need to re-add each of the dependencies in this list. After you click Add and select each dependency, it appears with the new version number in the Dependencies list. Click OK. The Azure packages then appear in the Dependencies list. Next, write the code that calls APIs in the Azure SDK for Java to create the App Service web app. 1. Create a Java class to contain the main entry point code. In Project Explorer, right-click on the project node and select New > Class. 3. Click Finish. The WebCreator.java file appears in Project Explorer. 2. In New Java Class, name the class WebCreator and check the public static void main checkbox. The selections should appear as follows: In WebCreator.java, add the following imports; these imports provide access to classes in the management libraries for consuming Azure APIs:
- 202. // Generalimports import java.net.URI; import java.util.ArrayList; // Imports for Exceptions import java.io.IOException; import java.net.URISyntaxException; import javax.xml.parsers.ParserConfigurationException; import com.microsoft.windowsazure.exception.ServiceException; import org.xml.sax.SAXException; // Imports for Azure App Service management configuration import com.microsoft.windowsazure.Configuration; import com.microsoft.windowsazure.management.configuration.ManagementConfiguration; // Service management imports for App Service Web Apps creation import com.microsoft.windowsazure.management.websites.*; import com.microsoft.windowsazure.management.websites.models.*; // Imports for authentication import com.microsoft.windowsazure.core.utils.KeyStoreType; Define the main entry point class Define the main entry point class public class WebAppCreator { // Parameter definitions used for authentication. private static String uri= "https://management.core.windows.net/"; private static String subscriptionId = "<subscription-id>"; private static String keyStoreLocation = "<certificate-store-path>"; private static String keyStorePassword = "<certificate-password>"; // Define web app parameter values. private static String webAppName = "WebDemoWebApp"; private static String domainName = ".azurewebsites.net"; private static String webSpaceName = WebSpaceNames.WESTUSWEBSPACE; private static String appServicePlanName = "WebDemoAppServicePlan"; Because the purpose of the AzureWebDemo application is to create an App Service Web App, name the main class for this application WebAppCreator . This class provides the main entry point code that calls the Azure Service Management API to create the web app. Add the following parameter definitions for the web app and webspace. You will need to provide your own Azure subscription ID and certificate information. where: <subscription-id> is the Azure subscription ID in which you want to create the resource. <certificate-store-path> is the path and filename to the JKS file in your local certificate store directory. For example, C:/Certificates/CertificateName.jks for Linux and C:CertificatesCertificateName.jks for Windows. <certificate-password> is the password you specified when you created your JKS certificate. webAppName can be any name you choose; this procedure uses the name WebDemoWebApp . The full domain name is the webAppName with the domainName appended, so in this case the full domain is webdemowebapp.azurewebsites.net . domainName should be specified as shown above. webSpaceName should be one of the values defined in the WebSpaceNames class. appServicePlanName should be specified as shown above. Note: Each time you run this application, you need to change the value of webAppName and appServicePlanName
- 203. Define the web creation method Define the web creation method (or delete the web app on the Azure Portal) before running the application again. Otherwise, execution will fail because the same resource already exists on Azure. Next, define a method to create the web app. This method, createWebApp , specifies the parameters of the web app and the webspace. It also creates and configures the App Service Web Apps management client, which is defined by the WebSiteManagementClient object. The management client is key to creating Web Apps. It provides RESTful web services that allow applications to manage web apps (performing operations such as create, update, and delete) by calling the service management API.
- 204. private static void createWebApp() throws Exception { // Specify configuration settings for the App Service management client. Configuration config = ManagementConfiguration.configure( newURI(uri), subscriptionId, keyStoreLocation, // Path to the JKS file keyStorePassword, // Password for the JKS file KeyStoreType.jks // Flag that you are using a JKS keystore ); // Create the App Service Web Apps management client to callAzure APIs // and pass it the App Service management configuration object. WebSiteManagementClient webAppManagementClient = WebSiteManagementService.create(config); // Create an App Service plan for the web app with the specified parameters. WebHostingPlanCreateParameters appServicePlanParams = newWebHostingPlanCreateParameters(); appServicePlanParams.setName(appServicePlanName); appServicePlanParams.setSKU(SkuOptions.Free); webAppManagementClient.getWebHostingPlansOperations().create(webSpaceName, appServicePlanParams); // Set webspace parameters. WebSiteCreateParameters.WebSpaceDetails webSpaceDetails = newWebSiteCreateParameters.WebSpaceDetails(); webSpaceDetails.setGeoRegion(GeoRegionNames.WESTUS); webSpaceDetails.setPlan(WebSpacePlanNames.VIRTUALDEDICATEDPLAN); webSpaceDetails.setName(webSpaceName); // Set web app parameters. // Note that the server farmname takes the Azure App Service plan name. WebSiteCreateParameters webAppCreateParameters = newWebSiteCreateParameters(); webAppCreateParameters.setName(webAppName); webAppCreateParameters.setServerFarm(appServicePlanName); webAppCreateParameters.setWebSpace(webSpaceDetails); // Set usage metrics attributes. WebSiteGetUsageMetricsResponse.UsageMetric usageMetric = newWebSiteGetUsageMetricsResponse.UsageMetric(); usageMetric.setSiteMode(WebSiteMode.Basic); usageMetric.setComputeMode(WebSiteComputeMode.Shared); // Define the web app object. ArrayList<String> fullWebAppName = newArrayList<String>(); fullWebAppName.add(webAppName + domainName); WebSite webApp = newWebSite(); webApp.setHostNames(fullWebAppName); // Create the web app. WebSiteCreateResponse webAppCreateResponse = webAppManagementClient.getWebSitesOperations().create(webSpaceName, webAppCreateParameters); // Output the HTTP status code of the response; 200indicates the request succeeded; 4xxindicates failure. System.out.println("----------"); System.out.println("Web app created - HTTP response " + webAppCreateResponse.getStatusCode() + "n"); // Output the name of the web app that this application created. String shinyNewWebAppName = webAppCreateResponse.getWebSite().getName(); System.out.println("----------n"); System.out.println("Name of web app created:" + shinyNewWebAppName + "n"); System.out.println("----------n"); } Define the main() method Define the main() method The code will output the HTTP status of the response indicating success or failure, and if successful, will output the name of the created web app. Provide the main() method code that calls createWebApp() to create the web app.
- 205. public static void main(String[] args) throws IOException, URISyntaxException, ServiceException, ParserConfigurationException, SAXException, Exception { // Create web app createWebApp(); } // end of main() } // end of WebAppCreator class Run the application and verify web app creation Run the application and verify web app creation ---------- Web app created - HTTP response 200 ---------- Name of web app created:WebDemoWebApp ---------- Deploying an Application to the Web App Create a JSP Hello World application Create a JSP Hello World application Create the application Create the application Finally, call createWebApp from main : To verify that your application runs, click Run > Run. When the application completes running, you should see the following output in the Eclipse console: Log into the Azure classic portal and click Web Apps. The new web app should appear in the Web Apps list within a few minutes. After you have run AzureWebDemo and created the new web app, log into the classic portal, click Web Apps, and select WebDemoWebApp in the Web Apps list. In the web app's dashboard page, click Browse (or click the URL, webdemowebapp.azurewebsites.net ) to navigate to it. You will see a blank placeholder page, because no content has been published to the web app yet. Next you will create a "Hello World" application and deploy it to the web app. In order to demonstrate how to deploy an application to the web, the following procedure shows you how to create a simple "Hello World" Java application and upload it to the App Service Web App that your application created. 1. Click File > New > Dynamic Web Project. Name it JSPHello . You do not need to change any other settings in this dialog. Click Finish.
- 206. Run the Hello World application in localhost Run the Hello World application in localhost 2. In Project Explorer, expand the JSPHello project, right-click WebContent, then click New > JSP File. In the New JSP File dialog, name the new file index.jsp . Click Next. 3. In the Select JSP Template dialog, select New JSP File (html) and click Finish. <head> ... java.util.Date date = newjava.util.Date(); </head> <body> Hello, the time is <%= date %> </body> 4. In index.jsp, add the following code in the <head> and <body> tag sections: Before you run this application, you need to configure a few properties. 1. Right-click the JSPHello project and select Properties. 2. In the Properties dialog: select Java Build Path, select the Order and Export tab, check JRE System Library, then click Up to move it to the top of the list.
- 207. 3. Also in the Properties dialog: select Targeted Runtimes and click New. 4. In the New Server Runtime Environment dialog, select a server such as Apache Tomcat v7.0 and click Next. In the Tomcat Server dialog, set Name to Apache Tomcat v7.0 , and set Tomcat Installation Directory to the directory in which you installed the version of Tomcat server you want to use. Click Finish.
- 208. 5. You then return to the Targeted Runtimes page of the Properties dialog. Select Apache Tomcat v7.0, then click OK. 6. In the Eclipse Run menu, click Run. In the Run As dialog, select Run on Server. In the Run on Server dialog, select Tomcat v7.0 Server:
- 209. Export the application as a WAR Export the application as a WAR META-INF WEB-INF index.jsp Deploying the Hello World Application Using FTP Deploying the Hello World Application Using FTP Set up deployment credentials Set up deployment credentials Get FTP connection information Get FTP connection information Click Finish. 7. When the application runs, you should see the JSPHello page appear in a localhost window in Eclipse ( http://localhost:8080/JSPHello/ ), displaying the following message: Hello World, the time is Tue Mar 2423:21:10GMT 2015 Export the web project files as a web archive (WAR) file so that you can deploy it to the web app. The following web project files reside in the WebContent folder: 1. Right-click the WebContent folder and select Export. 2. In the Export Select dialog, click Web > WAR file, then click Next. 3. In the WAR Export dialog, select the src directory in the current project, and include the name of the WAR file at the end. For example: <project-path>/JSPHello/src/JSPHello.war For more information on deploying WAR files, see Add a Java application to Azure App Service Web Apps. Select a third-party FTP client to publish the application. This procedure describes two options: the Kudu console built into Azure; and FileZilla, a popular tool with a convenient, graphical UI. Note: The Azure Toolkit for Eclipse supports deployment to storage accounts and cloud services, but does not currently support deployment to web apps. You can deploy to storage accounts and cloud services using an Azure Deployment Project as described in Creating a Hello World Application for Azure in Eclipse, but not to web apps. Use other methods such as FTP or GitHub to transfer files to your web app. Note: We do not recommend using FTP from the Windows command prompt (the command-line FTP.EXE utility that ships with Windows). FTP clients that use active FTP, such as FTP.EXE, often fail to work over firewalls. Active FTP specifies an internal LAN-based address, to which an FTP server will likely fail to connect. For more information on deployment to an App Service web app using FTP, see the following topics: Deploy using an FTP utility Make sure you have run the AzureWebDemo application to create a web app. You will transfer files to this location. 1. Log into the classic portal and click Web Apps. Make sure WebDemoWebApp appears in the list of web apps, and make sure that it is running. Click WebDemoWebApp to open its Dashboard page. 2. On the Dashboard page, under Quick Glance, click Set up your deployment credentials (if you already have deployment credentials, this reads Reset your deployment credentials). Deployment credentials are associated with a Microsoft account. You need to specify a username and password that you can use to deploy using Git and FTP. You can use these credentials to deploy to any web app in all Azure subscriptions associated with your Microsoft account. Provide Git and FTP deployment credentials in the dialog, and record the username and password for future use. To use FTP to deploy application files to the newly created web app, you need to obtain connection information.
- 210. Configure the Web App to host a Java application Configure the Web App to host a Java application Publish your application using Kudu Publish your application using Kudu There are two ways to obtain connection information. One way is to visit the web app's Dashboard page; the other way is to download the web app's publish profile. The publish profile is an XML file that provides information such as FTP host name and logon credentials for your web apps in Azure App Service. You can use this username and password to deploy to any web app in all subscriptions associated with the Azure account, not only this one. To obtain FTP connection information from the web app's blade in the Azure Portal: 1. Under Essentials, find and copy the FTP hostname. This is a URI similar to ftp://waws-prod-bay-NNN.ftp.azurewebsites.windows.net . 2. Under Essentials, find and copy FTP/Deployment username. This will have the form webappnamedeployment-username; for example WebDemoWebAppdeployer77 . To obtain FTP connection information from the publish profile: 1. In the web app's blade, click Get publish profile. This will download a .publishsettings file to your local drive. <publishProfile profileName="WebDemoWebApp - FTP" publishMethod="FTP" publishUrl="ftp://waws-prod-bay-NNN.ftp.azurewebsites.windows.net/site/wwwroot" ftpPassiveMode="True" userName="WebDemoWebApp$WebDemoWebApp" userPWD="<deployment-password>" ... </publishProfile> 3. Note that the web app's publishProfile settings map to the FileZilla Site Manager settings as follows: 2. Open the .publishsettings file in an XML editor or text editor and find the <publishProfile> element containing publishMethod="FTP" . It should look like the following: publishUrl is the same as FTP host name, the value you set in Host. publishMethod="FTP" means that you set Protocol to FTP - File Transfer Protocol, and Encryption to Use plain FTP. userName and userPWD are keys for the actual username and password values you specified when you reset the deployment credentials. userName is the same as Deployment / FTP user. They map to User and Password in FileZilla. ftpPassiveMode="True" means that the FTP site uses passive FTP transfer; select Passive on the Transfer Settings tab. Before you publish the application, you need to change a few configuration settings so that the web app can host a Java application. 1. In the classic portal, go to the web app's Dashboard page and click Configure. On the Configure page, specify the following settings. 2. In Java version the default is Off; select the Java version your application targets; for example 1.7.0_51. After you do this, also make sure that Web container is set to a version of Tomcat Server. 3. In Default Documents, add index.jsp and move it up to the top of the list. (The default file for web apps is hostingstart.html.) 4. Click Save. One way to publish the application is to use the Kudu debug console built into Azure. Kudu is known to be stable and consistent with App Service Web Apps and Tomcat Server. You access the console for the web app by browsing to a URL of the following form:
- 211. https://<webappname>.scm.azurewebsites.net/DebugConsole 2. From the top menu, select Debug Console > CMD. 1. For this procedure, the Kudu console is located at the following URL; browse to this location: https://webdemowebapp.scm.azurewebsites.net/DebugConsole 3. In the console command line, navigate to /site/wwwroot (or click site , then wwwroot in the directory view at the top of the page): cd /site/wwwroot 4. After you specify Java version, Tomcat server should create a webapps directory. In the console command line, navigate to the webapps directory: mkdir webapps cd webapps 5. Drag JSPHello.war from <project-path>/JSPHello/src/ and drop it into the Kudu directory view under /site/wwwroot/webapps . Do not drag it to the "Drag here to upload and zip" area, because Tomcat will unzip it. At first JSPHello.war appears in the directory area by itself: In a short time (probably less than 5 minutes) Tomcat Server will unzip the WAR file into an unpacked JSPHello directory. Click the ROOT directory to see whether index.jsp has been unzipped and copied there. If so, navigate back to the webapps directory to see whether the unpacked JSPHello directory has been created. If you do not see these items, wait and repeat.
- 212. Publish your application using FileZilla (optional) Publish your application using FileZilla (optional) Run the Hello World application on the Web App Run the Hello World application on the Web App Another tool you can use to publish the application is FileZilla, a popular third-party FTP client with a convenient, graphical UI. You can download and install FileZilla from http://filezilla-project.org/ if you do not already have it. For more information on using the client, see the FileZilla documentation and this blog entry on FTP Clients - Part 4: FileZilla. 1. In FileZilla, click File > Site Manager. 3. Click Connect. If successful, FileZilla's console will display a Status:Connected message and issue a LIST command to list the directory contents. 5. In the Remote site panel, select the destination folder. You will deploy the WAR file to the webapps directory under the web app's root. Navigate to /site/wwwroot , right-click on wwwroot , and select Create directory. Name the directory webapps and enter that directory. 6. Transfer JSPHello.war to /site/wwwroot/webapps . Select JSPHello.war in the Local file list, right-click on it and select Upload. You should see it appear in /site/wwwroot/webapps . 7. After you copy JSPHello.war to the webapps directory, Tomcat Server will automatically unpack (unzip) the files in the WAR file. Although Tomcat Server begins unpacking almost immediately, it might take a long time (possibly hours) for the files to appear in the FTP client. 2. In the Site Manager dialog, click New Site. A new blank FTP site will appear in Select Entry prompting you to provide a name. For this procedure, name it AzureWebDemo-FTP . On the General tab, specify the following settings: Host: Enter the FTP Host Name that you copied from the dashboard. Port: (Leave this blank, as this is a passive transfer and the server will determine the port to use.) Protocol: FTP File Transfer Protocol Encryption: Use plain FTP Logon Type: Normal User: Enter the Deployment / FTP user that you copied from the dashboard. This is the full FTP username, which has the form webappnameusername. Password: Enter the password that you specified when you set the deployment credentials. On the Transfer Settings tab, select Passive. 4. In the Local site panel, select the source directory in which the JSPHello.war file resides; the path will be similar to the following: <project-path>/JSPHello/src/ 1. After you have uploaded the WAR file and verified that Tomcat server has created an unpacked JSPHello directory, browse to http://webdemowebapp.azurewebsites.net/JSPHello to run the application. Note: If you click Browse from the classic portal, you might get the default webpage, saying "This Java based web application has been successfully created." You might have to refresh the webpage in order to view the application output instead of the default webpage.
- 213. Clean up Azure resources Clean up Azure resources What's changed NOTE NOTE 2. When the application runs, you should see a web page with the following output: Hello World, the time is Tue Mar 2423:21:10GMT 2015 This procedure creates an App Service web app. You will be billed for the resource as long as it exists. Unless you plan to continue using the web app for testing or development, you should consider stopping or deleting it. A web app that has been stopped will still incur a small charge, but you can restart it at any time. Deleting a web app erases all data you have uploaded to it. For a guide to the change from Websites to App Service see: Azure App Service and Its Impact on Existing Azure Services If you want to get started with Azure App Service before signing up for an Azure account, go to Try App Service, where you can immediately create a short-lived starter web app in App Service. No credit cards required; no commitments.
- 214. Add a Java application to Azure App Service Web Apps 4/26/2017 • 1 min to read • Edit Online See Also Once you have initialized your Java web app in Azure App Service as documented at Create a Java web app in Azure App Service, you can upload your application by placing your WAR in the webapps folder. The navigation path to the webapps folder differs based on how you set up your Web Apps instance. If you set up your web app by using the Azure Marketplace, the path to the webapps folder is in the form d:homesitewwwrootbinapplication_serverwebapps, where application_server is the name of the application server in effect for your Web Apps instance. If you set up your web app by using the Azure configuration UI, the path to the webapps folder is in the form d:homesitewwwrootwebapps. Note that you can use source control to upload your application or web pages, including continuous integration scenarios. FTP is also an option for uploading your application or web pages; for more information about deploying your applications over FTP, see Deploy your app to Azure App Service. Note for Tomcat web apps: Once you've uploaded your WAR file to the webapps folder, the Tomcat application server will detect that you've added it and will automatically load it. Note that if you copy files (other than WAR files) to the ROOT directory, the application server will need to be restarted before those files are used. The autoload functionality for the Tomcat Java web apps running on Azure is based on a new WAR file being added, or new files or directories added to the webapps folder. For more information about using Azure with Java, see the Azure Java Developer Center. application-insights-app-insights-java-get-started
- 215. Edit Online 1 min to read •
- 216. Edit Online 1 min to read •
- 217. Django and MySQL on Azure with Python Tools 2.2 for Visual Studio 2/28/2017 • 4 min to read • Edit Online NOTE NOTE Prerequisites NOTE NOTE NOTE NOTE Create the Project In this tutorial, you'll use Python Tools for Visual Studio to create a simple polls web app using one of the PTVS sample templates. You'll learn how to use a MySQL service hosted on Azure, how to configure the web app to use MySQL, and how to publish the web app to Azure App Service Web Apps. The information contained in this tutorial is also available in the following video: PTVS 2.1: Django app with MySQL See the Python Developer Center for more articles that cover development of Azure App Service Web Apps with PTVS using Bottle, Flask and Django web frameworks, with Azure Table Storage, MySQL, and SQL Database services. While this article focuses on App Service, the steps are similar when developing Azure Cloud Services. Visual Studio 2015 Python 2.7 32-bit or Python 3.4 32-bit Python Tools 2.2 for Visual Studio Python Tools 2.2 for Visual Studio Samples VSIX Azure SDK Tools for VS 2015 Django 1.9 or later To complete this tutorial, you need an Azure account. You can activate your Visual Studio subscriber benefits or sign up for a free trial. If you want to get started with Azure App Service before signing up for an Azure account, go to Try App Service, where you can immediately create a short-lived starter web app in App Service. No credit card is required, and no commitments are necessary. In this section, you'll create a Visual Studio project using a sample template. You'll create a virtual environment and install required packages. You'll create a local database using sqlite. Then you'll run the application locally. 1. In Visual Studio, select File, New Project. 2. The project templates from the Python Tools 2.2 for Visual Studio Samples VSIX are available under Python, Samples. Select Polls Django Web Project and click OK to create the project.
- 218. 3. You will be prompted to install external packages. Select Install into a virtual environment. 4. Select Python 2.7 or Python 3.4 as the base interpreter.
- 219. 5. In Solution Explorer, right-click on the project node and select Python, and then select Django Migrate. Then select Django Create Superuser. 6. This will open a Django Management Console and create a sqlite database in the project folder. Follow the prompts to create a user. 7. Confirm that the application works by pressing F5 . 8. Click Log in from the navigation bar at the top. 9. Enter the credentials for the user you created when you synchronized the database.
- 220. 10. Click Create Sample Polls. 11. Click on a poll and vote.
- 221. Create a MySQL Database Configure the Project For the database, you'll create a ClearDB MySQL hosted database on Azure. As an alternative, you can create your own Virtual Machine running in Azure, then install and administer MySQL yourself. You can create a database with a free plan by following these steps. 1. Log in to the Azure Portal. 2. At the Top of the navigation pane, click NEW, then click Data + Storage, and then click MySQL Database. 3. Configure the new MySQL database by creating a new resource group and select the appropriate location for it. 4. Once the MySQL database is created, click Properties in the database blade. 5. Use the copy button to put the value of CONNECTION STRING on the clipboard. In this section, you'll configure our web app to use the MySQL database you just created. You'll also install additional Python packages required to use MySQL databases with Django. Then you'll run the web app locally. Database=<NAME>;Data Source=<HOST>;User Id=<USER>;Password=<PASSWORD> DATABASES = { 'default':{ 'ENGINE':'django.db.backends.mysql', 'NAME':'<Database>', 'USER':'<User Id>', 'PASSWORD':'<Password>', 'HOST':'<Data Source>', 'PORT':'', } } 2. In Solution Explorer, under Python Environments, right-click on the virtual environment and select Install Python Package. 1. In Visual Studio, open settings.py, from the ProjectName folder. Temporarily paste the connection string in the editor. The connection string is in this format: Change the default database ENGINE to use MySQL, and set the values for NAME, USER, PASSWORD and HOST from the CONNECTIONSTRING. 3. Install the package mysqlclient using pip. 4. In Solution Explorer, right-click on the project node and select Python, and then select Django Migrate. Then select Django Create Superuser.
- 222. Publish the web app to Azure App Service 5. Run the application with F5 . Polls that are created with Create Sample Polls and the data submitted by voting will be serialized in the MySQL database. This will create the tables for the MySQL database you created in the previous section. Follow the prompts to create a user, which doesn't have to match the user in the sqlite database created in the first section of this article. The Azure .NET SDK provides an easy way to deploy your web app to Azure App Service. 2. Click on Microsoft Azure App Service. 3. Click on New to create a new web app. 5. Accept all other defaults and click Publish. 1. In Solution Explorer, right-click on the project node and select Publish. 4. Fill in the following fields and click Create: Web App name App Service plan Resource group Region Leave Database server set to No database 6. Your web browser will open automatically to the published web app. You should see the web app working as expected, using the MySQL database hosted on Azure.
- 223. Next steps Congratulations! You have successfully published your MySQL-based web app to Azure. Follow these links to learn more about Python Tools for Visual Studio, Django and MySQL. Python Tools for Visual Studio Documentation Django Documentation MySQL Web Projects Cloud Service Projects Remote Debugging on Microsoft Azure For more information, see the Python Developer Center.
- 224. How to Send Email Using SendGrid with Azure 3/9/2017 • 6 min to read • Edit Online Overview What is the SendGrid Email Service? Create a SendGrid Account To sign up for a SendGrid account To sign up for a SendGrid account This guide demonstrates how to perform common programming tasks with the SendGrid email service on Azure. The samples are written in C# and supports .NET Standard 1.3. The scenarios covered include constructing email, sending email, adding attachments, and enabling various mail and tracking settings. For more information on SendGrid and sending email, see the Next steps section. SendGrid is a cloud-based email service that provides reliable transactional email delivery, scalability, and real-time analytics along with flexible APIs that make custom integration easy. Common SendGrid use cases include: Automatically sending receipts or purchase confirmations to customers. Administering distribution lists for sending customers monthly fliers and promotions. Collecting real-time metrics for things like blocked email and customer engagement. Forwarding customer inquiries. Processing incoming emails. For more information, visit https://sendgrid.com or SendGrid's C# library GitHub repo. Azure customers can unlock 25,000 free emails each month. These 25,000 free monthly emails will give you access to advanced reporting and analytics and all APIs (Web, SMTP, Event, Parse and more). For information about additional services provided by SendGrid, visit the SendGrid Solutions page. 1. Log in to the Azure Management Portal. 2. In the menu on the left, click New. 3. Click Add-ons and then SendGrid Email Delivery.
- 225. 4. Complete the signup form and select Create.
- 226. 5. Enter a Name to identify your SendGrid service in your Azure settings. Names must be between 1 and 100 characters in length and contain only alphanumeric characters, dashes, dots, and underscores. The name must be unique in your list of subscribed Azure Store Items. 6. Enter and confirm your Password. 7. Choose your Subscription. 8. Create a new Resource group or use an existing one. 9. In the Pricing tier section select the SendGrid plan you want to sign up for.
- 227. 10. Enter a Promotion Code if you have one. 11. Enter your Contact Information. 12. Review and accept the Legal terms. 13. After confirming your purchase you will see a Deployment Succeeded pop-up and you will see your account listed in the All resources section. After you have completed your purchase and clicked the Manage button to initiate the email verification process, you will receive an email from SendGrid asking you to verify your account. If you do not receive this email, or have problems verifying your account, please see this FAQ.
- 228. To find your SendGrid API Key To find your SendGrid API Key You can only send up to 100 emails/day until you have verified your account. To modify your subscription plan or see the SendGrid contact settings, click the name of your SendGrid service to open the SendGrid Marketplace dashboard. To send an email using SendGrid, you must supply your API Key. 1. Click Manage. 2. In your SendGrid dashboard, select Settings and then API Keys in the menu on the left.
- 229. 3. Click the Create API Key dropdown and select General API Key. 4. At a minimum, provide the Name of this key and provide full access to Mail Send and select Save.
- 230. To find your SendGrid credentials To find your SendGrid credentials ![manage][manage] For more information on sending emailthrough SendGrid, visit the [EmailAPI Overview][EmailAPI Overview]. Reference the SendGrid .NET Class Library NOTE NOTE 5. Your API will be displayed at this point one time. Please be sure to store it safely. 2. The password is the one you chose at setup. You can select Change password or Reset password to make any changes. 1. Click the key icon to find your Username. To manage your email deliverability settings, click the Manage button. This will redirect to your SendGrid dashboard. The SendGrid NuGet package is the easiest way to get the SendGrid API and to configure your application with all dependencies. NuGet is a Visual Studio extension included with Microsoft Visual Studio 2015 and above that makes it easy to install and update libraries and tools. To install NuGet if you are running a version of Visual Studio earlier than Visual Studio 2015, visit http://www.nuget.org, and click the Install NuGet button. To install the SendGrid NuGet package in your application, do the following: 1. Click on New Project and select a Template.
- 231. 3. Search for SendGrid and select the SendGrid item in the results list. 5. Click Install to complete the installation, and then close this dialog. 2. In Solution Explorer, right-click References, then click Manage NuGet Packages. 4. Select the latest stable version of the Nuget package from the version dropdown to be able to work with the object model and APIs demonstrated in this article.
- 232. using SendGrid; using SendGrid.Helpers.Mail How to: Create an Email var msg = newSendGridMessage(); msg.SetFrom(newEmailAddress("dx@example.com", "SendGrid DXTeam")); var recipients = newList<EmailAddress> { newEmailAddress("jeff@example.com", "Jeff Smith"), newEmailAddress("anna@example.com", "Anna Lidman"), newEmailAddress("peter@example.com", "Peter Saddow") }; msg.AddTos(recipients); msg.SetSubject("Testing the SendGrid C# Library"); msg.AddContent(MimeType.Text, "Hello World plain text!"); msg.AddContent(MimeType.Html, "<p>Hello World!</p>"); How to: Send an Email SendGrid's .NET class library is called SendGrid. It contains the following namespaces: SendGrid for communicating with SendGrid’s API. SendGrid.Helpers.Mail for helper methods to easily create SendGridMessage objects that specify how to send emails. Add the following code namespace declarations to the top of any C# file in which you want to programmatically access the SendGrid email service. Use the SendGridMessage object to create an email message. Once the message object is created, you can set properties and methods, including the email sender, the email recipient, and the subject and body of the email. The following example demonstrates how to create a fully populated email object: For more information on all properties and methods supported by the SendGrid type, see sendgrid-csharp on GitHub. After creating an email message, you can send it using SendGrid's API. Alternatively, you may use .NET's built in library. Sending email requires that you supply your SendGrid API Key. If you need details about how to configure API Keys, please visit SendGrid's API Keys documentation. You may store these credentials via your Azure Portal by clicking Application settings and adding the key/value pairs under App settings.
- 233. var apiKey = System.Environment.GetEnvironmentVariable("SENDGRID_APIKEY"); var client = newSendGridClient(apiKey); using System; using System.Threading.Tasks; using SendGrid; using SendGrid.Helpers.Mail; namespace Example { internalclass Example { private static void Main() { Execute().Wait(); } static async TaskExecute() { var apiKey = System.Environment.GetEnvironmentVariable("SENDGRID_APIKEY"); var client = newSendGridClient(apiKey); var msg = newSendGridMessage() { From= newEmailAddress("test@example.com", "DXTeam"), Subject = "Hello World fromthe SendGrid CSharp SDK!", PlainTextContent = "Hello, Email!", HtmlContent = "<strong>Hello, Email!</strong>" }; msg.AddTo(newEmailAddress("test@example.com", "Test User")); var response = await client.SendEmailAsync(msg); } } } Then, you may access them as follows: The following examples show how to send a message using the Web API.
- 234. How to: Add an attachment var banner2= newAttachment() { Content = Convert.ToBase64String(raw_content), Type = "image/png", Filename = "banner2.png", Disposition = "inline", ContentId = "Banner 2" }; msg.AddAttachment(banner2); How to: Use mail settings to enable footers, tracking, and analytics Footer settings Footer settings msg.SetFooterSetting( true, "Some Footer HTML", "<strong>Some Footer Text</strong>"); Click tracking Click tracking msg.SetClickTracking(true); How to: Use Additional SendGrid Services Next steps Attachments can be added to a message by calling the AddAttachment method and minimally specifying the file name and Base64 encoded content you want to attach. You can include multiple attachments by calling this method once for each file you wish to attach or by using the AddAttachments method. The following example demonstrates adding an attachment to a message: SendGrid provides additional email functionality through the use of mail settings and tracking settings. These settings can be added to an email message to enable specific functionality such as click tracking, Google analytics, subscription tracking, and so on. For a full list of apps, see the Settings Documentation. Apps can be applied to SendGrid email messages using methods implemented as part of the SendGridMessage class. The following examples demonstrate the footer and click tracking filters: The following examples demonstrate the footer and click tracking filters: SendGrid offers several APIs and webhooks that you can use to leverage additional functionality within your Azure application. For more details, see the SendGrid API Reference. Now that you've learned the basics of the SendGrid Email service, follow these links to learn more. SendGrid C# library repo: sendgrid-csharp SendGrid API documentation: https://sendgrid.com/docs
- 235. Configure PHP in Azure App Service Web Apps 4/26/2017 • 6 min to read • Edit Online Introduction NOTE NOTE How to: Change the built-in PHP version Azure Portal Azure Portal This guide will show you how to configure the built-in PHP runtime for Web Apps in Azure App Service, provide a custom PHP runtime, and enable extensions. To use App Service, sign up for the free trial. To get the most from this guide, you should first create a PHP web app in App Service. Although this article refers to web apps, it also applies to API apps and mobile apps. By default, PHP 5.5 is installed and immediately available for use when you create an App Service web app. The best way to see the available release revision, its default configuration, and the enabled extensions is to deploy a script that calls the phpinfo() function. PHP 5.6 and PHP 7.0 versions are also available, but not enabled by default. To update the PHP version, follow one of these methods: 1. Browse to your web app in the Azure Portal and click on the Settings button. 2. From the Settings blade select Application Settings and choose the new PHP version.
- 236. Azure PowerShell (Windows) Azure PowerShell (Windows) Azure Command-Line Interface (Linux, Mac, Windows) Azure Command-Line Interface (Linux, Mac, Windows) 3. Click the Save button at the top of the Web app settings blade. PS C:> Login-AzureRmAccount PS C:> Set-AzureWebsite -PhpVersion {5.5| 5.6| 7.0} -Name {app-name} PS C:> Get-AzureWebsite -Name {app-name} | findstr PhpVersion 1. Open Azure PowerShell, and login to your account: 2. Set the PHP version for the web app. 3. The PHP version is now set. You can confirm these settings: To use the Azure Command-Line Interface, you must have Node.js installed on your computer. azure login azure site set --php-version {5.5| 5.6| 7.0} {app-name} 1. Open Terminal, and login to your account. 2. Set the PHP version for the web app.
- 237. NOTE NOTE azlogin azappservice web config update --php-version {5.5| 5.6| 7.0} -g {resource-group-name} -n {app-name} azappservice web config show-g {resource-group-name} -n {app-name} How to: Change the built-in PHP configurations Changing PHP_INI_USER, PHP_INI_PERDIR, PHP_INI_ALL configuration settings Changing PHP_INI_USER, PHP_INI_PERDIR, PHP_INI_ALL configuration settings Changing PHP_INI_SYSTEM configuration settings Changing PHP_INI_SYSTEM configuration settings azure site show{app-name} 3. The PHP version is now set. You can confirm these settings: The Azure CLI 2.0 commands that are equivalent to the above are: For any built-in PHP runtime, you can change any of the configuration options by following the steps below. (For information about php.ini directives, see List of php.ini directives.) 1. Add a .user.ini file to your root directory. ; Example Settings display_errors=On upload_max_filesize=10M ; OPTIONAL:Turn this on to write errors to d:homeLogFilesphp_errors.log ; log_errors=On 3. Deploy your web app. 4. Restart the web app. (Restarting is necessary because the frequency with which PHP reads .user.ini files is governed by the user_ini.cache_ttl setting, which is a system level setting and is 300 seconds (5 minutes) by default. Restarting the web app forces PHP to read the new settings in the .user.ini file.) 2. Add configuration settings to the .user.ini file using the same syntax you would use in a php.ini file. For example, if you wanted to turn the display_errors setting on and set upload_max_filesize setting to 10M, your .user.ini file would contain this text: As an alternative to using a .user.ini file, you can use the ini_set() function in scripts to set configuration options that are not system-level directives. 1. Add an App Setting to your Web App with the key PHP_INI_SCAN_DIR and value d:homesiteini 2. Create an settings.ini file using Kudu Console (http://<site-name>.scm.azurewebsite.net) in the d:homesiteini directory. ; Example Settings curl.cainfo="%ProgramFiles(x86)%Gitbincurl-ca-bundle.crt" wincache.maxfilesize=512 4. Restart your Web App to load the changes. 3. Add configuration settings to the settings.ini file using the same syntax you would use in a php.ini file. For example, if you wanted to point the curl.cainfo setting to a *.crt file and set 'wincache.maxfilesize' setting to 512K, your settings.ini file would contain this text:
- 238. How to: Enable extensions in the default PHP runtime Configure via ini settings Configure via ini settings Configure via App Setting Configure via App Setting As noted in the previous section, the best way to see the default PHP version, its default configuration, and the enabled extensions is to deploy a script that calls phpinfo(). To enable additional extensions, follow the steps below: 1. Add a ext directory to the d:homesite directory. 2. Put .dll extension files in the ext directory (for example, php_xdebug.dll ). Make sure that the extensions are compatible with default version of PHP and are VC9 and non-thread-safe (nts) compatible. 3. Add an App Setting to your Web App with the key PHP_INI_SCAN_DIR and value d:homesiteini 4. Create an ini file in d:homesiteini called extensions.ini . ; Enable Extensions extension=d:homesiteextphp_mongo.dll zend_extension=d:homesiteextphp_xdebug.dll 6. Restart your Web App to load the changes. 5. Add configuration settings to the extensions.ini file using the same syntax you would use in a php.ini file. For example, if you wanted to enable the MongoDB and XDebug extensions, your extensions.ini file would contain this text: 1. Add a bin directory to the root directory. 2. Put .dll extension files in the bin directory (for example, php_xdebug.dll ). Make sure that the extensions are compatible with default version of PHP and are VC9 and non-thread-safe (nts) compatible. 3. Deploy your web app. 5. From the Settings blade select Application Settings and scroll to the App settings section. 4. Browse to your web app in the Azure Portal and click on the Settings button. 6. In the App settings section, create a PHP_EXTENSIONS key. The value for this key would be a path relative to website root: binyour-ext-file.
- 239. How to: Use a custom PHP runtime 7. Click the Save button at the top of the Web app settings blade. Zend extensions are also supported by using a PHP_ZENDEXTENSIONS key. To enable multiple extensions, include a comma-separated list of .dll files for the app setting value. Instead of the default PHP runtime, App Service Web Apps can use a PHP runtime that you provide to execute PHP scripts. The runtime that you provide can be configured by a php.ini file that you also provide. To use a custom PHP runtime with Web Apps, follow the steps below. 1. Obtain a non-thread-safe, VC9 or VC11 compatible version of PHP for Windows. Recent releases of PHP for Windows can be found here: http://windows.php.net/download/. Older releases can be found in the archive here: http://windows.php.net/downloads/releases/archives/. 2. Modify the php.ini file for your runtime. Note that any configuration settings that are system-level-only directives will be ignored by Web Apps. (For information about system-level-only directives, see List of php.ini directives). 3. Optionally, add extensions to your PHP runtime and enable them in the php.ini file. 4. Add a bin directory to your root directory, and put the directory that contains your PHP runtime in it (for example, binphp ). 5. Deploy your web app. 6. Browse to your web app in the Azure Portal and click on the Settings button.
- 240. How to: Enable Composer automation in Azure NOTE NOTE 7. From the Settings blade select Application Settings and scroll to the Handler mappings section. Add *.php to the Extension field and add the path to the php-cgi.exe executable. If you put your PHP runtime in the bin directory in the root of you application, the path will be D:homesitewwwrootbinphpphp-cgi.exe . 8. Click the Save button at the top of the Web app settings blade. By default, App Service doesn't do anything with composer.json, if you have one in your PHP project. If you use Git deployment, you can enable composer.json processing during git push by enabling the Composer extension. You can vote for first-class Composer support in App Service here! 1. In your PHP web app's blade in the Azure portal, click Tools > Extensions. 2. Click Add, then click Composer.
- 241. Next steps 3. Click OK to accept legal terms. Click OK again to add the extension. The Installed extensions blade will now show the Composer extension. 4. Now, perform git add , git commit , and git push like in the previous section. You'll now see that Composer is installing dependencies defined in composer.json. For more information, see the PHP Developer Center.
- 242. NOTE NOTE If you want to get started with Azure App Service before signing up for an Azure account, go to Try App Service, where you can immediately create a short-lived starter web app in App Service. No credit cards required; no commitments.
- 243. Add a Java application to Azure App Service Web Apps 4/26/2017 • 1 min to read • Edit Online See Also Once you have initialized your Java web app in Azure App Service as documented at Create a Java web app in Azure App Service, you can upload your application by placing your WAR in the webapps folder. The navigation path to the webapps folder differs based on how you set up your Web Apps instance. If you set up your web app by using the Azure Marketplace, the path to the webapps folder is in the form d:homesitewwwrootbinapplication_serverwebapps, where application_server is the name of the application server in effect for your Web Apps instance. If you set up your web app by using the Azure configuration UI, the path to the webapps folder is in the form d:homesitewwwrootwebapps. Note that you can use source control to upload your application or web pages, including continuous integration scenarios. FTP is also an option for uploading your application or web pages; for more information about deploying your applications over FTP, see Deploy your app to Azure App Service. Note for Tomcat web apps: Once you've uploaded your WAR file to the webapps folder, the Tomcat application server will detect that you've added it and will automatically load it. Note that if you copy files (other than WAR files) to the ROOT directory, the application server will need to be restarted before those files are used. The autoload functionality for the Tomcat Java web apps running on Azure is based on a new WAR file being added, or new files or directories added to the webapps folder. For more information about using Azure with Java, see the Azure Java Developer Center. application-insights-app-insights-java-get-started
- 244. Use PM2 configuration for Node.js in Web Apps on Linux 2/28/2017 • 1 min to read • Edit Online { "name" :"worker", "script" :"/bin/server.js", "instances" :1, "merge_logs" :true, "log_date_format" :"YYYY-MM-DDHH:mmZ", "watch":["/bin/server.js", "foo.txt"], "watch_options":{ "followSymlinks":true, "usePolling" :true, "interval" :5 } } If you set the application stack to Node.js for Web Apps on Linux, you get the option to set a Node.js startup file as shown in the following image: You can use this option to do one of the following tasks: Specify the startup script for your Node.js app (for example: /bin/server.js). NOTE NOTE Specify the PM2 configuration file to use for your Node.js app (for example: /foo/process.json). If you want your Node.js processes to restart automatically when certain files are modified, use the PM2 configuration. Otherwise, your application won't restart when it receives change notifications (for example, when your application code changes). You can check the Node.js process file documentation for all the options, but following is a sample of what you can use as your process.json file: Important things to note in this configuration are: The "script" property specifies your application's start script. The "instances" property specifies how many instances of the node process to launch. If you are running your application on larger VMs that have multiple cores, it's a good idea to maximize your resources by setting a
- 245. Next steps higher value here. The "watch" array specifies all files that you want to restart the node process for when they change. For the "watch_options", you currently need to specify "usePolling" as true because of the way your application content is mounted. What is App Service on Linux? Azure App Service Web Apps on Linux FAQ
- 246. Configuring Python with Azure App Service Web Apps 2/28/2017 • 12 min to read • Edit Online Bottle, Django or Flask? Web app creation on Azure Portal Git Publishing Application Overview app.py requirements.txt runtime.txt web.config ptvs_virtualenv_proxy.py WSGI Handler This tutorial describes options for authoring and configuring a basic Web Server Gateway Interface (WSGI) compliant Python application on Azure App Service Web Apps. It describes additional features of Git deployment, such as virtual environment and package installation using requirements.txt. The Azure Marketplace contains templates for the Bottle, Django and Flask frameworks. If you are developing your first web app in Azure App Service, or you are not familiar with Git, we recommend that you follow one of these tutorials, which include step-by-step instructions for building a working application from the gallery using Git deployment from Windows or Mac: Creating web apps with Bottle Creating web apps with Django Creating web apps with Flask This tutorial assumes an existing Azure subscription and access to the Azure Portal. If you do not have an existing web app, you can create one from the Azure Portal. Click the NEW button in the top left corner, then click Web + Mobile > Web app. Configure Git publishing for your newly created web app by following the instructions at Local Git Deployment to Azure App Service. This tutorial uses Git to create, manage, and publish our Python web app to Azure App Service. Once Git publishing is set up, a Git repository will be created and associated with your web app. The repository's URL will be displayed and can henceforth be used to push data from the local development environment to the cloud. To publish applications via Git, make sure a Git client is also installed and use the instructions provided to push your web app content to Azure App Service. In the next sections, the following files are created. They should be placed in the root of the Git repository.
- 247. def wsgi_app(environ, start_response): status = '200OK' response_headers = [('Content-type', 'text/plain')] start_response(status, response_headers) response_body = 'Hello World' yield response_body.encode() if __name__ == '__main__': fromwsgiref.simple_server import make_server httpd = make_server('localhost', 5555, wsgi_app) httpd.serve_forever() Virtual Environment Package Management azure==0.8.4 Python Version WSGI is a Python standard described by PEP 3333 defining an interface between the web server and Python. It provides a standardized interface for writing various web applications and frameworks using Python. Popular Python web frameworks today use WSGI. Azure App Service Web Apps gives you support for any such frameworks; in addition, advanced users can even author their own as long as the custom handler follows the WSGI specification guidelines. Here's an example of an app.py that defines a custom handler: You can run this application locally with python app.py , then browse to http://localhost:5555 in your web browser. Although the example app above doesn't require any external packages, it is likely that your application will require some. To help manage external package dependencies, Azure Git deployment supports the creation of virtual environments. When Azure detects a requirements.txt in the root of the repository, it automatically creates a virtual environment named env . This only occurs on the first deployment, or during any deployment after the selected Python runtime has changed. You will probably want to create a virtual environment locally for development, but don't include it in your Git repository. Packages listed in requirements.txt will be installed automatically in the virtual environment using pip. This happens on every deployment, but pip will skip installation if a package is already installed. Example requirements.txt : Azure will determine the version of Python to use for its virtual environment with the following priority: 1. version specified in runtime.txt in the root folder 2. version specified by Python setting in the web app configuration (the Settings > Application Settings blade for your web app in the Azure Portal) 3. python-2.7 is the default if none of the above are specified
- 248. runtime.txt python-2.7 Web.config Valid values for the contents of are: python-2.7 python-3.4 If the micro version (third digit) is specified, it is ignored. Example runtime.txt : You'll need to create a web.config file to specify how the server should handle requests. Note that if you have a web.x.y.config file in your repository, where x.y matches the selected Python runtime, then Azure will automatically copy the appropriate file as web.config. The following web.config examples rely on a virtual environment proxy script, which is described in the next section. They work with the WSGI handler used in the example app.py above. Example web.config for Python 2.7:
- 249. <?xmlversion="1.0"?> <configuration> <appSettings> <add key="WSGI_ALT_VIRTUALENV_HANDLER" value="app.wsgi_app" /> <add key="WSGI_ALT_VIRTUALENV_ACTIVATE_THIS" value="D:homesitewwwrootenvScriptsactivate_this.py" /> <add key="WSGI_HANDLER" value="ptvs_virtualenv_proxy.get_virtualenv_handler()" /> <add key="PYTHONPATH" value="D:homesitewwwroot" /> </appSettings> <system.web> <compilation debug="true" targetFramework="4.0" /> </system.web> <system.webServer> <modules runAllManagedModulesForAllRequests="true" /> <handlers> <remove name="Python27_via_FastCGI" /> <remove name="Python34_via_FastCGI" /> <add name="Python FastCGI" path="handler.fcgi" verb="*" modules="FastCgiModule" scriptProcessor="D:Python27python.exe|D:Python27Scriptswfastcgi.py" resourceType="Unspecified" requireAccess="Script" /> </handlers> <rewrite> <rules> <rule name="Static Files" stopProcessing="true"> <conditions> <add input="true" pattern="false" /> </conditions> </rule> <rule name="Configure Python" stopProcessing="true"> <match url="(.*)" ignoreCase="false" /> <conditions> <add input="{REQUEST_URI}" pattern="^/static/.*" ignoreCase="true" negate="true" /> </conditions> <action type="Rewrite" url="handler.fcgi/{R:1}" appendQueryString="true" /> </rule> </rules> </rewrite> </system.webServer> </configuration> Example web.config for Python 3.4:
- 250. <?xmlversion="1.0"?> <configuration> <appSettings> <add key="WSGI_ALT_VIRTUALENV_HANDLER" value="app.wsgi_app" /> <add key="WSGI_ALT_VIRTUALENV_ACTIVATE_THIS" value="D:homesitewwwrootenvScriptspython.exe" /> <add key="WSGI_HANDLER" value="ptvs_virtualenv_proxy.get_venv_handler()" /> <add key="PYTHONPATH" value="D:homesitewwwroot" /> </appSettings> <system.web> <compilation debug="true" targetFramework="4.0" /> </system.web> <system.webServer> <modules runAllManagedModulesForAllRequests="true" /> <handlers> <remove name="Python27_via_FastCGI" /> <remove name="Python34_via_FastCGI" /> <add name="Python FastCGI" path="handler.fcgi" verb="*" modules="FastCgiModule" scriptProcessor="D:Python34python.exe|D:Python34Scriptswfastcgi.py" resourceType="Unspecified" requireAccess="Script" /> </handlers> <rewrite> <rules> <rule name="Static Files" stopProcessing="true"> <conditions> <add input="true" pattern="false" /> </conditions> </rule> <rule name="Configure Python" stopProcessing="true"> <match url="(.*)" ignoreCase="false" /> <conditions> <add input="{REQUEST_URI}" pattern="^/static/.*" ignoreCase="true" negate="true" /> </conditions> <action type="Rewrite" url="handler.fcgi/{R:1}" appendQueryString="true" /> </rule> </rules> </rewrite> </system.webServer> </configuration> Virtual Environment Proxy Static files will be handled by the web server directly, without going through Python code, for improved performance. In the above examples, the location of the static files on disk should match the location in the URL. This means that a request for http://pythonapp.azurewebsites.net/static/site.css will serve the file on disk at staticsite.css . WSGI_ALT_VIRTUALENV_HANDLER is where you specify the WSGI handler. In the above examples, it's app.wsgi_app because the handler is a function named wsgi_app in app.py in the root folder. PYTHONPATH can be customized, but if you install all your dependencies in the virtual environment by specifying them in requirements.txt, you shouldn't need to change it. The following script is used to retrieve the WSGI handler, activate the virtual environment and log errors. It is designed to be generic and used without modifications. Contents of ptvs_virtualenv_proxy.py :
- 251. # ############################################################################ # # Copyright (c) Microsoft Corporation. # # This source code is subject to terms and conditions of the Apache License, Version 2.0. A # copy of the license can be found in the License.htmlfile at the root of this distribution. If # you cannot locate the Apache License, Version 2.0, please send an emailto # vspython@microsoft.com. By using this source code in any fashion, you are agreeing to be bound # by the terms of the Apache License, Version 2.0. # # You must not remove this notice, or any other, fromthis software. # # ########################################################################### import datetime import os import sys import traceback if sys.version_info[0] == 3: def to_str(value): return value.decode(sys.getfilesystemencoding()) def execfile(path, global_dict): """Execute a file""" with open(path, 'r') as f: code = f.read() code = code.replace('rn', 'n') + 'n' exec(code, global_dict) else: def to_str(value): return value.encode(sys.getfilesystemencoding()) def log(txt): """Logs fatalerrors to a log file if WSGI_LOGenv var is defined""" log_file = os.environ.get('WSGI_LOG') if log_file: f = open(log_file, 'a+') try: f.write('%s:%s' % (datetime.datetime.now(), txt)) finally: f.close() ptvsd_secret = os.getenv('WSGI_PTVSD_SECRET') if ptvsd_secret: log('Enabling ptvsd ...n') try: import ptvsd try: ptvsd.enable_attach(ptvsd_secret) log('ptvsd enabled.n') except: log('ptvsd.enable_attach failedn') except ImportError: log('error importing ptvsd.n') def get_wsgi_handler(handler_name): if not handler_name: raise Exception('WSGI_ALT_VIRTUALENV_HANDLERenv var must be set') if not isinstance(handler_name, str): handler_name = to_str(handler_name) module_name, _, callable_name = handler_name.rpartition('.') should_call= callable_name.endswith('()') callable_name = callable_name[:-2] if should_callelse callable_name name_list = [(callable_name, should_call)] handler = None
- 252. handler = None last_tb = '' while module_name: try: handler = __import__(module_name, fromlist=[name_list[0][0]]) last_tb = '' for name, should_callin name_list: handler = getattr(handler, name) if should_call: handler = handler() break except ImportError: module_name, _, callable_name = module_name.rpartition('.') should_call= callable_name.endswith('()') callable_name = callable_name[:-2] if should_callelse callable_name name_list.insert(0, (callable_name, should_call)) handler = None last_tb = ':' + traceback.format_exc() if handler is None: raise ValueError('"%s" could not be imported%s' % (handler_name, last_tb)) return handler activate_this = os.getenv('WSGI_ALT_VIRTUALENV_ACTIVATE_THIS') if not activate_this: raise Exception('WSGI_ALT_VIRTUALENV_ACTIVATE_THIS is not set') def get_virtualenv_handler(): log('Activating virtualenv with %sn' % activate_this) execfile(activate_this, dict(__file__=activate_this)) log('Getting handler %sn' % os.getenv('WSGI_ALT_VIRTUALENV_HANDLER')) handler = get_wsgi_handler(os.getenv('WSGI_ALT_VIRTUALENV_HANDLER')) log('Got handler:%rn' % handler) return handler def get_venv_handler(): log('Activating venv with executable at %sn' % activate_this) import site sys.executable = activate_this old_sys_path, sys.path = sys.path, [] site.main() sys.path.insert(0, '') for itemin old_sys_path: if itemnot in sys.path: sys.path.append(item) log('Getting handler %sn' % os.getenv('WSGI_ALT_VIRTUALENV_HANDLER')) handler = get_wsgi_handler(os.getenv('WSGI_ALT_VIRTUALENV_HANDLER')) log('Got handler:%rn' % handler) return handler Customize Git deployment Azure will determine that your application uses Python if both of these conditions are true: requirements.txt file in the root folder any .py file in the root folder OR a runtime.txt that specifies python When that's the case, it will use a Python specific deployment script, which performs the standard synchronization of files, as well as additional Python operations such as:
- 253. .skipPythonDeployment .deployment deploy.cmd azure site deploymentscript --python Troubleshooting - Package Installation Request wheels Request wheels Build wheels (requires Windows) Build wheels (requires Windows) Automatic management of virtual environment Installation of packages listed in requirements.txt using pip Creation of the appropriate web.config based on the selected Python version. Collect static files for Django applications You can control certain aspects of the default deployment steps without having to customize the script. If you want to skip all Python specific deployment steps, you can create this empty file: For more control over deployment, you can override the default deployment script by creating the following files: You can use the Azure command-line interface to create the files. Use this command from your project folder: When these files don't exist, Azure creates a temporary deployment script and runs it. It is identical to the one you create with the command above. Some packages may not install using pip when run on Azure. It may simply be that the package is not available on the Python Package Index. It could be that a compiler is required (a compiler is not available on the machine running the web app in Azure App Service). In this section, we'll look at ways to deal with this issue. If the package installation requires a compiler, you should try contacting the package owner to request that wheels be made available for the package. With the recent availability of Microsoft Visual C++ Compiler for Python 2.7, it is now easier to build packages that have native code for Python 2.7. Note: When using this option, make sure to compile the package using a Python environment that matches the platform/architecture/version that is used on the web app in Azure App Service (Windows/32-bit/2.7 or 3.4). If the package doesn't install because it requires a compiler, you can install the compiler on your local machine and build a wheel for the package, which you will then include in your repository. Mac/Linux Users: If you don't have access to a Windows machine, see Create a Virtual Machine Running Windows for how to create a VM on Azure. You can use it to build the wheels, add them to the repository, and discard the VM if you like. For Python 2.7, you can install Microsoft Visual C++ Compiler for Python 2.7. For Python 3.4, you can install Microsoft Visual C++ 2010 Express. To build wheels, you'll need the wheel package:
- 254. envscriptspip installwheel envscriptspip wheelazure==0.8.4 --find-links wheelhouse azure==0.8.4 --no-index Customize installation Customize installation envscriptseasy_installsomepackage envscriptseasy_install"%DEPLOYMENT_SOURCE%installerssomepackage.exe" Include the virtual environment in the repository (requires Windows) Include the virtual environment in the repository (requires Windows) .skipPythonDeployment Troubleshooting - Virtual Environment You'll use pip wheel to compile a dependency: This creates a .whl file in the wheelhouse folder. Add the wheelhouse folder and wheel files to your repository. Edit your requirements.txt to add the --find-links option at the top. This tells pip to look for an exact match in the local folder before going to the python package index. If you want to include all your dependencies in the wheelhouse folder and not use the python package index at all, you can force pip to ignore the package index by adding --no-index to the top of your requirements.txt. You can customize the deployment script to install a package in the virtual environment using an alternate installer, such as easy_install. See deploy.cmd for an example that is commented out. Make sure that such packages aren't listed in requirements.txt, to prevent pip from installing them. Add this to the deployment script: You may also be able to use easy_install to install from an exe installer (some are zip compatible, so easy_install supports them). Add the installer to your repository, and invoke easy_install by passing the path to the executable. Add this to the deployment script: Note: When using this option, make sure to use a virtual environment that matches the platform/architecture/version that is used on the web app in Azure App Service (Windows/32-bit/2.7 or 3.4). If you include the virtual environment in the repository, you can prevent the deployment script from doing virtual environment management on Azure by creating an empty file: We recommend that you delete the existing virtual environment on the app, to prevent leftover files from when the virtual environment was managed automatically. The deployment script will skip creation of the virtual environment on Azure if it detects that a compatible virtual
- 255. Option 1: Use FTP Option 1: Use FTP Option 2: Toggle runtime Option 2: Toggle runtime Option 3: Customize deployment script Option 3: Customize deployment script Next steps NOTE NOTE What's changed environment already exists. This can speed up deployment considerably. Packages that are already installed will be skipped by pip. In certain situations, you may want to force delete that virtual environment. You'll want to do this if you decide to include a virtual environment as part of your repository. You may also want to do this if you need to get rid of certain packages, or test changes to requirements.txt. There are a few options to manage the existing virtual environment on Azure: With an FTP client, connect to the server and you'll be able to delete the env folder. Note that some FTP clients (such as web browsers) may be read-only and won't allow you to delete folders, so you'll want to make sure to use an FTP client with that capability. The FTP host name and user are displayed in your web app's blade on the Azure Portal. Here's an alternative that takes advantage of the fact that the deployment script will delete the env folder when it doesn't match the desired version of Python. This will effectively delete the existing environment, and create a new one. 1. Switch to a different version of Python (via runtime.txt or the Application Settings blade in the Azure Portal) 2. git push some changes (ignore any pip install errors if any) 3. Switch back to initial version of Python 4. git push some changes again If you've customized the deployment script, you can change the code in deploy.cmd to force it to delete the env folder. For more information, see the Python Developer Center. If you want to get started with Azure App Service before signing up for an Azure account, go to Try App Service, where you can immediately create a short-lived starter web app in App Service. No credit cards required; no commitments. For a guide to the change from Websites to App Service see: Azure App Service and Its Impact on Existing Azure Services
- 256. Configure web apps in Azure App Service 4/26/2017 • 5 min to read • Edit Online NOTE NOTE Application settings General settings General settings This topic explains how to configure a web app using the Azure Portal. Although this article refers to web apps, it also applies to API apps and mobile apps. 1. In the Azure Portal, open the blade for the web app. 2. Click All Settings. 3. Click Application Settings. The Application settings blade has settings grouped under several categories. Framework versions. Set these options if your app uses any these frameworks: .NET Framework: Set the .NET framework version. PHP: Set the PHP version, or OFF to disable PHP. Java: Select the Java version or OFF to disable Java. Use the Web Container option to choose between Tomcat and Jetty versions. Python: Select the Python version, or OFF to disable Python. For technical reasons, enabling Java for your app disables the .NET, PHP, and Python options. Platform. Selects whether your web app runs in a 32-bit or 64-bit environment. The 64-bit environment requires Basic or Standard mode. Free and Shared modes always run in a 32-bit environment. Web Sockets. Set ON to enable the WebSocket protocol; for example, if your web app uses ASP.NET SignalR or socket.io. Always On. By default, web apps are unloaded if they are idle for some period of time. This lets the system conserve resources. In Basic or Standard mode, you can enable Always On to keep the app loaded all the time. If
- 257. Debugging Debugging App settings App settings Connection strings Connection strings Default documents Default documents Handler mappings Handler mappings Virtual applications and directories Virtual applications and directories your app runs continuous web jobs, you should enable Always On, or the web jobs may not run reliably. Managed Pipeline Version. Sets the IIS pipeline mode. Leave this set to Integrated (the default) unless you have a legacy app that requires an older version of IIS. Auto Swap. If you enable Auto Swap for a deployment slot, App Service will automatically swap the web app into production when you push an update to that slot. For more information, see Deploy to staging slots for web apps in Azure App Service. Remote Debugging. Enables remote debugging. When enabled, you can use the remote debugger in Visual Studio to connect directly to your web app. Remote debugging will remain enabled for 48 hours. This section contains name/value pairs that you web app will load on start up. For .NET apps, these settings are injected into your .NET configuration AppSettings at runtime, overriding existing settings. PHP, Python, Java and Node applications can access these settings as environment variables at runtime. For each app setting, two environment variables are created; one with the name specified by the app setting entry, and another with a prefix of APPSETTING_. Both contain the same value. Connection strings for linked resources. For .NET apps, these connection strings are injected into your .NET configuration connectionStrings settings at runtime, overriding existing entries where the key equals the linked database name. For PHP, Python, Java and Node applications, these settings will be available as environment variables at runtime, prefixed with the connection type. The environment variable prefixes are as follows: SQL Server: SQLCONNSTR_ MySQL: MYSQLCONNSTR_ SQL Database: SQLAZURECONNSTR_ Custom: CUSTOMCONNSTR_ For example, if a MySql connection string were named connectionstring1 , it would be accessed through the environment variable MYSQLCONNSTR_connectionString1 . The default document is the web page that is displayed at the root URL for a website. The first matching file in the list is used. Web apps might use modules that route based on URL, rather than serving static content, in which case there is no default document as such. Use this area to add custom script processors to handle requests for specific file extensions. Extension. The file extension to be handled, such as *.php or handler.fcgi. Script Processor Path. The absolute path of the script processor. Requests to files that match the file extension will be processed by the script processor. Use the path D:homesitewwwroot to refer to your app's root directory. Additional Arguments. Optional command-line arguments for the script processor To configure virtual applications and directories, specify each virtual directory and its corresponding physical path
- 258. Enabling diagnostic logs relative to the website root. Optionally, you can select the Application checkbox to mark a virtual directory as an application. To enable diagnostic logs: 1. In the blade for your web app, click All settings. 2. Click Diagnostic logs. Options for writing diagnostic logs from a web application that supports logging: Application Logging. Writes application logs to the file system. Logging lasts for a period of 12 hours. Level. When application logging is enabled, this option specifies the amount of information that will be recorded (Error, Warning, Information, or Verbose). Web server logging. Logs are saved in the W3C extended log file format. Detailed error messages. Saves detailed error messages .htm files. The files are saved under /LogFiles/DetailedErrors. Failed request tracing. Logs failed requests to XML files. The files are saved under /LogFiles/W3SVCxxx, where xxx is a unique identifier. This folder contains an XSL file and one or more XML files. Make sure to download the XSL file, because it provides functionality for formatting and filtering the contents of the XML files. To view the log files, you must create FTP credentials, as follows: 1. In the blade for your web app, click All settings. 2. Click Deployment credentials. 3. Enter a user name and password. 4. Click Save. The full FTP user name is “appusername” where app is the name of your web app. The username is listed in the web app blade, under Essentials.
- 259. Other configuration tasks SSL SSL Domain names Domain names Deployments Deployments Monitoring Monitoring NOTE NOTE Next steps In Basic or Standard mode, you can upload SSL certificates for a custom domain. For more information, see [Enable HTTPS for a web app]. To view your uploaded certificates, click All Settings > Custom domains and SSL. Add custom domain names for your web app. For more information, see [Configure a custom domain name for a web app in Azure App Service]. To view your domain names, click All Settings > Custom domains and SSL. Set up continuous deployment. See Using Git to deploy Web Apps in Azure App Service. Deployment slots. See Deploy to Staging Environments for Web Apps in Azure App Service. To view your deployment slots, click All Settings > Deployment slots. In Basic or Standard mode, you can test the availability of HTTP or HTTPS endpoints, from up to three geo- distributed locations. A monitoring test fails if the HTTP response code is an error (4xx or 5xx) or the response takes more than 30 seconds. An endpoint is considered available if the monitoring tests succeed from all the specified locations. For more information, see How to: Monitor web endpoint status. If you want to get started with Azure App Service before signing up for an Azure account, go to Try App Service, where you can immediately create a short-lived starter web app in App Service. No credit cards required; no commitments. Configure a custom domain name in Azure App Service Enable HTTPS for an app in Azure App Service Scale a web app in Azure App Service Monitoring basics for Web Apps in Azure App Service
- 260. Deploy your app to Azure App Service 4/5/2017 • 9 min to read • Edit Online Azure App Service deployment overview NOTE NOTE This article helps you determine the best option to deploy the files for your web app, mobile app backend, or API app to Azure App Service, and then guides you to appropriate resources with instructions specific to your preferred option. Azure App Service maintains the application framework for you (ASP.NET, PHP, Node.js, etc). Some frameworks are enabled by default while others, like Java and Python, may need a simple checkmark configuration to enable it. In addition, you can customize your application framework, such as the PHP version or the bitness of your runtime. For more information, see Configure your app in Azure App Service. Since you don't have to worry about the web server or application framework, deploying your app to App Service is a matter of deploying your code, binaries, content files, and their respective directory structure, to the /site/wwwroot directory in Azure (or the /site/wwwroot/App_Data/Jobs/ directory for WebJobs). App Service supports three different deployment processes. All the deployment methods in this article use one of the following processes: FTP or FTPS: Use your favorite FTP or FTPS enabled tool to move your files to Azure, from FileZilla to full- featured IDEs like NetBeans. This is strictly a file upload process. No additional services are provided by App Service, such as version control, file structure management, etc. Web Deploy: Deploy code to App Service directly from your favorite Microsoft tools such as Visual Studio using the same tooling that automates deployment to IIS servers. This tool supports diff-only deployment, database creation, transforms of connection strings, etc. Web Deploy differs from Kudu in that application binaries are built before they are deployed to Azure. Similar to FTP, no additional services are provided by App Service. Kudu (Git/Mercurial or OneDrive/Dropbox): Kudu is the deployment engine in App Service. Push your code to Kudu directly from any repository. Kudu also provides added services whenever code is pushed to it, including version control, package restore, MSBuild, and web hooks for continuous deployment and other automation tasks. The Kudu deployment engine supports 3 different types of deployment sources: Content sync from OneDrive and Dropbox Repository-based continuous deployment with auto-sync from GitHub, Bitbucket, and Visual Studio Team Services Repository-based deployment with manual sync from local Git Popular web development tools support one or more of these deployment processes. While the tool you choose determines the deployment processes you can leverage, the actual DevOps functionality at your disposal depends on the combination of the deployment process and the specific tools you choose. For example, if you perform Web Deploy from Visual Studio with Azure SDK, even though you don't get automation from Kudu, you do get package restore and MSBuild automation in Visual Studio. These deployment processes don't actually provision the Azure resources that your app may need. However, most of the linked how-to articles show you how to provision the app AND deploy your code to it end-to-end. You can also find additional options for provisioning Azure resources in the Automate deployment by using command-line tools section.
- 261. Deploy manually by uploading files with FTP How to upload files with FTP How to upload files with FTP Deploy by syncing with a cloud folder How to deploy by syncing with a cloud folder How to deploy by syncing with a cloud folder Deploy continuously from a cloud-based source control service If you are used to manually copying your web content to a web server, you can use an FTP utility to copy files, such as Windows Explorer or FileZilla. The pros of copying files manually are: Familiarity and minimal complexity for FTP tooling. Knowing exactly where your files are going. Added security with FTPS. The cons of copying files manually are: Having to know how to deploy files to the correct directories in App Service. No version control for rollback when failures occur. No built-in deployment history for troubleshooting deployment issues. Potential long deployment times because many FTP tools don't provide diff-only copying and simply copy all the files. The Azure Portal gives you all the information you need to connect to your app's directories using FTP or FTPS. Deploy your app to Azure App Service using FTP A good alternative to copying files manually is syncing files and folders to App Service from a cloud storage service like OneDrive and Dropbox. Syncing with a cloud folder utilizes the Kudu process for deployment (see Overview of deployment processes). The pros of syncing with a cloud folder are: Simplicity of deployment. Services like OneDrive and Dropbox provide desktop sync clients, so your local working directory is also your deployment directory. One-click deployment. All functionality in the Kudu deployment engine is available (e.g. package restore, automation). The cons of syncing with a cloud folder are: No version control for rollback when failures occur. No automated deployment, manual sync is required. In the Azure Portal, you can designate a folder for content sync in your OneDrive or Dropbox cloud storage, work with your app code and content in that folder, and sync to App Service with the click of a button. Sync content from a cloud folder to Azure App Service. If your development team uses a cloud-based source code management (SCM) service like Visual Studio Team Services, GitHub, or BitBucket, you can configure App Service to integrate with your repository and deploy continuously. The pros of deploying from a cloud-based source control service are: Version control to enable rollback.
- 262. How to deploy continuously from a cloud-based source control service How to deploy continuously from a cloud-based source control service Deploy from local Git How to deploy from local Git How to deploy from local Git Deploy using an IDE Ability to configure continuous deployment for Git (and Mercurial where applicable) repositories. Branch-specific deployment, can deploy different branches to different slots. All functionality in the Kudu deployment engine is available (e.g. deployment versioning, rollback, package restore, automation). The con of deploying from a cloud-based source control service is: Some knowledge of the respective SCM service required. In the Azure Portal, you can configure continuous deployment from GitHub, Bitbucket, and Visual Studio Team Services. Continous Deployment to Azure App Service. To find out how to configure continuous deployment manually from a cloud repository not listed by the Azure Portal (such as GitLab), see Setting up continuous deployment using manual steps. If your development team uses an on-premises local source code management (SCM) service based on Git, you can configure this as a deployment source to App Service. Pros of deploying from local Git are: Version control to enable rollback. Branch-specific deployment, can deploy different branches to different slots. All functionality in the Kudu deployment engine is available (e.g. deployment versioning, rollback, package restore, automation). Con of deploying from local Git is: Some knowledge of the respective SCM system required. No turn-key solutions for continuous deployment. In the Azure Portal, you can configure local Git deployment. Local Git Deployment to Azure App Service. Publishing to Web Apps from any git/hg repo. If you are already using Visual Studio with an Azure SDK, or other IDE suites like Xcode, Eclipse, and IntelliJ IDEA, you can deploy to Azure directly from within your IDE. This option is ideal for an individual developer. Visual Studio supports all three deployment processes (FTP, Git, and Web Deploy), depending on your preference, while other IDEs can deploy to App Service if they have FTP or Git integration (see Overview of deployment processes). The pros of deploying using an IDE are: Potentially minimize the tooling for your end-to-end application life-cycle. Develop, debug, track, and deploy your app to Azure all without moving outside of your IDE. The cons of deploying using an IDE are: Added complexity in tooling.
- 263. How to deploy from Visual Studio directly How to deploy from Visual Studio directly How to deploy using the Azure Toolkits for Eclipse and IntelliJ IDEA How to deploy using the Azure Toolkits for Eclipse and IntelliJ IDEA Automate deployment by using command-line tools How to automate deployment with command-line tools How to automate deployment with command-line tools Still requires a source control system for a team project. Additional pros of deploying using Visual Studio with Azure SDK are: Azure SDK makes Azure resources first-class citizens in Visual Studio. Create, delete, edit, start, and stop apps, query the backend SQL database, live-debug the Azure app, and much more. Live editing of code files on Azure. Live debugging of apps on Azure. Integrated Azure explorer. Diff-only deployment. Get started with Azure and ASP.NET. How to create and deploy a simple ASP.NET MVC web project by using Visual Studio and Web Deploy. How to Deploy Azure WebJobs using Visual Studio. How to configure Console Application projects so that they deploy as WebJobs. Deploy a Secure ASP.NET MVC 5 app with Membership, OAuth, and SQL Database to Web Apps. How to create and deploy an ASP.NET MVC web project with a SQL database, by using Visual Studio, Web Deploy, and Entity Framework Code First Migrations. ASP.NET Web Deployment using Visual Studio. A 12-part tutorial series that covers a more complete range of deployment tasks than the others in this list. Some Azure deployment features have been added since the tutorial was written, but notes added later explain what's missing. Deploying an ASP.NET Website to Azure in Visual Studio 2012 from a Git Repository directly. Explains how to deploy an ASP.NET web project in Visual Studio, using the Git plug-in to commit the code to Git and connecting Azure to the Git repository. Starting in Visual Studio 2013, Git support is built-in and doesn't require installation of a plug-in. Microsoft makes it possible to deploy Web Apps to Azure directly from Eclipse and IntelliJ via the Azure Toolkit for Eclipse and Azure Toolkit for IntelliJ. The following tutorials illustrate the steps that are involved in deploying simple a "Hello" world Web App to Azure using either IDE: Create a Hello World Web App for Azure in Eclipse. This tutorial shows you how to use the Azure Toolkit for Eclipse to create and deploy a Hello World Web App for Azure. Create a Hello World Web App for Azure in IntelliJ. This tutorial shows you how to use the Azure Toolkit for IntelliJ to create and deploy a Hello World Web App for Azure. If you prefer the command-line terminal as the development environment of choice, you can script deployment tasks for your App Service app using command-line tools. Pros of deploying by using command-line tools are: Enables scripted deployment scenarios. Integrate provisioning of Azure resources and code deployment. Integrate Azure deployment into existing continous integration scripts. Cons of deploying by using command-line tools are: Not for GUI-preferring developers. See Automate deployment of your Azure app with command-line tools for a list of command-line tools and links to
- 264. Next Steps tutorials. In some scenarios you might want to be able to easily switch back and forth between a staging and a production version of your app. For more information, see Staged Deployment on Web Apps. Having a backup and restore plan in place is an important part of any deployment workflow. For information about the App Service backup and restore feature, see Web Apps Backups. For information about how to use Azure's Role-Based Access Control to manage access to App Service deployment, see RBAC and Web App Publishing.
- 265. Sync content from a cloud folder to Azure App Service 2/28/2017 • 1 min to read • Edit Online Overview of content sync deployment How to enable content sync deployment This tutorial shows you how to deploy to Azure App Service by syncing your content from popular cloud storage services like Dropbox and OneDrive. The on-demand content sync deployment is powered by the Kudu deployment engine integrated with App Service. In the Azure Portal, you can designate a folder in your cloud storage, work with your app code and content in that folder, and sync to App Service with the click of a button. Content sync utilizes the Kudu process for build and deployment. To enable content sync from the Azure Portal, follow these steps: NOTE NOTE 1. In your app's blade in the Azure Portal, click Settings > Deployment Source. Click Choose Source, then select OneDrive or Dropbox as the source for deployment. Because of underlying differences in the APIs, OneDrive for Business is not supported at this time. 2. Complete the authorization workflow to enable App Service to access a specific pre-defined designated path for OneDrive or Dropbox where all of your App Service content will be stored. After authorization the App Service platform will give you the option to create a content folder under the designated content path, or to choose an existing content folder under this designated content path. The designated content paths under your cloud storage accounts used for App Service sync are the following:
- 266. OneDrive: AppsAzure Web Apps Dropbox: DropboxAppsAzure 3. After the initial content sync the content sync can be initiated on demand from the Azure portal. Deployment history is available with the Deployments blade. More information for Dropbox deployment is available under Deploy from Dropbox.
- 267. Deploy your app to Azure App Service 4/5/2017 • 9 min to read • Edit Online Azure App Service deployment overview NOTE NOTE This article helps you determine the best option to deploy the files for your web app, mobile app backend, or API app to Azure App Service, and then guides you to appropriate resources with instructions specific to your preferred option. Azure App Service maintains the application framework for you (ASP.NET, PHP, Node.js, etc). Some frameworks are enabled by default while others, like Java and Python, may need a simple checkmark configuration to enable it. In addition, you can customize your application framework, such as the PHP version or the bitness of your runtime. For more information, see Configure your app in Azure App Service. Since you don't have to worry about the web server or application framework, deploying your app to App Service is a matter of deploying your code, binaries, content files, and their respective directory structure, to the /site/wwwroot directory in Azure (or the /site/wwwroot/App_Data/Jobs/ directory for WebJobs). App Service supports three different deployment processes. All the deployment methods in this article use one of the following processes: FTP or FTPS: Use your favorite FTP or FTPS enabled tool to move your files to Azure, from FileZilla to full- featured IDEs like NetBeans. This is strictly a file upload process. No additional services are provided by App Service, such as version control, file structure management, etc. Web Deploy: Deploy code to App Service directly from your favorite Microsoft tools such as Visual Studio using the same tooling that automates deployment to IIS servers. This tool supports diff-only deployment, database creation, transforms of connection strings, etc. Web Deploy differs from Kudu in that application binaries are built before they are deployed to Azure. Similar to FTP, no additional services are provided by App Service. Kudu (Git/Mercurial or OneDrive/Dropbox): Kudu is the deployment engine in App Service. Push your code to Kudu directly from any repository. Kudu also provides added services whenever code is pushed to it, including version control, package restore, MSBuild, and web hooks for continuous deployment and other automation tasks. The Kudu deployment engine supports 3 different types of deployment sources: Content sync from OneDrive and Dropbox Repository-based continuous deployment with auto-sync from GitHub, Bitbucket, and Visual Studio Team Services Repository-based deployment with manual sync from local Git Popular web development tools support one or more of these deployment processes. While the tool you choose determines the deployment processes you can leverage, the actual DevOps functionality at your disposal depends on the combination of the deployment process and the specific tools you choose. For example, if you perform Web Deploy from Visual Studio with Azure SDK, even though you don't get automation from Kudu, you do get package restore and MSBuild automation in Visual Studio. These deployment processes don't actually provision the Azure resources that your app may need. However, most of the linked how-to articles show you how to provision the app AND deploy your code to it end-to-end. You can also find additional options for provisioning Azure resources in the Automate deployment by using command-line tools section.
- 268. Deploy manually by uploading files with FTP How to upload files with FTP How to upload files with FTP Deploy by syncing with a cloud folder How to deploy by syncing with a cloud folder How to deploy by syncing with a cloud folder Deploy continuously from a cloud-based source control service If you are used to manually copying your web content to a web server, you can use an FTP utility to copy files, such as Windows Explorer or FileZilla. The pros of copying files manually are: Familiarity and minimal complexity for FTP tooling. Knowing exactly where your files are going. Added security with FTPS. The cons of copying files manually are: Having to know how to deploy files to the correct directories in App Service. No version control for rollback when failures occur. No built-in deployment history for troubleshooting deployment issues. Potential long deployment times because many FTP tools don't provide diff-only copying and simply copy all the files. The Azure Portal gives you all the information you need to connect to your app's directories using FTP or FTPS. Deploy your app to Azure App Service using FTP A good alternative to copying files manually is syncing files and folders to App Service from a cloud storage service like OneDrive and Dropbox. Syncing with a cloud folder utilizes the Kudu process for deployment (see Overview of deployment processes). The pros of syncing with a cloud folder are: Simplicity of deployment. Services like OneDrive and Dropbox provide desktop sync clients, so your local working directory is also your deployment directory. One-click deployment. All functionality in the Kudu deployment engine is available (e.g. package restore, automation). The cons of syncing with a cloud folder are: No version control for rollback when failures occur. No automated deployment, manual sync is required. In the Azure Portal, you can designate a folder for content sync in your OneDrive or Dropbox cloud storage, work with your app code and content in that folder, and sync to App Service with the click of a button. Sync content from a cloud folder to Azure App Service. If your development team uses a cloud-based source code management (SCM) service like Visual Studio Team Services, GitHub, or BitBucket, you can configure App Service to integrate with your repository and deploy continuously. The pros of deploying from a cloud-based source control service are: Version control to enable rollback.
- 269. How to deploy continuously from a cloud-based source control service How to deploy continuously from a cloud-based source control service Deploy from local Git How to deploy from local Git How to deploy from local Git Deploy using an IDE Ability to configure continuous deployment for Git (and Mercurial where applicable) repositories. Branch-specific deployment, can deploy different branches to different slots. All functionality in the Kudu deployment engine is available (e.g. deployment versioning, rollback, package restore, automation). The con of deploying from a cloud-based source control service is: Some knowledge of the respective SCM service required. In the Azure Portal, you can configure continuous deployment from GitHub, Bitbucket, and Visual Studio Team Services. Continous Deployment to Azure App Service. To find out how to configure continuous deployment manually from a cloud repository not listed by the Azure Portal (such as GitLab), see Setting up continuous deployment using manual steps. If your development team uses an on-premises local source code management (SCM) service based on Git, you can configure this as a deployment source to App Service. Pros of deploying from local Git are: Version control to enable rollback. Branch-specific deployment, can deploy different branches to different slots. All functionality in the Kudu deployment engine is available (e.g. deployment versioning, rollback, package restore, automation). Con of deploying from local Git is: Some knowledge of the respective SCM system required. No turn-key solutions for continuous deployment. In the Azure Portal, you can configure local Git deployment. Local Git Deployment to Azure App Service. Publishing to Web Apps from any git/hg repo. If you are already using Visual Studio with an Azure SDK, or other IDE suites like Xcode, Eclipse, and IntelliJ IDEA, you can deploy to Azure directly from within your IDE. This option is ideal for an individual developer. Visual Studio supports all three deployment processes (FTP, Git, and Web Deploy), depending on your preference, while other IDEs can deploy to App Service if they have FTP or Git integration (see Overview of deployment processes). The pros of deploying using an IDE are: Potentially minimize the tooling for your end-to-end application life-cycle. Develop, debug, track, and deploy your app to Azure all without moving outside of your IDE. The cons of deploying using an IDE are: Added complexity in tooling.
- 270. How to deploy from Visual Studio directly How to deploy from Visual Studio directly How to deploy using the Azure Toolkits for Eclipse and IntelliJ IDEA How to deploy using the Azure Toolkits for Eclipse and IntelliJ IDEA Automate deployment by using command-line tools How to automate deployment with command-line tools How to automate deployment with command-line tools Still requires a source control system for a team project. Additional pros of deploying using Visual Studio with Azure SDK are: Azure SDK makes Azure resources first-class citizens in Visual Studio. Create, delete, edit, start, and stop apps, query the backend SQL database, live-debug the Azure app, and much more. Live editing of code files on Azure. Live debugging of apps on Azure. Integrated Azure explorer. Diff-only deployment. Get started with Azure and ASP.NET. How to create and deploy a simple ASP.NET MVC web project by using Visual Studio and Web Deploy. How to Deploy Azure WebJobs using Visual Studio. How to configure Console Application projects so that they deploy as WebJobs. Deploy a Secure ASP.NET MVC 5 app with Membership, OAuth, and SQL Database to Web Apps. How to create and deploy an ASP.NET MVC web project with a SQL database, by using Visual Studio, Web Deploy, and Entity Framework Code First Migrations. ASP.NET Web Deployment using Visual Studio. A 12-part tutorial series that covers a more complete range of deployment tasks than the others in this list. Some Azure deployment features have been added since the tutorial was written, but notes added later explain what's missing. Deploying an ASP.NET Website to Azure in Visual Studio 2012 from a Git Repository directly. Explains how to deploy an ASP.NET web project in Visual Studio, using the Git plug-in to commit the code to Git and connecting Azure to the Git repository. Starting in Visual Studio 2013, Git support is built-in and doesn't require installation of a plug-in. Microsoft makes it possible to deploy Web Apps to Azure directly from Eclipse and IntelliJ via the Azure Toolkit for Eclipse and Azure Toolkit for IntelliJ. The following tutorials illustrate the steps that are involved in deploying simple a "Hello" world Web App to Azure using either IDE: Create a Hello World Web App for Azure in Eclipse. This tutorial shows you how to use the Azure Toolkit for Eclipse to create and deploy a Hello World Web App for Azure. Create a Hello World Web App for Azure in IntelliJ. This tutorial shows you how to use the Azure Toolkit for IntelliJ to create and deploy a Hello World Web App for Azure. If you prefer the command-line terminal as the development environment of choice, you can script deployment tasks for your App Service app using command-line tools. Pros of deploying by using command-line tools are: Enables scripted deployment scenarios. Integrate provisioning of Azure resources and code deployment. Integrate Azure deployment into existing continous integration scripts. Cons of deploying by using command-line tools are: Not for GUI-preferring developers. See Automate deployment of your Azure app with command-line tools for a list of command-line tools and links
- 271. Next Steps to tutorials. In some scenarios you might want to be able to easily switch back and forth between a staging and a production version of your app. For more information, see Staged Deployment on Web Apps. Having a backup and restore plan in place is an important part of any deployment workflow. For information about the App Service backup and restore feature, see Web Apps Backups. For information about how to use Azure's Role-Based Access Control to manage access to App Service deployment, see RBAC and Web App Publishing.
- 272. Continuous Deployment to Azure App Service 3/20/2017 • 3 min to read • Edit Online Enable continuous deployment This tutorial shows you how to configure a continuous deployment workflow for your Azure App Service app. App Service integration with BitBucket, GitHub, and Visual Studio Team Services (VSTS) enables a continuous deployment workflow where Azure pulls in the most recent updates from your project published to one of these services. Continuous deployment is a great option for projects where multiple and frequent contributions are being integrated. To find out how to configure continuous deployment manually from a cloud repository not listed by the Azure Portal (such as GitLab), see Setting up continuous deployment using manual steps. To enable continuous deployment, 1. Publish your app content to the repository that will be used for continuous deployment. For more information on publishing your project to these services, see Create a repo (GitHub), Create a repo (BitBucket), and Get started with VSTS. NOTE NOTE 3. Complete the authorization workflow. 2. In your app's menu blade in the Azure portal, click APP DEPLOYMENT > Deployment options. Click Choose Source, then select the deployment source. To configure a VSTS account for App Service deployment please see this tutorial. 4. In the Deployment source blade, choose the project and branch to deploy from. When you're done, click OK.
- 273. Continuous deployment of a Visual Studio solution NOTE NOTE 5. To verify the app is successfully deployed, click the URL at the top of the app's blade in the Azure portal. 6. To verify that continuous deployment is occurring from the repository of your choice, push a change to the repository. Your app should update to reflect the changes shortly after the push to the repository completes. You can verify that it has pulled in the update in the Deployment options blade of your app. When enabling continuous deployment with GitHub or BitBucket, both public and private projects will be displayed. App Service creates an association with the selected repository, pulls in the files from the specified branch, and maintains a clone of your repository for your App Service app. When you configure VSTS continuous deployment from the Azure portal, the integration uses the App Service Kudu deployment engine, which already automates build and deployment tasks with every git push . You do not need to separately set up continuous deployment in VSTS. After this process completes, the Deployment options app blade will show an active deployment that indicates deployment has succeeded. Pushing a Visual Studio solution to Azure App Service is just as easy as pushing a simple index.html file. The App Service deployment process streamlines all the details, including restoring NuGet dependencies and building the application binaries. You can follow the source control best practices of maintaining code only in your Git repository, and let App Service deployment take care of the rest. The steps for pushing your Visual Studio solution to App Service are the same as in the previous section, provided that you configure your solution and repository as follows: Use the Visual Studio source control option to generate a .gitignore file such as the image below or manually add a .gitignore file in your repository root with content similar to this .gitignore sample.
- 274. Disable continuous deployment Additional Resources Add the entire solution's directory tree to your repository, with the .sln file in the repository root. Once you have set up your repository as described, and configured your app in Azure for continuous publishing from one of the online Git repositories, you can develop your ASP.NET application locally in Visual Studio and continuously deploy your code simply by pushing your changes to your online Git repository. To disable continuous deployment, 2. After answering Yes to the confirmation message, you can return to your app's blade and click APP DEPLOYMENT > Deployment options if you would like to set up publishing from another source. 1. In your app's menu blade in the Azure portal, click APP DEPLOYMENT > Deployment options. Then click Disconnect in the Deployment options blade. How to investigate common issues with continuous deployment
- 275. NOTE NOTE How to use PowerShell for Azure How to use the Azure Command-Line Tools for Mac and Linux Git documentation Project Kudu Use Azure to automatically generate a CI/CD pipeline to deploy an ASP.NET 4 app If you want to get started with Azure App Service before signing up for an Azure account, go to Try App Service, where you can immediately create a short-lived starter web app in App Service. No credit cards required; no commitments.
- 276. Set up staging environments in Azure App Service 3/27/2017 • 10 min to read • Edit Online Add a deployment slot When you deploy your web app, mobile back end, and API app to App Service, you can deploy to a separate deployment slot instead of the default production slot when running in the Standard or Premium App Service plan mode. Deployment slots are actually live apps with their own hostnames. App content and configurations elements can be swapped between two deployment slots, including the production slot. Deploying your application to a deployment slot has the following benefits: You can validate app changes in a staging deployment slot before swapping it with the production slot. Deploying an app to a slot first and swapping it into production ensures that all instances of the slot are warmed up before being swapped into production. This eliminates downtime when you deploy your app. The traffic redirection is seamless, and no requests are dropped as a result of swap operations. This entire workflow can be automated by configuring Auto Swap when pre-swap validation is not needed. After a swap, the slot with previously staged app now has the previous production app. If the changes swapped into the production slot are not as you expected, you can perform the same swap immediately to get your "last known good site" back. Each App Service plan mode supports a different number of deployment slots. To find out the number of slots your app's mode supports, see App Service Pricing. When your app has multiple slots, you cannot change the mode. Scaling is not available for non-production slots. Linked resource management is not supported for non-production slots. In the Azure Portal only, you can avoid this potential impact on a production slot by temporarily moving the non-production slot to a different App Service plan mode. Note that the non-production slot must once again share the same mode with the production slot before you can swap the two slots. The app must be running in the Standard or Premium mode in order for you to enable multiple deployment slots. 1. In the Azure Portal, open your app's resource blade. 2. Choose the Deployment slots option, then click Add Slot.
- 277. NOTE NOTE If the app is not already in the Standard or Premium mode, you will receive a message indicating the supported modes for enabling staged publishing. At this point, you have the option to select Upgrade and navigate to the Scale tab of your app before continuing. 3. In the Add a slot blade, give the slot a name, and select whether to clone app configuration from another existing deployment slot. Click the check mark to continue. The first time you add a slot, you will only have two choices: clone configuration from the default slot in production or not at all. After you have created several slots, you will be able to clone configuration from a slot other than the one in production:
- 278. Configuration for deployment slots 5. Click the app URL in the slot's blade. Notice the deployment slot has its own hostname and is also a live app. To limit public access to the deployment slot, see App Service Web App – block web access to non- production deployment slots. 4. In your app's resource blade, click Deployment slots, then click a deployment slot to open that slot's resource blade, with a set of metrics and configuration just like any other app. The name of the slot is shown at the top of the blade to remind you that you are viewing the deployment slot. There is no content after deployment slot creation. You can deploy to the slot from a different repository branch, or an altogether different repository. You can also change the slot's configuration. Use the publish profile or deployment credentials associated with the deployment slot for content updates. For example, you can publish to this slot with git. When you clone configuration from another deployment slot, the cloned configuration is editable. Furthermore, some configuration elements will follow the content across a swap (not slot specific) while other configuration elements will stay in the same slot after a swap (slot specific). The following lists show the configuration that will change when you swap slots. Settings that are swapped:
- 279. Swap deployment slots IMPORTANT IMPORTANT General settings - such as framework version, 32/64-bit, Web sockets App settings (can be configured to stick to a slot) Connection strings (can be configured to stick to a slot) Handler mappings Monitoring and diagnostic settings WebJobs content Settings that are not swapped: Publishing endpoints Custom Domain Names SSL certificates and bindings Scale settings WebJobs schedulers To configure an app setting or connection string to stick to a slot (not swapped), access the Application Settings blade for a specific slot, then select the Slot Setting box for the configuration elements that should stick the slot. Note that marking a configuration element as slot specific has the effect of establishing that element as not swappable across all the deployment slots associated with the app. You can swap deployment slots in the Overview or Deployment slots view of your app's resource blade. Before you swap an app from a deployment slot into production, make sure that all non-slot specific settings are configured exactly as you want to have it in the swap target. 1. To swap deployment slots, click the Swap button in the command bar of the app or in the command bar of a deployment slot.
- 280. Swap with preview (multi-phase swap) Configure Auto Swap 2. Make sure that the swap source and swap target are set properly. Usually, the swap target is the production slot. Click OK to complete the operation. When the operation finishes, the deployment slots have been swapped. For the Swap with preview swap type, see Swap with preview (multi-phase swap). Swap with preview, or multi-phase swap, simplify validation of slot-specific configuration elements, such as connection strings. For mission-critical workloads, you want to validate that the app behaves as expected when the production slot's configuration is applied, and you must perform such validation before the app is swapped into production. Swap with preview is what you need. When you use the Swap with preview option (see Swap deployment slots), App Service does the following: Keeps the destination slot unchanged so existing workload on that slot (e.g. production) is not impacted. Applies the configuration elements of the destination slot to the source slot, including the slot-specific connection strings and app settings. Restarts the worker processes on the source slot using these aforementioned configuration elements. When you complete the swap: Moves the pre-warmed-up source slot into the destination slot. The destination slot is moved into the source slot as in a manual swap. When you cancel the swap: Reapplies the configuration elements of the source slot to the source slot. You can preview exactly how the app will behave with the destination slot's configuration. Once you completes validation, you complete the swap in a separate step. This step has the added advantage that the source slot is already warmed up with the desired configuration, and clients will not experience any downtime. Samples for the Azure PowerShell cmdlets available for multi-phase swap are included in the Azure PowerShell cmdlets for deployment slots section. Auto Swap streamlines DevOps scenarios where you want to continuously deploy your app with zero cold start
- 281. IMPORTANT IMPORTANT and zero downtime for end customers of the app. When a deployment slot is configured for Auto Swap into production, every time you push your code update to that slot, App Service will automatically swap the app into production after it has already warmed up in the slot. When you enable Auto Swap for a slot, make sure the slot configuration is exactly the configuration intended for the target slot (usually the production slot). Configuring Auto Swap for a slot is easy. Follow the steps below: 1. In Deployment Slots, select a non-production slot, and choose Application Settings in that slot's resource blade. 2. Select On for Auto Swap, select the desired target slot in Auto Swap Slot, and click Save in the command bar. Make sure configuration for the slot is exactly the configuration intended for the target slot. The Notifications tab will flash a green SUCCESS once the operation is complete.
- 282. To rollback a production app after swap Custom warm-up before swap <applicationInitialization> <add initializationPage="/" hostName="[app hostname]" /> <add initializationPage="/Home/About" hostname="[app hostname]" /> </applicationInitialization> To delete a deployment slot Azure PowerShell cmdlets for deployment slots NOTE NOTE 3. Execute a code push to that deployment slot. Auto Swap will happen after a short time and the update will be reflected at your target slot's URL. To test Auto Swap for your app, you can first select a non-production target slot in Auto Swap Slot to become familiar with the feature. If any errors are identified in production after a slot swap, roll the slots back to their pre-swap states by swapping the same two slots immediately. Some apps may require custom warm-up actions. The applicationInitialization configuration element in web.config allows you to specify custom initialization actions to be performed before a request is received. The swap operation will wait for this custom warm-up to complete. Here is a sample web.config fragment. In the blade for a deployment slot, open the deployment slot's blade, click Overview (the default page), and click Delete in the command bar. Azure PowerShell is a module that provides cmdlets to manage Azure through Windows PowerShell, including support for managing deployment slots in Azure App Service.
- 283. Create a web app Create a web app New-AzureRmWebApp -ResourceGroupName [resource group name] -Name [app name] -Location [location] -AppServicePlan [app service plan name] Create a deployment slot Create a deployment slot New-AzureRmWebAppSlot -ResourceGroupName [resource group name] -Name [app name] -Slot [deployment slot name] -AppServicePlan [app service plan name] Initiate a swap with review (multi-phase swap) and apply destination slot configuration to source slot Initiate a swap with review (multi-phase swap) and apply destination slot configuration to source slot $ParametersObject = @{targetSlot = "[slot name – e.g. “production”]"} Invoke-AzureRmResourceAction -ResourceGroupName [resource group name] -ResourceType Microsoft.Web/sites/slots -ResourceName [app name]/[slot name] -Action applySlotConfig -Parameters $ParametersObject -ApiVersion 2015-07-01 Cancel a pending swap (swap with review) and restore source slot configuration Cancel a pending swap (swap with review) and restore source slot configuration Invoke-AzureRmResourceAction -ResourceGroupName [resource group name] -ResourceType Microsoft.Web/sites/slots -ResourceName [app name]/[slot name] -Action resetSlotConfig -ApiVersion 2015-07-01 Swap deployment slots Swap deployment slots $ParametersObject = @{targetSlot = "[slot name – e.g. “production”]"} Invoke-AzureRmResourceAction -ResourceGroupName [resource group name] -ResourceType Microsoft.Web/sites/slots -ResourceName [app name]/[slot name] -Action slotsswap -Parameters $ParametersObject -ApiVersion 2015-07-01 Delete deployment slot Delete deployment slot Remove-AzureRmResource -ResourceGroupName [resource group name] -ResourceType Microsoft.Web/sites/slots –Name [app name]/[slot name] -ApiVersion 2015-07-01 Azure Command-Line Interface (Azure CLI) commands for Deployment Slots NOTE NOTE For information on installing and configuring Azure PowerShell, and on authenticating Azure PowerShell with your Azure subscription, see How to install and configure Microsoft Azure PowerShell. The Azure CLI provides cross-platform commands for working with Azure, including support for managing App Service deployment slots. For instructions on installing and configuring the Azure CLI, including information on how to connect Azure CLI to your Azure subscription, see Install and Configure the Azure CLI. To list the commands available for Azure App Service in the Azure CLI, call azure site -h . For Azure CLI 2.0 commands for deployment slots, see az appservice web deployment slot.
- 284. azure site list azure site list azure site create azure site create azure site swap azure site swap azure site delete azure site delete NOTE NOTE Next Steps For information about the apps in the current subscription, call azure site list, as in the following example. azure site list webappslotstest To create a deployment slot, call azure site create and specify the name of an existing app and the name of the slot to create, as in the following example. azure site create webappslotstest --slot staging To enable source control for the new slot, use the --git option, as in the following example. azure site create --git webappslotstest --slot staging To make the updated deployment slot the production app, use the azure site swap command to perform a swap operation, as in the following example. The production app will not experience any down time, nor will it undergo a cold start. azure site swap webappslotstest To delete a deployment slot that is no longer needed, use the azure site delete command, as in the following example. azure site delete webappslotstest --slot staging See a web app in action. Try App Service immediately and create a short-lived starter app—no credit card required, no commitments. Azure App Service Web App – block web access to non-production deployment slots Microsoft Azure Free Trial
- 285. Local Git Deployment to Azure App Service 3/21/2017 • 5 min to read • Edit Online Prerequisites NOTE NOTE Step 1: Create a local repository Step 2: Commit your content This tutorial shows you how to deploy your app to Azure App Service from a Git repository on your local computer. App Service supports this approach with the Local Git deployment option in the Azure Portal. Many of the Git commands described in this article are performed automatically when creating an App Service app using the Azure Command-Line Interface as described here. To complete this tutorial, you need: Git. You can download the installation binary here. Basic knowledge of Git. A Microsoft Azure account. If you don't have an account, you can sign up for a free trial or activate your Visual Studio subscriber benefits. If you want to get started with Azure App Service before signing up for an Azure account, go to Try App Service, where you can immediately create a short-lived starter app in App Service. No credit cards required; no commitments. Perform the following tasks to create a new Git repository. 1. Start a command-line tool, such as GitBash (Windows) or Bash (Unix Shell). On OS X systems you can access the command-line through the Terminal application. 2. Navigate to the directory where the content to deploy would be located. git init 3. Use the following command to initialize a new Git repository: App Service supports applications created in a variety of programming languages. git add -A 1. If your repository already includes content skip this point and move to point 2 below. If your repository does not already include content simply populate with a static .html file as follows: Using a text editor, create a new file named index.html at the root of the Git repository Add the following text as the contents for the index.html file and save it: Hello Git! 2. From the command-line, verify that you are under the root of your Git repository. Then use the following command to add files to your repository: 3. Next, commit the changes to the repository by using the following command:
- 286. Step 3: Enable the App Service app repository Step 4: Deploy your project git commit -m"Hello Azure App Service" Perform the following steps to enable a Git repository for your App Service app. 1. Log in to the Azure Portal. 2. In your App Service app's blade, click Settings > Deployment source. Click Choose source, then click Local Git Repository, and then click OK. 3. If this is your first time setting up a repository in Azure, you need to create login credentials for it. You will use them to log into the Azure repository and push changes from your local Git repository. From your app's blade, click Settings > Deployment credentials, then configure your deployment username and password. When you're done, click Save. Use the following steps to publish your app to App Service using Local Git. 1. In your app's blade in the Azure Portal, click Settings > Properties for the Git URL.
- 287. 2. Using the command-line, verify that you are in the root of your local Git repository. git remote add azure https://<username>@localgitdeployment.scm.azurewebsites.net:443/localgitdeployment.git NOTE NOTE git push azure master 6. Click the Browse button at the top of the app's blade to verify the content has been deployed. Git URL is the remote reference to deploy to from your local repository. You'll use this URL in the following steps. 3. Use git remote to add the remote reference listed in Git URL from step 1. Your command will look similar to the following: The remote command adds a named reference to a remote repository. In this example, it creates a reference named 'azure' for your web app's repository. 4. Push your content to App Service using the new azure remote you just created. You will be prompted for the password you created earlier when you reset your deployment credentials in the Azure Portal. Enter the password (note that Gitbash does not echo asterisks to the console as you type your password). 5. Go back to your app in the Azure Portal. A log entry of your most recent push should be displayed in the Deployments blade.
- 288. Troubleshooting git push azure master git push azure master git config --globalhttp.postBuffer 524288000 The following are errors or problems commonly encountered when using Git to publish to an App Service app in Azure: Symptom: Unable to access '[siteURL]': Failed to connect to [scmAddress] Cause: This error can occur if the app is not up and running. Resolution: Start the app in the Azure Portal. Git deployment will not work unless the app is running. Symptom: Couldn't resolve host 'hostname' Cause: This error can occur if the address information entered when creating the 'azure' remote was incorrect. Resolution: Use the git remote -v command to list all remotes, along with the associated URL. Verify that the URL for the 'azure' remote is correct. If needed, remove and recreate this remote using the correct URL. Symptom: No refs in common and none specified; doing nothing. Perhaps you should specify a branch such as 'master'. Cause: This error can occur if you do not specify a branch when performing a git push operation, and have not set the push.default value used by Git. Resolution: Perform the push operation again, specifying the master branch. For example: Symptom: src refspec [branchname] does not match any. Cause: This error can occur if you attempt to push to a branch other than master on the 'azure' remote. Resolution: Perform the push operation again, specifying the master branch. For example: Symptom: RPC failed; result=22, HTTP code = 502. Cause: This error can occur if you attempt to push a large git repository over HTTPS. Resolution: Change the git configuration on the local machine to make the postBuffer bigger Symptom: Error - Changes committed to remote repository but your web app not updated. Cause: This error can occur if you are deploying a Node.js app containing a package.json file that specifies additional required modules. Resolution: Additional messages containing 'npm ERR!' should be logged prior to this error, and can provide additional context on the failure. The following are known causes of this error and the corresponding 'npm ERR!' message: Malformed package.json file: npm ERR! Couldn't read dependencies. Native module that does not have a binary distribution for Windows:
- 289. Additional Resources npm ERR! [modulename@version] preinstall: `make || gmake` npm ERR! `cmd "/c" "node-gyp rebuild"` failed with 1 OR Git documentation Project Kudu documentation Continous Deployment to Azure App Service How to use PowerShell for Azure How to use the Azure Command-Line Interface
- 290. Provision and deploy microservices predictably in Azure 2/28/2017 • 14 min to read • Edit Online NOTE NOTE What you will do Tools you will use Azure Resource Manager templates (JSON) Azure Resource Manager templates (JSON) Azure SDK 2.6 for Visual Studio Azure SDK 2.6 for Visual Studio This tutorial shows how to provision and deploy an application composed of microservices in Azure App Service as a single unit and in a predictable manner using JSON resource group templates and PowerShell scripting. When provisioning and deploying high-scale applications that are composed of highly decoupled microservices, repeatability and predictability are crucial to success. Azure App Service enables you to create microservices that include web apps, mobile apps, API apps, and logic apps. Azure Resource Manager enables you to manage all the microservices as a unit, together with resource dependencies such as database and source control settings. Now, you can also deploy such an application using JSON templates and simple PowerShell scripting. Although this article refers to web apps, it also applies to API apps and mobile apps. In the tutorial, you will deploy an application that includes: Two web apps (i.e. two microservices) A backend SQL Database App settings, connection strings, and source control Application insights, alerts, autoscaling settings In this tutorial, you will use the following tools. Since it’s not comprehensive discussion on tools, I’m going to stick to the end-to-end scenario and just give you a brief intro to each, and where you can find more information on it. Every time you create a web app in Azure App Service, for example, Azure Resource Manager uses a JSON template to create the entire resource group with the component resources. A complex template from the Azure Marketplace like the Scalable WordPress app can include the MySQL database, storage accounts, the App Service plan, the web app itself, alert rules, app settings, autoscale settings, and more, and all these templates are available to you through PowerShell. For information on how to download and use these templates, see Using Azure PowerShell with Azure Resource Manager. For more information on the Azure Resource Manager templates, see Authoring Azure Resource Manager Templates The newest SDK contains improvements to the Resource Manager template support in the JSON editor. You can use this to quickly create a resource group template from scratch or open an existing JSON template (such as a downloaded gallery template) for modification, populate the parameters file, and even deploy the resource group directly from an Azure Resource Group solution. For more information, see Azure SDK 2.6 for Visual Studio.
- 291. Azure PowerShell 0.8.0 or later Azure PowerShell 0.8.0 or later Azure Resource Explorer Azure Resource Explorer Deploy to Azure button Deploy to Azure button Get the sample resource group template Beginning in version 0.8.0, the Azure PowerShell installation includes the Azure Resource Manager module in addition to the Azure module. This new module enables you to script the deployment of resource groups. For more information, see Using Azure PowerShell with Azure Resource Manager This preview tool enables you to explore the JSON definitions of all the resource groups in your subscription and the individual resources. In the tool, you can edit the JSON definitions of a resource, delete an entire hierarchy of resources, and create new resources. The information readily available in this tool is very helpful for template authoring because it shows you what properties you need to set for a particular type of resource, the correct values, etc. You can even create your resource group in the Azure Portal, then inspect its JSON definitions in the explorer tool to help you templatize the resource group. If you use GitHub for source control, you can put a Deploy to Azure button into your README.MD, which enables a turn-key deployment UI to Azure. While you can do this for any simple web app, you can extend this to enable deploying an entire resource group by putting an azuredeploy.json file in the repository root. This JSON file, which contains the resource group template, will be used by the Deploy to Azure button to create the resource group. For an example, see the ToDoApp sample, which you will use in this tutorial. So now let’s get right to it. 1. Navigate to the ToDoApp App Service sample. 2. In readme.md, click Deploy to Azure. 3. You’re taken to the deploy-to-azure site and asked to input deployment parameters. Notice that most of the fields are populated with the repository name and some random strings for you. You can change all the fields if you want, but the only things you have to enter are the SQL Server administrative login and the password, then click Next. 4. Next, click Deploy to start the deployment process. Once the process runs to completion, click the http://todoappXXXX.azurewebsites.net link to browse the deployed application.
- 292. 5. Back in the Deploy page, click the Manage link to see the new application in the Azure Portal. The UI would be a little slow when you first browse to it because the apps are just starting up, but convince yourself that it’s a fully-functional application. 6. In the Essentials dropdown, click the resource group link. Note also that the web app is already connected to the GitHub repository under External Project. 7. In the resource group blade, note that there are already two web apps and one SQL Database in the resource group. Everything that you just saw in a few short minutes is a fully deployed two-microservice application, with all the components, dependencies, settings, database, and continuous publishing, set up by an automated orchestration in Azure Resource Manager. All this was done by two things: The Deploy to Azure button azuredeploy.json in the repo root
- 293. Examine (or edit) AZUREDEPLOY.JSON Parameters Parameters You can deploy this same application tens, hundreds, or thousands of times and have the exact same configuration every time. The repeatability and the predictability of this approach enables you to deploy high-scale applications with ease and confidence. Now let’s look at how the GitHub repository was set up. You will be using the JSON editor in the Azure .NET SDK, so if you haven’t already installed Azure .NET SDK 2.6, do it now. 1. Clone the ToDoApp repository using your favorite git tool. In the screenshot below, I’m doing this in the Team Explorer in Visual Studio 2013. 2. From the repository root, open azuredeploy.json in Visual Studio. If you don’t see the JSON Outline pane, you need to install Azure .NET SDK. I’m not going to describe every detail of the JSON format, but the More Resources section has links for learning the resource group template language. Here, I’m just going to show you the interesting features that can help you get started in making your own custom template for app deployment.
- 294. Resources Resources App Service plan App Service plan NOTE NOTE SQL Server SQL Server Take a look at the parameters section to see that most of these parameters are what the Deploy to Azure button prompts you to input. The site behind the Deploy to Azure button populates the input UI using the parameters defined in azuredeploy.json. These parameters are used throughout the resource definitions, such as resource names, property values, etc. In the resources node, you can see that 4 top-level resources are defined, including a SQL Server instance, an App Service plan, and two web apps. Let’s start with a simple root-level resource in the JSON. In the JSON Outline, click the App Service plan named [hostingPlanName] to highlight the corresponding JSON code. Note that the type element specifies the string for an App Service plan (it was called a server farm a long, long time ago), and other elements and properties are filled in using the parameters defined in the JSON file, and this resource doesn’t have any nested resources. Note also that the value of apiVersion tells Azure which version of the REST API to use the JSON resource definition with, and it can affect how the resource should be formatted inside the {} . Next, click on the SQL Server resource named SQLServer in the JSON Outline.
- 295. Web app Web app Root resource Root resource App settings App settings Note the following about the highlighted JSON code: The use of parameters ensures that the created resources are named and configured in a way that makes them consistent with one another. The SQLServer resource has two nested resources, each has a different value for type . NOTE NOTE The effect of the dependsOn element is that Azure Resource Manager can know which resources can be created in parallel and which resources must be created sequentially. The nested resources inside “resources”:[…] , where the database and the firewall rules are defined, have a dependsOn element that specifies the resource ID of the root-level SQLServer resource. This tells Azure Resource Manager, “before you create this resource, that other resource must already exist; and if that other resource is defined in the template, then create that one first”. For detailed information on how to use the resourceId() function, see Azure Resource Manager Template Functions. Now, let’s move on to the actual web apps themselves, which are more complicated. Click the [variables(‘apiSiteName’)] web app in the JSON Outline to highlight its JSON code. You’ll notice that things are getting much more interesting. For this purpose, I’ll talk about the features one by one: The web app depends on two different resources. This means that Azure Resource Manager will create the web app only after both the App Service plan and the SQL Server instance are created. The app settings are also defined as a nested resource.
- 296. Connection strings Connection strings TIP TIP Source control Source control In the properties element for config/appsettings , you have two app settings in the format “<name>” :“<value>” . PROJECT is a KUDU setting that tells Azure deployment which project to use in a multi-project Visual Studio solution. I will show you later how source control is configured, but since the ToDoApp code is in a multi- project Visual Studio solution, we need this setting. clientUrl is simply an app setting that the application code uses. The connection strings are also defined as a nested resource. In the properties element for config/connectionstrings , each connection string is also defined as a name:value pair, with the specific format of “<name>” :{“value”:“…”, “type”:“…”} . For the type element, possible values are MySql , SQLServer , SQLAzure , and Custom . For a definitive list of the connection string types, run the following command in Azure PowerShell: [Enum]::GetNames("Microsoft.WindowsAzure.Commands.Utilities.Websites.Services.WebEntities.DatabaseType") The source control settings are also defined as a nested resource. Azure Resource Manager uses this resource to configure continuous publishing (see caveat on IsManualIntegration later) and also to kick off the deployment of application code automatically during the processing of the JSON file. RepoUrl and branch should be pretty intuitive and should point to the Git repository and the name of the branch to publish from. Again, these are defined by input parameters. Note in the dependsOn element that, in addition to the web app resource itself, sourcecontrols/web also depends on
- 297. NOTE NOTE Compare the JSON template with deployed resource group config/appsettings and config/connectionstrings . This is because once sourcecontrols/web is configured, the Azure deployment process will automatically attempt to deploy, build, and start the application code. Therefore, inserting this dependency helps you make sure that the application has access to the required app settings and connection strings before the application code is run. Note also that IsManualIntegration is set to true . This property is necessary in this tutorial because you do not actually own the GitHub repository, and thus cannot actually grant permission to Azure to configure continuous publishing from ToDoApp (i.e. push automatic repository updates to Azure). You can use the default value false for the specified repository only if you have configured the owner’s GitHub credentials in the Azure portal before. In other words, if you have set up source control to GitHub or BitBucket for any app in the Azure Portal previously, using your user credentials, then Azure will remember the credentials and use them whenever you deploy any app from GitHub or BitBucket in the future. However, if you haven’t done this already, deployment of the JSON template will fail when Azure Resource Manager tries to configure the web app’s source control settings because it cannot log into GitHub or BitBucket with the repository owner’s credentials. Here, you can go through all the web app’s blades in the Azure Portal, but there’s another tool that’s just as useful, if not more. Go to the Azure Resource Explorer preview tool, which gives you a JSON representation of all the resource groups in your subscriptions, as they actually exist in the Azure backend. You can also see how the resource group’s JSON hierarchy in Azure corresponds with the hierarchy in the template file that’s used to create it. For example, when I go to the Azure Resource Explorer tool and expand the nodes in the explorer, I can see the resource group and the root-level resources that are collected under their respective resource types. If you drill down to a web app, you should be able to see web app configuration details similar to the below screenshot:
- 298. Deploy the resource group template yourself Again, the nested resources should have a hierarchy very similar to those in your JSON template file, and you should see the app settings, connection strings, etc., properly reflected in the JSON pane. The absence of settings here may indicate an issue with your JSON file and can help you troubleshoot your JSON template file. The Deploy to Azure button is great, but it allows you to deploy the resource group template in azuredeploy.json only if you have already pushed azuredeploy.json to GitHub. The Azure .NET SDK also provides the tools for you to deploy any JSON template file directly from your local machine. To do this, follow the steps below: 1. In Visual Studio, click File > New > Project. 2. Click Visual C# > Cloud > Azure Resource Group, then click OK.
- 299. 3. In Select Azure Template, select Blank Template and click OK. 5. From Solution Explorer, open the copied azuredeploy.json. 4. Drag azuredeploy.json into the Template folder of your new project. 6. Just for the sake of the demonstration, let’s add some standard Application Insight resources to our JSON file, by clicking Add Resource. If you’re just interested in deploying the JSON file, skip to the deploy steps. 7. Select Application Insights for Web Apps, then make sure an existing App Service plan and web app is selected, and then click Add.
- 300. 8. In the JSON Outline, click appInsights AutoScale to highlight its JSON code. This is the scaling setting for your App Service plan. You’ll now be able to see several new resources that, depending on the resource and what it does, have dependencies on either the App Service plan or the web app. These resources are not enabled by their existing definition and you’re going to change that. 9. In the highlighted JSON code, locate the location and enabled properties and set them as shown below.
- 301. 10. In the JSON Outline, click CPUHigh appInsights to highlight its JSON code. This is an alert. 13. Log into your Azure account if you haven’t already done so. 11. Locate the location and isEnabled properties and set them as shown below. Do the same for the other three alerts (purple bulbs). 12. You’re now ready to deploy. Right-click the project and select Deploy > New Deployment. 14. Select an existing resource group in your subscription or create a new one, select azuredeploy.json, and then click Edit Parameters. You’ll now be able to edit all the parameters defined in the template file in a nice table. Parameters that define defaults will already have their default values, and parameters that define a list of allowed values will
- 302. NOTE NOTE 16. Click Deploy. If you selected Save passwords, the password will be saved in the parameter file in plain text. Otherwise, you’ll be asked to input the database password during the deployment process. be shown as dropdowns. 15. Fill in all the empty parameters, and use the GitHub repo address for ToDoApp in repoUrl. Then, click Save. Autoscaling is a feature offered in Standard tier or higher, and plan-level alerts are features offered in Basic tier or higher, you’ll need to set the sku parameter to Standard or Premium in order to see all your new App Insights resources light up. That’s it! Now you just need to go to the Azure Portal and the Azure Resource Explorer tool to see the new alerts
- 303. Summary Next Steps More resources and autoscale settings added to your JSON deployed application. Your steps in this section mainly accomplished the following: 1. Prepared the template file 2. Created a parameter file to go with the template file 3. Deployed the template file with the parameter file The last step is easily done by a PowerShell cmdlet. To see what Visual Studio did when it deployed your application, open ScriptsDeploy-AzureResourceGroup.ps1. There’s a lot of code there, but I’m just going to highlight all the pertinent code you need to deploy the template file with the parameter file. The last cmdlet, New-AzureResourceGroup , is the one that actually performs the action. All this should demonstrate to you that, with the help of tooling, it is relatively straightforward to deploy your cloud application predictably. Every time you run the cmdlet on the same template with the same parameter file, you’re going to get the same result. In DevOps, repeatability and predictability are keys to any successful deployment of a high-scale application composed of microservices. In this tutorial, you have deployed a two-microservice application to Azure as a single resource group using the Azure Resource Manager template. Hopefully, it has given you the knowledge you need in order to start converting your application in Azure into a template and can provision and deploy it predictably. Find out how to apply agile methodologies and continuously publish your microservices application with ease and advanced deployment techniques like flighting deployment easily. Azure Resource Manager Template Language Authoring Azure Resource Manager Templates Azure Resource Manager Template Functions Deploy an application with Azure Resource Manager template Using Azure PowerShell with Azure Resource Manager Troubleshooting Resource Group Deployments in Azure
- 304. Agile software development with Azure App Service 3/27/2017 • 13 min to read • Edit Online REQUIREMENT HOW AZURE ENABLES - Build with every commit - Build automatically and fast When configured with continuous deployment, Azure App Service can function as live-running builds based on a dev branch. Every time code is pushed to the branch, it is automatically built and running live in Azure. - Make builds self-testing Load tests, web tests, etc., can be deployed with the Azure Resource Manager template. - Perform tests in a clone of production environment Azure Resource Manager templates can be used to create clones of the Azure production environment (including app settings, connection string templates, scaling, etc.) for testing quickly and predictably. - View result of latest build easily Continuous deployment to Azure from a repository means that you can test new code in a live application immediately after you commit your changes. - Commit to the main branch every day - Automate deployment Continuous integration of a production application with a repository’s main branch automatically deploys every commit/merge to the main branch to production. NOTE NOTE What you will do In this tutorial, you will learn how to create high-scale complex applications with Azure App Service in a way that supports agile software development. It assumes that you already know how to deploy complex applications predictably in Azure. Limitations in technical processes can often stand in the way of successful implementation of agile methodologies. Azure App Service with features such as continuous publishing, staging environments (slots), and monitoring, when coupled wisely with the orchestration and management of deployment in Azure Resource Manager, can be part of a great solution for developers who embrace agile software development. The following table is a short list of requirements associated with agile development, and how Azure services enables each of them. Although this article refers to web apps, it also applies to API apps and mobile apps. You will walk through a typical dev-test-stage-production workflow in order to publish new changes to the ToDoApp sample application, which consists of two web apps, one being a frontend (FE) and the other being a Web API backend (BE), and a SQL database. You will work with the deployment architecture shown below:
- 305. What you will need To put the picture into words : The deployment architecture is separated into three distinct environments (or resource groups in Azure), each with its own App Service plan, scaling settings, and SQL database. Each environment can be managed separately. They can even exist in different subscriptions. Staging and production are implemented as two slots of the same App Service app. The master branch is setup for continuous integration with the staging slot. When a commit to master branch is verified on the staging slot (with production data), the verified staging app is swapped into the production slot with no downtime. The production and staging environment is defined by the template at <repository_root>/ARMTemplates/ProdandStage.json. The dev and test environments are defined by the template at <repository_root>/ARMTemplates/Dev.json. You will also use the typical branching strategy, with code moving from the dev branch up to the test branch, then to the master branch (moving up in quality, so to speak). An Azure account A GitHub account Git Shell (installed with GitHub for Windows) - this enables you to run both the Git and PowerShell commands in the same session Latest Azure PowerShell bits Basic understanding of the following:
- 306. NOTE NOTE Set up your production environment NOTE NOTE Azure Resource Manager template deployment (also see Deploy a complex application predictably in Azure) Git PowerShell You need an Azure account to complete this tutorial: You can open an Azure account for free - You get credits you can use to try out paid Azure services, and even after they're used up you can keep the account and use free Azure services, such as Web Apps. You can activate Visual Studio subscriber benefits - Your Visual Studio subscription gives you credits every month that you can use for paid Azure services. If you want to get started with Azure App Service before signing up for an Azure account, go to Try App Service, where you can immediately create a short-lived starter web app in App Service. No credit cards required; no commitments. The script used in this tutorial will automatically configure continuous publishing from your GitHub repository. This requires that your GitHub credentials are already stored in Azure, otherwise the scripted deployment will fail when attempting to configure source control settings for the web apps. To store your GitHub credentials in Azure, create a web app in the Azure Portal and configure GitHub deployment. You only need to do this once. In a typical DevOps scenario, you have an application that’s running live in Azure, and you want to make changes to it through continuous publishing. In this scenario, you have a template that you developed, tested, and used to deploy the production environment. You will set it up in this section. 2. Open a Git Shell session. If you don't have Git Shell yet, install GitHub for Windows now. 1. Create your own fork of the ToDoApp repository. For information on creating your fork, see Fork a Repo. Once your fork is created, you can see it in your browser. 3. Create a local clone of your fork by executing the following command: git clone https://github.com//ToDoApp.git
- 307. TIP TIP 7. When the script finishes, go back to browse to the frontend’s address (http://ToDoApp<unique_string>master.azurewebsites.net/) to see the application running in production. 4. Once you have your local clone, navigate to <repository_root>ARMTemplates, and run the deploy.ps1 script as follows: .deploy.ps1 –RepoUrl https://github.com//todoapp.git 5. When prompted, type in the desired username and password for database access. You should see the provisioning progress of various Azure resources. When deployment completes, the script will launch the application in the browser and give you a friendly beep. Take a look at <repository_root>ARMTemplatesDeploy.ps1, to see how it generates resources with unique IDs. You can use the same approach to create clones of the same deployment without worrying about conflicting resource names. 6. Back in your Git Shell session, run: .swap –Name ToDoAppmaster 8. Log into the Azure Portal and take a look at what’s created. You should be able to see two web apps in the same resource group, one with the Api suffix in the name. If you look at the resource group view, you will also see the SQL Database and server, the App Service plan, and the staging slots for the web apps. Browse through the different resources and compare them with <repository_root>ARMTemplatesProdAndStage.json to see how they are configured in the template.
- 308. Create dev and test branches You have now set up the production environment. Next, you will kick off a new update to the application. Now that you have a complex application running in production in Azure, you will make an update to your application in accordance with agile methodology. In this section, you will create the dev and test branches that you will need to make the required updates. 1. Create the test environment first. In your Git Shell session, run the following commands to create the environment for a new branch called NewUpdate. git checkout -b NewUpdate git push origin NewUpdate .deploy.ps1 -TemplateFile .Dev.json -RepoUrl https://github.com//ToDoApp.git -Branch NewUpdate 2. When prompted, type in the desired username and password for database access. When deployment completes, the script will launch the application in the browser and give you a friendly beep. And just like that, you now have a new branch with its own test environment. Take a moment to review a few things about this test environment: You can create it in any Azure subscription. That means the production environment can be managed separately from your test environment. Your test environment is running live in Azure. Your test environment is identical to the production environment, except for the staging slots and the scaling settings. You can know this because these are the only differences between ProdandStage.json and Dev.json. You can manage your test environment in its own App Service plan, with a different price tier (such as Free). Deleting this test environment will be as simple as deleting the resource group. You will find out how to do this later. 3. Go on to create a dev branch by running the following commands: git checkout -b Dev git push origin Dev .deploy.ps1 -TemplateFile .Dev.json -RepoUrl https://github.com//ToDoApp.git -Branch Dev 4. When prompted, type in the desired username and password for database access. Take a moment to review a few things about this dev environment:
- 309. NOTE NOTE Your dev environment has a configuration identical to the test environment because it’s deployed using the same template. Each dev environment can be created in the developer’s own Azure subscription, leaving the test environment to be separately managed. Your dev environment is running live in Azure. Deleting the dev environment is as simple as deleting the resource group. You will find out how to do this later. When you have multiple developers working on the new update, each of them can easily create a branch and dedicated dev environment by doing the following: 1. Create their own fork of the repository in GitHub (see Fork a Repo). 2. Clone the fork on their local machine 3. Run the same commands to create their own dev branch and environment. When you’re done, your GitHub fork should have three branches: And you should have six web apps (three sets of two) in three separate resource groups:
- 310. NOTE NOTE Build and test every commit Note that ProdandStage.json specifies the production environment to use the Standard pricing tier, which is appropriate for scalability of the production application. The template files ProdAndStage.json and Dev.json already specify the source control parameters, which by default sets up continuous publishing for the web app. Therefore, every commit to the GitHub branch triggers an automatic deployment to Azure from that branch. Let’s see how your setup works now. NOTE NOTE 1. Make sure that you’re in the Dev branch of the local repository. To do this, run the following command in Git Shell: git checkout Dev 2. Make a simple change to the app’s UI layer by changing the code to use Bootstrap lists. Open <repository_root>srcMultiChannelToDo.Webindex.cshtml and make the highlighted change below: If you can't read the image above: In line 18, change check-list to list-group . In line 19, change class="check-list-item" to class="list-group-item" . 3. Save the change. Back in Git Shell, run the following commands: cd git add . git commit -m "changed to bootstrap style" git push origin Dev These git commands are similar to "checking in your code" in another source control system like TFS. When you run git push , the new commit triggers an automatic code push to Azure, which then rebuilds the application to reflect the change in the dev environment. 4. To verify that this code push to your dev environment has occurred, go to your dev environment’s web app blade and look at the Deployment part. You should be able to see your latest commit message there.
- 311. Merge code into test environment 5. From there, click Browse to see the new change in the live application in Azure. This is a pretty minor change to the application. However, many times new changes to a complex web application has unintended and undesirable side effects. Being able to easily test every commit in live builds enables you to catch these issues before your customers see them. By now, you should be comfortable with the realization that, as a developer on the NewUpdate project, you will be able to easily create a dev environment for yourself, then build every commit and test every build. When you’re ready to push your code from Dev branch up to NewUpdate branch, it’s the standard git process: 1. Merge any new commits to NewUpdate into the Dev branch in GitHub, such as commits created by other
- 312. git checkout NewUpdate git pullorigin NewUpdate git merge Dev git push origin NewUpdate Deploy update to production git checkout master git pullorigin master git merge NewUpdate git push origin master Show-AzureWebsite -Name ToDoApp<unique_string>master -Slot Staging cd <repository_root>ARMTemplates .swap.ps1-Name ToDoApp<unique_string>master Delete dev and test enviroments developers. Any new commit on GitHub will trigger a code push and build in the dev environment. You can then make sure your code in Dev branch still works with the latest bits from NewUpdate branch. 2. Merge all your new commits from Dev branch into NewUpdate branch on GitHub. This action triggers a code push and build in the test environment. Note again that because continuous deployment is already setup with these git branches, you don’t need to take any other action like running integration builds. You simply need to perform standard source control practices using git, and Azure will perform all the build processes for you. Now, let’s push your code to NewUpdate branch. In Git Shell, run the following commands: That’s it! Go to the web app blade for your test environment to see your new commit (merged into NewUpdate branch) now pushed to the test environment. Then, click Browse to see that the style change is now running live in Azure. Pushing code to the staging and production environment should feel no different than what you’ve already done when you pushed code to the test environment. It's really that simple. In Git Shell, run the following commands: Remember that based on the way the staging and production environment is setup in ProdandStage.json, your new code is pushed to the Staging slot and is running there. So if you navigate to the staging slot’s URL, you’ll see the new code running there. To do this, run the Show-AzureWebsite cmdlet in Git Shell. And now, after you’ve verified the update in the staging slot, the only thing left to do is to swap it into production. In Git Shell, just run the following commands: Congratulations! You’ve successfully published a new update to your production web application. What’s more is that you’ve just done it by easily creating dev and test environments, and building and testing every commit. These are crucial building blocks for agile software development. Because you have purposely architected your dev and test environments to be self-contained resource groups, it is very easy to delete them. To delete the ones you created in this tutorial, both the GitHub branches and Azure artifacts, just run the following commands in Git Shell:
- 313. git branch -d Dev git push origin :Dev git branch -d NewUpdate git push origin :NewUpdate Remove-AzureRmResourceGroup -Name ToDoApp<unique_string>dev-group -Force -Verbose Remove-AzureRmResourceGroup -Name ToDoApp<unique_string>newupdate-group -Force -Verbose Summary More resources Agile software development is a must-have for many companies who want to adopt Azure as their application platform. In this tutorial, you have learned how to create and tear down exact replicas or near replicas of the production environment with ease, even for complex applications. You have also learned how to leverage this ability to create a development process that can build and test every single commit in Azure. This tutorial has hopefully shown you how you can best use Azure App Service and Azure Resource Manager together to create a DevOps solution that caters to agile methodologies. Next, you can build on this scenario by performing advanced DevOps techniques such as testing in production. For a common testing-in-production scenario, see Flighting deployment (beta testing) in Azure App Service. Deploy a complex application predictably in Azure Agile Development in Practice: Tips and Tricks for Modernized Development Cycle Advanced deployment strategies for Azure Web Apps using Resource Manager templates Authoring Azure Resource Manager Templates JSONLint - The JSON Validator ARMClient – Set up GitHub publishing to site Git Branching – Basic Branching and Merging David Ebbo’s Blog Azure PowerShell Azure Cross-Platform Command-Line Tools Create or edit users in Azure AD Project Kudu Wiki
- 314. Flighting deployment (beta testing) in Azure App Service 2/28/2017 • 15 min to read • Edit Online What you will do What you will need This tutorial shows you how to do flighting deployments by integrating the various capabilities of Azure App Service and Azure Application Insights. Flighting is a deployment process that validates a new feature or change with a limited number of real customers, and is a major testing in production scenario. It is akin to beta testing and is sometimes known as "controlled test flight". Many large enterprises with a web presence use this approach to get early validation on their app updates in their practice of agile development. Azure App Service enables you to integrate test in production with continous publishing and Application Insights to implement the same DevOps scenario. Benefits of this approach include: Gain real feedback before updates are released to production - The only thing better than gaining feedback as soon as you release is gaining feedback before you release. You can test updates with real user traffic and behaviors as early as you desire in the product life cycle. Enhance continuous test-driven development (CTDD) - By integrating test in production with continuous integration and instrumentation with Application Insights, user validation happens early and automatically in your product life cycle. This helps reduce time investments in manual test execution. Optimize test workflow - By automating test in production with continuous monitoring instrumentation, you can potentially accomplish the goals of various kinds of tests in a single process, such as integration, regression, usability, accessibility, localization, performance, security, and acceptance. A flighting deployment is not just about routing live traffic. In such a deployment you want to gain insight as quickly as possible, whether it be an unexpected bug, performance degradation, user experience issues. Remember, you are dealing with real customers. So to do it right, you must make sure that you have set up your flighting deployment to gather all the data you need in order to make an informed decision for your next step. This tutorial shows you how to collect data with Application Insights, but you can use New Relic or other technologies that suits your scenario. In this tutorial, you will learn how to bring the following scenarios together to test your App Service app in production: Route production traffic to your beta app Instrument your app to obtain useful metrics Continuously deploy your beta app and track live app metrics Compare metrics between the production app and the beta app to see how code changes translate to results An Azure account A GitHub account Visual Studio 2015 - you can download the Community edition. Git Shell (installed with GitHub for Windows) - this enables you to run both the Git and PowerShell commands in the same session Latest Azure PowerShell bits
- 315. NOTE NOTE Set up your production web app NOTE NOTE Basic understanding of the following: Azure Resource Manager template deployment (see Deploy a complex application predictably in Azure) Git PowerShell You need an Azure account to complete this tutorial: You can open an Azure account for free - You get credits you can use to try out paid Azure services, and even after they're used up you can keep the account and use free Azure services, such as Web Apps. You can activate Visual Studio subscriber benefits - Your Visual Studio subscription gives you credits every month that you can use for paid Azure services. If you want to get started with Azure App Service before signing up for an Azure account, go to Try App Service, where you can immediately create a short-lived starter web app in App Service. No credit cards required; no commitments. The script used in this tutorial will automatically configure continuous publishing from your GitHub repository. This requires that your GitHub credentials are already stored in Azure, otherwise the scripted deployment will fail when attempting to configure source control settings for the web apps. To store your GitHub credentials in Azure, create a web app in the Azure Portal and configure GitHub deployment. You only need to do this once. In a typical DevOps scenario, you have an application that’s running live in Azure, and you want to make changes to it through continuous publishing. In this scenario, you will deploy to production a template that you have developed and tested. 2. Open a Git Shell session. If you don't have Git Shell yet, install GitHub for Windows now. 1. Create your own fork of the ToDoApp repository. For information on creating your fork, see Fork a Repo. Once your fork is created, you can see it in your browser. 3. Create a local clone of your fork by executing the following command: git clone https://github.com//ToDoApp.git
- 316. 7. When the script finishes, go back to browse to the frontend’s address (http://ToDoApp<your_suffix>.azurewebsites.net/) to see the application running in production. 4. Once you have your local clone, navigate to <repository_root>ARMTemplates, and run the deploy.ps1 script with a unique suffix, as shown below: .deploy.ps1 –RepoUrl https://github.com//todoapp.git -ResourceGroupSuffix 5. When prompted, type in the desired username and password for database access. Remember your database credentials because you will need to specify them again when updating the resource group. You should see the provisioning progress of various Azure resources. When deployment completes, the script will launch the application in the browser and give you a friendly beep. 6. Back in your Git Shell session, run: .swap –Name ToDoApp 8. Log into the Azure Portal and take a look at what’s created. You should be able to see two web apps in the same resource group, one with the Api suffix in the name. If you look at the resource group view, you will also see the SQL Database and server, the App Service plan, and the staging slots for the web apps. Browse through the different resources and compare them with <repository_root>ARMTemplatesProdAndStage.json to see how they are configured in the template.
- 317. Investigate: Instrument your client app for monitoring/metrics You have set up the production app. Now, let's imagine that you receive feedback that usability is poor for the app. So you decide to investigate. You're going to instrument your app to give you feedback. 1. Open <repository_root>srcMultiChannelToDo.sln in Visual Studio. 2. Restore all Nuget packages by right-clicking solution > Manage NuGet Packages for Solution > Restore. 3. Right-click MultiChannelToDo.Web > Add Application Insights Telemetry > Configure Settings > Change resource group to ToDoApp<your_suffix> > Add Application Insights to Project. 4. In the Azure Portal, open the blade for the MultiChannelToDo.Web Application Insight resource. Then in the Application health part, click Learn how to collect browser page load data > copy code. <script type="text/javascript"> var appInsights=window.appInsights||function(config){ function s(config){t[config]=function(){var i=arguments;t.queue.push(function(){t[config].apply(t,i)})}}var t= {config:config},r=document,f=window,e="script",o=r.createElement(e),i,u;for(o.src=config.url||"//az416426.vo.msecnd.net/scripts/a/ai.0.js ",r.getElementsByTagName(e)[0].parentNode.appendChild(o),t.cookie=r.cookie,t.queue=[],i= ["Event","Exception","Metric","PageView","Trace"];i.length;)s("track"+i.pop());return config.disableExceptionTracking|| (i="onerror",s("_"+i),u=f[i],f[i]=function(config,r,f,e,o){var s=u&&u(config,r,f,e,o);return s!==!0&&t["_"+i](config,r,f,e,o),s}),t }({ instrumentationKey:"<your_unique_instrumentation_key>" }); window.appInsights=appInsights; appInsights.trackPageView(); </script> 5. Add the copied JS instrumentation code to <repository_root>srcMultiChannelToDo.WebappIndex.cshtml, just before the closing <heading> tag. It should contain the unique instrumentation key of your Application Insight resource. 6. Send custom events to Application Insights for mouse clicks by adding the following code to the bottom of body:
- 318. <script> $(document.body).find("*").click(function(event) { appInsights.trackEvent(event.target.tagName + ":" + event.target.className); }); </script> git add -A :/ git commit -m"add AI configuration for client app" git push origin master This JavaScript snippet sends a custom event to Application Insights every time a user clicks anywhere in the web app. 7. In Git Shell, commit and push your changes to your fork in GitHub. Then, wait for clients to refresh browser. 8. Swap the deployed app changes to production: .swap –Name ToDoApp 9. Browse to the Application Insights resource that you configured. Click Custom events. If you don't see metrics for custom events, wait a few minutes and click Refresh. Suppose you see a chart like below:
- 319. Instrument your server app for monitoring/metrics Instrument your server app for monitoring/metrics And the event grid below it: According to your ToDoApp application code, the BUTTON event corresponds to the submit button, and the INPUT event corresponds to the textbox. So far, things make sense. However, it looks like there's a good amount of clicks and very few clicks on the to-do items (the LI events). Based on this, you form your hypothesis that some users are confused which part of the UI is clickable and it is because the cursor is styled for text selection when it hovers on the list items and their icons. This might be a contrived example. Nevertheless, you're going to make an improvement to your app, and then perform a flighting deployment to get usability feedback from live customers. This is a tangent since the scenario demonstrated in this tutorial only deals with the client app. However, for
- 320. Investigate: Add slot-specific tags to your client app metrics completeness you will set up the server-side app. 1. Right-click MultiChannelToDo > Add Application Insights Telemetry > Configure Settings > Change resource group to ToDoApp<your_suffix> > Add Application Insights to Project. git add -A :/ git commit -m"add AI configuration for server app" git push origin master 2. In Git Shell, commit and push your changes to your fork in GitHub. Then, wait for clients to refresh browser. 3. Swap the deployed app changes to production: .swap –Name ToDoApp That's it! In this section, you will configure the different deployment slots to send slot-specific telemetry to the same Application Insights resource. This way, you can compare telemetry data between traffic from different slots (deployment environments) to easily see the effect of your app changes. At the same time, you can separate the production traffic from the rest so you can continue to monitor your production app as needed. Since you're gathering data on client behavior, you will add a telemetry initializer to your JavaScript code in index.cshtml. If you want to test server-side performance, for example, you can also do similarly in your server code (see Application Insights API for custom events and metrics. window.appInsights = appInsights; // Begin newcode appInsights.queue.push(function () { appInsights.context.addTelemetryInitializer(function (envelope) { var telemetryItem= envelope.data.baseData; telemetryItem.properties = telemetryItem.properties || {}; telemetryItem.properties["Environment"] = "@System.Configuration.ConfigurationManager.AppSettings["environment"]"; }); }); // End newcode appInsights.trackPageView(); $app = Get-AzureWebsite -Name todoapp<your_suffix> -Slot production $app.AppSettings.Add("environment", "Production") $app.SlotStickyAppSettingNames.Add("environment") $app | Set-AzureWebsite -Name todoapp<your_suffix> -Slot production 1. First, add the code bewteen the two // comments below in the JavaScript block that you added to the <heading> tag earlier. This initializer code causes the appInsights object to add the a custom property called Environment to every piece of telemetry it sends. 2. Next, add this custom property as a slot setting for your web app in Azure. To do this, run the following commands in your Git Shell session. The Web.config in your project already defines the environment app setting. With this setting, when you test the app locally, your metrics will be tagged with VS Debugger . However, when you push your changes to
- 321. Add slot-specific tags to your server app metrics Add slot-specific tags to your server app metrics git add -A :/ git commit -m"add environment property to AI events for client app" git push origin master TIP TIP Azure, Azure will find and use the environment app setting in the web app's configuration instead, and your metrics will be tagged with Production . 3. Commit and push your code changes to your fork on GitHub, and then wait for your users to use the new app (need to refresh the browser). It takes about 15 minutes for the new property to show up in your Application Insights MultiChannelToDo.Web resource. 4. Now, go to the Custom events blade again and filter the metrics on Environment=Production . You should now be able to see all the new custom events in the production slot with this filter. 5. Click the Favorites button to save the current Metrics Explorer settings to something like Custom events: Production. You can easily switch between this view and a deployment slot view later. For even more powerful analytics, consider integrating your Application Insights resource with Power BI. Again, for completeness you will set up the server-side app. Unlike the client app which is instrumented in JavaScript, slot-specific tags for the server app is instrumented with .NET code. 1. Open <repository_root>srcMultiChannelToDoGlobal.asax.cs. Add the code block below, just before the closing namespace curly brace.
- 322. Update: Set up your beta branch namespace MultiChannelToDo { ... // Begin newcode public class ConfigInitializer :ITelemetryInitializer { void ITelemetryInitializer.Initialize(ITelemetry telemetry) { telemetry.Context.Properties["Environment"] = System.Configuration.ConfigurationManager.AppSettings["environment"]; } } // End newcode } using Microsoft.ApplicationInsights.Channel; using Microsoft.ApplicationInsights.Extensibility; TelemetryConfiguration.Active.TelemetryInitializers.Add(newConfigInitializer()); git add -A :/ git commit -m"add environment property to AI events for server app" git push origin master 2. Correct the name resolution errors by adding the using statements below to the beginning of the file: 3. Add the code below to the beginning of the Application_Start() method: 4. Commit and push your code changes to your fork on GitHub, and then wait for your users to use the new app (need to refresh the browser). It takes about 15 minutes for the new property to show up in your Application Insights MultiChannelToDo resource. 1. Open <repository_root>ARMTemplatesProdAndStagetest.json and find the appsettings resources (search for "name":"appsettings" ). There are 4 of them, one for each slot. 3. In the same file, find the slotconfignames resources (search for "name":"slotconfignames" ). There are 2 of them, one for each app. 2. For each appsettings resource, add an "environment":"[parameters('slotName')]" app setting to the end of the properties array. Don't forget to end the previous line with a comma. You have just added the environment app setting to all the slots in the template.
- 323. git checkout -b alpha git push origin alpha .deploy.ps1-RepoUrlhttps://github.com/<your_fork>/ToDoApp.git -ResourceGroupSuffix<your_suffix> -SlotName beta -Branch alpha Update: Push your updates to the beta app git checkout -b beta git push origin beta .deploy.ps1-RepoUrlhttps://github.com/<your_fork>/ToDoApp.git -ResourceGroupSuffix<your_suffix> -SlotName beta -Branch beta NOTE NOTE 4. For each slotconfignames resource, add "environment" to the end of the appSettingNames array. Don't forget to end the previous line with a comma. You have just made the environment app setting stick to its respective deployment slot for both apps. 5. In your Git Shell session, run the following commands with the same resource group suffix that you used before. 6. When prompted, specify the same SQL database credentials as before. Then, when asked to update the resource group, type Y , then ENTER . Once the script finishes, all your resources in the original resource group are retained, but a new slot named "beta" is created in it with the same configuration as the "Staging" slot that was created in the beginning. This method of creating different deployment environments is different from the method in Agile software development with Azure App Service. Here, you create deployment environments with deployment slots, where as there you create deployment environments with resource groups. Managing deployment environments with resource groups enables you to keep the production environment off-limits to developers, but it's not easy to do testing in production, which you can do easily with slots. If you wish, you can also create an alpha app by running For this tutorial, you will just keep using your beta app. Back to your app that you want to improve. git checkout beta 1. Make sure you're now in your beta branch 2. In <repository_root>srcMultiChannelToDo.WebappIndex.cshtml, find the <li> tag and add the style="cursor:pointer" attribute, as shown below.
- 324. Validate: Route traffic to the beta app 3. commit and push to Azure. 4. Verify that the change is now reflected in the beta slot by navigating to http://todoapp<your_suffix>- beta.azurewebsites.net/. If you don't see the change yet, refresh your browser to get the new javascript code. Now that you have your change running in the beta slot, you are ready to perform a flighting deployment. In this section, you will route traffic to the beta app. For sake of clarity of demonstration, you're going to route a significant portion of the user traffic to it. In reality, the amount of traffic you want to route will depend on your specific situation. For example, if your site is at the scale of microsoft.com, then you may need less than one percent of your total traffic in order to gain useful data. $siteName = "ToDoApp<your suffix>" $rule = New-Object Microsoft.WindowsAzure.Commands.Utilities.Websites.Services.WebEntities.RampUpRule $rule.ActionHostName = "$siteName-beta.azurewebsites.net" $rule.ReroutePercentage = 50 $rule.Name = "beta" Set-AzureWebsite $siteName -Slot Production -RoutingRules $rule 2. Now navigate to http://ToDoApp<your_suffix>.azurewebsites.net. 50% of the traffic should now be redirected to the beta slot. NOTE NOTE 1. In your Git Shell session, run the following commands to route half of the production traffic to the beta slot: The ReroutePercentage=50 property specifies that 50% of the production traffic will be routed to the beta app's URL (specified by the ActionHostName property). 3. In your Application Insights resource, filter the metrics by environment="beta". If you save this filtered view as another favorite, then you can easily flip the metric explorer views between production and beta views. Suppose in Application Insights you see something similar to the following:
- 325. Go live: Move your new code into production Not only is this showing that there are many more clicks on the <li> tags, but there seems to be a surge of clicks on <li> tags. You can then conclude that people have discovered the new <li> tags are clickable and are now clearing all their previously-completed tasks in the app. Based on the data of your flighting deployment, you decide that your new UI is ready for production. You're now ready to move your update to production. What's great is that now you know that your update has already been validated before it is pushed to production. So now you can confidently deploy it. Since you made an update to the AngularJS client app, you only validated the client-side code. If you were to make changes to the back-end Web API app, you could validate your changes similarly and easily. Set-AzureWebsite $siteName -Slot Production -RoutingRules @() git checkout master git pullorigin master git merge beta git push origin master 3. Wait for a few minutes for the new code to be deployed to the staging slot, then launch http://ToDoApp<your_suffix>-staging.azurewebsites.net to verify that the new update is warmed up in the staging slot. Remember that the your fork's master branch is linked to the staging slot of your app. 1. In Git Shell, remove the traffic routing rule by running the following command: 2. Run the Git commands: 4. Now, swap the staging slot into production
- 326. Summary More resources cd <ROOT>ToDoAppARMTemplates .swap.ps1-Name todoapp<your_suffix> Azure App Service makes it easy for small- to medium-sized businesses to test their customer-facing apps in production, something that has been traditionally done in big enterprises. Hopefully, this tutorial has given you the knowledge you need to bring together App Service and Application Insights to make possible flighting deployment, and even other test-in-production scenarios, in your DevOps world. Agile software development with Azure App Service Set up staging environments for web apps in Azure App Service Deploy a complex application predictably in Azure Authoring Azure Resource Manager Templates JSONLint - The JSON Validator Git Branching – Basic Branching and Merging Azure PowerShell Project Kudu Wiki
- 327. Configure deployment credentials for Azure App Service 2/28/2017 • 2 min to read • Edit Online Set and reset user-level credentials Azure App Service supports two types of credentials for local Git deployment and FTP/S deployment. NOTE NOTE User-level credentials: one set of credentials for the entire Azure account. It can be used to deploy to App Service for any app, in any subscription, that the Azure account has permission to access. These are the default credentials set that you configure in App Services > <app_name> > Deployment credentials. This is also the default set that's surfaced in the portal GUI (such as the Overview and Properties of your app's resource blade). When you delegate access to Azure resources via Role Based Access Control (RBAC) or co-admin permissions, each Azure user that receives access to an app can use his/her personal user-level credentials until access is revoked. These deployment credentials should not be shared with other Azure users. App-level credentials: one set of credentials for each app. It can be used to deploy to that app only. The credentials for each app is generated automatically at app creation, and is found in the app's publish profile. You cannot manually configure the credentials, but you can reset them for an app anytime. You can configure your user-level credentials in any app's resource blade. Regardless in which app you configure these credentials, it applies to all apps and for all subscriptions in your Azure account. To configure your user-level credentials: NOTE NOTE 1. In the Azure portal, click App Service > <any_app> > Deployment credentials. In the portal, you must have at least one app before you can access the deployment credentials blade. However, with the Azure CLI, you can configure user-level credentials without an existing app. 2. Configure the user name and password, and then click Save.
- 328. Once you have set your deployment credentials, you can find the Git deployment username in your app's Overview, and and FTP deployment username in your app's Properties.
- 329. NOTE NOTE Get and reset app-level credentials Azure does not show your user-level deployment password. If you forget the password, you can't retrieve it. However, you can reset your credentials by following the steps in this section. For each app in App Service, its app-level credentials are stored in the XML publish profile. To get the app-level credentials: 1. In the Azure portal, click App Service > <any_app> > Overview. 2. Click ...More > Get publish profile, and download starts for a .PublishSettings file. 3. Open the .PublishSettings file and find the <publishProfile> tag with the attribute publishMethod="FTP" . Then, get its userName and password attributes. These are the app-level credentials.
- 330. Next steps Similar to the user-level credentials, the FTP deployment username is in the format of <app_name><username> , and the Git deployment username is just <username> without the preceding <app_name> . To reset the app-level credentials: 1. In the Azure portal, click App Service > <any_app> > Overview. 2. Click ...More > Reset publish profile. Click Yes to confirm the reset. The reset action invalidates any previously-downloaded .PublishSettings files. Find out how to use these credentials to deploy your app from local Git or using FTP/S.
- 331. Buy and Configure a custom domain name in Azure App Service 4/26/2017 • 5 min to read • Edit Online NOTE NOTE Overview When you create a web app, Azure assigns it to a subdomain of azurewebsites.net. For example, if your web app is named contoso, the URL is contoso.azurewebsites.net. Azure also assigns a virtual IP address. For a production web app, you probably want users to see a custom domain name. This article explains how to buy and configure a custom domain with App Service Web Apps. This article is for Azure App Service (Web Apps, API Apps, Mobile Apps, Logic Apps); for Cloud Services, see Configuring a custom domain name for an Azure cloud service. If you app is load-balanced by Azure Traffic Manager, click the selector at the top of this article to get specific steps. Custom domain names are not enabled for Free tier. You must scale up to a higher pricing tier, which may change how much you are billed for your subscription. See App Service Pricing for more information. If you don't have a domain name for your web app, you can easily buy one on Azure Portal. During the purchase process you can choose to have WWW and root domain's DNS records be mapped to your web app automatically. You also can manage your domain right inside Azure Portal. Use the following steps to buy domain names and assign to your web app. 1. In your browser, open the Azure Portal. 2. In the Web Apps tab, click the name of your web app, select Settings, and then select Custom domains 3. In the Custom domains blade, click Buy domains.
- 332. 4. In the Buy Domains blade, use the text box to type the domain name you want to buy and hit Enter. The suggested available domains will be shown just below the text box. Select what domain you want to buy. You can choose to purchase multiple domains at once. 5. Click the Contact Information and fill the domain's contact information form.
- 333. NOTE NOTE It is very important that you fill out all required fields with as much accuracy as possible, especially the email address. In case of purchasing the domain without "Privacy protection", you might be asked to verify your email before the domain becomes active. In some cases, incorrect data for contact information will result in failure to purchase domains. 6. Now you can choose to, a) "Auto renew" your domain every year b) Opt-in for "Privacy protection" which is included in the purchase price for FREE (Except for TLDs who's registry do not support Privacy. For example: .co.in, .co.uk etc.) c) "Assign default hostnames" for WWW and root domain to the current Web App.
- 334. NOTE NOTE Option C configures DNS bindings and Hostname bindings automatically for you. This way, your Web App can be accessed using custom domain as soon as the purchase is complete (baring DNS propagation delays in few cases). In case, your Web App is behind Azure Traffic Manager, you will not see an option to assign root domain, as A-Records do not work with the Traffic Manager. You can always assign the domains/sub-domains purchased through one Web App to another Web App and vice-versa. See step 8 for more details. 7. Click the Select on Buy Domains blade, then you will see the purchase information on Purchase confirmation blade. If you accept the legal terms and click Buy, your order will be submitted and you can monitor the purchasing process on Notification. Domain purchase can take few minutes to complete.
- 335. 8. If you successfully ordered a domain, you can manage the domain and assign to your web app. Click the "..." at the right side of your domain. Then you can Cancel purchase or Manage domain. Click Manage domain, then we can bind subdomain to our web app on Manage domain blade. If you want to bind a subdomain to a different Web App then perform this step from within the context of the respective Web App. Over here you an choose to assign the domain to Traffic manager endpoint (if Web App is behind TM) by simply selecting Traffic manager name from the Drop down menu. By doing this, domain/subdomain will be automatically assigned to all the Web Apps behind that Traffic Manager endpoint.
- 336. What happens to the custom domain you bought If you can't see the custom domain you bought NOTE NOTE You can "Cancel purchase" within 5 days for full refund. After 5 days you will not be able to "Cancel purchase", instead you will see an option to "Delete" the domain. Deleting the domain will result in releasing it from your subscription without refund and will become available domain. Once configuration has completed, the custom domain name will be listed in the Hostname bindings section of your web app. At this point, you should be able to enter the custom domain name in your browser and see that it successfully takes you to your web app. The custom domain you bought in the Custom domains and SSL blade is tied to the Azure subscription. As an Azure resource, this custom domain is separate and independent from the App Service app that you first bought the domain for. This means that: Within the Azure portal, you can use the custom domain you bought for more than one App Service app, and not just for the app that you first bought the custom domain for. You can manage all the custom domains you bought in the Azure subscription by going to the Custom domains and SSL blade of any App Service app in that subscription. You can assign any App Service app from the same Azure subscription to a subdomain within that custom domain. If you decide to delete an App Service app, you can choose not to delete the custom domain it is bound to if you want to keep using it for other apps. If you have bought the custom domain from within the Custom domains and SSL blade, but cannot see the custom domain under Managed domains, verify the following things: The custom domain creation may not have finished. Check the notification bell at the top of the Azure portal for the progress. The custom domain creation may have failed for some reason. Check the notification bell at the top of the Azure portal for the progress. The custom domain may have succeeded but the blade may not be refreshed yet. Try reopening the Custom domains and SSL blade.
- 337. You may have deleted the custom domain at some point. Check the audit logs by clicking Settings > Audit Logs from your app's main blade. The Custom domains and SSL blade you're looking in may belong to an app that's created in a different Azure subscription. Switch to another app in a different subscription and check its Custom domains and SSL blade. Within the portal, you won't be able to see or manage custom domains created in a different Azure subscription than the app. However, if you click Advanced management in the domain's Manage domain blade, you'll be redirected to the domain provider's website, where you'll be able to manually configure your custom domain like any external custom domain for apps created in a different Azure subscription.
- 338. Map a custom domain name to an Azure app 2/28/2017 • 6 min to read • Edit Online NOTE NOTE Types of domains you can map Types of DNS records you can use This article shows you how to manually map a custom domain name to your web app, mobile app backend, or API app in Azure App Service. You can always just buy a custom domain name directly from Azure. There are three main steps to map the custom domain to your app: 1. (A record only) Get app's IP address. 2. Create the DNS records that map your domain to your app. 3. Enable the custom domain name for your Azure app. 4. Verify DNS propagation. Where: your domain registrar's own management tool (e.g. Azure DNS, GoDaddy, etc.). Why: so your domain registrar knows to resolves the desired custom domain to your Azure app. Where: the Azure portal. Why: so your app knows to respond to requests made to the custom domain name. Azure App Service lets you map the following categories of custom domains to your app. Root domain - the domain name that you reserved with the domain registrar (represented by the @ host record, typically). For example, contoso.com. Subdomain - any domain that's under your root domain. For example, www.contoso.com (represented by the www host record). You can map different subdomains of the same root domain to different apps in Azure. Wildcard domain - any subdomain whose leftmost DNS label is * (e.g. host records * and *.blogs ). For example, *.contoso.com. Depending on your need, you can use two different types of standard DNS records to map your custom domain: A - maps your custom domain name to the Azure app's virtual IP address directly. CNAME - maps your custom domain name to your app's Azure domain name, <appname>.azurewebsites.net. The advantage of CNAME is that it persists across IP address changes. If you delete and recreate your app, or change from a higher pricing tier back to the Shared tier, your app's virtual IP address may change. Through such a change, a CNAME record is still valid, whereas an A record requires an update. The tutorial shows you steps for using the A record and also for using the CNAME record.
- 339. IMPORTANT IMPORTANT Step 1. (A record only) Get app's IP address Step 2. Create the DNS record(s) Create an A record Create an A record FQDN EXAMPLE A HOST A VALUE contoso.com (root) @ IP address from Step 1 www.contoso.com (sub) www IP address from Step 1 Do not create a CNAME record for your root domain (i.e. the "root record"). For more information, see Why can't a CNAME record be used at the root domain. To map a root domain to your Azure app, use an A record instead. To map a custom domain name using an A record, you need your Azure app's IP address. If you will map using a CNAME record instead, skip this step and move onto the next section. 1. Log in to the Azure portal. 2. Click App Services on the left menu. 3. Click your app, then click Custom domains. 5. Keep this portal blade open. You will come back to it once you create the DNS records. 4. Take note of the IP address above Hostnames section.. Log in to your domain registrar and use their tool to add an A record or CNAME record. Every registrar’s UI is slightly different, so you should consult your provider's documentation. However, here are some general guidelines. 1. Find the page for managing DNS records. Look for links or areas of the site labeled Domain Name, DNS, or Name Server Management. Often, you can find the link by viewing your account information, and then looking for a link such as My domains. 2. Look for a link that lets you add or edit DNS records. This might be a Zone file or DNS Records link, or an Advanced configuration link. 3. Create the record and save your changes. Instructions for an A record are here. Instructions for a CNAME record are here. To use an A record to map to your Azure app's IP address, you actually need to create both an A record and a TXT record. The A record is for the DNS resolution itself, and the TXT record is for Azure to verify that you own the custom domain name. Configure your A record as follows (@ typically represents the root domain):
- 340. *.contoso.com (wildcard) * IP address from Step 1 FQDN EXAMPLE TXT HOST TXT VALUE contoso.com (root) @ <appname>.azurewebsites.net www.contoso.com (sub) www <appname>.azurewebsites.net *.contoso.com (wildcard) * <appname>.azurewebsites.net Create a CNAME record Create a CNAME record IMPORTANT IMPORTANT FQDN EXAMPLE CNAME HOST CNAME VALUE www.contoso.com (sub) www <appname>.azurewebsites.net *.contoso.com (wildcard) * <appname>.azurewebsites.net Step 3. Enable the custom domain name for your app Your additional TXT record takes on the convention that maps from <subdomain>.<rootdomain> to <appname>.azurewebsites.net. Configure your TXT record as follows: If you use a CNAME record to map to your Azure app's default domain name, you don't need an additional TXT record like you do with an A record. Do not create a CNAME record for your root domain (i.e. the "root record"). For more information, see Why can't a CNAME record be used at the root domain. To map a root domain to your Azure app, use an A record instead. Configure your CNAME record as follows (@ typically represents the root domain): Back in the Custom Domains blade in the Azure portal (see Step 1), you need to add the fully-qualified domain name (FQDN) of your custom domain to the list. 1. If you haven't done so, log in to the Azure portal. 2. In the Azure portal, click App Services on the left menu. 3. Click your app, then click Custom domains > Add hostname. 4. Add the FQDN of your custom domain to the list (e.g. www.contoso.com).
- 341. Migrate an active domain name Verify DNS propagation NOTE NOTE NOTE NOTE 5. Click Validate. 6. Upon clicking Validate Azure will kick off Domain Verification workflow. This will check for Domain ownership as well as Hostname availability and report success or detailed error with prescriptive guidence on how to fix the error. 7. Upon successful validation Add hostname button will become active and you will be able to the assign hostname. 8. Once Azure finishes configuring your new custom domain name, navigate to your custom domain name in a browser. The browser should open your Azure app, which means that your custom domain name is configured properly. Azure will attempt to verify the domain name that you use here. Be sure that it is the same domain name for which you created a DNS record in Step 2. If the domain name you want to map is already in use by an existing website, and you want to avoid downtime, see Migrate an active custom domain to App Service. After you finish the configuration steps, it can take some time for the changes to propagate, depending on your DNS provider. You can verify that the DNS propagation is working as expected by using http://digwebinterface.com/. After you browse to the site, specify the hostnames in the textbox and click Dig. Verify the results to confirm if the recent changes have taken effect. The propagation of the DNS entries can take up to 48 hours (sometimes longer). If you have configured everything correctly, you still need to wait for the propagation to succeed.
- 342. Next steps NOTE NOTE Learn how to secure your custom domain name with HTTPS by buying an SSL certificate in Azure or using an SSL certificate from elsewhere. If you want to get started with Azure App Service before signing up for an Azure account, go to Try App Service, where you can immediately create a short-lived starter web app in App Service. No credit cards required; no commitments. Get started with Azure DNS Create DNS records for a web app in a custom domain Delegate Domain to Azure DNS
- 343. Configuring a custom domain name for a web app in Azure App Service using Traffic Manager 4/26/2017 • 8 min to read • Edit Online NOTE NOTE Understanding DNS records NOTE NOTE When you use a Microsoft Azure Traffic Manager to load balance traffic to your Azure Website, that website can then be accessed using the *.trafficmanager.net domain name assigned by Azure. You can also associate a custom domain name, such as www.contoso.com, with your website in order to provide a more recognizable domain name for your users. This article provides generic instructions for using a custom domain name with Azure App Service that use Traffic Manager for load balancing. If you do not already have a Traffic Manager profile, use the information in Create a Traffic Manager profile using Quick Create to create one. Note the .trafficmanager.net domain name associated with your Traffic Manager profile, as this will be used later by later steps in this document. This article is for Azure App Service (Web Apps, API Apps, Mobile Apps, Logic Apps); for Cloud Services, see Configuring a custom domain name for an Azure cloud service. If you app is load-balanced by Azure Traffic Manager, click the selector at the top of this article to get specific steps. Custom domain names are not enabled for Free tier. You must scale up to a higher pricing tier, which may change how much you are billed for your subscription. See App Service Pricing for more information. The Domain Name System (DNS) is used to locate things on the internet. For example, when you enter an address in your browser, or click a link on a web page, it uses DNS to translate the domain into an IP address. The IP address is sort of like a street address, but it's not very human friendly. For example, it is much easier to remember a DNS name like contoso.com than it is to remember an IP address such as 192.168.1.88 or 2001:0:4137:1f67:24a2:3888:9cce:fea3. The DNS system is based on records. Records associate a specific name, such as contoso.com, with either an IP address or another DNS name. When an application, such as a web browser, looks up a name in DNS, it finds the record, and uses whatever it points to as the address. If the value it points to is an IP address, the browser will use that value. If it points to another DNS name, then the application has to do resolution again. Ultimately, all name resolution will end in an IP address. When you create an Azure Website, a DNS name is automatically assigned to the site. This name takes the form of <yoursitename>.azurewebsites.net. When you add your website as an Azure Traffic Manager endpoint, your website is then accessible through the <yourtrafficmanagerprofile>.trafficmanager.net domain. When your website is configured as a Traffic Manager endpoint, you will use the .trafficmanager.net address when creating DNS records. You can only use CNAME records with Traffic Manager
- 344. CNAME or Alias record CNAME or Alias record NOTE NOTE Configure your web apps for standard mode Add a DNS record for your custom domain NOTE NOTE There are also multiple types of records, each with their own functions and limitations, but for websites configured to as Traffic Manager endpoints, we only care about one; CNAME records. A CNAME record maps a specific DNS name, such as mail.contoso.com or www.contoso.com, to another (canonical) domain name. In the case of Azure Websites using Traffic Manager, the canonical domain name is the <myapp>.trafficmanager.net domain name of your Traffic Manager profile. Once created, the CNAME creates an alias for the <myapp>.trafficmanager.net domain name. The CNAME entry will resolve to the IP address of your <myapp>.trafficmanager.net domain name automatically, so if the IP address of the website changes, you do not have to take any action. Once traffic arrives at Traffic Manager, it then routes the traffic to your website, using the load balancing method it is configured for. This is completely transparent to visitors to your website. They will only see the custom domain name in their browser. Some domain registrars only allow you to map subdomains when using a CNAME record, such as www.contoso.com, and not root names, such as contoso.com. For more information on CNAME records, see the documentation provided by your registrar, the Wikipedia entry on CNAME record, or the IETF Domain Names - Implementation and Specification document. Setting a custom domain name on a web app in Azure App Service that is load balanced by Traffic Manager is only available for Standard mode websites. Before switching a web app from the Free App Service plan mode to the Shared, Basic or Standard mode, you must first remove spending caps in place for your App Service subscription. For more information on the App Service plan modes, including how to change the mode of your site, see How to scale web sites. If you have purchased domain through Azure App Service Web Apps then skip following steps and refer to the final step of Buy Domain for Web Apps article. To associate your custom domain with a web app in Azure App Service, you must add a new entry in the DNS table for your custom domain by using tools provided by the domain registrar that you purchased your domain name from. Use the following steps to locate and use the DNS tools. 1. Sign in to your account at your domain registrar, and look for a page for managing DNS records. Look for links or areas of the site labeled as Domain Name, DNS, or Name Server Management. Often a link to this page can be found be viewing your account information, and then looking for a link such as My domains. 2. Once you have found the management page for your domain name, look for a link that allows you to edit the DNS records. This might be listed as a Zone file, DNS Records, or as an Advanced configuration link. The page will most likely have a few records already created, such as an entry associating '@' or '*' with a 'domain parking' page. It may also contain records for common sub-domains such as www. The page will mention CNAME records, or provide a drop-down to select a record type. It may also mention other records such as A records and MX records. In some cases, CNAME records will be called by other names such as an Alias Record. The page will also have fields that allow you to map from a Host name or Domain name to another
- 345. Enable Traffic Manager NOTE NOTE NOTE NOTE NOTE NOTE 4. Once you have finished adding or modifying DNS records at your registrar, save the changes. domain name. 3. While the specifics of each registrar vary, in general you map from your custom domain name (such as contoso.com,) to the Traffic Manager domain name (contoso.trafficmanager.net) that is used for your web app. Alternatively, if a record is already in use and you need to preemptively bind your apps to it, you can create an additional CNAME record. For example, to preemptively bind www.contoso.com to your web app, create a CNAME record from awverify.www to contoso.trafficmanager.net. You can then add "www.contoso.com" to your Web App without changing the "www" CNAME record. For more information, see Create DNS records for a web app in a custom domain. After the records for your domain name have propagated, you should be able to use your browser to verify that your custom domain name can be used to access your web app in Azure App Service. It can take some time for your CNAME to propagate through the DNS system. You can use a service such as http://www.digwebinterface.com/ to verify that the CNAME is available. If you have not already added your web app as a Traffic Manager endpoint, you must do this before name resolution will work, as the custom domain name routes to Traffic Manager. Traffic Manager then routes to your web app. Use the information in Add or Delete Endpoints to add your web app as an endpoint in your Traffic Manager profile. If your web app is not listed when adding an endpoint, verify that it is configured for Standard App Service plan mode. You must use Standard mode for your web app in order to work with Traffic Manager. 1. In your browser, open the Azure Portal. 2. In the Web Apps tab, click the name of your web app, select Settings, and then select Custom domains
- 346. Next steps What's changed 3. In the Custom domains blade, click Add hostname. 5. Click Validate to save the domain name configuration. 6. Upon clicking Validate Azure will kick off Domain Verification workflow. This will check for Domain ownership as well as Hostname availability and report success or detailed error with prescriptive guidence on how to fix the error. 4. Use the Hostname text boxes to enter the Traffic Manager domain name to associate with this web app. 7. Upon successful validation Add hostname button will become active and you will be able to the assign hostname. Now navigate to your custom domain name in a browser. You should now see your app running using your custom domain name. Once configuration has completed, the custom domain name will be listed in the domain names section of your web app. At this point, you should be able to enter the Traffic Manager domain name name in your browser and see that it successfully takes you to your web app. For more information, see the Node.js Developer Center.
- 347. NOTE NOTE For a guide to the change from Websites to App Service see: Azure App Service and Its Impact on Existing Azure Services If you want to get started with Azure App Service before signing up for an Azure account, go to Try App Service, where you can immediately create a short-lived starter web app in App Service. No credit cards required; no commitments.
- 348. Configure a custom domain name in Azure App Service (Purchased directly from GoDaddy) 4/20/2017 • 8 min to read • Edit Online NOTE NOTE Understanding DNS records NOTE NOTE When you create a web app, Microsoft Azure provides a friendly subdomain on the azurewebsites.net domain so your users can access your web app using a URL like http://<mywebapp>.azurewebsites.net. You can also associate a custom domain name, such as contoso.com, with your web app in order to provide a more recognizable domain name for your users. If you have purchased domain through Azure App Service Web Apps then refer to the final step of Buy Domain for Web Apps. This article provides instructions on using a custom domain name that was purchased directly from GoDaddy with App Service Web Apps. This article is for Azure App Service (Web Apps, API Apps, Mobile Apps, Logic Apps); for Cloud Services, see Configuring a custom domain name for an Azure cloud service. If you app is load-balanced by Azure Traffic Manager, click the selector at the top of this article to get specific steps. Custom domain names are not enabled for Free tier. You must scale up to a higher pricing tier, which may change how much you are billed for your subscription. See App Service Pricing for more information. The Domain Name System (DNS) is used to locate resources on the internet. For example, when you enter a web app address in your browser, or click a link on a web page, it uses DNS to translate the domain into an IP address. The IP address is sort of like a street address, but it's not very human friendly. For example, it is much easier to remember a DNS name like contoso.com than it is to remember an IP address such as 192.168.1.88 or 2001:0:4137:1f67:24a2:3888:9cce:fea3. The DNS system is based on records. Records associate a specific name, such as contoso.com, with either an IP address or another DNS name. When an application, such as a web browser, looks up a name in DNS, it finds the record, and uses whatever it points to as the address. If the value it points to is an IP address, the browser will use that value. If it points to another DNS name, then the application has to do resolution again. Ultimately, all name resolution will end in an IP address. When you create an web app in App Service, a DNS name is automatically assigned to the web app. This name takes the form of <yourwebappname>.azurewebsites.net. There is also a virtual IP address available for use when creating DNS records, so you can either create records that point to the .azurewebsites.net, or you can point to the IP address. The IP address of your web app will change if you delete and recreate your web app, or change the App Service plan mode to Free after it has been set to Basic, Shared, or Standard. There are also multiple types of records, each with their own functions and limitations, but for web apps we only
- 349. Address record (A record) Address record (A record) NOTE NOTE Alias record (CNAME record) Alias record (CNAME record) NOTE NOTE Web app DNS specifics Web app DNS specifics care about two, A and CNAME records. An A record maps a domain, such as contoso.com or www.contoso.com, or a wildcard domain such as *.contoso.com, to an IP address. In the case of a web app in App Service, either the virtual IP of the service or a specific IP address that you purchased for your web app. The main benefits of an A record over a CNAME record are: You can map a root domain such as contoso.com to an IP address; many registrars only allow this using A records You can have one entry that uses a wildcard, such as *.contoso.com, which would handle requests for multiple sub-domains such as mail.contoso.com, blogs.contoso.com, or www.contso.com. Since an A record is mapped to a static IP address, it cannot automatically resolve changes to the IP address of your web app. An IP address for use with A records is provided when you configure custom domain name settings for your web app; however, this value may change if you delete and recreate your web app, or change the App Service plan mode to back to Free. A CNAME record maps a specific DNS name, such as mail.contoso.com or www.contoso.com, to another (canonical) domain name. In the case of App Service Web Apps, the canonical domain name is the <yourwebappname>.azurewebsites.net domain name of your web app. Once created, the CNAME creates an alias for the <yourwebappname>.azurewebsites.net domain name. The CNAME entry will resolve to the IP address of your <yourwebappname>.azurewebsites.net domain name automatically, so if the IP address of the web app changes, you do not have to take any action. Some domain registrars only allow you to map subdomains when using a CNAME record, such as www.contoso.com, and not root names, such as contoso.com. For more information on CNAME records, see the documentation provided by your registrar, the Wikipedia entry on CNAME record, or the IETF Domain Names - Implementation and Specification document. Using an A record with Web Apps requires you to first create one of the following TXT records: For the root domain - A DNS TXT record of @ to <yourwebappname>.azurewebsites.net. For a specific sub-domain - A DNS name of <sub-domain> to <yourwebappname>.azurewebsites.net. For example, blogs if the A record is for blogs.contoso.com. For the wildcard sub-dodmains - A DNS TXT record of ***** to <yourwebappname>.azurewebsites.net. This TXT record is used to verify that you own the domain you are attempting to use. This is in addition to creating an A record pointing to the virtual IP address of your web app. You can find the IP address and .azurewebsites.net names for your web app by performing the following steps: 1. In your browser, open the Azure Portal. 2. In the Web Apps blade, click the name of your web app, and then select Custom domains from the bottom of the page.
- 350. Add a DNS record for your custom domain NOTE NOTE 3. In the Custom domains blade, you will see the virtual IP address. Save this information, as it will be used when creating DNS records You cannot use custom domain names with a Free web app, and must upgrade the App Service plan to Shared, Basic, Standard, or Premium tier. For more information on the App Service plan's pricing tiers, including how to change the pricing tier of your web app, see How to scale web apps. To associate your custom domain with a web app in App Service, you must add a new entry in the DNS table for your custom domain by using tools provided by GoDaddy. Use the following steps to locate the DNS tools for GoDaddy.com 1. Log on to your account with GoDaddy.com, and select My Account and then Manage my domains. Select the drop-down menu for the domain name that you wish to use with your Azure web app and select Manage DNS.
- 351. NOTE NOTE 2. From the Domain details page, scroll to the DNS Zone File tab. This is the section used for adding and modifying DNS records for your domain name. Select Add Record to add an existing record. To edit an existing record, select the pen & paper icon beside the record. Before adding new records, note that GoDaddy has already created DNS records for popular sub-domains (called Host in editor,) such as email, files, mail, and others. If the name you wish to use already exists, modify the existing record instead of creating a new one. 3. When adding a record, you must first select the record type. Next, you must provide the Host (the custom domain or sub-domain) and what it Points to.
- 352. Enable the domain name on your web app NOTE NOTE 4. Click Add Another. NOTE NOTE 6. When you have finished adding or modifying records, click Finish to save changes. When adding an A (host) record - you must set the Host field to either @ (this represents root domain name, such as contoso.com,) * (a wildcard for matching multiple sub-domains,) or the sub-domain you wish to use (for example, www.) You must set the Points to field to the IP address of your Azure web app. When adding a CNAME (alias) record - you must set the Host field to the sub-domain you wish to use. For example, www. You must set the Points to field to the .azurewebsites.net domain name of your Azure web app. For example, contoso.azurewebsites.net. 5. Select TXT as the record type, then specify a Host value of @ and a Points to value of <yourwebappname>.azurewebsites.net. This TXT record is used by Azure to validate that you own the domain described by the A record or the first TXT record. Once the domain has been mapped to the web app in the Azure Portal, this TXT record entry can be removed. After the records for your domain name have propagated, you must associate them with your Web App. Use the following steps to enable the domain names using your web browser. It can take some time for TXT records created in the previous steps to propagate through the DNS system. You cannot add the domain name of to your web app until the TXT record has propagated. If you are using an A record, you cannot add the A record domain name to your web app until the TXT record created in the previous step has propagated. You can use a service such as http://www.digwebinterface.com/ to verify that the TXT record is available. 1. In your browser, open the Azure Portal.
- 353. NOTE NOTE What's changed 3. In the Custom domains blade, click Add hostname. 5. Click Validate. 6. Upon clicking Validate Azure will kick off Domain Verification workflow. This will check for Domain ownership as well as Hostname availability and report success or detailed error with prescriptive guidence on how to fix the error. 2. In the Web Apps tab, click the name of your web app, and then select Custom domains 4. Use the Hostname text boxes to enter the domain names to associate with this web app. At this point, you should be able to enter the custom domain name in your browser and see that it successfully takes you to your web app. If you want to get started with Azure App Service before signing up for an Azure account, go to Try App Service, where you can immediately create a short-lived starter web app in App Service. No credit cards required; no commitments. For a guide to the change from Websites to App Service see: Azure App Service and Its Impact on Existing Azure Services
- 354. Migrate an active custom domain to Azure App Service 4/3/2017 • 1 min to read • Edit Online Prerequisites Bind the domain name preemptively Next steps This article shows you how to migrate an active custom domain to Azure App Service without any downtime. When you migrate a live site and its domain name to App Service, that domain name is already serving live traffic, and you don't want any downtime in DNS resolution during the migration process. In this case, you need to preemptively bind the domain name to your Azure app for domain verification. This article assumes that you already know how to manually map a custom domain to App Service. When you bind a custom domain preemptively, you accomplish both of the following before making any changes to your DNS records: Verify domain ownership Enable the domain name for your app When you finally change the DNS record to point to your App Service app, clients are redirected from your old site to your App Service app without any downtime in DNS resolution. Follow the steps below: FQDN EXAMPLE TXT HOST TXT VALUE contoso.com (root) awverify.contoso.com <appname>.azurewebsites.net www.contoso.com (sub) awverify.www.contoso.com <appname>.azurewebsites.net *.contoso.com (wildcard) awverify.*.contoso.com <appname>.azurewebsites.net 1. First, create a verification TXT record with your DNS registry by following the steps at Create the DNS record(s). Your additional TXT record takes on the convention that maps from <subdomain>.<rootdomain> to <appname>.azurewebsites.net. See the following table for examples: 2. Then, add your custom domain name to your Azure app by following the steps at Enable the custom domain name for your app. Your custom domain is now enabled in your Azure app. The only thing left to do is to update the DNS record with your domain registrar. 3. Finally, update your domain's DNS record to point to your Azure app as is shown in Create the DNS record(s). User traffic should be redirected to your Azure app immediately after DNS propagation happens.
- 355. NOTE NOTE Learn how to secure your custom domain name with HTTPS by buying an SSL certificate in Azure or using an SSL certificate from elsewhere. If you want to get started with Azure App Service before signing up for an Azure account, go to Try App Service, where you can immediately create a short-lived starter web app in App Service. No credit cards required; no commitments. Get started with Azure DNS Create DNS records for a web app in a custom domain Delegate Domain to Azure DNS
- 356. Migrate an enterprise web app to Azure App Service 3/23/2017 • 6 min to read • Edit Online IMPORTANT IMPORTANT NOTE NOTE Elements Verified During Compatibility Analysis You can easily migrate your existing websites that run on Internet Information Service (IIS) 6 or later to App Service Web Apps. Windows Server 2003 reached end of support on July 14th 2015. If you are currently hosting your websites on an IIS server that is Windows Server 2003, Web Apps is a low-risk, low-cost, and low-friction way to keep your websites online, and Web Apps Migration Assistant can help automate the migration process for you. Web Apps Migration Assistant can analyze your IIS server installation, identify which sites can be migrated to App Service, highlight any elements that cannot be migrated or are unsupported on the platform, and then migrate your websites and associated databases to Azure. Although this article refers to web apps, it also applies to API apps and mobile apps. The Migration Assistant creates a readiness report to identify any potential causes for concern or blocking issues which may prevent a successful migration from on-premises IIS to Azure App Service Web Apps. Some of the key items to be aware of are: Port Bindings – Web Apps only supports Port 80 for HTTP and Port 443 for HTTPS traffic. Different port configurations will be ignored and traffic will be routed to 80 or 443. Authentication – Web Apps supports Anonymous Authentication by default and Forms Authentication where specified by an application. Windows Authentication can be used by integrating with Azure Active Directory and ADFS only. All other forms of authentication - for example, Basic Authentication - are not currently supported. Global Assembly Cache (GAC) – The GAC is not supported in Web Apps. If your application references assemblies which you usually deploy to the GAC, you will need to deploy to the application bin folder in Web Apps. IIS5 Compatibility Mode – This is not supported in Web Apps. Application Pools – In Web Apps, each site and its child applications run in the same application pool. If your site has multiple child applications utilizing multiple application pools, consolidate them to a single application pool with common settings or migrate each application to a separate web app. COM Components – Web Apps does not allow the registration of COM Components on the platform. If your websites or applications make use of any COM Components, you must rewrite them in managed code and deploy them with the website or application. ISAPI Extensions – Web Apps can support the use of ISAPI Extensions. You need to do the following: deploy the DLLs with your web app register the DLLs using Web.config place an applicationHost.xdt file in the site root with the content outlined in "Allowing arbitrart ISAPI extensions to be loaded" section of this article
- 357. For more examples of howto use XMLDocument Transformations with your website, see [Transformyour Microsoft Azure Web Site] (http://blogs.msdn.com/b/waws/archive/2014/06/17/transform-your-microsoft-azure-web-site.aspx). How to use the Web Apps Migration Assistant Other components like SharePoint, front page server extensions (FPSE), FTP, SSL certificates will not be migrated. This section steps through an example to to migrate a few websites that use a SQL Server database and running on an on-premise Windows Server 2003 R2 (IIS 6.0) machine: 2. Install Web Apps Migration Assistant by clicking on the Dedicated IIS Server button. More options will be options in the near future. NOTE NOTE 1. On the IIS server or your client machine navigate to https://www.movemetothecloud.net/ 3. Click the Install Tool button to install Web Apps Migration Assistant on your machine. You can also click Download for offline install to download a ZIP file for installing on servers not connected to the internet. Or, you can click Upload an existing migration readiness report, which is an advanced option to work with an existing migration readiness report that you previously generated (explained later). 4. In the Application Install screen, click Install to install on your machine. It will also install corresponding dependencies like Web Deploy, DacFX, and IIS, if needed.
- 358. Once installed, Web Apps Migration Assistant automatically starts. 5. Choose Migrate sites and databases from a remote server to Azure. Enter the administrative credentials for the remote server and click Continue. You can of course choose to migrate from the local server. The remote option is useful when you want to migrate websites from a production IIS server. At this point the migration tool will inspect the your IIS server's configuration, such as Sites, Applications, Application Pools, and dependencies to identify candidate websites for migration. 6. The screenshot below shows three websites – Default Web Site, TimeTracker, and CommerceNet4. All of them have an associated database that we want to migrate. Select all of the sites you would like to assess and then click Next.
- 359. 7. Click Upload to upload the readiness report. If you click save file locally, you can run the migration tool again later and upload the saved readiness report as noted earlier. Once you upload the readiness report, Azure performs readiness analysis and shows you the results. Read the assessment details for each website and make sure that you understand or have addressed all issues before you proceed.
- 360. 8. Click Begin Migration to start the migration.You will now be redirected to Azure to log into your account. It is important that you log in with an account that has an active Azure Subscription. If you do not have an Azure account then you can sign up for a free trial here. 9. Select the tenant account, Azure subscription and region to use for your migrated Azure web apps and databases, and then click Start Migration. You can select the websites to migrate later. 10. On the next screen you can make changes to the default migration settings, such as: use an existing Azure SQL Database or create a new Azure SQL Database, and configure its credentials select the websites to migrate define names for the Azure web apps and their linked SQL databases customize the global settings and site-level settings The screenshot below shows all the websites selected for migration with the default settings.
- 361. NOTE NOTE 12. Click the links to the Azure web apps and verify that the migration has succeeded. 13. You can now manage the migrated web apps in Azure App Service. To do this, log into the Azure Portal. the Enable Azure Active Directory checkbox in custom settings integrates the Azure web app with Azure Active Directory (the Default Directory). For more information on syncing Azure Active Directory with your on-premise Active Directory, see Directory integration. 11. Once you make all the desired changes, click Create to start the migration process. The migration tool will create the Azure SQL Database and Azure web app, and then publish the website content and databases. The migration progress is clearly shown in the migration tool, and you will see a summary screen at the end, which details the sites migrated, whether they were successful, links to the newly-created Azure web apps. If any error occurs during migration, the migration tool will clearly indicate the failure and rollback the changes. You will also be able to send the error report directly to the engineering team by clicking the Send Error Report button, with the captured failure call stack and build message body. If migrate succeeds without errors, you can also click the Give Feedback button to provide any feedback directly. 14. In the Azure Portal, open the Web Apps blade to see your migrated websites (shown as web apps), then click
- 362. NOTE NOTE What's changed on any one of them to start managing the web app, such as configuring continuous publishing, creating backups, autoscaling, and monitoring usage or performance. If you want to get started with Azure App Service before signing up for an Azure account, go to Try App Service, where you can immediately create a short-lived starter web app in App Service. No credit cards required; no commitments. For a guide to the change from Websites to App Service see: Azure App Service and Its Impact on Existing Azure Services
- 363. Get started with test in production for Web Apps 2/28/2017 • 3 min to read • Edit Online Traffic Routing in App Service Web Apps Requirements for using Traffic Routing in Web Apps Requirements for using Traffic Routing in Web Apps Route traffic segment to a deployment slot NOTE NOTE Testing in production, or live-testing your web app using live customer traffic, is a test strategy that app developers increasingly integrate into their agile development methodology. It enables you to test the quality of your apps with live user traffic in your production environment, as opposed to synthesized data in a test environment. By exposing your new app to real users, you can be informed on the real problems your app may face once it is deployed. You can verify the functionality, performance, and value of your app updates against the volume, velocity, and variety of real user traffic, which you can never approximate in a test environment. With the Traffic Routing feature in Azure App Service, you can direct a portion of live user traffic to one or more deployment slots, and then analyze your app with Azure Application Insights or Azure HDInsight, or a third-party tool like New Relic to validate your change. For example, you can implement the following scenarios with App Service: Discover functional bugs or pinpoint performance bottlenecks in your updates prior to site-wide deployment Perform "controlled test flights" of your changes by measuring usability metrics on the beta app Gradually ramp up to a new update, and gracefully back down to the current version if an error occurs Optimize your app's business results by running A/B tests or multivariate tests in multiple deployment slots Your web app must run in Standard or Premium tier, as it is required for multiple deployment slots. In order to work properly, Traffic Routing requires cookies to be enabled in the users' browser. Traffic Routing uses cookies to pin a client browser to a deployment slot for the life the client session. Traffic Routing supports advanced TiP scenarios through Azure PowerShell cmdlets. At the basic level in every TiP scenario, you route a predefined percentage of your live traffic to a non-production deployment slot. To do this, follow the steps below: The steps here assumes that you already have a non-production deployment slot and that the desired web app content is already deployed to it. 1. Log into the Azure Portal. 2. In your web app's blade, click Settings > Traffic Routing.
- 364. 3. Select the slot that you want to route traffic to and the percentage of the total traffic you desire, then click Save. 4. Go to the deployment slot's blade. You should now see live traffic being routed to it.
- 365. Force client requests to a specific slot Once Traffic Routing is configured, the specified percentage of clients will be randomly routed to your non- production slot. However, it is important to note that once a client is automatically routed to a specific slot, it will be "pinned" to that slot for the life of that client session. This done using a cookie to pin the user session. If you inspect the HTTP requests, you will find a TipMix cookie in every subsequent request. In addition to automatic traffic routing, App Service is able to route requests to a specific slot. This is useful when you want your users to be able to opt-into or opt-out of your beta app. To do this, you use the x-ms-routing-name query parameter. To reroute users to a specific slot using x-ms-routing-name , you must make sure that the slot is already added to the Traffic Routing list. Since you want to route to a slot explicitly, the actual routing percentage you set doesn't matter. If you want, you can craft a "beta link" that users can click to access the beta app.
- 366. Opt users out of beta app Opt users out of beta app <a href="<webappname>.azurewebsites.net/?x-ms-routing-name=self">Go backto production app</a> Opt users in to beta app Opt users in to beta app <webappname>.azurewebsites.net/?x-ms-routing-name=staging More resources To let users opt out of your beta app, for example, you can put this link in your web page: The string x-ms-routing-name=self specifies the production slot. Once the client browser access the link, not only is it redirected to the production slot, but every subsequent request will contain the x-ms-routing-name=self cookie that pins the session to the production slot. To let users opt in to your beta app, set the same query parameter to the name of the non-production slot, for example: Set up staging environments for web apps in Azure App Service Deploy a complex application predictably in Azure Agile software development with Azure App Service Use DevOps environments effectively for your web apps
- 367. Add functionality to your first web app 4/5/2017 • 7 min to read • Edit Online NOTE NOTE Authenticate your users In Deploy your first web app to Azure in five minutes, you deployed a sample web app to Azure App Service. In this article, you'll quickly add some great functionalities to your deployed web app. In a few minutes, you will: enforce authentication for your users scale your app automatically receive alerts on the performance of your app Regardless of which sample app you deployed in the previous article, you can follow along in the tutorial. The three activities in this tutorial are only a few examples of the many useful features you get when you put your web app in App Service. Many of the features are available in the Free tier (which is what your first web app is running on), and you can use your trial credits to try out features that require higher pricing tiers. Rest assured that your web app remains in Free tier unless you explicitly changes it to a different pricing tier. The web app you created with Azure CLI runs in Free tier, which only allows one shared VM instance with resource quotas. For more information on what you get with Free tier, see App Service limits. Now, let's see how easy it is to add authentication to your app (further reading at App Service Authentication/Authorization). 1. In the portal blade for your app, which you just opened, click Settings > Authentication / Authorization. 2. Click On to turn on authentication. 3. In Authentication Providers, click Azure Active Directory.
- 368. 4. In the Azure Active Directory Settings blade, click Express, then click OK. The default settings create a new Azure AD application in your default directory. 6. Back in the portal blade of your app, click the URL link (or Browse in the menu bar). The link is an HTTP address. 5. Click Save. Once the change is successful, you'll see the notification bell turn green, along with a friendly message.
- 369. Scale your app automatically based on demand But once it opens the app in a new tab, the URL box redirects several times and finishes on your app with an HTTPS address. What you're seeing is that you're already logged in to your Azure subscription, and you're automatically authenticated in the app. So if you now open an unauthenticated session in a different browser, you'll see a login screen when you navigate to the same URL. If you've never done anything with Azure Active Directory, your default directory might not have any Azure AD users. In that case, probably the only account in there is the Microsoft account with your Azure subscription. That's why you were automatically logged in to the app in the same browser earlier. You can use that same Microsoft account to log in on this login page as well. Congratulations, you are authenticating all traffic to your web app. You may have noticed in the Authentication / Authorization blade that you can do a lot more, such as: Enable social login Enable multiple login options Change the default behavior when people first navigate to your app App Service provides a turn-key solution for some of the common authentication needs so you don't need to provide the authentication logic yourself. For more information, see App Service Authentication/Authorization. Next, let's autoscale your app so that it will automatically adjust it capacity to respond to user demand (further reading at Scale up your app in Azure and Scale instance count manually or automatically). Briefly, you scale your web app in two ways: Scale up: Get more CPU, memory, disk space, and extra features like dedicated VMs, custom domains and certificates, staging slots, autoscaling, and more. You scale up by changing the pricing tier of the App Service plan your app belongs to. Scale out: Increasing the number of VM instances that run your app. You can scale out to as many as 50 instances, depending on your pricing tier. Without further ado, let's set up autoscaling.
- 370. 1. First, let's scale up to enable autoscaling. In the portal blade of your app, click Settings > Scale Up (App Service Plan). IMPORTANT IMPORTANT 3. Next, let's configure autoscaling. In the portal blade of your app, click Settings > Scale Out (App Service Plan). 2. Scroll and select the S1 Standard tier, the lowest tier that supports autoscaling (circled in screenshot), then click Select. You're done scaling up. This tier expends your free trial credits. If you have a pay-per-use account, it incurs charges to your account.
- 371. 5. Click Save in the menu bar. 4. Change Scale by to CPU Percentage. The sliders underneath the dropdown update accordingly. Then, define an Instances range between 1 and 2 and a Target range between 40 and 80. Do it by typing in the boxes or by moving the sliders. Based on this configuration, your app automatically scales out when CPU utilization is above 80% and scales in when CPU utilization is below 40%. Congratulations, your app is autoscaling. You may have noticed in the Scale Settings blade that you can do a lot more, such as: Scale to a specific number of instances manually Scale by other performance metrics, such as memory percentage or disk queue Customize scaling behavior when a performance rule is triggered Autoscale on a schedule
- 372. Receive alerts for your app Set autoscaling behavior for a future event For more information on scaling up your app, see Scale up your app in Azure. For more information on scaling out, see Scale instance count manually or automatically. Now that your app is autoscaling, what happens when it reaches the maximum instance count (2) and CPU is above desired utilization (80%)? You can set up an alert (further reading at Receive alert notifications) to inform you of this situation so you can further scale up/out your app, for example. Let's quickly set up an alert for this scenario. 1. In the portal blade of your app, click Tools > Alerts. 2. Click Add alert. Then, in the Resource box, select the resource that ends with (serverfarms). That's your App Service plan. 3. Specify Name as CPUMaxed , Metric as CPU Percentage, and Threshold as 90 , then select Email owners, contributors, and readers, and then click OK.
- 373. When Azure finishes creating the alert, you'll see it in the Alerts blade. Congratulations, you're now getting alerts. This alert setting checks CPU utilization every five minutes. If that number goes above 90%, you'll receive an email alert, along with anyone who is authorized. To see everyone who is authorized to receive the alerts, go back to the portal blade of your app and click the Access button.
- 374. NOTE NOTE Next Steps You should see that Subscription admins are already the Owner of the app. This group would include you if you're the account administrator of your Azure subscription (e.g. your trial subscription). For more information on Azure role-based access control, see Azure Role-Based Access Control. Alert rules is an Azure feature. For more information, see Receive alert notifications. On your way to configure the alert, you may have noticed a rich set of tools in the Tools blade. Here, you can troubleshoot issues, monitor performance, test for vulnerabilities, manage resources, interact with the VM console, and add useful extensions. We invite you to click on each one of these tools to discover the simple yet powerful tools at your finger tips. Find out how to do more with your deployed app. Here's only a partial list: Buy and configure a custom domain name - Buy an attractive domain for your web app instead of the *.azurewebsites.net domain. Or use a domain that you already have. Set up staging environments - Deploy your app to a staging URL before putting it into production. Update your live web app with confidence. Set up an elaborate DevOps solution with multiple deployment slots. Set up continuous deployment - Integrate app deployment into your source control system. Deploy to Azure with every commit. Access on-premises resources - Access an existing on-premises database or CRM system. Back up your app - Set up back up and restore for your web app. Prepare for unexpected failures and recover from them. Enable diagnostic logs - Read the IIS logs from Azure or application traces. Read them in a stream, download them, or port them into Application Insights for turn-key analysis. Scan your app for vulnerabilities - Scan your web app against modern threats using service provided by Tinfoil Security. Run background jobs - Run jobs for data processing, reporting, etc. Learn how App Service works
- 375. Access on-premises resources using hybrid connections in Azure App Service 2/28/2017 • 6 min to read • Edit Online NOTE NOTE Prerequisites NOTE NOTE Create a web app in the Azure Portal NOTE NOTE You can connect an Azure App Service app to any on-premises resource that uses a static TCP port, such as SQL Server, MySQL, HTTP Web APIs, and most custom Web Services. This article shows you how to create a hybrid connection between App Service and an on-premises SQL Server database. The Web Apps portion of the Hybrid Connections feature is available only in the Azure Portal. To create a connection in BizTalk Services, see Hybrid Connections. This content also applies to Mobile Apps in Azure App Service. To use an on-premises SQL Server or SQL Server Express database with a hybrid connection, TCP/IP needs to be enabled on a static port. Using a default instance on SQL Server is recommended because it uses static port 1433. For information on installing and configuring SQL Server Express for use with hybrid connections, see Connect to an on-premises SQL Server from an Azure web site using Hybrid Connections. An Azure subscription. For a free subscription, see Azure Free Trial. If you want to get started with Azure App Service before signing up for an Azure account, go to Try App Service, where you can immediately create a short-lived starter web app in App Service. No credit cards required; no commitments. The computer on which you install the on-premises Hybrid Connection Manager agent described later in this article: Must be able to connect to Azure over port 5671 Must be able to reach the hostname:portnumber of your on-premises resource. The steps in this article assume that you are using the browser from the computer that will host the on-premises hybrid connection agent. If you have already created a web app or Mobile App backend in the Azure Portal that you want to use for this tutorial, you can skip ahead to Create a Hybrid Connection and a BizTalk Service and start from there. 1. In the upper left corner of the Azure Portal, click New > Web + Mobile > Web App.
- 376. 2. On the Web app blade, provide a URL and click Create. 3. After a few moments, the web app is created and its web app blade appears. The blade is a vertically scrollable dashboard that lets you manage your site.
- 377. 4. To verify the site is live, you can click the Browse icon to display the default page.
- 378. Create a Hybrid Connection and a BizTalk Service Next, you will create a hybrid connection and a BizTalk service for the web app. 1. In your web app blade click on All settings > Networking > Configure your hybrid connection endpoints. 2. On the Hybrid connections blade, click Add. 3. The Add a hybrid connection blade opens. Since this is your first hybrid connection, the New hybrid connection option is preselected, and the Create hybrid connection blade opens for you.
- 379. On the Create hybrid connection blade: For Name, provide a name for the connection. For Hostname, enter the name of the on-premises computer that hosts your resource. For Port, enter the port number that your on-premises resource uses (1433 for a SQL Server default instance). Click Biz Talk Service 4. The Create BizTalk Service blade opens. Enter a name for the BizTalk service, and then click OK.
- 380. The Create BizTalk Service blade closes and you are returned to the Create hybrid connection blade. 5. On the Create hybrid connection blade, click OK. 6. When the process completes, the notifications area in the Portal informs you that the connection has been successfully created. 7. On the web app's blade, the Hybrid connections icon now shows that 1 hybrid connection has been
- 381. Install the on-premises Hybrid Connection Manager to complete the connection created. At this point, you have completed an important part of the cloud hybrid connection infrastructure. Next, you will create a corresponding on-premises piece. 1. On the web app's blade, click All settings > Networking > Configure your hybrid connection endpoints. 2. On the Hybrid connections blade, the Status column for the recently added endpoint shows Not connected. Click the connection to configure it. The Hybrid connection blade opens.
- 382. 3. On the blade, click Listener Setup. 4. The Hybrid connection properties blade opens. Under On-premises Hybrid Connection Manager, choose Click here to install. 5. In the Application Run security warning dialog, choose Run to continue.
- 383. 6. In the User Account Control dialog, choose Yes. 7. The Hybrid Connection Manager is downloaded and installed for you. 8. When the install completes, click Close.
- 384. NOTE NOTE Configure the Mobile App .NET backend project to connect to the SQL Server database On the Hybrid connections blade, the Status column now shows Connected. Now that the hybrid connection infrastructure is complete, you can create a hybrid application that uses it. The following sections show you how to use a hybrid connection with a Mobile Apps .NET backend project. In App Service, a Mobile Apps .NET backend project is just an ASP.NET web app with an additional Mobile Apps SDK installed and initialized. To use your web app as a Mobile Apps backend, you must download and initialize the Mobile Apps .NET backend SDK. For Mobile Apps, you also need to define a connection string for the on-premises database and modify the backend to use this connection. <add name="OnPremisesDBConnection" connectionString="Data Source=OnPremisesServer,1433; InitialCatalog=OnPremisesDB; User ID=HybridConnectionLogin; Password=<**secure_password**>; MultipleActiveResultSets=True" providerName="System.Data.SqlClient" /> 1. In Solution Explorer in Visual Studio, open the Web.config file for your Mobile App .NET backend, locate the connectionStrings section, add a new SqlClient entry like the following, which points to the on-premises SQL Server database: Remember to replace <**secure_password**> in this string with the password you created for HybridConnectionLogin.
- 385. Update the Mobile App backend to use the on-premises connection string Next Steps NOTE NOTE 3. Expand the Models folder and open the data model file, which ends in Context.cs. public class hybridService1Context :DbContext { public hybridService1Context() :base("OnPremisesDBConnection") { } } 2. Click Save in Visual Studio to save the Web.config file. This connection setting is used when running on the local computer. When running in Azure, this setting is overriden by the connection setting defined in the portal. 4. Modify the DbContext instance constructor to pass the value OnPremisesDBConnection to the base DbContext constructor, similar to the following snippet: The service will now use the new connection to the SQL Server database. Next, you need to add an app setting for this new connection string so that it can be used from Azure. 1. Back in the Azure portal in the web app backend code for your Mobile App, click All settings, then Application settings. 3. Press Save to save the hybrid connection and connection string you just created. 2. In the Web app settings blade, scroll down to Connection strings and add an new SQL Server connection string named OnPremisesDBConnection with a value like Server=OnPremisesServer,1433;Database=OnPremisesDB;User ID=HybridConnectionsLogin;Password=<**secure_password**> . Replace <**secure_password**> with the secure password for your on-premises database. At this point you can republish the server project and test the new connection with your existing Mobile Apps clients. Data will be read from and written to the on-premises database using the hybrid connection. For information on creating an ASP.NET web application that uses a hybrid connection, see Connect to an on- premises SQL Server from an Azure web site using Hybrid Connections.
- 386. Additional Resources Additional Resources What's changed Hybrid Connections overview Josh Twist introduces hybrid connections (Channel 9 video) Hybrid Connections web site BizTalk Services: Dashboard, Monitor, Scale, Configure, and Hybrid Connection tabs Building a Real-World Hybrid Cloud with Seamless Application Portability (Channel 9 video) Connect to an on-premises SQL Server from Azure Mobile Services using Hybrid Connections (Channel 9 video) For a guide to the change from Websites to App Service see: Azure App Service and Its Impact on Existing Azure Services
- 387. Integrate your app with an Azure Virtual Network 3/28/2017 • 22 min to read • Edit Online Getting started Getting started This document describes the Azure App Service virtual network integration feature and shows how to set it up with apps in Azure App Service. If you are unfamiliar with Azure Virtual Networks (VNETs), this is a capability that allows you to place many of your Azure resources in a non-internet routeable network that you control access to. These networks can then be connected to your on premise networks using a variety of VPN technologies. To learn more about Azure Virtual Networks start with the information here: Azure Virtual Network Overview. The Azure App Service has two forms. 1. The multi-tenant systems that support the full range of pricing plans 2. The App Service Environment (ASE) premium feature which deploys into your VNET. This document goes through VNET Integration and not App Service Environment. If you want to learn more about the ASE feature then start with the information here: App Service Environment introduction. VNET Integration gives your web app access to resources in your virtual network but does not grant private access to your web app from the virtual network. Private site access is only available with an ASE configured with an Internal Load Balancer (ILB). For details on using an ILB ASE, start with the article here: Creating and using an ILB ASE. A common scenario where you would use VNET Integration is enabling access from your web app to a database or a web services running on a virtual machine in your Azure virtual network. With VNET Integration you don't need to expose a public endpoint for applications on your VM but can use the private non-internet routable addresses instead. The VNET Integration feature: requires a Standard or Premium pricing plan will work with Classic(V1) or Resource Manager(V2) VNET supports TCP and UDP works with Web, Mobile and API apps enables an app to connect to only 1 VNET at a time enables up to 5 VNETs to be integrated with in an App Service Plan allows the same VNET to be used by multiple apps in an App Service Plan supports a 99.9% SLA due to a reliance on the VNET Gateway There are some things that VNET Integration does not support including: mounting a drive AD integration NetBios private site access Here are some things to keep in mind before connecting your web app to a virtual network: VNET Integration only works with apps in a Standard or Premium pricing plan. If you enable the feature and then scale your App Service Plan to an unsupported pricing plan your apps will lose their connections to the VNETs they are using.
- 388. Enabling VNET Integration NOTE NOTE If your target virtual network already exists, it must have point-to-site VPN enabled with a Dynamic routing gateway before it can be connected to an app. You cannot enable point-to-site Virtual Private Network (VPN) if your gateway is configured with Static routing. The VNET must be in the same subscription as your App Service Plan(ASP). The apps that integrate with a VNET will use the DNS that is specified for that VNET. By default your integrating apps will only route traffic into your VNET based on the routes that are defined in your VNET. This document is focused primarily on using the Azure Portal for VNET Integration. To enable VNET Integration with your app using PowerShell, follow the directions here: Connect your app to your virtual network by using PowerShell. You have the option to connect your app to a new or existing virtual network. If you create a new network as a part of your integration then in addition to just creating the VNET, a dynamic routing gateway will be pre-configured for you and Point to Site VPN will be enabled. Configuring a new virtual network integration can take several minutes. To enable VNET Integration open your app Settings and then select Networking. The UI that opens up offers three networking choices. This guide is only going into VNET Integration though Hybrid Connections and App Service Environments are discussed later in this document. If your app is not in the correct pricing plan the UI will helpfully enable you to scale your plan to a higher pricing plan of your choice.
- 389. Enabling VNET Integration with a pre-existing VNET Enabling VNET Integration with a pre-existing VNET Enable Point to Site in a Classic VN ET Enable Point to Site in a Classic VN ET The VNET Integration UI allows you to select from a list of your VNETs. The Classic VNETs will indicate that they are such with the word "Classic" in parenthesis next to the VNET name. The list is sorted such that the Resource Manager VNETs are listed first. In the image shown below you can see that only one VNET can be selected. There are multiple reasons that a VNET will be greyed out including: the VNET is in another subscription that your account has access to the VNET does not have Point to Site enabled the VNET does not have a dynamic routing gateway To enable integration simply click on the VNET you wish to integrate with. After you select the VNET, your app will be automatically restarted for the changes to take effect. If your VNET does not have a gateway nor has Point to Site then you have to set that up first. To do this for a Classic VNET, go to the Azure Portal and bring up the list of Virtual Networks(classic). From here click on the network you want to integrate with and click on the big box under Essentials called VPN Connections. From here you can create your point to site VPN and even have it create a gateway. After you go through the point to site with gateway creation experience it will be about 30 minutes before it is ready.
- 390. Enabling Point to Site in a Resource Manager VN ET Enabling Point to Site in a Resource Manager VN ET Creating a pre-configured VNET Creating a pre-configured VNET NOTE NOTE To configure a Resource Manager VNET with a gateway and Point to Site, you can use either PowerShell as documented here, Configure a Point-to-Site connection to a virtual network using PowerShell or use the Azure Portal as documented here, Configure a Point-to-Site connection to a VNet using the Azure Portal. The UI to perform this capability is not yet available. If you want to create a new VNET that is configured with a gateway and Point-to-Site, then the App Service networking UI has the capability to do that but only for a Resource manager VNET. If you wish to create a Classic VNET with a gateway and Point-to-Site then you need to do this manually through the Networking user interface. To create a Resource Manager VNET through the VNET Integration UI, simply select Create New Virtual Network and provide the: Virtual Network Name Virtual Network Address Block Subnet Name Subnet Address Block Gateway Address Block Point-to-Site Address Block If you want this VNET to connect to any of your other network then you should avoid picking IP address space that overlaps with those networks. Resource Manager VNET creation with a gateway takes about 30 minutes and currently will not integrate the VNET with your app. After your VNET is created with the gateway you need to come back to your app VNET Integration UI and select your new VNET.
- 391. How the system works Azure VNETs normally are created within private network addresses. By default the VNET Integration feature will route any traffic destined for those IP address ranges into your VNET. The private IP address ranges are: 10.0.0.0/8 - this is the same as 10.0.0.0 - 10.255.255.255 172.16.0.0/12 - this is the same as 172.16.0.0 - 172.31.255.255 192.168.0.0/16 - this is the same as 192.168.0.0 - 192.168.255.255 The VNET address space needs to be specified in CIDR notation. If you are unfamiliar with CIDR notation, it is a method for specifying address blocks using an IP address and an integer that represents the network mask. As a quick reference, consider that 10.1.0.0/24 would be 256 addresses and 10.1.0.0/25 would be 128 addresses. An IPv4 address with a /32 would be just 1 address. If you set the DNS server information here then that will be set for your VNET. After VNET creation you can edit this information from the VNET user experiences. When you create a Classic VNET using the VNET Integration UI, it will create a VNET in the same resource group as your app. Under the covers this feature builds on top of Point-to-Site VPN technology to connect your app to your VNET. Apps in Azure App Service have a multi-tenant system architecture which precludes provisioning an app directly in a VNET as is done with virtual machines. By building on point-to-site technology we limit network access to just the virtual machine hosting the app. Access to the network is further restricted on those app hosts so that your apps can only access the networks that you configure them to access.
- 392. Managing the VNET Integrations If you haven’t configured a DNS server with your virtual network you will need to use IP addresses. While using IP addresses, remember that the major benefit of this feature is that it enables you to use the private addresses within your private network. If you set your app up to use public IP addresses for one of your VMs then you aren't using the VNET Integration feature and are communicating over the internet. The ability to connect and disconnect to a VNET is at an app level. Operations that can affect the VNET Integration across multiple apps are at an ASP level. From the UI that is shown at the app level you can get details on your VNET. Most of the same information is also shown at the ASP level. From the Network Feature Status page you can see if your app is connected to your VNET. If your VNET gateway is down for whatever reason then this would show as not-connected.
- 393. The information you now have available to you in the app level VNET Integration UI is the same as the detail information you get from the ASP. Here are those items: VNET Name - This link opens the the network UI Location - This reflects the location of your VNET. It is possible to integrate with a VNET in another location. Certificate Status - There are certificates used to secure the VPN connection between the app and the VNET. This reflects a test to ensure they are in sync. Gateway Status - Should your gateways be down for whatever reason then your app cannot access resources in the VNET. VNET address space - This is the IP address space for your VNET. Point to Site address space - This is the point to site IP address space for your VNET. Your app will show communication as coming from one of the IPs in this address space. Site to site address space - You can use Site to Site VPNs to connect your VNET to your on premise resources or to other VNETs. Should you have that configured then the IP ranges defined with that VPN connection will show here. DNS Servers - If you have DNS Servers configured with your VNET then they are listed here. IPs routed to the VNET - There are a list of IP addresses that your VNET has routing defined for. Those addresses will show here. The only operation you can take in the app view of your VNET Integration is to disconnect your app from the VNET it is currently connected to. To do this simply click Disconnect at the top. This action does not change your VNET. The VNET and it's configuration including the gateways remains unchanged. If you then want to delete your VNET you need to first delete the resources in it including the gateways. The App Service Plan view has a number of additional operations. It is also accessed differently than from the app. To reach the ASP Networking UI simply open your ASP UI and scroll down. There is a UI element called Network Feature Status. It will give some minor details around your VNET Integration. Clicking on this UI opens the Network Feature Status UI. If you then click on "Click here to manage" you will open up UI that lists the VNET Integrations in this ASP. The location of the ASP is good to remember when looking at the locations of the VNETs you are integrating with. When the VNET is in another location you are far more likely to see latency issues. The VNETs integrated with is a reminder on how many VNETs your apps are integrated with in this ASP and how many you can have. To see added details on each VNET, just click on the VNET you are interested in. In addition to the details that were
- 394. Accessing on premise resources noted earlier you will also see a list of the apps in this ASP that are using that VNET. With respect to actions there are two primary actions. The first is the ability to add routes that drive traffic leaving your app into your VNET. The second action is the ability to sync certificates and network information. Routing As noted earlier the routes that are defined in your VNET are what is used for directing traffic into your VNET from your app. There are some uses though where customers want to send additional outbound traffic from an app into the VNET and for them this capability is provided. What happens to the traffic after that is up to how the customer configures their VNET. Certificates The Certificate Status reflects a check being performed by the App Service to validate that the certificates that we are using for the VPN connection are still good. When VNET Integration enabled, then if this is the first integration to that VNET from any apps in this ASP, there is a required exchange of certificates to ensure the security of the connection. Along with the certificates we get the DNS configuration, routes and other similar things that describe the network. If those certificates or network information is changed then you will need to click "Sync Network". NOTE: When you click "Sync Network" then you will cause a brief outage in connectivity between your app and your VNET. While your app will not be restarted the loss of connectivity could cause your site to not function properly. One of the benefits of the VNET Integration feature is that if your VNET is connected to your on premise network with a Site to Site VPN then your apps can have access to your on premise resources from your app. For this to
- 395. NOTE NOTE Pricing details Troubleshooting Tools Tools nameresolver.exe hostname [optional:DNS Server] work though you may need to update your on premise VPN gateway with the routes for your Point to Site IP range. When the Site to Site VPN is first set up then the scripts used to configure it should set up routes including your Point to Site VPN. If you add the Point to Site VPN after your create your Site to Site VPN then you will need to update the routes manually. Details on how to do that will vary per gateway and are not described here. While the VNET Integration feature will work with a Site to Site VPN to access on premise resources it currently will not work with an ExpressRoute VPN to do the same. This is true when integrating with either a Classic or Resource Manager VNET. If you need to access resources through an ExpressRoute VPN then you can use an ASE which can run in your VNET. There are a few pricing nuances that you should be aware of when using the VNET Integration feature. There are 3 related charges to the use of this feature: ASP pricing tier requirements Data transfer costs VPN Gateway costs. For your apps to be able to use this feature, they need to be in a Standard or Premium App Service Plan. You can see more details on those costs here: App Service Pricing. Due to the way Point to Site VPNs are handled, you always have a charge for outbound data through your VNET Integration connection even if the VNET is in the same data center. To see what those charges are take a look here: Data Transfer Pricing Details. The last item is the cost of the VNET gateways. If you don't need the gateways for something else such as Site to Site VPNs then you are paying for gateways to support the VNET Integration feature. There are details on those costs here: VPN Gateway Pricing. While the feature is easy to set up that doesn't mean that your experience will be problem free. Should you encounter problems accessing your desired endpoint there are some utilities you can use to test connectivity from the app console. There are two console experiences you can use. One is from the Kudu console and the other is the console that you can reach in the Azure Portal. To get to the Kudu console from your app go to Tools -> Kudu. This is the same as going to [sitename].scm.azurewebsites.net. Once that opens simply go to the Debug console tab. To get to the Azure portal hosted console then from your app go to Tools -> Console. The tools ping, nslookup and tracert won’t work through the console due to security constraints. To fill the void there have been two separate tools added. In order to test DNS functionality we added a tool named nameresolver.exe. The syntax is: You can use nameresolver to check the hostnames that your app depends on. This way you can test if you have anything mis-configured with your DNS or perhaps don't have access to your DNS server. The next tool allows you to test for TCP connectivity to a host and port combination. This tool is called tcpping.exe and the syntax is:
- 396. tcpping.exe hostname [optional:port] Debugging access to VNET hosted resources Debugging access to VNET hosted resources This tool will tell you if you can reach a specific host and port but will not perform the same task you get with the ICMP based ping utility. The ICMP ping utility will tell you if your host is up. With tcpping you find out if you can access a specific port on a host. There are a number of things that can prevent your app from reaching a specific host and port. Most of the time it is one of three things: There is a firewall in the way If you have a firewall in the way then you will hit the TCP timeout. That is 21 seconds in this case. Use the tcpping tool to test connectivity. TCP timeouts can be due to many things beyond firewalls but start there. DNS is not accessible The DNS timeout is 3 seconds per DNS server. If you have 2 DNS servers that is 6 seconds. Use nameresolver to see if DNS is working. Remember you can't use nslookup as that does not use the DNS your VNET is configured with. Invalid P2S IP range The point to site IP range needs to be in the RFC 1918 private IP ranges (10.0.0.0- 10.255.255.255 / 172.16.0.0-172.31.255.255 / 192.168.0.0-192.168.255.255) If the range uses IPs outside of that then things won't work. If those items don't answer your problem, look first for the simple things like: Does the Gateway show as being up in the Portal? Do certificates show as being in sync? Did anybody change the network configuration without doing a "Sync Network" in the affected ASPs? If your gateway is down then bring it back up. If your certificates are out of sync then go to the ASP view of your VNET Integration and hit "Sync Network". If you suspect that there has been a change made to your VNET configuration and it wasn't sync'd with your ASPs then go to the ASP view of your VNET Integration and hit "Sync Network" Just as a reminder, this will cause a brief outage with your VNET connection and your apps. If all of that is fine then you need to dig in a bit deeper: Are there any other apps using VNET Integration to reach resources in the same VNET? Can you go to the app console and use tcpping to reach any other resources in your VNET? If either of the above are true then your VNET Integration is fine and the problem is somewhere else. This is where it gets to be more of a challenge because there is no simple way to see why you can't reach a host:port. Some of the causes include: you have a firewall up on your host preventing access to the application port from your point to site IP range. Crossing subnets often requires Public access. your target host is down your application is down you had the wrong IP or hostname your application is listening on a different port than what you expected. You can check this by going onto that host and using "netstat -aon" from the cmd prompt. This will show you what process ID is listening on what port. your network security groups are configured in such a manner that they prevent access to your application host and port from your point to site IP range Remember that you don't know what IP in your Point to Site IP range that your app will use so you need to allow access from the entire range. Additional debug steps include:
- 397. Hybrid Connections and App Service Environments log onto another VM in your VNET and attempt to reach your resource host:port from there. There are some TCP ping utilities that you can use for this purpose or can even use telnet if need be. The purpose here is just to determine if connectivity is there from this other VM. bring up an application on another VM and test access to that host and port from the console from your app ####On premise resources#### If your cannot reach resources on premise then the first thing you should check is if you can reach a resource in your VNET. If that is working then the next steps are pretty easy. From a VM in your VNET you need to try to reach the on premise application. You can use telnet or a TCP ping utility. If your VM can't reach your on premise resource then first make sure your Site to Site VPN connection is working. If it is working then check the same things noted earlier as well as the on premise gateway configuration and status. Now if your VNET hosted VM can reach your on premise system but your app can't then the reason is likely one of the following: your routes are not configured with your point to site IP ranges in your on premise gateway your network security groups are blocking access for your Point to Site IP range your on premise firewalls are blocking traffic from your Point to Site IP range you have a User Defined Route(UDR) in your VNET that prevents your Point to Site based traffic from reaching your on premise network There are 3 features that enable access to VNET hosted resources. They are: VNET Integration Hybrid Connections App Service Environments Hybrid Connections requires you to install a relay agent called the Hybrid Connection Manager(HCM) in your network. The HCM needs to be able to connect to Azure and also to your application. This solution is especially great from a remote network such as your on premise network or even another cloud hosted network because it does not require an internet accessible endpoint. The HCM only runs on Windows and you can have up to 5 instances running to provide high availability. Hybrid Connections only supports TCP though and each HC endpoint has to match to a specific host:port combination. The App Service Environment feature allows you to run an instance of the Azure App Service in your VNET. This lets your apps access resources in your VNET without any extra steps. Some of the other benefits of an App Service Environment is that you can use 8 core dedicated workers with 14 GB of RAM. Another benefit is that you can scale the system to meet your needs. Unlike the multi-tenant environments where your ASP is limited in size, in an ASE you control how many resources you want to give to the system. With respect to the network focus of this document though, one of the things you get with an ASE that you don't with VNET Integration is that it can work with an ExpressRoute VPN. While there is some use case overlap, none of these feature can replace any of the others. Knowing what feature to use is tied to your needs and how you will want to use it. For example: If you are a developer and simply want to run a site in Azure and have it access the database on the workstation under your desk then the easiest thing to use is Hybrid Connections. If you are a large organization that wants to put a large number of web properties in the public cloud and manage them in your own network then you want to go with the App Service Environment. If you have a number of App Service hosted apps and simply want to access resources in your VNET then VNET Integration is the way to go. Beyond the use cases there are some simplicity related aspects. If your VNET is already connected to your on
- 398. premise network then using VNET Integration or an App Service Environment is an easy way to consume on premise resources. On the other hand, if your VNET is not connected to your on premise network then it's a lot more overhead to set up a site to site VPN with your VNET compared with installing the HCM. Beyond the functional differences there are also pricing differences. The App Service Environment feature is a Premium service offering but offers the most network configuration possibilities in addition to other great features. VNET Integration can be used with Standard or Premium ASPs and is perfect for securely consuming resources in your VNET from the multi-tenant App Service. Hybrid Connections currently depends on a BizTalk account which has pricing levels that start free and then get progressively more expensive based on the amount you need. When it comes to working across many networks though, there is no other feature like Hybrid Connections which can enable you to access resources in well over 100 separate networks.
- 399. Connect your app to your virtual network by using PowerShell 2/28/2017 • 19 min to read • Edit Online Overview Classic virtual networks Connect an app to a classic VNet Connect an app to a classic VNet Set up Az ure Pow er Shell SDK Set up Az ure Pow er Shell SDK In Azure App Service, you can connect your app (web, mobile, or API) to an Azure virtual network (VNet) in your subscription. This feature is called VNet Integration. The VNet Integration feature should not be confused with the App Service Environment feature, which allows you to run an instance of Azure App Service in your virtual network. The VNet Integration feature has a user interface (UI) in the new portal that you can use to integrate with virtual networks that are deployed by using either the classic deployment model or the Azure Resource Manager deployment model. If you want to learn more about the feature, see Integrate your app with an Azure virtual network. This article is not about how to use the UI but rather about how to enable integration by using PowerShell. Because the commands for each deployment model are different, this article has a section for each deployment model. Before you continue with this article, ensure that you have: The latest Azure PowerShell SDK installed. You can install this with the Web Platform Installer. An app in Azure App Service running in a Standard or Premium SKU. This section explains three tasks for virtual networks that use the classic deployment model: 1. Connect your app to a preexisting virtual network that has a gateway and is configured for point-to-site connectivity. 2. Update your virtual network integration information for your app. 3. Disconnect your app from your virtual network. To connect an app to a virtual network, follow these three steps: 1. Declare to the web app that it will be joining a particular virtual network. The app will generate a certificate that will be given to the virtual network for point-to-site connectivity. 2. Upload the web app certificate to the virtual network, and then retrieve the point-to-site VPN package URI. 3. Update the web app's virtual network connection with the point-to-site package URI. The first and third steps are fully scriptable, but the second step requires a one-time, manual action through the portal, or access to perform PUT or PATCH actions on the virtual network Azure Resource Manager endpoint. Contact Azure Support to have this enabled. Before you start, make sure that you have a classic virtual network that has point-to-site connectivity already enabled and a deployed gateway. To create the gateway and enable point-to- site connectivity, you need to use the portal as described at Creating a VPN gateway. The classic virtual network needs to be in the same subscription as your App Service plan that holds the app that you are integrating with. Open a PowerShell window and set up your Azure account and subscription by using:
- 400. Login-AzureRmAccount Select-AzureRmSubscription –SubscriptionName [WebAppSubscriptionName] Select-AzureRmSubscription –SubscriptionId [WebAppSubscriptionId] Variables used in this article Variables used in this article $Configuration = @{} $Configuration.WebAppResourceGroup = "[Your web app resource group]" $Configuration.WebAppName = "[Your web app name]" $Configuration.VnetSubscriptionId = "[Your vnet subscription id]" $Configuration.VnetResourceGroup = "[Your vnet resource group]" $Configuration.VnetName = "[Your vnet name]" $Configuration.WebAppLocation = "[Your web app Location]" $Configuration.GeneratedCertificatePath = "[C:PathToCertificate.cer]" > $Configuration Name Value ---- ----- GeneratedCertificatePath C:vnetcert.cer VnetSubscriptionId efc239a4-88f9-2c5e-a9a1-3034c21ad496 WebAppResourceGroup vnetdemo-rg VnetResourceGroup testase1-rg VnetName TestNetwork WebAppName vnetintdemoapp WebAppLocation centralus Declare the virtual netw ork to the app Declare the virtual netw ork to the app That command will open a prompt to get your Azure credentials. After you sign in, use either of the following commands to select the subscription that you want to use. Make sure that you are using the subscription that your virtual network and App Service plan are in. or To simplify commands, we will set a $Configuration PowerShell variable with the specific configuration. Set a variable as follows in PowerShell with the following parameters: The app location should be the location without any spaces. For example, West US is westus. The next item is where the certificate should be written. It should be a writable path on your local computer. Make sure to include .cer at the end. To see what you set, type $Configuration. The rest of this section assumes that you have a variable created as just described. Use the following command to tell the app that it will be using this particular virtual network. This will cause the app to generate necessary certificates:
- 401. $vnet = New-AzureRmResource -Name "$($Configuration.WebAppName)/$($Configuration.VnetName)" -ResourceGroupName $Configuration.WebAppResourceGroup -ResourceType "Microsoft.Web/sites/virtualNetworkConnections" -PropertyObject @{"VnetResourceId" = "/subscriptions/$($Configuration.VnetSubscriptionId)/resourceGroups/$($Configuration.VnetResourceGroup)/providers/Microsoft.ClassicNetwor k/virtualNetworks/$($Configuration.VnetName)"} -Location $Configuration.WebAppLocation -ApiVersion 2015-07-01 Upload the w eb app certificate to the virtual netw ork Upload the w eb app certificate to the virtual netw ork $certBytes = [System.Convert]::FromBase64String($vnet.Properties.certBlob) [System.IO.File]::WriteAllBytes("$($Configuration.GeneratedCertificatePath)", $certBytes) Get the point-to-site package Get the point-to-site package If this command succeeds, $vnet should have a Properties variable in it. The Properties variable should contain both a certificate thumbprint and the certificate data. A manual, one-time step is required for each subscription and virtual network combination. That is, if you are connecting apps in Subscription A to Virtual Network A, you will need to do this step only once regardless of how many apps you configure. If you are adding a new app to another virtual network, you'll need to do this again. The reason for this is that a set of certificates is generated at a subscription level in Azure App Service, and the set is generated once for each virtual network that the apps will connect to. The certificates will have already been set if you followed these steps or if you integrated with the same virtual network by using the portal. The first step is to generate the .cer file. The second step is to upload the .cer file to your virtual network. To generate the .cer file from the API call in the earlier step, run the following commands. The certificate will be found in the location that $Configuration.GeneratedCertificatePath specifies. To upload the certificate manually, use the Azure portal and Browse Virtual Network (classic) > VPN connections > Point-to-site > Manage certificates. From here, upload your certificate. The next step in setting up a virtual network connection on a web app is to get the point-to-site package and provide it to your web app. Save the following template to a file called GetNetworkPackageUri.json somewhere on your computer, for example, C:AzureTemplatesGetNetworkPackageUri.json.
- 402. { "$schema":"http://schema.management.azure.com/schemas/2014-04-01-preview/deploymentTemplate.json#", "contentVersion":"1.0.0.0", "parameters":{ "certData":{ "type":"string" }, "certThumbprint":{ "type":"string" }, "networkName":{ "type":"string" } }, "variables":{ "legacyVnetName":"[concat('Group ', resourceGroup().name, ' ', parameters('networkName'))]" }, "resources":[ ], "outputs" :{ "PackageUri" : { "value" :"[listPackage(resourceId('Microsoft.ClassicNetwork/virtualNetworks/gateways/clientRootCertificates', parameters('networkName'), 'primary', parameters('certThumbprint')), '2014-06-01').packageUri]", "type" :"string" } } } $parameters = @{"certData" = $vnet.Properties.certBlob ; certThumbprint = $vnet.Properties.certThumbprint ; "networkName" = $Configuration.VnetName } $output = New-AzureRmResourceGroupDeployment -Name unused -ResourceGroupName $Configuration.VnetResourceGroup - TemplateParameterObject $parameters -TemplateFile C:PATHTOGetNetworkPackageUri.json Upload the point-to-site package to your app Upload the point-to-site package to your app $vnet = New-AzureRmResource -Name "$($Configuration.WebAppName)/$($Configuration.VnetName)/primary" -ResourceGroupName $Configuration.WebAppResourceGroup -ResourceType "Microsoft.Web/sites/virtualNetworkConnections/gateways" -ApiVersion 2015-07-01- PropertyObject @{"VnetName" = $Configuration.VnetName ; "VpnPackageUri" = $($output.Outputs.packageUri).Value } -Location $Configuration.WebAppLocation SET WEBSITE_ Set input parameters: Call the script: The variable $output.Outputs.packageUri will now contain the package URI to be given to your web app. The final step is to provide the app with this package. Simply run the next command: If a message asks you to confirm that you are overwriting an existing resource, make sure to allow it. After this command succeeds, your app should now be connected to the virtual network. To confirm success, go to your app console, and type the following: If there is an environment variable called WEBSITE_VNETNAME that has a value that matches the name of the target virtual network, all configurations have succeeded.
- 403. Update classic VNet integration information Update classic VNet integration information Disconnect your app from a classic VNet Disconnect your app from a classic VNet $vnet = Remove-AzureRmResource -Name "$($Configuration.WebAppName)/$($Configuration.VnetName)" -ResourceGroupName $Configuration.WebAppResourceGroup -ResourceType "Microsoft.Web/sites/virtualNetworkConnections" -ApiVersion 2015-07-01 Resource Manager virtual networks Resource Manager VNet App Service integration script Resource Manager VNet App Service integration script function ReadHostWithDefault($message, $default) { $result = Read-Host "$message [$default]" if($result -eq "") { $result = $default } return $result } function PromptCustom($title, $optionValues, $optionDescriptions) { Write-Host $title Write-Host $a = @() for($i= 0; $i-lt $optionValues.Length; $i++){ Write-Host "$($i+1))" $optionDescriptions[$i] } Write-Host while($true) { Write-Host "Choose an option:" $option = Read-Host $option = $option -as [int] if($option -ge 1-and $option -le $optionValues.Length) To update or resync your information, simply repeat the steps that you followed when you created the integration in the first place. Those steps are: 1. Define your configuration information. 2. Declare the virtual network to the app. 3. Get the point-to-site package. 4. Upload the point-to-site package to your app. To disconnect the app, you need the configuration information that was set during virtual network integration. Using that information, there is then one command to disconnect your app from your virtual network. Resource Manager virtual networks have Azure Resource Manager APIs, which simplify some processes when compared with classic virtual networks. We have a script that will help you complete the following tasks: Create a Resource Manager virtual network and integrate your app with it. Create a gateway, configure point-to-site connectivity in a preexisting Resource Manager virtual network, and then integrate your app with it. Integrate your app with a preexisting Resource Manager virtual network that has a gateway and point-to-site connectivity enabled. Disconnect your app from your virtual network. Copy the following script and save it to a file. If you don’t want to use the script, feel free to learn from it to see how to set things up with a Resource Manager virtual network.
- 404. if($option -ge 1-and $option -le $optionValues.Length) { return $optionValues[$option-1] } } } function PromptYesNo($title, $message, $default = 0) { $yes = New-Object System.Management.Automation.Host.ChoiceDescription "&Yes", "" $no = New-Object System.Management.Automation.Host.ChoiceDescription "&No", "" $options = [System.Management.Automation.Host.ChoiceDescription[]]($yes, $no) $result = $host.ui.PromptForChoice($title, $message, $options, $default) return $result } function CreateVnet($resourceGroupName, $vnetName, $vnetAddressSpace, $vnetGatewayAddressSpace, $location) { Write-Host "Creating a newVNET" $gatewaySubnet = New-AzureRmVirtualNetworkSubnetConfig -Name "GatewaySubnet" -AddressPrefix$vnetGatewayAddressSpace New-AzureRmVirtualNetwork-Name $vnetName -ResourceGroupName $resourceGroupName -Location $location -AddressPrefix $vnetAddressSpace -Subnet $gatewaySubnet } function CreateVnetGateway($resourceGroupName, $vnetName, $vnetIpName, $location, $vnetIpConfigName, $vnetGatewayName, $certificateData, $vnetPointToSiteAddressSpace) { $vnet = Get-AzureRmVirtualNetwork-Name $vnetName -ResourceGroupName $resourceGroupName $subnet=Get-AzureRmVirtualNetworkSubnetConfig -Name "GatewaySubnet" -VirtualNetwork$vnet Write-Host "Creating a public IP address for this VNET" $pip = New-AzureRmPublicIpAddress -Name $vnetIpName -ResourceGroupName $resourceGroupName -Location $location -AllocationMethod Dynamic $ipconf = New-AzureRmVirtualNetworkGatewayIpConfig -Name $vnetIpConfigName -Subnet $subnet -PublicIpAddress $pip Write-Host "Adding a root certificate to this VNET" $root = New-AzureRmVpnClientRootCertificate -Name "AppServiceCertificate.cer" -PublicCertData $certificateData Write-Host "Creating Azure VNET Gateway. This may take up to an hour." New-AzureRmVirtualNetworkGateway -Name $vnetGatewayName -ResourceGroupName $resourceGroupName -Location $location - IpConfigurations $ipconf -GatewayType Vpn -VpnType RouteBased -EnableBgp $false -GatewaySku Basic -VpnClientAddressPool $vnetPointToSiteAddressSpace -VpnClientRootCertificates $root } function AddNewVnet($subscriptionId, $webAppResourceGroup, $webAppName) { Write-Host "Adding a newVnet" Write-Host $vnetName = Read-Host "Specify a name for this VirtualNetwork" $vnetGatewayName="$($vnetName)-gateway" $vnetIpName="$($vnetName)-ip" $vnetIpConfigName="$($vnetName)-ipconf" # VirtualNetworksettings $vnetAddressSpace="10.0.0.0/8" $vnetGatewayAddressSpace="10.5.0.0/16" $vnetPointToSiteAddressSpace="172.16.0.0/16" $changeRequested = 0 $resourceGroupName = $webAppResourceGroup while($changeRequested -eq 0) { Write-Host Write-Host "Currently, I willcreate a VNET with the following settings:" Write-Host Write-Host "VirtualNetworkName:$vnetName" Write-Host "Resource Group Name: $resourceGroupName" Write-Host "Gateway Name:$vnetGatewayName"
- 405. Write-Host "Gateway Name:$vnetGatewayName" Write-Host "Vnet IP name:$vnetIpName" Write-Host "Vnet IP config name: $vnetIpConfigName" Write-Host "Address Space:$vnetAddressSpace" Write-Host "Gateway Address Space:$vnetGatewayAddressSpace" Write-Host "Point-To-Site Address Space: $vnetPointToSiteAddressSpace" Write-Host $changeRequested = PromptYesNo "" "Do you wish to change these settings?" 1 if($changeRequested -eq 0) { $vnetName = ReadHostWithDefault "VirtualNetworkName" $vnetName $resourceGroupName = ReadHostWithDefault "Resource Group Name" $resourceGroupName $vnetGatewayName = ReadHostWithDefault "Vnet Gateway Name" $vnetGatewayName $vnetIpName = ReadHostWithDefault "Vnet IP name" $vnetIpName $vnetIpConfigName = ReadHostWithDefault "Vnet IP configuration name" $vnetIpConfigName $vnetAddressSpace = ReadHostWithDefault "Vnet Address Space" $vnetAddressSpace $vnetGatewayAddressSpace = ReadHostWithDefault "Vnet Gateway Address Space" $vnetGatewayAddressSpace $vnetPointToSiteAddressSpace = ReadHostWithDefault "Vnet Point-to-site Address Space" $vnetPointToSiteAddressSpace } } $ErrorActionPreference = "Stop"; # We create the virtualnetworkand add it here. The way this works is: # 1) Add the VNET association to the App. This allows the App to generate certificates, etc. for the VNET. # 2) Create the VNET and VNET gateway, add the certificates, create the public IP, etc., required for the gateway # 3) Get the VPNpackage fromthe gateway and pass it backto the App. $webApp = Get-AzureRmResource -ResourceName $webAppName -ResourceType "Microsoft.Web/sites" -ApiVersion 2015-08-01- ResourceGroupName $webAppResourceGroup $location = $webApp.Location Write-Host "Creating App association to VNET" $propertiesObject = @{ "vnetResourceId" = "/subscriptions/$($subscriptionId)/resourceGroups/$($resourceGroupName)/providers/Microsoft.Network/virtualNetworks/$($vnetName)" } $virtualNetwork= New-AzureRmResource -Location $location -Properties $PropertiesObject -ResourceName "$($webAppName)/$($vnetName)" -ResourceType "Microsoft.Web/sites/virtualNetworkConnections" -ApiVersion 2015-08-01-ResourceGroupName $webAppResourceGroup - Force CreateVnet $resourceGroupName $vnetName $vnetAddressSpace $vnetGatewayAddressSpace $location CreateVnetGateway $resourceGroupName $vnetName $vnetIpName $location $vnetIpConfigName $vnetGatewayName $virtualNetwork.Properties.CertBlob $vnetPointToSiteAddressSpace Write-Host "Retrieving VPNPackage and supplying to App" $packageUri= Get-AzureRmVpnClientPackage -ResourceGroupName $resourceGroupName -VirtualNetworkGatewayName $vnetGatewayName - ProcessorArchitecture Amd64 # Put the VPNclient configuration package onto the App $PropertiesObject = @{ "vnetName" = $VirtualNetworkName; "vpnPackageUri" = $packageUri } New-AzureRmResource -Location $location -Properties $PropertiesObject -ResourceName "$($webAppName)/$($vnetName)/primary" - ResourceType "Microsoft.Web/sites/virtualNetworkConnections/gateways" -ApiVersion 2015-08-01-ResourceGroupName $webAppResourceGroup -Force Write-Host "Finished!" } function AddExistingVnet($subscriptionId, $resourceGroupName, $webAppName) { $ErrorActionPreference = "Stop"; # At this point, the gateway should be able to be joined to an App, but may require some minor tweaking. We willdeclare to the App nowto use this VNET
- 406. Write-Host "Getting App information" $webApp = Get-AzureRmResource -ResourceName $webAppName -ResourceType "Microsoft.Web/sites" -ApiVersion 2015-08-01- ResourceGroupName $resourceGroupName $location = $webApp.Location $webAppConfig = Get-AzureRmResource -ResourceName "$($webAppName)/web" -ResourceType "Microsoft.Web/sites/config" -ApiVersion 2015-08-01-ResourceGroupName $resourceGroupName $currentVnet = $webAppConfig.Properties.VnetName if($currentVnet -ne $null-and $currentVnet -ne "") { Write-Host "Currently connected to VNET $currentVnet" } # Display existing vnets $vnets = Get-AzureRmVirtualNetwork $vnetNames = @() foreach($vnet in $vnets) { $vnetNames += $vnet.Name } Write-Host $vnet = PromptCustom"Select a VNET to integrate with" $vnets $vnetNames # We need to checkif this VNET is able to be joined to a App, based on following criteria # If there is no gateway, we can create one. # If there is a gateway: # It must be of type Vpn # It must be of VpnType RouteBased # If it doesn't have the right certificate, we willneed to add it. # If it doesn't have a point-to-site range, we willneed to add it. $gatewaySubnet = $vnet.Subnets | Where-Object { $_.Name -eq "GatewaySubnet" } if($gatewaySubnet -eq $null-or $gatewaySubnet.IpConfigurations -eq $null-or $gatewaySubnet.IpConfigurations.Count -eq 0) { $ErrorActionPreference = "Continue"; # There is no gateway. We need to create one. Write-Host "This VirtualNetworkhas no gateway. I willneed to create one." $vnetName = $vnet.Name $vnetGatewayName="$($vnetName)-gateway" $vnetIpName="$($vnetName)-ip" $vnetIpConfigName="$($vnetName)-ipconf" # VirtualNetworksettings $vnetAddressSpace="10.0.0.0/8" $vnetGatewayAddressSpace="10.5.0.0/16" $vnetPointToSiteAddressSpace="172.16.0.0/16" $changeRequested = 0 Write-Host "Your VNET is in the address space $($vnet.AddressSpace.AddressPrefixes), with the following Subnets:" foreach($subnet in $vnet.Subnets) { Write-Host "$($subnet.Name):$($subnet.AddressPrefix)" } $vnetGatewayAddressSpace = Read-Host "Please choose a GatewaySubnet address space" while($changeRequested -eq 0) { Write-Host Write-Host "Currently, I willcreate a VNET gateway with the following settings:" Write-Host Write-Host "VirtualNetworkName:$vnetName" Write-Host "Resource Group Name: $($vnet.ResourceGroupName)" Write-Host "Gateway Name:$vnetGatewayName" Write-Host "Vnet IP name:$vnetIpName"
- 407. Write-Host "Vnet IP name:$vnetIpName" Write-Host "Vnet IP config name: $vnetIpConfigName" Write-Host "Address Space:$($vnet.AddressSpace.AddressPrefixes)" Write-Host "Gateway Address Space:$vnetGatewayAddressSpace" Write-Host "Point-To-Site Address Space: $vnetPointToSiteAddressSpace" Write-Host $changeRequested = PromptYesNo "" "Do you wish to change these settings?" 1 if($changeRequested -eq 0) { $vnetGatewayName = ReadHostWithDefault "Vnet Gateway Name" $vnetGatewayName $vnetIpName = ReadHostWithDefault "Vnet IP name" $vnetIpName $vnetIpConfigName = ReadHostWithDefault "Vnet IP configuration name" $vnetIpConfigName $vnetGatewayAddressSpace = ReadHostWithDefault "Vnet Gateway Address Space" $vnetGatewayAddressSpace $vnetPointToSiteAddressSpace = ReadHostWithDefault "Vnet Point-to-site Address Space" $vnetPointToSiteAddressSpace } } $ErrorActionPreference = "Stop"; Write-Host "Creating App association to VNET" $propertiesObject = @{ "vnetResourceId" = "/subscriptions/$($subscriptionId)/resourceGroups/$($vnet.ResourceGroupName)/providers/Microsoft.Network/virtualNetworks/$($vnetName)" } $virtualNetwork= New-AzureRmResource -Location $location -Properties $PropertiesObject -ResourceName "$($webAppName)/$($vnet.Name)" -ResourceType "Microsoft.Web/sites/virtualNetworkConnections" -ApiVersion 2015-08-01- ResourceGroupName $resourceGroupName -Force # If there is no gateway subnet, we need to create one. if($gatewaySubnet -eq $null) { $gatewaySubnet = New-AzureRmVirtualNetworkSubnetConfig -Name "GatewaySubnet" -AddressPrefix$vnetGatewayAddressSpace $vnet.Subnets.Add($gatewaySubnet); Set-AzureRmVirtualNetwork-VirtualNetwork$vnet } CreateVnetGateway $vnet.ResourceGroupName $vnetName $vnetIpName $location $vnetIpConfigName $vnetGatewayName $virtualNetwork.Properties.CertBlob $vnetPointToSiteAddressSpace $gateway = Get-AzureRmVirtualNetworkGateway -ResourceGroupName $vnet.ResourceGroupName -Name $vnetGatewayName } else { $uriParts = $gatewaySubnet.IpConfigurations[0].Id.Split('/') $gatewayResourceGroup = $uriParts[4] $gatewayName = $uriParts[8] $gateway = Get-AzureRmVirtualNetworkGateway -ResourceGroupName $vnet.ResourceGroupName -Name $gatewayName # validate gateway types, etc. if($gateway.GatewayType -ne "Vpn") { Write-Error "This gateway is not of the Vpn type. It cannot be joined to an App." return } if($gateway.VpnType -ne "RouteBased") { Write-Error "This gateways Vpn type is not RouteBased. It cannot be joined to an App." return } if($gateway.VpnClientConfiguration -eq $null-or $gateway.VpnClientConfiguration.VpnClientAddressPool-eq $null) { Write-Host "This gateway does not have a Point-to-site Address Range. Please specify one in CIDRnotation, e.g. 10.0.0.0/8" $pointToSiteAddress = Read-Host "Point-To-Site Address Space" Set-AzureRmVirtualNetworkGatewayVpnClientConfig -VirtualNetworkGateway $gateway.Name -VpnClientAddressPool $pointToSiteAddress
- 408. $pointToSiteAddress } Write-Host "Creating App association to VNET" $propertiesObject = @{ "vnetResourceId" = "/subscriptions/$($subscriptionId)/resourceGroups/$($vnet.ResourceGroupName)/providers/Microsoft.Network/virtualNetworks/$($vnet.Name)" } $virtualNetwork= New-AzureRmResource -Location $location -Properties $PropertiesObject -ResourceName "$($webAppName)/$($vnet.Name)" -ResourceType "Microsoft.Web/sites/virtualNetworkConnections" -ApiVersion 2015-08-01- ResourceGroupName $resourceGroupName -Force # We need to checkif the certificate here exists in the gateway. $certificates = $gateway.VpnClientConfiguration.VpnClientRootCertificates $certFound = $false foreach($certificate in $certificates) { if($certificate.PublicCertData -eq $virtualNetwork.Properties.CertBlob) { $certFound = $true break } } if(-not $certFound) { Write-Host "Adding certificate" Add-AzureRmVpnClientRootCertificate -VpnClientRootCertificateName "AppServiceCertificate.cer" -PublicCertData $virtualNetwork.Properties.CertBlob -VirtualNetworkGatewayName $gateway.Name } } # Nowfinish joining by getting the VPNpackage and giving it to the App Write-Host "Retrieving VPNPackage and supplying to App" $packageUri= Get-AzureRmVpnClientPackage -ResourceGroupName $vnet.ResourceGroupName -VirtualNetworkGatewayName $gateway.Name -ProcessorArchitecture Amd64 # Put the VPNclient configuration package onto the App $PropertiesObject = @{ "vnetName" = $vnet.Name; "vpnPackageUri" = $packageUri } New-AzureRmResource -Location $location -Properties $PropertiesObject -ResourceName "$($webAppName)/$($vnet.Name)/primary" - ResourceType "Microsoft.Web/sites/virtualNetworkConnections/gateways" -ApiVersion 2015-08-01-ResourceGroupName $resourceGroupName -Force Write-Host "Finished!" } function RemoveVnet($subscriptionId, $resourceGroupName, $webAppName) { $webAppConfig = Get-AzureRmResource -ResourceName "$($webAppName)/web" -ResourceType "Microsoft.Web/sites/config" -ApiVersion 2015-08-01-ResourceGroupName $resourceGroupName $currentVnet = $webAppConfig.Properties.VnetName if($currentVnet -ne $null-and $currentVnet -ne "") { Write-Host "Currently connected to VNET $currentVnet" Remove-AzureRmResource -ResourceName "$($webAppName)/$($currentVnet)" -ResourceType "Microsoft.Web/sites/virtualNetworkConnections" -ApiVersion 2015-08-01-ResourceGroupName $resourceGroupName } else { Write-Host "Not connected to a VNET." } } Write-Host "Please Login"
- 409. Write-Host "Please Login" Login-AzureRmAccount # Choose subscription. If there's only one we willchoose automatically $subs = Get-AzureRmSubscription $subscriptionId = "" if($subs.Length -eq 0) { Write-Error "No subscriptions bound to this account." return } if($subs.Length -eq 1) { $subscriptionId = $subs[0].SubscriptionId } else { $subscriptionChoices = @() $subscriptionValues = @() foreach($subscription in $subs){ $subscriptionChoices += "$($subscription.SubscriptionName) ($($subscription.SubscriptionId))"; $subscriptionValues += ($subscription.SubscriptionId); } $subscriptionId = PromptCustom"Choose a subscription" $subscriptionValues $subscriptionChoices } Select-AzureRmSubscription -SubscriptionId $subscriptionId $resourceGroup = Read-Host "Please enter the Resource Group of your App" $appName = Read-Host "Please enter the Name of your App" $options = @("Add a NEW VirtualNetworkto an App", "Add an EXISTINGVirtualNetworkto an App", "Remove a VirtualNetworkfroman App"); $optionValues = @(0, 1, 2) $option = PromptCustom"What do you want to do?" $optionValues $options if($option -eq 0) { AddNewVnet $subscriptionId $resourceGroup $appName } if($option -eq 1) { AddExistingVnet $subscriptionId $resourceGroup $appName } if($option -eq 2) { RemoveVnet $subscriptionId $resourceGroup $appName } Save a copy of the script. In this article, it is called V2VnetAllinOne.ps1, but you can use another name. There are no arguments for this script. You simply run it. The first thing the script will do is prompt you to sign in. After you sign in, the script gets details about your account and returns a list of subscriptions. Not counting the request for your credentials, the initial script execution looks like this:
- 410. PS C:UsersccompyDocumentsVNET> .V2VnetAllInOne.ps1 Please Login Environment :AzureCloud Account :ccompy@microsoft.com TenantId :722278f-fef1-499f-91ab-2323d011db47 SubscriptionId :af5358e1-acac-2c90-a9eb-722190abf47a CurrentStorageAccount : Choose a subscription 1) Demo Subscription (af5358e1-acac-2c90-a9eb-722190abf47a) 2) MS Test (a5350f55-dd5a-41ec-2ddb-ff7b911bb2ef) 3) Purple Demo Subscription (2d4c99a4-57f9-4d5e-a0a1-0034c52db59d) Choose an option: 3 Account :ccompy@microsoft.com Environment :AzureCloud Subscription :2d4c99a4-57f9-4d5e-a0a1-0034c52db59d Tenant :722278f-fef1-499f-91ab-2323d011db47 Please enter the Resource Group of your App:hcdemo-rg Please enter the Name of your App:v2vnetpowershell What do you want to do? 1) Add a NEW VirtualNetworkto an App 2) Add an EXISTINGVirtualNetworkto an App 3) Remove a VirtualNetworkfroman App Create a Resource Manager VNet and integrate with it Create a Resource Manager VNet and integrate with it VirtualNetworkName: v2pshell Resource Group Name: hcdemo-rg Gateway Name: v2pshell-gateway Vnet IP name: v2pshell-ip Vnet IP config name: v2pshell-ipconf Address Space: 10.0.0.0/8 Gateway Address Space: 10.5.0.0/16 Point-To-Site Address Space: 172.16.0.0/12 Do you wish to change these settings? [Y] Yes [N] No [?] Help (default is "N"): The rest of this section explains each of those three options. To create a new virtual network that uses the Resource Manager deployment model and integrate it with your app, select 1) Add a NEW Virtual Network to an App. This will prompt you for the name of the virtual network. In my case, as you can see in the following settings, I used the name, v2pshell. The script gives the details about the virtual network that's being created. If I want, I can change any of the values. In this example execution, I created a virtual network that has the following settings: If you want to change any of the values, type Y and make the changes. When you are happy with the virtual network settings, type N or simply press Enter when prompted about changing the settings. From there on until completion, the script will tell you some of what it' i's doing until it starts to create the virtual network gateway. That step can take up to an hour. There is no progress indicator during this phase, but the script will let you know when the gateway has been created. When the script finishes, it will say Finished. At this point, you will have a Resource Manager virtual network that has the name and settings that you selected. This new virtual network will also be integrated with your app.
- 411. Integrate your app with a preexisting Resource Manager VNet Integrate your app with a preexisting Resource Manager VNet Select a VNET to integrate with 1) v2demonetwork 2) v2pshell 3) v2vnetintdemo 4) v2asenetwork 5) v2pshell2 Choose an option: 5 This VirtualNetworkhas no gateway. I willneed to create one. Your VNET is in the address space 172.16.0.0/16, with the following Subnets: default:172.16.0.0/24 Please choose a GatewaySubnet address space:172.16.1.0/26 VirtualNetworkName: v2pshell2 Resource Group Name: vnetdemo-rg Gateway Name: v2pshell2-gateway Vnet IP name: v2pshell2-ip Vnet IP config name: v2pshell2-ipconf Address Space: 172.16.0.0/16 Gateway Address Space: 172.16.1.0/26 Point-To-Site Address Space: 172.16.0.0/12 Do you wish to change these settings? [Y] Yes [N] No [?] Help (default is "N"): Creating App association to VNET Disconnect your app from a Resource Manager VNet Disconnect your app from a Resource Manager VNet When you're integrating with a preexisting virtual network, if you provide a Resource Manager virtual network that doesn’t have a gateway or point-to-site connectivity, the script will set that up. If the VNET already has those things set up, the script goes straight to the app integration. To start this process, simply select 2) Add an EXISTING Virtual Network to an App. This option works only if you have a preexisting Resource Manager virtual network that is in the same subscription as your app. After you select the option, you will be presented with a list of your Resource Manager virtual networks. Simply select the virtual network that you want to integrate with. If you already have a gateway that has point-to- site connectivity enabled, the script will simply integrate your app with your virtual network. If you do not have a gateway, you will need to specify the gateway subnet. Your gateway subnet must be in your virtual network address space, and it cannot be in any other subnet. If you have a virtual network without a gateway and run this step, things look like this: In this example, I created a virtual network gateway that has the following settings: If you want to change any of those settings, you can do so. Otherwise, press Enter and the script will create your gateway and attach your app to your virtual network. The gateway creation time is still an hour, though, so make sure you keep that in mind. When everything is finished, the script will say Finished. Disconnecting your app from your virtual network does not take down the gateway or disable point-to-site connectivity. You might, after all, be using it for something else. It also does not disconnect it from any other apps other than the one you provided. To perform this action, select 3) Remove a Virtual Network from an App. When you do so, you will see something like this:
- 412. Currently connected to VNET v2pshell Confirm Are you sure you want to delete the following resource: /subscriptions/edcc99a4-b7f9-4b5e-a9a1-3034c51db496/resourceGroups/hcdemo-rg/providers/Microsoft.Web/sites/v2vnetpowers hell/virtualNetworkConnections/v2pshell [Y] Yes [N] No [S] Suspend [?] Help (default is "Y"): Although the script says delete, it does not delete the virtual network. It’s just removing the integration. After you confirm that this is what you want to do, the command is processed quite quickly and tells you True when it is done.
- 413. Create a web app in Azure that connects to MongoDB running on a virtual machine 3/24/2017 • 8 min to read • Edit Online NOTE NOTE Background knowledge Prerequisites NOTE NOTE Create a virtual machine and install MongoDB Using Git, you can deploy an ASP.NET application to Azure App Service Web Apps. In this tutorial, you will build a simple front-end ASP.NET MVC task list application that connects to a MongoDB database running on a virtual machine in Azure. MongoDB is a popular open source, high performance NoSQL database. After running and testing the ASP.NET application on your development computer, you will upload the application to App Service Web Apps using Git. If you want to get started with Azure App Service before signing up for an Azure account, go to Try App Service, where you can immediately create a short-lived starter web app in App Service. No credit cards required; no commitments. Knowledge of the following is useful for this tutorial, though not required: The C# driver for MongoDB. For more information on developing C# applications against MongoDB, see the MongoDB CSharp Language Center. The ASP .NET web application framework. You can learn all about it at the ASP.net website. The ASP .NET MVC web application framework. You can learn all about it at the ASP.NET MVC website. Azure. You can get started reading at Azure. Visual Studio Express 2013 for Web or Visual Studio 2013 Azure SDK for .NET An active Microsoft Azure subscription To complete this tutorial, you need an Azure account. You can activate your Visual Studio subscriber benefits or sign up for a free trial. This tutorial assumes you have created a virtual machine in Azure. After creating the virtual machine you need to install MongoDB on the virtual machine: To create a Windows virtual machine and install MongoDB, see Install MongoDB on a virtual machine running Windows Server in Azure. After you have created the virtual machine in Azure and installed MongoDB, be sure to remember the DNS name of the virtual machine ("testlinuxvm.cloudapp.net", for example) and the external port for MongoDB that you specified in the endpoint. You will need this information later in the tutorial.
- 414. Create the application In this section you will create an ASP.NET application called "My Task List" by using Visual Studio and perform an initial deployment to Azure App Service Web Apps. You will run the application locally, but it will connect to your virtual machine on Azure and use the MongoDB instance that you created there. 1. In Visual Studio, click New Project. 2. In the New Project window, in the left pane, select Visual C#, and then select Web. In the middle pane, select ASP.NET Web Application. At the bottom, name your project "MyTaskListApp," and then click OK.
- 415. 3. In the New ASP.NET Project dialog box, select MVC, and then click OK.
- 416. 4. If you aren't already signed into Microsoft Azure, you will be prompted to sign in. Follow the prompts to sign into Azure. 6. After the project creation completes, wait for the web app to be created in Azure App Service as indicated in the Azure App Service Activity window. Then, click Publish MyTaskListApp to this Web App now. 5. Once you are signed in, you can start configuring your App Service web app. Specify the Web App name, App Service plan, Resource group, and Region, then click Create. 7. Click Publish.
- 417. Install the MongoDB C# driver Once your default ASP.NET application is published to Azure App Service Web Apps, it will be launched in the browser. MongoDB offers client-side support for C# applications through a driver, which you need to install on your local development computer. The C# driver is available through NuGet. To install the MongoDB C# driver: 1. In Solution Explorer, right-click the MyTaskListApp project and select Manage NuGetPackages.
- 418. 3. Click I Accept to accept the 10gen, Inc. license terms. 4. Click Close after the driver has installed. 2. In the Manage NuGet Packages window, in the left pane, click Online. In the Search Online box on the right, type "mongodb.driver". Click Install to install the driver.
- 419. Add a model The MongoDB C# driver is now installed. References to the MongoDB.Bson, MongoDB.Driver, and MongoDB.Driver.Core libraries have been added to the project. In Solution Explorer, right-click the Models folder and Add a new Class and name it TaskModel.cs. In
- 420. using System; using System.Collections.Generic; using System.Linq; using System.Web; using MongoDB.Bson.Serialization.Attributes; using MongoDB.Bson.Serialization.IdGenerators; using MongoDB.Bson; namespace MyTaskListApp.Models { public class MyTask { [BsonId(IdGenerator = typeof(CombGuidGenerator))] public Guid Id { get; set; } [BsonElement("Name")] public string Name { get; set; } [BsonElement("Category")] public string Category { get; set; } [BsonElement("Date")] public DateTime Date { get; set; } [BsonElement("CreatedDate")] public DateTime CreatedDate { get; set; } } } Add the data access layer using System; using System.Collections.Generic; using System.Linq; using System.Web; using MyTaskListApp.Models; using MongoDB.Driver; using MongoDB.Bson; using System.Configuration; namespace MyTaskListApp { public class Dal:IDisposable { private MongoServer mongoServer = null; private booldisposed = false; // To do:update the connection string with the DNS name // or IP address of your server. //For example, "mongodb://testlinux.cloudapp.net" private string connectionString = "mongodb://mongodbsrv20151211.cloudapp.net"; // This sample uses a database named "Tasks" and a //collection named "TasksList". The database and collection //willbe automatically created if they don't already exist. private string dbName = "Tasks"; private string collectionName = "TasksList"; TaskModel.cs, replace the existing code with the following code: In Solution Explorer, right-click the MyTaskListApp project and Add a New Folder named DAL. Right-click the DAL folder and Add a new Class. Name the class file Dal.cs. In Dal.cs, replace the existing code with the following code:
- 421. private string collectionName = "TasksList"; // Default constructor. public Dal() { } // Gets allTaskitems fromthe MongoDBserver. public List<MyTask> GetAllTasks() { try { var collection = GetTasksCollection(); return collection.Find(newBsonDocument()).ToList(); } catch (MongoConnectionException) { return newList<MyTask>(); } } // Creates a Taskand inserts it into the collection in MongoDB. public void CreateTask(MyTasktask) { var collection = GetTasksCollectionForEdit(); try { collection.InsertOne(task); } catch (MongoCommandException ex) { string msg = ex.Message; } } private IMongoCollection<MyTask> GetTasksCollection() { MongoClient client = newMongoClient(connectionString); var database = client.GetDatabase(dbName); var todoTaskCollection = database.GetCollection<MyTask>(collectionName); return todoTaskCollection; } private IMongoCollection<MyTask> GetTasksCollectionForEdit() { MongoClient client = newMongoClient(connectionString); var database = client.GetDatabase(dbName); var todoTaskCollection = database.GetCollection<MyTask>(collectionName); return todoTaskCollection; } # region IDisposable public void Dispose() { this.Dispose(true); GC.SuppressFinalize(this); } protected virtualvoid Dispose(booldisposing) { if (!this.disposed) { if (disposing) { if (mongoServer != null) { this.mongoServer.Disconnect(); } }
- 422. } } this.disposed = true; } # endregion } } Add a controller using System; using System.Collections.Generic; using System.Linq; using System.Web; using System.Web.Mvc; using MyTaskListApp.Models; using System.Configuration; namespace MyTaskListApp.Controllers { public class HomeController :Controller, IDisposable { private Daldal= newDal(); private booldisposed = false; // // GET:/MyTask/ public ActionResult Index() { return View(dal.GetAllTasks()); } // // GET:/MyTask/Create public ActionResult Create() { return View(); } // // POST:/MyTask/Create [HttpPost] public ActionResult Create(MyTasktask) { try { dal.CreateTask(task); return RedirectToAction("Index"); } catch { return View(); } } public ActionResult About() { return View(); } # region IDisposable Open the ControllersHomeController.cs file in Solution Explorer and replace the existing code with the following:
- 423. # region IDisposable newprotected void Dispose() { this.Dispose(true); GC.SuppressFinalize(this); } newprotected virtualvoid Dispose(booldisposing) { if (!this.disposed) { if (disposing) { this.dal.Dispose(); } } this.disposed = true; } # endregion } } Set up the styles @Html.ActionLink("My TaskList Application", "Index", "Home", null, new{ @class = "navbar-brand" }) To change the title at the top of the page, open the ViewsShared_Layout.cshtml file in Solution Explorer and replace "Application name" in the navbar header with "My Task List Application" so that it looks like this: In order to set up the Task List menu, open the ViewsHomeIndex.cshtml file and replace the existing code with the following code:
- 424. @modelIEnumerable<MyTaskListApp.Models.MyTask> @{ ViewBag.Title = "My TaskList"; } <h2>My TaskList</h2> <table border="1"> <tr> <th>Task</th> <th>Category</th> <th>Date</th> </tr> @foreach (var itemin Model) { <tr> <td> @Html.DisplayFor(modelItem=> item.Name) </td> <td> @Html.DisplayFor(modelItem=> item.Category) </td> <td> @Html.DisplayFor(modelItem=> item.Date) </td> </tr> } </table> <div> @Html.Partial("Create", newMyTaskListApp.Models.MyTask())</div> To add the ability to create a new task, right-click the ViewsHome folder and Add a View. Name the view Create. Replace the code with the following:
- 425. @modelMyTaskListApp.Models.MyTask <script src="@Url.Content("~/Scripts/jquery-1.10.2.min.js")" type="text/javascript"></script> <script src="@Url.Content("~/Scripts/jquery.validate.min.js")" type="text/javascript"></script> <script src="@Url.Content("~/Scripts/jquery.validate.unobtrusive.min.js")" type="text/javascript"></script> @using (Html.BeginForm("Create", "Home")) { @Html.ValidationSummary(true) <fieldset> <legend>NewTask</legend> <div class="editor-label"> @Html.LabelFor(model=> model.Name) </div> <div class="editor-field"> @Html.EditorFor(model=> model.Name) @Html.ValidationMessageFor(model=> model.Name) </div> <div class="editor-label"> @Html.LabelFor(model=> model.Category) </div> <div class="editor-field"> @Html.EditorFor(model=> model.Category) @Html.ValidationMessageFor(model=> model.Category) </div> <div class="editor-label"> @Html.LabelFor(model=> model.Date) </div> <div class="editor-field"> @Html.EditorFor(model=> model.Date) @Html.ValidationMessageFor(model=> model.Date) </div> <p> <input type="submit" value="Create" /> </p> </fieldset> } Solution Explorer should look like this:
- 426. Set the MongoDB connection string private string connectionString = "mongodb://<vm-dns-name>"; private string connectionString = "mongodb://testlinuxvm.cloudapp.net"; private string connectionString = "mongodb://testlinuxvm.cloudapp.net:12345"; In Solution Explorer, open the DAL/Dal.cs file. Find the following line of code: Replace <vm-dns-name> with the DNS name of the virtual machine running MongoDB you created in the Create a virtual machine and install MongoDB step of this tutorial. To find the DNS name of your virtual machine, go to the Azure Portal, select Virtual Machines, and find DNS Name. If the DNS name of the virtual machine is "testlinuxvm.cloudapp.net" and MongoDB is listening on the default port 27017, the connection string line of code will look like: If the virtual machine endpoint specifies a different external port for MongoDB, you can specifiy the port in the connection string:
- 427. Test the local deployment Publish to Azure App Service Web Apps Summary What's changed For more information on MongoDB connection strings, see Connections. To run your application on your development computer, select Start Debugging from the Debug menu or hit F5. IIS Express starts and a browser opens and launches the application's home page. You can add a new task, which will be added to the MongoDB database running on your virtual machine in Azure. In this section you will publish your changes to Azure App Service Web Apps. 1. In Solution Explorer, right-click MyTaskListApp again and click Publish. 2. Click Publish. You should now see your web app running in Azure App Service and accessing the MongoDB database in Azure Virtual Machines. You have now successfully deployed your ASP.NET application to Azure App Service Web Apps. To view the web app: 1. Log into the Azure Portal. 2. Click Web apps. 3. Select your web app in the Web Apps list. For more information on developing C# applications against MongoDB, see CSharp Language Center. For a guide to the change from Websites to App Service see: Azure App Service and Its Impact on Existing Azure Services
- 428. How to configure your App Service application to use Azure Active Directory login 3/8/2017 • 5 min to read • Edit Online Configure Azure Active Directory using express settings (Alternative method) Manually configure Azure Active Directory with advanced settings This topic shows you how to configure Azure App Services to use Azure Active Directory as an authentication provider. 1. In the Azure portal, navigate to your application. Click Settings, and then Authentication/Authorization. 2. If the Authentication / Authorization feature is not enabled, turn the switch to On. 3. Click Azure Active Directory, and then click Express under Management Mode. 5. (Optional) To restrict access to your site to only users authenticated by Azure Active Directory, set Action to take when request is not authenticated to Log in with Azure Active Directory. This requires that all requests be authenticated, and all unauthenticated requests are redirected to Azure Active Directory for authentication. 6. Click Save. 4. Click OK to register the application in Azure Active Directory. This will create a new registration. If you want to choose an existing registration instead, click Select an existing app and then search for the name of a previously created registration within your tenant. Click the registration to select it and click OK. Then click OK on the Azure Active Directory settings blade. By default, App Service provides authentication but does not restrict authorized access to your site content and APIs. You must authorize users in your app code. You are now ready to use Azure Active Directory for authentication in your app.
- 429. Register your application with Azure Active Directory Register your application with Azure Active Directory You can also choose to provide configuration settings manually. This is the preferred solution if the AAD tenant you wish to use is different from the tenant with which you sign into Azure. To complete the configuration, you must first create a registration in Azure Active Directory, and then you must provide some of the registration details to App Service. 1. Log on to the Azure portal, and navigate to your application. Copy your URL. You will use this to configure your Azure Active Directory app. 3. Select your directory, and then select the Applications tab at the top. Click ADD at the bottom to create a new app registration. 4. Click Add an application my organization is developing. 5. In the Add Application Wizard, enter a Name for your application and click the Web Application And/Or Web API type. Then click to continue. 6. In the SIGN-ON URL box, paste the application URL you copied earlier. Enter that same URL in the App ID URI box. Then click to continue. 2. Sign in to the Azure classic portal and navigate to Active Directory. 7. Once the application has been added, click the Configure tab. Edit the Reply URL under Single Sign-on to be the URL of your application appended with the path, /.auth/login/aad/callback. For example, https://contoso.azurewebsites.net/.auth/login/aad/callback . Make sure that you are using the HTTPS scheme.
- 430. Add Azure Active Directory information to your application Add Azure Active Directory information to your application 8. Click Save. Then copy the Client ID for the app. You will configure your application to use this later. 9. In the bottom command bar, click View Endpoints, and then copy the Federation Metadata Document URL and download that document or navigate to it in a browser. 10. Within the root EntityDescriptor element, there should be an entityID attribute of the form https://sts.windows.net/ followed by a GUID specific to your tenant (called a "tenant ID"). Copy this value - it will serve as your Issuer URL. You will configure your application to use this later. 1. Back in the Azure portal, navigate to your application. Click Settings, and then Authentication/Authorization. 2. If the Authentication/Authorization feature is not enabled, turn the switch to On. 3. Click Azure Active Directory, and then click Advanced under Management Mode. Paste in the Client ID and Issuer URL value which you obtained previously. Then click OK. By default, App Service provides authentication but does not restrict authorized access to your site content
- 431. (Optional) Configure a native client application Related Content 4. (Optional) To restrict access to your site to only users authenticated by Azure Active Directory, set Action to take when request is not authenticated to Log in with Azure Active Directory. This requires that all requests be authenticated, and all unauthenticated requests are redirected to Azure Active Directory for authentication. 5. Click Save. and APIs. You must authorize users in your app code. You are now ready to use Azure Active Directory for authentication in your app. Azure Active Directory also allows you to register native clients, which provides greater control over permissions mapping. You need this if you wish to perform logins using a library such as the Active Directory Authentication Library. 1. Navigate to Active Directory in the Azure classic portal. 2. Select your directory, and then select the Applications tab at the top. Click ADD at the bottom to create a new app registration. 3. Click Add an application my organization is developing. 4. In the Add Application Wizard, enter a Name for your application and click the Native Client Application type. Then click to continue. 5. In the Redirect URI box, enter your site's /.auth/login/done endpoint, using the HTTPS scheme. This value should be similar to https://contoso.azurewebsites.net/.auth/login/done. If creating a Windows application, instead use the package SID as the URI. 6. Once the native application has been added, click the Configure tab. Find the Client ID and make a note of this value. 7. Scroll the page down to the Permissions to other applications section and click Add application. 8. Search for the web application that you registered earlier and click the plus icon. Then click the check to close the dialog. If the web application cannot be found, navigate to its registration and add a new reply URL (e.g., the HTTP version of your current URL), click save, and then repeat these steps - the application should show up in the list. 9. On the new entry you just added, open the Delegated Permissions dropdown and select Access (appName). Then click Save. You have now configured a native client application which can access your App Service application. App Service Authentication / Authorization overview Add authentication to a Web App Add authentication to your Mobile App: iOS, Android, Windows Universal, Xamarin.Android, Xamarin.iOS, Xamarin.Forms, Cordova Learn how to add App Service authenication to your mobile app. Authentication in API Apps: user principal, service principal Learn how to secure your API app using App Service authentication.
- 432. How to configure your App Service application to use Facebook login 3/8/2017 • 2 min to read • Edit Online Register your application with Facebook Add Facebook information to your application This topic shows you how to configure Azure App Service to use Facebook as an authentication provider. To complete the procedure in this topic, you must have a Facebook account that has a verified email address and a mobile phone number. To create a new Facebook account, go to facebook.com. 1. Log on to the Azure portal, and navigate to your application. Copy your URL. You will use this to configure your Facebook app. 2. In another browser window, navigate to the Facebook Developers website and sign-in with your Facebook account credentials. 3. (Optional) If you have not already registered, click Apps > Register as a Developer, then accept the policy and follow the registration steps. 4. Click My Apps > Add a New App > Website > Skip and Create App ID. 5. In Display Name, type a unique name for your app, type your Contact Email, choose a Category for your app, then click Create App ID and complete the security check. This takes you to the developer dashboard for your new Facebook app. NOTE NOTE IMPORTANT IMPORTANT 8. The Facebook account which was used to register the application is an administrator of the app. At this point, only administrators can sign into this application. To authenticate other Facebook accounts, click App Review and enable Make public to enable general public access using Facebook authentication. 6. Under "Facebook Login," click Get Started. Add your application's Redirect URI to Valid OAuth redirect URIs, then click Save Changes. Your redirect URI is the URL of your application appended with the path, /.auth/login/facebook/callback. For example, https://contoso.azurewebsites.net/.auth/login/facebook/callback . Make sure that you are using the HTTPS scheme. 7. In the left-hand navigation, click Settings. On the App Secret field, click Show, provide your password if requested, then make a note of the values of App ID and App Secret. You use these later to configure your application in Azure. The app secret is an important security credential. Do not share this secret with anyone or distribute it within a client application. 1. Back in the Azure portal, navigate to your application. Click Settings > Authentication / Authorization, and make sure that App Service Authentication is On. 2. Click Facebook, paste in the App ID and App Secret values which you obtained previously, optionally
- 433. Related Content 3. (Optional) To restrict access to your site to only users authenticated by Facebook, set Action to take when request is not authenticated to Facebook. This requires that all requests be authenticated, and all unauthenticated requests are redirected to Facebook for authentication. 4. When done configuring authentication, click Save. enable any scopes needed by your application, then click OK. By default, App Service provides authentication but does not restrict authorized access to your site content and APIs. You must authorize users in your app code. You are now ready to use Facebook for authentication in your app. App Service Authentication / Authorization overview Add authentication to a Web App Add authentication to your Mobile App: iOS, Android, Windows Universal, Xamarin.Android, Xamarin.iOS, Xamarin.Forms, Cordova Learn how to add App Service authenication to your mobile app. Authentication in API Apps: user principal, service principal Learn how to secure your API app using App Service authentication.
- 434. How to configure your App Service application to use Google login 3/8/2017 • 2 min to read • Edit Online Register your application with Google Add Google information to your application This topic shows you how to configure Azure App Service to use Google as an authentication provider. To complete the procedure in this topic, you must have a Google account that has a verified email address. To create a new Google account, go to accounts.google.com. 1. Log on to the Azure portal, and navigate to your application. Copy your URL, which you use later to configure your Google app. 2. Navigate to the Google apis website, sign in with your Google account credentials, click Create Project, provide a Project name, then click Create. 3. Under Social APIs click Google+ API and then Enable. 4. In the left navigation, Credentials > OAuth consent screen, then select your Email address, enter a Product Name, and click Save. 5. In the Credentials tab, click Create credentials > OAuth client ID, then select Web application. 6. Paste the App Service URL you copied earlier into Authorized JavaScript Origins, then paste your redirect URI into Authorized Redirect URI. The redirect URI is the URL of your application appended with the path, /.auth/login/google/callback. For example, https://contoso.azurewebsites.net/.auth/login/google/callback . Make sure that you are using the HTTPS scheme. Then click Create. 7. On the next screen, make a note of the values of the client ID and client secret. [AZURE.IMPORTANT] The client secret is an important security credential. Do not share this secret with anyone or distribute it within a client application. 1. Back in the Azure portal, navigate to your application. Click Settings, and then Authentication / Authorization. 2. If the Authentication / Authorization feature is not enabled, turn the switch to On. 3. Click Google. Paste in the App ID and App Secret values which you obtained previously, and optionally enable any scopes your application requires. Then click OK.
- 435. Related Content 4. (Optional) To restrict access to your site to only users authenticated by Google, set Action to take when request is not authenticated to Google. This requires that all requests be authenticated, and all unauthenticated requests are redirected to Google for authentication. 5. Click Save. By default, App Service provides authentication but does not restrict authorized access to your site content and APIs. You must authorize users in your app code. You are now ready to use Google for authentication in your app. App Service Authentication / Authorization overview Add authentication to a Web App Add authentication to your Mobile App: iOS, Android, Windows Universal, Xamarin.Android, Xamarin.iOS, Xamarin.Forms, Cordova Learn how to add App Service authenication to your mobile app. Authentication in API Apps: user principal, service principal Learn how to secure your API app using App Service authentication.
- 436. How to configure your App Service application to use Microsoft Account login 3/8/2017 • 2 min to read • Edit Online Register your app with Microsoft Account Add Microsoft Account information to your App Service application This topic shows you how to configure Azure App Service to use Microsoft Account as an authentication provider. 1. Log on to the Azure portal, and navigate to your application. Copy your URL, which later you use to configure your app with Microsoft Account. 2. Navigate to the My Applications page in the Microsoft Account Developer Center, and log on with your Microsoft account, if required. 3. Click Add an app, then type an application name, and click Create application. 4. Make a note of the Application ID, as you will need it later. 5. Under "Platforms," click Add Platform and select "Web". NOTE NOTE 6. Under "Redirect URIs" supply the endpoint for your application, then click Save. Your redirect URI is the URL of your application appended with the path, /.auth/login/microsoftaccount/callback. For example, https://contoso.azurewebsites.net/.auth/login/microsoftaccount/callback . Make sure that you are using the HTTPS scheme. 7. Under "Application Secrets," click Generate New Password. Make note of the value that appears. Once you leave the page, it will not be displayed again. [AZURE.IMPORTANT] The password is an important security credential. Do not share the password with anyone or distribute it within a client application. 1. Back in the Azure portal, navigate to your application, click Settings > Authentication / Authorization. 2. If the Authentication / Authorization feature is not enabled, switch it On. 3. Click Microsoft Account. Paste in the Application ID and Password values which you obtained previously, and optionally enable any scopes your application requires. Then click OK.
- 437. Related content 4. (Optional) To restrict access to your site to only users authenticated by Microsoft account, set Action to take when request is not authenticated to Microsoft Account. This requires that all requests be authenticated, and all unauthenticated requests are redirected to Microsoft account for authentication. 5. Click Save. By default, App Service provides authentication but does not restrict authorized access to your site content and APIs. You must authorize users in your app code. You are now ready to use Microsoft Account for authentication in your app. App Service Authentication / Authorization overview Add authentication to a Web App Add authentication to your Mobile App: iOS, Android, Windows Universal, Xamarin.Android, Xamarin.iOS, Xamarin.Forms, Cordova Learn how to add App Service authenication to your mobile app. Authentication in API Apps: user principal, service principal Learn how to secure your API app using App Service authentication.
- 438. How to configure your App Service application to use Twitter login 3/8/2017 • 2 min to read • Edit Online Register your application with Twitter Add Twitter information to your application This topic shows you how to configure Azure App Service to use Twitter as an authentication provider. To complete the procedure in this topic, you must have a Twitter account that has a verified email address and phone number. To create a new Twitter account, go to twitter.com. 1. Log on to the Azure portal, and navigate to your application. Copy your URL. You will use this to configure your Twitter app. 2. Navigate to the Twitter Developers website, sign in with your Twitter account credentials, and click Create New App. 3. Type in the Name and a Description for your new app. Paste in your application's URL for the Website value. Then, for the Callback URL, paste the Callback URL you copied earlier. This is your Mobile App gateway appended with the path, /.auth/login/twitter/callback. For example, https://contoso.azurewebsites.net/.auth/login/twitter/callback . Make sure that you are using the HTTPS scheme. 4. At the bottom the page, read and accept the terms. Then click Create your Twitter application. This registers the app displays the application details. 5. Click the Settings tab, check Allow this application to be used to sign in with Twitter, then click Update Settings. NOTE NOTE 6. Select the Keys and Access Tokens tab. Make a note of the values of Consumer Key (API Key) and Consumer secret (API Secret). The consumer secret is an important security credential. Do not share this secret with anyone or distribute it with your app. 1. Back in the Azure portal, navigate to your application. Click Settings, and then Authentication / Authorization. 2. If the Authentication / Authorization feature is not enabled, turn the switch to On. 3. Click Twitter. Paste in the App ID and App Secret values which you obtained previously. Then click OK.
- 439. Related Content 4. (Optional) To restrict access to your site to only users authenticated by Twitter, set Action to take when request is not authenticated to Twitter. This requires that all requests be authenticated, and all unauthenticated requests are redirected to Twitter for authentication. 5. Click Save. By default, App Service provides authentication but does not restrict authorized access to your site content and APIs. You must authorize users in your app code. You are now ready to use Twitter for authentication in your app. App Service Authentication / Authorization overview Add authentication to a Web App Add authentication to your Mobile App: iOS, Android, Windows Universal, Xamarin.Android, Xamarin.iOS, Xamarin.Forms, Cordova Learn how to add App Service authenication to your mobile app. Authentication in API Apps: user principal, service principal Learn how to secure your API app using App Service authentication.
- 440. Authenticate with on-premises Active Directory in your Azure app 2/28/2017 • 1 min to read • Edit Online Authenticate through Azure Active Directory Authenticate through an on-premises STS This article shows you how to authenticate with on-premises Active Directory (AD) in Azure App Service. An Azure app is hosted in the cloud, but there are ways to authenticate on-premises AD users securely. An Azure Active Directory tenant can be directory-synced with an on-premises AD. This approach enables AD users to access your App from the internet and authenticate using their on-premises credentials. Furthermore, Azure App Service provides a turn-key solution for this method. With a few clicks of a button, you can enable authentication with a directory-synced tenant for your Azure app. This approach has the following advantages: Does not require any authentication code in your app. Let App Service do the authentication for you and spend your time on providing functionality in your app. Azure AD Graph API enables access to directory data from your Azure app. Provides SSO to all applications supported by Azure Active Directory, including Office 365, Dynamics CRM Online, Microsoft Intune, and thousands of non-Microsoft cloud applications. Azure Active Directory supports role-based access control. You can use the [Authorize(Roles="X")] pattern with minimal changes to your code. To see how to write a line-of-business Azure app that authenticates with Azure Active Directory, see Create a line- of-business Azure app with Azure Active Directory authentication. If you have an on-premises secure token service (STS) like Active Directory Federation Services (AD FS), you can use that to federate authentication for your Azure app. This approach is best when company policy prohibits AD data from being stored in Azure. However, note the following: STS topology must be deployed on-premises, with cost and management overhead. Only AD FS administrators can configure relying party trusts and claim rules, which may limit the developer's options. On the other hand, it is possible to manage and customize claims on a per-application basis. Access to on-premises AD data requires a separate solution through the corporate firewall. To see how to write a line-of-business Azure app that authenticates with an on-premises STS, see Create a line-of- business Azure app with AD FS authentication.
- 441. Tutorial: Web app with a multi-tenant database using Entity Framework and Row-Level Security 1/17/2017 • 6 min to read • Edit Online Step 1: Add an Interceptor class in the application to set the SESSION_CONTEXT This tutorial shows how to build a multi-tenant web app with a "shared database, shared schema" tenancy model, using Entity Framework and Row-Level Security. In this model, a single database contains data for many tenants, and each row in each table is associated with a "Tenant ID." Row-Level Security (RLS), a new feature for Azure SQL Database, is used to prevent tenants from accessing each other's data. This requires just a single, small change to the application. By centralizing the tenant access logic within the database itself, RLS simplifies the application code and reduces the risk of accidental data leakage between tenants. Let's start with the simple Contact Manager application from Create an ASP.NET MVP app with auth and SQL DB and deploy to Azure App Service. Right now, the application allows all users (tenants) to see all contacts: With just a few small changes, we will add support for multi-tenancy, so that users are able to see only the contacts that belong to them. There is one application change we need to make. Because all application users connect to the database using the same connection string (i.e. same SQL login), there is currently no way for an RLS policy to know which user it should filter for. This approach is very common in web applications because it enables efficient connection pooling, but it means we need another way to identify the current application user within the database. The solution is to have the application set a key-value pair for the current UserId in the SESSION_CONTEXT immediately after opening a connection, before it executes any queries. SESSION_CONTEXT is a session-scoped key-value store, and our RLS policy will use the UserId stored in it to identify the current user. We will add an interceptor (in particular, a DbConnectionInterceptor), a new feature in Entity Framework (EF) 6, to automatically set the current UserId in the SESSION_CONTEXT by executing a T-SQL statement whenever EF opens a connection.
- 442. using System; using System.Collections.Generic; using System.Linq; using System.Web; using System.Data.Common; using System.Data.Entity; using System.Data.Entity.Infrastructure.Interception; using Microsoft.AspNet.Identity; namespace ContactManager.Models { public class SessionContextInterceptor :IDbConnectionInterceptor { public void Opened(DbConnection connection, DbConnectionInterceptionContext interceptionContext) { // Set SESSION_CONTEXT to current UserId whenever EF opens a connection try { var userId = System.Web.HttpContext.Current.User.Identity.GetUserId(); if (userId != null) { DbCommand cmd = connection.CreateCommand(); cmd.CommandText = "EXECsp_set_session_context @key=N'UserId', @value=@UserId"; DbParameter param= cmd.CreateParameter(); param.ParameterName = "@UserId"; param.Value = userId; cmd.Parameters.Add(param); cmd.ExecuteNonQuery(); } } catch (System.NullReferenceException) { // If no user is logged in, leave SESSION_CONTEXT null(allrows willbe filtered) } } public void Opening(DbConnection connection, DbConnectionInterceptionContext interceptionContext) { } public void BeganTransaction(DbConnection connection, BeginTransactionInterceptionContext interceptionContext) { } public void BeginningTransaction(DbConnection connection, BeginTransactionInterceptionContext interceptionContext) { } public void Closed(DbConnection connection, DbConnectionInterceptionContext interceptionContext) { } public void Closing(DbConnection connection, DbConnectionInterceptionContext interceptionContext) { } public void ConnectionStringGetting(DbConnection connection, DbConnectionInterceptionContext<string> interceptionContext) { } public void ConnectionStringGot(DbConnection connection, DbConnectionInterceptionContext<string> interceptionContext) { 1. Open the ContactManager project in Visual Studio. 2. Right-click on the Models folder in the Solution Explorer, and choose Add > Class. 3. Name the new class "SessionContextInterceptor.cs" and click Add. 4. Replace the contents of SessionContextInterceptor.cs with the following code.
- 443. { } public void ConnectionStringSet(DbConnection connection, DbConnectionPropertyInterceptionContext<string> interceptionContext) { } public void ConnectionStringSetting(DbConnection connection, DbConnectionPropertyInterceptionContext<string> interceptionContext) { } public void ConnectionTimeoutGetting(DbConnection connection, DbConnectionInterceptionContext<int> interceptionContext) { } public void ConnectionTimeoutGot(DbConnection connection, DbConnectionInterceptionContext<int> interceptionContext) { } public void DataSourceGetting(DbConnection connection, DbConnectionInterceptionContext<string> interceptionContext) { } public void DataSourceGot(DbConnection connection, DbConnectionInterceptionContext<string> interceptionContext) { } public void DatabaseGetting(DbConnection connection, DbConnectionInterceptionContext<string> interceptionContext) { } public void DatabaseGot(DbConnection connection, DbConnectionInterceptionContext<string> interceptionContext) { } public void Disposed(DbConnection connection, DbConnectionInterceptionContext interceptionContext) { } public void Disposing(DbConnection connection, DbConnectionInterceptionContext interceptionContext) { } public void EnlistedTransaction(DbConnection connection, EnlistTransactionInterceptionContext interceptionContext) { } public void EnlistingTransaction(DbConnection connection, EnlistTransactionInterceptionContext interceptionContext) { } public void ServerVersionGetting(DbConnection connection, DbConnectionInterceptionContext<string> interceptionContext) { } public void ServerVersionGot(DbConnection connection, DbConnectionInterceptionContext<string> interceptionContext) { } public void StateGetting(DbConnection connection, DbConnectionInterceptionContext<System.Data.ConnectionState> interceptionContext) { } public void StateGot(DbConnection connection, DbConnectionInterceptionContext<System.Data.ConnectionState> interceptionContext) { } } public class SessionContextConfiguration :DbConfiguration
- 444. { public SessionContextConfiguration() { AddInterceptor(newSessionContextInterceptor()); } } } Step 2: Add a UserId column to the database schema ALTERTABLEContacts ADDUserId nvarchar(128) DEFAULT CAST(SESSION_CONTEXT(N'UserId') AS nvarchar(128)) That's the only application change required. Go ahead and build and publish the application. Next, we need to add a UserId column to the Contacts table to associate each row with a user (tenant). We will alter the schema directly in the database, so that we don't have to include this field in our EF data model. Connect to the database directly, using either SQL Server Management Studio or Visual Studio, and then execute the following T-SQL: This adds a UserId column to the Contacts table. We use the nvarchar(128) data type to match the UserIds stored in the AspNetUsers table, and we create a DEFAULT constraint that will automatically set the UserId for newly inserted rows to be the UserId currently stored in SESSION_CONTEXT. Now the table looks like this: When new contacts are created, they'll automatically be assigned the correct UserId. For demo purposes, however, let's assign a few of these existing contacts to an existing user. If you've created a few users in the application already (e.g., using local, Google, or Facebook accounts), you'll see them in the AspNetUsers table. In the screenshot below, there is only one user so far. Copy the Id for user1@contoso.com, and paste it into the T-SQL statement below. Execute this statement to associate three of the Contacts with this UserId.
- 445. UPDATEContacts SET UserId = '19bc9b0d-28dd-4510-bd5e-d6b6d445f511' WHEREContactId IN(1, 2, 5) Step 3: Create a Row-Level Security policy in the database CREATESCHEMA Security go CREATEFUNCTIONSecurity.userAccessPredicate(@UserId nvarchar(128)) RETURNS TABLE WITHSCHEMABINDING AS RETURNSELECT 1AS accessResult WHERE@UserId = CAST(SESSION_CONTEXT(N'UserId') AS nvarchar(128)) go CREATESECURITYPOLICYSecurity.userSecurityPolicy ADDFILTERPREDICATESecurity.userAccessPredicate(UserId) ONdbo.Contacts, ADDBLOCKPREDICATESecurity.userAccessPredicate(UserId) ONdbo.Contacts go The final step is to create a security policy that uses the UserId in SESSION_CONTEXT to automatically filter the results returned by queries. While still connected to the database, execute the following T-SQL: This code does three things. First, it creates a new schema as a best practice for centralizing and limiting access to the RLS objects. Next, it creates a predicate function that will return '1' when the UserId of a row matches the UserId in SESSION_CONTEXT. Finally, it creates a security policy that adds this function as both a filter and block predicate on the Contacts table. The filter predicate causes queries to return only rows that belong to the current user, and the block predicate acts as a safeguard to prevent the application from ever accidentally inserting a row for the wrong user. Now run the application, and sign in as user1@contoso.com. This user now sees only the Contacts we assigned to this UserId earlier: To validate this further, try registering a new user. They will see no contacts, because none have been assigned to
- 446. Next steps them. If they create a new contact, it will be assigned to them, and only they will be able to see it. That's it! The simple Contact Manager web app has been converted into a multi-tenant one where each user has its own contact list. By using Row-Level Security, we've avoided the complexity of enforcing tenant access logic in our application code. This transparency allows the application to focus on the real business problem at hand, and it also reduces the risk of accidentally leaking data as the application's codebase grows. This tutorial has only scratched the surface of what's possible with RLS. For instance, it's possible to have more sophisticated or granular access logic, and it's possible to store more than just the current UserId in the SESSION_CONTEXT. It's also possible to integrate RLS with the elastic database tools client libraries to support multi-tenant shards in a scale-out data tier. Beyond these possibilities, we're also working to make RLS even better. If you have any questions, ideas, or things you'd like to see, please let us know in the comments. We appreciate your feedback!
- 447. Secure your app's custom domain with HTTPS 4/21/2017 • 19 min to read • Edit Online NOTE NOTE What you need This article shows you how to enable HTTPS for a web app, a mobile app backend, or an API app in Azure App Service that uses a custom domain name. It covers server-only authentication. If you need mutual authentication (including client authentication), see How To Configure TLS Mutual Authentication for App Service. To secure with HTTPS an app that has a custom domain name, you add a certificate for that domain name. By default, Azure secures the *.azurewebsites.net wildcard domain with a single SSL certificate, so your clients can already access your app at https://<appname>.azurewebsites.net. But if you want to use a custom domain, like contoso.com, www.contoso.com, and *.contoso.com, the default certificate can't secure that. Furthermore, like all wildcard certificates, the default certificate is not as secure as using a custom domain and a certificate for that custom domain. You can get help from Azure experts anytime on the Azure forums. For more personalized support, go to Azure Support and click Get Support. To secure your custom domain name with HTTPS, you bind a custom SSL certificate to that custom domain in Azure. Before binding a custom certificate, you need to do the following: Configure the custom domain - App Service only allows adding a certificate for a domain name that's already configured in your app. For instructions, see Map a custom domain name to an Azure app. Scale up to Basic tier or higher - App Service plans in lower pricing tiers don't support custom SSL certificates. For instructions, see Scale up an app in Azure. Get an SSL certificate - If you do not already have one, you need to get one from a trusted certificate authority (CA). The certificate must meet all the following requirements: It is signed by a trusted CA (no private CA servers). It contains a private key. It is created for key exchange, and exported to a .PFX file. It uses a minimum of 2048-bit encryption. Its subject name matches the custom domain it needs to secure. To secure multiple domains with one certificate, you need to use a wildcard name (e.g. *.contoso.com) or specify subjectAltName values. NOTE NOTE It is merged with all intermediate certificates used by your CA. Otherwise, you may run into irreproducible interoperability problems on some clients. The easiest way to get an SSL certificate that meets all the requirements is to buy one in the Azure portal directly. This article shows you how to do it manually and then bind it to your custom domain in App Service. Elliptic Curve Cryptography (ECC) certificates can work with App Service, but outside the scope of this article. Work with your CA on the exact steps to create ECC certificates.
- 448. Step 1. Get an SSL certificate Get a certificate using Certreq.exe Get a certificate using Certreq.exe Because CAs provide the various SSL certificate types at different price points, you should start by deciding what type of SSL certificate to buy. To secure a single domain name (www.contoso.com), you just need a basic certificate. To secure multiple domain names (contoso.com and www.contoso.com and mail.contoso.com), you need either a wildcard certificate or a certificate with Subject Alternate Name ( subjectAltName ). Once you know which SSL certificate to buy, you submit a Certificate Signing Request (CSR) to a CA. When you get requested certificate back from the CA, you then generate a .pfx file from the certificate. You can perform these steps using the tool of your choice. Here are instructions for the common tools: Certreq.exe steps - the Windows utility for creating certificate requests. It has been part of Windows since Windows XP/Windows Server 2000. IIS Manager steps - The tool of choice if you're already familiar with it. OpenSSL steps - an open-source, cross-platform tool. Use it to help you get an SSL certificate from any platform. subjectAltName steps using OpenSSL - steps for getting subjectAltName certificates. If you want to test the setup in App Service before buying a certificate, you can generate a self-signed certificate. This tutorial gives you two ways to generate it: Self-signed certificate, Certreq.exe steps Self-signed certificate, OpenSSL steps [NewRequest] Subject = "CN=<your-domain>" ; E.g. "CN=www.contoso.com", or "CN=*.contoso.com" for a wildcard certificate Exportable = TRUE KeyLength = 2048 ; Required minimumis 2048 KeySpec = 1 KeyUsage = 0xA0 MachineKeySet = FALSE ProviderName = "Microsoft RSA SChannelCryptographic Provider" ProviderType = 12 HashAlgorithm= SHA256 [EnhancedKeyUsageExtension] OID=1.3.6.1.5.5.7.3.1 ; Server Authentication certreq -newmyrequest.txt myrequest.csr 1. Create a file (e.g. myrequest.txt), and copy into it the following text, and save it in a working directory. Replace the <your-domain> placeholder with the custom domain name of your app. For more information on the options in the CSR, and other available options, see the Certreq reference documentation. 2. In a command prompt, CD into your working directory and run the following command to create the CSR: myrequest.csr is now created in your current working directory. 3. Submit myrequest.csr to a CA to obtain an SSL certificate. You either upload the file, or copy its content from a text editor into a web form. For a list of CAs trusted by Microsoft, see Microsoft Trusted Root Certificate Program: Participants. 4. Once the CA has responded to you with a certificate (.CER) file, save it in your working directory. Then, run the following command to complete the pending CSR.
- 449. certreq -accept -user <certificate-name>.cer This command stores the finished certificate in the Windows certificate store. 5. If your CA uses intermediate certificates, install them before you proceed. They usually come as a separate download from your CA, and in several formats for different web server types. Select the version for Microsoft IIS. Once you have downloaded the certificates, right-click each of them in Windows Explorer and select Install certificate. Use the default values in the Certificate Import Wizard, and continue selecting Next until the import has completed. 6. To export your SSL certificate from the certificate store, press Win + R and run certmgr.msc to launch Certificate Manager. Select Personal > Certificates. In the Issued To column, you should see an entry with your custom domain name, and the CA you used to generate the certificate in the Issued By column. 7. Right-click the certificate and select All Tasks > Export. In the Certificate Export Wizard, click Next, then select Yes, export the private key, and then click Next again. 8. Select Personal Information Exchange - PKCS #12, Include all certificates in the certificate path if possible, and Export all extended properties. Then, click Next.
- 450. 9. Select Password, and then enter and confirm the password. Click Next. 10. Provide a path and filename for the exported certificate, with the extension .pfx. Click Next to finish.
- 451. Get a certificate using the IIS Manager Get a certificate using the IIS Manager You are now ready to upload the exported PFX file to App Service. See Step 2. Upload and bind the custom SSL certificate. 1. Generate a CSR with IIS Manager to send to the CA. For more information on generating a CSR, see Request an Internet Server Certificate (IIS 7). 2. Submit your CSR to a CA to get an SSL certificate. For a list of CAs trusted by Microsoft, see Microsoft Trusted Root Certificate Program: Participants. 3. Complete the CSR with the certificate that the CA sends back to you. For more information on completing the CSR, see Install an Internet Server Certificate (IIS 7). 4. If your CA uses intermediate certificates, install them before you proceed. They usually come as a separate download from your CA, and in several formats for different web server types. Select the version for Microsoft IIS. Once you have downloaded the certificates, right-click each of them in Windows Explorer and select Install certificate. Use the default values in the Certificate Import Wizard, and continue selecting Next until the import has completed. 5. Export the SSL certificate from IIS Manager. For more information on exporting the certificate, see Export a Server Certificate (IIS 7).
- 452. IMPORTANT IMPORTANT In the Certificate Export Wizard, make sure that you select Yes, export the private key and also select Personal Information Exchange - PKCS #12, Include all certificates in the certificate path if possible, and Export all extended properties. You are now ready to upload the exported PFX file to App Service. See Step 2. Upload and bind the custom SSL
- 453. Get a certificate using OpenSSL Get a certificate using OpenSSL certificate. opensslreq -sha256-new-nodes -keyout myserver.key -out server.csr -newkey rsa:2048 Country Name (2letter code) State or Province Name (fullname) []:Washington Locality Name (eg, city) []:Redmond Organization Name (eg, company) []:Microsoft OrganizationalUnit Name (eg, section) []:Azure Common Name (eg, YOURname) []:www.microsoft.com EmailAddress []: Please enter the following 'extra' attributes to be sent with your certificate request A challenge password []: 3. Submit your CSR to a CA to get an SSL certificate. For a list of CAs trusted by Microsoft, see Microsoft Trusted Root Certificate Program: Participants. -----BEGINCERTIFICATE----- MIIDJDCCAgwCCQCpCY4o1LBQuzANBgkqhkiG9w0BAQUFADBUMQswCQYDVQQGEwJV UzELMAkGA1UECBMCV0ExEDAOBgNVBAcTB1JlZG1vbmQxEDAOBgNVBAsTB0NvbnRv c28xFDASBgNVBAMTC2NvbnRvc28uY29tMB4XDTE0MDExNjE1MzIyM1oXDTE1MDEx NjE1MzIyM1owVDELMAkGA1UEBhMCVVMxCzAJBgNVBAgTAldBMRAwDgYDVQQHEwdS ZWRtb25kMRAwDgYDVQQLEwdDb250b3NvMRQwEgYDVQQDEwtjb250b3NvLmNvbTCC ASIwDQYJKoZIhvcNAQEBBQADggEPADCCAQoCggEBAN96hBX5EDgULtWkCRK7DMM3 enae1LT9fXqGlbA7ScFvFivGvOLEqEPD//eLGsf15OYHFOQHK1hwgyfXa9sEDPMT 3AsF3iWyF7FiEoR/qV6LdKjeQicJ2cXjGwf3G5vPoIaYifI5r0lhgOUqBxzaBDZ4 xMgCh2yv7NavI17BHlWyQo90gS2X5glYGRhzY/fGp10BeUEgIs3Se0kQfBQOFUYb ktA6802lod5K0OxlQy4Oc8kfxTDf8AF2SPQ6BL7xxWrNl/Q2DuEEemjuMnLNxmeA Ik2+6Z6+WdvJoRxqHhleoL8ftOpWR20ToiZXCPo+fcmLod4ejsG5qjBlztVY4qsC AwEAATANBgkqhkiG9w0BAQUFAAOCAQEAVcM9AeeNFv2li69qBZLGDuK0NDHD3zhK Y0nDkqucgjE2QKUuvVSPodz8qwHnKoPwnSrTn8CRjW1gFq5qWEO50dGWgyLR8Wy1 F69DYsEzodG+shv/G+vHJZg9QzutsJTB/Q8OoUCSnQS1PSPZP7RbvDV9b7Gx+gtg 7kQ55j3A5vOrpI8N9CwdPuimtu6X8Ylw9ejWZsnyy0FMeOPpK3WTkDMxwwGxkU3Y lCRTzkv6vnHrlYQxyBLOSafCB1RWinN/slcWSLHADB6R+HeMiVKkFpooT+ghtii1 A9PdUQIhK9bdaFicXPBYZ6AgNVuGtfwyuS5V6ucm7RE6+qf+QjXNFg== -----ENDCERTIFICATE----- opensslpkcs12-export -out myserver.pfx-inkey myserver.key -in myserver.crt 1. In a command-line terminal, CD into a working directory generate a private key and CSR by running the following command: 2. When prompted, enter the appropriate information. For example: When finished, you should have two files in your working directory: myserver.key and server.csr. The server.csr contains the CSR, and you need myserver.key later. 4. Once the CA sends you the requested certificate, save it to a file named myserver.crt in your working directory. If your CA provides it in a text format, simply copy the content into myserver.crt in a text editor and save it. Your file should look like the following: 5. In the command-line terminal, run the following command to export myserver.pfx from myserver.key and myserver.crt: When prompted, define a password to secure the .pfx file.
- 454. Get a SubjectAltName certificate using OpenSSL Get a SubjectAltName certificate using OpenSSL NOTE NOTE If your CA uses intermediate certificates, you must include them with the -certfile parameter. They usually come as a separate download from your CA, and in several formats for different web server types. Select the version with the .pem extension. Your openssl -export command should look like the following example, which creates a .pfx file that includes the intermediate certificates from the intermediate-cets.pem file: openssl pkcs12 -chain -export -out myserver.pfx -inkey myserver.key -in myserver.crt -certfile intermediate-cets.pem You are now ready to upload the exported PFX file to App Service. See Step 2. Upload and bind the custom SSL certificate. # -------------- BEGINcustomsancert.cnf ----- HOME= . oid_section = new_oids [ new_oids ] [ req ] default_days = 730 distinguished_name = req_distinguished_name encrypt_key = no string_mask= nombstr req_extensions = v3_req # Extensions to add to certificate request [ req_distinguished_name ] countryName = Country Name (2letter code) countryName_default = stateOrProvinceName = State or Province Name (fullname) stateOrProvinceName_default = localityName = Locality Name (eg, city) localityName_default = organizationalUnitName = OrganizationalUnit Name (eg, section) organizationalUnitName_default = commonName = Your common name (eg, domain name) commonName_default = www.mydomain.com commonName_max= 64 [ v3_req ] subjectAltName=DNS:ftp.mydomain.com,DNS:blog.mydomain.com,DNS:*.mydomain.com # -------------- ENDcustomsancert.cnf ----- subjectAltName=DNS:sales.contoso.com,DNS:support.contoso.com,DNS:fabrikam.com opensslreq -sha256-new-nodes -keyout myserver.key -out server.csr -newkey rsa:2048-config sancert.cnf 1. Create a file named sancert.cnf, copy the following text into it, and save it in a working directory: In the line that begins with subjectAltName , replace the value with all domain names you want to secure (in addition to commonName ). For example: You do not need to change any other field, including commonName . You will be prompted to specify them in the next few steps. 2. In a command-line terminal, CD into your working directory and run the following command: 3. When prompted, enter the appropriate information. For example:
- 455. Generate a self-signed certificate using Certreq.exe Generate a self-signed certificate using Certreq.exe Country Name (2letter code) []:US State or Province Name (fullname) []:Washington Locality Name (eg, city) []:Redmond OrganizationalUnit Name (eg, section) []:Azure Your common name (eg, domain name) []:www.microsoft.com 4. Submit your CSR to a CA to get an SSL certificate. For a list of CAs trusted by Microsoft, see Microsoft Trusted Root Certificate Program: Participants. -----BEGINCERTIFICATE----- MIIDJDCCAgwCCQCpCY4o1LBQuzANBgkqhkiG9w0BAQUFADBUMQswCQYDVQQGEwJV UzELMAkGA1UECBMCV0ExEDAOBgNVBAcTB1JlZG1vbmQxEDAOBgNVBAsTB0NvbnRv c28xFDASBgNVBAMTC2NvbnRvc28uY29tMB4XDTE0MDExNjE1MzIyM1oXDTE1MDEx NjE1MzIyM1owVDELMAkGA1UEBhMCVVMxCzAJBgNVBAgTAldBMRAwDgYDVQQHEwdS ZWRtb25kMRAwDgYDVQQLEwdDb250b3NvMRQwEgYDVQQDEwtjb250b3NvLmNvbTCC ASIwDQYJKoZIhvcNAQEBBQADggEPADCCAQoCggEBAN96hBX5EDgULtWkCRK7DMM3 enae1LT9fXqGlbA7ScFvFivGvOLEqEPD//eLGsf15OYHFOQHK1hwgyfXa9sEDPMT 3AsF3iWyF7FiEoR/qV6LdKjeQicJ2cXjGwf3G5vPoIaYifI5r0lhgOUqBxzaBDZ4 xMgCh2yv7NavI17BHlWyQo90gS2X5glYGRhzY/fGp10BeUEgIs3Se0kQfBQOFUYb ktA6802lod5K0OxlQy4Oc8kfxTDf8AF2SPQ6BL7xxWrNl/Q2DuEEemjuMnLNxmeA Ik2+6Z6+WdvJoRxqHhleoL8ftOpWR20ToiZXCPo+fcmLod4ejsG5qjBlztVY4qsC AwEAATANBgkqhkiG9w0BAQUFAAOCAQEAVcM9AeeNFv2li69qBZLGDuK0NDHD3zhK Y0nDkqucgjE2QKUuvVSPodz8qwHnKoPwnSrTn8CRjW1gFq5qWEO50dGWgyLR8Wy1 F69DYsEzodG+shv/G+vHJZg9QzutsJTB/Q8OoUCSnQS1PSPZP7RbvDV9b7Gx+gtg 7kQ55j3A5vOrpI8N9CwdPuimtu6X8Ylw9ejWZsnyy0FMeOPpK3WTkDMxwwGxkU3Y lCRTzkv6vnHrlYQxyBLOSafCB1RWinN/slcWSLHADB6R+HeMiVKkFpooT+ghtii1 A9PdUQIhK9bdaFicXPBYZ6AgNVuGtfwyuS5V6ucm7RE6+qf+QjXNFg== -----ENDCERTIFICATE----- opensslpkcs12-export -out myserver.pfx-inkey myserver.key -in myserver.crt NOTE NOTE Once finished, you should have two files in your working directory: myserver.key and server.csr. The server.csr contains the CSR, and you need myserver.key later. 5. Once the CA sends you the requested certificate, save it to a file named myserver.crt. If your CA provides it in a text format, simply copy the content into myserver.crt in a text editor and save it. The file should look like the following: 6. In the command-line terminal, run the following command to export myserver.pfx from myserver.key and myserver.crt: When prompted, define a password to secure the .pfx file. If your CA uses intermediate certificates, you must include them with the -certfile parameter. They usually come as a separate download from your CA, and in several formats for different web server types. Select the version with the .pem extension). Your openssl -export command should look like the following example, which creates a .pfx file that includes the intermediate certificates from the intermediate-cets.pem file: openssl pkcs12 -chain -export -out myserver.pfx -inkey myserver.key -in myserver.crt -certfile intermediate-cets.pem You are now ready to upload the exported PFX file to App Service. See Step 2. Upload and bind the custom SSL certificate.
- 456. IMPORTANT IMPORTANT Self-signed certificates are for test purposes only. Most browsers return errors when visiting a website that's secured by a self-signed certificate. Some browsers may even refuse to navigate to the site. [NewRequest] Subject = "CN=<your-domain>" ; E.g. "CN=www.contoso.com", or "CN=*.contoso.com" for a wildcard certificate Exportable = TRUE KeyLength = 2048 ; KeyLength can be 2048, 4096, 8192, or 16384(required minimumis 2048) KeySpec = 1 KeyUsage = 0xA0 MachineKeySet = True ProviderName = "Microsoft RSA SChannelCryptographic Provider" ProviderType = 12 HashAlgorithm= SHA256 RequestType = Cert ; Self-signed certificate ValidityPeriod = Years ValidityPeriodUnits = 1 [EnhancedKeyUsageExtension] OID=1.3.6.1.5.5.7.3.1 ; Server Authentication certreq -newmycert.txt mycert.crt 1. Create a text file (e.g. mycert.txt), copy into it the following text, and save the file in a working directory. Replace the <your-domain> placeholder with the custom domain name of your app. The important parameter is RequestType = Cert , which specifies a self-signed certificate. For more information on the options in the CSR, and other available options, see the Certreq reference documentation. 2. In the command prompt, CD to your working directory and run the following command: Your new self-signed certificate is now installed in the certificate store. 3. To export the certificate from the certificate store, press Win + R and run certmgr.msc to launch Certificate Manager. Select Personal > Certificates. In the Issued To column, you should see an entry with your custom domain name, and the CA you used to generate the certificate in the Issued By column. 4. Right-click the certificate and select All Tasks > Export. In the Certificate Export Wizard, click Next, then select Yes, export the private key, and then click Next again.
- 457. 5. Select Personal Information Exchange - PKCS #12, Include all certificates in the certificate path if possible, and Export all extended properties. Then, click Next. 6. Select Password, and then enter and confirm the password. Click Next.
- 458. Generate a self-signed certificate using OpenSSL Generate a self-signed certificate using OpenSSL 7. Provide a path and filename for the exported certificate, with the extension .pfx. Click Next to finish. You are now ready to upload the exported PFX file to App Service. See Step 2. Upload and bind the custom SSL certificate.
- 459. IMPORTANT IMPORTANT Step 2. Upload and bind the custom SSL certificate Self-signed certificates are for test purposes only. Most browsers return errors when visiting a website that's secured by a self-signed certificate. Some browsers may even refuse to navigate to the site. [ req ] default_bits = 2048 default_keyfile = privkey.pem distinguished_name = req_distinguished_name attributes = req_attributes x509_extensions = v3_ca [ req_distinguished_name ] countryName = Country Name (2letter code) countryName_min = 2 countryName_max = 2 stateOrProvinceName = State or Province Name (fullname) localityName = Locality Name (eg, city) 0.organizationName = Organization Name (eg, company) organizationalUnitName = OrganizationalUnit Name (eg, section) commonName = Common Name (eg, your app's domain name) commonName_max = 64 emailAddress = EmailAddress emailAddress_max = 40 [ req_attributes ] challengePassword = A challenge password challengePassword_min = 4 challengePassword_max = 20 [ v3_ca ] subjectKeyIdentifier=hash authorityKeyIdentifier=keyid:always,issuer:always basicConstraints = CA:false keyUsage=nonRepudiation, digitalSignature, keyEncipherment extendedKeyUsage = serverAuth opensslreq -sha256-x509-nodes -days 365-newkey rsa:2048-keyout myserver.key -out myserver.crt -config serverauth.cnf opensslpkcs12-export -out myserver.pfx-inkey myserver.key -in myserver.crt 1. Create a text file named serverauth.cnf, then copy the following content into it, and then save it in a working directory: 2. In a command-line terminal, CD into your working directory and run the following command: This command creates two files: myserver.crt (the self-signed certificate) and myserver.key (the private key), based on the settings in serverauth.cnf. 3. Export the certificate to a .pfx file by running the following command: When prompted, define a password to secure the .pfx file. You are now ready to upload the exported PFX file to App Service. See Step 2. Upload and bind the custom SSL certificate.
- 460. Step 3. Change your domain name mapping (IP based SSL only) Before you move on, review the What you need section and verify that: you have a custom domain that maps to your Azure app, your app is running in Basic tier or higher, and you have an SSL certificate for the custom domain from a CA. 1. In your browser, open the Azure Portal. 2. Click the App Service option on the left side of the page. 3. Click the name of your app to which you want to assign this certificate. 4. In the Settings, Click SSL certificates 5. Click Upload Certificate 6. Select the .pfx file that you exported in Step 1 and specify the password that you create before. Then, click Upload to upload the certificate. You should now see your uploaded certificate back in the SSL certificate blade. 7. In the ssl bindings section Click on Add bindings NOTE NOTE 8. In the Add SSL Binding blade use the dropdowns to select the domain name to secure with SSL, and the certificate to use. You may also select whether to use Server Name Indication (SNI) or IP based SSL. IP based SSL associates a certificate with a domain name by mapping the dedicated public IP address of the server to the domain name. This requires each domain name (contoso.com, fabricam.com, etc.) associated with your service to have a dedicated IP address. This is the traditional method of associating SSL certificates with a web server. SNI based SSL is an extension to SSL and Transport Layer Security (TLS) that allows multiple domains to share the same IP address, with separate security certificates for each domain. Most modern browsers (including Internet Explorer, Chrome, Firefox and Opera) support SNI, however older browsers may not support SNI. For more information on SNI, see the Server Name Indication article on Wikipedia. 9. Click Add Binding to save the changes and enable SSL. If you use SNI SSL bindings only, skip this section. Multiple SNI SSL bindings can work together on the existing shared IP address assigned to your app. However, if you create an IP based SSL binding, App Service creates a dedicated IP address for the binding because the IP based SSL requires one. Only one dedicated IP address can be created, therefore only one IP based SSL binding may be added. Because of this dedicated IP address, you will need to configure your app further if:
- 461. Step 4. Test HTTPS for your custom domain Enforce HTTPS on your app NOTE NOTE You used an A record to map your custom domain to your Azure app, and you just added an IP based SSL binding. In this scenario, you need to remap the existing A record to point to the dedicated IP address by following these steps: 2. Remap the A record for your custom domain name to this new IP address. 1. After you have configured an IP based SSL binding, a dedicated IP address is assigned to your app. You can find this IP address on the Custom domain page under settings of your app, right above the Hostnames section. It will be listed as External IP Address You already have one or more SNI SSL bindings in your app, and you just added an IP based SSL binding. Once the binding is complete, your <appname>.azurewebsites.net domain name points to the new IP address. Therefore, any existing CNAME mapping from the custom domain to <appname>.azurewebsites.net, including the ones that the SNI SSL secure, also receives traffic on the new address, which is created for the IP based SSL only. In this scenario, you need to send the SNI SSL traffic back to the original shared IP address by following these steps: 1. Identify all CNAME mappings of custom domains to your app that has an SNI SSL binding. 2. Remap each CNAME record to sni.<appname>.azurewebsites.net instead of <appname>.azurewebsites.net. All that's left to do now is to make sure that HTTPS works for your custom domain. In various browsers, browse to https://<your.custom.domain> to see that it serves up your app. If your app gives you certificate validation errors, you're probably using a self-signed certificate. If that's not the case, you may have left out intermediate certificates when you export your .pfx certificate. Go back to What you need to verify that your CSR meets all the requirements by App Service. If you still want to allow HTTP access to your app, skip this step. App Service does not enforce HTTPS, so visitors can still access your app using HTTP. If you want to enforce HTTPS for your app, you can define a rewrite rule in the web.config file for your app. Every App Service app has this file, regardless of the language framework of your app. There is language-specific redirection of requests. ASP.NET MVC can use the RequireHttps filter instead of the rewrite rule in web.config (see Deploy a secure ASP.NET MVC 5 app to a web app). Follow these steps: 1. Navigate to the Kudu debug console for your app. Its address is https://<appname>.scm.azurewebsites.net/DebugConsole . 2. In the debug console, CD to D:homesitewwwroot . 3. Open web.config by clicking the pencil button.
- 462. More Resources <?xmlversion="1.0" encoding="UTF-8"?> <configuration> <system.webServer> <rewrite> <rules> <!-- BEGINrule TAGFORHTTPS REDIRECT --> <rule name="Force HTTPS" enabled="true"> <match url="(.*)" ignoreCase="false" /> <conditions> <add input="{HTTPS}" pattern="off" /> </conditions> <action type="Redirect" url="https://{HTTP_HOST}/{R:1}" appendQueryString="true" redirectType="Permanent" /> </rule> <!-- ENDrule TAGFORHTTPS REDIRECT --> </rules> </rewrite> </system.webServer> </configuration> IMPORTANT IMPORTANT 5. Save the file in the Kudu debug console. It should take effect immediately redirect all requests to HTTPS. If you deploy your app with Visual Studio or Git, App Service automatically generates the appropriate web.config for your .NET, PHP, Node.js, or Python app in the application root. If web.config doesn't exist, run touch web.config in the web-based command prompt to create it. Or, you can create it in your local project and redeploy your code. 4. If you had to create a web.config , copy the following code into it and save it. If you opened an existing web.config, then you just need to copy the entire <rule> tag into your web.config 's configuration/system.webServer/rewrite/rules element. This rule returns an HTTP 301 (permanent redirect) to the HTTPS protocol whenever the user requests a page using HTTP. It redirects from http://contoso.com to https://contoso.com. If there are already other <rule> tags in your web.config , then place the copied <rule> tag before the other <rule> tags. For more information on the IIS URL Rewrite module, see the URL Rewrite documentation. Microsoft Azure Trust Center Configuration options unlocked in Azure Web Sites Enable diagnostic logging Configure web apps in Azure App Service Azure Management Portal
- 463. NOTE NOTE If you want to get started with Azure App Service before signing up for an Azure account, go to Try App Service, where you can immediately create a short-lived starter app in App Service. No credit cards required; no commitments.
- 464. Secure your app's custom domain with HTTPS 4/21/2017 • 19 min to read • Edit Online NOTE NOTE What you need This article shows you how to enable HTTPS for a web app, a mobile app backend, or an API app in Azure App Service that uses a custom domain name. It covers server-only authentication. If you need mutual authentication (including client authentication), see How To Configure TLS Mutual Authentication for App Service. To secure with HTTPS an app that has a custom domain name, you add a certificate for that domain name. By default, Azure secures the *.azurewebsites.net wildcard domain with a single SSL certificate, so your clients can already access your app at https://<appname>.azurewebsites.net. But if you want to use a custom domain, like contoso.com, www.contoso.com, and *.contoso.com, the default certificate can't secure that. Furthermore, like all wildcard certificates, the default certificate is not as secure as using a custom domain and a certificate for that custom domain. You can get help from Azure experts anytime on the Azure forums. For more personalized support, go to Azure Support and click Get Support. To secure your custom domain name with HTTPS, you bind a custom SSL certificate to that custom domain in Azure. Before binding a custom certificate, you need to do the following: Configure the custom domain - App Service only allows adding a certificate for a domain name that's already configured in your app. For instructions, see Map a custom domain name to an Azure app. Scale up to Basic tier or higher - App Service plans in lower pricing tiers don't support custom SSL certificates. For instructions, see Scale up an app in Azure. Get an SSL certificate - If you do not already have one, you need to get one from a trusted certificate authority (CA). The certificate must meet all the following requirements: It is signed by a trusted CA (no private CA servers). It contains a private key. It is created for key exchange, and exported to a .PFX file. It uses a minimum of 2048-bit encryption. Its subject name matches the custom domain it needs to secure. To secure multiple domains with one certificate, you need to use a wildcard name (e.g. *.contoso.com) or specify subjectAltName values. NOTE NOTE It is merged with all intermediate certificates used by your CA. Otherwise, you may run into irreproducible interoperability problems on some clients. The easiest way to get an SSL certificate that meets all the requirements is to buy one in the Azure portal directly. This article shows you how to do it manually and then bind it to your custom domain in App Service. Elliptic Curve Cryptography (ECC) certificates can work with App Service, but outside the scope of this article. Work with your CA on the exact steps to create ECC certificates.
- 465. Step 1. Get an SSL certificate Get a certificate using Certreq.exe Get a certificate using Certreq.exe Because CAs provide the various SSL certificate types at different price points, you should start by deciding what type of SSL certificate to buy. To secure a single domain name (www.contoso.com), you just need a basic certificate. To secure multiple domain names (contoso.com and www.contoso.com and mail.contoso.com), you need either a wildcard certificate or a certificate with Subject Alternate Name ( subjectAltName ). Once you know which SSL certificate to buy, you submit a Certificate Signing Request (CSR) to a CA. When you get requested certificate back from the CA, you then generate a .pfx file from the certificate. You can perform these steps using the tool of your choice. Here are instructions for the common tools: Certreq.exe steps - the Windows utility for creating certificate requests. It has been part of Windows since Windows XP/Windows Server 2000. IIS Manager steps - The tool of choice if you're already familiar with it. OpenSSL steps - an open-source, cross-platform tool. Use it to help you get an SSL certificate from any platform. subjectAltName steps using OpenSSL - steps for getting subjectAltName certificates. If you want to test the setup in App Service before buying a certificate, you can generate a self-signed certificate. This tutorial gives you two ways to generate it: Self-signed certificate, Certreq.exe steps Self-signed certificate, OpenSSL steps [NewRequest] Subject = "CN=<your-domain>" ; E.g. "CN=www.contoso.com", or "CN=*.contoso.com" for a wildcard certificate Exportable = TRUE KeyLength = 2048 ; Required minimumis 2048 KeySpec = 1 KeyUsage = 0xA0 MachineKeySet = FALSE ProviderName = "Microsoft RSA SChannelCryptographic Provider" ProviderType = 12 HashAlgorithm= SHA256 [EnhancedKeyUsageExtension] OID=1.3.6.1.5.5.7.3.1 ; Server Authentication certreq -newmyrequest.txt myrequest.csr 1. Create a file (e.g. myrequest.txt), and copy into it the following text, and save it in a working directory. Replace the <your-domain> placeholder with the custom domain name of your app. For more information on the options in the CSR, and other available options, see the Certreq reference documentation. 2. In a command prompt, CD into your working directory and run the following command to create the CSR: myrequest.csr is now created in your current working directory. 3. Submit myrequest.csr to a CA to obtain an SSL certificate. You either upload the file, or copy its content from a text editor into a web form. For a list of CAs trusted by Microsoft, see Microsoft Trusted Root Certificate Program: Participants. 4. Once the CA has responded to you with a certificate (.CER) file, save it in your working directory. Then, run
- 466. certreq -accept -user <certificate-name>.cer the following command to complete the pending CSR. This command stores the finished certificate in the Windows certificate store. 5. If your CA uses intermediate certificates, install them before you proceed. They usually come as a separate download from your CA, and in several formats for different web server types. Select the version for Microsoft IIS. Once you have downloaded the certificates, right-click each of them in Windows Explorer and select Install certificate. Use the default values in the Certificate Import Wizard, and continue selecting Next until the import has completed. 6. To export your SSL certificate from the certificate store, press Win + R and run certmgr.msc to launch Certificate Manager. Select Personal > Certificates. In the Issued To column, you should see an entry with your custom domain name, and the CA you used to generate the certificate in the Issued By column. 7. Right-click the certificate and select All Tasks > Export. In the Certificate Export Wizard, click Next, then select Yes, export the private key, and then click Next again. 8. Select Personal Information Exchange - PKCS #12, Include all certificates in the certificate path if possible, and Export all extended properties. Then, click Next.
- 467. 9. Select Password, and then enter and confirm the password. Click Next. 10. Provide a path and filename for the exported certificate, with the extension .pfx. Click Next to finish.
- 468. Get a certificate using the IIS Manager Get a certificate using the IIS Manager You are now ready to upload the exported PFX file to App Service. See Step 2. Upload and bind the custom SSL certificate. 1. Generate a CSR with IIS Manager to send to the CA. For more information on generating a CSR, see Request an Internet Server Certificate (IIS 7). 2. Submit your CSR to a CA to get an SSL certificate. For a list of CAs trusted by Microsoft, see Microsoft Trusted Root Certificate Program: Participants. 3. Complete the CSR with the certificate that the CA sends back to you. For more information on completing the CSR, see Install an Internet Server Certificate (IIS 7). 4. If your CA uses intermediate certificates, install them before you proceed. They usually come as a separate download from your CA, and in several formats for different web server types. Select the version for Microsoft IIS. Once you have downloaded the certificates, right-click each of them in Windows Explorer and select Install certificate. Use the default values in the Certificate Import Wizard, and continue selecting Next until the import has completed. 5. Export the SSL certificate from IIS Manager. For more information on exporting the certificate, see Export a Server Certificate (IIS 7).
- 469. IMPORTANT IMPORTANT In the Certificate Export Wizard, make sure that you select Yes, export the private key and also select Personal Information Exchange - PKCS #12, Include all certificates in the certificate path if possible, and Export all extended properties. You are now ready to upload the exported PFX file to App Service. See Step 2. Upload and bind the custom SSL
- 470. Get a certificate using OpenSSL Get a certificate using OpenSSL certificate. opensslreq -sha256-new-nodes -keyout myserver.key -out server.csr -newkey rsa:2048 Country Name (2letter code) State or Province Name (fullname) []:Washington Locality Name (eg, city) []:Redmond Organization Name (eg, company) []:Microsoft OrganizationalUnit Name (eg, section) []:Azure Common Name (eg, YOURname) []:www.microsoft.com EmailAddress []: Please enter the following 'extra' attributes to be sent with your certificate request A challenge password []: 3. Submit your CSR to a CA to get an SSL certificate. For a list of CAs trusted by Microsoft, see Microsoft Trusted Root Certificate Program: Participants. -----BEGINCERTIFICATE----- MIIDJDCCAgwCCQCpCY4o1LBQuzANBgkqhkiG9w0BAQUFADBUMQswCQYDVQQGEwJV UzELMAkGA1UECBMCV0ExEDAOBgNVBAcTB1JlZG1vbmQxEDAOBgNVBAsTB0NvbnRv c28xFDASBgNVBAMTC2NvbnRvc28uY29tMB4XDTE0MDExNjE1MzIyM1oXDTE1MDEx NjE1MzIyM1owVDELMAkGA1UEBhMCVVMxCzAJBgNVBAgTAldBMRAwDgYDVQQHEwdS ZWRtb25kMRAwDgYDVQQLEwdDb250b3NvMRQwEgYDVQQDEwtjb250b3NvLmNvbTCC ASIwDQYJKoZIhvcNAQEBBQADggEPADCCAQoCggEBAN96hBX5EDgULtWkCRK7DMM3 enae1LT9fXqGlbA7ScFvFivGvOLEqEPD//eLGsf15OYHFOQHK1hwgyfXa9sEDPMT 3AsF3iWyF7FiEoR/qV6LdKjeQicJ2cXjGwf3G5vPoIaYifI5r0lhgOUqBxzaBDZ4 xMgCh2yv7NavI17BHlWyQo90gS2X5glYGRhzY/fGp10BeUEgIs3Se0kQfBQOFUYb ktA6802lod5K0OxlQy4Oc8kfxTDf8AF2SPQ6BL7xxWrNl/Q2DuEEemjuMnLNxmeA Ik2+6Z6+WdvJoRxqHhleoL8ftOpWR20ToiZXCPo+fcmLod4ejsG5qjBlztVY4qsC AwEAATANBgkqhkiG9w0BAQUFAAOCAQEAVcM9AeeNFv2li69qBZLGDuK0NDHD3zhK Y0nDkqucgjE2QKUuvVSPodz8qwHnKoPwnSrTn8CRjW1gFq5qWEO50dGWgyLR8Wy1 F69DYsEzodG+shv/G+vHJZg9QzutsJTB/Q8OoUCSnQS1PSPZP7RbvDV9b7Gx+gtg 7kQ55j3A5vOrpI8N9CwdPuimtu6X8Ylw9ejWZsnyy0FMeOPpK3WTkDMxwwGxkU3Y lCRTzkv6vnHrlYQxyBLOSafCB1RWinN/slcWSLHADB6R+HeMiVKkFpooT+ghtii1 A9PdUQIhK9bdaFicXPBYZ6AgNVuGtfwyuS5V6ucm7RE6+qf+QjXNFg== -----ENDCERTIFICATE----- opensslpkcs12-export -out myserver.pfx-inkey myserver.key -in myserver.crt 1. In a command-line terminal, CD into a working directory generate a private key and CSR by running the following command: 2. When prompted, enter the appropriate information. For example: When finished, you should have two files in your working directory: myserver.key and server.csr. The server.csr contains the CSR, and you need myserver.key later. 4. Once the CA sends you the requested certificate, save it to a file named myserver.crt in your working directory. If your CA provides it in a text format, simply copy the content into myserver.crt in a text editor and save it. Your file should look like the following: 5. In the command-line terminal, run the following command to export myserver.pfx from myserver.key and myserver.crt: When prompted, define a password to secure the .pfx file.
- 471. Get a SubjectAltName certificate using OpenSSL Get a SubjectAltName certificate using OpenSSL NOTE NOTE If your CA uses intermediate certificates, you must include them with the -certfile parameter. They usually come as a separate download from your CA, and in several formats for different web server types. Select the version with the .pem extension. Your openssl -export command should look like the following example, which creates a .pfx file that includes the intermediate certificates from the intermediate-cets.pem file: openssl pkcs12 -chain -export -out myserver.pfx -inkey myserver.key -in myserver.crt -certfile intermediate-cets.pem You are now ready to upload the exported PFX file to App Service. See Step 2. Upload and bind the custom SSL certificate. # -------------- BEGINcustomsancert.cnf ----- HOME= . oid_section = new_oids [ new_oids ] [ req ] default_days = 730 distinguished_name = req_distinguished_name encrypt_key = no string_mask= nombstr req_extensions = v3_req # Extensions to add to certificate request [ req_distinguished_name ] countryName = Country Name (2letter code) countryName_default = stateOrProvinceName = State or Province Name (fullname) stateOrProvinceName_default = localityName = Locality Name (eg, city) localityName_default = organizationalUnitName = OrganizationalUnit Name (eg, section) organizationalUnitName_default = commonName = Your common name (eg, domain name) commonName_default = www.mydomain.com commonName_max= 64 [ v3_req ] subjectAltName=DNS:ftp.mydomain.com,DNS:blog.mydomain.com,DNS:*.mydomain.com # -------------- ENDcustomsancert.cnf ----- subjectAltName=DNS:sales.contoso.com,DNS:support.contoso.com,DNS:fabrikam.com opensslreq -sha256-new-nodes -keyout myserver.key -out server.csr -newkey rsa:2048-config sancert.cnf 1. Create a file named sancert.cnf, copy the following text into it, and save it in a working directory: In the line that begins with subjectAltName , replace the value with all domain names you want to secure (in addition to commonName ). For example: You do not need to change any other field, including commonName . You will be prompted to specify them in the next few steps. 2. In a command-line terminal, CD into your working directory and run the following command: 3. When prompted, enter the appropriate information. For example:
- 472. Generate a self-signed certificate using Certreq.exe Generate a self-signed certificate using Certreq.exe Country Name (2letter code) []:US State or Province Name (fullname) []:Washington Locality Name (eg, city) []:Redmond OrganizationalUnit Name (eg, section) []:Azure Your common name (eg, domain name) []:www.microsoft.com 4. Submit your CSR to a CA to get an SSL certificate. For a list of CAs trusted by Microsoft, see Microsoft Trusted Root Certificate Program: Participants. -----BEGINCERTIFICATE----- MIIDJDCCAgwCCQCpCY4o1LBQuzANBgkqhkiG9w0BAQUFADBUMQswCQYDVQQGEwJV UzELMAkGA1UECBMCV0ExEDAOBgNVBAcTB1JlZG1vbmQxEDAOBgNVBAsTB0NvbnRv c28xFDASBgNVBAMTC2NvbnRvc28uY29tMB4XDTE0MDExNjE1MzIyM1oXDTE1MDEx NjE1MzIyM1owVDELMAkGA1UEBhMCVVMxCzAJBgNVBAgTAldBMRAwDgYDVQQHEwdS ZWRtb25kMRAwDgYDVQQLEwdDb250b3NvMRQwEgYDVQQDEwtjb250b3NvLmNvbTCC ASIwDQYJKoZIhvcNAQEBBQADggEPADCCAQoCggEBAN96hBX5EDgULtWkCRK7DMM3 enae1LT9fXqGlbA7ScFvFivGvOLEqEPD//eLGsf15OYHFOQHK1hwgyfXa9sEDPMT 3AsF3iWyF7FiEoR/qV6LdKjeQicJ2cXjGwf3G5vPoIaYifI5r0lhgOUqBxzaBDZ4 xMgCh2yv7NavI17BHlWyQo90gS2X5glYGRhzY/fGp10BeUEgIs3Se0kQfBQOFUYb ktA6802lod5K0OxlQy4Oc8kfxTDf8AF2SPQ6BL7xxWrNl/Q2DuEEemjuMnLNxmeA Ik2+6Z6+WdvJoRxqHhleoL8ftOpWR20ToiZXCPo+fcmLod4ejsG5qjBlztVY4qsC AwEAATANBgkqhkiG9w0BAQUFAAOCAQEAVcM9AeeNFv2li69qBZLGDuK0NDHD3zhK Y0nDkqucgjE2QKUuvVSPodz8qwHnKoPwnSrTn8CRjW1gFq5qWEO50dGWgyLR8Wy1 F69DYsEzodG+shv/G+vHJZg9QzutsJTB/Q8OoUCSnQS1PSPZP7RbvDV9b7Gx+gtg 7kQ55j3A5vOrpI8N9CwdPuimtu6X8Ylw9ejWZsnyy0FMeOPpK3WTkDMxwwGxkU3Y lCRTzkv6vnHrlYQxyBLOSafCB1RWinN/slcWSLHADB6R+HeMiVKkFpooT+ghtii1 A9PdUQIhK9bdaFicXPBYZ6AgNVuGtfwyuS5V6ucm7RE6+qf+QjXNFg== -----ENDCERTIFICATE----- opensslpkcs12-export -out myserver.pfx-inkey myserver.key -in myserver.crt NOTE NOTE Once finished, you should have two files in your working directory: myserver.key and server.csr. The server.csr contains the CSR, and you need myserver.key later. 5. Once the CA sends you the requested certificate, save it to a file named myserver.crt. If your CA provides it in a text format, simply copy the content into myserver.crt in a text editor and save it. The file should look like the following: 6. In the command-line terminal, run the following command to export myserver.pfx from myserver.key and myserver.crt: When prompted, define a password to secure the .pfx file. If your CA uses intermediate certificates, you must include them with the -certfile parameter. They usually come as a separate download from your CA, and in several formats for different web server types. Select the version with the .pem extension). Your openssl -export command should look like the following example, which creates a .pfx file that includes the intermediate certificates from the intermediate-cets.pem file: openssl pkcs12 -chain -export -out myserver.pfx -inkey myserver.key -in myserver.crt -certfile intermediate-cets.pem You are now ready to upload the exported PFX file to App Service. See Step 2. Upload and bind the custom SSL certificate.
- 473. IMPORTANT IMPORTANT Self-signed certificates are for test purposes only. Most browsers return errors when visiting a website that's secured by a self-signed certificate. Some browsers may even refuse to navigate to the site. [NewRequest] Subject = "CN=<your-domain>" ; E.g. "CN=www.contoso.com", or "CN=*.contoso.com" for a wildcard certificate Exportable = TRUE KeyLength = 2048 ; KeyLength can be 2048, 4096, 8192, or 16384(required minimumis 2048) KeySpec = 1 KeyUsage = 0xA0 MachineKeySet = True ProviderName = "Microsoft RSA SChannelCryptographic Provider" ProviderType = 12 HashAlgorithm= SHA256 RequestType = Cert ; Self-signed certificate ValidityPeriod = Years ValidityPeriodUnits = 1 [EnhancedKeyUsageExtension] OID=1.3.6.1.5.5.7.3.1 ; Server Authentication certreq -newmycert.txt mycert.crt 1. Create a text file (e.g. mycert.txt), copy into it the following text, and save the file in a working directory. Replace the <your-domain> placeholder with the custom domain name of your app. The important parameter is RequestType = Cert , which specifies a self-signed certificate. For more information on the options in the CSR, and other available options, see the Certreq reference documentation. 2. In the command prompt, CD to your working directory and run the following command: Your new self-signed certificate is now installed in the certificate store. 3. To export the certificate from the certificate store, press Win + R and run certmgr.msc to launch Certificate Manager. Select Personal > Certificates. In the Issued To column, you should see an entry with your custom domain name, and the CA you used to generate the certificate in the Issued By column. 4. Right-click the certificate and select All Tasks > Export. In the Certificate Export Wizard, click Next, then select Yes, export the private key, and then click Next again.
- 474. 5. Select Personal Information Exchange - PKCS #12, Include all certificates in the certificate path if possible, and Export all extended properties. Then, click Next. 6. Select Password, and then enter and confirm the password. Click Next.
- 475. Generate a self-signed certificate using OpenSSL Generate a self-signed certificate using OpenSSL 7. Provide a path and filename for the exported certificate, with the extension .pfx. Click Next to finish. You are now ready to upload the exported PFX file to App Service. See Step 2. Upload and bind the custom SSL certificate.
- 476. IMPORTANT IMPORTANT Step 2. Upload and bind the custom SSL certificate Self-signed certificates are for test purposes only. Most browsers return errors when visiting a website that's secured by a self-signed certificate. Some browsers may even refuse to navigate to the site. [ req ] default_bits = 2048 default_keyfile = privkey.pem distinguished_name = req_distinguished_name attributes = req_attributes x509_extensions = v3_ca [ req_distinguished_name ] countryName = Country Name (2letter code) countryName_min = 2 countryName_max = 2 stateOrProvinceName = State or Province Name (fullname) localityName = Locality Name (eg, city) 0.organizationName = Organization Name (eg, company) organizationalUnitName = OrganizationalUnit Name (eg, section) commonName = Common Name (eg, your app's domain name) commonName_max = 64 emailAddress = EmailAddress emailAddress_max = 40 [ req_attributes ] challengePassword = A challenge password challengePassword_min = 4 challengePassword_max = 20 [ v3_ca ] subjectKeyIdentifier=hash authorityKeyIdentifier=keyid:always,issuer:always basicConstraints = CA:false keyUsage=nonRepudiation, digitalSignature, keyEncipherment extendedKeyUsage = serverAuth opensslreq -sha256-x509-nodes -days 365-newkey rsa:2048-keyout myserver.key -out myserver.crt -config serverauth.cnf opensslpkcs12-export -out myserver.pfx-inkey myserver.key -in myserver.crt 1. Create a text file named serverauth.cnf, then copy the following content into it, and then save it in a working directory: 2. In a command-line terminal, CD into your working directory and run the following command: This command creates two files: myserver.crt (the self-signed certificate) and myserver.key (the private key), based on the settings in serverauth.cnf. 3. Export the certificate to a .pfx file by running the following command: When prompted, define a password to secure the .pfx file. You are now ready to upload the exported PFX file to App Service. See Step 2. Upload and bind the custom SSL certificate.
- 477. Step 3. Change your domain name mapping (IP based SSL only) Before you move on, review the What you need section and verify that: you have a custom domain that maps to your Azure app, your app is running in Basic tier or higher, and you have an SSL certificate for the custom domain from a CA. 1. In your browser, open the Azure Portal. 2. Click the App Service option on the left side of the page. 3. Click the name of your app to which you want to assign this certificate. 4. In the Settings, Click SSL certificates 5. Click Upload Certificate 6. Select the .pfx file that you exported in Step 1 and specify the password that you create before. Then, click Upload to upload the certificate. You should now see your uploaded certificate back in the SSL certificate blade. 7. In the ssl bindings section Click on Add bindings NOTE NOTE 8. In the Add SSL Binding blade use the dropdowns to select the domain name to secure with SSL, and the certificate to use. You may also select whether to use Server Name Indication (SNI) or IP based SSL. IP based SSL associates a certificate with a domain name by mapping the dedicated public IP address of the server to the domain name. This requires each domain name (contoso.com, fabricam.com, etc.) associated with your service to have a dedicated IP address. This is the traditional method of associating SSL certificates with a web server. SNI based SSL is an extension to SSL and Transport Layer Security (TLS) that allows multiple domains to share the same IP address, with separate security certificates for each domain. Most modern browsers (including Internet Explorer, Chrome, Firefox and Opera) support SNI, however older browsers may not support SNI. For more information on SNI, see the Server Name Indication article on Wikipedia. 9. Click Add Binding to save the changes and enable SSL. If you use SNI SSL bindings only, skip this section. Multiple SNI SSL bindings can work together on the existing shared IP address assigned to your app. However, if you create an IP based SSL binding, App Service creates a dedicated IP address for the binding because the IP based SSL requires one. Only one dedicated IP address can be created, therefore only one IP based SSL binding may be added. Because of this dedicated IP address, you will need to configure your app further if:
- 478. Step 4. Test HTTPS for your custom domain Enforce HTTPS on your app NOTE NOTE You used an A record to map your custom domain to your Azure app, and you just added an IP based SSL binding. In this scenario, you need to remap the existing A record to point to the dedicated IP address by following these steps: 2. Remap the A record for your custom domain name to this new IP address. 1. After you have configured an IP based SSL binding, a dedicated IP address is assigned to your app. You can find this IP address on the Custom domain page under settings of your app, right above the Hostnames section. It will be listed as External IP Address You already have one or more SNI SSL bindings in your app, and you just added an IP based SSL binding. Once the binding is complete, your <appname>.azurewebsites.net domain name points to the new IP address. Therefore, any existing CNAME mapping from the custom domain to <appname>.azurewebsites.net, including the ones that the SNI SSL secure, also receives traffic on the new address, which is created for the IP based SSL only. In this scenario, you need to send the SNI SSL traffic back to the original shared IP address by following these steps: 1. Identify all CNAME mappings of custom domains to your app that has an SNI SSL binding. 2. Remap each CNAME record to sni.<appname>.azurewebsites.net instead of <appname>.azurewebsites.net. All that's left to do now is to make sure that HTTPS works for your custom domain. In various browsers, browse to https://<your.custom.domain> to see that it serves up your app. If your app gives you certificate validation errors, you're probably using a self-signed certificate. If that's not the case, you may have left out intermediate certificates when you export your .pfx certificate. Go back to What you need to verify that your CSR meets all the requirements by App Service. If you still want to allow HTTP access to your app, skip this step. App Service does not enforce HTTPS, so visitors can still access your app using HTTP. If you want to enforce HTTPS for your app, you can define a rewrite rule in the web.config file for your app. Every App Service app has this file, regardless of the language framework of your app. There is language-specific redirection of requests. ASP.NET MVC can use the RequireHttps filter instead of the rewrite rule in web.config (see Deploy a secure ASP.NET MVC 5 app to a web app). Follow these steps: 1. Navigate to the Kudu debug console for your app. Its address is https://<appname>.scm.azurewebsites.net/DebugConsole . 2. In the debug console, CD to D:homesitewwwroot .
- 479. More Resources <?xmlversion="1.0" encoding="UTF-8"?> <configuration> <system.webServer> <rewrite> <rules> <!-- BEGINrule TAGFORHTTPS REDIRECT --> <rule name="Force HTTPS" enabled="true"> <match url="(.*)" ignoreCase="false" /> <conditions> <add input="{HTTPS}" pattern="off" /> </conditions> <action type="Redirect" url="https://{HTTP_HOST}/{R:1}" appendQueryString="true" redirectType="Permanent" /> </rule> <!-- ENDrule TAGFORHTTPS REDIRECT --> </rules> </rewrite> </system.webServer> </configuration> IMPORTANT IMPORTANT 5. Save the file in the Kudu debug console. It should take effect immediately redirect all requests to HTTPS. 3. Open web.config by clicking the pencil button. If you deploy your app with Visual Studio or Git, App Service automatically generates the appropriate web.config for your .NET, PHP, Node.js, or Python app in the application root. If web.config doesn't exist, run touch web.config in the web-based command prompt to create it. Or, you can create it in your local project and redeploy your code. 4. If you had to create a web.config , copy the following code into it and save it. If you opened an existing web.config, then you just need to copy the entire <rule> tag into your web.config 's configuration/system.webServer/rewrite/rules element. This rule returns an HTTP 301 (permanent redirect) to the HTTPS protocol whenever the user requests a page using HTTP. It redirects from http://contoso.com to https://contoso.com. If there are already other <rule> tags in your web.config , then place the copied <rule> tag before the other <rule> tags. For more information on the IIS URL Rewrite module, see the URL Rewrite documentation. Microsoft Azure Trust Center Configuration options unlocked in Azure Web Sites Enable diagnostic logging Configure web apps in Azure App Service
- 480. NOTE NOTE Azure Management Portal If you want to get started with Azure App Service before signing up for an Azure account, go to Try App Service, where you can immediately create a short-lived starter app in App Service. No credit cards required; no commitments.
- 481. How To Configure TLS Mutual Authentication for Web App 3/22/2017 • 4 min to read • Edit Online Overview NOTE NOTE Configure Web App for Client Certificate Authentication ARMClient PUT subscriptions/{Subscription Id}/resourcegroups/{Resource Group Name}/providers/Microsoft.Web/sites/{Website Name}? api-version=2015-04-01@enableclientcert.json -verbose { "location":"My Web App Location", "properties":{ "clientCertEnabled":true } } You can restrict access to your Azure web app by enabling different types of authentication for it. One way to do so is to authenticate using a client certificate when the request is over TLS/SSL. This mechanism is called TLS mutual authentication or client certificate authentication and this article will detail how to setup your web app to use client certificate authentication. Note: If you access your site over HTTP and not HTTPS, you will not receive any client certificate. So if your application requires client certificates you should not allow requests to your application over HTTP. Although this article refers to web apps, it also applies to API apps and mobile apps. To setup your web app to require client certificates you need to add the clientCertEnabled site setting for your web app and set it to true. This setting is not currently available through the management experience in the Portal, and the REST API will need to be used to accomplish this. You can use the ARMClient tool to make it easy to craft the REST API call. After you log in with the tool you will need to issue the following command: replacing everything in {} with information for your web app and creating a file called enableclientcert.json with the following JSON content: Make sure to change the value of "location" to wherever your web app is located e.g. North Central US or West US etc. You can also use https://resources.azure.com to flip the clientCertEnabled property to true . Note: If you run ARMClient from Powershell, you will need to escape the @ symbol for the JSON file with a back tick `.
- 482. Accessing the Client Certificate From Your Web App Special Considerations for Certificate Validation using System; using System.Collections.Specialized; using System.Security.Cryptography.X509Certificates; using System.Web; namespace ClientCertificateUsageSample { public partialclass cert :System.Web.UI.Page { public string certHeader = ""; public string errorString = ""; private X509Certificate2certificate = null; public string certThumbprint = ""; public string certSubject = ""; public string certIssuer = ""; public string certSignatureAlg = ""; public string certIssueDate = ""; public string certExpiryDate = ""; public boolisValidCert = false; // // Read the certificate fromthe header into an X509Certificate2object // Display properties of the certificate on the page // protected void Page_Load(object sender, EventArgs e) { NameValueCollection headers = base.Request.Headers; certHeader = headers["X-ARR-ClientCert"]; if (!String.IsNullOrEmpty(certHeader)) { try { byte[] clientCertBytes = Convert.FromBase64String(certHeader); certificate = newX509Certificate2(clientCertBytes); certSubject = certificate.Subject; certIssuer = certificate.Issuer; certThumbprint = certificate.Thumbprint; certSignatureAlg = certificate.SignatureAlgorithm.FriendlyName; certIssueDate = certificate.NotBefore.ToShortDateString() + " " + certificate.NotBefore.ToShortTimeString(); certExpiryDate = certificate.NotAfter.ToShortDateString() + " " + certificate.NotAfter.ToShortTimeString(); } catch (Exception ex) { errorString = ex.ToString(); } finally { isValidCert = IsValidClientCertificate(); if (!isValidCert) Response.StatusCode = 403; else Response.StatusCode = 200; } If you are using ASP.NET and configure your app to use client certificate authentication, the certificate will be available through the HttpRequest.ClientCertificate property. For other application stacks, the client cert will be available in your app through a base64 encoded value in the "X-ARR-ClientCert" request header. Your application can create a certificate from this value and then use it for authentication and authorization purposes in your application. The client certificate that is sent to the application does not go through any validation by the Azure Web Apps platform. Validating this certificate is the responsibility of the web app. Here is sample ASP.NET code that validates certificate properties for authentication purposes.
- 483. } } else { certHeader = ""; } } // // This is a SAMPLEverification routine. Depending on your application logic and security requirements, // you should modify this method // private boolIsValidClientCertificate() { // In this example we willonly accept the certificate as a valid certificate if allthe conditions beloware met: // 1. The certificate is not expired and is active for the current time on server. // 2. The subject name of the certificate has the common name nildevecc // 3. The issuer name of the certificate has the common name nildevecc and organization name Microsoft Corp // 4. The thumbprint of the certificate is 30757A2E831977D8BD9C8496E4C99AB26CB9622B // // This example does NOT test that this certificate is chained to a Trusted Root Authority (or revoked) on the server // and it allows for self signed certificates // if (certificate == null|| !String.IsNullOrEmpty(errorString)) return false; // 1. Checktime validity of certificate if (DateTime.Compare(DateTime.Now, certificate.NotBefore) < 0|| DateTime.Compare(DateTime.Now, certificate.NotAfter) > 0) return false; // 2. Checksubject name of certificate boolfoundSubject = false; string[] certSubjectData = certificate.Subject.Split(newchar[] { ',' }, StringSplitOptions.RemoveEmptyEntries); foreach (string s in certSubjectData) { if (String.Compare(s.Trim(), "CN=nildevecc") == 0) { foundSubject = true; break; } } if (!foundSubject) return false; // 3. Checkissuer name of certificate boolfoundIssuerCN= false, foundIssuerO= false; string[] certIssuerData = certificate.Issuer.Split(newchar[] { ',' }, StringSplitOptions.RemoveEmptyEntries); foreach (string s in certIssuerData) { if (String.Compare(s.Trim(), "CN=nildevecc") == 0) { foundIssuerCN= true; if (foundIssuerO) break; } if (String.Compare(s.Trim(), "O=Microsoft Corp") == 0) { foundIssuerO= true; if (foundIssuerCN) break; } } if (!foundIssuerCN|| !foundIssuerO) return false; // 4. Checkthumprint of certificate if (String.Compare(certificate.Thumbprint.Trim().ToUpper(), "30757A2E831977D8BD9C8496E4C99AB26CB9622B") != 0) return false; // If you also want to test if the certificate chains to a Trusted Root Authority you can uncomment the code below // //X509Chain certChain = newX509Chain(); //certChain.Build(certificate); //boolisValidCertChain = true;
- 484. //boolisValidCertChain = true; //foreach (X509ChainElement chElement in certChain.ChainElements) //{ // if (!chElement.Certificate.Verify()) // { // isValidCertChain = false; // break; // } //} //if (!isValidCertChain) return false; return true; } } }
- 485. Scale up an app in Azure 3/8/2017 • 3 min to read • Edit Online NOTE NOTE Scale up your pricing tier This article shows you how to scale your app in Azure App Service. There are two workflows for scaling, scale up and scale out, and this article explains the scale up workflow. Scale up: Get more CPU, memory, disk space, and extra features like dedicated virtual machines (VMs), custom domains and certificates, staging slots, autoscaling, and more. You scale up by changing the pricing tier of the App Service plan that your app belongs to. Scale out: Increase the number of VM instances that run your app. You can scale out to as many as 20 instances, depending on your pricing tier. App Service Environments in Premium tier will further increase your scale-out count to 50 instances. For more information about scaling out, see Scale instance count manually or automatically. There you will find out how to use autoscaling, which is to scale instance count automatically based on predefined rules and schedules. The scale settings take only seconds to apply and affect all apps in your App Service plan. They do not require you to change your code or redeploy your application. For information about the pricing and features of individual App Service plans, see App Service Pricing Details. Before you switch an App Service plan from the Free tier, you must first remove the spending limits in place for your Azure subscription. To view or change options for your Microsoft Azure App Service subscription, see Microsoft Azure Subscriptions. 1. In your browser, open the Azure portal. 2. In your app's blade, click All settings, and then click Scale Up.
- 486. Scale related resources 3. Choose your tier, and then click Select. The Notifications tab will flash a green SUCCESS after the operation is complete. If your app depends on other services, such as Azure SQL Database or Azure Storage, you can also scale up those resources based on your needs. These resources are not scaled with the App Service plan and must be scaled separately. 1. In Essentials, click the Resource group link. 2. In the Summary part of the Resource group blade, click a resource that you want to scale. The following screenshot shows a SQL Database resource and an Azure Storage resource.
- 487. 3. For a SQL Database resource, click Settings > Pricing tier to scale the pricing tier. You can also turn on geo-replication for your SQL Database instance. For an Azure Storage resource, click Settings > Configuration to scale up your storage options.
- 488. Learn about developer features Bitness Bitness Debugger support Debugger support Learn about other features NOTE NOTE Next steps Depending on the pricing tier, the following developer-oriented features are available: The Basic, Standard, and Premium tiers support 64-bit and 32-bit applications. The Free and Shared plan tiers support 32-bit applications only. Debugger support is available for the Free, Shared, and Basic modes at one connection per App Service plan. Debugger support is available for the Standard and Premium modes at five concurrent connections per App Service plan. For detailed information about all of the remaining features in the App Service plans, including pricing and features of interest to all users (including developers), see App Service Pricing Details. If you want to get started with Azure App Service before you sign up for an Azure account, go to Try App Service where you can immediately create a short-lived starter web app in App Service. No credit cards are required and there are no commitments. To get started with Azure, see Microsoft Azure Free Trial. For information about pricing, support, and SLA, visit the following links. Data Transfers Pricing Details Microsoft Azure Support Plans Service Level Agreements SQL Database Pricing Details
- 489. For information about Azure App Service best practices, including building a scalable and resilient architecture, see Best Practices: Azure App Service Web Apps. Virtual Machine and Cloud Service Sizes for Microsoft Azure App Service Pricing Details App Service Pricing Details - SSL Connections For videos about scaling App Service apps, see the following resources: When to Scale Azure Websites - with Stefan Schackow Auto Scaling Azure Websites, CPU or Scheduled - with Stefan Schackow How Azure Websites Scale - with Stefan Schackow
- 490. Scale instance count manually or automatically 1/23/2017 • 6 min to read • Edit Online NOTE NOTE Scaling manually In the Azure Portal, you can manually set the instance count of your service, or, you can set parameters to have it automatically scale based on demand. This is typically referred to as Scale out or Scale in. Before scaling based on instance count, you should consider that scaling is affected by Pricing tier in addition to instance count. Different pricing tiers can have different numbers cores and memory, and so they will have better performance for the same number of instances (which is Scale up or Scale down). This article specifically covers Scale in and out. You can scale in the portal, and you can also use the REST API or .NET SDK to adjust scale manually or automatically. This article describes how to create an autoscale setting in the portal at http://portal.azure.com. Autoscale settings created in this portal cannot be edited it the classic portal (http://manage.windowsazure.com). 1. In the Azure Portal, click Browse, then navigate to the resource you want to scale, such as a App Service plan. 2. The Scale tile in Operations will tell you the status of scaling: Off for when you are scaling manually, On for when you are scaling by one or more performance metrics. 3. Clicking on the tile will take you to the Scale blade. At the top of the scale blade you can see a history of autoscale actions the service.
- 491. Scaling based on a pre-set metric NOTE NOTE 4. You can manually adjust the number Instances with slider. 5. Click the Save command and you'll be scaled to that number of instances almost immediately. Only actions that are performed by autoscale will show up in this chart. If you manually adjust the instance count, the change will not be reflected in this chart. If you want the number of instances to automatically adjust based on a metric, select the metric you want in the Scale by dropdown. For example, for an App Service plan you can scale by CPU Percentage. 1. When you select a metric you'll get a slider, and/or, text boxes to enter the number of instances you want to scale between:
- 492. Scale based on other metrics Adding or changing a rule Adding or changing a rule 2. Second, you choose the target range for the metric. For example, if you chose CPU percentage, you can set a target for the average CPU across all of the instances in your service. A scale out will happen when the average CPU exceeds the maximum you define, likewise, a scale in will happen whenever the average CPU drops below the minimum. 3. Click the Save command. Autoscale will check every few minutes to make sure that you are in the instance range and target for your metric. When your service receives additional traffic, you will get more instances without doing anything. Autoscale will never take your service below or above the boundaries that you set, no matter your load. You can scale based on metrics other than the presets that appear in the Scale by dropdown, and can even have a complex set of scale out and scale in rules. 1. Choose the schedule and performance rules in the Scale by dropdown:
- 493. 2. If you previously had autoscale, on you'll see a view of the exact rules that you had. 3. To scale based on another metric click the Add Rule row. You can also click one of the existing rows to change from the metric you previously had to the metric you want to scale by. 5. After choosing your metric you choose the threshold for the metric, and the operator. For example, you could say Greater than 80%. 4. Now you need to select which metric you want to scale by. When choosing a metric there are a couple things to consider: The resource the metric comes from. Typically, this will be the same as the resource you are scaling. However, if you want to scale by the depth of a Storage queue, the resource is the queue that you want to scale by. The metric name itself. The time aggregation of the metric. This is how the data is combine over the duration. 6. Then choose the action that you want to take. There are a couple different type of actions: Increase or decrease by - this will add or remove the Value number of instances you define
- 494. Scaling with multiple steps Scaling with multiple steps Scale based on a schedule 7. Finally, you can choose cool down - how long this rule should wait after the previous scale action to scale again. 8. After configuring your rule hit OK. 9. Once you have configured all of the rules you want, be sure to hit the Save command. Increase or decrease percent - this will change the instance count by a percent. For example, you could put 25 in the Value field, and if you currently had 8 instances, 2 would be added. Increase or decrease to - this will set the instance count to the Value you define. The examples above are pretty basic. However, if you want to be more agressive about scaling up (or down), you can even add multiple scale rules for the same metric. For example, you can define two scale rules on CPU percentage: 1. Scale out by 1 instance if CPU percentage is above 60% 2. Scale out by 3 instances if CPU percentage is above 85% With this additional rule, if your load exceeds 85% before a scale action, you will get two additional instances instead of one. By default, when you create a scale rule it will always apply. You can see that when you click on the profile header:
- 495. However, you may want to have more agressive scaling during the day, or the week, than on the weekend. You could even shut down your service entirely off working hours. 1. To do this, on the profile you have, select recurrence instead of always, and choose the times that you want the profile to apply. 2. For example, to have a profile that applies during the week, in the Days dropdown uncheck Saturday and Sunday. 3. To have a profile that applies during the daytime, set the Start time to the time of day that you want to start at.
- 496. 4. Click OK. 5. Next, you will need to add the profile that you want to apply at other times. Click the Add Profile row. 6. Name your new, second, profile, for example you could call it Off work. 7. Then select recurrence again, and choose the instance count range you want during this time. 8. As with the Default profile, choose the Days you want this profile to apply to, and the Start time during the
- 497. Next steps NOTE NOTE 9. Click OK. 11. Be sure to create both a rule for scale out and scale in, or else during the profile the instance count will only grow (or decrease). 12. Finally, click Save. day. Autoscale will use the Daylight savings rules for whichever Time zone you select. However, during Daylight savings time the UTC offset will show the base Time zone offset, not the Daylight savings UTC offset. 10. Now, you will need to add whatever rules you want to apply during your second profile. Click Add Rule, and then you could construct the same rule you have during the Default profile. Monitor service metrics to make sure your service is available and responsive. Enable monitoring and diagnostics to collect detailed high-frequency metrics on your service. Receive alert notifications whenever operational events happen or metrics cross a threshold. Monitor application performance if you want to understand exactly how your code is performing in the cloud. View events and activity log to learn everything that has happened in your service. Monitor availability and responsiveness of any web page with Application Insights so you can find out if your
- 498. page is down.
- 499. Controlling Azure web app traffic with Azure Traffic Manager 2/28/2017 • 3 min to read • Edit Online NOTE NOTE Introduction Load Balancing Methods Web Apps and Traffic Manager Profiles This article provides summary information for Microsoft Azure Traffic Manager as it relates to Azure App Service Web Apps. More information about Azure Traffic Manager itself can be found by visiting the links at the end of this article. You can use Azure Traffic Manager to control how requests from web clients are distributed to web apps in Azure App Service. When web app endpoints are added to a Azure Traffic Manager profile, Azure Traffic Manager keeps track of the status of your web apps (running, stopped or deleted) so that it can decide which of those endpoints should receive traffic. Azure Traffic Manager uses three different load balancing methods. These are described in the following list as they pertain to Azure web apps. Failover: If you have web app clones in different regions, you can use this method to configure one web app to service all web client traffic, and configure another web app in a different region to service that traffic in case the first web app becomes unavailable. Round Robin: If you have web app clones in different regions, you can use this method to distribute traffic equally across the web apps in different regions. Performance: The Performance method distributes traffic based on the shortest round trip time to clients. The Performance method can be used for web apps within the same region or in different regions. To configure the control of web app traffic, you create a profile in Azure Traffic Manager that uses one of the three load balancing methods described previously, and then add the endpoints (in this case, web apps) for which you want to control traffic to the profile. Your web app status (running, stopped or deleted) is regularly communicated to the profile so that Azure Traffic Manager can direct traffic accordingly. When using Azure Traffic Manager with Azure, keep in mind the following points: For web app only deployments within the same region, Web Apps already provides failover and round-robin functionality without regard to web app mode. For deployments in the same region that use Web Apps in conjunction with another Azure cloud service, you can combine both types of endpoints to enable hybrid scenarios. You can only specify one web app endpoint per region in a profile. When you select a web app as an endpoint for one region, the remaining web apps in that region become unavailable for selection for that profile. The web app endpoints that you specify in a Azure Traffic Manager profile will appear under the Domain Names section on the Configure page for the web app in the profile, but will not be configurable there. After you add a web app to a profile, the Site URL on the Dashboard of the web app's portal page will display the custom domain URL of the web app if you have set one up. Otherwise, it will display the Traffic Manager
- 500. Next Steps profile URL (for example, contoso.trafficmgr.com ). Both the direct domain name of the web app and the Traffic Manager URL will be visible on the web app's Configure page under the Domain Names section. Your custom domain names will work as expected, but in addition to adding them to your web apps, you must also configure your DNS map to point to the Traffic Manager URL. For information on how to set up a custom domain for a Azure web app, see Configuring a custom domain name for an Azure web site. You can only add web apps that are in standard mode to a Azure Traffic Manager profile. For a conceptual and technical overview of Azure Traffic Manager, see Traffic Manager Overview. For more information about using Traffic Manager with Web Apps, see the blog posts Using Azure Traffic Manager with Azure Web Sites and Azure Traffic Manager can now integrate with Azure Web Sites.
- 501. App Service Environment Documentation 2/28/2017 • 1 min to read • Edit Online How To's Videos An App Service Environment is a Premium service plan option of Azure App Service that provides a fully isolated and dedicated environment for securely running Azure App Service apps at high scale, including Web Apps, Mobile Apps, and API Apps. App Service Environments are ideal for application workloads requiring: Very high scale Isolation and secure network access Customers can create multiple App Service Environments within a single Azure region, as well as across multiple Azure regions. This makes App Service Environments ideal for horizontally scaling state-less application tiers in support of high RPS workloads. App Service Environments are isolated to running only a single customer's applications, and are always deployed into a virtual network. Customers have fine-grained control over both inbound and outbound application network traffic using network security groups. Applications can also establish high-speed secure connections over virtual networks to on-premises corporate resources. Apps frequently need to access corporate resources such as internal databases and web services. Apps running on App Service Environments can access resources reachable via Site-to-Site VPN and Azure ExpressRoute connections. What is an App Service Environment? Creating an App Service Environment Creating Apps in an App Service Environment Creating and Using an Internal Load Balancer with App Service Environments Configuring an App Service Environment Scaling Apps in an App Service Environment Network Security and Architecture Setting Up a Geo-Distributed App Footprint Implementing a Layered Security Architecture Configuring a Web Application Firewall with an App Service Environment Creating an ILB Enabled App Service Environment using Resource Manager Templates Using Auto-Scale with an App Service Environment Securing Inbound Traffic Connecting to Backend Resources ExpressRoute and App Service Environments Custom Configuration Settings for App Service Environments Including PCI Compliance Settings High Density App Hosting with App Service Environments
- 503. Use Azure CDN in Azure App Service 2/28/2017 • 19 min to read • Edit Online NOTE NOTE What you will build What you will need NOTE NOTE Deploy a web app to Azure with an integrated CDN endpoint App Service can be integrated with Azure CDN, adding to the global scaling capabilities inherent in App Service Web Apps by serving your web app content globally from server nodes near your customers (an updated list of all current node locations can be found here). In scenarios like serving static images, this integration can dramatically increase the performance of your Azure App Service Web Apps and significantly improves your web app's user experience worldwide. Integrating Web Apps with Azure CDN gives you the following advantages: Integrate content deployment (images, scripts, and stylesheets) as part of your web app's continuous deployment process Easily upgrade the NuGet packages in your web app in Azure App Service, such as jQuery or Bootstrap versions Manage your Web application and your CDN-served content from the same Visual Studio interface Integrate ASP.NET bundling and minification with Azure CDN Although this article refers to web apps, it also applies to API apps and mobile apps. You will deploy a web app to Azure App Service using the default ASP.NET MVC template in Visual Studio, add code to serve content from an integrated Azure CDN, such as an image, controller action results, and the default JavaScript and CSS files, and also write code to configure the fallback mechanism for bundles served in the event that the CDN is offline. This tutorial has the following prerequisites: An active Microsoft Azure account Visual Studio 2015 with the Azure SDK for .NET. If you use Visual Studio, the steps may vary. You need an Azure account to complete this tutorial: You can open an Azure account for free - You get credits you can use to try out paid Azure services, and even after they're used up you can keep the account and use free Azure services, such as Web Apps. You can activate Visual Studio subscriber benefits - Your Visual Studio subscription gives you credits every month that you can use for paid Azure services. If you want to get started with Azure App Service before signing up for an Azure account, go to Try App Service, where you can immediately create a short-lived starter web app in App Service. No credit cards required; no commitments. In this section, you will deploy the default ASP.NET MVC application template in Visual Studio 2015 to App Service,
- 504. and then integrate it with a new CDN endpoint. Follow the instructions below: 1. In Visual Studio 2015, create a new ASP.NET web application from the menu bar by going to File > New > Project > Web > ASP.NET Web Application. Give it a name and click OK. 2. Select MVC and click OK. 3. If you haven't logged into your Azure account yet, click the account icon in the upper-right corner and follow the dialog to log into your Azure account. Once you're done, configure your app as shown below, then click
- 505. New to create a new App Service plan for your app. 4. Configure a new App Service plan in the dialog as shown below and click OK. 5. Click Create to create the web app.
- 506. 7. To create a CDN endpoint, log into the Azure portal. 6. Once your ASP.NET application is created, publish it to Azure in the Azure App Service Activity pane by clicking Publish <app name> to this Web App now. Click Publish to complete the process. You will see your published web app in the browser when publishing is complete. 8. Click + New > Media + CDN > CDN.
- 507. 9. Specify the CDN, Location, Resource group, Pricing tier, then click Create
- 508. 10. In the CDN Profile blade click on + Endpoint button. Give it a name, select Web App in the Origin Type dropdown and your web app in the Origin hostname dropdown, then click Add.
- 509. [AZURE.NOTE] Once your CDN endpoint is created, the Endpoint blade will show you its CDN URL and the origin domain that it's integrated with. However, it can take a while for the new CDN endpoint's configuration to be fully propagated to all the CDN node locations. 11. Back in the Endpoint blade, click the name of the CDN endpoint you just created. 12. Click the Configure button. In the Configure blade, select Cache every unique URL in Query string caching behavior dropdown, then click the Save button.
- 510. NOTE NOTE Once you enable this, the same link accessed with different query strings will be cached as separate entries. While enabling the query string is not necessary for this tutorial section, you want to do this as early as possible for convenience since any change here is going to take time to propagate to all the CDN nodes, and you don't want any non- query-string-enabled content to clog up the CDN cache (updating CDN content will be discussed later). 1. Now, navigate to the CDN endpoint address. If the endpoint is ready, you should see your web app displayed. If you get an HTTP 404 error, the CDN endpoint is not ready. You may need to wait up to an hour for the CDN configuration to be propagated to all the edge nodes.
- 511. http://az673227.azureedge.net/Content/bootstrap.css http://cdnwebapp.azurewebsites.net/Content/bootstrap.css 2. Next, try to access the ~/Content/bootstrap.css file in your ASP.NET project. In the browser window, navigate to http://<cdnName>.azureedge.net/Content/bootstrap.css. In my setup, this URL is: Which corresponds to the following origin URL at the CDN endpoint: When you navigate to http://<cdnName>.azureedge.net/Content/bootstrap.css, you will be prompted to download the bootstrap.css that came from your web app in Azure. You can similarly access any publicly accessible URL at http://<serviceName>.cloudapp.net/, straight from your CDN endpoint. For example: A .js file from the /Script path Any content file from the /Content path Any controller/action If the query string is enabled at your CDN endpoint, any URL with query strings The entire Azure web app, if all content is public Note that it may not be always a good idea (or generally a good idea) to serve an entire Azure web app through Azure CDN. Some of the caveats are: This approach requires your entire site to be public, because Azure CDN cannot serve any private content. If the CDN endpoint goes offline for any reason, whether scheduled maintenance or user error, your entire web app goes offline unless the customers can be redirected to the origin URL http://<sitename>.azurewebsites.net/. Even with the custom Cache-Control settings (see Configure caching options for static files in your Azure web app), a CDN endpoint does not improve the performance of highly-dynamic content. If you tried to load the home page from your CDN endpoint as shown above, notice that it took at least 5 seconds to load the default home page the first time, which is a fairly simple page. Imagine what would happen to the client experience if this page contains dynamic content that must update every minute. Serving dynamic content from a CDN
- 512. Configure caching options for static files in your Azure web app <system.webServer> <staticContent> <clientCache cacheControlMode="UseMaxAge" cacheControlMaxAge="3.00:00:00"/> </staticContent> ... </system.webServer> <?xmlversion="1.0"?> <configuration> <system.webServer> <staticContent> <clientCache cacheControlMode="UseMaxAge" cacheControlMaxAge="15.00:00:00"/> </staticContent> </system.webServer> </configuration> Serve content from controller actions through Azure CDN endpoint requires short cache expiration, which translates to frequent cache misses at the CDN endpoint. This hurts the performance of your Azure web app and defeats the purpose of a CDN. The alternative is to determine which content to serve from Azure CDN on a case-by-case basis in your Azure web app. To that end, you have already seen how to access individual content files from the CDN endpoint. I will show you how to serve a specific controller action through the CDN endpoint in Serve content from controller actions through Azure CDN. With Azure CDN integration in your Azure web app, you can specify how you want static content to be cached in the CDN endpoint. To do this, open Web.config from your ASP.NET project (e.g. cdnwebapp) and add a <staticContent> element to <system.webServer> . The XML below configures the cache to expire in 3 days. Once you do this, all static files in your Azure web app will observe the same rule in your CDN cache. For more granular control of cache settings, add a Web.config file into a folder and add your settings there. For example, add a Web.config file to the Content folder and replace the content with the following XML: This setting causes all static files from the Content folder to be cached for 15 days. For more information on how to configure the <clientCache> element, see Client Cache <clientCache>. In the next section, I will also show you how you can configure cache settings for controller action results in the CDN cache. When you integrate Web Apps with Azure CDN, it is relatively easy to serve content from controller actions through the Azure CDN. Again, if you decide to serve the entire Azure web app through your CDN, you don't need to do this at all since all the controller actions are reachable through the CDN already. But for the reasons I already pointed out in Deploy an Azure web app with an integrated CDN endpoint, you may decide against this and choose instead to select the controller action you want to serve from Azure CDN. Maarten Balliauw shows you how to do it with a fun MemeGenerator controller in Reducing latency on the web with the Azure CDN. I will simply reproduce it here. Suppose in your web app you want to generate memes based on a young Chuck Norris image (photo by Alan Light) like this:
- 513. You have a simple Index action that allows the customers to specify the superlatives in the image, then generates the meme once they post to the action. Since it's Chuck Norris, you would expect this page to become wildly popular globally. This is a good example of serving semi-dynamic content with Azure CDN. Follow the steps above to setup this controller action: using System; using System.Collections.Generic; using System.Diagnostics; using System.Drawing; using System.IO; using System.Net; using System.Web.Hosting; using System.Web.Mvc; using System.Web.UI; namespace cdnwebapp.Controllers { public class MemeGeneratorController :Controller { static readonly Dictionary<string, Tuple<string ,string>> Memes = newDictionary<string, Tuple<string, string>>(); public ActionResult Index() { return View(); } [HttpPost, ActionName("Index")] public ActionResult Index_Post(string top, string bottom) { var identifier = Guid.NewGuid().ToString(); if (!Memes.ContainsKey(identifier)) { Memes.Add(identifier, newTuple<string, string>(top, bottom)); } return Content("<a href="" + Url.Action("Show", new{id = identifier}) + "">here's your meme</a>"); } 1. In the Controllers folder, create a new .cs file called MemeGeneratorController.cs and replace the content with the following code. Substitute your file path for ~/Content/chuck.bmp and your CDN name for yourCDNName .
- 514. [OutputCache(VaryByParam= "*", Duration = 1, Location = OutputCacheLocation.Downstream)] public ActionResult Show(string id) { Tuple<string, string> data = null; if (!Memes.TryGetValue(id, out data)) { return newHttpStatusCodeResult(HttpStatusCode.NotFound); } if (Debugger.IsAttached) // Preserve the debug experience { return Redirect(string.Format("/MemeGenerator/Generate?top={0}&bottom={1}", data.Item1, data.Item2)); } else // Get content fromAzure CDN { return Redirect(string.Format("http://<yourCDNName>.azureedge.net/MemeGenerator/Generate?top={0}&bottom={1}", data.Item1, data.Item2)); } } [OutputCache(VaryByParam= "*", Duration = 3600, Location = OutputCacheLocation.Downstream)] public ActionResult Generate(string top, string bottom) { string imageFilePath = HostingEnvironment.MapPath("~/Content/chuck.bmp"); Bitmap bitmap = (Bitmap)Image.FromFile(imageFilePath); using (Graphics graphics = Graphics.FromImage(bitmap)) { SizeF size = newSizeF(); using (Font arialFont = FindBestFitFont(bitmap, graphics, top.ToUpperInvariant(), newFont("ArialNarrow", 100), out size)) { graphics.DrawString(top.ToUpperInvariant(), arialFont, Brushes.White, newPointF(((bitmap.Width - size.Width) / 2), 10f)); } using (Font arialFont = FindBestFitFont(bitmap, graphics, bottom.ToUpperInvariant(), newFont("ArialNarrow", 100), out size)) { graphics.DrawString(bottom.ToUpperInvariant(), arialFont, Brushes.White, newPointF(((bitmap.Width - size.Width) / 2), bitmap.Height - 10f - arialFont.Height)); } } MemoryStreamms = newMemoryStream(); bitmap.Save(ms, System.Drawing.Imaging.ImageFormat.Png); return File(ms.ToArray(), "image/png"); } private Font FindBestFitFont(Image i, Graphics g, String text, Font font, out SizeF size) { // Compute actualsize, shrinkif needed while (true) { size = g.MeasureString(text, font); // It fits, backout if (size.Height < i.Height && size.Width < i.Width) { return font; } // Try a smaller font (90% of old size) Font oldFont = font; font = newFont(font.Name, (float)(font.Size * .9), font.Style); oldFont.Dispose(); } } } } 2. Right-click in the default Index() action and select Add View.
- 515. <h2>Meme Generator</h2> <formaction="" method="post"> <input type="text" name="top" placeholder="Enter top text here" /> <br /> <input type="text" name="bottom" placeholder="Enter bottomtext here" /> <br /> <input class="btn" type="submit" value="Generate meme" /> </form> 5. Publish to the Azure web app again and navigate to http://<serviceName>.cloudapp.net/MemeGenerator/Index in your browser. 3. Accept the settings below and click Add. 4. Open the new ViewsMemeGeneratorIndex.cshtml and replace the content with the following simple HTML for submitting the superlatives: When you submit the form values to /MemeGenerator/Index , the Index_Post action method returns a link to the Show action method with the respective input identifier. When you click the link, you reach the following code:
- 516. [OutputCache(VaryByParam= "*", Duration = 1, Location = OutputCacheLocation.Downstream)] public ActionResult Show(string id) { Tuple<string, string> data = null; if (!Memes.TryGetValue(id, out data)) { return newHttpStatusCodeResult(HttpStatusCode.NotFound); } if (Debugger.IsAttached) // Preserve the debug experience { return Redirect(string.Format("/MemeGenerator/Generate?top={0}&bottom={1}", data.Item1, data.Item2)); } else // Get content fromAzure CDN { return Redirect(string.Format("http://<yourCDNName>.azureedge.net/MemeGenerator/Generate?top={0}&bottom={1}", data.Item1, data.Item2)); } } http://<yourCDNName>.azureedge.net/MemeGenerator/Generate?top=<formInput>&bottom=<formInput> http://<yourSiteName>.azurewebsites.net/cdn/MemeGenerator/Generate?top=<formInput>&bottom=<formInput> http://<yourSiteName>.azurewebsites.net/MemeGenerator/Generate?top=<formInput>&bottom=<formInput> [OutputCache(VaryByParam= "*", Duration = 3600, Location = OutputCacheLocation.Downstream)] Integrate ASP.NET bundling and minification with Azure CDN If your local debugger is attached, then you will get the regular debug experience with a local redirect. If it's running in the Azure web app, then it will redirect to: Which corresponds to the following origin URL at your CDN endpoint: After URL rewrite rule previously applied, the actual file that gets cached to your CDN endpoint is: You can then use the OutputCacheAttribute attribute on the Generate method to specify how the action result should be cached, which Azure CDN will honor. The code below specify a cache expiration of 1 hour (3,600 seconds). Likewise, you can serve up content from any controller action in your Azure web app through your Azure CDN, with the desired caching option. In the next section, I will show you how to serve the bundled and minified scripts and CSS through Azure CDN. Scripts and CSS stylesheets change infrequently and are prime candidates for the Azure CDN cache. Serving the entire web app through your Azure CDN is the easiest way to integrate bundling and minification with Azure CDN. However, as you may elect against this approach for the reasons described in Integrate an Azure CDN endpoint with your Azure web app and serve static content in your Web pages from Azure CDN, I will show you how to do it while preserving the desired develper experience of ASP.NET bundling and minification, such as: Great debug mode experience Streamlined deployment Immediate updates to clients for script/CSS version upgrades
- 517. public static void RegisterBundles(BundleCollection bundles) { bundles.Add(newScriptBundle("~/bundles/jquery").Include( "~/Scripts/jquery-{version}.js")); ... } @Scripts.Render("~/bundles/jquery") <script src="/bundles/jquery?v=FVs3ACwOLIVInrAl5sdzR2jrCDmVOWFbZMY6g6Q0ulE1"></script> <script src="/Scripts/jquery-1.10.2.js"></script> Fallback mechanism when your CDN endpoint fails Minimize code modification In the ASP.NET project that you created in Integrate an Azure CDN endpoint with your Azure web app and serve static content in your Web pages from Azure CDN, open App_StartBundleConfig.cs and take a look at the bundles.Add() method calls. The first bundles.Add() statement adds a script bundle at the virtual directory ~/bundles/jquery . Then, open ViewsShared_Layout.cshtml to see how the script bundle tag is rendered. You should be able to find the following line of Razor code: When this Razor code is run in the Azure web app, it will render a <script> tag for the script bundle similar to the following: However, when it is run in Visual Studio by typing F5 , it will render each script file in the bundle individually (in the case above, only one script file is in the bundle): This enables you to debug the JavaScript code in your development environment while reducing concurrent client connections (bundling) and improving file download performance (minification) in production. It's a great feature to preserve with Azure CDN integration. Furthermore, since the rendered bundle already contains an automatically generated version string, you want to replicate that functionality so that whenever you update your jQuery version through NuGet, it can be updated at the client side as soon as possible. Follow the steps below to integration ASP.NET bundling and minification with your CDN endpoint. 1. Back in App_StartBundleConfig.cs, modify the bundles.Add() methods to use a different Bundle constructor, one that specifies a CDN address. To do this, replace the RegisterBundles method definition with the following code:
- 518. public static void RegisterBundles(BundleCollection bundles) { bundles.UseCdn = true; var version = System.Reflection.Assembly.GetAssembly(typeof(Controllers.HomeController)) .GetName().Version.ToString(); var cdnUrl= "http://<yourCDNName>.azureedge.net/{0}?" + version; bundles.Add(newScriptBundle("~/bundles/jquery", string.Format(cdnUrl, "bundles/jquery")).Include( "~/Scripts/jquery-{version}.js")); bundles.Add(newScriptBundle("~/bundles/jqueryval", string.Format(cdnUrl, "bundles/jqueryval")).Include( "~/Scripts/jquery.validate*")); // Use the development version of Modernizr to develop with and learn from. Then, when you're // ready for production, use the build toolat http://modernizr.comto pickonly the tests you need. bundles.Add(newScriptBundle("~/bundles/modernizr", string.Format(cdnUrl, "bundles/modernizr")).Include( "~/Scripts/modernizr-*")); bundles.Add(newScriptBundle("~/bundles/bootstrap", string.Format(cdnUrl, "bundles/bootstrap")).Include( "~/Scripts/bootstrap.js", "~/Scripts/respond.js")); bundles.Add(newStyleBundle("~/Content/css", string.Format(cdnUrl, "Content/css")).Include( "~/Content/bootstrap.css", "~/Content/site.css")); } newScriptBundle("~/bundles/jquery", string.Format(cdnUrl, "bundles/jquery")) newScriptBundle("~/bundles/jquery", string.Format(cdnUrl, "http://<yourCDNName>.azureedge.net/bundles/jquery?<W.X.Y.Z>")) [assembly:AssemblyVersion("1.0.0.*")] Be sure to replace <yourCDNName> with the name of your Azure CDN. In plain words, you are setting bundles.UseCdn = true and added a carefully crafted CDN URL to each bundle. For example, the first constructor in the code: is the same as: This constructor tells ASP.NET bundling and minification to render individual script files when debugged locally, but use the specified CDN address to access the script in question. However, note two important characteristics with this carefully crafted CDN URL: The origin for this CDN URL is http://<yourSiteName>.azurewebsites.net/bundles/jquery?<W.X.Y.Z> , which is actually the virtual directory of the script bundle in your Web application. Since you are using CDN constructor, the CDN script tag for the bundle no longer contains the automatically generated version string in the rendered URL. You must manually generate a unique version string every time the script bundle is modified to force a cache miss at your Azure CDN. At the same time, this unique version string must remain constant through the life of the deployment to maximize cache hits at your Azure CDN after the bundle is deployed. 2. The query string <W.X.Y.Z> pulls from PropertiesAssemblyInfo.cs in your ASP.NET project. You can have a deployment workflow that includes incrementing the assembly version every time you publish to Azure. Or, you can just modify PropertiesAssemblyInfo.cs in your project to automatically increment the version string every time you build, using the wildcard character '*'. For example, change AssemblyVersion as shown below:
- 519. Fallback mechanism for CDN URLs 3. Republish the ASP.NET application and access the home page. ... <linkhref="http://az673227.azureedge.net/Content/css?1.0.0.25449" rel="stylesheet"/> <script src="http://az673227.azureedge.net/bundles/modernizer?1.0.0.25449"></script> ... <script src="http://az673227.azureedge.net/bundles/jquery?1.0.0.25449"></script> <script src="http://az673227.azureedge.net/bundles/bootstrap?1.0.0.25449"></script> ... 5. In Visual Studio, debug the ASP.NET application in Visual Studio by typing F5 ., ... <linkhref="/Content/bootstrap.css" rel="stylesheet"/> <linkhref="/Content/site.css" rel="stylesheet"/> <script src="/Scripts/modernizr-2.6.2.js"></script> ... <script src="/Scripts/jquery-1.10.2.js"></script> <script src="/Scripts/bootstrap.js"></script> <script src="/Scripts/respond.js"></script> ... Any other strategy to streamline generating a unique string for the life of a deployment will work here. 4. View the HTML code for the page. You should be able to see the CDN URL rendered, with a unique version string every time you republish changes to your Azure web app. For example: 6. View the HTML code for the page. You will still see each script file individually rendered so that you can have a consistent debug experience in Visual Studio. When your Azure CDN endpoint fails for any reason, you want your Web page to be smart enough to access your origin Web server as the fallback option for loading JavaScript or Bootstrap. It's serious enough to lose images on your web app due to CDN unavailability, but much more severe to lose crucial page functionality provided by your scripts and stylesheets. The Bundle class contains a property called CdnFallbackExpression that enables you to configure the fallback mechanism for CDN failure. To use this property, follow the steps below: 1. In your ASP.NET project, open App_StartBundleConfig.cs, where you added a CDN URL in each Bundle constructor, and add CdnFallbackExpression code in four places as shown to add a fallback mechanism to the default bundles.
- 520. public static void RegisterBundles(BundleCollection bundles) { var version = System.Reflection.Assembly.GetAssembly(typeof(BundleConfig)) .GetName().Version.ToString(); var cdnUrl= "http://cdnurl.azureedge.net/.../{0}?" + version; bundles.UseCdn = true; bundles.Add(newScriptBundle("~/bundles/jquery", string.Format(cdnUrl, "bundles/jquery")) { CdnFallbackExpression = "window.jquery" } .Include("~/Scripts/jquery-{version}.js")); bundles.Add(newScriptBundle("~/bundles/jqueryval", string.Format(cdnUrl, "bundles/jqueryval")) { CdnFallbackExpression = "$.validator" } .Include("~/Scripts/jquery.validate*")); // Use the development version of Modernizr to develop with and learn from. Then, when you're // ready for production, use the build toolat http://modernizr.comto pickonly the tests you need. bundles.Add(newScriptBundle("~/bundles/modernizr", string.Format(cdnUrl, "bundles/modernizer")) { CdnFallbackExpression = "window.Modernizr" } .Include("~/Scripts/modernizr-*")); bundles.Add(newScriptBundle("~/bundles/bootstrap", string.Format(cdnUrl, "bundles/bootstrap")) { CdnFallbackExpression = "$.fn.modal" } .Include( "~/Scripts/bootstrap.js", "~/Scripts/respond.js")); bundles.Add(newStyleBundle("~/Content/css", string.Format(cdnUrl, "Content/css")).Include( "~/Content/bootstrap.css", "~/Content/site.css")); } 2. To use the workaround for CSS, create a new .cs file in your ASP.NET project's App_Start folder called StyleBundleExtensions.cs, and replace its content with the code from GitHub. 3. In App_StartStyleFundleExtensions.cs, rename the namespace to your ASP.NET application's namespace (e.g. cdnwebapp). bundles.Add(newStyleBundle("~/Content/css", string.Format(cdnUrl, "Content/css")) .IncludeFallback("~/Content/css", "sr-only", "width", "1px") .Include( "~/Content/bootstrap.css", "~/Content/site.css")); When CdnFallbackExpression is not null, script is injected into the HTML to test whether the bundle is loaded successfully and, if not, access the bundle directly from the origin Web server. This property needs to be set to a JavaScript expression that tests whether the respective CDN bundle is loaded properly. The expression needed to test each bundle differs according to the content. For the default bundles above: window.jquery is defined in jquery-{version}.js $.validator is defined in jquery.validate.js window.Modernizr is defined in modernizer-{version}.js $.fn.modal is defined in bootstrap.js You might have noticed that I did not set CdnFallbackExpression for the ~/Cointent/css bundle. This is because currently there is a bug in System.Web.Optimization that injects a <script> tag for the fallback CSS instead of the expected <link> tag. There is, however, a good Style Bundle Fallback offered by Ember Consulting Group. 4. Go back to App_StartBundleConfig.cs and replace the last bundles.Add statement with the following code:
- 521. 5. Publish to your Azure web app again and access the home page. ... <linkhref="http://az673227.azureedge.net/Content/css?1.0.0.25474" rel="stylesheet"/> <script>(function() { var loadFallback, len = document.styleSheets.length; for (var i= 0; i< len; i++) { var sheet = document.styleSheets[i]; if (sheet.href.indexOf('http://az673227.azureedge.net/Content/css?1.0.0.25474') !== -1) { var meta = document.createElement('meta'); meta.className = 'sr-only'; document.head.appendChild(meta); var value = window.getComputedStyle(meta).getPropertyValue('width'); document.head.removeChild(meta); if (value !== '1px') { document.write('<linkhref="/Content/css" rel="stylesheet" type="text/css" />'); } } } return true; }())||document.write('<script src="/Content/css"></script>');</script> <script src="http://az673227.azureedge.net/bundles/modernizer?1.0.0.25474"></script> <script>(window.Modernizr)||document.write('<script src="/bundles/modernizr"></script>');</script> ... <script src="http://az673227.azureedge.net/bundles/jquery?1.0.0.25474"></script> <script>(window.jquery)||document.write('<script src="/bundles/jquery"></script>');</script> <script src="http://az673227.azureedge.net/bundles/bootstrap?1.0.0.25474"></script> <script>($.fn.modal)||document.write('<script src="/bundles/bootstrap"></script>');</script> ... }())||document.write('<script src="/Content/css"></script>');</script> This new extension method uses the same idea to inject script in the HTML to check the DOM for the a matching class name, rule name, and rule value defined in the CSS bundle, and falls back to the origin Web server if it fails to find the match. 6. View the HTML code for the page. You should find injected scripts similar to the following: Note that injected script for the CSS bundle still contains the errant remnant from the CdnFallbackExpression property in the line: But since the first part of the || expression will always return true (in the line directly above that), the document.write() function will never run. 7. To test whether the fallback script is working, go back to the your CDN endpoint's blade and click Stop.
- 522. More Information 8. Refresh your browser window for the Azure web app. You should now see that the all scripts and stylesheets are properly loaded. Overview of the Azure Content Delivery Network (CDN) Using Azure CDN Integrate a cloud service with Azure CDN ASP.NET Bundling and Minification
- 523. Connect a web app in Azure App Service to Redis Cache via the Memcache protocol 2/28/2017 • 6 min to read • Edit Online NOTE NOTE Prerequisites Enable the Web Apps Memcache shim In this article, you'll learn how to connect a WordPress web app in Azure App Service to Azure Redis Cache using the Memcache protocol. If you have an existing web app that uses a Memcached server for in-memory caching, You can migrate it to Azure App Service and use the first-party caching solution in Microsoft Azure with little or no change to your application code. Furthermore, you can use your existing Memcache expertise to create highly scalable, distributed apps in Azure App Service with Azure Redis Cache for in-memory caching, while using popular application frameworks such as .NET, PHP, Node.js, Java, and Python. App Service Web Apps enables this application scenario with the Web Apps Memcache shim, which is a local Memcached server that acts as a Memcache proxy for caching calls to Azure Redis Cache. This enables any app that communicates using the Memcache protocol to cache data with Redis Cache. This Memcache shim works at the protocol level, so it can be used by any application or application framework as long as it communicates using the Memcache protocol. Although this article refers to web apps, it also applies to API apps and mobile apps. The Web Apps Memcache shim can be used with any application provided it communicates using the Memcache protocol. For this particular example, the reference application is a Scalable WordPress site which can be provisioned from the Azure Marketplace. Follow the steps outlined in these articles: Provision an instance of the Azure Redis Cache Service Deploy a Scalable WordPress site in Azure Once you have the Scalable WordPress site deployed and a Redis Cache instance provisioned you will be ready to proceed with enabling the Memcache shim in Azure App Service Web Apps. In order to configure Memcache shim, you must create three app settings. This can be done using a variety of methods including the Azure Portal, the classic portal, the Azure PowerShell Cmdlets or the Azure Command-Line Interface. For the purposes of this post, I’m going to use the Azure Portal to set the app settings. The following values can be retrieved from Settings blade of your Redis Cache instance.
- 524. Add REDIS_HOST app setting Add REDIS_HOST app setting Add REDIS_KEY app setting Add REDIS_KEY app setting Add MEMCACHESHIM_REDIS_ENABLE app setting Add MEMCACHESHIM_REDIS_ENABLE app setting The first app setting you need to create is the REDIS_HOST app setting. This setting sets the destination to which the shim forwards the cache information. The value required for the REDIS_HOST app setting can be retrieved from the Properties blade of your Redis Cache instance. Set the key of the app setting to REDIS_HOST and the value of the app setting to the hostname of the Redis Cache instance. The second app setting you need to create is the REDIS_KEY app setting. This setting provides the authentication token required to securely access the Redis Cache instance. You can retrieve the value required for the REDIS_KEY app setting from the Access keys blade of the Redis Cache instance. Set the key of the app setting to REDIS_KEY and the value of the app setting to the Primary Key of the Redis Cache instance. The last app setting is used to enable the Memcache Shim in Web Apps, which uses the REDIS_HOST and
- 525. Enable Memcache extension for PHP Download the php_memcache Extension Download the php_memcache Extension Enable the php_memcache extension Enable the php_memcache extension REDIS_KEY to connect to the Azure Redis Cache and forward the cache calls. Set the key of the app setting to MEMCACHESHIM_REDIS_ENABLE and the value to true. Once you are done adding the three (3) app settings, click Save. In order for the application to speak the Memcache protocol, it's necessary to install the Memcache extension to PHP--the language framework for your WordPress site. Browse to PECL. Under the caching category, click memcache. Under the downloads column click the DLL link. Download the Non-Thread Safe (NTS) x86 link for the version of PHP enabled in Web Apps. (Default is PHP 5.4) After you download the file, unzip and upload the php_memcache.dll into the d:homesitewwwrootbinext directory. After the php_memcache.dll is uploaded into the web app, you need to enable the extension to the PHP Runtime. To enable the Memcache extension in the Azure Portal, open the Application Settings blade for the web app, then add a new app setting with the key of PHP_EXTENSIONS and the value binextphp_memcache.dll.
- 526. NOTE NOTE Install Memcache WordPress plugin NOTE NOTE Enable the Memcache WordPress plugin Enable the Memcache WordPress plugin NOTE NOTE $memcached_servers = array( 'default' => array('localhost:' . getenv("MEMCACHESHIM_PORT")) ); If the web app needs to load multiple PHP extensions, the value of PHP_EXTENSIONS should be a comma delimited list of relative paths to DLL files. Once finished, click Save. You can also download the Memcached Object Cache Plugin from WordPress.org. On the WordPress plugins page, click Add New. In the search box, type memcached and press Enter. Find Memcached Object Cache in the list, then click Install Now. Follow the instructions in this blog on How to enable a Site Extension in Web Apps to install Visual Studio Team Services. In the wp-config.php file, add the following code above the stop editing comment near the end of the file. Once this code has been pasted, monaco will automatically save the document.
- 527. Verify the Memcache Object Cache plugin is functioning Enable the non-SSL port support in Azure Redis Cache Enable the non-SSL port support in Azure Redis Cache NOTE NOTE The next step is to enable the object-cache plugin. This is done by dragging and dropping object-cache.php from wp-content/plugins/memcached folder to the wp-content folder to enable the Memcache Object Cache functionality. Now that the object-cache.php file is in the wp-content folder, the Memcached Object Cache is now enabled. All of the steps to enable the Web Apps Memcache shim are now complete. The only thing left is to verify that the data is populating your Redis Cache instance. At the time of writing this article, the Redis CLI does not support SSL connectivity, thus the following steps are necessary. In the Azure Portal, browse to the Redis Cache instance that you created for this web app. Once the cache's blade is open, click the Settings icon. Select Access Ports from the list.
- 528. Connect to Azure Redis Cache from redis-cli Connect to Azure Redis Cache from redis-cli NOTE NOTE redis-cli–h <hostname-for-redis-cache> –a <primary-key-for-redis-cache> –p 6379 Click No for Allow access only via SSL. You will see that the NON-SSL port is now set. Click Save. This step assumes that redis is installed locally on your development machine. Install Redis locally using these instructions. Open your command-line console of choice and type the following command: Replace the <hostname-for-redis-cache> with the actual xxxxx.redis.cache.windows.net hostname and the <primary-key-for-redis-cache> with the access key for the cache, then press Enter. Once the CLI has connected to the Redis Cache instance, issue any redis command. In the screenshot below, I’ve chosen to list the keys.
- 529. Conclusion NOTE NOTE What's changed The call to list the keys should return a value. If not, try navigating to the web app and trying again. Congratulations! The WordPress app now has a centralized in-memory cache to aid in increasing throughput. Remember, the Web Apps Memcache Shim can be used with any Memcache client regardless of programming language or application framework. To provide feedback or to ask questions about the Web Apps Memcache shim, post to MSDN Forums or Stackoverflow. If you want to get started with Azure App Service before signing up for an Azure account, go to Try App Service, where you can immediately create a short-lived starter web app in App Service. No credit cards required; no commitments. For a guide to the change from Websites to App Service see: Azure App Service and its impact on existing Azure Services
- 530. Create a Redis Cache using a template 1/27/2017 • 3 min to read • Edit Online NOTE NOTE What you will deploy Parameters cacheSKUName cacheSKUName In this topic, you learn how to create an Azure Resource Manager template that deploys an Azure Redis Cache. The cache can be used with an existing storage account to keep diagnostic data. You also learn how to define which resources are deployed and how to define parameters that are specified when the deployment is executed. You can use this template for your own deployments, or customize it to meet your requirements. Currently, diagnostic settings are shared for all caches in the same region for a subscription. Updating one cache in the region affects all other caches in the region. For more information about creating templates, see Authoring Azure Resource Manager Templates. For the complete template, see Redis Cache template. Resource Manager templates for the new Premium tier are available. Create a Premium Redis Cache with clustering Create Premium Redis Cache with data persistence Create Premium Redis Cache with VNet and optional clustering To check for the latest templates, see Azure Quickstart Templates and search for Redis Cache . In this template, you will deploy an Azure Redis Cache that uses an existing storage account for diagnostic data. To run the deployment automatically, click the following button: With Azure Resource Manager, you define parameters for values you want to specify when the template is deployed. The template includes a section called Parameters that contains all of the parameter values. You should define a parameter for those values that vary based on the project you are deploying or based on the environment you are deploying to. Do not define parameters for values that always stay the same. Each parameter value is used in the template to define the resources that are deployed. The pricing tier of the new Azure Redis Cache.
- 531. "cacheSKUName":{ "type":"string", "allowedValues":[ "Basic", "Standard" ], "defaultValue":"Basic", "metadata":{ "description":"The pricing tier of the newAzure Redis Cache." } }, cacheSKUFamily cacheSKUFamily "cacheSKUFamily":{ "type":"string", "allowedValues":[ "C" ], "defaultValue":"C", "metadata":{ "description":"The family for the sku." } }, cacheSKUCapacity cacheSKUCapacity "cacheSKUCapacity":{ "type":"int", "allowedValues":[ 0, 1, 2, 3, 4, 5, 6 ], "defaultValue":0, "metadata":{ "description":"The size of the newAzure Redis Cache instance. " } } redisCacheLocation redisCacheLocation The template defines the values that are permitted for this parameter (Basic or Standard), and assigns a default value (Basic) if no value is specified. Basic provides a single node with multiple sizes available up to 53 GB. Standard provides two-node Primary/Replica with multiple sizes available up to 53 GB and 99.9% SLA. The family for the sku. The size of the new Azure Redis Cache instance. The template defines the values that are permitted for this parameter (0, 1, 2, 3, 4, 5 or 6), and assigns a default value (1) if no value is specified. Those numbers correspond to following cache sizes: 0 = 250 MB, 1 = 1 GB, 2 = 2.5 GB, 3 = 6 GB, 4 = 13 GB, 5 = 26 GB, 6 = 53 GB The location of the Redis Cache. For best performance, use the same location as the app to be used with the cache.
- 532. "redisCacheLocation":{ "type":"string" } existingDiagnosticsStorageAccountName existingDiagnosticsStorageAccountName "existingDiagnosticsStorageAccountName":{ "type":"string" } enableNonSslPort enableNonSslPort "enableNonSslPort":{ "type":"bool" } diagnosticsStatus diagnosticsStatus "diagnosticsStatus":{ "type":"string", "defaultValue":"ON", "allowedValues":[ "ON", "OFF" ] } Resources to deploy Redis Cache Redis Cache The name of the existing storage account to use for diagnostics. A boolean value that indicates whether to allow access via non-SSL ports. A value that indicates whether diagnostics is enabled. Use ON or OFF. Creates the Azure Redis Cache.
- 533. { "apiVersion":"2015-08-01", "name":"[parameters('redisCacheName')]", "type":"Microsoft.Cache/Redis", "location":"[parameters('redisCacheLocation')]", "properties":{ "enableNonSslPort":"[parameters('enableNonSslPort')]", "sku":{ "capacity":"[parameters('redisCacheCapacity')]", "family":"[parameters('redisCacheFamily')]", "name":"[parameters('redisCacheSKU')]" } }, "resources":[ { "apiVersion":"2015-07-01", "type":"Microsoft.Cache/redis/providers/diagnosticsettings", "name":"[concat(parameters('redisCacheName'), '/Microsoft.Insights/service')]", "location":"[parameters('redisCacheLocation')]", "dependsOn":[ "[concat('Microsoft.Cache/Redis/', parameters('redisCacheName'))]" ], "properties":{ "status":"[parameters('diagnosticsStatus')]", "storageAccountName":"[parameters('existingDiagnosticsStorageAccountName')]" } } ] } Commands to run deployment PowerShell PowerShell New-AzureRmResourceGroupDeployment -TemplateUrihttps://raw.githubusercontent.com/Azure/azure-quickstart-templates/master/101-redis- cache/azuredeploy.json -ResourceGroupName ExampleDeployGroup -redisCacheName ExampleCache Azure CLI Azure CLI azure group deployment create --template-urihttps://raw.githubusercontent.com/Azure/azure-quickstart-templates/master/101-redis- cache/azuredeploy.json -g ExampleDeployGroup To deploy the resources to Azure, you must be logged in to your Azure account and you must use the Azure Resource Manager module. To learn about using Azure Resource Manager with either Azure PowerShell or Azure CLI, see: Using Azure PowerShell with Azure Resource Manager Using the Azure CLI for Mac, Linux, and Windows with Azure Resource Management. The following examples assume you already have a resource group in your account with the specified name.
- 534. Session state with Azure Redis cache in Azure App Service 2/28/2017 • 2 min to read • Edit Online NOTE NOTE Create the Cache Add the RedisSessionStateProvider NuGet package to your web app Modify the Web.Config File This topic explains how to use the Azure Redis Cache Service for session state. If your ASP.NET web app uses session state, you will need to configure an external session state provider (either the Redis Cache Service or a SQL Server session state provider). If you use session state, and don't use an external provider, you will be limited to one instance of your web app. The Redis Cache Service is the fastest and simplest to enable. Although this article refers to web apps, it also applies to API apps and mobile apps. Follow these directions to create the cache. Install the NuGet RedisSessionStateProvider package. Use the following command to install from the package manager console (Tools > NuGet Package Manager > Package Manager Console): PM> Install-Package Microsoft.Web.RedisSessionStateProvider To install from Tools > NuGet Package Manager > Manage NugGet Packages for Solution, search for RedisSessionStateProvider . For more information see the NuGet RedisSessionStateProvider page and Configure the cache client. In addition to making assembly references for Cache, the NuGet package adds stub entries in the web.config file. 1. Open the web.config and find the the sessionState element. 2. Enter the values for host , accessKey , port (the SSL port should be 6380), and set SSL to true . These values can be obtained from the Azure Portal blade for your cache instance. For more information, see Connect to the cache. Note that the non-SSL port is disabled by default for new caches. For more information about enabling the non-SSL port, see the Access Ports section in the Configure a cache in Azure Redis Cache topic. The following markup shows the changes to the web.config file, specifically the changes to port, host, accessKey, and *ssl.
- 535. Use the Session Object in Code string strValue = "yourvalue"; Session.Add("yourkey", strValue); object objValue = Session["yourkey"]; if (objValue != null) strValue = (string)objValue; NOTE NOTE What's changed <system.web>; <customErrors mode="Off" />; <authentication mode="None" />; <compilation debug="true" targetFramework="4.5" />; <httpRuntime targetFramework="4.5" />; <sessionState mode="Custom" customProvider="RedisSessionProvider">; <providers>; <!--<add name="RedisSessionProvider" host = "127.0.0.1" [String] port = "" [number] accessKey = "" [String] ssl= "false" [true|false] throwOnError = "true" [true|false] retryTimeoutInMilliseconds = "0" [number] databaseId = "0" [number] applicationName = "" [String] />;-->; <add name="RedisSessionProvider" type="Microsoft.Web.Redis.RedisSessionStateProvider" port="6380" host="movie2.redis.cache.windows.net" accessKey="m7PNV60CrvKpLqMUxosC3dSe6kx9nQ6jP5del8TmADk=" ssl="true" />; <!--<add name="MySessionStateStore" type="Microsoft.Web.Redis.RedisSessionStateProvider" host="127.0.0.1" accessKey="" ssl="false" />;-->; </providers>; </sessionState>; </system.web>; The final step is to begin using the Session object in your ASP.NET code. You add objects to session state by using the Session.Add method. This method uses key-value pairs to store items in the session state cache. The following code retrieves this value from session state. You can also use the Redis Cache to cache objects in your web app. For more info, see MVC movie app with Azure Redis Cache in 15 minutes. For more details about how to use ASP.NET session state, see ASP.NET Session State Overview. If you want to get started with Azure App Service before signing up for an Azure account, go to Try App Service, where you can immediately create a short-lived starter web app in App Service. No credit cards required; no commitments. For a guide to the change from Websites to App Service see: Azure App Service and Its Impact on Existing Azure Services
- 536. By Rick Anderson
- 537. How to: Monitor Apps in Azure App Service 2/28/2017 • 5 min to read • Edit Online NOTE NOTE Understanding Quotas and Metrics Quotas Quotas Quota Enforcement Quota Enforcement App Service provides built in monitoring functionality in the Azure Portal. This includes the ability to review quotas and metrics for an app as well as the App Service plan, setting up alerts and even scaling automatically based on these metrics. Although this article refers to web apps, it also applies to API apps and mobile apps. Applications hosted in App Service are subject to certain limits on the resources they can use. The limits are defined by the App Service plan associated with the app. If the application is hosted in a Free or Shared plan, then the limits on the resources the app can use are defined by Quotas. If the application is hosted in a Basic, Standard or Premium plan, then the limits on the resources they can use are set by the size (Small, Medium, Large) and instance count (1, 2, 3, ...) of the App Service plan. Quotas for Free or Shared apps are: CPU(Short) CPU(Day) Memory Bandwidth Filesystem Amount of CPU allowed for this application in a 3-minute interval. This quota re-sets every 3 minutes. Total amount of CPU allowed for this application in a day. This quota re-sets every 24 hours at midnight UTC. Total amount of memory allowed for this application. Total amount of outgoing bandwidth allowed for this application in a day. This quota re-sets every 24 hours at midnight UTC. Total amount of storage allowed. The only quota applicable to apps hosted on Basic, Standard and Premium plans is Filesystem. More information about the specific quotas, limits and features available to the different App Service SKUs can be found here: Azure Subscription Service Limits If an application in its usage exceeds the CPU (short), CPU (Day), or bandwidth quota then the application will be stopped until the quota re-sets. During this time, all incoming requests will result in an HTTP 403.
- 538. Metrics Metrics If the application memory quota is exceeded, then the application will be re-started. If the Filesystem quota is exceeded, then any write operation will fail, this includes writing to logs. Quotas can be increased or removed from your app by upgrading your App Service plan. Metrics provide information about the app, or App Service plan's behavior. For an Application, the available metrics are: Average Response Time Average memory working set CPU Time Data In Data Out Http 2xx Http 3xx Http 401 Http 403 Http 404 Http 406 The average time taken for the app to serve requests in ms. The average amount of memory in MiBs used by the app. The amount of CPU in seconds consumed by the app. For more information about this metric see: CPU time vs CPU percentage The amount of incoming bandwidth consumed by the app in MiBs. The amount of outgoing bandwidth consumed by the app in MiBs. Count of requests resulting in a http status code >= 200 but < 300. Count of requests resulting in a http status code >= 300 but < 400. Count of requests resulting in HTTP 401 status code. Count of requests resulting in HTTP 403 status code. Count of requests resulting in HTTP 404 status code.
- 539. NOTE NOTE CPU time vs CPU percentage CPU time vs CPU percentage Metrics Granularity and Retention Policy Monitoring Quotas and Metrics in the Azure Portal. Http 4xx Http Server Errors Memory working set Requests Count of requests resulting in HTTP 406 status code. Count of requests resulting in a http status code >= 400 but < 500. Count of requests resulting in a http status code >= 500 but < 600. Current amount of memory used by the app in MiBs. Total number of requests regardless of their resulting HTTP status code. For an App Service plan, the available metrics are: App Service plan metrics are only available for plans in Basic, Standard and Premium SKU. CPU Percentage Memory Percentage Data In Data Out Disk Queue Length Http Queue Length The average CPU used across all instances of the plan. The average memory used across all instances of the plan. The average incoming bandwidth used across all instances of the plan. The average outgoing bandwidth used across all instances of the plan. The average number of both read and write requests that were queued on storage. A high disk queue length is an indication of an application that might be slowing down due to excessive disk I/O. The average number of HTTP requests that had to sit on the queue before being fulfilled. A high or increasing HTTP Queue length is a symptom of a plan under heavy load. There are 2 metrics that reflect CPU usage. CPU time and CPU percentage CPU Time is useful for apps hosted in Free or Shared plans since one of their quotas is defined in CPU minutes used by the app. CPU percentage on the other hand is useful for apps hosted in basic, standard and premium plans since they can be scaled out and this metric is a good indication of the overall usage across all instances. Metrics for an application and app service plan are logged and aggregated by the service with the following granularities and retention policies: Minute granularity metrics are retained for 48 hours Hour granularity metrics are retained for 30 days Day granularity metrics are retained for 90 days You can review the status of the different quotas and metrics affecting an application in the Azure Portal.
- 540. Alerts and Autoscale Quotas can be found under Settings>Quotas. The UX allows you to review: (1) the quotas name, (2) its reset interval, (3) its current limit and (4) current value. Metrics can be access directly from the resource blade. You can also customize the chart by: (1) click on it, and select (2) edit chart. From here you can change the (3) time range, (4) chart type, and (5) metrics to display. You can learn more about metrics here: Monitor service metrics. Metrics for an App or App Service plan can be hooked up to alerts, to learn more about this, see Receive alert notifications App Service apps hosted in basic, standard or premium App Service Plans support autoscale. This allows you to configure rules that monitor the App Service plan metrics and can increase or decrease the instance count providing additional resources as needed, or saving money when the application is over-provision. You can learn more about auto scale here: How to Scale and here Best practices for Azure Monitor autoscaling
- 541. NOTE NOTE What's changed If you want to get started with Azure App Service before signing up for an Azure account, go to Try App Service, where you can immediately create a short-lived starter web app in App Service. No credit cards required; no commitments. For a guide to the change from Websites to App Service see: Azure App Service and Its Impact on Existing Azure Services
- 542. Enable diagnostics logging for web apps in Azure App Service 4/26/2017 • 12 min to read • Edit Online Overview NOTE NOTE Web server diagnostics and application diagnostics Web server diagnostics Web server diagnostics Application diagnostics Application diagnostics System.Diagnostics.Trace.TraceError("If you're seeing this, something bad happened"); Azure provides built-in diagnostics to assist with debugging an App Service web app. In this article you'll learn how to enable diagnostic logging and add instrumentation to your application, as well as how to access the information logged by Azure. This article uses the Azure Portal, Azure PowerShell, and the Azure Command-Line Interface (Azure CLI) to work with diagnostic logs. For information on working with diagnostic logs using Visual Studio, see Troubleshooting Azure in Visual Studio. Although this article refers to web apps, it also applies to API apps and mobile apps. App Service web apps provide diagnostic functionality for logging information from both the web server and the web application. These are logically separated into web server diagnostics and application diagnostics. You can enable or disable the following kinds of logs: Detailed Error Logging - Detailed error information for HTTP status codes that indicate a failure (status code 400 or greater). This may contain information that can help determine why the server returned the error code. Failed Request Tracing - Detailed information on failed requests, including a trace of the IIS components used to process the request and the time taken in each component. This can be useful if you are attempting to increase site performance or isolate what is causing a specific HTTP error to be returned. Web Server Logging - Information about HTTP transactions using the W3C extended log file format. This is useful when determining overall site metrics such as the number of requests handled or how many requests are from a specific IP address. Application diagnostics allows you to capture information produced by a web application. ASP.NET applications can use the System.Diagnostics.Trace class to log information to the application diagnostics log. For example: At runtime you can retrieve these logs to help with troubleshooting. For more information, see Troubleshooting Azure web apps in Visual Studio. App Service web apps also log deployment information when you publish content to a web app. This happens automatically and there are no configuration settings for deployment logging. Deployment logging allows you to determine why a deployment failed. For example, if you are using a custom deployment script, you might use deployment logging to determine why the script is failing.
- 543. How to enable diagnostics NOTE NOTE To enable diagnostics in the Azure Portal, go to the blade for your web app and click Settings > Diagnostics logs. When you enable application diagnostics you also choose the Level. This setting allows you to filter the information captured to informational, warning or error information. Setting this to verbose will log all information produced by the application. Unlike changing the web.config file, enabling Application diagnostics or changing diagnostic log levels does not recycle the app domain that the application runs within. In the classic portal Web app Configure tab, you can select storage or file system for web server logging. Selecting storage allows you to select a storage account, and then a blob container that the logs will be written to. All other logs for site diagnostics are written to the file system only.
- 544. NOTE NOTE NOTE NOTE NOTE NOTE How to: Download logs The classic portal Web app Configure tab also has additional settings for application diagnostics: File system - stores the application diagnostics information to the web app file system. These files can be accessed by FTP, or downloaded as a Zip archive by using the Azure PowerShell or Azure Command-Line Interface (Azure CLI). Table storage - stores the application diagnostics information in the specified Azure Storage Account and table name. Blob storage - stores the application diagnostics information in the specified Azure Storage Account and blob container. Retention period - by default, logs are not automatically deleted from blob storage. Select set retention and enter the number of days to keep logs if you wish to automatically delete logs. If you regenerate your storage account's access keys, you must reset the respective logging configuration to use the updated keys. To do this: 1. In the Configure tab, set the respective logging feature to Off. Save your setting. 2. Enable logging to the storage account blob or table again. Save your setting. Any combination of file system, table storage, or blob storage can be enabled at the same time, and have individual log level configurations. For example, you may wish to log errors and warnings to blob storage as a long-term logging solution, while enabling file system logging with a level of verbose. While all three storage locations provide the same basic information for logged events, table storage and blob storage log additional information such as the instance ID, thread ID, and a more granular timestamp (tick format) than logging to file system. Information stored in table storage or blob storage can only be accessed using a storage client or an application that can directly work with these storage systems. For example, Visual Studio 2013 contains a Storage Explorer that can be used to explore table or blob storage, and HDInsight can access data stored in blob storage. You can also write an application that accesses Azure Storage by using one of the Azure SDKs. Diagnostics can also be enabled from Azure PowerShell using the Set-AzureWebsite cmdlet. If you have not installed Azure PowerShell, or have not configured it to use your Azure Subscription, see How to Use Azure PowerShell. Diagnostic information stored to the web app file system can be accessed directly using FTP. It can also be downloaded as a Zip archive using Azure PowerShell or the Azure Command-Line Interface. The directory structure that the logs are stored in is as follows: Application logs - /LogFiles/Application/. This folder contains one or more text files containing information produced by application logging. Failed Request Traces - /LogFiles/W3SVC#########/. This folder contains an XSL file and one or more XML files. Ensure that you download the XSL file into the same directory as the XML file(s) because the XSL file provides functionality for formatting and filtering the contents of the XML file(s) when viewed in Internet Explorer.
- 545. FTP FTP NOTE NOTE Download with Azure PowerShell Download with Azure PowerShell Save-AzureWebSiteLog -Name webappname NOTE NOTE Download with Azure Command-Line Interface Download with Azure Command-Line Interface azure site log download webappname NOTE NOTE How to: View logs in Application Insights Detailed Error Logs - /LogFiles/DetailedErrors/. This folder contains one or more .htm files that provide extensive information for any HTTP errors that have occurred. Web Server Logs - /LogFiles/http/RawLogs. This folder contains one or more text files formatted using the W3C extended log file format. Deployment logs - /LogFiles/Git. This folder contains logs generated by the internal deployment processes used by Azure web apps, as well as logs for Git deployments. To access diagnostic information using FTP, visit the Dashboard of your web app in the classic portal. In the quick glance section, use the FTP Diagnostic Logs link to access the log files using FTP. The Deployment/FTP User entry lists the user name that should be used to access the FTP site. If the Deployment/FTP User entry is not set, or you have forgotten the password for this user, you can create a new user and password by using the Reset deployment credentials link in the quick glance section of the Dashboard. To download the log files, start a new instance of Azure PowerShell and use the following command: This will save the logs for the web app specified by the -Name parameter to a file named logs.zip in the current directory. If you have not installed Azure PowerShell, or have not configured it to use your Azure Subscription, see How to Use Azure PowerShell. To download the log files using the Azure Command Line Interface, open a new command prompt, PowerShell, Bash, or Terminal session and enter the following command: This will save the logs for the web app named 'webappname' to a file named diagnostics.zip in the current directory. If you have not installed the Azure Command-Line Interface (Azure CLI), or have not configured it to use your Azure Subscription, see How to Use Azure CLI. Visual Studio Application Insights provides tools for filtering and searching logs, and for correlating the logs with requests and other events. 1. Add the Application Insights SDK to your project in Visual Studio. In Solution Explorer, right click your project and choose Add Application Insights. You'll be guided
- 546. How to: Stream logs NOTE NOTE NOTE NOTE Streaming with Azure PowerShell Streaming with Azure PowerShell Get-AzureWebSiteLog -Name webappname -Tail Get-AzureWebSiteLog -Name webappname -Tail-Message Error Get-AzureWebSiteLog -Name webappname -Tail-Path http NOTE NOTE 2. Add the Trace Listener package to your project. 3. Upload your project and run it to generate log data. 4. In the Azure Portal, browse to your new Application Insights resource, and open Search. You'll see your log data, along with request, usage and other telemetry. Some telemetry might take a few minutes to arrive: click Refresh. Learn more through steps that include creating an Application Insights resource. Learn more Right click your project and choose Manage NuGet Packages. Select Microsoft.ApplicationInsights.TraceListener Learn more Learn more about performance tracking with Application Insights While developing an application, it is often useful to see logging information in near-real time. This can be accomplished by streaming logging information to your development environment using either Azure PowerShell or the Azure Command-Line Interface. Some types of logging buffer write to the log file, which can result in out of order events in the stream. For example, an application log entry that occurs when a user visits a page may be displayed in the stream before the corresponding HTTP log entry for the page request. Log streaming will also stream information written to any text file stored in the D:homeLogFiles folder. To stream logging information, start a new instance of Azure PowerShell and use the following command: This will connect to the web app specified by the -Name parameter and begin streaming information to the PowerShell window as log events occur on the web app. Any information written to files ending in .txt, .log, or .htm that are stored in the /LogFiles directory (d:/home/logfiles) will be streamed to the local console. To filter specific events, such as errors, use the -Message parameter. For example: To filter specific log types, such as HTTP, use the -Path parameter. For example: To see a list of available paths, use the -ListPath parameter. If you have not installed Azure PowerShell, or have not configured it to use your Azure Subscription, see How to Use Azure PowerShell.
- 547. Streaming with Azure Command-Line Interface Streaming with Azure Command-Line Interface azure site log tailwebappname azure site log tailwebappname --filter Error azure site log tailwebappname --path http NOTE NOTE How to: Understand diagnostics logs Application diagnostics logs Application diagnostics logs {Date} PID[{process id}] {event type/level} {message} 2014-01-30T16:36:59 PID[3096] Error Fatalerror on the page! To stream logging information, open a new command prompt, PowerShell, Bash, or Terminal session and enter the following command: This will connect to the web app named 'webappname' and begin streaming information to the window as log events occur on the web app. Any information written to files ending in .txt, .log, or .htm that are stored in the /LogFiles directory (d:/home/logfiles) will be streamed to the local console. To filter specific events, such as errors, use the --Filter parameter. For example: To filter specific log types, such as HTTP, use the --Path parameter. For example: If you have not installed the Azure Command-Line Interface, or have not configured it to use your Azure Subscription, see How to Use Azure Command-Line Interface. Application diagnostics stores information in a specific format for .NET applications, depending on whether you store logs to the file system, table storage, or blob storage. The base set of data stored is the same across all three storage types - the date and time the event occurred, the process ID that produced the event, the event type (information, warning, error,) and the event message. File system Each line logged to the file system or received using streaming will be in the following format: For example, an error event would appear similar to the following: Logging to the file system provides the most basic information of the three available methods, providing only the time, process id, event level, and message. Table storage When logging to table storage, additional properties are used to facilitate searching the data stored in the table as well as more granular information on the event. The following properties (columns) are used for each entity (row) stored in the table.
- 548. PROPERTY NAME VALUE/FORMAT PartitionKey Date/time of the event in yyyyMMddHH format RowKey A GUID value that uniquely identifies this entity Timestamp The date and time that the event occurred EventTickCount The date and time that the event occurred, in Tick format (greater precision) ApplicationName The web app name Level Event level (e.g. error, warning, information) EventId The event ID of this event InstanceId Instance of the web app that the even occurred on Pid Process ID Tid The thread ID of the thread that produced the event Message Event detail message PROPERTY NAME VALUE/FORMAT Date The date and time that the event occurred Level Event level (e.g. error, warning, information) ApplicationName The web app name InstanceId Instance of the web app that the event occurred on EventTickCount The date and time that the event occurred, in Tick format (greater precision) EventId The event ID of this event Pid Process ID Tid The thread ID of the thread that produced the event Defaults to 0 if none specified Blob storage When logging to blob storage, data is stored in comma-separated values (CSV) format. Similar to table storage, additional fields are logged to provide more granular information about the event. The following properties are used for each row in the CSV: Defaults to 0 if none specified
- 549. Message Event detail message PROPERTY NAME VALUE/FORMAT date,level,applicationName,instanceId,eventTickCount,eventId,pid,tid,message 2014-01-30T16:36:52,Error,mywebapp,6ee38a,635266966128818593,0,3096,9,An error occurred NOTE NOTE Failed request traces Failed request traces The data stored in a blob would look similar to the following: The first line of the log will contain the column headers as represented in this example. Failed request traces are stored in XML files named fr######.xml. To make it easier to view the logged information, an XSL stylesheet named freb.xsl is provided in the same directory as the XML files. Opening one of the XML files in Internet Explorer will use the XSL stylesheet to provide a formatted display of the trace information. This will appear similar to the following:
- 550. Detailed error logs Detailed error logs Web server logs Web server logs NOTE NOTE Detailed error logs are HTML documents that provide more detailed information on HTTP errors that have occurred. Since they are simply HTML documents, they can be viewed using a web browser. The web server logs are formatted using the W3C extended log file format. This information can be read using a text editor or parsed using utilities such as Log Parser. The logs produced by Azure web apps do not support the s-computername, s-ip, or cs-version fields.
- 551. Next steps NOTE NOTE What's changed How to Monitor Web Apps Troubleshooting Azure web apps in Visual Studio Analyze web app Logs in HDInsight If you want to get started with Azure App Service before signing up for an Azure account, go to Try App Service, where you can immediately create a short-lived starter web app in App Service. No credit cards required; no commitments. For a guide to the change from Websites to App Service see: Azure App Service and Its Impact on Existing Azure Services For a guide to the change of the old portal to the new portal see: Reference for navigating the Azure portal
- 552. Streaming Logs and the Console 2/28/2017 • 1 min to read • Edit Online Streaming Logs How to write traces in your code How to write traces in your code Trace.TraceInformation("My trace statement"); Trace.TraceWarning("My warning statement"); Trace.TraceError("My error statement"); console.log("My trace statement"). How to enable and view the streaming logs How to enable and view the streaming logs The Azure portal provides an integrated streaming log viewer that lets you view tracing events from your App Service apps in real time. Setting up this feature requires a few simple steps: Write traces in your code Enable Application Diagnostic Logs for your app View the stream from the built-in Streaming Logs UI in the Azure portal. Writing traces in your code is easy. In C# it's as easy as writing the following code: The Trace class lives in the System.Diagnostics namespace. In a node.js app you can write this code to achieve the same result:
- 553. NOTE NOTE Diagnostics are enabled on a per app basis. Start by browsing to the site you would like to enable this feature on. From settings menu, scroll down to the Monitoring section and click on (1) Diagnostic Logs. Then (2) enable Application Logging (Filesystem) or Application Logging (blob) The Level option lets you change the severity level of traces to capture. If you're just trying to get familiar with the feature, set the level to Verbose to ensure all of your trace statements are collected. Click SAVE at the top of the blade and you're ready to view logs. The higher the severity level the more resources are consumed to log and the more traces are produced. Make sure severity level is configured to the correct verbosity for a production or high traffic site.
- 554. Console dir To view the streaming logs from within the Azure portal, click on (1) Log Stream also in the Monitoring section of the settings menu. If your app is actively writing trace statements, then you should see them in the (2) streaming logs UI in near real time. The Azure portal provides console access to your app. You can explore your app's file system and run powershell/cmd scripts. You are bound by the same permissions set as your running app code when executing console commands. Access to protected directories or running scripts that require elevated permissions is blocked. From settings menu, scroll down to Development Tools section and click on (1) Console and the (2) console UI opens to the right. To get familiar with the console, try basic commands like:
- 555. cd
- 556. Back up your app in Azure 2/28/2017 • 6 min to read • Edit Online What gets backed up NOTE NOTE Requirements and restrictions Create a manual backup The Backup and Restore feature in Azure App Service lets you easily create app backups manually or automatically. You can restore your app to a previous state, or create a new app based on one of your original app's backups. For information on restoring an app from backup, see Restore an app in Azure. App Service can back up the following information: App configuration File content Any Azure SQL Databases or Azure MySQL (ClearDB) databases connected to your app (you can choose which ones to include in the backup) This information is backed up to the Azure storage account and container that you specify. Each backup is a complete offline copy of your app, not an incremental update. The Backup and Restore feature requires the App Service plan to be in the Standard tier or higher. For more information about scaling your App Service plan to use a higher tier, see Scale up an app in Azure. Note that Premium tier allows a greater number of daily backups than Standard tier. You need an Azure storage account and container in the same subscription as the app that you want to back up. For more information on Azure storage accounts, see the links at the end of this article. Backups can be up to 10GB of app and database content. You will get an error if the backup size exceeds this limit. 1. In the Azure Portal, navigate to your app's blade, select Settings, then Backups. The Backups blade will be displayed.
- 557. NOTE NOTE If you see the message below, click it to upgrade your App Service plan before you can proceed with backups. See Scale up an app in Azure for more information. 2. In the Backups blade, click Storage: Not configured to configure a storage account. 3. Choose your backup destination by selecting a Storage Account and Container. The storage account
- 558. NOTE NOTE 5. In the Configure Backup Settings blade, click Save. must belong to the same subscription as the app you want to back up. If you wish, you can create a new storage account or a new container in the respective blades. When you're done, click Select. 4. In the Configure Backup Settings blade that is still left open, click Database Settings, then select the databases you want to include in the backups (SQL database or MySQL), then click OK. For a database to appear in this list, its connection string must exist in the Connection strings section of the Application settings blade for your app. 6. In the command bar of the Backups blade, click Backup Now. You will see a progress message during the backup process.
- 559. Configure automated backups After you have configured a storage account and container for backups, you can make a manual backup at any time. 1. In the Backups blade, click Schedule: Not configured. 2. On the Backup Schedule Settings blade, set Scheduled Backup to On, then configure the backup schedule as desired and click OK.
- 560. 3. In the Configure Backup Settings blade that is still left open, click Storage Settings, then choose your backup destination by selecting a Storage Account and Container. The storage account must belong to the same subscription as the app you want to back up. If you wish, you can create a new storage account or a new container in the respective blades. When you're done, click Select.
- 561. Backup just part of your app Exclude files from your backup Exclude files from your backup NOTE NOTE 5. In the Configure Backup Settings blade, click Save. 4. In the Configure Backup Settings blade, click Database Settings, then select the databases you want to include in the backups (SQL database or MySQL), then click OK. For a database to appear in this list, its connection string must exist in the Connection strings section of the Application settings blade for your app. Sometimes you don't want to backup everything on your app. Here are a few examples: You set up weekly backups of your app that contains static content that never changes, such as old blog posts or images. Your app has over 10GB of content (that's the max amount you can backup at a time). You don't want to back up the log files. Partial backups will let you choose exactly which files you want to back up. To exclude files and folders from your backups, create a _backup.filter file in the D:homesitewwwroot folder of your app and specify the list of files and folders you want to exclude in there. An easy way to access this is through the Kudu Console. Suppose you have an app that contains log files and static images from past years that are never going to change. You already have a full backup of the app that includes the old images. Now you want to backup the app every day, but you don't want to pay for storing log files or the static image files that never change.
- 562. NOTE NOTE How backups are stored The below steps show how you would exclude these files from the backup. D:homesitewwwrootLogs D:homeLogFiles D:homesitewwwrootImages2013 D:homesitewwwrootImages2014 D:homesitewwwrootImagesbrand.png 3. Upload this file to the D:homesitewwwroot directory of your site using ftp or any other method. If you wish, you can create the file directly in http://{yourapp}.scm.azurewebsites.net/DebugConsole and insert the content there. 4. Run backups the same way you would normally do it, manually or automatically. 1. Go to http://{yourapp}.scm.azurewebsites.net/DebugConsole and identify the folders that you want to exclude from your backups. In this example, you would want to exclude the following files and folders shown in that UI: [AZURE.NOTE] The last line shows that you can exclude individuals files as well as folders. 2. Create a file called _backup.filter and put the list above in the file, but remove D:home . List one directory or file per line. So the content of the file should be: sitewwwrootLogs LogFiles sitewwwrootImages2013 sitewwwrootImages2014 sitewwwrootImagesbrand.png Now, any files and folders that are specified in _backup.filter will be excluded from the backup. In this example, the log files and the 2013 and 2014 image files will no longer be backed up, as well as brand.png. You restore partial backups of your site the same way you would restore a regular backup. The restore process will do the right thing. When a full backup is restored, all content on the site is replaced with whatever is in the backup. If a file is on the site but not in the backup it gets deleted. But when a partial backup is restored, any content that is located in one of the blacklisted directories, or any blacklisted file, is left as is. After you have made one or more backups for your app, the backups will be visible on the Containers blade of your storage account, as well as your app. In the storage account, each backup consists of a .zip file that contains the backup data and an .xml file that contains a manifest of the .zip file contents. You can unzip and browse these
- 563. WARNING WARNING Next Steps NOTE NOTE files if you want to access your backups without actually performing an app restore. The database backup for the app is stored in the root of the .zip file. For a SQL database, this is a BACPAC file (no file extension) and can be imported. To create a new SQL database based on the BACPAC export, see Import a BACPAC File to Create a New User Database. Altering any of the files in your websitebackups container can cause the backup to become invalid and therefore non- restorable. For information on restoring an app from a backup, see Restore an app in Azure. You can also backup and restore App Service apps using REST API (see Use REST to back up and restore App Service apps). If you want to get started with Azure App Service before signing up for an Azure account, go to Try App Service, where you can immediately create a short-lived starter web app in App Service. No credit cards required; no commitments.
- 564. Restore an app in Azure 2/28/2017 • 2 min to read • Edit Online Restore an app from an existing backup This article shows you how to restore an app in Azure App Service that you have previously backed up (see Back up your app in Azure). You can restore your app with its linked databases (SQL Database or MySQL) on-demand to a previous state, or create a new app based on one of your original app's backup. Creating a new app that runs in parallel to the latest version can be useful for A/B testing. Restoring from backups is available to apps running in Standard and Premium tier. For information about scaling up your app, see Scale up an app in Azure. Premium tier allows a greater number of daily backups to be performed than Standard tier. WARNING WARNING 1. On the Settings blade of your app in the Azure Portal, click Backups to display the Backups blade. Then click Restore Now in the command bar. 2. In the Restore blade, first select the backup source. The App backup option shows you all the existing backups of the current app, and you can easily select one. The Storage option lets you select any backup ZIP file from any existing Azure Storage account and container in your subscription. If you're trying to restore a backup of another app, use the Storage option. 3. Then, specify the destination for the app restore in Restore destination. If you choose Overwrite, all existing data in your current app will be erased. Before you click OK, make sure that it is exactly what you want to do.
- 565. Download or delete a backup from a storage account 4. Click OK. You can select Existing App to restore the app backup to another app in the same resoure group. Before you use this option, you should have already created another app in your resource group with mirroring database configuration to the one defined in the app backup. 1. From the main Browse blade of the Azure Portal, select Storage accounts. A list of your existing storage accounts will be displayed. 2. Select the storage account that contains the backup that you want to download or delete. The blade for the storage account will be displayed. 3. In the storage account blade, select the container you want 4. Select backup file you want to download or delete.
- 566. Monitor a restore operation Next Steps NOTE NOTE 5. Click Download or Delete depending on what you want to do. 2. Scroll down to find the desired restore operation and click to select it. 1. To see details about the success or failure of the app restore operation, navigate to the Activity Log blade in the Azure portal. The Activity log blade displays all of your operations, along with level, status, resource, and time details. The details blade will display the available information related to the restore operation. You can also backup and restore App Service apps using REST API (see Use REST to back up and restore App Service apps). If you want to get started with Azure App Service before signing up for an Azure account, go to Try App Service, where you can immediately create a short-lived starter web app in App Service. No credit cards required; no commitments.
- 567. Use REST to back up and restore App Service apps 2/28/2017 • 7 min to read • Edit Online Getting Started Backup and restore REST API App Service apps can be backed up as blobs in Azure storage. The backup can also contain the app’s databases. If the app is ever accidentally deleted, or if the app needs to be reverted to a previous version, it can be restored from any previous backup. Backups can be done at any time on demand, or backups can be scheduled at suitable intervals. This article explains how to backup and restore an app with RESTful API requests. If you would like to create and manage app backups graphically through the Azure portal, see Back up a web app in Azure App Service To send REST requests, you need to know your app’s name, resource group, and subscription id. This information can be found by clicking your app in the App Service blade of the Azure portal. For the examples in this article, we are configuring the website backuprestoreapiexamples.azurewebsites.net. It is stored in the Default-Web-WestUS resource group and is running on a subscription with the ID 00001111-2222-3333-4444- 555566667777. We will now cover several examples of how to use the REST API to backup and restore an app. Each example includes a URL and HTTP request body. The sample URL contains placeholders wrapped in curly braces, such as {subscription-id}. Replace the placeholders with the corresponding information for your app. For reference, here is an explanation of each placeholder that appears in the example URLs. subscription-id – ID of the Azure subscription containing the app resource-group-name – Name of the resource group containing the app name – Name of the app backup-id – ID of the app backup
- 568. Backup an app on demand { "properties": { "storageAccountUrl":“https://account.blob.core.windows.net/backups?sv=2015-02- 21&sr=c&sig=DzlkBl7h32C8qCv%2BifdBRxE63r4iv0kZ9L7E0qP16sY%3D&se=2016-09-15T22%3A46%3A54Z&sp=rwdl”, “databases”:[ { “databaseType”:“SqlAzure”, “name”:“MyDatabase1”, "connectionString":"<your database connection string>" } ] } } For the complete documentation of the API, including several optional parameters that can be included in the HTTP request, see the Azure Resource Explorer. To back up an app immediately, send a POST request to https://management.azure.com/subscriptions/{subscription-id}/resourceGroups/{resource-group- name}/providers/Microsoft.Web/sites/{name}/backup/. Here is what the URL looks like using our example website. https://management.azure.com/subscriptions/00001111-2222-3333-4444- 555566667777/resourceGroups/Default-Web- WestUS/providers/Microsoft.Web/sites/backuprestoreapiexamples/backup/ Supply a JSON object in the body of your request to specify which storage account to use to store the backup. The JSON object must have a property named storageAccountUrl, which holds a SAS URL granting write access to the Azure Storage container that holds the backup blob. If you want to back up your databases, you must also supply a list containing the names, types, and connection strings of the databases to be backed up. A backup of the app begins immediately when the request is received. The backup process may take a long time to complete. The HTTP response contains an ID that you can use in another request to see the status of the backup. Here is an example of the body of the HTTP response to our backup request.
- 569. { "id":"/subscriptions/00001111-2222-3333-4444-555566667777/resourceGroups/Default-Web- WestUS/providers/Microsoft.Web/sites/backuprestoreapiexamples", "name":" backuprestoreapiexamples ", "type":"Microsoft.Web/sites", "location":"WestUS", "properties": { "id":1, "storageAccountUrl":“https://account.blob.core.windows.net/backups?sv=2015-02- 21&sr=c&sig=DzlkBl7h32C8qCv%2BifdBRxE63r4iv0kZ9L7E0qP16sY%3D&se=2016-09-15T22%3A46%3A54Z&sp=rwdl”, "blobName":“backup_201509291825.zip”, "name":"backup_201509291825", "status":4, "sizeInBytes":0, "created":"2015-09-29T18:25:26.3992707Z", "log":null, "databases":[ { "databaseType":"SqlAzure", "name":"MyDatabase1", "connectionString":"<your database connection string>" } ], "scheduled":false, "correlationId":"ea730f4d-dd06-4f7f-a090-9aa09k662h36", } } NOTE NOTE Schedule automatic backups Set up a new automatic backup schedule Set up a new automatic backup schedule Error messages can be found in the log property of the HTTP response. In addition to backing up an app on demand, you can also schedule a backup to happen automatically. To set up a backup schedule, send a PUT request to https://management.azure.com/subscriptions/{subscription-id}/resourceGroups/{resource-group- name}/providers/Microsoft.Web/sites/{name}/config/backup. Here is what the URL looks like for our example website. https://management.azure.com/subscriptions/00001111-2222-3333-4444- 555566667777/resourceGroups/Default-Web- WestUS/providers/Microsoft.Web/sites/backuprestoreapiexamples/config/backup The request body must have a JSON object that specifies the backup configuration. Here is an example with all the required parameters.
- 570. { "location":"WestUS", "properties":// Represents an app restore request { "backupSchedule":{ // Required for automatically scheduled backups "frequencyInterval":"7", "frequencyUnit":"Day", "keepAtLeastOneBackup":"True", "retentionPeriodInDays":"10", }, "enabled":"True", // Must be set to true to enable automatic backups "name":“mysitebackup”, "storageAccountUrl":"https://account.blob.core.windows.net/backups?sv=2015-02- 21&sr=c&sig=DzlkBl7h32C8qCv%2BifdBRxE63r4iv0kZ9L7E0qP16sY%3D&se=2016-09-15T22%3A46%3A54Z&sp=rwdl" } } Get the automatic backup schedule Get the automatic backup schedule Get the status of a backup This example configures the app to be automatically backed up every seven days. The parameters frequencyInterval and frequencyUnit together determine how often the backups happen. Valid values for frequencyUnit are hour and day. For example, to back up an app every 12 hours, set frequencyInterval to 12 and frequencyUnit to hour. Old backups are automatically removed from the storage account. You can control how old the backups can be by setting the retentionPeriodInDays parameter. If you want to always have at least one backup saved, regardless of how old it is, set keepAtLeastOneBackup to true. To get an app’s backup configuration, send a POST request to the URL https://management.azure.com/subscriptions/{subscription-id}/resourceGroups/{resource-group- name}/providers/Microsoft.Web/sites/{name}/config/backup/list. The URL for our example site is https://management.azure.com/subscriptions/00001111-2222-3333-4444- 555566667777/resourceGroups/Default-Web- WestUS/providers/Microsoft.Web/sites/backuprestoreapiexamples/config/backup/list. Depending on how large the app is, a backup may take a while to complete. Backups might also fail, time out, or partially succeed. To see the status of all an app’s backups, send a GET request to the URL https://management.azure.com/subscriptions/{subscription-id}/resourceGroups/{resource-group- name}/providers/Microsoft.Web/sites/{name}/backups. To see the status of a specific backup, send a GET request to the URL https://management.azure.com/subscriptions/{subscription-id}/resourceGroups/{resource-group- name}/providers/Microsoft.Web/sites/{name}/backups/{backup-id}. Here is what the URL looks like for our example website. https://management.azure.com/subscriptions/00001111-2222-3333-4444- 555566667777/resourceGroups/Default-Web- WestUS/providers/Microsoft.Web/sites/backuprestoreapiexamples/backups/1 The response body contains a JSON object similar to this example.
- 571. { "properties": { "id":1, "storageAccountUrl":"https://account.blob.core.windows.net/backups?sv=2015-02- 21&sr=c&sig=DzlkBl7h32C8qCv%2BifdBRxE63r4iv0kZ9L7E0qP16sY%3D&se=2016-09-15T22%3A46%3A54Z&sp=rwdl", "blobName":"backup_201509291734.zip", "name":"backup_201509291734", "status":2, "sizeInBytes":151973, "created":"2015-09-29T17:34:57.2091605", "scheduled":false, "lastRestoreTimeStamp":null, "finishedTimeStamp":"2015-09-29T17:35:11.3293602", "correlationId":"2379fc13-418a-4b9c-920d-d06e73c5028d", "websiteSizeInBytes":209920 } } Restore an app from a backup The status of a backup is an enumerated type. Here is every possible state. 0 – InProgress: The backup has been started but has not yet completed. 1 – Failed: The backup was unsuccessful. 2 – Succeeded: The backup completed successfully. 3 – TimedOut: The backup did not finish in time and was canceled. 4 – Created: The backup request is queued but has not been started. 5 – Skipped: The backup did not proceed due to a schedule triggering too many backups. 6 – PartiallySucceeded: The backup succeeded, but some files were not backed up because they could not be read. This usually happens because an exclusive lock was placed on the files. 7 – DeleteInProgress: The backup has been requested to be deleted, but has not yet been deleted. 8 – DeleteFailed: The backup could not be deleted. This might happen because the SAS URL that was used to create the backup has expired. 9 – Deleted: The backup was deleted successfully. If your app has been deleted, or if you want to revert your app to a previous version, you can restore the app from a backup. To invoke a restore, send a POST request to the URL https://management.azure.com/subscriptions/{subscription-id}/resourceGroups/{resource-group- name}/providers/Microsoft.Web/sites/{name}/backups/{backup-id}/restore. Here is what the URL looks like for our example website. https://management.azure.com/subscriptions/00001111-2222-3333-4444- 555566667777/resourceGroups/Default-Web- WestUS/providers/Microsoft.Web/sites/backuprestoreapiexamples/backups/1/restore In the request body, send a JSON object that contains the properties for the restore operation. Here is an example containing all required properties:
- 572. { "location":"WestUS", "properties": { "blobName":"backup_201509280431.zip", "databases":[ // Not required unless you’re restoring databases { “databaseType”:“SqlAzure”, “name”:“MyDatabase1” }], "overwrite":"true", "storageAccountUrl":"https://account.blob.core.windows.net/backups?sv=2015-02- 21&sr=c&sig=DzlkBl7h32C8qCv%2BifdBRxE63r4iv0kZ9L7E0qP16sY%3D&se=2016-09-15T22%3A46%3A54Z&sp=rwdl" // SAS URLto storage container containing your website backup } } Restore to a new app Restore to a new app Delete an app backup Manage a backup’s SAS URL { "properties": { "storageAccountUrl":"https://account.blob.core.windows.net/backups?sv=2015-02- 21&sr=c&sig=DzlkBl7h32C8qCv%2BifdBRxE63r4iv0kZ9L7E0qP16sY%3D&se=2016-09-15T22%3A46%3A54Z&sp=rwdl" } } Sometimes you might want to create a new app when you restore a backup, instead of overwriting an already existing app. To do this, change the request URL to point to the new app you want to create, and change the overwrite property in the JSON to false. If you would like to delete a backup, send a DELETE request to the URL https://management.azure.com/subscriptions/{subscription-id}/resourceGroups/{resource-group- name}/providers/Microsoft.Web/sites/{name}/backups/{backup-id}. Here is what the URL looks like for our example website. https://management.azure.com/subscriptions/00001111-2222-3333-4444- 555566667777/resourceGroups/Default-Web- WestUS/providers/Microsoft.Web/sites/backuprestoreapiexamples/backups/1 Azure App Service will attempt to delete your backup from Azure Storage using the SAS URL that was provided when the backup was created. If this SAS URL is no longer valid, the backup cannot be deleted through the REST API. However, you can update the SAS URL associated with a backup by sending a POST request to the URL https://management.azure.com/subscriptions/{subscription-id}/resourceGroups/{resource-group- name}/providers/Microsoft.Web/sites/{name}/backups/{backup-id}/list. Here is what the URL looks like for our example website. https://management.azure.com/subscriptions/00001111-2222-3333-4444- 555566667777/resourceGroups/Default-Web- WestUS/providers/Microsoft.Web/sites/backuprestoreapiexamples/backups/1/list In the request body, send a JSON object that contains the new SAS URL. Here is an example.
- 573. NOTE NOTE For security reasons, the SAS URL associated with a backup is not returned when sending a GET request for a specific backup. If you want to view the SAS URL associated with a backup, send a POST request to the same URL above. Include an empty JSON object in the request body. The response from the server contains all of that backup’s information, including its SAS URL.
- 574. Azure App Service App Cloning Using PowerShell 3/17/2017 • 5 min to read • Edit Online NOTE NOTE Cloning an existing App $srcapp = Get-AzureRmWebApp -ResourceGroupName SourceAzureResourceGroup -Name source-webapp New-AzureRmAppServicePlan -Location "South CentralUS" -ResourceGroupName DestinationAzureResourceGroup -Name NewAppServicePlan -Tier Premium $destapp = New-AzureRmWebApp -ResourceGroupName DestinationAzureResourceGroup -Name dest-webapp -Location "North CentralUS" - AppServicePlan DestinationAppServicePlan -SourceWebApp $srcapp $destapp = New-AzureRmWebApp -ResourceGroupName DestinationAzureResourceGroup -Name dest-webapp -Location "North CentralUS" - AppServicePlan DestinationAppServicePlan -SourceWebApp $srcapp -IncludeSourceWebAppSlots With the release of Microsoft Azure PowerShell version 1.1.0 a new option has been added to New- AzureRMWebApp that would give the user the ability to clone an existing Web App to a newly created app in a different region or in the same region. This will enable customers to deploy a number of apps across different regions quickly and easily. App cloning is currently only supported for premium tier app service plans. The new feature uses the same limitations as Web Apps Backup feature, see Back up a web app in Azure App Service. Although this article refers to web apps, it also applies to API apps and mobile apps. To learn about using Azure Resource Manager based Azure PowerShell cmdlets to manage your Web Apps check Azure Resource Manager based PowerShell commands for Azure Web App Scenario: An existing web app in South Central US region, the user would like to clone the contents to a new web app in North Central US region. This can be accomplished by using the Azure Resource Manager version of the PowerShell cmdlet to create a new web app with the -SourceWebApp option. Knowing the resource group name that contains the source web app, we can use the following PowerShell command to get the source web app's information (in this case named source-webapp): To create a new App Service Plan, we can use New-AzureRmAppServicePlan command as in the following example Using the New-AzureRmWebApp command, we can create the new web app in the North Central US region, and tie it to an existing premium tier App Service Plan, moreover we can use the same resource group as the source web app, or define a new resource group, the following demonstrates that: To clone an existing web app including all associated deployment slots, the user will need to use the IncludeSourceWebAppSlots parameter, the following PowerShell command demonstrates the use of that parameter with the New-AzureRmWebApp command:
- 575. $destapp = New-AzureRmWebApp -ResourceGroupName NewAzureResourceGroup -Name dest-webapp -Location "South CentralUS" - AppServicePlan NewAppServicePlan -SourceWebApp $srcap Cloning an existing App to an App Service Environment $srcapp = Get-AzureRmWebApp -ResourceGroupName SourceAzureResourceGroup -Name source-webapp $destapp = New-AzureRmWebApp -ResourceGroupName DestinationAzureResourceGroup -Name dest-webapp -Location "North CentralUS" - AppServicePlan DestinationAppServicePlan -ASEName DestinationASE-ASEResourceGroupName DestinationASEResourceGroupName - SourceWebApp $srcapp Cloning an existing App Slot $srcappslot = Get-AzureRmWebAppSlot -ResourceGroupName SourceAzureResourceGroup -Name source-webapp -Slot source-webappslot $destapp = New-AzureRmWebApp -ResourceGroupName DestinationAzureResourceGroup -Name dest-webapp -Location "North CentralUS" - AppServicePlan DestinationAppServicePlan -SourceWebApp $srcappslot Configuring Traffic Manager while cloning a App Creating a new Traffic Manager profile while cloning a App Creating a new Traffic Manager profile while cloning a App To clone an existing web app within the same region, the user will need to create a new resource group and a new app service plan in the same region, and then using the following PowerShell command to clone the web app Scenario: An existing web app in South Central US region, the user would like to clone the contents to a new web app to an existing App Service Environment (ASE). Knowing the resource group name that contains the source web app, we can use the following PowerShell command to get the source web app's information (in this case named source-webapp): Knowing the ASE's name, and the resource group name that the ASE belongs to, the user can use the New- AzureRmWebApp command to create the new web app in the existing ASE, the following demonstrates that: The Location parameter is required due to legacy reason, but in the case of creating an app in an ASE it will be ignored. Scenario: The user would like to clone an existing Web App Slot to either a new Web App or a new Web App slot. The new Web App can be in the same region as the original Web App slot or in a different region. Knowing the resource group name that contains the source web app, we can use the following PowerShell command to get the source web app slot's information (in this case named source-webappslot) tied to Web App source-webapp: The following demonstrates creating a clone of the source web app to a new web app: Creating multi-region web apps and configuring Azure Traffic Manager to route traffic to all these web apps, is a n important scenario to insure that customers' apps are highly available, when cloning an existing web app you have the option to connect both web apps to either a new traffic manager profile or an existing one - note that only Azure Resource Manager version of Traffic Manager is supported. Scenario: The user would like to clone an web app to another region, while configuring an Azure Resource Manager traffic manager profile that include both web apps. The following demonstrates creating a clone of the source web
- 576. $destapp = New-AzureRmWebApp -ResourceGroupName DestinationAzureResourceGroup -Name dest-webapp -Location "South CentralUS" - AppServicePlan DestinationAppServicePlan -SourceWebApp $srcapp -TrafficManagerProfileName newTrafficManagerProfile Adding new cloned Web App to an existing Traffic Manager profile Adding new cloned Web App to an existing Traffic Manager profile $TMProfileID= "/subscriptions/<Your subscription IDgoes here>/resourceGroups/<Your resource group name goes here>/providers/Microsoft.TrafficManagerProfiles/ExistingTrafficManagerProfileName" $destapp = New-AzureRmWebApp -ResourceGroupName <Resource group name> -Name dest-webapp -Location "South CentralUS" - AppServicePlan DestinationAppServicePlan -SourceWebApp $srcapp -TrafficManagerProfileId $TMProfileID Current Restrictions References References app to a new web app while configuring a new Traffic Manager profile: Scenario: The user already have an Azure Resource Manager traffic manager profile that he would like to add both web apps as endpoints. To do so, we first need to assemble the existing traffic manager profile id, we will need the subscription id, resource group name and the existing traffic manager profile name. After having the traffic manger id, the following demonstrates creating a clone of the source web app to a new web app while adding them to an existing Traffic Manager profile: This feature is currently in preview, we are working to add new capabilities over time, the following list are the known restrictions on the current version of app cloning: Auto scale settings are not cloned Backup schedule settings are not cloned VNET settings are not cloned App Insights are not automatically set up on the destination web app Easy Auth settings are not cloned Kudu Extension are not cloned TiP rules are not cloned Database content are not cloned Azure Resource Manager based PowerShell commands for Azure Web App Web App Cloning using Azure Portal Back up a web app in Azure App Service Azure Resource Manager support for Azure Traffic Manager Preview Introduction to App Service Environment Using Azure PowerShell with Azure Resource Manager
- 577. Azure App Service App Cloning Using Azure Portal 1/17/2017 • 1 min to read • Edit Online NOTE NOTE Cloning an existing App The cloning feature in Azure App Service Web Apps lets you easily clone existing web apps to a newly created app in a different region or in the same region. This will enable customers to deploy a number of apps across different regions quickly and easily. App cloning is currently only supported for premium tier app service plans. The new feature uses the same limitations as Web Apps Backup feature, see Back up a web app in Azure App Service. Although this article refers to web apps, it also applies to API apps and mobile apps. The web app must be running in the Premium mode in order for you to create a clone for the web app. 1. In the Azure Portal, open your web app's blade. NOTE NOTE 2. Click Tools. Then, in the Tools blade, click Clone App. If the web app is not already in the Premium mode, you will receive a message indicating the supported modes for app cloning. At this point, you have the option to select Upgrade. 3. In the Clone App blade provide a name of the new web app, Resource Group, and App Service Plan. Also the user will be able to choose whether to clone a number of source web app settings or not.
- 578. Cloning an existing App to an App Service Environment Current Restrictions References References 4. After clicking create the platform will start working on creating a clone of the source web app. In the Clone App blade the customer will have the option to choose an app pool in an existing App Service Environment. This feature is currently in preview, we are working to add new capabilities over time, the following list are the known restrictions on the current support of app cloning in Azure Portal: Azure Traffic Manager settings are not cloned Auto scale settings are not cloned Backup schedule settings are not cloned VNET settings are not cloned App Insights are not automatically set up on the destination web app Easy Auth settings are not cloned Kudu Extension are not cloned TiP rules are not cloned Database content are not cloned Web App Cloning using PowerShell Back up a web app in Azure App Service How to Create an App Service Environment Create a web app in an App Service Environment Introduction to App Service Environment
- 579. Supported Move Configurations 2/28/2017 • 1 min to read • Edit Online You can move Azure Web App resources using the Resource Manager Move Resources API. Azure Web Apps currently supports the following move scenarios: NOTE NOTE Move the entire contents of a resource group (web apps, app service plans, and certificates) to another resource group. The destination resource group can not contain any Microsoft.Web resources in this scenario. Move individual web apps to a different resource group, while still hosting them in their current app service plan (the app service plan stays in the old resource group).
- 580. Using Azure Resource Manager-Based PowerShell to Manage Azure Web Apps 1/17/2017 • 5 min to read • Edit Online Managing App Service Plans Create an App Service Plan Create an App Service Plan New-AzureRmAppServicePlan -Name ContosoAppServicePlan -Location "South CentralUS" -ResourceGroupName ContosoAzureResourceGroup -Tier Premium-WorkerSize Large -NumberofWorkers 10 Create an App Service Plan in an App Service Environment Create an App Service Plan in an App Service Environment New-AzureRmAppServicePlan -Name ContosoAppServicePlan -Location "South CentralUS" -ResourceGroupName ContosoAzureResourceGroup -AseName constosoASE-AseResourceGroupName contosoASERG-Tier Premium-WorkerSize Large - NumberofWorkers 10 List Existing App Service Plans List Existing App Service Plans With Microsoft Azure PowerShell version 1.0.0 new commands have been added, that give the user the ability to use Azure Resource Manager-based PowerShell commands to manage Web Apps. To learn about managing Resource Groups, see Using Azure PowerShell with Azure Resource Manager. To learn about the full list of parameters and options for the PowerShell cmdlets, see the full Cmdlet Reference of Web App Azure Resource Manager-based PowerShell Cmdlets To create an app service plan, use the New-AzureRmAppServicePlan cmdlet. Following are descriptions of the different parameters: Name: name of the app service plan. Location: service plan location. ResourceGroupName: resource group that includes the newly created app service plan. Tier: the desired pricing tier (Default is Free, other options are Shared, Basic, Standard, and Premium.) WorkerSize: the size of workers (Default is small if the Tier parameter was specified as Basic, Standard, or Premium. Other options are Medium, and Large.) NumberofWorkers: the number of workers in the app service plan (Default value is 1). Example to use this cmdlet: To create an app service plan in an app service environment, use the same command New- AzureRmAppServicePlan command with extra parameters to specify the ASE's name and ASE's resource group name. Example to use this cmdlet: To learn more about app service environment, check Introduction to App Service Environment To list the existing app service plans, use Get-AzureRmAppServicePlan cmdlet. To list all app service plans under your subscription, use:
- 581. Get-AzureRmAppServicePlan Get-AzureRmAppServicePlan -ResourceGroupname ContosoAzureResourceGroup Get-AzureRmAppServicePlan -Name ContosoAppServicePlan Configure an existing App Service Plan Configure an existing App Service Plan Set-AzureRmAppServicePlan -Name ContosoAppServicePlan -ResourceGroupName ContosoAzureResourceGroup -Tier Standard -WorkerSize Medium-NumberofWorkers 9 Scaling an App Service Plan Scaling an App Service Plan Set-AzureRmAppServicePlan -Name ContosoAppServicePlan -ResourceGroupName ContosoAzureResourceGroup -NumberofWorkers 9 Changing the worker size of an App Service Plan Changing the worker size of an App Service Plan Set-AzureRmAppServicePlan -Name ContosoAppServicePlan -ResourceGroupName ContosoAzureResourceGroup -WorkerSize Medium Changing the Tier of an App Service Plan Changing the Tier of an App Service Plan Set-AzureRmAppServicePlan -Name ContosoAppServicePlan -ResourceGroupName ContosoAzureResourceGroup -Tier Standard Delete an existing App Service Plan Delete an existing App Service Plan Remove-AzureRmAppServicePlan -Name ContosoAppServicePlan -ResourceGroupName ContosoAzureResourceGroup Managing App Service Web Apps Create a Web App Create a Web App To list all app service plans under a specific resource group, use: To get a specific app service plan, use: To change the settings for an existing app service plan, use the Set-AzureRmAppServicePlan cmdlet. You can change the tier, worker size, and the number of workers To scale an existing App Service Plan, use: To change the size of workers in an existing App Service Plan, use: To change the tier of an existing App Service Plan, use: To delete an existing app service plan, all assigned web apps need to be moved or deleted first. Then using the Remove-AzureRmAppServicePlan cmdlet you can delete the app service plan. To create a web app, use the New-AzureRmWebApp cmdlet. Following are descriptions of the different parameters: Name: name for the web app. AppServicePlan: name for the service plan used to host the web app. ResourceGroupName: resource group that hosts the App service plan.
- 582. New-AzureRmWebApp -Name ContosoWebApp -AppServicePlan ContosoAppServicePlan -ResourceGroupName ContosoAzureResourceGroup -Location "South CentralUS" Create a Web App in an App Service Environment Create a Web App in an App Service Environment New-AzureRmWebApp -Name ContosoWebApp -AppServicePlan ContosoAppServicePlan -ResourceGroupName ContosoAzureResourceGroup -Location "South CentralUS" -ASEName ContosoASEName -ASEResourceGroupName ContosoASEResourceGroupName Delete an existing Web App Delete an existing Web App Remove-AzureRmWebApp -Name ContosoWebApp -ResourceGroupName ContosoAzureResourceGroup List existing Web Apps List existing Web Apps Get-AzureRmWebApp Get-AzureRmWebApp -ResourceGroupname ContosoAzureResourceGroup Get-AzureRmWebApp -Name ContosoWebApp Configure an existing Web App Configure an existing Web App $connectionstrings = @{ ContosoConn1= @{ Type = “MySql”; Value = “MySqlConn”}; ContosoConn2= @{ Type = “SQLAzure”; Value = “SQLAzureConn”} } Set-AzureRmWebApp -Name ContosoWebApp -ResourceGroupName ContosoAzureResourceGroup -ConnectionStrings $connectionstrings Location: the web app location. Example to use this cmdlet: To create a web app in an App Service Environment (ASE). Use the same New-AzureRmWebApp command with extra parameters to specify the ASE name and the resource group name that the ASE belongs to. To learn more about app service environment, check Introduction to App Service Environment To delete an existing web app you can use the Remove-AzureRmWebApp cmdlet, you need to specify the name of the web app and the resource group name. To list the existing web apps, use the Get-AzureRmWebApp cmdlet. To list all web apps under your subscription, use: To list all web apps under a specific resource group, use: To get a specific web app, use: To change the settings and configurations for an existing web app, use the Set-AzureRmWebApp cmdlet. For a full list of parameters, check the Cmdlet reference link Example (1): use this cmdlet to change connection strings Example (2): add or change app settings
- 583. $appsettings = @{appsetting1= "appsetting1value"; appsetting2= "appsetting2value"} Set-AzureRmWebApp -Name ContosoWebApp -ResourceGroupName ContosoAzureResourceGroup -AppSettings $appsettings Set-AzureRmWebApp -Name ContosoWebApp -ResourceGroupName ContosoAzureResourceGroup -Use32BitWorkerProcess $False Change the state of an existing Web App Change the state of an existing Web App Restart a web app Restart a web app Restart-AzureRmWebapp -Name ContosoWebApp -ResourceGroupName ContosoAzureResourceGroup Stop a web app Stop a web app Stop-AzureRmWebapp -Name ContosoWebApp -ResourceGroupName ContosoAzureResourceGroup Start a web app Start a web app Start-AzureRmWebapp -Name ContosoWebApp -ResourceGroupName ContosoAzureResourceGroup Manage Web App Publishing profiles Manage Web App Publishing profiles Get Publishing Profile Get Publishing Profile Get-AzureRmWebAppPublishingProfile -Name ContosoWebApp -ResourceGroupName ContosoAzureResourceGroup -OutputFile .publishingprofile.txt Reset Publishing Profile Reset Publishing Profile Reset-AzureRmWebAppPublishingProfile -Name ContosoWebApp -ResourceGroupName ContosoAzureResourceGroup Manage Web App Certificates Manage Web App Certificates Next Steps Next Steps Example (3): set the web app to run in 64-bit mode To restart a web app, you must specify the name and resource group of the web app. To stop a web app, you must specify the name and resource group of the web app. To start a web app, you must specify the name and resource group of the web app. Each web app has a publishing profile that can be used to publish your apps, several operations can be executed on publishing profiles. To get the publishing profile for a web app, use: This command echoes the publishing profile to the command line as well output the publishing profile to a text file. To reset both the publishing password for FTP and web deploy for a web app, use: To learn about how to manage web app certificates, see SSL Certificates binding using PowerShell To learn about Azure Resource Manager PowerShell support, see Using Azure PowerShell with Azure Resource Manager. To learn about App Service Environments, see Introduction to App Service Environment. To learn about managing App Service SSL certificates using PowerShell, see SSL Certificates binding using PowerShell.
- 584. To learn about the full list of Azure Resource Manager-based PowerShell cmdlets for Azure Web Apps, see Azure Cmdlet Reference of Web Apps Azure Resource Manager PowerShell Cmdlets. To learn about managing App Service using CLI, see Using Azure Resource Manager-Based XPlat CLI for Azure Web App.
- 585. Managing Azure Web App using Azure Automation 1/17/2017 • 1 min to read • Edit Online What is Azure Automation? How can Azure Automation help manage Azure Web App? Next steps This guide will introduce you to the Azure Automation service, and how it can be used to simplify management of Azure Web App. Azure Automation is an Azure service for simplifying cloud management through process automation. Using Azure Automation, manual, repeated, long-running, and error-prone tasks can be automated to increase reliability, efficiency, and time to value for your organization. Azure Automation provides a highly-reliable, highly-available workflow execution engine that scales to meet your needs. In Azure Automation, processes can be kicked off manually, by 3rd-party systems, or at scheduled intervals so that tasks happen exactly when needed. Reduce operational overhead and free up IT and DevOps staff to focus on work that adds business value by moving your cloud management tasks to be run automatically by Azure Automation. Web App can be managed in Azure Automation by using the PowerShell cmdlets that are available in the Azure PowerShell modules. You can install these Web App PowerShell cmdlets in Azure Automation, so that you can perform all of your Web App management tasks within the service. You can also pair these cmdlets in Azure Automation with the cmdlets for other Azure services to automate complex tasks across Azure services and 3rd party systems. Here are some examples of managing App Services with Automation: Scripts for managing Web Apps Now that you've learned the basics of Azure Automation and how it can be used to manage Azure Web App, follow these links to learn more about Azure Automation. See the Azure Automation Getting Started Tutorial
- 586. Troubleshoot a web app in Azure App Service using Visual Studio 4/5/2017 • 30 min to read • Edit Online Overview NOTE NOTE Prerequisites Web app configuration and management This tutorial shows how to use Visual Studio tools that help debug a web app in App Service, by running in debug mode remotely or by viewing application logs and web server logs. Although this article refers to web apps, it also applies to API apps and mobile apps. You'll learn: Which Azure web app management functions are available in Visual Studio. How to use Visual Studio remote view to make quick changes in a remote web app. How to run debug mode remotely while a project is running in Azure, both for a web app and for a WebJob. How to create application trace logs and view them while the application is creating them. How to view web server logs, including detailed error messages and failed request tracing. How to send diagnostic logs to an Azure Storage account and view them there. If you have Visual Studio Ultimate, you can also use IntelliTrace for debugging. IntelliTrace is not covered in this tutorial. This tutorial works with the development environment, web project, and Azure web app that you set up in Get started with Azure and ASP.NET. For the WebJobs sections, you'll need the application that you create in Get Started with the Azure WebJobs SDK. The code samples shown in this tutorial are for a C# MVC web application, but the troubleshooting procedures are the same for Visual Basic and Web Forms applications. The tutorial assumes you're using Visual Studio 2015 or 2013. If you're using Visual Studio 2013, the WebJobs features require Update 4 or later. The streaming logs feature only works for applications that target .NET Framework 4 or later. Visual Studio provides access to a subset of the web app management functions and configuration settings available in the Azure Portal. In this section you'll see what's available by using Server Explorer. To see the latest Azure integration features, try out Cloud Explorer also. You can open both windows from the View menu. 1. If you aren't already signed in to Azure in Visual Studio, click the Connect to Azure button in Server Explorer. An alternative is to install a management certificate that enables access to your account. If you choose to install a certificate, right-click the Azure node in Server Explorer, and then click Manage and Filter
- 587. NOTE NOTE 2. In Server Explorer, expand Azure and expand App Service. Subscriptions in the context menu. In the Manage Azure Subscriptions dialog box, click the Certificates tab, and then click Import. Follow the directions to download and then import a subscription file (also called a .publishsettings file) for your Azure account. If you download a subscription file, save it to a folder outside your source code directories (for example, in the Downloads folder), and then delete it once the import has completed. A malicious user who gains access to the subscription file can edit, create, and delete your Azure services. For more information about connecting to Azure resources from Visual Studio, see Manage Accounts, Subscriptions, and Administrative Roles. 3. Expand the resource group that includes the web app that you created in Getting started with Azure and ASP.NET, and then right-click the web app node and click View Settings. The Azure Web App tab appears, and you can see there the web app management and configuration tasks that are available in Visual Studio.
- 588. Access web app files in Server Explorer In this tutorial you'll be using the logging and tracing drop-downs. You'll also use remote debugging but you'll use a different method to enable it. For information about the App Settings and Connection Strings boxes in this window, see Azure Web Apps: How Application Strings and Connection Strings Work. If you want to perform a web app management task that can't be done in this window, click Open in Management Portal to open a browser window to the Azure portal. You typically deploy a web project with the customErrors flag in the Web.config file set to On or RemoteOnly , which means you don't get a helpful error message when something goes wrong. For many errors all you get is a page like one of the following ones. Server Error in '/' Application:
- 589. An error occurred: The website cannot display the page
- 590. Frequently the easiest way to find the cause of the error is to enable detailed error messages, which the first of the preceding screenshots explains how to do. That requires a change in the deployed Web.config file. You could edit the Web.config file in the project and redeploy the project, or create a Web.config transform and deploy a debug build, but there's a quicker way: in Solution Explorer you can directly view and edit files in the remote web app by using the remote view feature. 1. In Server Explorer, expand Azure, expand App Service, expand the resource group that your web app is located in, and then expand the node for your web app. You see nodes that give you access to the web app's content files and log files. 2. Expand the Files node, and double-click the Web.config file. Visual Studio opens the Web.config file from the remote web app and shows [Remote] next to the file name in the title bar. 3. Add the following line to the system.web element: <customErrors mode="Off"></customErrors>
- 591. Remote debugging web apps 4. Refresh the browser that is showing the unhelpful error message, and now you get a detailed error message, such as the following example: (The error shown was created by adding the line shown in red to ViewsHomeIndex.cshtml.) Editing the Web.config file is only one example of scenarios in which the ability to read and edit files on your Azure web app make troubleshooting easier. If the detailed error message doesn't provide enough information, and you can't re-create the error locally, another way to troubleshoot is to run in debug mode remotely. You can set breakpoints, manipulate memory directly, step through code, and even change the code path.
- 592. Remote debugging does not work in Express editions of Visual Studio. This section shows how to debug remotely using the project you create in Getting started with Azure and ASP.NET. 1. Open the web project that you created in Getting started with Azure and ASP.NET. 2. Open ControllersHomeController.cs. public ActionResult About() { string currentTime = DateTime.Now.ToLongTimeString(); ViewBag.Message = "The current time is " + currentTime; return View(); } 4. Set a breakpoint on the ViewBag.Message line. 5. In Solution Explorer, right-click the project, and click Publish. 6. In the Profile drop-down list, select the same profile that you used in Getting started with Azure and ASP.NET. 8. After deployment finishes and your browser opens to the Azure URL of your web app, close the browser. 3. Delete the About() method and insert the following code in its place. 7. Click the Settings tab, and change Configuration to Debug, and then click Publish. 9. In Server Explorer, right-click your web app, and then click Attach Debugger.
- 593. Remote debugging WebJobs 12. Enter a new value for the currentTime variable, such as "Now running in Azure". The browser automatically opens to your home page running in Azure. You might have to wait 20 seconds or so while Azure sets up the server for debugging. This delay only happens the first time you run in debug mode on a web app. Subsequent times within the next 48 hours when you start debugging again there won't be a delay. Note: If you have any trouble starting the debugger, try to do it by using Cloud Explorer instead of Server Explorer. 10. Click About in the menu. Visual Studio stops on the breakpoint, and the code is running in Azure, not on your local computer. 11. Hover over the currentTime variable to see the time value. The time you see is the Azure server time, which may be in a different time zone than your local computer. 13. Press F5 to continue running. The About page running in Azure displays the new value that you entered into the currentTime variable. This section shows how to debug remotely using the project and web app you create in Get Started with the Azure WebJobs SDK. The features shown in this section are available only in Visual Studio 2013 with Update 4 or later. Remote debugging only works with continuous WebJobs. Scheduled and on-demand WebJobs don't support debugging. 1. Open the web project that you created in Get Started with the Azure WebJobs SDK. 2. In the ContosoAdsWebJob project, open Functions.cs. 3. Set a breakpoint on the first statement in the GnerateThumbnail method.
- 594. 4. In Solution Explorer, right-click the web project (not the WebJob project), and click Publish. 5. In the Profile drop-down list, select the same profile that you used in Get Started with the Azure WebJobs SDK. 7. In Server Explorer expand Azure > App Service > your resource group > your web app > WebJobs > Continuous, and then right-click ContosoAdsWebJob. 12. In the browser, refresh the Index page and you see the thumbnail. 6. Click the Settings tab, and change Configuration to Debug, and then click Publish. Visual Studio deploys the web and WebJob projects, and your browser opens to the Azure URL of your web app. 8. Click Attach Debugger. The browser automatically opens to your home page running in Azure. You might have to wait 20 seconds or so while Azure sets up the server for debugging. This delay only happens the first time you run in debug mode on a web app. The next time you attach the debugger there won't be a delay, if you do it within 48 hours. 9. In the web browser that is opened to the Contoso Ads home page, create a new ad. Creating an ad causes a queue message to be created, which will be picked up by the WebJob and processed. When the WebJobs SDK calls the function to process the queue message, the code will hit your breakpoint. 10. When the debugger breaks at your breakpoint, you can examine and change variable values while the program is running the cloud. In the following illustration the debugger shows the contents of the blobInfo object that was passed to the GenerateThumbnail method. 11. Press F5 to continue running. The GenerateThumbnail method finishes creating the thumbnail.
- 595. 13. In Visual Studio, press SHIFT+F5 to stop debugging. 14. In Server Explorer, right-click the ContosoAdsWebJob node and click View Dashboard. 15. Sign in with your Azure credentials, and then click the WebJob name to go to the page for your WebJob. The Dashboard shows that the GenerateThumbnail function executed recently. (The next time you click View Dashboard, you don't have to sign in, and the browser goes directly to the page for your WebJob.) 16. Click the function name to see details about the function execution.
- 596. Notes about remote debugging If your function wrote logs, you could click ToggleOutput to see them. Running in debug mode in production is not recommended. If your production web app is not scaled out to multiple server instances, debugging will prevent the web server from responding to other requests. If you do have multiple web server instances, when you attach to the debugger you'll get a random instance, and you have no way to ensure that subsequent browser requests will go to that instance. Also, you typically don't deploy a debug build to production, and compiler optimizations for release builds might make it impossible to show what is happening line by line in your source code. For troubleshooting production problems, your best resource is application tracing and web server logs. Avoid long stops at breakpoints when remote debugging. Azure treats a process that is stopped for longer than a few minutes as an unresponsive process, and shuts it down. While you're debugging, the server is sending data to Visual Studio, which could affect bandwidth charges. For information about bandwidth rates, see Azure Pricing. Make sure that the debug attribute of the compilation element in the Web.config file is set to true. It is set to true by default when you publish a debug build configuration.
- 597. Diagnostic logs overview Create and view application trace logs Add tracing statements to the application Add tracing statements to the application <system.web> <compilation debug="true" targetFramework="4.5" /> <httpRuntime targetFramework="4.5" /> </system.web> If you find that the debugger won't step into code that you want to debug, you might have to change the Just My Code setting. For more information, see Restrict stepping to Just My Code. A timer starts on the server when you enable the remote debugging feature, and after 48 hours the feature is automatically turned off. This 48 hour limit is done for security and performance reasons. You can easily turn the feature back on as many times as you like. We recommend leaving it disabled when you are not actively debugging. You can manually attach the debugger to any process, not only the web app process (w3wp.exe). For more information about how to use debug mode in Visual Studio, see Debugging in Visual Studio. An ASP.NET application that runs in an Azure web app can create the following kinds of logs: Application tracing logs The application creates these logs by calling methods of the System.Diagnostics.Trace class. Web server logs The web server creates a log entry for every HTTP request to the web app. Detailed error message logs The web server creates an HTML page with some additional information for failed HTTP requests (those that result in status code 400 or greater). Failed request tracing logs The web server creates an XML file with detailed tracing information for failed HTTP requests. The web server also provides an XSL file to format the XML in a browser. Logging affects web app performance, so Azure gives you the ability to enable or disable each type of log as needed. For application logs, you can specify that only logs above a certain severity level should be written. When you create a new web app, by default all logging is disabled. Logs are written to files in a LogFiles folder in the file system of your web app and are accessible via FTP. Web server logs and application logs can also be written to an Azure Storage account. You can retain a greater volume of logs in a storage account than is possible in the file system. You're limited to a maximum of 100 megabytes of logs when you use the file system. (File system logs are only for short-term retention. Azure deletes old log files to make room for new ones after the limit is reached.) In this section you'll do the following tasks: Add tracing statements to the web project that you created in Get started with Azure and ASP.NET. View the logs when you run the project locally. View the logs as they are generated by the application running in Azure. For information about how to create application logs in WebJobs, see How to work with Azure queue storage using the WebJobs SDK - How to write logs. The following instructions for viewing logs and controlling how they're stored in Azure apply also to application logs created by WebJobs. 1. Open ControllersHomeController.cs, and replace the Index , About , and Contact methods with the
- 598. View the tracing output locally View the tracing output locally public ActionResult Index() { Trace.WriteLine("Entering Indexmethod"); ViewBag.Message = "Modify this template to jump-start your ASP.NET MVCapplication."; Trace.TraceInformation("Displaying the Indexpage at " + DateTime.Now.ToLongTimeString()); Trace.WriteLine("Leaving Indexmethod"); return View(); } public ActionResult About() { Trace.WriteLine("Entering About method"); ViewBag.Message = "Your app description page."; Trace.TraceWarning("Transient error on the About page at " + DateTime.Now.ToShortTimeString()); Trace.WriteLine("Leaving About method"); return View(); } public ActionResult Contact() { Trace.WriteLine("Entering Contact method"); ViewBag.Message = "Your contact page."; Trace.TraceError("Fatalerror on the Contact page at " + DateTime.Now.ToLongTimeString()); Trace.WriteLine("Leaving Contact method"); return View(); } 2. Add a using System.Diagnostics; statement to the top of the file. following code in order to add Trace statements and a using statement for System.Diagnostics : 1. Press F5 to run the application in debug mode. The default trace listener writes all trace output to the Output window, along with other Debug output. The following illustration shows the output from the trace statements that you added to the Index method. The following steps show how to view trace output in a web page, without compiling in debug mode. 2. Open the application Web.config file (the one located in the project folder) and add a <system.diagnostics> element at the end of the file just before the closing </configuration> element:
- 599. <system.diagnostics> <trace> <listeners> <add name="WebPageTraceListener" type="System.Web.WebPageTraceListener, System.Web, Version=4.0.0.0, Culture=neutral, PublicKeyToken=b03f5f7f11d50a3a" /> </listeners> </trace> </system.diagnostics> <trace enabled="true" writeToDiagnosticsTrace="true" mostRecent="true" pageOutput="false" /> 4. Press CTRL+F5 to run the application. 5. In the address bar of the browser window, add trace.axd to the URL, and then press Enter (the URL will be similar to http://localhost:53370/trace.axd). The WebPageTraceListener lets you view trace output by browsing to /trace.axd . 3. Add a trace element under <system.web> in the Web.config file, such as the following example: 6. On the Application Trace page, click View Details on the first line (not the BrowserLink line). The Request Details page appears, and in the Trace Information section you see the output from the trace statements that you added to the Index method.
- 600. View the tracing output in Azure View the tracing output in Azure <trace enabled="true" writeToDiagnosticsTrace="true" localOnly="false" mostRecent="true" pageOutput="false" /> By default, trace.axd is only available locally. If you wanted to make it available from a remote web app, you could add localOnly="false" to the trace element in the Web.config file, as shown in the following example: However, enabling trace.axd in a production web app is generally not recommended for security reasons, and in the following sections you'll see an easier way to read tracing logs in an Azure web app. 1. In Solution Explorer, right-click the web project and click Publish. 2. In the Publish Web dialog box, click Publish. After Visual Studio publishes your update, it opens a browser window to your home page (assuming you didn't clear Destination URL on the Connection tab). 3. In Server Explorer, right-click your web app and select View Streaming Logs. The Output window shows that you are connected to the log-streaming service, and adds a notification line each minute that goes by without a log to display.
- 601. 4. In the browser window that shows your application home page, click Contact. Within a few seconds the output from the error-level trace you added to the Contact method appears in the Output window. Visual Studio is only showing error-level traces because that is the default setting when you enable the log monitoring service. When you create a new Azure web app, all logging is disabled by default, as you saw when you opened the settings page earlier: However, when you selected View Streaming Logs, Visual Studio automatically changed Application Logging(File System) to Error, which means error-level logs get reported. In order to see all of your tracing logs, you can change this setting to Verbose. When you select a severity level lower than error, all logs for higher severity levels are also reported. So when you select verbose, you also see information, warning, and error logs. 5. In Server Explorer, right-click the web app, and then click View Settings as you did earlier. 6. Change Application Logging (File System) to Verbose, and then click Save. 7. In the browser window that is now showing your Contact page, click Home, then click About, and then
- 602. Output window features Output window features View web server logs click Contact. Within a few seconds, the Output window shows all of your tracing output. In this section you enabled and disabled logging by using Azure web app settings. You can also enable and disable trace listeners by modifying the Web.config file. However, modifying the Web.config file causes the app domain to recycle, while enabling logging via the web app configuration doesn't do that. If the problem takes a long time to reproduce, or is intermittent, recycling the app domain might "fix" it and force you to wait until it happens again. Enabling diagnostics in Azure doesn't do this, so you can start capturing error information immediately. The Azure Logs tab of the Output Window has several buttons and a text box: These perform the following functions: Clear the Output window. Enable or disable word wrap. Start or stop monitoring logs. Specify which logs to monitor. Download logs. Filter logs based on a search string or a regular expression. Close the Output window. If you enter a search string or regular expression, Visual Studio filters logging information at the client. That means you can enter the criteria after the logs are displayed in the Output window and you can change filtering criteria without having to regenerate the logs. Web server logs record all HTTP activity for the web app. In order to see them in the Output window you have to enable them for the web app and tell Visual Studio that you want to monitor them. 1. In the Azure Web App Configuration tab that you opened from Server Explorer, change Web Server Logging to On, and then click Save.
- 603. 2. In the Output Window, click the Specify which Azure logs to monitor button. 3. In the Azure Logging Options dialog box, select Web server logs, and then click OK. 4. In the browser window that shows the web app, click Home, then click About, and then click Contact. The application logs generally appear first, followed by the web server logs. You might have to wait a while for the logs to appear.
- 604. View detailed error message logs By default, when you first enable web server logs by using Visual Studio, Azure writes the logs to the file system. As an alternative, you can use the Azure portal to specify that web server logs should be written to a blob container in a storage account. If you use the portal to enable web server logging to an Azure storage account, and then disable logging in Visual Studio, when you re-enable logging in Visual Studio your storage account settings are restored. Detailed error logs provide some additional information about HTTP requests that result in error response codes (400 or above). In order to see them in the Output window, you have to enable them for the web app and tell Visual Studio that you want to monitor them. 1. In the Azure Web App Configuration tab that you opened from Server Explorer, change Detailed Error Messages to On, and then click Save.
- 605. 2. In the Output Window, click the Specify which Azure logs to monitor button. 3. In the Azure Logging Options dialog box, click All logs, and then click OK. 4. In the address bar of the browser window, add an extra character to the URL to cause a 404 error (for example, http://localhost:53370/Home/Contactx ), and press Enter. After several seconds the detailed error log appears in the Visual Studio Output window. Control+click the link to see the log output formatted in a browser:
- 606. Download file system logs Any logs that you can monitor in the Output window can also be downloaded as a .zip file. 1. In the Output window, click Download Streaming Logs. File Explorer opens to your Downloads folder with the downloaded file selected.
- 607. View storage logs 2. Extract the .zip file, and you see the following folder structure: Application tracing logs are in .txt files in the LogFilesApplication folder. Web server logs are in .log files in the LogFileshttpRawLogs folder. You can use a tool such as Log Parser to view and manipulate these files. Detailed error message logs are in .html files in the LogFilesDetailedErrors folder. (The deployments folder is for files created by source control publishing; it doesn't have anything related to Visual Studio publishing. The Git folder is for traces related to source control publishing and the log file streaming service.) Application tracing logs can also be sent to an Azure storage account, and you can view them in Visual Studio. To do that you'll create a storage account, enable storage logs in the classic portal, and view them in the Logs tab of the Azure Web App window. You can send logs to any or all of three destinations: The file system. Storage account tables. Storage account blobs. You can specify a different severity level for each destination. Tables make it easy to view details of logs online, and they support streaming; you can query logs in tables and see new logs as they are being created. Blobs make it easy to download logs in files and to analyze them using HDInsight, because HDInsight knows how to work with blob storage. For more information, see Hadoop and MapReduce in Data Storage Options (Building Real-World Cloud Apps with Azure). You currently have file system logs set to verbose level; the following steps walk you through setting up information level logs to go to storage account tables. Information level means all logs created by calling Trace.TraceInformation , Trace.TraceWarning , and Trace.TraceError will be displayed, but not logs created by calling Trace.WriteLine . Storage accounts offer more storage and longer-lasting retention for logs compared to the file system. Another advantage of sending application tracing logs to storage is that you get some additional information with each log that you don't get from file system logs. 1. Right-click Storage under the Azure node, and then click Create Storage Account.
- 608. 1. In the Create Storage Account dialog, enter a name for the storage account. The name must be must be unique (no other Azure storage account can have the same name). If the name you enter is already in use you'll get a chance to change it. The URL to access your storage account will be {name}.core.windows.net. 2. Set the Region or Affinity Group drop-down list to the region closest to you. This setting specifies which Azure datacenter will host your storage account. For this tutorial your choice won't make a noticeable difference, but for a production web app you want your web server and your storage account to be in the same region to minimize latency and data egress charges. The web app (which you'll create later) should run in a region as close as possible to the browsers accessing your web app in order to minimize latency. 3. Set the Replication drop-down list to Locally redundant. When geo-replication is enabled for a storage account, the stored content is replicated to a secondary datacenter to enable failover to that location in case of a major disaster in the primary location. Geo- replication can incur additional costs. For test and development accounts, you generally don't want to pay for geo-replication. For more information, see Create, manage, or delete a storage account. 4. Click Create. 5. In the Visual Studio Azure Web App window, click the Logs tab, and then click Configure Logging in Management Portal.
- 609. 6. In the classic portal's Configure tab, scroll down to the application diagnostics section, and then change Application Logging (Table Storage) to On. 7. Change Logging Level to Information. This opens the Configure tab in the classic portal for your web app. 8. Click Manage Table Storage. In the Manage table storage for application diagnostics box, you can choose your storage account if you have more than one. You can create a new table or use an existing one.
- 610. 9. In the Manage table storage for application diagnostics box click the check mark to close the box. 10. In the classic portal's Configure tab, click Save. 11. In the browser window that displays the application web app, click Home, then click About, and then click Contact. The logging information produced by browsing these web pages will be written to the storage account. 12. In the Logs tab of the Azure Web App window in Visual Studio, click Refresh under Diagnostic Summary. The Diagnostic Summary section shows logs for the last 15 minutes by default. You can change the period to see more logs. (If you get a "table not found" error, verify that you browsed to the pages that do the tracing after you enabled Application Logging (Storage) and after you clicked Save.)
- 611. View failed request tracing logs Notice that in this view you see Process ID and Thread ID for each log, which you don't get in the file system logs. You can see additional fields by viewing the Azure storage table directly. 13. Click View all application logs. The trace log table appears in the Azure storage table viewer. (If you get a "sequence contains no elements" error, open Server Explorer, expand the node for your storage account under the Azure node, and then right-click Tables and click Refresh.) This view shows additional fields you don't see in any other views. This view also enables you to filter logs by using special Query Builder UI for constructing a query. For more information, see Working with Table Resources - Filtering Entities in Browsing Storage Resources with Server Explorer. 14. To look at the details for a single row, double-click one of the rows.
- 612. Failed request tracing logs are useful when you need to understand the details of how IIS is handling an HTTP request, in scenarios such as URL rewriting or authentication problems. Azure web apps use the same failed request tracing functionality that has been available with IIS 7.0 and later. You don't have access to the IIS settings that configure which errors get logged, however. When you enable failed request tracing, all errors are captured. You can enable failed request tracing by using Visual Studio, but you can't view them in Visual Studio. These logs are XML files. The streaming log service only monitors files that are deemed readable in plain text mode: .txt, .html, and .log files. You can view failed request tracing logs in a browser directly via FTP or locally after using an FTP tool to download them to your local computer. In this section you'll view them in a browser directly. 3. In Visual Studio, in the Configuration tab of the Azure Web App window, click Open in Management Portal. 1. In the Configuration tab of the Azure Web App window that you opened from Server Explorer, change Failed Request Tracing to On, and then click Save. 2. In the address bar of the browser window that shows the web app, add an extra character to the URL and click Enter to cause a 404 error. This causes a failed request tracing log to be created, and the following steps show how to view or download the log. 4. In the Azure Portal Settings blade for your web app, click Deployment credentials, and then enter a new user name and password.
- 613. 5. In a new browser window, go to the URL that is shown under FTP hostname or FTPS hostname in the Web App blade for your web app. **When you log in, you have to use the full user name with the web app name prefixed to it. For example, if you enter "myid" as a user name and the site is "myexample", you log in as "myexamplemyid". 6. Log in using the FTP credentials that you created earlier (including the web app name prefix for the user name). The browser shows the root folder of the web app. 7. Open the LogFiles folder. 8. Open the folder that is named W3SVC plus a numeric value. The folder contains XML files for any errors that have been logged after you enabled failed request tracing, and an XSL file that a browser can use to format the XML.
- 614. 9. Click the XML file for the failed request that you want to see tracing information for. The following illustration shows part of the tracing information for a sample error.
- 615. Next Steps You've seen how Visual Studio makes it easy to view logs created by an Azure web app. The following sections provide links to more resources on related topics: Azure web app troubleshooting Debugging in Visual Studio Remote debugging in Azure Tracing in ASP.NET applications
- 616. Azure web app troubleshooting Azure web app troubleshooting Debugging in Visual Studio Debugging in Visual Studio Remote debugging in Azure Remote debugging in Azure Tracing in ASP.NET applications Tracing in ASP.NET applications Analyzing web server logs Analyzing failed request tracing logs Debugging Cloud Services For more information about troubleshooting web apps in Azure App Service, see the following resources: How to monitor web apps Investigating Memory Leaks in Azure Web Apps with Visual Studio 2013. Microsoft ALM blog post about Visual Studio features for analyzing managed memory issues. Azure web apps online tools you should know about. Blog post by Amit Apple. For help with a specific troubleshooting question, start a thread in one of the following forums: The Azure forum on the ASP.NET site. The Azure forum on MSDN. StackOverflow.com. For more information about how to use debug mode in Visual Studio, see the Debugging in Visual Studio MSDN topic and Debugging Tips with Visual Studio 2010. For more information about remote debugging for Azure web apps and WebJobs, see the following resources: Introduction to Remote Debugging Azure App Service Web Apps. Introduction to Remote Debugging Azure App Service Web Apps part 2 - Inside Remote debugging Introduction to Remote Debugging on Azure App Service Web Apps part 3 - Multi-Instance environment and GIT WebJobs Debugging (video) If your web app uses an Azure Web API or Mobile Services back-end and you need to debug that, see Debugging .NET Backend in Visual Studio. There are no thorough and up-to-date introductions to ASP.NET tracing available on the Internet. The best you can do is get started with old introductory materials written for Web Forms because MVC didn't exist yet, and supplement that with newer blog posts that focus on specific issues. Some good places to start are the following resources: Monitoring and Telemetry (Building Real-World Cloud Apps with Azure). E-book chapter with recommendations for tracing in Azure cloud applications. ASP.NET Tracing Old but still a good resource for a basic introduction to the subject. Trace Listeners Information about trace listeners but doesn't mention the WebPageTraceListener. Walkthrough: Integrating ASP.NET Tracing with System.Diagnostics Tracing This too is old, but includes some additional information that the introductory article doesn't cover. Tracing in ASP.NET MVC Razor Views Besides tracing in Razor views, the post also explains how to create an error filter in order to log all unhandled exceptions in an MVC application. For information about how to log all unhandled exceptions in a Web Forms application, see the Global.asax example in Complete Example for Error Handlers on MSDN. In either MVC or Web Forms, if you want to log certain exceptions but let the default framework handling take effect for them, you can catch and rethrow as in the following example:
- 617. Analyzing web server logs Analyzing web server logs Analyzing failed request tracing logs Analyzing failed request tracing logs try { // Your code that might cause an exception to be thrown. } catch (Exception ex) { Trace.TraceError("Exception:" + ex.ToString()); throw; } Streaming Diagnostics Trace Logging from the Azure Command Line (plus Glimpse!) How to use the command line to do what this tutorial shows how to do in Visual Studio. Glimpse is a tool for debugging ASP.NET applications. Using Web Apps Logging and Diagnostics - with David Ebbo and Streaming Logs from Web Apps - with David Ebbo Videos by Scott Hanselman and David Ebbo. For error logging, an alternative to writing your own tracing code is to use an open-source logging framework such as ELMAH. For more information, see Scott Hanselman's blog posts about ELMAH. Also, note that you don't have to use ASP.NET or System.Diagnostics tracing if you want to get streaming logs from Azure. The Azure web app streaming log service will stream any .txt, .html, or .log file that it finds in the LogFiles folder. Therefore, you could create your own logging system that writes to the file system of the web app, and your file will be automatically streamed and downloaded. All you have to do is write application code that creates files in the d:homelogfiles folder. For more information about analyzing web server logs, see the following resources: LogParser A tool for viewing data in web server logs (.log files). Troubleshooting IIS Performance Issues or Application Errors using LogParser An introduction to the Log Parser tool that you can use to analyze web server logs. Blog posts by Robert McMurray on using LogParser The HTTP status code in IIS 7.0, IIS 7.5, and IIS 8.0 The Microsoft TechNet website includes a Using Failed Request Tracing section which may be helpful for understanding how to use these logs. However, this documentation focuses mainly on configuring failed request tracing in IIS, which you can't do in Azure Web Apps.
- 618. Best practices and troubleshooting guide for node applications on Azure Web Apps 4/5/2017 • 13 min to read • Edit Online WARNING WARNING IISNODE configuration In this article, you will learn the best practices and troubleshooting steps for node applications running on Azure Webapps (with iisnode). Use caution when using troubleshooting steps on your production site. Recommendation is to troubleshoot your app on a non-production setup for example your staging slot and when the issue is fixed, swap your staging slot with your production slot. This schema file shows all the settings that can be configured for iisnode. Some of the settings that will be useful for your application are: nodeProcessCountPerApplication This setting controls the number of node processes that are launched per IIS application. Default value is 1. You can launch as many node.exe’s as your VM core count by setting this to 0. Recommended value is 0 for most application so you can utilize all of the cores on your machine. Node.exe is single threaded so one node.exe will consume a maximum of 1 core and to get maximum performance out of your node application you would want to utilize all cores. nodeProcessCommandLine This setting controls the path to the node.exe. You can set this value to point to your node.exe version. maxConcurrentRequestsPerProcess This setting controls the maximum number of concurrent requests sent by iisnode to each node.exe. On azure webapps, the default value for this is Infinite. You will not have to worry about this setting. Outside azure webapps, the default value is 1024. You might want to configure this depending on how many requests your application gets and how fast your application processes each request. maxNamedPipeConnectionRetry This setting controls the maximum number of times iisnode will retry making connection on the named pipe to send the request over to node.exe. This setting in combination with namedPipeConnectionRetryDelay determines the total timeout of each request within iisnode. Default value is 200 on Azure Webapps. Total Timeout in seconds = (maxNamedPipeConnectionRetry * namedPipeConnectionRetryDelay) / 1000 namedPipeConnectionRetryDelay This setting controls the amount of time (in ms) iisnode will wait for between each retry to send request to node.exe over the named pipe. Default value is 250ms. Total Timeout in seconds = (maxNamedPipeConnectionRetry * namedPipeConnectionRetryDelay) / 1000 By default the total timeout in iisnode on azure webapps is 200 * 250ms = 50 seconds. logDirectory
- 619. <configuration> <system.webServer> <!-- ... --> <iisnode flushResponse="true" /> </system.webServer> </configuration> <handlers> <add name="iisnode" path="app.js" verb="*" modules="iisnode" responseBufferLimit="0"/> </handlers> This setting controls the directory where iisnode will log stdout/stderr. Default value is iisnode which is relative to the main script directory (directory where main server.js is present) debuggerExtensionDll This setting controls what version of node-inspector iisnode will use when debugging your node application. Currently iisnode-inspector-0.7.3.dll and iisnode-inspector.dll are the only 2 valid values for this setting. Default value is iisnode-inspector-0.7.3.dll. iisnode-inspector-0.7.3.dll version uses node-inspector-0.7.3 and uses websockets, so you will need to enable websockets on your azure webapp to use this version. See http://www.ranjithr.com/?p=98 for more details on how to configure iisnode to use the new node-inspector. flushResponse The default behavior of IIS is that it buffers response data up to 4MB before flushing, or until the end of the response, whichever comes first. iisnode offers a configuration setting to override this behavior: to flush a fragment of the response entity body as soon as iisnode receives it from node.exe, you need to set the iisnode/@flushResponse attribute in web.config to 'true': Enabling flushing of every fragment of the response entity body adds performance overhead that reduces the throughput of the system by ~5% (as of v0.1.13), so it is best to scope this setting only to endpoints that require response streaming (e.g. using the element in the web.config) In addition to this, for streaming applications, you will need to also set responseBufferLimit of your iisnode handler to 0. watchedFiles This is a semi-colon separated list of files that will be watched for changes. A change to a file causes the application to recycle. Each entry consists of an optional directory name plus required file name which are relative to the directory where the main application entry point is located. Wild cards are allowed in the file name portion only. Default value is “*.js;web.config” recycleSignalEnabled Default value is false. If enabled, your node application can connect to a named pipe (environment variable IISNODE_CONTROL_PIPE) and send a “recycle” message. This will cause the w3wp to recycle gracefully. idlePageOutTimePeriod Default value is 0 which means this feature is disabled. When set to some value greater than 0, iisnode will page out all its child processes every ‘idlePageOutTimePeriod’ milliseconds. To understand what page out means, please refer to this documentation. This setting will be useful for applications that consume a lot of memory and want to pageout memory to disk occasionally to free up some RAM.
- 620. WARNING WARNING Scenarios and recommendations/troubleshooting My node application is making too many outbound calls. My node application is making too many outbound calls. Use caution when enabling the following configuration settings on production applications. Recommendation is to not enable them on live production applications. debugHeaderEnabled The default value is false. If set to true, iisnode will add an HTTP response header iisnode-debug to every HTTP response it sends the iisnode-debug header value is a URL. Individual pieces of diagnostic information can be gleaned by looking at the URL fragment, but a much better visualization is achieved by opening the URL in the browser. loggingEnabled This setting controls the logging of stdout and stderr by iisnode. Iisnode will capture stdout/stderr from node processes it launches and write to the directory specified in the ‘logDirectory’ setting. Once this is enable, your application will be writing logs to the file system and depending on the amount of logging done by the application, there could be performance implications. devErrorsEnabled Default value is false. When set to true, iisnode will display the HTTP status code and Win32 error code on your browser. The win32 code will be helpful in debugging certain types of issues. debuggingEnabled (do not enable on live production site) This setting controls debugging feature. Iisnode is integrated with node-inspector. By enabling this setting, you enable debugging of your node application. Once this setting is enabled, iisnode will layout the necessary node-inspector files in ‘debuggerVirtualDir’ directory on the first debug request to your node application. You can load the node-inspector by sending a request to http://yoursite/server.js/debug. You can control the debug URL segment with ‘debuggerPathSegment’ setting. By default debuggerPathSegment=’debug’. You can set this to a GUID for example so that it is more difficult to be discovered by others. Check this link for more details on debugging. Many applications would want to make outbound connections as part of their regular operation. For example, when a request comes in, your node app would want to contact a REST API elsewhere and get some information to process the request. You would want to use a keep alive agent when making http or https calls. For example, you could use the agentkeepalive module as your keep alive agent when making these outbound calls. This makes sure that the sockets are reused on your azure webapp VM and reducing the overhead of creating new sockets for every outbound request. Also, this makes sure that you are using less number of sockets to make many outbound requests and therefore you don’t exceed the maxSockets that are allocated per VM. Recommendation on Azure Webapps would be to set the agentKeepAlive maxSockets value to a total of 160 sockets per VM. This means that if you have 4 node.exe running on the VM, you would want to set the agentKeepAlive maxSockets to 40 per node.exe which is 160 total per VM. Example agentKeepALive configuration:
- 621. var keepaliveAgent = newAgent({ maxSockets:40, maxFreeSockets:10, timeout:60000, keepAliveTimeout:300000 }); My node application is consuming too much CPU. My node application is consuming too much CPU. Profiling your node application on azure webapps with V8-Profiler Profiling your node application on azure webapps with V8-Profiler var http = require('http'); function WriteConsoleLog() { for(var i=0;i<99999;++i) { console.log('hello world'); } } function HandleRequest() { WriteConsoleLog(); } http.createServer(function (req, res) { res.writeHead(200, {'Content-Type':'text/html'}); HandleRequest(); res.end('Hello world!'); }).listen(process.env.PORT); This example assumes you have 4 node.exe running on your VM. If you have a different number of node.exe running on the VM, you will have to modify the maxSockets setting accordingly. You will probably get a recommendation from Azure Webapps on your portal about high cpu consumption. You can also setup monitors to watch for certain metrics. When checking the CPU usage on the Azure Portal Dashboard, please check the MAX values for CPU so you don’t miss out the peak values. In cases where you think your application is consuming too much CPU and you cannot explain why, you will need to profile your node application. For example, lets say you have a hello world app that you want to profile as shown below: Go to your scm site https://yoursite.scm.azurewebsites.net/DebugConsole You will see a command prompt as shown below. Go into your site/wwwroot directory
- 622. var http = require('http'); var profiler = require('v8-profiler'); var fs = require('fs'); function WriteConsoleLog() { for(var i=0;i<99999;++i) { console.log('hello world'); } } function HandleRequest() { profiler.startProfiling('HandleRequest'); WriteConsoleLog(); fs.writeFileSync('profile.cpuprofile', JSON.stringify(profiler.stopProfiling('HandleRequest'))); } http.createServer(function (req, res) { res.writeHead(200, {'Content-Type':'text/html'}); HandleRequest(); res.end('Hello world!'); }).listen(process.env.PORT); Run the command “npm install v8-profiler” This should install v8-profiler under node_modules directory and all of its dependencies. Now, edit your server.js to profile your application. The above changes will profile the WriteConsoleLog function and then write the profile output to ‘profile.cpuprofile’ file under your site wwwroot. Send a request to your application. You will see a ‘profile.cpuprofile’ file created under your site wwwroot.
- 623. My node application is consuming too much memory. My node application is consuming too much memory. Leak detection and Heap Diffing for node.js Leak detection and Heap Diffing for node.js Download this file and you will need to open this file with Chrome F12 Tools. Hit F12 on chrome, then click on the “Profiles Tab”. Click on “Load” Button. Select your profile.cpuprofile file that you just downloaded. Click on the profile you just loaded. You will see that 95% of the time was consumed by WriteConsoleLog function as shown below. This also shows you the exact line numbers and source files that cause the issue. You will probably get a recommendation from Azure Webapps on your portal about high memory consumption. You can also setup monitors to watch for certain metrics. When checking the memory usage on the Azure Portal Dashboard, please check the MAX values for memory so you don’t miss out the peak values.
- 624. My node.exe’s are getting killed randomly My node.exe’s are getting killed randomly My node application does not start My node application does not start My node application crashed My node application crashed My node application takes too much time to startup (Cold Start) My node application takes too much time to startup (Cold Start) IISNODE http status and substatus HTTP STATUS HTTP SUBSTATUS POSSIBLE REASON? You could use node-memwatch to help you identify memory leaks. You can install memwatch just like v8-profiler and edit your code to capture and diff heaps to identify the memory leaks in your application. There are a few reasons why this could be happening: 1. Your application is throwing uncaught exceptions – Please check d:homeLogFilesApplicationlogging- errors.txt file for the details on the exception thrown. This file has the stack trace so you can fix your application based on this. 2. Your application is consuming too much memory which is affecting other processes from getting started. If the total VM memory is close to 100%, your node.exe’s could be killed by the process manager to let other processes get a chance to do some work. To fix this, either make sure your application is not leaking memory OR if you application really needs to use a lot of memory, please scale up to a larger VM with a lot more RAM. If your application is returning 500 Errors at startup, there could be a few reasons: 1. Node.exe is not present at the correct location. Check nodeProcessCommandLine setting. 2. Main script file is not present at the correct location. Check web.config and make sure the name of the main script file in the handlers section matches the main script file. 3. Web.config configuration is not correct – check the settings names/values. 4. Cold Start – Your application is taking too long to startup. If your application takes longer than (maxNamedPipeConnectionRetry * namedPipeConnectionRetryDelay) / 1000 seconds, iisnode will return 500 error. Increase the values of these settings to match your application start time to prevent iisnode from timing out and returning the 500 error. Your application is throwing uncaught exceptions – Please check d:homeLogFilesApplicationlogging-errors.txt file for the details on the exception thrown. This file has the stack trace so you can fix your application based on this. Most common reason for this is that the application has a lot of files in the node_modules and the application tries to load most of these files during startup. By default, since your files reside on the network share on Azure Webapps, loading so many files can take some time. Some solutions to make this faster are: 1. Make sure you have a flat dependency structure and no duplicate dependencies by using npm3 to install your modules. 2. Try to lazy load your node_modules and not load all of the modules at startup. This means that the call to require(‘module’) should be done when you actually need it within the function you try to use the module. 3. Azure Webapps offers a feature called local cache. This feature copies your content from the network share to the local disk on the VM. Since the files are local, the load time of node_modules is much faster. - This documentation explains how to use Local Cache in more detail. This source file lists all the possible status/substatus combination iisnode can return in case of error. Enable FREB for your application to see the win32 error code (please make sure you enable FREB only on non- production sites for performance reasons).
- 625. 500 1000 There was some issue dispatching the request to IISNODE – check if node.exe was started up. Node.exe could have crashed on startup. Check your web.config configuration for errors. 500 1001 - Win32Error 0x2 - App is not responding to the URL. Check URL rewrite rules or if your express app has the correct routes defined. - Win32Error 0x6d – named pipe is busy – Node.exe is not accepting requests because the pipe is busy. Check high cpu usage. - Other errors – check if node.exe crashed. 500 1002 Node.exe crashed – check d:homeLogFileslogging-errors.txt for stack trace. 500 1003 Pipe configuration Issue – You should never see this but if you do, the named pipe configuration is incorrect. 500 1004-1018 There was some error while sending the request or processing the response to/from node.exe. Check if node.exe crashed. check d:homeLogFileslogging-errors.txt for stack trace. 503 1000 Not enough memory to allocate more named pipe connections. Check why your app is consuming so much memory. Check maxConcurrentRequestsPerProcess setting value. If its not infinite and you have a lot of requests, increase this value to prevent this error. 503 1001 Request could not be dispatched to node.exe because the application is recycling. After the application has recycled, requests should be served normally. 503 1002 Check win32 error code for actual reason – Request could not be dispatched to a node.exe. 503 1003 Named pipe is too Busy – Check if node is consuming a lot of CPU HTTP STATUS HTTP SUBSTATUS POSSIBLE REASON? There is a setting within NODE.exe called NODE_PENDING_PIPE_INSTANCES. By default outside of azure webapps this value is 4. This means that node.exe can only accept 4 requests at a time on the named pipe. On Azure Webapps, this value is set to 5000 and this value should be good enough for most node applications running on azure webapps. You should not see 503.1003 on azure webapps because we have a high value for the
- 626. More resources NODE_PENDING_PIPE_INSTANCES. | Follow these links to learn more about node.js applications on Azure App Service. Get started with Node.js web apps in Azure App Service How to debug a Node.js web app in Azure App Service Using Node.js Modules with Azure applications Azure App Service Web Apps: Node.js Node.js Developer Center Exploring the Super Secret Kudu Debug Console
- 627. Troubleshoot HTTP errors of "502 bad gateway" and "503 service unavailable" in your Azure web apps 2/28/2017 • 4 min to read • Edit Online Symptom Cause Troubleshooting steps to solve "502 bad gateway" and "503 service unavailable" errors 1. Observe and monitor application behavior 1. Observe and monitor application behavior Track Service health Track Service health Monitor your web app Monitor your web app "502 bad gateway" and "503 service unavailable" are common errors in your web app hosted in Azure App Service. This article helps you troubleshoot these errors. If you need more help at any point in this article, you can contact the Azure experts on the MSDN Azure and the Stack Overflow forums. Alternatively, you can also file an Azure support incident. Go to the Azure Support site and click on Get Support. When you browse to the web app, it returns a HTTP "502 Bad Gateway" error or a HTTP "503 Service Unavailable" error. This problem is often caused by application level issues, such as: requests taking a long time application using high memory/CPU application crashing due to an exception. Troubleshooting can be divided into three distinct tasks, in sequential order: 1. Observe and monitor application behavior 2. Collect data 3. Mitigate the issue App Service Web Apps gives you various options at each step. Microsoft Azure publicizes each time there is a service interruption or performance degradation. You can track the health of the service on the Azure Portal. For more information, see Track service health. This option enables you to find out if your application is having any issues. In your web app’s blade, click the Requests and errors tile. The Metric blade will show you all the metrics you can add. Some of the metrics that you might want to monitor for your web app are Average memory working set Average response time CPU time Memory working set
- 628. 2. Collect data 2. Collect data Use the Azure App Service Support Portal Use the Azure App Service Support Portal Use the Kudu Debug Console Use the Kudu Debug Console Requests For more information, see: Monitor Web Apps in Azure App Service Receive alert notifications Web Apps provides you with the ability to troubleshoot issues related to your web app by looking at HTTP logs, event logs, process dumps, and more. You can access all this information using our Support portal at http://<your app name>.scm.azurewebsites.net/Support The Azure App Service Support portal provides you with three separate tabs to support the three steps of a common troubleshooting scenario: 1. Observe current behavior 2. Analyze by collecting diagnostics information and running the built-in analyzers 3. Mitigate If the issue is happening right now, click Analyze > Diagnostics > Diagnose Now to create a diagnostic session for you, which will collect HTTP logs, event viewer logs, memory dumps, PHP error logs and PHP process report. Once the data is collected, it will also run an analysis on the data and provide you with an HTML report. In case you want to download the data, by default, it would be stored in the D:homedataDaaS folder. For more information on the Azure App Service Support portal, see New Updates to Support Site Extension for Azure Websites. Web Apps comes with a debug console that you can use for debugging, exploring, uploading files, as well as JSON endpoints for getting information about your environment. This is called the Kudu Console or the SCM Dashboard for your web app. You can access this dashboard by going to the link https://<Your app name>.scm.azurewebsites.net/. Some of the things that Kudu provides are: environment settings for your application log stream
- 629. 3. Mitigate the issue 3. Mitigate the issue Scale the web app Scale the web app Use AutoHeal Use AutoHeal Restart the web app Restart the web app diagnostic dump debug console in which you can run Powershell cmdlets and basic DOS commands. Another useful feature of Kudu is that, in case your application is throwing first-chance exceptions, you can use Kudu and the SysInternals tool Procdump to create memory dumps. These memory dumps are snapshots of the process and can often help you troubleshoot more complicated issues with your web app. For more information on features available in Kudu, see Azure Websites online tools you should know about. In Azure App Service, for increased performance and throughput, you can adjust the scale at which you are running your application. Scaling up a web app involves two related actions: changing your App Service plan to a higher pricing tier, and configuring certain settings after you have switched to the higher pricing tier. For more information on scaling, see Scale a web app in Azure App Service. Additionally, you can choose to run your application on more than one instance . This not only provides you with more processing capability, but also gives you some amount of fault tolerance. If the process goes down on one instance, the other instance will still continue serving requests. You can set the scaling to be Manual or Automatic. AutoHeal recycles the worker process for your app based on settings you choose (like configuration changes, requests, memory-based limits, or the time needed to execute a request). Most of the time, recycle the process is the fastest way to recover from a problem. Though you can always restart the web app from directly within the Azure Portal, AutoHeal will do it automatically for you. All you need to do is add some triggers in the root web.config for your web app. Note that these settings would work in the same way even if your application is not a .Net one. For more information, see Auto-Healing Azure Web Sites. This is often the simplest way to recover from one-time issues. On the Azure Portal, on your web app’s blade, you have the options to stop or restart your app. You can also manage your web app using Azure Powershell. For more information, see Using Azure PowerShell with Azure Resource Manager.
- 630. Troubleshoot slow web app performance issues in Azure App Service 2/28/2017 • 7 min to read • Edit Online Symptom Cause Troubleshooting steps 1. Observe and monitor application behavior 1. Observe and monitor application behavior Track Service health Track Service health Monitor your web app Monitor your web app This article helps you troubleshoot slow web app performance issues in Azure App Service. If you need more help at any point in this article, you can contact the Azure experts on the MSDN Azure and the Stack Overflow forums. Alternatively, you can also file an Azure support incident. Go to the Azure Support site and click on Get Support. When you browse the web app, the pages load slowly and sometimes timeout. This problem is often caused by application level issues, such as: requests taking a long time application using high memory/CPU application crashing due to an exception. Troubleshooting can be divided into three distinct tasks, in sequential order: 1. Observe and monitor application behavior 2. Collect data 3. Mitigate the issue App Service Web Apps gives you various options at each step. Microsoft Azure publicizes each time there is a service interruption or performance degradation. You can track the health of the service on the Azure Portal. For more information, see Track service health. This option enables you to find out if your application is having any issues. In your web app’s blade, click the Requests and errors tile. The Metric blade will show you all the metrics you can add. Some of the metrics that you might want to monitor for your web app are Average memory working set Average response time CPU time Memory working set Requests
- 631. Monitor web endpoint status Monitor web endpoint status Application performance monitoring using Extensions Application performance monitoring using Extensions 2. Collect data 2. Collect data Enable diagnostics logging for your web app Enable diagnostics logging for your web app For more information, see: Monitor Web Apps in Azure App Service Receive alert notifications If you are running your web app in the Standard pricing tier, Web Apps lets you monitor 2 endpoints from 3 geographic locations. Endpoint monitoring configures web tests from geo-distributed locations that test response time and uptime of web URLs. The test performs an HTTP GET operation on the web URL to determine the response time and uptime from each location. Each configured location runs a test every five minutes. Uptime is monitored using HTTP response codes, and response time is measured in milliseconds. A monitoring test fails if the HTTP response code is greater than or equal to 400 or if the response takes more than 30 seconds. An endpoint is considered available if its monitoring tests succeed from all the specified locations. To set it up, see Monitor apps in Azure App Service. Also, see Keeping Azure Web Sites up plus Endpoint Monitoring - with Stefan Schackow for a video on endpoint monitoring. You can also monitor your application performance by leveraging site extensions. Each App Service web app provides an extensible management end point that allows you to leverage a powerful set of tools deployed as site extensions. These tools range from source code editors like Visual Studio Team Services to management tools for connected resources such as a MySQL database connected to a web app. Azure Application Insights and New Relic are two of the performance monitoring site extensions that are available. To use New Relic, you install an agent at runtime. To use Azure Application Insights, you rebuild your code with an SDK, and you can also install an extension that provides access to additional data. The SDK lets you write code to monitor the usage and performance of your app in more detail. To use Application Insights, see Monitor performance in web applications. To use New Relic, see New Relic Application Performance Management on Azure. The Web Apps environment provides diagnostic functionality for logging information from both the web server
- 632. W eb server diagnostics W eb server diagnostics Application diagnostics Application diagnostics Use Remote Profiling Use Remote Profiling Use the Azure App Service Support Portal Use the Azure App Service Support Portal Use the Kudu Debug Console Use the Kudu Debug Console and the web application. These are logically separated into web server diagnostics and application diagnostics. You can enable or disable the following kinds of logs: Detailed Error Logging - Detailed error information for HTTP status codes that indicate a failure (status code 400 or greater). This may contain information that can help determine why the server returned the error code. Failed Request Tracing - Detailed information on failed requests, including a trace of the IIS components used to process the request and the time taken in each component. This can be useful if you are attempting to improve web app performance or isolate what is causing a specific HTTP error. Web Server Logging - Information about HTTP transactions using the W3C extended log file format. This is useful when determining overall web app metrics, such as the number of requests handled or how many requests are from a specific IP address. Application diagnostics enables you to capture information produced by a web application. ASP.NET applications can use the System.Diagnostics.Trace class to log information to the application diagnostics log. For detailed instructions on how to configure your application for logging, see Enable diagnostics logging for web apps in Azure App Service. In Azure App Service, Web Apps, API Apps, and WebJobs can be remotely profiled. If your process is running slower than expected, or the latency of HTTP requests are higher than normal and the CPU usage of the process is also high, you can remotely profile your process and get the CPU sampling call stacks to analyze the process activity and code hot paths. For more information on, see Remote Profiling support in Azure App Service. Web Apps provides you with the ability to troubleshoot issues related to your web app by looking at HTTP logs, event logs, process dumps, and more. You can access all this information using our Support portal at http://<your app name>.scm.azurewebsites.net/Support The Azure App Service Support portal provides you with three separate tabs to support the three steps of a common troubleshooting scenario: 1. Observe current behavior 2. Analyze by collecting diagnostics information and running the built-in analyzers 3. Mitigate If the issue is happening right now, click Analyze > Diagnostics > Diagnose Now to create a diagnostic session for you, which will collect HTTP logs, event viewer logs, memory dumps, PHP error logs and PHP process report. Once the data is collected, it will also run an analysis on the data and provide you with an HTML report. In case you want to download the data, by default, it would be stored in the D:homedataDaaS folder. For more information on the Azure App Service Support portal, see New Updates to Support Site Extension for Azure Websites. Web Apps comes with a debug console that you can use for debugging, exploring, uploading files, as well as JSON endpoints for getting information about your environment. This is called the Kudu Console or the SCM Dashboard for your web app. You can access this dashboard by going to the link https://<Your app name>.scm.azurewebsites.net/. Some of the things that Kudu provides are:
- 633. 3. Mitigate the issue 3. Mitigate the issue Scale the web app Scale the web app Use AutoHeal Use AutoHeal Restart the web app Restart the web app environment settings for your application log stream diagnostic dump debug console in which you can run Powershell cmdlets and basic DOS commands. Another useful feature of Kudu is that, in case your application is throwing first-chance exceptions, you can use Kudu and the SysInternals tool Procdump to create memory dumps. These memory dumps are snapshots of the process and can often help you troubleshoot more complicated issues with your web app. For more information on features available in Kudu, see Azure Websites Team Services tools you should know about. In Azure App Service, for increased performance and throughput, you can adjust the scale at which you are running your application. Scaling up a web app involves two related actions: changing your App Service plan to a higher pricing tier, and configuring certain settings after you have switched to the higher pricing tier. For more information on scaling, see Scale a web app in Azure App Service. Additionally, you can choose to run your application on more than one instance . This not only provides you with more processing capability, but also gives you some amount of fault tolerance. If the process goes down on one instance, the other instance will still continue serving requests. You can set the scaling to be Manual or Automatic. AutoHeal recycles the worker process for your app based on settings you choose (like configuration changes, requests, memory-based limits, or the time needed to execute a request). Most of the time, recycle the process is the fastest way to recover from a problem. Though you can always restart the web app from directly within the Azure Portal, AutoHeal will do it automatically for you. All you need to do is add some triggers in the root web.config for your web app. Note that these settings would work in the same way even if your application is not a .Net one. For more information, see Auto-Healing Azure Web Sites. This is often the simplest way to recover from one-time issues. On the Azure Portal, on your web app’s blade, you have the options to stop or restart your app. You can also manage your web app using Azure Powershell. For more information, see Using Azure PowerShell with Azure Resource Manager.
- 634. Azure subscription and service limits, quotas, and constraints 4/20/2017 • 51 min to read • Edit Online NOTE NOTE Limits and the Azure Resource Manager NOTE NOTE Service-specific limits This document lists some of the most common Microsoft Azure limits, which are also sometimes called quotas. This document doesn't currently cover all Azure services. Over time, the list will be expanded and updated to cover more of the platform. Please visit Azure Pricing Overview to learn more about Azure pricing. There, you can estimate your costs using the Pricing Calculator or by visiting the pricing details page for a service (for example, Windows VMs). For tips to help manage your costs, see Prevent unexpected costs with Azure billing and cost management. If you want to raise the limit or quota above the Default Limit, open an online customer support request at no charge. The limits can't be raised above the Maximum Limit value shown in the following tables. If there is no Maximum Limit column, then the resource doesn't have adjustable limits. Free Trial subscriptions are not eligible for limit or quota increases. If you have a Free Trial, you can upgrade to a Pay-As-You- Go subscription. For more information, see Upgrade Azure Free Trial to Pay-As-You-Go. It is now possible to combine multiple Azure resources in to a single Azure Resource Group. When using Resource Groups, limits that once were global become managed at a regional level with the Azure Resource Manager. For more information about Azure Resource Groups, see Azure Resource Manager overview. In the limits below, a new table has been added to reflect any differences in limits when using the Azure Resource Manager. For example, there is a Subscription Limits table and a Subscription Limits - Azure Resource Manager table. When a limit applies to both scenarios, it is only shown in the first table. Unless otherwise indicated, limits are global across all regions. It is important to emphasize that quotas for resources in Azure Resource Groups are per-region accessible by your subscription, and are not per-subscription, as the service management quotas are. Let's use core quotas as an example. If you need to request a quota increase with support for cores, you need to decide how many cores you want to use in which regions, and then make a specific request for Azure Resource Group core quotas for the amounts and regions that you want. Therefore, if you need to use 30 cores in West Europe to run your application there; you should specifically request 30 cores in West Europe. But you will not have a core quota increase in any other region -- only West Europe will have the 30-core quota. As a result, you may find it useful to consider deciding what your Azure Resource Group quotas need to be for your workload in any one region, and request that amount in each region into which you are considering deployment. See troubleshooting deployment issues for more help discovering your current quotas for specific regions. Active Directory API Management
- 635. Subscription limits Subscription limits Subscription limits Subscription limits App Service Application Gateway Application Insights Automation Azure Redis Cache Azure RemoteApp Backup Batch BizTalk Services CDN Cloud Services Data Factory Data Lake Analytics Data Lake Store DNS DocumentDB Event Hubs IoT Hub Key Vault Log Analytics / Operational Insights Media Services Mobile Engagement Mobile Services Monitor Multi-Factor Authentication Networking Network Watcher Notification Hub Service Resource Group Scheduler Search Service Bus Site Recovery SQL Database Storage StorSimple System Stream Analytics Subscription Traffic Manager Virtual Machines Virtual Machine Scale Sets
- 636. RESOURCE DEFAULT LIMIT MAXIMUM LIMIT Cores per subscription 20 10,000 Co-administrators per subscription 200 200 Storage accounts per subscription 200 250 Cloud services per subscription 20 200 Local networks per subscription 10 500 SQL Database servers per subscription 6 150 DNS servers per subscription 9 100 Reserved IPs per subscription 20 100 Hosted service certificates per subscription 400 400 Affinity groups per subscription 256 256 Alert rules per subscription 250 250 Subscription limits - Azure Resource Manager Subscription limits - Azure Resource Manager RESOURCE DEFAULT LIMIT MAXIMUM LIMIT VMs per subscription 20 per Region 10,000 per Region VM total cores per subscription 20 per Region Contact support VM per series (Dv2, F, etc.) cores per subscription 20 per Region Contact support Co-administrators per subscription Unlimited Unlimited Storage accounts per subscription 200 200 Resource Groups per subscription 800 800 Availability Sets per subscription 2000 per Region 2000 per Region 1 2 Extra Small instances count as one core towards the core limit despite using a partial core. 1 This includes both Standard and Premium storage accounts. If you require more than 200 storage accounts, make a request through Azure Support. The Azure Storage team will review your business case and may approve up to 250 storage accounts. 2 The following limits apply when using the Azure Resource Manager and Azure Resource Groups. Limits that have not changed with the Azure Resource Manager are not listed below. Please refer to the previous table for those limits. For information about handling limits on Resource Manager requests, see Throttling Resource Manager requests. 1 1 1 2
- 637. Resource Manager API Reads 15000 per hour 15000 per hour Resource Manager API Writes 1200 per hour 1200 per hour Resource Manager API request size 4194304 bytes 4194304 bytes Cloud services per subscription Not Applicable Not Applicable Affinity groups per subscription Not Applicable Not Applicable RESOURCE DEFAULT LIMIT MAXIMUM LIMIT NOTE NOTE Resource Group limits Resource Group limits RESOURCE DEFAULT LIMIT MAXIMUM LIMIT Resources per resource group (per resource type) 800 Varies per resource type Deployments per resource group 800 800 Resources per deployment 800 800 Management Locks (per unique scope) 20 20 Number of Tags (per resource or resource group) 15 15 Tag key length 512 512 Tag value length 256 256 Resources in exported templates 200 200 Virtual Machines limits Virtual Machines limits Virtual Machine limits Virtual Machine limits 3 3 3 3 Default limits vary by offer Category Type, such as Free Trial, Pay-As-You-Go, and series, such as Dv2, F, G, etc. 1 This includes both Standard and Premium storage accounts. If you require more than 200 storage accounts, make a request through Azure Support. The Azure Storage team will review your business case and may approve up to 250 storage accounts. 2 These features are no longer required with Azure Resource Groups and the Azure Resource Manager. 3 It is important to emphasize that virtual machine cores have a regional total limit as well as a regional per size series (Dv2, F, etc.) limit that are separately enforced. For example, consider a subscription with a US East total VM core limit of 30, an A series core limit of 30, and a D series core limit of 30. This subscription would be allowed to deploy 30 A1 VMs, or 30 D1 VMs, or a combnation of the two not to exceed a total of 30 cores (e.g. 10 A1 VMs and 20 D1 VMs).
- 638. RESOURCE DEFAULT LIMIT MAXIMUM LIMIT Virtual machines per cloud service 50 50 Input endpoints per cloud service 150 150 Virtual Machines limits - Azure Resource Manager Virtual Machines limits - Azure Resource Manager RESOURCE DEFAULT LIMIT Virtual machines per availability set 200 Certificates per subscription Unlimited Virtual Machine Scale Sets limits Virtual Machine Scale Sets limits RESOURCE MAXIMUM LIMIT Maximum number of VMs in a scale set 1000 Maximum number of scale sets in a region 2000 Networking limits Networking limits ExpressRoute Limits ExpressRoute Limits RESOURCE DEFAULT LIMIT ExpressRoute circuits per subscription 10 ExpressRoute circuits per region per subscription for ARM 10 Maximum number of routes for Azure private peering with ExpressRoute standard 4,000 Maximum number of routes for Azure private peering with ExpressRoute premium add-on 10,000 1 2 Virtual machines created in Service Management (instead of Resource Manager) are automatically stored in a cloud service. You can add more virtual machines to that cloud service for load balancing and availability. See How to Connect Virtual Machines with a Virtual Network or Cloud Service. 1 Input endpoints allow communications to a virtual machine from outside the virtual machine's cloud service. Virtual machines in the same cloud service or virtual network can automatically communicate with each other. See How to Set Up Endpoints to a Virtual Machine. 2 The following limits apply when using the Azure Resource Manager and Azure Resource Groups. Limits that have not changed with the Azure Resource Manager are not listed below. Please refer to the previous table for those limits. 1 With Azure Resource Manager, certificates are stored in the Azure Key Vault. Although the number of certificates is unlimited for a subscription, there is still a 1 MB limit of certificates per deployment (which consists of either a single VM or an availability set). 1 The following limits apply to ExpressRoute resources per subscription.
- 639. Maximum number of routes for Azure public peering with ExpressRoute standard 200 Maximum number of routes for Azure public peering with ExpressRoute premium add-on 200 Maximum number of routes for Azure Microsoft peering with ExpressRoute standard 200 Maximum number of routes for Azure Microsoft peering with ExpressRoute premium add-on 200 Number of virtual network links allowed per ExpressRoute circuit see table below RESOURCE DEFAULT LIMIT Number of Virtual Networks per ExpressRoute circuit Number of Virtual Networks per ExpressRoute circuit CIRCUIT SIZE NUMBER OF VNET LINKS FOR STANDARD NUMBER OF VNET LINKS WITH PREMIUM ADD-ON 50 Mbps 10 20 100 Mbps 10 25 200 Mbps 10 25 500 Mbps 10 40 1 Gbps 10 50 2 Gbps 10 60 5 Gbps 10 75 10 Gbps 10 100 Networking limits Networking limits RESOURCE DEFAULT LIMIT MAXIMUM LIMIT Virtual networks per subscription 50 100 Local network sites per subscription 20 contact support DNS Servers per virtual network 20 100 Private IP Addresses per virtual network 4096 4096 Concurrent TCP connections for a virtual machine or role instance 500K 500K The following limits apply only for networking resources managed through the classic deployment model per subscription.
- 640. Network Security Groups (NSG) 100 200 NSG rules per NSG 200 400 User defined route tables 100 200 User defined routes per route table 100 400 Public IP addresses (dynamic) 5 contact support Reserved public IP addresses 20 contact support Public VIP per deployment 5 contact support Private VIP (ILB) per deployment 1 1 Endpoint Access Control Lists (ACLs) 50 50 RESOURCE DEFAULT LIMIT MAXIMUM LIMIT Networking Limits - Azure Resource Manager Networking Limits - Azure Resource Manager RESOURCE DEFAULT LIMIT MAXIMUM LIMIT Virtual networks per subscription 50 500 Subnets per virtual network 1,000 contact support DNS Servers per virtual network 9 25 Private IP Addresses per virtual network 4096 4096 Private IP Addresses per network interface 50 contact support Concurrent TCP connections for a virtual machine or role instance 500K 500K Network Interfaces (NIC) 300 10000 Network Security Groups (NSG) 100 400 NSG rules per NSG 200 500 User defined route tables 100 200 User defined routes per route table 100 400 Public IP addresses (dynamic) 60 contact support Public IP addresses (Static) 20 contact support The following limits apply only for networking resources managed through Azure Resource Manager per region per subscription.
- 641. Load balancers (internal and internet facing) 100 contact support Load balancer rules per load balancer 150 150 Public front end IP per load balancer 10 30 Private front end IP per load balancer 10 contact support VNets peerings per Virtual Network 10 50 Point-to-Site Root Certificates per VPN Gateway 20 20 Secondary IP configurations per virtual network 1000 contact support RESOURCE DEFAULT LIMIT MAXIMUM LIMIT Application Gateway limits Application Gateway limits RESOURCE DEFAULT LIMIT NOTE Application Gateway 50 per subscription Frontend IP Configurations 2 1 public and 1 private Frontend Ports 20 Backend Address Pools 20 Backend Servers per pool 100 HTTP Listeners 20 HTTP load balancing rules 200 # of HTTP Listeners * n, n=10 Default Backend HTTP settings 20 1 per Backend Address Pool Instances per gateway 10 SSL certificates 20 1 per HTTP Listeners Authentication certificates 5 Maximum 10 Request timeout min 1 second Request timeout max 24hrs Number of sites 20 1 per HTTP Listeners URL Maps per listener 1 Contact support in case you need to increase limits from default.
- 642. Network Watcher limits Network Watcher limits RESOURCE DEFAULT LIMIT NOTE Network Watcher 1 per region Packet Capture sessions 10 per region # of sessions only, not saved captures Traffic Manager limits Traffic Manager limits RESOURCE DEFAULT LIMIT Profiles per subscription 100 Endpoints per profile 200 DNS limits DNS limits RESOURCE DEFAULT LIMIT Zones per subscription 100 Record sets per zone 5000 Records per record set 20 Storage limits Storage limits Storage Service limits Storage Service limits RESOURCE DEFAULT LIMIT Number of storage accounts per subscription 200 TB per storage account 500 TB Max number of blob containers, blobs, file shares, tables, queues, entities, or messages per storage account Only limit is the 500 TB storage account capacity Max size of a single blob container, table, or queue 500 TB Max number of blocks in a block blob or append blob 50,000 Max size of a block in a block blob 100 MB Max size of a block blob 50,000 X 100 MB (approx. 4.75 TB) Max size of a block in an append blob 4 MB Max size of an append blob 50,000 X 4 MB (approx. 195 GB) 1 Contact support in case you need to increase these limits. 1 1 1 Contact Azure Support in case you need to increase these limits. 1 For additional details on storage account limits, see Azure Storage Scalability and Performance Targets. 1
- 643. Max size of a page blob 1 TB Max size of a table entity 1 MB Max number of properties in a table entity 252 Max size of a message in a queue 64 KB Max size of a file share 5 TB Max size of a file in a file share 1 TB Max number of files in a file share Only limit is the 5 TB total capacity of the file share Max IOPS per share 1000 Max number of files in a file share Only limit is the 5 TB total capacity of the file share Max number of blob containers, blobs, file shares, tables, queues, entities, or messages per storage account Only limit is the 500 TB storage account capacity Max number of stored access policies per container, file share, table, or queue 5 Maximum Request Rate per storage account Blobs: 20,000 requests per second for blobs of any valid size (capped only by the account's ingress/egress limits) Files: 1000 IOPS (8 KB in size) per file share Queues: 20,000 messages per second (assuming 1 KB message size) Tables: 20,000 transactions per second (assuming 1 KB entity size) Target throughput for single blob Up to 60 MB per second, or up to 500 requests per second Target throughput for single queue (1 KB messages) Up to 2000 messages per second Target throughput for single table partition (1 KB entities) Up to 2000 entities per second Target throughput for single file share Up to 60 MB per second Max ingress per storage account (US Regions) 10 Gbps if GRS/ZRS enabled, 20 Gbps for LRS Max egress per storage account (US Regions) 20 Gbps if RA-GRS/GRS/ZRS enabled, 30 Gbps for LRS Max ingress per storage account (Non-US regions) 5 Gbps if GRS/ZRS enabled, 10 Gbps for LRS Max egress per storage account (Non-US regions) 10 Gbps if RA-GRS/GRS/ZRS enabled, 15 Gbps for LRS RESOURCE DEFAULT LIMIT 2 3 2 3 2 3 2 3 This includes both Standard and Premium storage accounts. If you require more than 200 storage accounts, make a request through Azure Support. The Azure Storage team will review your business case and may approve up to 250 storage accounts. 1 Ingress refers to all data (requests) being sent to a storage account. Egress refers to all data (responses) being 2
- 644. Virtual machine disk limits Virtual machine disk limits Managed virtual machine disks Managed virtual machine disks STANDARD DISK TYPE S4 S6 S10 S20 S30 Disk Size 30 GB 64 GB 128 GB 512 GB 1024 GB (1 TB) IOPS per disk 500 500 500 500 500 Throughput per disk 60 MB/sec 60 MB/sec 60 MB/sec 60 MB/sec 60 MB/sec PREMIUM STORAGE DISK TYPE P10 P20 P30 Disk size 128 GiB 512 GiB 1024 GiB (1 TB) Max IOPS per disk 500 2300 5000 Max throughput per disk 100 MB/s 150 MB/s 200 MB/s received from a storage account. Azure Storage replication options include: 3 RA-GRS: Read-access geo-redundant storage. If RA-GRS is enabled, egress targets for the secondary location are identical to those for the primary location. GRS: Geo-redundant storage. ZRS: Zone-redundant storage. Available only for block blobs. LRS: Locally redundant storage. An Azure virtual machine supports attaching a number of data disks. For optimal performance, you will want to limit the number of highly utilized disks attached to the virtual machine to avoid possible throttling. If all disks are not being highly utilized at the same time, the storage account can support a larger number disks. For premium storage accounts: A premium storage account has a maximum total throughput rate of 50 Gbps. The total throughput across all of your VM disks should not exceed this limit. For Azure Managed Disks: Managed Disks count limit is regional for the subscription. The default soft limit is 2,000 per region per subscription. To increase your limit, contact Azure support. Managed Snapshots and Images are counted against the Managed Disks limit. For standard storage accounts: A standard storage account has a maximum total request rate of 20,000 IOPS. The total IOPS across all of your virtual machine disks in a standard storage account should not exceed this limit. You can roughly calculate the number of highly utilized disks supported by a single standard storage account based on the request rate limit. For example, for a Basic Tier VM, the maximum number of highly utilized disks is about 66 (20,000/300 IOPS per disk), and for a Standard Tier VM, it is about 40 (20,000/500 IOPS per disk), as shown in the table below. See Virtual machine sizes for additional details. Standard managed virtual machine disks Premium managed virtual machine disks: per disk limits
- 645. RESOURCE DEFAULT LIMIT Max IOPS Per VM 80,000 IOPS with GS5 VM Max throughput per VM 2,000 MB/s with GS5 VM Unmanaged virtual machine disks Unmanaged virtual machine disks VM TIER BASIC TIER VM STANDARD TIER VM Disk size 1023 GB 1023 GB Max 8 KB IOPS per persistent disk 300 500 Max number of disks performing max IOPS 66 40 RESOURCE DEFAULT LIMIT Total disk capacity per account 35 TB Total snapshot capacity per account 10 TB Max bandwidth per account (ingress + egress ) <=50 Gbps PREMIUM STORAGE DISK TYPE P10 P20 P30 Disk size 128 GiB 512 GiB 1024 GiB (1 TB) Max IOPS per disk 500 2300 5000 Max throughput per disk 100 MB/s 150 MB/s 200 MB/s Max number of disks per storage account 280 70 35 RESOURCE DEFAULT LIMIT Max IOPS Per VM 80,000 IOPS with GS5 VM Premium managed virtual machine disks: per VM limits 1 1 Refer to VM Size for limits on other VM sizes. 1 Standard unmanaged virtual machine disks: per disk limits Premium unmanaged virtual machine disks: per account limits 1 Ingress refers to all data (requests) being sent to a storage account. Egress refers to all data (responses) being received from a storage account. 1 Premium unmanaged virtual machine disks: per disk limits Premium unmanaged virtual machine disks: per VM limits 1
- 646. Max throughput per VM 2,000 MB/s with GS5 VM RESOURCE DEFAULT LIMIT Storage Resource Provider limits Storage Resource Provider limits RESOURCE DEFAULT LIMIT Storage account management operations (read) 800 per 5 minutes Storage account management operations (write) 200 per hour Storage account management operations (list) 100 per 5 minutes Cloud Services limits Cloud Services limits RESOURCE DEFAULT LIMIT MAXIMUM LIMIT Web/worker roles per deployment 25 25 Instance Input Endpoints per deployment 25 25 Input Endpoints per deployment 25 25 Internal Endpoints per deployment 25 25 App Service limits App Service limits RESOURCE FREE SHARED (PREVIEW) BASIC STANDARD PREMIUM (PREVIEW) Web, mobile, or API apps per App Service plan 10 100 Unlimited Unlimited Unlimited Logic apps per App Service plan 10 10 10 20 per core 20 per core App Service plan 1 per region 10 per resource group 100 per resource group 100 per resource group 100 per resource group Compute instance type Shared Shared Dedicated Dedicated Dedicated Scale-Out (max instances) 1 shared 1 shared 3 dedicated 10 dedicated 20 dedicated (50 in ASE) 1 Refer to VM Size for limits on other VM sizes. 1 The following limits apply when using the Azure Resource Manager and Azure Resource Groups only. 1 Each Cloud Service with Web/Worker roles can have two deployments, one for production and one for staging. Also note that this limit refers to the number of distinct roles (configuration) and not the number of instances per role (scaling). 1 The following App Service limits include limits for Web Apps, Mobile Apps, API Apps, and Logic Apps. 1 2 2 2 1 3 3 3 3 3 3,4
- 647. Storage 1 GB 1 GB 10 GB 50 GB 500 GB CPU time (5 min) 3 minutes 3 minutes Unlimited, pay at standard rates Unlimited, pay at standard rates Unlimited, pay at standard rates CPU time (day) 60 minutes 240 minutes Unlimited, pay at standard rates Unlimited, pay at standard rates Unlimited, pay at standard rates Memory (1 hour) 1024 MB per App Service plan 1024 MB per app N/A N/A N/A Bandwidth 165 MB Unlimited, data transfer rates apply Unlimited, data transfer rates apply Unlimited, data transfer rates apply Unlimited, data transfer rates apply Application architecture 32-bit 32-bit 32-bit/64-bit 32-bit/64-bit 32-bit/64-bit Web Sockets per instance 5 35 350 Unlimited Unlimited Concurrent debugger connections per application 1 1 1 5 5 azurewebsites.net subdomain with FTP/S and SSL X X X X X Custom domain support X X X X Custom domain SSL support Unlimited Unlimited, 5 SNI SSL and 1 IP SSL connections included Unlimited, 5 SNI SSL and 1 IP SSL connections included Integrated Load Balancer X X X X Always On X X X Scheduled Backups Once per day Once every 5 minutes Auto Scale X X X WebJobs X X X X X Azure Scheduler support X X X X RESOURCE FREE SHARED (PREVIEW) BASIC STANDARD PREMIUM (PREVIEW) 5 5 5 5 5 4,5 6 6 7 8 9
- 648. Endpoint monitoring X X X Staging Slots 5 20 Custom domains per app 500 500 500 500 SLA 99.9% 99.95% 99.95% RESOURCE FREE SHARED (PREVIEW) BASIC STANDARD PREMIUM (PREVIEW) Scheduler limits Scheduler limits RESOURCE LIMIT DESCRIPTION Job size Maximum job size is 16K. If a PUT or a PATCH results in a job larger than these limits, a 400 Bad Request status code is returned. Request URL size Maximum size of the request URL is 2048 chars. Aggregate header size Maximum aggregate header size is 4096 chars. Header count Maximum header count is 50 headers. Body size Maximum body size is 8192 chars. Recurrence span Maximum recurrence span is 18 months. 10 10 Apps and storage quotas are per App Service plan unless noted otherwise. The actual number of apps that you can host on these machines depends on the activity of the apps, the size of the machine instances, and the corresponding resource utilization. Dedicated instances can be of different sizes. See App Service Pricing for more details. Premium tier allows up to 50 computes instances (subject to availability) and 500 GB of disk space when using App Service Environments, and 20 compute instances and 250 GB storage otherwise. The storage limit is the total content size across all apps in the same App Service plan. More storage options are available in App Service Environment These resources are constrained by physical resources on the dedicated instances (the instance size and the number of instances). If you scale an app in the Basic tier to two instances, you have 350 concurrent connections for each of the two instances. Premium tier allows backup intervals down up to every 5 minutes when using App Service Environments, and 50 times per day otherwise. Run custom executables and/or scripts on demand, on a schedule, or continuously as a background task within your App Service instance. Always On is required for continuous WebJobs execution. Azure Scheduler Free or Standard is required for scheduled WebJobs. There is no predefined limit on the number of WebJobs that can run in an App Service instance, but there are practical limits that depend on what the application code is trying to do. SLA of 99.95% provided for deployments that use multiple instances with Azure Traffic Manager configured for failover. 1 2 3 4 5 6 7 8 9 10 The following table describes each of the major quotas, limits, defaults, and throttles in Azure Scheduler.
- 649. Time to start time Maximum “time to start time” is 18 months. Job history Maximum response body stored in job history is 2048 bytes. Frequency The default max frequency quota is 1 hour in a free job collection and 1 minute in a standard job collection. The max frequency is configurable on a job collection to be lower than the maximum. All jobs in the job collection are limited the value set on the job collection. If you attempt to create a job with a higher frequency than the maximum frequency on the job collection then request will fail with a 409 Conflict status code. Jobs The default max jobs quota is 5 jobs in a free job collection and 50 jobs in a standard job collection. The maximum number of jobs is configurable on a job collection. All jobs in the job collection are limited the value set on the job collection. If you attempt to create more jobs than the maximum jobs quota, then the request fails with a 409 Conflict status code. Job collections Maximum number of job collection per subscription is 200,000. Job history retention Job history is retained for up to 2 months or up to the last 1000 executions. Completed and faulted job retention Completed and faulted jobs are retained for 60 days. Timeout There’s a static (not configurable) request timeout of 60 seconds for HTTP actions. For longer running operations, follow HTTP asynchronous protocols; for example, return a 202 immediately but continue working in the background. RESOURCE LIMIT DESCRIPTION Batch limits Batch limits RESOURCE DEFAULT LIMIT MAXIMUM LIMIT Batch accounts per region per subscription 3 50 Cores per Batch account (Batch service mode) 20 N/A Active jobs and job schedules per Batch account 20 5000 Pools per Batch account 20 2500 1 2 3 4 Cores quotas shown are only for accounts with the pool allocation mode set to Batch service. For accounts with the mode set to user subscription, cores quotas are based on the VM cores quota at a regional level or per VM family in your subscription. 1 The number of cores per Batch account can be increased, but the maximum number is unspecified. Contact Azure support to discuss increase options. 2 3
- 650. BizTalk Services limits BizTalk Services limits RESOURCE FREE (PREVIEW) DEVELOPER BASIC STANDARD PREMIUM Scale out N/A N/A Yes, in increments of 1 Basic Unit Yes, in increments of 1 Standard Unit Yes, in increments of 1 Premium Unit Scale Limit N/A N/A Up to 8 units Up to 8 units Up to 8 units EAI Bridges per Unit N/A 25 25 125 500 EDI Agreements per Unit N/A 10 50 250 1000 Hybrid Connections per Unit 5 5 10 50 100 Hybrid Connection Data Transfer (GBs) per Unit 5 5 50 250 500 Number of connections using BizTalk Adapter Service per Unit N/A 1 2 5 25 Archiving N/A Available N/A N/A Available High Availability N/A N/A Available Available Available DocumentDB limits DocumentDB limits Mobile Engagement limits Mobile Engagement limits RESOURCE MAXIMUM LIMIT App Collection Users 5 per App Collection Average Data points 200 per Active User/Day Average App-Info set 50 per Active User/Day Average Messages pushed 20 per Active User/Day Completed jobs and job schedules are not limited. 3 Contact Azure support if you want to request an increase beyond this limit. 4 The following table shows the limits for Azure Biztalk Services. DocumentDB is a global scale database in which throughput and storage can be scaled to handle whatever your application requires. If you have any questions about the scale DocumentDB provides, please send email to askdocdb@microsoft.com.
- 651. Segments 100 per app Criteria per segment 10 Active Push Campaigns 50 per app Total Push Campaigns (includes Active & Completed) 1000 per app RESOURCE MAXIMUM LIMIT Search limits Search limits RESOURCE FREE BASIC S1 S2 S3 S3 HD Maximum services 1 12 12 6 6 6 Maximum scale in SU N/A 3 SU 36 SU 36 SU 36 SU 36 SU Pricing tiers determine the capacity and limits of your search service. Tiers include: Free multi-tenant service, shared with other Azure subscribers, intended for evaluation and small development projects. Basic provides dedicated computing resources for production workloads at a smaller scale, with up to three replicas for highly available query workloads. Standard (S1, S2, S3, S3 High Density) is for larger production workloads. Multiple levels exist within the standard tier so that you can choose a resource configuration that best matches your workload profile. Limits per subscription You can create multiple services within a subscription, each one provisioned at a specific tier, limited only by the number of services allowed at each tier. For example, you could create up to 12 services at the Basic tier and another 12 services at the S1 tier within the same subscription. For more information about tiers, see Choose a SKU or tier for Azure Search. Maximum service limits can be raised upon request. Contact Azure Support if you need more services within the same subscription. 1 2 3 4 S3 HD does not support indexers at this time. 1 Search units (SU) are billing units, allocated as either a replica or a partition. You need both resources for storage, indexing, and query operations. To learn more about how search units are computed, plus a chart of valid combinations that stay under the maximum limits, see Scale resource levels for query and index workloads. 2 Free is based on shared resources used by multiple subscribers. At this tier, there are no dedicated resources for an individual subscriber. For this reason, maximum scale is marked as not applicable. 3 Basic has one fixed partition. At this tier, additional SUs are used for allocating more replicas for increased query workloads. 4 Limits per search service Storage is constrained by disk space or by a hard limit on the maximum number of indexes or documents, whichever comes first.
- 652. RESOURCE FREE BASIC S1 S2 S3 S3 HD Service Level Agreement (SLA) No Yes Yes Yes Yes Yes Storage per partition 50 MB 2 GB 25 GB 100 GB 200 GB 200 GB Partitions per service N/A 1 12 12 12 3 Partition size N/A 2 GB 25 GB 100 GB 200 GB 200 GB Replicas N/A 3 12 12 12 12 Maximum indexes 3 5 50 200 200 1000 per partition or 3000 per service Maximum indexers 3 5 50 200 200 No indexer support Maximum datasources 3 5 50 200 200 No indexer support Maximum documents 10,000 1 million 15 million per partition or 180 million per service 60 million per partition or 720 million per service 120 million per partition or 1.4 billion per service 1 million per index or 200 million per partition Estimated queries per second (QPS) N/A ~3 per replica ~15 per replica ~60 per replica ~60 per replica >60 per replica Media Services limits Media Services limits NOTE NOTE 1 2 Free and Preview SKUs do not come with service level agreements (SLAs). SLAs are enforced once a SKU becomes generally available. 1 S3 HD has a hard limit of 3 partitions, which is lower than the partition limit for S3. The lower partition limit is imposed because the index count for S3 HD is substantially higher. Given that service limits exist for both computing resources (storage and processing) and content (indexes and documents), the content limit is reached first. 2 To learn more about limits on a more granular level, such as document size, queries per second, keys, requests, and responses, see Service limits in Azure Search. For resources that are not fixed, you may ask for the quotas to be raised, by opening a support ticket. Do not create additional Azure Media Services accounts in an attempt to obtain higher limits.
- 653. RESOURCE DEFAULT LIMIT Azure Media Services (AMS) accounts in a single subscription 25 (fixed) Media Reserved Units (RUs) per AMS account 25 (S1, S2) 10 (S3) Jobs per AMS account 50,000 Chained tasks per job 30 (fixed) Assets per AMS account 1,000,000 Assets per task 50 Assets per job 100 Unique locators associated with an asset at one time 5 Live channels per AMS account 5 Programs in stopped state per channel 50 Programs in running state per channel 3 Streaming endpoints in running state per AMS account 2 Streaming units per streaming endpoint 10 Storage accounts 1,000 (fixed) Policies 1,000,000 File size In some scenarios there is a limit on the maximum file size supported for processing in Media Services. (1) (2) (4) (5) (6) 7 S3 RUs are not available in India West. 1 This number includes queued, finished, active, and canceled jobs. It does not include deleted jobs. You can delete the old jobs using IJob.Delete or the DELETE HTTP request. 2 Starting April 1, 2017, any Job record in your account older than 90 days will be automatically deleted, along with its associated Task records, even if the total number of records is below the maximum quota. If you need to archive the job/task information, you can use the code described here. When making a request to list Job entities, a maximum of 1,000 will be returned per request. If you need to keep track of all submitted Jobs, you can use top/skip as described in OData system query options. 3 Locators are not designed for managing per-user access control. To give different access rights to individual users, use Digital Rights Management (DRM) solutions. For more information, see this section. 4 The storage accounts must be from the same Azure subscription. 5 There is a limit of 1,000,000 policies for different AMS policies (for example, for Locator policy or ContentKeyAuthorizationPolicy). 6
- 654. NOTE NOTE MEDIA RESERVED UNIT TYPE MAXIMUM FILE SIZE (GB) S1 325 S2 640 S3 260 CDN limits CDN limits RESOURCE SOFT LIMIT CDN profiles 8 CDN endpoints per profile 10 Custom domains per endpoint 10 Mobile Services limits Mobile Services limits TIER: FREE BASIC STANDARD API Calls 500 K 1.5 M / unit 15 M / unit Active Devices 500 Unlimited Unlimited Scale N/A Up to 6 units Unlimited units Push Notifications Notification Hubs Free Tier included, up to 1 M pushes Notification Hubs Basic Tier included, up to 10 M pushes Notification Hubs Standard Tier included, up to 10 M pushes Real time messaging/ Web Sockets Limited 350 / mobile service Unlimited Offline synchronizations Limited Included Included Scheduled jobs Limited Included Included SQL Database (required) Standard rates apply for additional capacity 20 MB included 20 MB included 20 MB included You should use the same policy ID if you are always using the same days / access permissions / etc. For information and an example, see this section. If you are uploading content to an Asset in Azure Media Services with the intent to process it with one of the media processors in our service (i.e. encoders like Media Encoder Standard and Media Encoder Premium Workflow, or analysis engines like Face Detector), then you should be aware of the following limits. 7 Request an update to your subscription's soft limits by opening a support ticket.
- 655. CPU capacity 60 minutes / day Unlimited Unlimited Outbound data transfer 165 MB per day (daily Rollover) Included Included TIER: FREE BASIC STANDARD Monitor limits Monitor limits RESOURCE LIMIT Autoscale Settings 100 per region per subscription Metric Alerts 100 active alert rules per subscription Notification Hub Service limits Notification Hub Service limits TIER: FREE BASIC STANDARD Included Pushes 1 Million 10 Million 10 Million Active Devices 500 200,000 10 million Tag quota per installation/registration 60 60 60 Event Hubs limits Event Hubs limits LIMIT SCOPE TYPE BEHAVIOR WHEN EXCEEDED VALUE Number of Event Hubs per namespace Namespace Static Subsequent requests for creation of a new namespace will be rejected. 10 Number of partitions per Event Hub Entity Static - 32 Number of consumer groups per Event Hub Entity Static - 20 Number of AMQP connections per namespace Namespace Static Subsequent requests for additional connections will be rejected and an exception will be received by the calling code. 5,000 For additional details on these limits and for information on pricing, see Mobile Services Pricing. For additional details on these limits and for information on pricing, see Notification Hubs Pricing. The following table lists quotas and limits specific to Azure Event Hubs. For information about Event Hubs pricing, see Event Hubs Pricing.
- 656. Maximum size of Event Hubs event System-wide Static - 256KB Maximum size of an Event Hub name Entity Static - 50 characters Number of non- epoch receivers per consumer group Entity Static - 5 Maximum retention period of event data Entity Static - 1-7 days Maximum throughput units Namespace Static Exceeding the throughput unit limit will cause your data to be throttled and generate a ServerBusyExceptio n. You can request a larger number of throughput units for a Standard tier by filing a support ticket. Additional throughput units are available in blocks of twenty on a committed purchase basis. 20 LIMIT SCOPE TYPE BEHAVIOR WHEN EXCEEDED VALUE Service Bus limits Service Bus limits QUOTA NAME SCOPE TYPE BEHAVIOR WHEN EXCEEDED VALUE Maximum number of basic / standard namespaces per Azure subscription Namespace Static Subsequent requests for additional basic / standard namespaces will be rejected by the portal. 100 Maximum number of premium namespaces per Azure subscription Namespace Static Subsequent requests for additional premium namespaces will be rejected by the portal. 10 Queue/topic size Entity Defined upon creation of the queue/topic. Incoming messages will be rejected and an exception will be received by the calling code. 1, 2, 3, 4 or 5 GB. If partitioning is enabled, the maximum queue/topic size is 80 GB. The following table lists quota information specific to Service Bus messaging. For information about pricing and other quotas for Service Bus, see the Service Bus Pricing overview.
- 657. Number of concurrent connections on a namespace Namespace Static Subsequent requests for additional connections will be rejected and an exception will be received by the calling code. REST operations do not count towards concurrent TCP connections. NetMessaging: 1,000 AMQP: 5,000 Number of concurrent receive requests on a queue/topic/subscripti on entity Entity Static Subsequent receive requests will be rejected and an exception will be received by the calling code. This quota applies to the combined number of concurrent receive operations across all subscriptions on a topic. 5,000 Number of topics/queues per service namespace System-wide Static Subsequent requests for creation of a new topic or queue on the service namespace will be rejected. As a result, if configured through the Azure portal, an error message will be generated. If called from the management API, an exception will be received by the calling code. 10,000 The total number of topics plus queues in a service namespace must be less than or equal to 10,000. This is not applicable to Premium as all entities are partitioned. Number of partitioned topics/queues per service namespace System-wide Static Subsequent requests for creation of a new partitioned topic or queue on the service namespace will be rejected. As a result, if configured through the Azure portal, an error message will be generated. If called from the management API, a QuotaExceededExce ption exception will be received by the calling code. Basic and Standard Tiers - 100 Premium - 1,000 Each partitioned queue or topic counts towards the quota of 10,000 entities per namespace. QUOTA NAME SCOPE TYPE BEHAVIOR WHEN EXCEEDED VALUE
- 658. Maximum size of any messaging entity path: queue or topic Entity Static - 260 characters Maximum size of any messaging entity name: namespace, subscription, or subscription rule Entity Static - 50 characters Message size for a queue/topic/subscripti on entity System-wide Static Incoming messages that exceed these quotas will be rejected and an exception will be received by the calling code. Maximum message size: 256KB (Standard tier) / 1MB (Premium tier). Note Due to system overhead, this limit is usually slightly less. Maximum header size: 64KB Maximum number of header properties in property bag: byte/int.MaxValue Maximum size of property in property bag: No explicit limit. Limited by maximum header size. Message property size for a queue/topic/subscripti on entity System-wide Static A SerializationExcepti on exception is generated. Maximum message property size for each property is 32K. Cumulative size of all properties cannot exceed 64K. This applies to the entire header of the BrokeredMessage, which has both user properties as well as system properties (such as SequenceNumber, Label, MessageId, and so on). QUOTA NAME SCOPE TYPE BEHAVIOR WHEN EXCEEDED VALUE
- 659. Number of subscriptions per topic System-wide Static Subsequent requests for creating additional subscriptions for the topic will be rejected. As a result, if configured through the portal, an error message will be shown. If called from the management API an exception will be received by the calling code. 2,000 Number of SQL filters per topic System-wide Static Subsequent requests for creation of additional filters on the topic will be rejected and an exception will be received by the calling code. 2,000 Number of correlation filters per topic System-wide Static Subsequent requests for creation of additional filters on the topic will be rejected and an exception will be received by the calling code. 100,000 Size of SQL filters/actions System-wide Static Subsequent requests for creation of additional filters will be rejected and an exception will be received by the calling code. Maximum length of filter condition string: 1024 (1K). Maximum length of rule action string: 1024 (1K). Maximum number of expressions per rule action: 32. Number of SharedAccessAuthoriz ationRule rules per namespace, queue, or topic Entity, namespace Static Subsequent requests for creation of additional rules will be rejected and an exception will be received by the calling code. Maximum number of rules: 12. Rules that are configured on a Service Bus namespace apply to all queues and topics in that namespace. QUOTA NAME SCOPE TYPE BEHAVIOR WHEN EXCEEDED VALUE IoT Hub limits IoT Hub limits The following table lists the limits associated with the different service tiers (S1, S2, S3, F1). For information about the cost of each unit in each tier, see IoT Hub Pricing.
- 660. RESOURCE S1 STANDARD S2 STANDARD S3 STANDARD F1 FREE Messages/day 400,000 6,000,000 300,000,000 8,000 Maximum units 200 200 10 1 NOTE NOTE RESOURCE LIMIT Maximum paid IoT hubs per Azure subscription 10 Maximum free IoT hubs per Azure subscription 1 Maximum number of device identities returned in a single call 1000 IoT Hub message maximum retention for device-to-cloud messages 7 days Maximum size of device-to-cloud message 256 KB Maximum size of device-to-cloud batch 256 KB Maximum messages in device-to-cloud batch 500 Maximum size of cloud-to-device message 64 KB Maximum TTL for cloud-to-device messages 2 days Maximum delivery count for cloud-to-device messages 100 Maximum delivery count for feedback messages in response to a cloud-to-device message 100 Maximum TTL for feedback messages in response to a cloud-to-device message 2 days Maximum size of device twin (tags, reported properties, and desired properties) 8 KB Maximum size of device twin string value 512 bytes Maximum depth of object in device twin 5 Maximum size of direct method payload 8 KB Job history maximum retention 30 days If you anticipate using more than 200 units with an S1 or S2 or 10 units with an S3 tier hub, contact Microsoft support. The following table lists the limits that apply to IoT Hub resources:
- 661. Maximum concurrent jobs 10 (for S3), 5 for (S2), 1 (for S1) Maximum additional endpoints 10 (for S1, S2, S3) Maximum message routing rules 100 (for S1, S2, S3) RESOURCE LIMIT NOTE NOTE NOTE NOTE THROTTLE PER-HUB VALUE Identity registry operations (create, retrieve, list, update, delete), individual or bulk import/export 83.33/sec/unit (5000/min/unit) (for S3) 1.67/sec/unit (100/min/unit) (for S1 and S2). Device connections 6000/sec/unit (for S3), 120/sec/unit (for S2), 12/sec/unit (for S1). Minimum of 100/sec. Device-to-cloud sends 6000/sec/unit (for S3), 120/sec/unit (for S2), 12/sec/unit (for S1). Minimum of 100/sec. Cloud-to-device sends 83.33/sec/unit (5000/min/unit) (for S3), 1.67/sec/unit (100/min/unit) (for S1 and S2). Cloud-to-device receives 833.33/sec/unit (50000/min/unit) (for S3), 16.67/sec/unit (1000/min/unit) (for S1 and S2). File upload operations 83.33 file upload notifications/sec/unit (5000/min/unit) (for S3), 1.67 file upload notifications/sec/unit (100/min/unit) (for S1 and S2). 10000 SAS URIs can be out for an Azure Storage account at one time. 10 SAS URIs/device can be out at one time. Direct methods 1500/sec/unit (for S3), 30/sec/unit (for S2), 10/sec/unit (for S1) Device twin reads 50/sec/unit (for S3), Maximum of 10/sec or 1/sec/unit (for S2), 10/sec (for S1) Device twin updates 50/sec/unit (for S3), Maximum of 10/sec or 1/sec/unit (for S2), 10/sec (for S1) If you need more than 10 paid IoT hubs in an Azure subscription, contact Microsoft support. Currently, the maximum number of devices you can connect to a single IoT hub is 500,000. If you want to increase this limit, contact Microsoft Support. The IoT Hub service throttles requests when the following quotas are exceeded:
- 662. Jobs operations (create, update, list, delete) 83.33/sec/unit (5000/min/unit) (for S3), 1.67/sec/unit (100/min/unit) (for S2), 1.67/sec/unit (100/min/unit) (for S1) Jobs per-device operation throughput 50/sec/unit (for S3), Maximum of 10/sec or 1/sec/unit (for S2), 10/sec (for S1) THROTTLE PER-HUB VALUE Data Factory limits Data Factory limits RESOURCE DEFAULT LIMIT MAXIMUM LIMIT data factories in an Azure subscription 50 Contact support pipelines within a data factory 2500 Contact support datasets within a data factory 5000 Contact support concurrent slices per dataset 10 10 bytes per object for pipeline objects 200 KB 200 KB bytes per object for dataset and linked service objects 100 KB 2000 KB HDInsight on-demand cluster cores within a subscription 60 Contact support Cloud data movement unit 32 Contact support Retry count for pipeline activity runs 1000 MaxInt (32 bit) RESOURCE DEFAULT LOWER LIMIT MINIMUM LIMIT Scheduling interval 15 minutes 15 minutes Interval between retry attempts 1 second 1 second Data factory is a multi-tenant service that has the following default limits in place to make sure customer subscriptions are protected from each other's workloads. Many of the limits can be easily raised for your subscription up to the maximum limit by contacting support. 1 1 2 3 Pipeline, dataset, and linked service objects represent a logical grouping of your workload. Limits for these objects do not relate to amount of data you can move and process with the Azure Data Factory service. Data factory is designed to scale to handle petabytes of data. 1 On-demand HDInsight cores are allocated out of the subscription that contains the data factory. As a result, the above limit is the Data Factory enforced core limit for on-demand HDInsight cores and is different from the core limit associated with your Azure subscription. 2 Cloud data movement unit (DMU) is being used in a cloud-to-cloud copy operation. It is a measure that represents the power (a combination of CPU, memory, and network resource allocation) of a single unit in Data Factory. You can achieve higher copy throughput by leveraging more DMUs for some scenarios. Refer to Cloud data movement units section on details. 3
- 663. Retry timeout value 1 second 1 second RESOURCE DEFAULT LOWER LIMIT MINIMUM LIMIT Web service call limits Web service call limits Data Lake Analytics limits Data Lake Analytics limits RESOURCE DEFAULT LIMIT COMMENTS max concurrent jobs 3 Max parallelism per account 60 Use any combination of up to a maximum of 60 units of parallelism across three jobs. Data Lake Store limits Data Lake Store limits RESOURCE DEFAULT LIMIT COMMENTS Max number of Data Lake Store accounts, per subscription, per region 10 Contact Support to request an increase for this limit Stream Analytics limits Stream Analytics limits LIMIT IDENTIFIER LIMIT COMMENTS Maximum number of Streaming Units per subscription per region 50 A request to increase streaming units for your subscription beyond 50 can be made by contacting Microsoft Support. Maximum throughput of a Streaming Unit 1MB/s* Maximum throughput per SU depends on the scenario. Actual throughput may be lower and depends upon query complexity and partitioning. Further details can be found in the Scale Azure Stream Analytics jobs to increase throughput article. Maximum number of inputs per job 60 There is a hard limit of 60 inputs per Stream Analytics job. Maximum number of outputs per job 60 There is a hard limit of 60 outputs per Stream Analytics job. Azure Resource Manager has limits for API calls. You can make API calls at a rate within the Azure Resource Manager API limits. Data Lake Analytics makes the complex task of managing distributed infrastructure and complex code easy. It dynamically provisions resources and lets you do analytics on exabytes of data. When the job completes, it winds down resources automatically, and you pay only for the processing power used. As you increase or decrease the size of data stored or the amount of compute used, you don’t have to rewrite code. Many of the default limits can be easily raised for your subscription by contacting support. Azure Data Lake Store is an enterprise-wide hyper-scale repository for big data analytic workloads. Data Lake Store enables you to capture data of any size, type, and ingestion speed in one single place for operational and exploratory analytics. There is no limit to the amount of data you can store in a Data Lake Store account.
- 664. Maximum number of functions per job 60 There is a hard limit of 60 functions per Stream Analytics job. Maximum number of Streaming Units per job 120 There is a hard limit of 120 Streaming Units per Stream Analytics job. Maximum number of jobs per region 1500 Each subscription may have up to 1500 jobs per geographical region. Reference data blob MB 100 Reference data blobs cannot be larger than 100 MB each. LIMIT IDENTIFIER LIMIT COMMENTS Active Directory limits Active Directory limits CATEGORY LIMITS Directories A single user can only be associated with a maximum of 20 Azure Active Directory directories. Examples of possible combinations: Objects Schema extensions Applications A maximum of 100 users can be owners of a single application. Here are the usage constraints and other service limits for the Azure Active Directory service. A single user creates 20 directories. A single user is added to 20 directories as a member. A single user creates 10 directories and later is added by others to 10 different directories. A maximum of 500,000 objects can be used in a single directory by users of the Free edition of Azure Active Directory. A non-admin user can create no more than 250 objects. String type extensions can have maximum of 256 characters. Binary type extensions are limited to 256 bytes. 100 extension values (across ALL types and ALL applications) can be written to any single object. Only “User”, “Group”, “TenantDetail”, “Device”, “Application” and “ServicePrincipal” entities can be extended with “String” type or “Binary” type single- valued attributes. Schema extensions are available only in Graph API- version 1.21-preview. The application must be granted write access to register an extension.
- 665. Groups Access Panel Reports A maximum of 1,000 rows can be viewed or downloaded in any report. Any additional data is truncated. Administrative units An object can be a member of no more than 30 administrative units. CATEGORY LIMITS Azure RemoteApp limits Azure RemoteApp limits RESOURCE DEFAULT LIMIT Collections per user 1 Published apps per collection 100 Paid collections 3 Paid template images 25 Users - basic tier 800 maximum Users - standard tier 500 maximum Users- premium tier 100 maximum Users - premium plus tier 50 maximum User data storage (UPD) per user per collection 50 GB Idle timeout 4 hours A maximum of 100 users can be owners of a single group. Any number of objects can be members of a single group in Azure Active Directory. The number of members in a group you can synchronize from your on-premises Active Directory to Azure Active Directory is limited to 15K members, using Azure Active Directory Directory Synchronization (DirSync). The number of members in a group you can synchronize from your on-premises Active Directory to Azure Active Directory using Azure AD Connect is limited to 50K members. There is no limit to the number of applications that can be seen in the Access Panel per end user, for users assigned licenses for Azure AD Premium or the Enterprise Mobility Suite. A maximum of 10 app tiles (examples: Box, Salesforce, or Dropbox) can be seen in the Access Panel for each end user for users assigned licenses for Free or Azure AD Basic editions of Azure Active Directory. This limit does not apply to Administrator accounts.
- 666. Disconnected timeout 4 hours RESOURCE DEFAULT LIMIT StorSimple System limits StorSimple System limits LIMIT IDENTIFIER LIMIT COMMENTS Maximum number of storage account credentials 64 Maximum number of volume containers 64 Maximum number of volumes 255 Maximum number of schedules per bandwidth template 168 A schedule for every hour, every day of the week (24*7). Maximum size of a tiered volume on physical devices 64 TB for 8100 and 8600 8100 and 8600 are physical devices. Maximum size of a tiered volume on virtual devices in Azure 30 TB for 8010 64 TB for 8020 8010 and 8020 are virtual devices in Azure that use Standard Storage and Premium Storage respectively. Maximum size of a locally pinned volume on physical devices 9 TB for 8100 24 TB for 8600 8100 and 8600 are physical devices. Maximum number of iSCSI connections 512 Maximum number of iSCSI connections from initiators 512 Maximum number of access control records per device 64 Maximum number of volumes per backup policy 24 Maximum number of backups retained per backup policy 64 Maximum number of schedules per backup policy 10 Maximum number of snapshots of any type that can be retained per volume 256 This includes local snapshots and cloud snapshots. The number of users is determined by the number of VMs used for your collection: Basic = 16 users per VM Standard = 10 users per VM Premium = 4 users per VM Premium plus = 2 users per VM
- 667. Maximum number of snapshots that can be present in any device 10,000 Maximum number of volumes that can be processed in parallel for backup, restore, or clone 16 Restore and clone recover time for tiered volumes < 2 minutes LIMIT IDENTIFIER LIMIT COMMENTS If there are more than 16 volumes, they will be processed sequentially as processing slots become available. New backups of a cloned or a restored tiered volume cannot occur until the operation is finished. However, for a local volume, backups are allowed after the volume is online. The volume is made available within 2 minutes of restore or clone operation, regardless of the volume size. The volume performance may initially be slower than normal as most of the data and metadata still resides in the cloud. Performance may increase as data flows from the cloud to the StorSimple device. The total time to download metadata depends on the allocated volume size. Metadata is automatically brought into the device in the background at the rate of 5 minutes per TB of allocated volume data. This rate may be affected by Internet bandwidth to the cloud. The restore or clone operation is complete when all the metadata is on the device. Backup operations cannot be performed until the restore or clone operation is fully complete.
- 668. Restore recover time for locally pinned volumes < 2 minutes Thin-restore availability Last failover Maximum client read/write throughput (when served from the SSD tier)* 920/720 MB/s with a single 10GbE network interface Up to 2x with MPIO and two network interfaces. Maximum client read/write throughput (when served from the HDD tier)* 120/250 MB/s Maximum client read/write throughput (when served from the cloud tier)* 11/41 MB/s Read throughput depends on clients generating and maintaining sufficient I/O queue depth. LIMIT IDENTIFIER LIMIT COMMENTS Log Analytics limits Log Analytics limits The volume is made available within 2 minutes of the restore operation, regardless of the volume size. The volume performance may initially be slower than normal as most of the data and metadata still resides in the cloud. Performance may increase as data flows from the cloud to the StorSimple device. The total time to download metadata depends on the allocated volume size. Metadata is automatically brought into the device in the background at the rate of 5 minutes per TB of allocated volume data. This rate may be affected by Internet bandwidth to the cloud. Unlike tiered volumes, in the case of locally pinned volumes, the volume data is also downloaded locally on the device. The restore operation is complete when all the volume data has been brought to the device. The restore operations may be long and the total time to complete the restore will depend on the size of the provisioned local volume, your Internet bandwidth and the existing data on the device. Backup operations on the locally pinned volume are allowed while the restore operation is in progress. * Maximum throughput per I/O type was measured with 100 percent read and 100 percent write scenarios. Actual throughput may be lower and depends on I/O mix and network conditions.
- 669. NOTE NOTE RESOURCE DEFAULT LIMIT COMMENTS Number of free workspaces per subscription 10 This limit cannot be increased. Number of paid workspaces per subscription N/A You are limited by the number of resources within a resource group and number of resource groups per subscription FREE STANDARD PREMIUM STANDALONE OMS Data volume collected per day 500 MB None None None None Data retention period 7 days 1 month 12 months 1 month 1 month CATEGORY LIMITS COMMENTS Data Collector API Maximum size for a single post is 30 MB Maximum size for field values is 32 KB Split larger volumes into multiple posts Fields longer than 32 KB are truncated. Search API 5000 records returned for non- aggregated data 500000 records for aggregated data Aggregated data is a search that includes the measure command Backup limits Backup limits LIMIT IDENTIFIER DEFAULT LIMIT Number of servers/machines that can be registered against each vault 50 for Windows Server/Client/SCDPM 200 for IaaS VMs Size of a data source for data stored in Azure vault storage 54400 GB max Number of backup vaults that can be created in each Azure subscription 25(Backup vaults) 25 Recovery Services vault per region Log Analytics was formerly known as Operational Insights. The following limits apply to Log Analytics resources per subscription: The following limits apply to each Log Analytics workspace: 1 2 2 When customers reach their 500 MB daily data transfer limit, data analysis stops and resumes at the start of the next day. A day is based on UTC. 1 The data retention period for the Standalone and OMS pricing plans can be increased to 730 days. 2 The following limits apply to Azure Backup. 1
- 670. Number of times backup can be scheduled per day 3 per day for Windows Server/Client 2 per day for SCDPM Once a day for IaaS VMs Data disks attached to an Azure virtual machine for backup 16 LIMIT IDENTIFIER DEFAULT LIMIT Site Recovery limits Site Recovery limits LIMIT IDENTIFIER DEFAULT LIMIT Number of vaults per subscription 25 Number of servers per Azure vault 250 Number of protection groups per Azure vault No limit Number of recovery plans per Azure vault No limit Number of servers per protection group No limit Number of servers per recovery plan 50 Application Insights limits Application Insights limits RESOURCE DEFAULT LIMIT NOTE Total data per day 500 GB You can reduce data by setting a cap. If you need more, mail AIDataCap@microsoft.com. Free data per month (Basic price plan) 1 GB Additional data is charged per gigabyte. Throttling 32 k events/second The limit is measured over a minute. Data retention 90 days This resource is for Search, Analytics, and Metrics Explorer. Availability multi-step test detailed results retention 90 days This resource provides detailed results of each step. Maximum event size 64 K Property and metric name length 150 see comment below for more informaiton The 54400 GB limit does not apply to IaaS VM backup. 1 The following limits apply to Azure Site Recovery: There are some limits on the number of metrics and events per application (that is, per instrumentation key). Limits depend on the pricing plan that you choose.
- 671. Property value string length 8,192 see comment below for more informaiton Trace and exception message length 10 k see comment below for more informaiton Availability tests count per app 10 RESOURCE DEFAULT LIMIT NOTE API Management limits API Management limits RESOURCE LIMIT API Calls (per unit of scale) 32 million per day Data transfer (per unit of scale) 161 GB per day Cache 5 GB Units of scale Unlimited Azure Active Directory Integration Unlimited User Accounts Azure Redis Cache limits Azure Redis Cache limits RESOURCE LIMIT Cache size 530 GB (contact us for more) Databases 64 Max connected clients 40,000 Redis Cache replicas (for high availability) 1 Shards in a premium cache with clustering 10 Key Vault limits Key Vault limits For more information, see About pricing and quotas in Application Insights. For more informaiton on data fields limits see per type schemas 1 1 1 1 1 API Management limits are different for each pricing tier. To see the pricing tiers and their associated limits and scaling options, see API Management Pricing. 1 Azure Redis Cache limits and sizes are different for each pricing tier. To see the pricing tiers and their associated sizes, see Azure Redis Cache Pricing. For more information on Azure Redis Cache configuration limits, see Default Redis server configuration. Because configuration and management of Azure Redis Cache instances is done by Microsoft, not all Redis commands are supported in Azure Redis Cache. For more information, see [Redis commands not supported in Azure Redis Cache]((redis-cache/cache-configure.md#redis-commands-not-supported-in-azure-redis-cache).
- 672. TRANSACTIONS TYPE MAX TRANSACTIONS ALLOWED IN 10 SECONDS, PER VAULT PER REGION HSM- CREATE KEY 5 HSM- other transactions 1000 Soft-key CREATE KEY 10 Soft-key other transactions 1500 All secrets, vault related transactions 2000 Multi-Factor Authentication Multi-Factor Authentication RESOURCE DEFAULT LIMIT MAXIMUM LIMIT Max number of Trusted IP addresses/ranges per subscription 0 50 Remember my devices - number of days 14 60 Max number of app passwords? 0 No Limit Allow X attempts during MFA call 1 99 Two-way Text message Timeout Seconds 60 600 Default one-time bypass seconds 300 1800 Lock user account after X consecutive MFA denials Not Set 99 Reset account lockout counter after X minutes Not Set 9999 Unlock account after X minutes Not Set 9999 Automation limits Automation limits RESOURCE MAXIMUM LIMIT Max number of new jobs that can be submitted every 30 seconds per Automation Account (non Scheduled jobs) 100 Max number of concurrent running jobs at the same instance of time per Automation Account (non Scheduled jobs) 200 Max number of modules that can be imported every 30 seconds per Automation Account 5 1 There is a subscription-wide limit for all transaction types, that is 5x per key vault limit. For example, HSM- other transactions per subscription are limited to 5000 transactions in 10 seconds per subscription. 1
- 673. Max size of a Module 100 MB Job Run Time - Free tier 500 minutes per subscription per calendar month Max amount of memory given to a job 400 MB Max number of network sockets allowed per job 1000 RESOURCE MAXIMUM LIMIT SQL Database limits SQL Database limits See also For SQL Database limits, see SQL Database Resource Limits. Understanding Azure Limits and Increases Virtual Machine and Cloud Service Sizes for Azure Sizes for Cloud Services
- 674. Best Practices for Azure App Service 2/28/2017 • 3 min to read • Edit Online Colocation When apps consume more memory than expected When apps consume more CPU than expected When socket resources are exhausted When your app backup starts failing This article summarizes best practices for using Azure App Service. When Azure resources composing a solution such as a web app and a database are located in different regions the effects can include the following: Increased latency in communication between resources Monetary charges for outbound data transfer cross-region as noted on the Azure pricing page. Colocation in the same region is best for Azure resources composing a solution such as a web app and a database or storage account used to hold content or data. When creating resources you should make sure they are in the same Azure region unless you have specific business or design reason for them not to be. You can move an App Service app to the same region as your database by leveraging the App Service cloning feature currently available for Premium App Service Plan apps. When you notice an app consumes more memory than expected as indicated via monitoring or service recommendations consider the App Service Auto-Healing feature. One of the options for the Auto-Healing feature is taking custom actions based on a memory threshold. Actions span the spectrum from email notifications to investigation via memory dump to on-the-spot mitigation by recycling the worker process. Auto-healing can be configured via web.config and via a friendly user interface as described at in this blog post for the App Service Support Site Extension. When you notice an app consumes more CPU than expected or experiences repeated CPU spikes as indicated via monitoring or service recommendations consider scaling up or scaling out the App Service plan. If your application is statefull, scaling up is the only option, while if your application is stateless, scaling out will give you more flexibility and higher scale potential. For more information about “statefull” vs “stateless” applications you can watch this video: Planning a Scalable End- to-End Multi-Tier Application on Microsoft Azure Web App. For more information about App Service scaling and autoscaling options read: Scale a Web App in Azure App Service. A common reason for exhausting outbound TCP connections is the use of client libraries which are not implemented to reuse TCP connections, or in the case of a higher level protocol such as HTTP - Keep-Alive not being leveraged. Please review the documentation for each of the libraries referenced by the apps in your App Service Plan to ensure they are configured or accessed in your code for efficient reuse of outbound connections. Also follow the library documentation guidance for proper creation and release or cleanup to avoid leaking connections. While such client libraries investigations are in progress impact may be mitigated by scaling out to multiple instances.
- 675. When new Node.js apps are deployed to Azure App Service The two most common reasons why app backup fails are: invalid storage settings and invalid database configuration. These failures typically happen when there are changes to storage or database resources, or changes for how to access these resources (e.g. credentials updated for the database selected in the backup settings). Backups typically run on a schedule and require access to storage (for outputting the backed up files) and databases (for copying and reading contents to be included in the backup). The result of failing to access either of these resources would be consistent backup failure. When backup failures happen, please review most recent results to understand which type of failure is happening. In the case of storage access failures, please review and update the storage settings used in the backup configuration. In the case of database access failures, please review and update your connections strings as part of app settings; then proceed to update your backup configuration to properly include the required databases. For more information on app backup please see the Back up a web app in Azure App Service documentation. Azure App Service default configuration for Node.js apps is intended to best suit the needs of most common apps. If configuration for your Node.js app would benefit from personalized tuning to improve performance or optimize resource usage for CPU/memory/network resources, you could review our best practices and troubleshooting steps. This documentation article describes the iisnode settings you may need to configure for your Node.js app, describes the various scenarios or issues that your app may be facing, and shows how to address these issues: Best practices and troubleshooting guide for Node applications on Azure App Service.
- 676. Edit Online 1 min to read •