


Excel project 2 formulas functions and formatting
- 1. Pgs. EX66 to EX128
- 2. Functions – a prewritten formula that is built into excel How to verify a formula Adding borders Formatting numbers and text Using conditional formatting – creating a rule that says if something happens then certain formatting will occur to a cell Review of changing widths and heights of columns and rows Adding headers and footers
- 3. To create multiple lines in a cell the user must press ALT+ENTER Another way to make multiple line in cell is to right click cell | select format cell | click alignment tab | check box that say wrap text To make columns wider place cursor on line between columns and double-click or click and drag (rows are the same)
- 4. The power of excel is being able to assign formulas to a cell A function is a prewritten formula in excel A user should use cell references instead of numbers whenever possible (=C4+C5, instead of 234+ 278) A formula always begins with an equal (=) sign. This tells excel that a computation is needed. A circular reference occurs when a formula contains a reference back to itself Excel often sees this as an error and will display #REF!
- 5. A function in excel uses arguments. In the function =Average(C4:C12) =Average is the function C4:C12 is the argument It is always best to use an existing function, if possible, in Excel instead of typing in a formula Excel follows the order or operations when doing compound formulas: Negation (-), Percentages (%), Exponentiations (^), Multiplications (*) and Divisions (/), Additions (+) and Subtractions (-)
- 6. When entering formulas it is best to use cell references as mentioned before Using the point and click method works best to enter these cell references Click in the cell where the formulas will be and type the = sign Click the first cell in the formula Then type the operator to be used Then click the next cell in the formula Repeat steps as needed Once formulas are entered use Fill handle to copy – will save time and possible errors
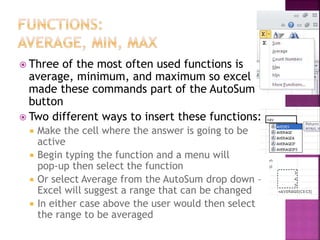
- 7. Three of the most often used functions is average, minimum, and maximum so excel made these commands part of the AutoSum button Two different ways to insert these functions: Make the cell where the answer is going to be active Begin typing the function and a menu will pop-up then select the function Or select Average from the AutoSum drop down – Excel will suggest a range that can be changed In either case above the user would then select the range to be averaged
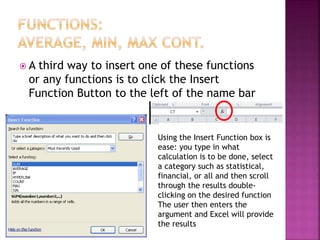
- 8. A third way to insert one of these functions or any functions is to click the Insert Function Button to the left of the name bar Using the Insert Function box is ease: you type in what calculation is to be done, select a category such as statistical, financial, or all and then scroll through the results double- clicking on the desired function The user then enters the argument and Excel will provide the results
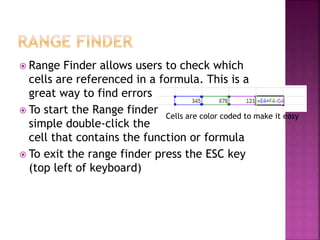
- 9. Range Finder allows users to check which cells are referenced in a formula. This is a great way to find errors To start the Range finder simple double-click the cell that contains the function or formula To exit the range finder press the ESC key (top left of keyboard) Cells are color coded to make it easy
- 10. Theme – predefined set of colors, fonts, chart styles, and fill effects that can be applied to an entire worksheet. Click Page layout tab | Click Themes
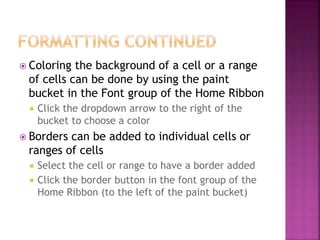
- 11. Coloring the background of a cell or a range of cells can be done by using the paint bucket in the Font group of the Home Ribbon Click the dropdown arrow to the right of the bucket to choose a color Borders can be added to individual cells or ranges of cells Select the cell or range to have a border added Click the border button in the font group of the Home Ribbon (to the left of the paint bucket)
- 12. There are several ways to format the data in a cell or a range of cells 1st – use the ribbon 2nd – select the cell or range | right click on it | click format cells | select the appropriate tab 3rd – CTRL+1 will bring up the format cell window (same as above)
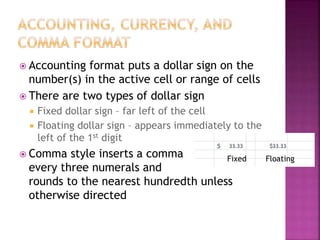
- 13. Accounting format puts a dollar sign on the number(s) in the active cell or range of cells There are two types of dollar sign Fixed dollar sign – far left of the cell Floating dollar sign – appears immediately to the left of the 1st digit Comma style inserts a comma every three numerals and rounds to the nearest hundredth unless otherwise directed Fixed Floating
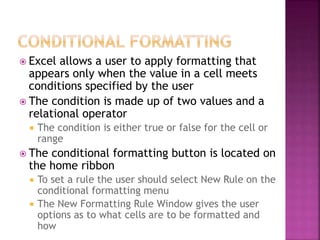
- 14. Excel allows a user to apply formatting that appears only when the value in a cell meets conditions specified by the user The condition is made up of two values and a relational operator The condition is either true or false for the cell or range The conditional formatting button is located on the home ribbon To set a rule the user should select New Rule on the conditional formatting menu The New Formatting Rule Window gives the user options as to what cells are to be formatted and how
- 15. To adjust the size of a column or row place the curser on the line in between the rows or columns then drag or double click Double clicking will BEST FIT the information in the cells BEST FIT means that the width of the column will increase or decrease so that the widest entry will fit in the column A user can resize multiple columns or rows by selecting them – Click on the column or row header and drag to select or click once and hold down the control key to select multiple non-adjacent rows or columns If a number comes up as ##### within a cell this means the column is to small and needs to be resized
- 16. To add a header to a worksheet click the page layout view button (bottom right) | click in the header box | type name | click a cell in the spreadsheet | click the normal view User will not see header or footer until viewing the print preview or actually printing A second way to add header / Footer is to click File | click Print | On the bottom center of page click Page Setup |Click header footer tab | click custom header | add information desired
- 17. Values Version (Results) – this version show the values or results of the work being done Formulas Version – this version shows the formulas and functions that have been entered To display the formulas the user must press CTRL+ACCENT MARK (to the left of the 1 on keyboard) Value View Formula View