SlideShare a Scribd company logo
Forsus
Forsus™ FRD
Sinan Al-Hadeed
Supervised by:
Dr. Ahmad Altarawneh
Dr. Jumana Tbeishat
Dr. Bashar Almomani
Dr. Anwar Alrahamneh
What is “Forsus™” appliance?
• Developed by Bill Vogt in 2001.
• Considered one of the Flexible Fixed
Functional Appliances.
• All of which have a “flexible” component such
as a spring and can be used with a fixed pre-
adjusted Edgewise appliance.
• The second most popular functional appliance
used by orthodontists in the UK, USA, and
Australia.
Forsus
Components of Forsus™ FRD
• Spring Modules:
– EZ2 Module.
– L-pin Spring Module.
• Push Rods.
• Split Crimps.
• Measurement Gauge.
• Spring Modules:
– EZ2 Module.
– L-pin Spring Module
• Push Rods.
– The push rods come in six different lengths and
are oriented to the patient’s right and left.
– 22, 25, 29, 32, 35, and 38.
– The proper size is selected using the
• Measurement Gauge
• Split Crimps.
Instruments used with Forsus™ FRD
• Weingart Utility Pliers.
When to use Forsus™ FRD?
• Class II cases where the patient did not show a
good cooperation in using class II elastics.
• Upright or retroclined lower labial segment.
• Proclined upper labial segment.
It is necessary to plan the use of Forsus in the
original treatment plan and not as a “bail-out”
class II correction.
Setting up for Forsus
• Use upper molar bands with occlusal headgear
tubes.
• TPA might be useful in avoiding expanding the
upper first molars or try to band the upper
second molars to decrease the tendency of
buccal flaring of the molars.
• Avoid using the device in a crowded upper labial
segment instead use sectional arch wire
extending from the canine to the molar region.
Setting up for Forsus
It is important to enforce the lower arch anchorage by:
– Including the lower second molars.
– Make sure that the lower arch spaces are closed.
– Use steel ligation or tie-backs to secure the lower arch and
avoid reopening of spaces.
– Ligation of the lower Canines or First premolars are
important even when using SLB.
– Use lower labial brackets with increased buccal root torque
(-ve) torque
– Start using Forsus only with riged S.S arch wire. A
minimum of 0.017 × 0.025 S.S archwire is recommended
for 0.018 slot in the maxillary and mandibular arches.
0.019 × 0.025 S.S archwire is recommended for 0.022 slot.
• Assess mandibular incisor position.
– Factor in existing proclination and any additional
proclining that will occur when eliminating crowding
and the Curve of Spee.
– Consider whether extractions or interproximal
reduction may be indicated to upright mandibular
incisors where proclination is excessive.
• You should make sure that the upper and lower
arches are well coordinated and you don’t end up
in buccal cross-bite after correction. “Expand the
upper arch.”
Forsus
Canine or First premolar?
• Actually there are three places where you can
place the push rod:
1. First premolar. Placing the push rod distal to the first
premolar is a more recent recommendation for
placement. The benefits include improved patient
comfort, better aesthetics and reduced interference.
2. Canine. The traditional location to place the push rod is
distal to the canine. Placement behind the canine will
work in most cases, especially when the premolar is not
an option, for example:
1. When placement at first premolars is over-active with a 22 mm
push rod.
2. When placement is more vertical than needed.
3. Severe Class II malocclusions where a large portion of the
discrepancy is from a retruded mandible.
3. Omega Loop. Using an Omega Loop allows the
angulation to be varied. It will also keep the push rod
from contacting the bracket. Omega Loop. Using an
Omega Loop allows the angulation to be varied. It will
also keep the push rod from contacting the bracket.
Forsus
Push Rod Selection
• Use the Measurement Guide to determine
correct push rod length, depending on the
selected push rod location (distal to canine, first
premolar, Omega loop).
– Measure each side from the distal end of maxillary
molar tube to the distal side of the chosen mandibular
stop, having the patient bite in centric occlusion
without advancing the mandible. When in doubt, use
the shorter length push rod.
– Select the Right and Left configuration push rods from
the available sizes.
Review visits
• The patient should be reviewed every 6-8
weeks.
• Check for:
– Lower labial segment position; over-jet and
spaces.
– Molar and canine relationships.
– Upper molar position; intrusion and buccal flaring.
– Lower canine or premolar bracket and ligation.
– Breakage of the appliance or patient’s complaints.
• Split Crimps Split crimps are used to reactivate
the spring module as treatment progresses.
The recommendation is to add one split crimp
(1.5 mm of activation) to the push rod, and if
another crimp is needed, move to the next
size push rod.
• Over activated appliance will show a closed
compressed spring and might extrude the rod
from the coil assembly. This will cause
discomfort, breakage of the lower brackets,
and unwanted side effects.
How to deal with emergencies
• The patient should be instructed on how to
sustain a satisfactory level of oral hygiene.
• Emergencies include broken lower brackets,
molar band/tube loosening, broken appliance,
trauma or irritation to the oral tissues, and
disassembled appliance system.
• In case of disassembly, the patient is
instructed to compress the spring and try to
insert the rod within the assembly. If it was
found to be difficult the patient will try to use
an elastic or a dental floss to secure the
segments with the main archwires. And
schedule an emergency visit as soon as
possible.
Forsus
Thank you

More Related Content

PDF
Kapitel 5 Einzelzahnbewegungen. Aufrichten von Molaren
PPTX
Anchorage in orthodontics
PPTX
non compliance class 2 correcters
PPT
Moment to force ratio
PPT
Refined begg technique
PPTX
Opus loop
PPT
Concepts of orthodontic bracket positioning techniques / fixed orthodontics c...
PPTX
Brackets’ modification
Kapitel 5 Einzelzahnbewegungen. Aufrichten von Molaren
Anchorage in orthodontics
non compliance class 2 correcters
Moment to force ratio
Refined begg technique
Opus loop
Concepts of orthodontic bracket positioning techniques / fixed orthodontics c...
Brackets’ modification

What's hot (20)

PPT
Construction bite
PPTX
Utility arch
PPTX
Part one the royal london space planning
PPTX
pg spring.pptx
PPT
Biomechanics of headgears in orthodontics /certified fixed orthodontic course...
PPTX
Elastics in Orthodontics-II
PPTX
Pa ceph analysis
PPTX
Envelope of Discrepancy in Orthodontics: Enhancing Precision in Treatment
PPT
Intrusion arches
PPTX
Orthodontic triage
PPTX
Pitchfork Analysis
PPT
Andrew’s straight wire appliance
PPTX
Schwarz analysis (mothi krishna)
PPTX
Holdway's analysis
PPTX
fixed functional appliances
PDF
The Quad-Helix appliance R.M. Ricketts
PDF
PENDULUM APPLIANCE.pdf
PPT
PPTX
Rakosis analysis
PPT
Soft tissue analysis
Construction bite
Utility arch
Part one the royal london space planning
pg spring.pptx
Biomechanics of headgears in orthodontics /certified fixed orthodontic course...
Elastics in Orthodontics-II
Pa ceph analysis
Envelope of Discrepancy in Orthodontics: Enhancing Precision in Treatment
Intrusion arches
Orthodontic triage
Pitchfork Analysis
Andrew’s straight wire appliance
Schwarz analysis (mothi krishna)
Holdway's analysis
fixed functional appliances
The Quad-Helix appliance R.M. Ricketts
PENDULUM APPLIANCE.pdf
Rakosis analysis
Soft tissue analysis
Ad

Similar to Forsus (20)

PPTX
PPTX
Removable appliances
PPTX
1 opening the bite with bite turbo
PPTX
Orthodontic Forsus Fatigue Resistant Device.pptx
PPTX
14. Refined and Modifie Begg.pptx
PPTX
Orthodontic fixed appliances
PPTX
beggs treatment mechanics stages.ppt.pptx
PPTX
Stability in complete dentures
PPT
Frankel’s functional regulator /certified fixed orthodontic courses by Indi...
PPTX
Fixed appliances
PDF
2-0bracketplacementguideforspeed2ndedition-110403201913-phpapp01.pdf
PPTX
uGICJVOSJACVSAIYCVACIAVCKJX xL XFCOYSACBMCLXvCOYCV XNOUXFYXkl.pptx
PPT
P3 Setting of teeth
PPTX
Bracket placement and positioning (dr nayaungbds phd)
PDF
Removable Orthodontics Appliances dentistry
PPTX
Stability in complete dentures
PPT
Roth prescription.ppt
Removable appliances
1 opening the bite with bite turbo
Orthodontic Forsus Fatigue Resistant Device.pptx
14. Refined and Modifie Begg.pptx
Orthodontic fixed appliances
beggs treatment mechanics stages.ppt.pptx
Stability in complete dentures
Frankel’s functional regulator /certified fixed orthodontic courses by Indi...
Fixed appliances
2-0bracketplacementguideforspeed2ndedition-110403201913-phpapp01.pdf
uGICJVOSJACVSAIYCVACIAVCKJX xL XFCOYSACBMCLXvCOYCV XNOUXFYXkl.pptx
P3 Setting of teeth
Bracket placement and positioning (dr nayaungbds phd)
Removable Orthodontics Appliances dentistry
Stability in complete dentures
Roth prescription.ppt
Ad

More from Royal medical services - JOS (20)

PPTX
Presentation lara
PPTX
Orthodonticscasepresentation yasmin-hzayyen
PPTX
New case final copy
PPTX
Management of craniofacial syndromes and developmental anomalies
PPTX
Luma sem-171022105354
PPTX
Final case-presentation
PPTX
Dr hanan's cl ii case
PPTX
Bimaxillary proclination
PPTX
case Presentation - Dr Sara maaitah
PPTX
Orthodontic Biomechanics
PPTX
case presentation by Dr. jamal a. m. hafiz al qadhi
PPTX
Impacted teeth by DR luma
PPTX
Orthodontic case presentation Dr Lubna Abu Alrub
PPTX
Orthodontic case presentation Dr Alaa Ibrahimi
PPTX
Orthodontic case presentation Dr Alaa Ibrahimi
PPTX
Local problems in orthodontics
Presentation lara
Orthodonticscasepresentation yasmin-hzayyen
New case final copy
Management of craniofacial syndromes and developmental anomalies
Luma sem-171022105354
Final case-presentation
Dr hanan's cl ii case
Bimaxillary proclination
case Presentation - Dr Sara maaitah
Orthodontic Biomechanics
case presentation by Dr. jamal a. m. hafiz al qadhi
Impacted teeth by DR luma
Orthodontic case presentation Dr Lubna Abu Alrub
Orthodontic case presentation Dr Alaa Ibrahimi
Local problems in orthodontics

Recently uploaded (20)

PPTX
Electromyography (EMG) in Physiotherapy: Principles, Procedure & Clinical App...
DOCX
RUHS II MBBS Microbiology Paper-II with Answer Key | 6th August 2025 (New Sch...
PPTX
post stroke aphasia rehabilitation physician
DOC
Adobe Premiere Pro CC Crack With Serial Key Full Free Download 2025
PPTX
1 General Principles of Radiotherapy.pptx
PPTX
Important Obstetric Emergency that must be recognised
PPTX
Pathophysiology And Clinical Features Of Peripheral Nervous System .pptx
PPTX
Imaging of parasitic D. Case Discussions.pptx
PPTX
Note on Abortion.pptx for the student note
PDF
Deadly Stampede at Yaounde’s Olembe Stadium Forensic.pdf
PPT
genitourinary-cancers_1.ppt Nursing care of clients with GU cancer
PPT
OPIOID ANALGESICS AND THEIR IMPLICATIONS
PDF
Medical Evidence in the Criminal Justice Delivery System in.pdf
PPT
Management of Acute Kidney Injury at LAUTECH
PPTX
CME 2 Acute Chest Pain preentation for education
PPTX
Neuropathic pain.ppt treatment managment
PPTX
ca esophagus molecula biology detailaed molecular biology of tumors of esophagus
PDF
CT Anatomy for Radiotherapy.pdf eryuioooop
PPT
Copy-Histopathology Practical by CMDA ESUTH CHAPTER(0) - Copy.ppt
PDF
Intl J Gynecology Obste - 2021 - Melamed - FIGO International Federation o...
Electromyography (EMG) in Physiotherapy: Principles, Procedure & Clinical App...
RUHS II MBBS Microbiology Paper-II with Answer Key | 6th August 2025 (New Sch...
post stroke aphasia rehabilitation physician
Adobe Premiere Pro CC Crack With Serial Key Full Free Download 2025
1 General Principles of Radiotherapy.pptx
Important Obstetric Emergency that must be recognised
Pathophysiology And Clinical Features Of Peripheral Nervous System .pptx
Imaging of parasitic D. Case Discussions.pptx
Note on Abortion.pptx for the student note
Deadly Stampede at Yaounde’s Olembe Stadium Forensic.pdf
genitourinary-cancers_1.ppt Nursing care of clients with GU cancer
OPIOID ANALGESICS AND THEIR IMPLICATIONS
Medical Evidence in the Criminal Justice Delivery System in.pdf
Management of Acute Kidney Injury at LAUTECH
CME 2 Acute Chest Pain preentation for education
Neuropathic pain.ppt treatment managment
ca esophagus molecula biology detailaed molecular biology of tumors of esophagus
CT Anatomy for Radiotherapy.pdf eryuioooop
Copy-Histopathology Practical by CMDA ESUTH CHAPTER(0) - Copy.ppt
Intl J Gynecology Obste - 2021 - Melamed - FIGO International Federation o...

Forsus

  • 2. Forsus™ FRD Sinan Al-Hadeed Supervised by: Dr. Ahmad Altarawneh Dr. Jumana Tbeishat Dr. Bashar Almomani Dr. Anwar Alrahamneh
  • 3. What is “Forsus™” appliance? • Developed by Bill Vogt in 2001. • Considered one of the Flexible Fixed Functional Appliances. • All of which have a “flexible” component such as a spring and can be used with a fixed pre- adjusted Edgewise appliance. • The second most popular functional appliance used by orthodontists in the UK, USA, and Australia.
  • 5. Components of Forsus™ FRD • Spring Modules: – EZ2 Module. – L-pin Spring Module. • Push Rods. • Split Crimps. • Measurement Gauge.
  • 8. • Push Rods. – The push rods come in six different lengths and are oriented to the patient’s right and left. – 22, 25, 29, 32, 35, and 38. – The proper size is selected using the • Measurement Gauge
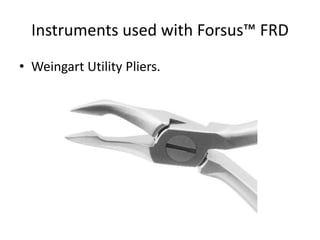
  • 10. Instruments used with Forsus™ FRD • Weingart Utility Pliers.
  • 11. When to use Forsus™ FRD? • Class II cases where the patient did not show a good cooperation in using class II elastics. • Upright or retroclined lower labial segment. • Proclined upper labial segment. It is necessary to plan the use of Forsus in the original treatment plan and not as a “bail-out” class II correction.
  • 12. Setting up for Forsus • Use upper molar bands with occlusal headgear tubes. • TPA might be useful in avoiding expanding the upper first molars or try to band the upper second molars to decrease the tendency of buccal flaring of the molars. • Avoid using the device in a crowded upper labial segment instead use sectional arch wire extending from the canine to the molar region.
  • 13. Setting up for Forsus It is important to enforce the lower arch anchorage by: – Including the lower second molars. – Make sure that the lower arch spaces are closed. – Use steel ligation or tie-backs to secure the lower arch and avoid reopening of spaces. – Ligation of the lower Canines or First premolars are important even when using SLB. – Use lower labial brackets with increased buccal root torque (-ve) torque – Start using Forsus only with riged S.S arch wire. A minimum of 0.017 × 0.025 S.S archwire is recommended for 0.018 slot in the maxillary and mandibular arches. 0.019 × 0.025 S.S archwire is recommended for 0.022 slot.
  • 14. • Assess mandibular incisor position. – Factor in existing proclination and any additional proclining that will occur when eliminating crowding and the Curve of Spee. – Consider whether extractions or interproximal reduction may be indicated to upright mandibular incisors where proclination is excessive. • You should make sure that the upper and lower arches are well coordinated and you don’t end up in buccal cross-bite after correction. “Expand the upper arch.”
  • 16. Canine or First premolar? • Actually there are three places where you can place the push rod:
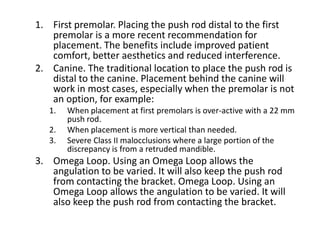
  • 17. 1. First premolar. Placing the push rod distal to the first premolar is a more recent recommendation for placement. The benefits include improved patient comfort, better aesthetics and reduced interference. 2. Canine. The traditional location to place the push rod is distal to the canine. Placement behind the canine will work in most cases, especially when the premolar is not an option, for example: 1. When placement at first premolars is over-active with a 22 mm push rod. 2. When placement is more vertical than needed. 3. Severe Class II malocclusions where a large portion of the discrepancy is from a retruded mandible. 3. Omega Loop. Using an Omega Loop allows the angulation to be varied. It will also keep the push rod from contacting the bracket. Omega Loop. Using an Omega Loop allows the angulation to be varied. It will also keep the push rod from contacting the bracket.
  • 19. Push Rod Selection • Use the Measurement Guide to determine correct push rod length, depending on the selected push rod location (distal to canine, first premolar, Omega loop). – Measure each side from the distal end of maxillary molar tube to the distal side of the chosen mandibular stop, having the patient bite in centric occlusion without advancing the mandible. When in doubt, use the shorter length push rod. – Select the Right and Left configuration push rods from the available sizes.
  • 20. Review visits • The patient should be reviewed every 6-8 weeks. • Check for: – Lower labial segment position; over-jet and spaces. – Molar and canine relationships. – Upper molar position; intrusion and buccal flaring. – Lower canine or premolar bracket and ligation. – Breakage of the appliance or patient’s complaints.
  • 21. • Split Crimps Split crimps are used to reactivate the spring module as treatment progresses. The recommendation is to add one split crimp (1.5 mm of activation) to the push rod, and if another crimp is needed, move to the next size push rod. • Over activated appliance will show a closed compressed spring and might extrude the rod from the coil assembly. This will cause discomfort, breakage of the lower brackets, and unwanted side effects.
  • 22. How to deal with emergencies • The patient should be instructed on how to sustain a satisfactory level of oral hygiene. • Emergencies include broken lower brackets, molar band/tube loosening, broken appliance, trauma or irritation to the oral tissues, and disassembled appliance system.
  • 23. • In case of disassembly, the patient is instructed to compress the spring and try to insert the rod within the assembly. If it was found to be difficult the patient will try to use an elastic or a dental floss to secure the segments with the main archwires. And schedule an emergency visit as soon as possible.