


![Toad for Oracle User Guide
Introduction
78
l In some actions, you can also specify connections to execute against in the
Automation Designer.
l Action Parameter files
l Actions can now accept parameter files. They are in INI format. Right click on an
Action/App in Automation Designer and choose "Create Parameter file" to build
an INI file based on the current Action properties. It will create property=value
pairs for the things which can be overridden. This parameter file can then be used
in the Automation Designer ('Run with parameter file') or on the command line by
using a pipe to separate the Action/App name from the filename. For example:
toad.exe -a "App->Export Dataset1 | c:data
filesexportDataset1.ini"
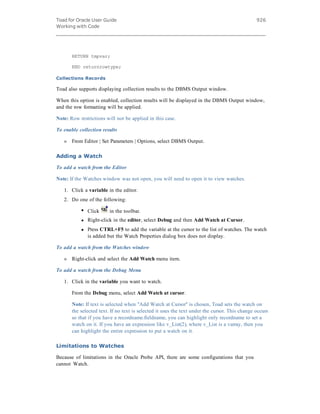
l You will know which Actions can generate/read an INI file by whether or not the
'Create parameter file' popup menu item in Automation Designer is enabled.
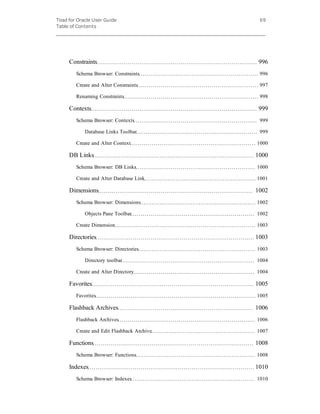
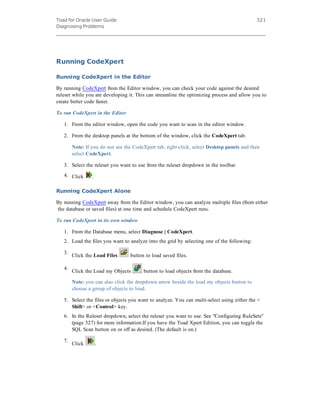
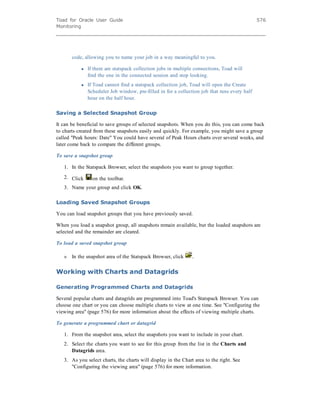
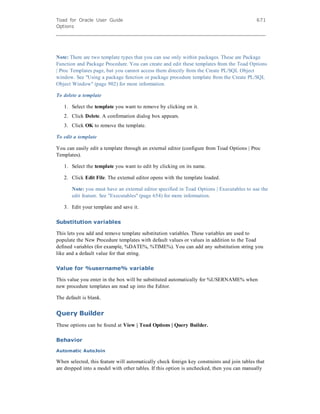
Here is a sample section from an INI file which shows an Execute Script Action:
[47]
Name=Execute Script1
Type=Execute Script
ItemCount=2
Item0=c:try1.sql
Item1=c:try2.sql
Output=1 {1=SingleFile, 2=SeparateFile, 3=Clipboard, 4=Discard}
Output Location=C:some folderoutput.txt
ConnectionCount=2
Connection_1=mlerch@ora10gr2.world
Connection_2=scott@ora2gr2.world
[47] is an internal identifier. "Name" and "Type" are only for your use, to find your
Action within a longer App INI file. Each Actions INI section will be unique to
that Action, and in the case of things like enumerated types, will include
explanatory notes embedded within the line itself. In this example of 'Execute
Script,' two connections are specified. This will override the bound connection of
the Action. If that line wasn't there, the bound connection would be used.
The order of precedence for which connections get used:
1. Those specified on command-line always override everything else](https://image.slidesharecdn.com/toad-150627005322-lva1-app6892/85/Toad-80-320.jpg)


![Toad for Oracle User Guide
Toad Basics
113
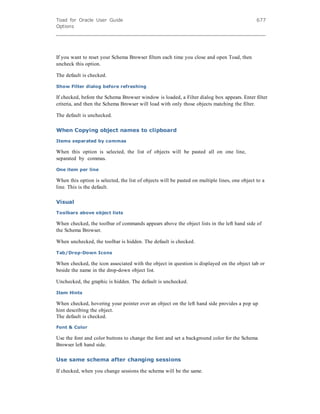
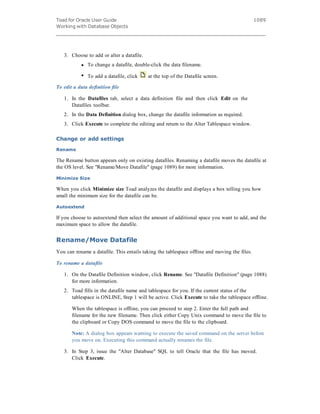
RAC Support
Toad supports Oracle's support for RAC systems. If you have multiple database server boxes,
Oracle RAC lets you start an Oracle instance on each server, and have all those instances open
the same shared database (or shared set of data files). In this way, you can scale the size of your
database server by adding more computers as you add users. Multiple computers, one database.
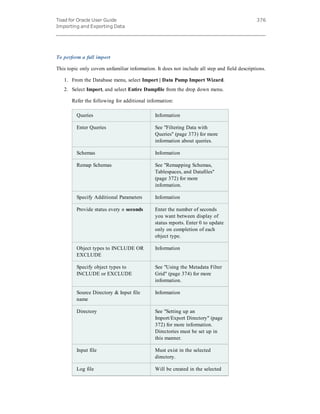
Additional Information for RAC Connections
When you log in to a RAC connection, Toad notes this fact and makes additional information
available in some of its windows to help you manage that connection.
Caption
If a RAC connection is in effect, the caption of the Toad Main window will reflect this by
showing: TOAD: RAC[n], where n is the session id.
Connection bar
In the connection bar, RAC connections are listed as SCHEMA@RAC[n], where n is the instance
number of the connection.
Database Monitor
Within the database monitor, all information is provided as per a single connection. However, it
is summarized or aggregated for all the instances that compose the RAC cluster. For example,
looking at SGA memory - if each RAC instance is 150 MB, and you have two RAC instances,
this column will display 300MB. See "Toad Database Monitor" (page 535) for more information.
Oracle Parameters Screen
RAC database single grid view - The Single Grid checkbox above the grid and to the right of
the toolbar toggles whether Toad displays a single grid or a multi-grid. Toad sorts first by default
on the option and then by the instance name for easier readability.
RAC database multi-grid view - If you choose the multi-grid view, Toad displays a separate tab
for each RAC instance.
See "Oracle Parameters" (page 357) for more information.
Drag-and-Drop
You can Drag-and-Drop objects between many Toad windows, and between Toad and some
external applications.
These possible Drag-and-Drop combinations include:](https://image.slidesharecdn.com/toad-150627005322-lva1-app6892/85/Toad-115-320.jpg)


![Toad for Oracle User Guide
Toad Basics
121
70 $46 0106 39 F F
71 $47 0107 40 G G
72 $48 0110 41 H H
73 $49 0111 42 I I
74 $4A 0112 43 J J
75 $4B 0113 44 K K
76 $4C 0114 45 L L
77 $4D 0115 46 M M
78 $4E 0116 47 N N
79 $4F 0117 48 O O
80 $50 0120 49 P P
81 $51 0121 50 Q Q
82 $52 0122 51 R R
83 $53 0123 52 S S
84 $54 0124 53 T T
85 $55 0125 54 U U
86 $56 0126 55 V V
87 $57 0127 56 W W
88 $58 0130 57 X X
89 $59 0131 58 Y Y
90 $5A 0132 59 Z Z
91 $5B 0133 60 [ Left Bracket
92 $5C 0134 61 Back Slash
93 $5D 0135 62 ] Right Bracket
94 $5E 0136 63 ^ Circumflex
95 $5F 0137 64 _ Underline
96 $60 0140 65 ` Accent
97 $61 0141 66 a a
98 $62 0142 67 b b
99 $63 0143 68 c c
100 $64 0144 69 d d
101 $65 0145 70 e e
102 $66 0146 71 f f
103 $67 0147 72 g g
104 $68 0150 73 h h
105 $69 0151 74 i i
106 $6A 0152 75 j j
107 $6B 0153 76 k k
108 $6C 0154 77 l l
109 $6D 0155 78 m m](https://image.slidesharecdn.com/toad-150627005322-lva1-app6892/85/Toad-123-320.jpg)
![Toad for Oracle User Guide
Toad Basics
122
110 $6E 0156 79 n n
111 $6F 0157 80 o o
112 $70 0160 81 p p
113 $71 0161 82 q q
114 $72 0162 83 r r
115 $73 0163 84 s s
116 $74 0164 85 t t
117 $75 0165 86 u u
118 $76 0166 87 v v
119 $77 0167 88 w w
120 $78 0170 89 x x
121 $79 0171 90 y y
122 $7A 0172 91 z z
123 $7B 0173 92 { Left Brace
124 $7C 0174 93 | Vertical Bar
125 $7D 0175 94 } Right Brace
126 $7E 0176 95 ~ Tilde
127 $7F 0177 96 DEL DEL
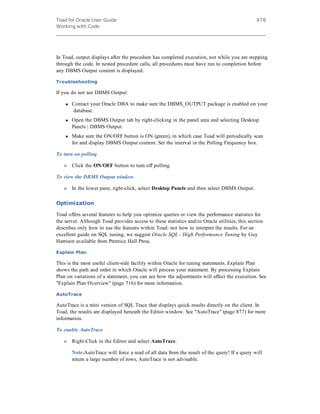
Toolbars, Menus and Shortcut Keys
Configurable Toolbars and Menus - Overview
The main Toad toolbar and menu bar is configurable, as are the Editor toolbar and keyboard
shortcuts. This lets you arrange Toad to best reflect how you want to work.
If you are using a custom configuration, new commands will not be added to your custom
toolbars when you upgrade Toad. However, you can see both new commands and commands
that have been completely removed from the toolbars and menus.
Note: Commands that have been removed from the toolbar and not the menu bar (or the other
way around) will not appear in the Unused area. Because of this, it may not be obvious that you
have removed a command from one location and not the other.
To view and add new/removed commands
1. Right-click over the toolbar and select Customize.
2. Click the Commands tab.
3. Select [New] or [Unused].
4. Drag a command to the toolbar/menu of your choosing.
5. Click Close.](https://image.slidesharecdn.com/toad-150627005322-lva1-app6892/85/Toad-124-320.jpg)


![Toad for Oracle User Guide
Toad Basics
133
To see what has been removed
» Select [Removed] in the commands list.
To restore commands
» Do one of the following:
l From the [Removed] list, drag the command back to the toolbar or menu.
l From the Toolbars tab, select the toolbar you want to restore and
click Restore.
Locking Toolbars
Once you have customized your toolbars in the manner you want, you can lock the toolbars so
that it is more difficult to inadvertently change your customizations. You can also lock them to
the default.
To lock toolbars
» Right-click over the toolbars and select Lock Toolbars.
Window Bar
The window bar in the main window displays the windows currently open in Toad. The window
bar is, by default, located just below the connection bar. Tooltips on the window bar display the
full window caption.
Options for the window bar appear under Toad Options | Toolbars/Menus. See "Toolbars/Menus"
(page 685) for more information.
To turn off the window bar
» Right-click over it and clear the Window Bar check box.
Note: If you are using a read only toolbar configuration and you want the window](https://image.slidesharecdn.com/toad-150627005322-lva1-app6892/85/Toad-135-320.jpg)


![Toad for Oracle User Guide
Installation and Administration of Toad
149
Options, Parameters and Meanings
Option Parameter Meaning
ADDLOCAL Client, Server Determines the type of install. Parameters denote:
l Client - client install only
l Server - server install only
l client, server - full install
/i Package |
ProductCode
Installs or configures a product.
/f [p | o | e | d | c | a | u
| m | s | v]
Package |
ProductCode
Repairs a product. This option ignores any
property values entered on the command line.
The default argument list for this option is 'omus.'
p - Reinstalls only if file is missing.
o - Reinstalls if file is missing or an older version
is installed.
e - Reinstalls if file is missing or an equal or
older version is installed.
d - Reinstalls if file is missing or a different
version is installed.
c - Reinstalls if file is missing or the stored
checksum does not match the calculated value.
Only repairs files that have
msidbFileAttributesChecksum in the Attributes
column of the File table.
a - Forces all files to be reinstalled.
u - Rewrites all required user-specific registry
entries.
m - Rewrites all required computer-specific
registry entries.
s - Overwrites all existing shortcuts.
v - Runs from source and re-caches the local
package. Do not use the v reinstall option for the
first installation of an application or feature.
/a Package Administrative installation option. Installs a
product on the network.
/x Package/ProductCode Uninstalls a product.](https://image.slidesharecdn.com/toad-150627005322-lva1-app6892/85/Toad-151-320.jpg)
![Toad for Oracle User Guide
Installation and Administration of Toad
150
Option Parameter Meaning
/l [i | w | e | a | r | u | c |
m | o | p | v | x | + | !
| *]
Logfile
Writes logging information into a logfile at the
specified existing path. The path to the logfile
location must already exist. The installer does
not create the directory structure for the logfile.
Flags indicate which information to log. If no
flags are specified, the default is 'iwearmo.'
i - Status messages.
w - Nonfatal warnings.
e - All error messages.
a - Start up of actions.
r - Action-specific records.
u - User requests.
c - Initial UI parameters.
m - Out-of-memory or fatal exit information.
o - Out-of-disk-space messages.
p - Terminal properties.
v - Verbose output.
x - Extra debugging information. Only available
on Windows Server 2003.
+ - Append to existing file.
! - Flush each line to the log.
"*" - Wildcard, log all information except for the
v and x options. To include the v and x options,
specify "/l*vx".
/q n | b | r | f Sets user interface level.
q , qn - No UI
qb - Basic UI. Use qb! to hide the Cancel button.
qr - Reduced UI with no modal dialog box
displayed at the end of the installation.
qf - Full UI and any authored FatalError,
UserExit, or Exit modal dialog boxes at the end.
qn+ - No UI except for a modal dialog box
displayed at the end.
qb+ - Basic UI with a modal dialog box
displayed at the end. The modal box is not
displayed if the user cancels the installation. Use
qb+! or qb!+ to hide the Cancel button.
qb- - Basic UI with no modal dialog boxes.
Please note that /qb+- is not a supported UI
level. Use qb-! or qb!- to hide the Cancel button.](https://image.slidesharecdn.com/toad-150627005322-lva1-app6892/85/Toad-152-320.jpg)


![Toad for Oracle User Guide
Installation and Administration of Toad
159
V$SESSION_LONGOPS
V$SQLTEXT_WITH_NEWLINES
In addition, you must have access to the following:
SYS.V_$TRANSACTION
SYS.V_$ROLLNAME
Space Manager Setup
The following public synonym must be present.
V$SYSSTAT
The Toad schema must have the privileges to create and alter jobs, create and drop its own tables
and procedures, and must have SELECT access on the following:
DBA_DATA_FILES
DBA_FREE_SPACE
DBA_JOBS
DBA_TABLESPACES
V_$FILESTAT
The Toad INI file
There are only a few settings that require a manual edit of the TOAD.INI file. For all other
settings, use the appropriate GUI.
SQL Results panel splitter
[SETTINGS]
SLIDER_TOP=200
If you cannot see the SQL Results panel because of resizing the MDI child window too small,
you can quit Toad, edit this value to a low number, like 150 or 200, and restart Toad. There is
no default value.
Keep users from dropping or truncating tables
[SETTINGS]
ALLOW_DROP_TBL=0
By default, Toad permits the user to drop tables and truncate tables. If you do not want to give a
Toad user this power, put in ALLOW_DROP_TBL=0 into their TOAD.INI file. The default is 1.
Put lines of comments between identifier and name of procedure
The default to this is not included automatically in the TOAD.INI file. You can add it:](https://image.slidesharecdn.com/toad-150627005322-lva1-app6892/85/Toad-161-320.jpg)
![Toad for Oracle User Guide
Installation and Administration of Toad
160
[SETTINGS]
PELineOffsetOverride=1
On is 1, set it to 0 to turn it off without deleting it.
You should only set this if you want to put lines of comments between the identifier and the
name of the procedure, as in:
create or replace procedure
-- xx
-- yy
aaa
as
begin
raise no_data_found ;
end ;
/
For Toad to use the correct line number in the above example, this setting must be on (
PELineOffsetOverride=1).
However, if this is on (PELineOffsetOverride=1), you will then get the wrong line # for cases
where you do this:
create or replace procedure aaa
-- xx
-- yy
as
begin
raise no_data_found ;
end ;
/
How to create your ToadStats.ini file
On the Toad Server Statistics window, Analysis tab, if you do not have the Documents and
SettingsusernameToad for OracleToadStats.ini threshold file, these are the default threshold
values used. See "Toad Server Statistics" (page 517) for more information.
INI
Entry
Min
Value
Warn
Value
Max
Value
Description Warning
Message
dg_
row
-9999 -9999 -
9999
dictionary
gets
n/a
dm_
row
98 -
9999
-
9999
dictionary
misses
n/a
dcr_
row
-
9999
-
9999
-
9999
dictionary
cache hit
rate
high
dictionary
cache
miss
bcr_
row
90 -
9999
-
9999
buffer cache
hit ratio
may need
to increase](https://image.slidesharecdn.com/toad-150627005322-lva1-app6892/85/Toad-162-320.jpg)

![Toad for Oracle User Guide
Installation and Administration of Toad
162
scanned
-9999 = No value
To set your own custom thresholds, create an ini file, called ToadStats.ini. Place this file into
your Toad for OracleUser Files folder.
For each "INI Entry" above, you can set Minimum values, Warning values, and Maximum
values. Also, you can specify a custom Title and Set the warning message when the warning
value is exceeded.
When the warning value is exceeded, the circle is pink. When the maximum value is exceeded,
the circle is red.
As in standard Windows .ini format, place the "INI Entry" string within left and right brackets.
This becomes the section. Then, you can place Min, Warn, Max, Title, and ErrorMsg items into
each section.
For example:
[dm_row]
Min=98
[bcr_row]
Min=90
[dsr_row]
Max=10
[bbw_row]
Max=1
[fbw_row]
Max=1
[lchr_row]
Min=85
Warn=90
ErrorMsg=Dynamic or Unsharable SQL?
[lcpr_row]
Max=190](https://image.slidesharecdn.com/toad-150627005322-lva1-app6892/85/Toad-164-320.jpg)
![Toad for Oracle User Guide
Installation and Administration of Toad
163
Warn=80
Title=library cache pin hit ratio
[rswr_row]
Max=1
[cfr_row]
Max=0.01
[per_row]
Warn=17
Max=20
Title=Parse to Execute Ratio
ErrorMsg=High parse to execute ratio
[cpo_row]
Max=15
[dbwra_row]
Max=255
Properties Files
Options settings for Toad are stored in several different locations. We maintain them this way so
that it is easier to reset or share only a small set of options.
Location Options file Function
Toad for Oracle directory/docs 3rdprtylic.txt Contains copies of our 3rd party lic
agreements
Toad.chm, Toad.pdf,
ReleaseNotes.htm, Tips Folder
Help files, User Guides, Release No
Tips folder.
Toad for Oracle directory
beef.dat Export File Browser
chc.rev CodeXpert](https://image.slidesharecdn.com/toad-150627005322-lva1-app6892/85/Toad-165-320.jpg)


![Toad for Oracle User Guide
Connecting to Oracle
183
To manually edit the toad.ini file
1. Using Notepad, or another text editor, open toad.ini.
2. Add the following line:
[SET ROLE]
3. Enter as many specific SET ROLE entries under this line as needed. The syntax for these
parameters is:
Entry#=<DB>db_name</DB><USER>User_name</USER><ROLE>role_
name</ROLE><ONFAIL>Fail_action</ONFAIL>
Where:
Variable Meaning
# An identification number that keeps the entries unique. You can have as many entries as you want
db_name Corresponds to the database alias in your tnsnames.ora file (or LDAP entry). An asterisk (*) can be
User_
name
Logon user name. An asterisk (*) can be used to specify "any user."
Role_
name
Any valid argument to the SET ROLE command. See your Oracle documentation.
Fail_
action
One of the following: Abort, Message, or ignore.
Abort - don't allow the connection
Message - display an error message and then allow the connection
Ignore -silently ignore the error message
Auto Connect
Toad can connect to a connection of your choice whenever you start Toad.
To create an automatic connection
1. From the Session menu, select New Connection.
2. In the connection grid, select the checkbox in the Auto Connect? column.
Note: You can cancel after Toad has begun to auto connect, if you have multiple
connections. Toad will finish the current one and abort all that have not yet occurred.
To remove an automatic connection
1. From the Server Login window, find the connection in the list of previous connections.
2. Clear the check box in the "Auto Connect?" column.](https://image.slidesharecdn.com/toad-150627005322-lva1-app6892/85/Toad-185-320.jpg)


![Toad for Oracle User Guide
Tutorials
231
6. Check the Partition box. Click the drop down partition list and you will see the two
partitions listed that you created. Choose FOODRANK1.
Make sure that the Terminated by box contains a comma (,).
NOTE: If the data were tab delimited, you would choose TAB from the dropdown.
On the lower right side of the add table window is the Load Rec Condition When area.
This means "load the record into the table when the following conditions are present". In
this field, enter the following:
RANK != "1"
This says that you only want records whose RANK field is not equal to the character "1".
NOTE: All character data is interpreted automatically by Oracle. If you wanted to enforce
certain data types for special conditions you could do so under the Column Parameters
data type field.
7. Click OK and then click Next.
8. Leave global options and defaults blank. Click Next.
9. Enter a control file name to create. Click Next.
10. Select Execute Now and Watch progress and then click Finish. The status
window opens.
Click the Log File tab. Scroll down and you should come to these lines:
Record 1: Discarded - failed all WHEN clauses.
Record 5: Rejected - Error on table "MARKSFAVORITEFOODS",
partition FOODRANK1.
ORA-14401: inserted partition key is outside specified partition
[and so on for the rest of the records]
This says that the first record failed the WHEN clause. It certainly did – it had a rank of 1
and we told Toad not to load any records with that rank. The rest of the rejection lines
state that the inserted partition key is outside the partition bounds. This is because records
with a rank of 5 and above exceed the partition bounds you chose for FOODRANK1.
Look in Schema Browser and you should find the foods ranked 2 through 4 in the data.
Load from Several Files of Different Formats - Intermediate
SQL*Loader Tutorial
This example will use three different data files and demonstrate the three supported format types:
stream, fixed and variable.
1. Use the MarksData.txt data file from the previous tutorial. Use Notepad (this is
important) as an editor.](https://image.slidesharecdn.com/toad-150627005322-lva1-app6892/85/Toad-233-320.jpg)


![Toad for Oracle User Guide
Diagnosing Problems
337
COBOL Conversion
The COBOL conversion within SQL Scanning searches for three items within the syntax of a
SQL statement that are allowed in the COBOL, but are not valid SQL syntax: 1) a dash or minus
in a variable name, 2) comments in the middle of the SQL statement, and 3) the ]] (double right
square bracket) as the concatenate symbol. See "SQL Scanning" (page 332) for more information.
Conversion for variable name
If a variable name contains "-" minus sign, then it will be replaced with an "_".
Conversion for comment
If the 7th column of the line is an "*" (asterisk) then the complete line will be recognized as a
line comment.
Conversion for concatenate character
If "]]" (two right square brackets) are used to concatenate column names, they will be replaced
with a "+".
For example:
Original SQL statement:
SELECT * FROM EMPLOYEE
* Get the department number
WHERE EMP_ID > :employee-id
AND ENAME]]JOB = :name-job
After conversion:
SELECT *
FROM EMPLOYEE -- * Get the department number
WHERE EMP_ID > @employee_id
AND ENAME | | JOB = @name_job
Note: If your COBOL file has tags at the beginning of the lines of code, you need to use the
"Number of characters to be skipped at the beginning of every line for all files" option found on
the SQL Scanner tab page in the Preferences window.
This conversion is only applied when the Scanner Job is added to the Job Manager window
using the COBOL option under the Source Codes tab in the Add Jobs window.
Local Variable Conversion
Note: This extended Toad feature is only available in Toad for Oracle XPert edition.](https://image.slidesharecdn.com/toad-150627005322-lva1-app6892/85/Toad-339-320.jpg)
![Toad for Oracle User Guide
Diagnosing Problems
338
The local variable conversion within SQL Scanning is only applied to the Single Command Line
Dynamic (SCLD) SQL files and database objects. See "SQL Scanning" (page 332) for more
information.
If a local variable is detected in the SQL statement, the SQL Scanner encloses the variable name
with "&[" and "]".
For example:
Original source SQL statement before scanning:
"SELECT " + VEMPID + " FROM EMPLOYEE WHERE EMP_ID > 100"
After conversion:
SELECT &[VEMPID] FROM EMPLOYEE WHERE EMP_ID > 100
Note: The local variables in a scanned SQL statement should be treated as replacement or
substitute variables rather than bind variables. Therefore, you should hard code the values before
you optimize the SQL statement. The reason for hard coding the values is that the local variables
may be literals and when the application is run, these values are replaced before the SQL is sent
to the database. That’s why the SQL Scanner uses "&[" and "]" to differentiate the local variables
from the bind variables.
This conversion is only applied if the SCLD option is selected from the Summary tab page
in the Add Jobs window or from the Modify option from the Pop-up menu in the Job
Manager window.
SQL Scanning Options
Scanning tab
Note: This extended Toad feature is only available in Toad for Oracle XPert edition.
The Scanning tab is part of Code Xpert options.See "Code Xpert Options" (page 319) for more
information.
Skip SQL within comments
Specify that the scanning algorithm ignore any SQL statement within comments using the /* */,
// or –- comment format. Otherwise, the scanning algorithm finds SQL statements that are not
currently being executed in the application. It may also attempt to build a SQL statement if it
finds the word SELECT, INSERT, UPDATE, or DELETE within the text of a comment.
Skip SQL that only involves the SYS.DUAL table
Specify to ignore any SQL statement that only references the SYS.DUAL table.](https://image.slidesharecdn.com/toad-150627005322-lva1-app6892/85/Toad-340-320.jpg)


![Toad for Oracle User Guide
Database Administration
347
5. Click OK. Toad will "grant select on toad_restrictions to developer_role" and write these
records into the Toad_RESTRICTIONS table:
USER_NAME FEATURE
DEVELOPER_
ROLE
CHANGE A
PASSWORD
DEVELOPER_
ROLE
CREATE
ROLLBACK SEG
DEVELOPER_
ROLE
CREATE
SNAPSHOT LOG
DEVELOPER_
ROLE
CREATE USER
6. Ensure that the Oracle Roles have been granted to the user: [grant developer_role
to scott].
7. Have user SCOTT log off/on to Toad. Scott’s Toad features should be limited as
specified.
8. Repeat setting up restricted features for the other desired roles, e.g., TUNER_ROLE,
MAINTENANCE_ROLE, and so on.](https://image.slidesharecdn.com/toad-150627005322-lva1-app6892/85/Toad-349-320.jpg)


![Toad for Oracle User Guide
Importing and Exporting Data
373
To remove a remap from the grid
» Select an item in the grid and then click the - button to remove it.
Filtering Data with Queries
Note: This Toad feature is only available in the commercial version of Toad in either the
Professional Edition or with the optional DB Admin Module.
When importing or exporting data using the data pump, you can use queries to filter the data
you import or export. See "Data Pump Overview" (page 370) for more information about the
various features of the data pump.
The format of these queries is important and will have an effect on the data you import or export.
The query statement must be in the following format:
[[schema_name.]table_name:]"query_clause"
The schema name and table name are optional. The query_clause is a WHERE statement.
If the table name is not specified, the query will be applied to all tables.
Some sample query statements are as follows:
Statement Definition
DEPT:"WHERE
DName='ACCOUNTING'"
Limits the import for the DEPT table to just those rows
where the column DName='Accounting'.
SCOTT.EMP:"WHERE
EName='SMITH'"
Limits the SCOTT.EMP table.
"WHERE Col1=10" Limits ALL table sin the dump file. Each table will have
to have a "Col1" for this query to work.
Effect of remapping on queries
Remapping a schema to a different schema when importing can affect the results of queries. For
example, in the second query above, that limits the SCOTT table, if you remap the SCOTT
schema to JSMITH, then the query will fail, and all data will be imported. See "Remapping
Schemas, Tablespaces, and Datafiles" (page 372) for more information.
In this scenario, the first and third queries will still function.
Failure versus no Results
A query fails when it cannot be resolved.
For example:](https://image.slidesharecdn.com/toad-150627005322-lva1-app6892/85/Toad-375-320.jpg)


![Toad for Oracle User Guide
Importing and Exporting Data
377
directory.
SQL file If provided, the import will not
occur: the DDL necessary to
perform the import will be
generated and stored in a file of
the given name, and the file
will be created in the directory
specified by the Directory
selection.
3. Complete the wizard.
Entering Table Names
Note: This Toad feature is only available in the commercial version of Toad in either the
Professional Edition or with the optional DB Admin Module.
When importing tables using the Data Pump Import wizard, you must enter the table names into
the grid. The format of these table names is very important to the import.
The format for table names is as follows:
[SCHEMA].TABLENAME:[partition name]
The schema and partition name is optional; however, if no schema is designated in the entry, the
current user is assumed. Therefore, if you are logged in as JSMITH, and importing tables from the
SCOTT schema, you must prefix the table name with SCOTT, as follows:
SCOTT.SCOTTSTABLE
You can also import partitions using this feature. An example of a partition syntax is as follows:
SCOTT.SCOTTSTABLE:scotts_partition
Importing Tables
Note: This Toad feature is only available in the commercial version of Toad in either the
Professional Edition or with the optional DB Admin Module.
You can use the Data Pump Import wizard to import tables. If you are importing all the tables
from a dumpfile, you may prefer to do a "full import" and just specify Tables - Include at Step
14. See "Import Wizard" (page 375) for more information.
Using the Import tables mode gives you the opportunity to specify which tables you
want to import.
Note: Most parameters in the following procedure are defined by Oracle. Please see your Oracle
documentation for more detailed information about them.](https://image.slidesharecdn.com/toad-150627005322-lva1-app6892/85/Toad-379-320.jpg)


![Toad for Oracle User Guide
Managing Projects
436
3. Complete the Task Scheduler wizard. See "Task Scheduler" (page 762) for more
information.
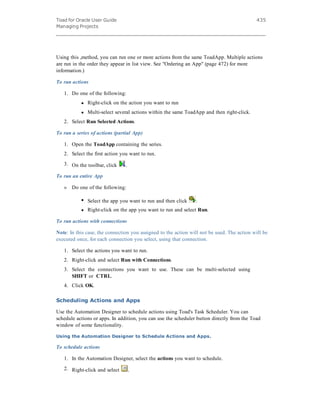
To schedule a ToadApp
1. In the Automation Designer, select the App you want to schedule.
2. Click .
3. Complete the Task Scheduler wizard. See "Task Scheduler" (page 762) for more
information.
Scheduling from a Toad Window
When you have finished scheduling an action in this way, you can view them from the Task
Scheduler window, or the Scheduled Items area of the Automation Designer.
To schedule an action
1. In the status bar of the feature you want to make an action, click .
2. Complete the Schedule Action wizard.
Apps and Actions on the Toolbar
You can add ToadApps and actions to your toolbar so you can execute them with one click.
To add actions to the toolbar
1. Right-click on the main toolbar and select Customize.
2. Click the Actions tab.
3. Click on an app in the left hand side to display the actions contained in it.
4. Drag and drop the action on the toolbar.
To add apps to the toolbar
1. Right-click on the main toolbar and select Customize.
2. Click the Actions tab.
3. Click [All Apps] in the left hand side.
4. Drag and drop the appropriate app onto the toolbar.
Searching the Automation Designer
You can search the Automation Designer to find apps or actions that you have created. This
panel supports both standard searches and regular expressions
To search the Automation Designer
1. In the Automation Designer's left hand panel, click Search panel.
2. In the Text to find box, enter the text you want to find.](https://image.slidesharecdn.com/toad-150627005322-lva1-app6892/85/Toad-438-320.jpg)


![Toad for Oracle User Guide
Managing Projects
439
You can use the parameter file to override some settings in an action so that you can run various
permutations without creating multiple actions.
An action parameter INI file contains property=value pairs for the settings that can be
overridden. When originally created, these will correspond to the properties saved within
the actions.
To create an action parameter file
1. In the Automation Designer, right-click on an Action or an App and select Create
Parameter file.
Note: If an action does not support a parameter file, then this option will not be available
on the popup menu.
2. Name the parameter file and save it to a folder. You do not need to save it in the
default folder.
3. Modify the parameter file if necessary. You can save multiple versions of the same file
with slightly different names.
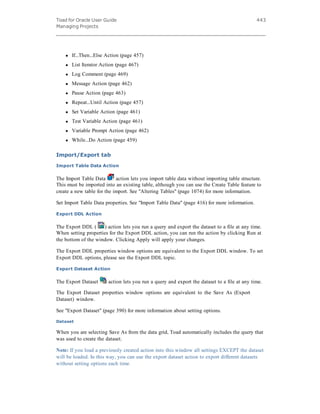
Example
The Execute Script action is enabled for parameter files. An ExecuteScript.ini file created as a
parameter file might look like the following:
Content of ini File Line Meaning
[47] Internal identifier. There will be one of
these identifiers for each action within
a selected App.
Name=Execute Script1 This is the name you have given the
action so you can find it within a
longer App file.
Type=Execute Script This is the type of action.
ItemCount=2 Number of items to execute.
Item0=c:try1.sql First item to execute.
Item1=c:try2.sql Second item to execute.
Output=1{1=SingleFile, 2=SeparateFile,
3=Clipboard, 4=Discard}
Output type.
Note: In some cases, explanatory
information will be included in braces
within the line itself.
Output Location=C:somefolderoutput.txt Output destination.
Connection=user@database Connection associated with this](https://image.slidesharecdn.com/toad-150627005322-lva1-app6892/85/Toad-441-320.jpg)
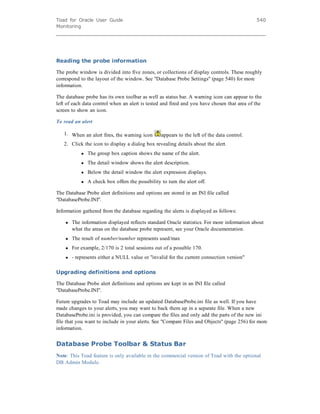
![Toad for Oracle User Guide
Managing Projects
440
Content of ini File Line Meaning
action. When a connection is specified
in the parameters file, it will override
the bound connection of the Action. If
this line is not included, then the
bound connection is used.
Parameter files for ToadApps will contain multiple [Key] sections: one for each action within the
app. These can be removed as needed to use a particular action's default properties.
Running Actions with Parameter Files
Parameter files can be used from within the Automation Designer or from the command line.
If connections are included in a parameter file and/or the command line, Toad will use
connections in the following order:
1. Connections specified on the command-line always override everything else.
2. If a connection is not present on the command line, then those specified in a parameter
(ini) file are used.
3. If there are no connections on the command-line or defined from the Automation
Designer's Run with connections option, then the connection bound to the action is used.
To run an action/parameter file set from the Automation Designer
1. In the Automation Designer, right-click on the action you want to run and select Run
with parameter file.
2. Select the parameter file you want to use and click OK.
To run an action/parameter file set from the command line
» Enter the command line as you would normally, and then use a pipe to separate the
Action/App name from the parameter filename. For example:
toad.exe -a "App->Export Dataset1 | c:data
filesExportDataset1.ini"
Sharing Actions
One of the advantages to using actions and apps to manage your processes is that they can be
shared easily with others.
Sending Actions by email
Sending an action from the clipboard
1. From the window you want to share (such as Export Dataset) click in the status bar.
2. Select Save to Clipboard.](https://image.slidesharecdn.com/toad-150627005322-lva1-app6892/85/Toad-442-320.jpg)


![Toad for Oracle User Guide
Options
667
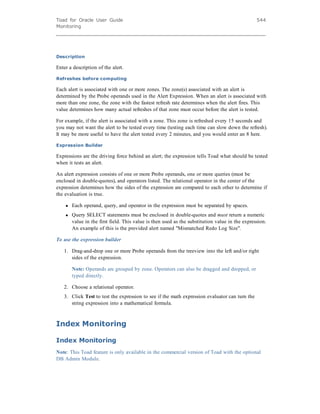
Double Quote Object Names
If you
select:
These will be enclosed in double-quotes
Minimal l Mixed case words
l Reserved words
l Words starting with any of the following: 0123456789#$_~`'%^&*(),-
=+}{][:;<.>?/ or space
l Words containing any of the following: ~`'%^&*(),-=+}{][:;<.>?/ or
space
Non-
ASCII
Everything minimal double-quotes, plus words containing non-ASCII
characters
All Everything
OCI Array Buffer size number box
This option lets you set the size of the OCI Array buffer.
When a SELECT query is executed, Toad retrieves the rows from the Oracle server. Toad
retrieves the rows in blocks. The number of rows retrieved in each block is the number of rows
you specify with the OCI Array Buffer Size option.
You can set the buffer up to a value of 999. The disadvantage to a higher setting of OCI Array
Buffer Size is that Toad must allocate memory to hold that many rows prior to each fetch. If that
many rows are actually fetched, there is no loss. On the other hand, if not that many rows are
retrieved, then some memory is allocated that will not be released until the cursor is freed.
Overall, this amount of allocated memory is generally unnoticeable.
The default is 500.
CR/LF Example
You can use the following script to demonstrate the Newline options:
CREATE TABLE crlf_comp
(textcol VARCHAR2(20));
INSERT INTO crlf_comp VALUES ('crlf'| | CHR(13)| | CHR(10)| | 'char');
/*Carriage return linefeed combo*/
INSERT INTO crlf_comp VALUES ('line'| | CHR(10)| | 'feed'); /*Linefeed only*/
COMMIT;
See "Oracle - General" (page 664) for more information](https://image.slidesharecdn.com/toad-150627005322-lva1-app6892/85/Toad-670-320.jpg)


![Toad for Oracle User Guide
Options
703
Using Substitutions
When auto-replace is active, Toad uses several characters as auto replace activation keys. Toad
will automatically replace an activation key with the substitution value when it reaches a
terminator, for example the space key. For example, "teh" is by default set to replace with "the"
in the editor. Or, you can enter "pack" and Toad will expand it to "package".
An activation key will cause a matched "replace" string immediately before the cursor to be
replaced by the "with" substitution value. For example, if you have dept = DEPARTMENT in
your auto replace file, you can enter the following:
dept[space] and the editor will expand to DEPARTMENT .
Or, you can enter dept: and the editor will expand to DEPARTMENT:.
Or you can enter dept; and the editor will expand to DEPARTMENT;.
Note: The activation key is always included in the expanded substitution.
You can edit this list of keys in the box if you have other needs.
Importing and Exporting Files
Also from the Editing options window, you can import and export auto substitution files.
Toad comes with a handful of substitution pairs. You can edit and add to the list from the Auto
Replace dialog. You can then export the settings to a text file. Alternately, you can create or edit
a substitutions file manually and then import it.
Export
Saves the auto replace settings to a separate text file. If you make many changes to your auto
replace settings, it is recommended that you export them regularly for back up.
Note: If you do not export your settings to a file before you import a file, they will be lost.
Import
You can import a text file into Toad. This file can be created independently or by exporting the
settings you have created in Toad.
Importing a file overwrites the current settings.
Editing a substitutions file
Because it can be tedious to add large amounts of information to the substitution file directly
from the interface, you may want to edit or create a text file directly.
Use the format of string=replacement string. For example:
aax=AAX_ACCESSGROUP_APPLICATION
aca=ACA_ACTIVITY_ACTION](https://image.slidesharecdn.com/toad-150627005322-lva1-app6892/85/Toad-706-320.jpg)


Toad
- 2. © 2009 Quest Software, Inc. ALL RIGHTS RESERVED. This guide contains proprietary information protected by copyright. The software described in this guide is furnished under a software license or nondisclosure agreement. This software may be used or copied only in accordance with the terms of the applicable agreement. No part of this guide may be reproduced or transmitted in any form or by any means, electronic or mechanical, including photocopying and recording for any purpose other than the purchaser’s personal use without the written permission of Quest Software, Inc. If you have any questions regarding your potential use of this material, contact: Quest Software World Headquarters LEGAL Dept 5 Polaris Way Aliso Viejo, CA 92656 Web site: www.quest.com email: legal@quest.com Refer to our Web site for regional and international office information. Disclaimer: The information in this document is provided in connection with Quest products. No license, express or implied, by estoppel or otherwise, to any intellectual property right is granted by this document or in connection with the sale of Quest products. EXCEPT AS SET FORTH IN QUEST'S TERMS AND CONDITIONS AS SPECIFIED IN THE LICENSE AGREEMENT FOR THIS PRODUCT, QUEST ASSUMES NO LIABILITY WHATSOEVER AND DISCLAIMS ANY EXPRESS, IMPLIED OR STATUTORY WARRANTY RELATING TO ITS PRODUCTS INCLUDING, BUT NOT LIMITEDO, THE IMPLIED WARRANTY OF MERCHANTABILITY, FITNESS FOR A PARTICULAR PURPOSE, OR NON-INFRINGEMENT. IN NO EVENT SHALL QUEST BE LIABLE FOR ANY DIRECT, INDIRECT, CONSEQUENTIAL, PUNITIVE, SPECIAL OR INCIDENTAL DAMAGES (INCLUDING, WITHOUT LIMITATION, DAMAGES FOR LOSS OF PROFITS, BUSINESS INTERRUPTION OR LOSS OF INFORMATION) ARISING OUT OF THE USE OR INABILITY TO USE THIS DOCUMENT, EVEN IF QUEST HAS BEEN ADVISED OF THE POSSIBILITY OF SUCH DAMAGES. Quest makes no representations or warranties with respect to the accuracy or completeness of the contents of this document and reserves the right to make changes to specifications and product descriptions at any time without notice. Quest does not make any commitment to update the information contained in this document. Trademarks Quest, Quest Software, the Quest Software logo, ActiveRoles, Aelita, AppAssure, Benchmark Factory, Big Brother, DataFactory, DeployDirector, ERDisk, Foglight, Funnel Web, I/Watch, Imceda, InLook, IntelliProfile, InTrust, IT Dad, I/Watch, JClass, Jint, JProbe, LECCO SQL Expert, LECCO Tech, LiteSpeed, LiveReorg, MessageStats, NBSpool, NetBase, PerformaSure, PortalVue, Quest Central, SharePlex, Sitraka, SmartAlarm, Spotlight, SQL LiteSpeed, SQL Navigator, SQL Watch, SQLab, Stat, Stat!, StealthCollect, Tag and Follow, Toad, T.O.A.D., Toad World, Vintela, Virtual DBA, Xaffire, and XRT are trademarks and registered trademarks of Quest Software, Inc in the United States of America and other countries. Other trademarks and registered trademarks used in this guide are property of their respective owners. Third Party Contributions DEVELOPER EXPRESS, INC., ExpressQuantumGrid SUITE SOFTWARE COMPONENT PRODUCT, ExpressBars SUITE SOFTWARE COMPONENT PRODUCT, ExpressPrinting System SOFTWARE COMPONENT PRODUCT, ExpressScheduler SUITE SOFTWARE COMPONENT PRODUCT, ExpressPivotGrid SUITE
- 3. iii SOFTWARE COMPONENT PRODUCT, ExpressQuantumTreeList SUITE SOFTWARE COMPONENT PRODUCT , ExpressVerticalGrid SUITE SOFTWARE COMPONENT PRODUCT, ExpressNavBar SUITE SOFTWARE COMPONENT PRODUCT, ExpressLayout Control SOFTWARE COMPONENT PRODUCT, ExpressSpreadSheet (Cross-Platform) SOFTWARE COMPONENT PRODUCT, ExpressMasterView SOFTWARE COMPONENT PRODUCT, ExpressDBTree SUITE SOFTWARE COMPONENT PRODUCT, ExpressOrgChart SUITE SOFTWARE COMPONENT PRODUCT, ExpressFlowChart SUITE SOFTWARE COMPONENT PRODUCT, ExpressWeb Framework SOFTWARE COMPONENT PRODUCT, COMPONENTAGE SOFTWARE - DIALOG WORKSHOP FOR DELPHI/C++BUILDER, ECONTROL LTD. – ECONTROL SYNTAX EDITOR SDK, FABIO DELL'ARIA - EUREKALOG SOFTWARE, FAST REPORTS, INC. - FASTREPORT 4, /N SOFTWARE, INC. – IP*WORKS, PROJECT JEDI, DEVART – ORACLE DATA ACCESS COMPONENTS (ODAC), SICOMPONENTS - SCHEDULING AGENT, ELDOS CORPORATION – SECUREBLACKBOX, MIKE SHKOLNIK – SMIMPORT SUITE, DEEP SOFTWARE - STORAGE LIBRARY, STEEMA SOFTWARE – TEECHART PRO V8, VCLZIP, VIRTUALSHELLTOOLS, MIKE LISCHKE - VIRTUALTREEVIEW, AXOLOT - XLSREADWRITEII Toad for Oracle 10 Install Guide September, 2009
- 4. iv
- 5. Table of Contents Introduction 77 New in This Release 77 In All Toad Editions 77 In the Professional, Xpert, Development Suite, and DBA Suite Editions 82 In the DB Admin Module and DBA Suite 83 Introduction to Toad 85 DB Admin Module 86 History and Compatibility of Toad and Oracle 91 Toad History 91 Oracle History 92 Client/Server Compatibility 92 Toad and Oracle Enterprise Manager 92 Disabling Access to OEM Functionality in Toad 93 Customizing Your Toolbar 93 Using Toad Options to Hide Windows 93 Using Toad Group Policy Manager 94 Getting Help 95 Online Resources 95 Toad Online 95 What's New Tab 95 Join Mailing Lists Tab 95 Release Notes Tab 95 Online Resources Tab 96 Help File 97 Quick Search Bar 97 Check for Updates 97
- 6. Toad for Oracle User Guide Table of Contents 4 Download Toad Tips 98 Frequently Asked Questions (FAQ) 98 Show Tips 98 Navigating the tips window 99 Notes tab 99 Hiding the tips window 99 Toad Advisor 99 About Toad 100 Release Notes 100 Support Bundle 100 Support Bundle Overview 100 Support Bundle Toolbar 101 Troubleshooting 102 Unicode Troubleshooting 102 Hints and Tips: Connecting To Personal Oracle 103 Hints and Tips: Table Does Not Exist Errors 104 Working with other Quest Products 105 Knowledge Xpert 105 Using Knowledge Xpert in Toad 105 Using SQL Optimizer with Toad 106 Switching between versions of SQL Optimizer 106 Benchmark Factory 107 Setting Benchmark Factory Properties 108 Quest Code Tester Integration 109 Toad Basics 111 Toad Tips 111 Errors 111
- 7. Toad for Oracle User Guide Table of Contents 5 Toad Error 111 Application Error 112 RAC Support 113 Additional Information for RAC Connections 113 Drag-and-Drop 113 Task Bar & Status Bar 117 Task Bar 117 Status Bar 118 ASCII Chart 119 Toolbars, Menus and Shortcut Keys 122 Configurable Toolbars and Menus - Overview 122 Shortcut Keys 123 Menu hotkeys 129 Shortcut keys 129 Toolbars 130 Personalized Menus and Toolbars 130 Other 130 Restoring Lost Toolbars 134 Standard Toolbars 135 Saving the desktop 137 Missing Toolbars 138 Menus 142 Adding sub-menus 143 Installation and Administration of Toad 144 Window Privileges and Toad 144 Toad for Oracle, Read-Only 144 What is Toad Read Only? 144 Why use Toad Read Only? 144
- 8. Toad for Oracle User Guide Table of Contents 6 Where to get Toad Read Only? 144 Toad Security 145 Toad Read Only Installation 145 Registering Toad 145 Silent Installation 146 Extracting the MSI Installer 146 Full Installation 147 Network Installation 147 Citrix Installation 148 Silent Uninstall 148 Options, Parameters and Meanings 149 Group Policy Management 151 Toad 151 Citrix Support 151 Installing Toad on a Citrix server 152 Connecting to Toad through Citrix 152 User Configuration Files in Citrix 152 Script Manager and Citrix 152 SQL*Net Versions 152 Configuration Files 153 V$ Tables Required 153 The Toad INI file 159 SQL Results panel splitter 159 Keep users from dropping or truncating tables 159 Put lines of comments between identifier and name of procedure 159 How to create your ToadStats.ini file 160 Properties Files 163 Transferring Configuration files 171
- 9. Toad for Oracle User Guide Table of Contents 7 Server Side Objects Installation 172 Installing Server Side objects 172 Using the Server Side Install Wizard 173 Connecting to Oracle 177 Server Login Window 177 Troubleshoot the Server Login Window 177 Using the Connection Grid 177 Refreshing Oracle information 178 Create New Connection 179 LDAP 180 Troubleshooting 180 Selecting Connection Color 181 SET ROLE 181 Auto Connect 183 Save Passwords for Connections 184 Save Pwd? Column 184 Save Passwords Check Box 184 Password Options 184 Select and View Favorite Connections 184 Organize your login display 185 Use Existing Connection 185 SQLNET Editor 186 Backing up your SQLNET File 186 LDAP Editor 187 Backing up your LDAP File 187 Using the LDAP Editor 187 Oracle Homes 188
- 10. Toad for Oracle User Guide Table of Contents 8 Selecting the Oracle Home 188 Selecting a Default Oracle Home 189 Oracle Home Editor 190 TNSNames Editor 191 TNSNames Editor Overview 191 Limitations of the TNSNames Editor 191 Load and View TNSNAMES Files 192 Switching Views 192 Pasting Entries into the TNSNames File 193 Checking Syntax 193 Add Service and Details 194 Configuration Notes 195 Cloning a Service 195 Delete Service or Details 196 Edit Service 196 Saving Changes to TNSNames Files 197 Testing a Connection 197 Working with Two Files 197 Tutorials 199 CodeXpert 199 Using the CodeXpert Tutorial 199 Creating a Ruleset Tutorial 200 PL/SQL Debugger 201 Debugging a Procedure or Function 201 Enter the code in the Editor 202 Add Watches - Debugging Tutorial 203 Set Parameters- Debugging Tutorial 203 Run Code and Display Output - Debugging Tutorial 205
- 11. Toad for Oracle User Guide Table of Contents 9 Change Watch Properties - Debugging Tutorial 205 Disable a Watch - Debugging Tutorial 205 Step Through the Code - Debugging Tutorial 206 Add Breakpoints - Debugging Tutorial 206 Disable Breakpoints - Debugging Tutorial 207 Edit Line Number 207 Use Passcount - Debugging Tutorial 207 Use Conditional Breakpoint - Debugging Tutorial 208 Use Passcount and Conditions together - Debugging Tutorial 208 Debugging a Package 209 Debugging an INSERT Trigger 214 Debugging an UPDATE Trigger 216 Debugging a DELETE Trigger 218 SQL*Loader 220 SQLLoader Tutorials 220 Basic SQL*LoaderTutorial 220 Control File 225 Intermediate SQL*Loader Tutorials 228 Advanced SQL*Loader Tutorial 233 Team Coding 238 Team Coding Tutorials 238 Installing Team Coding Database Objects - Team Coding Tutorial 238 Setting up and Enabling TC without Version Control Software 239 Team Coding Roles 239 Administrator (TC_ADMIN_ROLE) 239 Project Manager (TC_MGR_ROLE) 239 Team Leader (TC_LDR_ROLE) 239 Users without a role granted 239
- 12. Toad for Oracle User Guide Table of Contents 10 Setting up and Enabling Team Coding with Version Control Software 240 Steps 241 RMAN Templates 244 RMAN Scripts in Toad 244 Working with RMAN Templates 244 Executing RMAN Scripts from Toad 245 Comparing 246 Data Duplicates 246 Compare Single Objects 246 Comparing Databases 247 Compare Databases 247 Compare Databases - Database Tab 248 Compare Databases - Options Tab 249 Compare Databases - Object Set Tab 250 Compare Databases - Results 251 Compare Databases - Sync Script 253 Sync Script toolbar 253 Scheduling Compare Databases as Windows Task 253 Comparing Data 254 Comparing Data 254 Reviewing Differences 255 Compare Files (Difference Viewer) 256 Compare Files and Objects 256 To compare two files on disk 256 To compare objects in the Schema Browser 257 To compare differing objects from a schema compare 257 Viewing File Differences 257 File Comparison Rules 258
- 13. Toad for Oracle User Guide Table of Contents 11 Difference Viewer Options 260 Comparing Schemas 260 Compare Schemas 260 Compare Schemas - Schemas Tab 260 Compare Schemas - Options Tab 262 Compare Schemas - Object Set Tab 263 Compare Schemas - Results 264 For example: 264 Compare Schemas - Sync Script 266 Sync Script toolbar 266 Scheduling Compare Schemas as a Windows Task 267 Controlling Sessions 268 Select Session 268 End Connections 268 Test Connections 268 Configure User Lists 268 Session Information 269 Change Password 270 Commit & Rollback 270 Transaction Processing with Auto-commit 270 Connect and Disconnect 271 DBMS_Flashback 271 Requirements 271 Using Wall-Clock time 272 Using an SCN 272 Using Flashback 272
- 14. Toad for Oracle User Guide Table of Contents 12 Diagnosing Problems 273 View Extents 273 Identify Space Deficits 273 Log Switch Frequency Map 274 Tablespace Map 274 Quest Space Manager 276 TKProf Interface Wizard 276 Undo Advisor 278 Undo Advisor (OEM) Overview 278 Altering the Undo Tablespace 279 Altering Undo Retention 280 Switching Tablespaces 280 Segment Advisor 280 Segment Advisor (OEM) 280 Examining Objects 281 Advisor Tasks 282 Advisor Recommendations 282 LogMiner Interface 283 LogMiner Overview 283 Logminer Wizard 284 LogMiner Interface Grid 286 Health Check 287 DB Health Check 287 DB Health Check - Checks and Options 288 DB Health Check - Check Descriptions 289 DB Health Check - Schemas 309 Health Check - Differences Since Last Run 309 DB Health Check - Email Results 311
- 15. Toad for Oracle User Guide Table of Contents 13 DB Health Check - Saving Results 311 Trace File Browser 312 Trace File Browser 312 General Functionality 313 Statement Details 314 Wait Summary 315 Query Summary tab 316 File Header 316 CodeXpert 317 CodeXpert Overview 317 CodeXpert Icon Legend 318 CodeXpert Toolbars 318 Code Xpert Options 319 Prompt for CodeXpert Run names 320 Use Central Repository for DB Inserts 320 Scanning tab 320 SQL Classification Options tab 320 Running CodeXpert 321 Working with Results 322 Additional Information 322 Configuring RuleSets 327 Left Pane 328 Right Panel 328 Rules Tab 328 Summary Tab 328 RuleSet Toolbar 328 Rules Tab Toolbar 329 Summary Tab Toolbar 330
- 16. Toad for Oracle User Guide Table of Contents 14 Creating a RuleSet 330 Create Ruleset Wizard 331 RuleSet Properties 331 SQL Scanning 332 SQL Conversion Overview 333 Indicator Conversion 333 INDICATOR keyword found in an INTO clause 333 Original SQL statement 334 After conversion 334 TWO Variables found in the INTO clause without a separator 334 Original SQL statement 334 After conversion 334 External Parameter Conversion 335 Original SQL statement 335 After conversion 335 PL/SQL Conversion 335 Original SQL statement 335 After conversion 335 Date Conversion 335 Example 1 336 Original 336 Conversion 336 Example 2 336 Original 336 Conversion 336 Example 3 336 Original 336 Conversion 336 COBOL Conversion 337
- 17. Toad for Oracle User Guide Table of Contents 15 Conversion for variable name 337 Conversion for comment 337 Conversion for concatenate character 337 For example: 337 Local Variable Conversion 337 For example: 338 Scanning tab 338 Skip SQL within comments 338 Skip SQL that only involves the SYS.DUAL table 338 Ignore duplicate SQL statements 339 Whole word matching for the first SQL keyword 339 Maximum scanned word size (Bytes) 339 SQL Classification Tab 339 Simple SQL 339 Number of table scan operations less than 339 Complex SQL 340 Number of table scan operations 340 Including SYS.DUAL table 340 With Full Index Scan 340 Problematic SQL 340 Number of table scan operations greater than 340 With full table scan 340 With full table scan iterated by nested loop 341 Retrieve table size by counting: SYS.DBA_SEGMENTS 341 Retrieve table size by counting: System tables 341 Applying the Classification Options 342 Full Table Scan Threshold 342 Default values 342 Calculating Table Size 342
- 18. Toad for Oracle User Guide Table of Contents 16 Example – Determining the Full Table Scan threshold using SYS.DBA_ SEGMENTS 343 Database Administration 344 Audit SQL/Sys Privs 344 Audit SQL/Sys Privileges Toolbar 344 NLS Parameters 345 Toad Features Security 345 Disable Saving Oracle Passwords by Toad 348 Read-only 348 ASM Manager 348 ASM Manager Overview 348 Viewing Disk Groups 349 Disk Group Toolbar 350 Files, Directories and Aliases toolbar 350 Creating Disk Groups 351 Dropping Disk Groups 352 Altering Disk Groups 352 Viewing Clients 353 Audit Objects 354 Audit Objects 354 Setting an Object Audit 355 Multiple Object Privileges 355 Multiple Object Privileges 355 Granting Multiple Privileges 356 Revoking Multiple Privileges 356 Oracle Parameters 357 Oracle Parameters 357 Viewing Parameter Strings 358
- 19. Toad for Oracle User Guide Table of Contents 17 Changing a Parameter String 359 Tablespaces 359 View Tablespaces 359 Tablespace Details 361 Space Manager 362 Setting up Space Manager 362 Graph Usage 365 Forecast Usage 366 Zoom 366 Print Graph 366 Zoom 367 Redo Log Manager 367 Redo Log Manager 367 Balancing Redo Log Groups 369 Importing and Exporting Data 370 Data Pump 370 Data Pump Overview 370 Data Pump Job Manager Overview 371 Setting up an Import/Export Directory 372 Remapping Schemas, Tablespaces, and Datafiles 372 Filtering Data with Queries 373 Using the Metadata Filter Grid 374 Import Wizard 375 Export Wizard 385 Export Dataset 390 Export Dataset 390 File Formats and Options 391 Commit Intervals 394
- 20. Toad for Oracle User Guide Table of Contents 18 Export DDL 396 Export DDL 396 Select Objects to Export as DDL 396 Export as DDL Output 396 Export DDL Script Options 397 Create and Drop 398 Schema name 398 Drop statement 398 Use purge option for tables 398 Related Objects 398 Formatting 398 Tables 399 Indexes 399 Online 399 Compute Statistics 399 No parse 399 Force 399 Use interval expression for next date 400 Indexes 400 Format 400 Materialized view comments 400 Column Comments 400 Extract both spec and body when only one is selected in objects grid 400 Always keep spec and body in the same file or editor tab 400 Queues 400 Grants to the role 401 Start with minval 401 General options 401 Explicitly specify NULL in table DDL 401
- 21. Toad for Oracle User Guide Table of Contents 19 Rebuild FK's referencing selected tables 401 Insert statements 401 Table comments 401 Column comments 401 Constraints 401 List constraints after columns 402 Individual "Alter Table" commands 402 Single "Alter Table" command 402 Other Related Objects 402 Parse triggers for schema name 402 Export File Browser 403 Export File Browser Toolbar 403 Viewing an Export File 404 Finding Information in an Export File 404 Reading the Treeview 405 Open Export File Window 405 DB Compare Mode 406 Troubleshooting 407 DDL Operations 408 General Export 409 Export Table as Flat File 409 Export Utility Wizard 410 Data Subset Wizard 411 General Import 416 Import Table Data 416 Import Utility Wizard 419 SQL*Loader Wizard 420 Troubleshooting 420
- 22. Toad for Oracle User Guide Table of Contents 20 Using the SQL*Loader wizard 420 "Command Line" options 422 Skip 422 Load 422 Errors 422 Rows 422 Read size 422 Bind size 423 Stream Size 423 Resumable timeout 423 Resumable name 423 Column array rows 423 Direct 423 Parallel 423 Resumable 423 Multithreading 423 Skip index maintenance 423 Silent 423 Implements all of the keywords. Skip unusable indexes 424 Load Statement 424 Database redo Log 424 Load Type 424 Load Method 424 Length 424 Byte order 424 Byte order mark 424 Character set 424 Read buffers 424 Preserve blanks 424
- 23. Toad for Oracle User Guide Table of Contents 21 Combine Physical Records Area 425 Field Delimiters 425 By Field 425 Preview Fields 426 Generate Database Script 427 Generate Database Script 427 Scheduling a Database Script as a Windows task 428 Generate Schema Script 429 Generate Schema Script 429 Object Listing Tab 431 Scheduling a Schema Script as a Windows Task 432 Managing Projects 433 Using Automation Designer to Control Toad 433 About the Automation Designer 433 Using the Automation Designer to Schedule Actions and Apps. 435 Scheduling from a Toad Window 436 Using Actions 437 Creating a new action from a Toad window 437 Creating a new action from the Automation Designer 437 Setting the number of actions saved in the vault 438 Clearing the Action Recall Node 438 Example 439 Running Actions with Parameter Files 440 Sending Actions by email 440 Receiving Actions by email 441 Action Catalog 441 Import Export 441 DB Misc 441
- 24. Toad for Oracle User Guide Table of Contents 22 Utilities 442 File Management 442 Control 442 Import Table Data Action 443 Export DDL Action 443 Export Dataset Action 443 Dataset 443 ANSI Join Syntax 444 Actionable Query 444 Restrictions/Validations 445 Execute Script 445 Script Source 445 File list 445 Text 446 Output 446 Directory 446 DB Health Check Action 446 HTML Schema Doc Generator Action 446 Object Search Action 447 Compare Schemas Action 447 Email Action 447 Email properties 447 Recipients 447 From 448 Append Clipboard Contents 448 SMTP Server and Port 448 Execute Shell Action 448 Properties 448 Parameters 448
- 25. Toad for Oracle User Guide Table of Contents 23 Macros 448 Archive Action 449 Properties 449 Zip tab 449 Unzip tab 449 FTP Action 449 Ping Action 450 TNS Ping Action 450 Service Action 451 Format Files Action 451 Create Directory Action 451 Delete Directory Action 452 Move Directory Action 453 Tips 453 Create File Action 453 Delete File Action 454 Move File Action 455 Tips 455 Copy File Action 455 File Exists Action 456 If...Then...Else Action 457 Repeat...Until Action 457 Example 458 While...Do Action 459 Example 460 Test Variable Action 461 Example 461 Set Variable Action 461 Variable Support 461
- 26. Toad for Oracle User Guide Table of Contents 24 Example 462 Variable Prompt Action 462 Message Action 462 Variable Support 462 Example 462 Pause Action 463 Example 463 File Iterator Action 463 Variable Support 464 Example 464 Folder Iterator Action 465 Variable Support 465 Example 465 List Iterator Action 467 Variables 467 Example 468 Log Comment 469 ToadApps 469 Between ToadApps 470 Within a ToadApp 470 Linking apps 471 Project Manager 472 Project Manager Overview 472 Project Manager Toolbar 474 Removing Dead Links 475 Configuring the Project Manager 476 Reset all Defaults 476 Use Defaults 476 Editor file load options 476
- 27. Toad for Oracle User Guide Table of Contents 25 Reload into existing window 476 Load into new window 477 Navigate to previous invocation 477 Prompt each time 477 Export Options 477 Compress export file (.zip) 477 Watch progress 477 FTP server passwords 477 Save encrypted passwords 477 To-Do 477 Past due color drop down 477 Server side compression 478 Utility for 'compress' action 478 Web Browser 478 Filename 478 Browse 478 Find default 478 Dragging and Dropping 478 Prompt if multiple actions are available 478 Use user setting 478 Refresh folder links 478 Include subdirectories 478 Refresh after changing properties 479 Prompt before rebuilding 479 Shell for remote file execution 479 Tree 479 Font 479 SmartExpand 479 Property Descriptions 480
- 28. Toad for Oracle User Guide Table of Contents 26 Title 480 Program 480 Working dir 480 Parameters 480 Extensions 480 Run 480 Icon 481 Resetting Defaults 482 Working with the Project Manager 482 Drag-and-Drop 484 Double-Click 484 Right-click Menu 484 Connection Panel 487 Project Nodes 489 Schema Nodes 491 Adding 491 Right-click 491 Note Property 492 Folders 497 FTP Folder Actions 499 Add FTP Folder Items 499 To Do Lists 500 Query Viewer 501 Query Viewer 501 Finding Queries in Context 501 Query Viewer Filters 502 Using the Query Viewer 502 SQL Command Recall 503
- 29. Toad for Oracle User Guide Table of Contents 27 SQL Statement Recall (History - F8) 503 SQL Statement Recall (Personal) 503 SQL Statement Recall (Named) 503 Script Manager 503 Script Manager Overview 503 Connections grid 504 Scripts 504 Output 504 Messages 504 Opening Script Manager 504 From File Menu 504 Scripts Provided with Toad 505 DBA Scripts 505 Oracle 8i Data Dictionary scripts 505 Script Manager Toolbar 505 Managing Script Datafiles 506 Appropriate Script Datafile names 506 Manage Script Entries 508 Reorder Grid 508 Print Grid 508 Execute Scripts 512 Execute the Scripts 513 Output 514 Messages Tab 515 Output tab 515 Quick Scripts 515 Monitoring 517 Toad Server Statistics 517
- 30. Toad for Oracle User Guide Table of Contents 28 Analysis 517 Waits 517 Latches 517 Sessions 517 Instance Summary 517 Monitor 518 SQL Monitor 518 Toad UNIX Monitor 518 Requirements 519 Troubleshooting 519 Refresh rate 519 Zoom 520 Connecting 520 Viewing Graph History 520 ADDM/AWR 520 ADDM/AWR (OEM) 520 AWR Browser (OEM) Overview 521 Snapshot List Area 522 Chart List Area 522 Chart Display 522 Advice Display 522 Generating an ADDM Report 523 Working with ADDM Reports 523 Generating an AWR Report 524 Generating an AWR SQL Report 524 Generating an AWR Diff Report 525 Generating an ASH Report 526 Data Select Dialog 526
- 31. Toad for Oracle User Guide Table of Contents 29 Snapshot Management 527 Collection Settings 527 Snapshot Interval 527 Retention 527 Top N SQL 527 Snapshots 528 Baseline Management 530 Viewing Baseline Template Information 531 Creating New Templates 531 Dropping a Baseline Template 532 Database Browser 532 Database Browser 532 Database Nodes 533 Database Objects nodes 533 Database Browser Toolbar 534 Database Monitor 535 Toad Database Monitor 535 Zoom 536 Database Monitor Toolbar 536 Database Monitor Email Alerts 537 Flushing the SGA or Buffer Cache 537 Database Monitor Options 538 Database Probe 538 Database Probe Overview 538 Database Probe Toolbar & Status Bar 540 Database Probe Settings 540 Refreshes 541 Gauges 541
- 32. Toad for Oracle User Guide Table of Contents 30 Active Alert Count 541 Tested 542 Fired 542 Extinguished 542 Alert Map 542 Adding and Editing Alerts 542 Name 542 Active 543 Alert position 543 Description 543 Refreshes before computing 543 Expression Builder 543 Index Monitoring 544 Index Monitoring 544 Activating Index Monitoring 545 Deactivating Index Monitoring 545 Instance Manager 546 Instance Manager 546 Instance Manager - Status Tab 547 Instance Manager – Startup 548 Instance Manager - Shutdown 550 Instance Manager - Alter 551 Session Browser 551 Session Browser Overview 551 Session Browser Toolbar 552 Flip the Session Browser Layout 552 Viewing Sessions 553 Filtering Sessions 554
- 33. Toad for Oracle User Guide Table of Contents 31 User Defined Filters 554 Static Filters 554 User Defined Filters 554 Left Side Panel 554 Minimum version 555 Right Side Panel 555 Adding a User Defined Filter 555 Features of the Add Filter dialog box 555 Expression box 555 Columns 555 Lookup 556 Editing a User Defined Filter 556 Deleting a User Defined Filter 557 Static Filters 557 Exclude NULL 557 Exclude slaves 557 Viewing Information 558 Selecting Columns to Display 558 Calculated V$SESSION column 558 Viewing Sessions Detail Information 559 Session Details 559 Single Record View 559 Multi Record View 559 Process Details 559 Single Record View 560 Multi Record View 560 IO Details Tab 560 Single Record View 560 Multi Record View 560
- 34. Toad for Oracle User Guide Table of Contents 32 Waits Details 561 Current Statement Details 561 Current Statement toolbar 561 Open Cursors Details 562 Access Details 562 Locks Details 562 Types of Locks 562 RBS Usage Details 563 Long Ops Details 563 Percent Column Calculation 563 Statistics Details 564 Types of Locks 564 User Locks 564 System Locks 565 Changing the View 565 Advice 565 Performing Actions on Sessions 566 Queries Used to Kill Sessions 566 SGA Trace/Optimization 567 SGA Trace/Optimization 567 Execution Stats 568 SQL Shared Pool 568 SGA Trace Toolbar 569 SGA Trace Explain Plan Options 569 Always set session to statement user 570 Use connected user/schema 570 Always set session to statement user 570 Use connected user/schema 570
- 35. Toad for Oracle User Guide Table of Contents 33 StatsPack Browser 571 StatsPack Browser Overview 571 Snapshot List Area 571 Chart List Area 571 Chart Display 572 Working with Snapshots 572 Statspack Snapshots Toolbar 572 Selecting Groups of Snapshots 573 Viewing advice for snapshot intervals 573 Working with Charts and Datagrids 575 Configuring the viewing area 576 Viewing Series within Charts 576 Synchronizing Wait Times Charts 577 Refreshing the viewing area 577 Top Session Finder 579 Top Session Finder 579 Single Parameter Mode 579 Multiple Parameter Select Mode 580 Top Session Finder toolbar 580 Top Session Finder - Options 581 Short Parameter List 581 Exclude Inactive Sessions 581 Exclude Sessions Inactive for the past ___ Minutes 581 Limit Pie Chart to top ___ sessions 581 Top Session Finder - Viewing Data 581 Dataset tab 581 Right-click options 582 Pie Chart tab 582
- 36. Toad for Oracle User Guide Table of Contents 34 Right-click options 582 Finding a Specific Session 583 Optimizing (Tuning) 584 DBMS_REDEFINITION Wizard 584 Estimate Index Size 585 Load and Scan Indexes 585 Using the Grid 586 Saving the grid 586 Estimate Table Size 586 Load and Scan Tables 587 Using the Grid 587 Estimating Index Size 588 Saving the grid 588 Explain Plan 588 Pinned Code 589 Flushing the SGA Cache 589 Refreshing the SGA Cache view 590 Repair Chained Rows 590 Analyze tab 590 Data tab 590 Repair tab 591 Results tab 591 Rebuild Table 591 Unix Kernel Parms 592 Options 592 Calculate 593 Windows Registry Parms 593 Reading Registries 594
- 37. Toad for Oracle User Guide Table of Contents 35 Updating Registries 594 Registry Export Files 594 Analyze All Objects 594 Analyze All Objects 594 Analyze Options 596 DBMS_STATS functions 596 Profilers 597 Profilers 597 Profiler Analysis 598 Opening a run 598 Opening a unit 598 Toggle PL/SQL Profiling 599 Editor Profiler Tab 600 Editor Profiler Nodes 600 Editor Profiler Tab Toolbar 602 Profiler Filters 602 Line Item Profiler 602 Using DBMS_PROFILER 602 DBMS_PROFILER Session 603 Collected Data 603 Using DBMS_PROFILER with the Java debugger 603 The SYS.DBMS_PROFILER package 604 Install Profiler Server Side Objects 604 Anonymous Blocks and Lines Not Executed 605 Hierarchical Profiler 605 The DBMS_HPROF package 605 Install Profiler Server Side Objects 605 Parameters 607
- 38. Toad for Oracle User Guide Table of Contents 36 Oracle Tuning 608 Oracle Tuning Advisor (OEM) Overview 608 Creating Oracle Tuning Tasks 609 Viewing Oracle Tuning Tasks 609 Quest SQL Optimizer 610 Quest SQL Optimizer Overview 610 Tuning Lab-SQL Optimizer 611 Tuning Lab-Find Best SQL Alternative 611 Tuning Lab-Deploy Outline 611 Tuning Lab-Index Expert 612 Tuning Lab-Find Best Index Alternative 612 Tuning Lab-Best Practices 612 Test for Scalability 612 Rebuild Multiple Objects 612 Rebuild Multiple Objects Overview 612 Email Notification - Rebuild Multiple Objects 613 Rebuilding Indexes 614 Rebuild Recommended Indexes 614 Create Script to Rebuild Recommended Indexes 615 Rebuild Checked Indexes 615 Create Script to Rebuild Checked Indexes 615 Rebuilding Tables 615 Load My... 615 Load... Like 616 Load by User 616 Load by Tablespace 616 Reload 617 Clear Selected Rows 617
- 39. Toad for Oracle User Guide Table of Contents 37 Clear Entire List 617 Thresholds and Performance Options 617 Height > 618 ? Deleted Rows > 618 % Storage used < and % Storage used > 618 Setting Conditional Thresholds 618 Size is greater than 618 # Extents is greater than 619 Using Conditional Thresholds 619 Tables and Indexes 619 Use ‘Online’ option 619 Parallel 619 Refresh Index Data 619 Indexes Only 619 Nologging 619 Alter indexes to logging after rebuild 620 Change Sort Area Size for this session to: 620 After Rebuilds, change sort area size to: 620 Change Extent Sizes 620 Tablespaces 621 Options 622 Formatting Options 622 Changes in the Formatter 622 Toad Options 623 Toad Options 623 Searching Options 623 Data Grids - Data 624 Use Read-Only Queries 624
- 40. Toad for Oracle User Guide Table of Contents 38 Confirm record deletions 625 Warn of cascading constraints on deletions 625 Preview CLOB and LONG data 625 Deferred LOB read 625 Stop data fetches when available memory becomes less than n MB 625 Show ROWID in editable grids 625 Trim string data in CHAR and NCHAR columns 625 Display large numbers in Scientific Notation 626 Date format: (dropdown list) 626 Time format: (dropdown list) 626 Sliding window for entering two digit years 626 Data Grids - Visual 627 Tabs 627 Tab Through 627 Row Select 627 Multi Select 627 Immediate Edit 628 Confirm sorts when clicking on column header 628 Size to header 628 Size to data 628 Allow columns narrower than header width 628 Allow columns wider than grid width 628 Preview column height n 629 Show Focus Rectangle 629 Show grid selection 629 Show grid lines 629 Grid line width n 629 Show row numbers 629 Use grid border color 629
- 41. Toad for Oracle User Guide Table of Contents 39 Show Group Summaries 630 Null columns 630 Data font 630 Data Background 630 Header font 630 Header Background 630 Preview Column font 630 Data Types 630 Cache Object Type list per Connection 631 DBA 631 Delete 632 Show segment names on grid hint 632 Remember legend window state 632 Remember segments window state 633 Remember filters window state 633 Debugger Options 633 DBMS 634 JDWP 635 Script 635 Default Buffer size 635 Editor - Behavior 636 Apply commit/rollback to all tabs (threaded queries) 636 Auto Indent 636 Backspace unindent 636 Backup editor every n minutes 637 Block select 637 Clear grid on editor clear 637 Collapse empty lines 637 Confirm Clear All Text 637
- 42. Toad for Oracle User Guide Table of Contents 40 Copy text in rich text format 637 Cursor beyond end of line 637 Double click line select 638 Enable code folding 638 Find text at cursor 638 Group redo/undo 638 Hide cursor when typing 638 Preload objects on "Load Object from DB" window 638 Scroll past last line 638 Treat underscore char as a word character 639 Use lower case object names from select windows 639 Use single Editor instance for PL/SQL if possible 639 Word wrap 639 Word break on right margin 639 Mode 640 Tab Stops 640 Block indent 640 Optimal fill 640 Code Templates 640 Syntax Highlighting 640 Editor - Code Assist 641 Cache Code Insight results 641 Ctrl+Click jumps to PLSQL objects 641 Jump to package and type body 641 CTRL+Click describes objects 642 Show object types as text in pick list 642 Display parameter hints after typing open parenthesis 642 Display pick list after typing object name followed by a period 642 Sort pick list alphabetically 642
- 43. Toad for Oracle User Guide Table of Contents 41 Delay popups ... milliseconds 642 Save only valid statements 642 Show only statements for the active session 642 Write statements to disk prior to execution 643 Statements to save: 643 MakeCode format list 643 Creating and Editing MakeCode languages 643 MakeCode Variable Name 644 Select Statement based on cursor position 644 Strip Code copies to clipboard 644 Editor - Display 644 Highlight execution line when not debugging 644 Lock results tab 644 Persist display of execution time 645 Persist dynamic highlighting when not focused 645 Persist selection when not focused 645 Persist selection when using navigation keys 645 Show word wrap indicator 645 Show control characters 646 Show current line focus rectangle 646 Show executable line indicators in gutter 646 Show line numbers 646 Show results tab toolbars 646 Use multi-line editor tabs 646 Highlight table names 647 Highlight view names 647 Highlight stored procedure names 647 Use when printing 647 Editor 647
- 44. Toad for Oracle User Guide Table of Contents 42 Line number 647 Gutter and Margin 647 Visible gutter width: 647 Visible right margin position: 647 Editor - Open/Save Options 648 Automatically split files when multiple objects separated by "/" 648 Prompt to split files 648 Never split files 648 Automatically combine spec/body when saving object to file 649 Prompt to combine spec/body 649 Never combine spec/body 649 Prompt for reload on activation if timestamp has changed 650 Prompt to save on editor close 650 Format files when opened 650 Owner Name 650 Packages/Types 650 Editor - Printing 651 Word wrap 651 Hide collapsed 651 Transparent 651 Colors 651 Line Numbers 651 Email Settings 652 Executables 654 Execute/Compile 654 Poll for DBMS Output when detected 654 Prompt for substitution variables 655 Always open Parameters window 655 Save proc parameters between sessions 655
- 45. Toad for Oracle User Guide Table of Contents 43 Save profiler Settings between sessions 655 Use hierarchical profiler on Oracle 11g and newer 655 Allow compiling when source is loaded from database 655 Compile Spec and Body as pair (Package or User Type) 656 Default to "Compile with Debug" 656 Use "CREATE" instead of "CREATE OR REPLACE" when loading database objects 656 Notification when compile process is complete 656 Set optimizing compiler value (10g only) 656 Set Modified Flag off after compiling from database 656 glogin.sql 657 login.sql 657 Execute login scripts 657 Restore SET defaults prior to script execution 657 Limit results to 658 Warn when available memory becomes less than n MB 658 Show Script Grids 658 Maintain Script History 658 Show Script Start/End times 658 Font 658 Error Font 658 Files - General 658 Files - Open/Save Dialogs 660 Sort Alphabetically 660 Options - General 661 Log File 662 Number of errors to log 662 Network Utilities 662 Font 663
- 46. Toad for Oracle User Guide Table of Contents 44 Background Color 663 Oracle - General 664 Save passwords for all Oracle connections 664 Remember passwords for Oracle reconnects 664 Windows style (convert all newlines to CR/LF) 664 Unix style (convert all newlines to LF) 665 Schema 665 Table 665 Save previous Explain Plan results (requires Toad tables) 665 Schema/Table boxes 665 DBMS Buffer Size 665 DBMS Output Font 666 Default schema for connections to: current connection 666 Default schema for connections to: current schema@current connection 666 Used in 666 CR/LF Example 667 Oracle Optimizer Hints 668 All Others 668 Oracle - Transactions 669 Commit 670 Rollback 670 Prompt For Commit/Rollback when changes detected, or detection is not possible due to lack of privileges on dbms_transaction 670 Proc Templates 670 Query Builder 671 Automatic AutoJoin 671 Include schema in generated SQL 672 Automatically Select All Columns 672 Allow Cartesian Joins 672
- 47. Toad for Oracle User Guide Table of Contents 45 Use ANSI Syntax 672 Open full screen from Schema Browser 672 Limit visible columns to n when adding tables to the model area 672 Object Font 673 RMAN Templates 673 Schema Browser - Data 674 Save layouts 674 Set focus to table data grid after selecting table 674 Highlight columns populated by sequence/trigger pair 674 Enable value lookup for foreign key constraints 674 Use NOPARALLEL hint 675 Don't select BLOB/CLOB fields in data grids 675 Warn after n fetches (n records) 675 Fetch 25 rows at a time through db links 675 Schema Browser - Left Hand Side 675 After an object is created 675 After an object is altered 675 Limit to nn Items 676 Restore History on connection 676 Show All Users 676 Only Show Users That Own Objects 676 Only show users that own objects excluding Synonyms 676 Only show users that own objects excluding Synonyms and Temporary Tables 676 Save Filters for object lists 676 Show Filter dialog before refreshing 677 Items separated by commas 677 One item per line 677 Toolbars above object lists 677
- 48. Toad for Oracle User Guide Table of Contents 46 Tab/Drop-Down Icons 677 Item Hints 677 Font & Color 677 Schema Browser - Right Hand Side 678 Sort package procedures 678 Show Body when Package Name is Selected 678 Omit SYS objects from Procedure Dependencies List 678 Compile Mode… 678 List primary key columns 679 Include hidden columns 679 Show Column length info with Column data type 679 Allow extra lines for column comments 679 Show Create/Alter dates 679 Update RHS on database object selection in LHS 679 Only show top-level grants for Users, Roles, Sys Privs, and Resource Groups tabs 679 Items separated by commas 680 One item per line 680 Schema Browser - Types Tab 680 Source Control Options 682 Source Control Provider 682 Prompt for Check Out comment 682 Prompt for Check In comment 682 Prompt for Add File comment 682 Disable login prompt on connection 682 Automatic Check-Out 682 Automatic Check-In 683 Prompt for Check Out Comment 683 Prompt for Check In Comment 683
- 49. Toad for Oracle User Guide Table of Contents 47 Prompt for Check In All on Exit 683 Schema Replacement for Stored Code, Triggers and Views 683 Enable Actions in Schema Browser & Project Manager 683 Simultaneously Check Out/In Spec and Body 683 Default: Force New Revision on Check-In 683 Default Working Directory 684 VCS Provider Options 684 Startup 684 Toolbars/Menus 685 Auto-save current desktop 685 Show window titles on Window Bar 685 Show connect strings on Window Bar 685 Use Vertical Text when Toolbars are Vertical 686 Multi-Line Window Bar 686 Multi-Line Connection Bar 686 Quick connect/disconnect dropdown count 686 Connection Bar and Window Bar Fonts 686 Visual Style 686 Toolbars/Menus - Shortcuts 686 Variables 687 Windows 687 Auto-open bring to front 687 Describe windows 687 Scroll pinned windows at n millisecs 688 Show USER@DATABASE in captions 688 Use Alias instead of database (set in login window) 688 Show spec and body in package describes 688 Language Management 688 Language Management Overview 688
- 50. Toad for Oracle User Guide Table of Contents 48 Syntax Highlighting 690 General tab 692 Highlighting tab 692 Style type 693 Background 693 Font color 693 Capitalization effect 693 Custom Font 693 Font Style 693 Borders 693 Tokens Tab 693 Parser Tab 694 Regular expression test 694 Evaluates to token type 694 Default Highlighting style 694 Parent block 695 Enabled from character position: _____ to ______ 695 Rules Tab 695 Rule type 696 Change token type 696 Style 696 Range Highlighting 696 Collapsed text string 696 Active Highlighting 697 Draw block staple 697 Self Closing Range 697 Parent block 697 Gramma 698 Range Offset 698
- 51. Toad for Oracle User Guide Table of Contents 49 Cancel next rules 698 Relative to end of condition 698 Sub Languages Tab 698 Code Templates Tab 699 Grammar 700 Code Completion Templates 700 Auto Replace Substitutions 702 Export 703 Import 703 Printing 705 Printing 705 Printing editor contents 705 Printing a Data Grid 705 Print Grid 705 Report Link Designer 706 Using the ReportLink Designer 706 Title Properties 706 Colors tab 707 Fonts tab 707 Behaviors tab 707 Miscellaneous tab 707 Reporting 708 Toad Control Files 708 Dependencies 709 ER Diagrams 709 ER Diagram 709 ER Diagram Toolbar 710 Creating an ER Diagram 711
- 52. Toad for Oracle User Guide Table of Contents 50 Reading the ER Diagram 712 Navigating the Diagram 713 Model tab 713 Workspace tab 713 Workspaces 714 Integration with Toad Data Modeler 714 Workspace Format 715 Explain Plans 716 Explain Plan Overview 716 Execute Explain Plan on SQL Statements 717 Explain Plan Results 717 Object Usage 718 Printing and Copying Explain Plans 719 Viewing Previous Explain Plan Results 719 Saving Explain Plans 719 Comparing Explain Plans 720 Code Road Map 721 Road Map Overview 721 Code Road Map Toolbar 721 Choosing Code to Model 722 Display Options 723 Reading the Code Model 723 Working with the graphic model 724 Saving a Text Model 725 Copying the Code Model 725 HTML Schema Doc Generator 726 HTML Schema Doc Generator 726 Scheduling Schema Doc Generation as a Windows Task 728
- 53. Toad for Oracle User Guide Table of Contents 51 Master/Detail Browser 728 Master/Detail Browser 728 Master/Detail Browser Toolbar 729 Generating XML Output 730 Selecting the Master Object 731 Adding Detail Datasets 731 Defining a Master/Detail Relationship 732 Reports Manager 733 Reports Manager Overview 733 Reports Manager Toolbar 734 Creating a Report 735 Example Query for RefCursor Output 735 Queries 736 Parameters 736 Value (Literal) 736 Value (Expression) 736 String Parameter 737 Table List Parameter 737 Other Parameter Types 737 Creating a Master/Detail Dataset 737 Copying a Report 738 Adding Run Info Data to a Report 738 Changing a Report's Category 738 Importing/Exporting Reports 739 Scheduling a report as a Windows Task 740 Reporting from Data Grids 740 Report 740 Printing or Exporting Reports Manually from the Command Line 740
- 54. Toad for Oracle User Guide Table of Contents 52 One Parameter 741 Multiple Parameters 742 Report Builder Wizard 742 Spool SQL 744 Spool SQL 744 Utilities 745 Archive 745 Wrap Code 745 Troubleshooting 746 Service Manager 746 Adding Services 746 Removing Services 747 Refresh 747 Starting and Stopping Services 747 External tools 747 Configure Toad Tools 747 Execute Toad Tools 750 FTP 750 Server Settings 750 FTP 752 Rename File 755 Java Manager 755 Java Manager Overview 755 Load Objects 755 Create public synonym 756 Resolve 756 Definer 756 Force loading of classes whether or not they were previously loaded 756
- 55. Toad for Oracle User Guide Table of Contents 53 Resolver 756 Encoding 757 Schema 757 Grant access to other users 757 Drop Java Objects 757 Drop synonym 758 Encoding 758 Schema 758 Network Utilities 758 Network Utilities 758 Telnet 759 RExec 759 Ping 760 TNS Ping 760 IP Addresses 761 SSH 761 Task Scheduler 762 Task Scheduler 762 Add Task Wizard 763 Viewing Task Properties 763 Scheduling a Task 764 Unix Job Scheduler 764 Unix Scheduler Overview 764 Scheduling and Deploying Tasks 766 Adding a Server 766 Adding a SID 766 Assigning New Tasks 768 Setting Task Properties 770
- 56. Toad for Oracle User Guide Table of Contents 54 Scheduling Tasks 771 Pre-defined Schedules 772 Options for scheduling 772 Basic Entries 772 Additional Customization 773 Adding Additional Schedules 773 Setting Parameter Information 774 Checking Required Elements 774 Advanced Features 775 Saving the Task File 775 Header 776 Using the Logging Facility 777 Fetching the Log File List 777 Viewing Log Files 778 Deleting Log Files 778 Viewing the Crontab File 778 Starting and Stopping the Cron program 778 Source Control and Team Coding 779 Support for Version Control Products 779 Team Coding 779 Third Party File Based Source Control 779 Notes 780 CVS Support 780 Third Party File Based Source Control 780 Third Party File Based Source Control 780 Source Control Toolbar 782 Running Source Control 782 Team Coding 783
- 57. Toad for Oracle User Guide Table of Contents 55 Team Coding Overview 783 Team Coding and SCC Interaction 784 Using Team Coding in SQL Navigator Environments 785 Installing and Enabling Team Coding 786 Configuration Settings 789 File Extension Options 789 General Settings 789 User Settings 789 Global Settings 789 Using Team Coding 790 Team Coding Toolbar 790 Viewing Object Status 792 Team Coding Viewer 792 Viewing Team Coding Object Status 793 Status in the Editor Status Bar or Team Coding Viewer Status Column 793 Detailed File Properties 794 Version Control 794 Checking Objects and Scripts in and out 795 Using Automatic Check-in and Automatic Check-out 795 Manually check-in or check-out 795 Entering Comments on Check in or out 796 Check In All 797 Undo Checkout 798 Freezing an Object 799 Code Control Groups Overview 799 Using Code Control Groups Example 1 - a Single Application 800 Using CCGs to map objects from multiple schemas to one VCS Project 800 Including certain types and schemas 800
- 58. Toad for Oracle User Guide Table of Contents 56 Excluding objects 801 Scripts 801 Using Code Control Groups Example 2 - Multiple CCGs 801 Using CCGs to map objects from one schema to different VCS projects 802 Code Control Groups Toolbar 802 Enabling Code Control Groups 803 Creating a CCG 803 Viewing and Modifying CCGs 804 Specifying CCG Object Masks 804 Object Mask Ranking 805 Specifying File Server Scripts 805 Mapping a User to a CCG 806 Example of User Mapping 806 Remapping a Project Association 808 Team Coding Viewer Filter 808 VCS Use 808 Exporting Objects 808 Importing Objects 809 Version Control 810 Version Control Browser 810 TC Locks Option 811 TC Locks not selected 811 TC Locks selected 811 Browsing Version Control Archives 812 Viewing Differences Between Revisions 812 Getting the latest Revision 812 CVS Requirements 813 Setting up the Oracle Database 813
- 59. Toad for Oracle User Guide Table of Contents 57 Configuring Toad for use with CVS under Team Coding 814 CVS Configurations Options 814 Updating Working Folders 816 Logging Into CVS 817 Multiple Connections and CVS Logins 818 Authentication Methods and the CVS Root 818 CVS Authentication Methods tested with Toad 819 Using pserver and sserver methods 819 Using local and ext methods 819 SSH Authentication Using the ext Method 819 Example SSH configuration steps: 819 Missing CVSEntries File Error 820 Setting up your Entries file 820 Additional CVS Entries File Information 821 Setting up your Entries file 821 Working from the Command Line 822 Command Line Syntax 822 Command List 823 Examples 826 Converting Old Settings Files to Actions 827 Command Line Passwords 828 Export Tables, Views, SQL Queries from the Command Line 828 Create the Action 828 Run from the Command Prompt 829 Errors 829 Run Analyze Objects from the Command Line 829 Adjust the file 829 Commands 831
- 60. Toad for Oracle User Guide Table of Contents 58 Run CodeXpert from the Command Line 834 Scheduling CodeXpert 835 Command Line Error Log 835 Running Actions from the Command Line 835 Command Line Syntax 835 Parameters in Command Line Syntax 836 Connections in the Command Line Syntax 836 Examples of command line syntax 838 Run Compare Databases from Command Prompt 839 Adjust the file 839 Run from the Command Prompt 841 Run Compare Schemas from a Command Prompt 842 Run Copy to another Schema from Command Prompt 842 Build the file to run Copy Data to another Schema 842 Adjust the file 842 Run from the Command Prompt 843 Run Generate Database Script from a Command Prompt 843 Adjust the file 843 Run from the Command Prompt 844 Run Generate Schema Script from Command Line 845 Adjust the file 845 Run from the Command Prompt 846 Run Rebuild Objects from the Command Prompt 846 Adjust the file 847 Backwards Compatible commands 850 Run from the Command Prompt 850 Run Reports Manager from the Command Line 851 Create the command file 851
- 61. Toad for Oracle User Guide Table of Contents 59 Adjust the command file 852 Running the command file 852 Using Variables 853 Using Variables 853 System Variables 853 User Variables 853 Working with Code 854 Editor 854 Toad Editor 854 Configuring the Editor 855 Troubleshooting the Editor 855 Auto Backup 857 Closing an Editor tab 857 Code Snippets 857 Configuring your Desktop 858 Describe (Parse) Select Query 860 Execute as Script 860 Execute Snippet 860 Execute SQL via SQL*Plus 860 Executing SQL Scripts 861 Execute Statement 861 Extract Procedure 862 Highlight Snippet 863 Load and Execute a Script File 863 Moving Between Editor Tabs 863 Object Palette 864 Opening Files 865 Save All 866
- 62. Toad for Oracle User Guide Table of Contents 60 Current Schema Drop down 866 Toad Insight Pick lists 866 File Management 867 Macros 868 Viewing Possible Macro Commands 869 Navigation 870 Sorting Statements 872 Sort 872 General 872 Initial Node Expansion 872 Lower-case text 872 Sort 872 Font 872 Statements 872 PL/SQL Components 873 Other configuration options 873 Editing 874 Code Statistics 875 Working with Results 877 Troubleshooting 878 Explain Plan 878 AutoTrace 878 SQL Trace (tkprof) 879 Server Statistics 879 Optimizer Mode 879 SQL Tuning 879 Various Tabs 879 Popup menu 880 Environment Tab 881
- 63. Toad for Oracle User Guide Table of Contents 61 System Variables 881 User Variables 882 Output 882 Data Grids 882 History 882 Working with Statements and Scripts 883 Commands to execute code 884 F9 884 SHIFT+F9 884 Highlighting SQL Snippets 885 SQL*Plus Syntax - Supported 885 SQL*Plus Syntax - Ignored 888 SQL*Plus - Unsupported 888 Marking Code to Fold 889 Data Grid 890 DBMS Output 891 Aliases 891 Using Aliases 891 ALIASES.TXT file 891 Skipping Aliases 892 Tracking Aliases 892 Opening a Script 893 Variables Window 893 Strip Code Statement and Make Code Statement Functions 893 Strip Code Statement 894 Make Code Statement 894 Selecting the Code Development Tool 894 Creating Make Code Templates 895 Examples: 895
- 64. Toad for Oracle User Guide Table of Contents 62 Quick Describe 896 Keeping Popup Describe Windows on Top 896 SQL Statement Recall 896 Saving only valid SQL statements 897 Editing Saved SQL Attributes 897 SQL Statement Recall Toolbar 897 Main Toolbar 897 SQL Filter Toolbar 898 Viewing Recalled SQL 898 Working with Recalled SQL 898 Add to Personal SQLs 899 Add to Named SQLs 899 Working with PL/SQL 900 Default Templates 900 Editing Templates 901 Auto Replace Keywords 901 KEYWORD RESULT REPLACEMENT 901 Using a package function or package procedure template from the Create PL/SQL Object Window 902 Debugging 903 Debugger Overview 903 Compiling Dependencies with Debug Information 904 Troubleshooting the Debugger 904 Minimum Oracle Database Requirements 906 Database Version Notes 907 Debugging on a RAC 908 Starting the Debugger 908 Stopping the Debugger 909 Toggle Compiling with Debug 909
- 65. Toad for Oracle User Guide Table of Contents 63 General Options 909 Setting Parameters 909 Debugger Output Options 910 Do not output results 910 Print to DBMS Output (char/number columns only) 910 RPAD columns to a width of N characters 911 Fetch no more than N rows per cursor 911 Load into grid from memory (strong and weak) 911 Dependencies & References 911 Preparing PL/SQL Code for Production 912 Debugging Types 912 Debugging Java 912 Troubleshooting 914 Determine that the Java debugger is selected 914 Oracle debugger hanging 914 General Limitations 914 Oracle 9iR2 Issues 914 Stepping into Code 915 Oracle 10g Issues 915 Debugger jumps over bulleted lines of code 915 Debugger gutter line execution bullets not visible 915 Directing Output to the DBMS Output window 915 Tracing into System.out.println 915 Debugging Scripts 915 Show/Hide Grid 916 Debugger Output 916 Troubleshooting 917 Enabling or Disabling DBMS Output 917 DBMS Output Specific Commands 917
- 66. Toad for Oracle User Guide Table of Contents 64 Editing DBMS Output Content 917 Breakpoints 917 Breakpoints Window Toolbar 918 Standard Breakpoints 919 Conditional Breakpoints 919 Format of a Conditional Breakpoint 919 Supported Operators 920 Pass Count Breakpoints 920 Combining Conditional and Pass Count Breakpoints 920 Watches 922 Watches Window Toolbar 922 Configuring the Smart Watch window 923 Moving Smart Watches to the Watch panel 923 Explicit record declarations: 924 Implicit record declarations: 925 Collections Records 926 External Debugging 929 Before Initializing 930 Initializing 930 After running external application 930 Call Stacks 931 Triggers 931 INSERT 932 UPDATE 932 DELETE 932 Multiple Trigger Priorities 932 Query Builder 933 Query Builder Overview 933 Query Builder Toolbar 933
- 67. Toad for Oracle User Guide Table of Contents 65 Quick Start 934 Model Area 935 Explain Plan 936 Query Builder Options 936 Viewing Joins 936 Populating the Where Clause 936 Populating the Having Clause 938 Creating a SubQuery 940 Reverse Engineering a Query 940 Query Report Format 941 Generated Query 941 Query Results 942 Removing columns from the Tree 942 Working with Data 943 Column Names Supported 943 Graph Properties 943 OPS$ Accounts 943 Viewing or Hiding Docked Windows 944 Hidden Docked windows 944 Viewing Source Surrounding a PL/SQL Error 945 Sample output 945 Dataset Operations 946 Dataset Operations 946 Dataset Toolbar 946 Go to Row Number 947 Get Row Count 947 Data Grids 948 Toad Grids 948
- 68. Toad for Oracle User Guide Table of Contents 66 Sort Data in Grid 948 Export Data to Flat File 949 Customizing Grid Views 949 Troubleshooting 950 Highlighting columns populated with a trigger/sequence pair 951 Filtering Results 953 Schema Browser Filters 953 IN clause 954 Filters in the View | Toad Options | Files dialog 954 Viewing and Editing Data 955 Exporting the Dataset 956 Editing LONG and LONG RAW columns 957 Example 960 BLOB Editor Toolbar 961 DBMS Output 963 DBMS Output Window 963 Generating DBMS Output 963 Polling for DBMS Output 964 Editing the DBMS Output Display 964 Using the DBMS Output window for Debugging 964 Finding Data 965 Find in Editor 965 Find in Grid 965 Find In Files 966 Find Next, Find Previous 966 Find and Replace Text 966 Goto Line 967 Object Search 967
- 69. Toad for Oracle User Guide Table of Contents 67 Schemas to Search 968 Search Object Names 968 Search Column Names 968 Source Search 968 Object Search DDL Script Options 968 Regular Expressions 969 Replace with Template 969 Simple Matches 969 Metacharacters 969 Example 971 Generate Test Data 972 Generating Data Overview 972 Data Generation - Options 973 Working with Database Objects 978 Schema Browser Window Overview 978 Object Pane - Left Hand Side Object Tabs 978 Details Pane - Right Hand Side Information 979 Schema Browser Options 979 Right-Click Menus 979 Auto-Refreshing the Datagrid 979 Icon Legend 980 Privileges 980 Troubleshooting 980 Schema Browser Toolbars 981 Objects Pane Toolbars 981 Details Pane Toolbars 981 Statement Processing 982 Create Objects in Another Schema 982
- 70. Toad for Oracle User Guide Table of Contents 68 Personalizing the Schema Browser 982 Personalizing the Schema Browser 982 Changing the Browser Display 983 Configuring Browser Tabs 983 Browser Tabs Order 984 General Schema Browser Actions 985 General Schema Browser Actions 985 Adding Objects to Project Manager 986 Dropping Objects 986 Choosing Columns in Object List 987 Schema Browser: Jump to Object 987 Create Custom Queries 988 Refresh Options 989 Browser Filters 989 Schema Browser Filters 989 Loading and Applying Browser Filters 990 Saving Browser Filters 990 Edit Browser Filter Query 990 Clearing Datagrid Filters 992 Creating Default Browser Filters 992 Filtering by Project Manager file 992 Using the QuickFilter Box 993 Wildcard Characters 993 Examples of Wildcards and Sets 993 Clusters 994 Schema Browser: Clusters 994 Cluster Toolbar 994 Create and Alter Cluster 995
- 71. Toad for Oracle User Guide Table of Contents 69 Constraints 996 Schema Browser: Constraints 996 Create and Alter Constraints 997 Renaming Constraints 998 Contexts 999 Schema Browser: Contexts 999 Database Links Toolbar 999 Create and Alter Context 1000 DB Links 1000 Schema Browser: DB Links 1000 Create and Alter Database Link 1001 Dimensions 1002 Schema Browser: Dimensions 1002 Objects Pane Toolbar 1002 Create Dimension 1003 Directories 1003 Schema Browser: Directories 1003 Directory toolbar 1004 Create and Alter Directory 1004 Favorites 1005 Favorites 1005 Flashback Archives 1006 Flashback Archives 1006 Create and Edit Flashback Archive 1007 Functions 1008 Schema Browser: Functions 1008 Indexes 1010 Schema Browser: Indexes 1010
- 72. Toad for Oracle User Guide Table of Contents 70 Indexes Toolbar 1010 Create and Alter Index 1010 Rebuild Index 1015 Rename Index 1015 Invalid Objects 1016 Schema Browser: Invalid Objects 1016 Invalid objects toolbar 1016 Java 1017 Java 1017 Java Toolbar 1018 Publish Java to PL/SQL SQL Wizard Overview 1019 Java Types and Oracle Return Types 1019 Jobs 1020 Schema Browser: Jobs 1020 Jobs Toolbar 1020 Upper 1021 Lower 1021 Create and Alter Jobs 1022 Libraries 1023 Schema Browser: Libraries 1023 Library Toolbar 1023 Create and Alter Library 1024 Materialized Views (Snapshots) 1025 Schema Browser: Materialized Views 1025 Materialized Views Toolbar 1025 Create and Alter Materialized View 1026 Materialized View (Snapshot) Logs 1027 Schema Browser: Materialized View Logs 1027
- 73. Toad for Oracle User Guide Table of Contents 71 Materialized View Logs Toolbar 1027 Create Materialized View Log 1028 Oracle Scheduler 1028 Schema Browser: Scheduler 1028 Jobs 1029 Objects Pane 1029 Sched:Jobs toolbar 1029 Details Pane 1030 Scheduler Chains 1031 Objects Pane 1031 Sched:Chains toolbar 1031 Details Pane 1031 Job Classes 1032 Objects Pane 1032 Sched.Jobs Classes toolbar 1032 Details Pane 1033 Programs 1033 Objects Pane 1034 Programs toolbar 1034 Details Pane 1034 Schedules 1036 Objects Pane 1036 Schedules toolbar 1036 Details Pane 1036 Windows 1037 Objects Pane 1037 Windows toolbar 1037 Details Pane 1038 Window Groups 1039
- 74. Toad for Oracle User Guide Table of Contents 72 Objects Pane 1039 Window Groups toolbar 1039 Details Pane 1040 Packages 1040 Schema Browser: Packages 1040 Policies 1042 Schema Browser: Policies 1042 Policy Toolbar 1042 Create Policy Definition 1043 Policy Groups 1043 Schema Browser: Policy Groups 1043 Policy Toolbar 1043 Create Policy Group 1044 Procedures 1044 Schema Browser: Procedures 1044 Executing Stored Code from the Schema Browser 1046 Profiles 1046 Schema Browser: Profiles 1046 Profiles Toolbar 1046 Create and Alter Profile 1047 Queue Tables 1047 Queue Tables 1047 Queue Tables toolbar 1048 General 1048 Queues 1048 Statistics 1049 Schedules 1049 Script 1049
- 75. Toad for Oracle User Guide Table of Contents 73 Create and Alter Queue Table 1049 Queues 1052 Schema Browser: Queues 1052 Queues toolbar 1052 Create and Alter Queue 1053 Recycle Bin 1053 Schema Browser: Recycle Bin 1053 Refresh Group Toolbar 1054 Flashback Table 1054 Purging Objects from the Recycle Bin 1054 Refresh Groups 1055 Schema Browser: Refresh Groups 1055 Refresh Group Toolbar 1055 Create and Alter Refresh Group 1056 Resource Consumer Groups 1057 Schema Browser: Resource Groups 1057 Research Consumer Group Toolbar 1058 Create and Alter Resource Consumer Group 1058 Resource Plans 1059 Schema Browser: Resource Plans 1059 Research Plan Toolbar 1059 Create and Alter Resource Plan 1060 Schedule Resource Plans 1060 Roles 1061 Schema Browser: Roles 1061 Roles Toolbar 1061 Create and Alter Role 1062 Rollback Segments 1062
- 76. Toad for Oracle User Guide Table of Contents 74 Schema Browser: Rollback Segments 1062 Rollback toolbar 1063 Create and Alter Rollback Segment 1063 Sequences 1064 Schema Browser: Sequences 1064 Sequences Toolbar 1064 Create and Alter Sequence 1065 Synonyms 1066 Schema Browser: Synonyms 1066 Create Synonym 1066 System Privileges 1067 Schema Browser: System Privileges 1067 Sys Privs Toolbar 1067 Configure Grantees 1068 Tables 1068 Schema Browser: Tables 1068 List of Tables 1068 Tables Toolbar 1068 Tables and Columns Comments 1069 Creating DML Procedures 1070 Creating Tables 1073 Altering Tables 1074 Columns Tab 1076 Hot Keys 1076 Columns Tab 1077 Editing buttons 1077 Hot Keys 1077 External Properties 1077
- 77. Toad for Oracle User Guide Table of Contents 75 Access Driver 1077 Access Type 1077 Default Directory 1077 Reject Limit 1077 Table Details 1078 Build a SQL statement 1079 Multiple Table Details 1079 Single Table Details 1079 Actions on Tables 1080 The Foreign Key Lookup Window 1081 Working with Data 1081 Filter and Sort 1081 Insert Records 1082 Sending Data Query to Editor 1082 Source/Dest and Options 1083 Where Clauses (optional) 1083 Saving and Loading Settings 1084 Scheduling the Copy 1084 Tablespaces 1084 Schema Browser: Tablespaces 1084 Tablespaces toolbar 1084 Create and Alter Tablespace 1085 Create and Alter Tablespace Quota 1087 Drop Tablespace 1088 Drop Datafile 1088 Datafile Definition 1088 Rename 1089 Minimize Size 1089 Autoextend 1089
- 78. Toad for Oracle User Guide Table of Contents 76 Rename/Move Datafile 1089 Triggers 1090 Schema Browser: Triggers 1090 Triggers Toolbar 1090 Create and Alter Trigger 1091 Types 1091 Schema Browser: Types 1091 Types Toolbar 1092 Dependencies tab information 1093 Create Object Type 1093 Attributes 1094 Methods 1094 Edit Object Type 1095 Create and Alter Collection Type 1096 Users 1097 Schema Browser: Users 1097 Users Toolbar 1097 Create and Alter User 1098 Views 1099 Schema Browser: Views 1099 Views Toolbar 1099 Create and Alter View 1100 Views - Data Grids 1101 Appendix:Contact Quest 1103 Contacting Quest Support 1103 Contact Quest Software 1103 About Quest Software 1104 Index 1105
- 79. Introduction New in This Release In All Toad Editions Unicode Support l Toad now supports Unicode. For people already using Unicode-enabled databases, this should be a seamless transition. Note: Some Oracle features are not Unicode-enabled, or have specific Unicode requirements to function. Please see your Oracle documentation for information about these features. There is an online video tutorial for this feature. This video opens a new browser window and requires an internet connection. l Toad Advisor now checks that NLS_LANG value matches client character. l Default Encoding option added to Options | General to set default encoding for new Editor tabs and for saving files. l If you are an upgrading user, you will need to make the following change to your LexLib for the Editor parser to work correctly with Unicode: 1. From the View menu, select Options. 2. Click the Editor - Behavior node. 3. Set the language dropdown to PL/SQL and then click the Edit Language button. 4. Click the Parser tab and select Any Name. 5. Add (?r) to the beginning of the "Any name" parser rule: 6. Click OK or Apply to save changes. Actions l AppDesigner has been renamed to Automation Designer. l When specifying connections on the command line (toad.exe -c ), these connections will now be used in the Actions specified afterward ( -a ), instead of the connection currently bound to the Action. 1
- 80. Toad for Oracle User Guide Introduction 78 l In some actions, you can also specify connections to execute against in the Automation Designer. l Action Parameter files l Actions can now accept parameter files. They are in INI format. Right click on an Action/App in Automation Designer and choose "Create Parameter file" to build an INI file based on the current Action properties. It will create property=value pairs for the things which can be overridden. This parameter file can then be used in the Automation Designer ('Run with parameter file') or on the command line by using a pipe to separate the Action/App name from the filename. For example: toad.exe -a "App->Export Dataset1 | c:data filesexportDataset1.ini" l You will know which Actions can generate/read an INI file by whether or not the 'Create parameter file' popup menu item in Automation Designer is enabled. Here is a sample section from an INI file which shows an Execute Script Action: [47] Name=Execute Script1 Type=Execute Script ItemCount=2 Item0=c:try1.sql Item1=c:try2.sql Output=1 {1=SingleFile, 2=SeparateFile, 3=Clipboard, 4=Discard} Output Location=C:some folderoutput.txt ConnectionCount=2 Connection_1=mlerch@ora10gr2.world Connection_2=scott@ora2gr2.world [47] is an internal identifier. "Name" and "Type" are only for your use, to find your Action within a longer App INI file. Each Actions INI section will be unique to that Action, and in the case of things like enumerated types, will include explanatory notes embedded within the line itself. In this example of 'Execute Script,' two connections are specified. This will override the bound connection of the Action. If that line wasn't there, the bound connection would be used. The order of precedence for which connections get used: 1. Those specified on command-line always override everything else
- 81. Toad for Oracle User Guide Introduction 79 2. If 1 is not present, those specified in an INI file are considered next 3. Finally, the connection bound to the Action is used if none are in 1 or 2 Application Data Folders l The default installation directory for new installs enables roaming profile support by default. In the View | Toad Options | General | Application Data Directory, the Use Default button now points to the user's main application data folder. The Use Local Default button points to the user's local application data folder, which does not support roaming profiles. l You must restart Toad for a change in this option to become active. Editor l New menu item added to the main Toad Editor menu. "Split Size Horizontally" This item will auto size the Editor so that there is equal space allocated for the edit control and the bottom docking panels. The default shortcut is CTRL+F2. You will need to manually add the item to the toolbar or reset your toolbar to see this if upgrading. ER Diagram In addition to the following information, there is an online video tutorial for this feature. This video opens in a new browser window and requires an internet connection. l The ER Diagram has been expanded in Toad 10. This functionality is based on, and works with, the Toad Data Modeler. Toad's ER Diagrammer is not meant to be a modeling tool, but it can help you visualize complicated database structures. l You can now see the objects included referentially when you add objects using Referential Integrity: l In addition, you can now subdivide your diagram into multiple workspaces. l Separate objects into categories, and color code them, and add Model information to the diagram. Grids In addition to this information, there is also an online video for this feature. This video opens in a new browser window and requires an internet connection. l Grids are now consistent throughout Toad. Some new features include: o Grids now share a single popup menu. o Reset Grid View restores the grid to the original configuration so you can undo any groupings, bookmarks and so on with one selection. o Grids can handle block selection if row select is unchecked and multi- select is checked. o Grids can be grouped by a column header by dragging the header into the Group
- 82. Toad for Oracle User Guide Introduction 80 By area at the top of the grid. This feature can be toggled on the right-click menu. o Grids that had special functionality now have an upper toolbar containing that functionality, as in the Rebuild Multiple Indexes grid. o You can check or uncheck all boxes in a grid column by right-clicking in the column header and selecting the appropriate option. o Navigator toolbars have been moved to the bottom of the grid area. If you do not see a navigator, right-click in the grid and select Toggle Navigator. o Single Record View is now part of the Navigator toolbar. o You can bookmark one location in the grid and return to it later. Put your cursor in the row you want to bookmark and click the bookmark button on Navigator toolbar. To return to the bookmark, click the Goto Bookmark button on the same toolbar. o Show/Hide columns with the Quick Column Customization drop down in the upper left. o All customizations are remembered (column order and size, group header visibility, and so on). Licensing Structure The licensing structure has been changed to support one key for all products in a Toad Edition. If you are upgrading your version of Toad, old license keys are still supported. Load Database Object l Load Database Object now allows incremental searching in both the schema box and the object grid. Profiler Analysis l Show anonymous blocks toggle in right-click menu added. This defaults to the setting made in the Profiler tab in the Editor. Project Manager l AutoConnect mirrors auto-connect property of the login record for Toad as a 2-way mirror, rather than as an independent auto connection. Rebuild Table l Can rebuild tables containing LONG columns. Script Manager l Has been redesigned for improved support for multiple connections. Search Functionality l A quick search bar has been added to the main toolbar. From this toolbar you can:
- 83. Toad for Oracle User Guide Introduction 81 o Search Toad World online o Search Toad World and other Toad-related sites o Search AskToad (the Toad wiki) o Search Knowledge Xpert o Perform keyword searches against the Toad help file. l You can enable/disable the search bar by right-clicking on the toolbar and selecting "Online Search". l You may need to restore the toolbar defaults to have it display initially. To do this, right- click on the main toolbar and select Restore defaults. Server Side Object Wizard l Now a part of Toad instead of a separate application (required for Unicode support). l Data Generation scripts added. Setting Parameters l Setting Parameters now provides lists for parameter selection, and larger editing areas for large parameters. Set Sequence l Set Sequence feature replaced with an auto-increment via sequence and trigger. 1. From the Schema Browser | Tables page, right-click and select Add | Trigger/Sequence Pair and then enter the required information: 2. Double-check the SQL created, make any required changes, and then click OK. Once the sequence/trigger pair is set, you can highlight columns populated by it by doing the following: From View | Toad Options | Schema Browser - Visual, select Highlight columns populated by sequence/trigger pair. TNS Names Editor An online video tutorial is also available for this feature. This video opens in a new browser window and requires an internet connection. l Delete host nodes in Host View mode l Delete multiple nodes (host or service) l Retain relative position in the tree view when nodes deleted User Data Migration on Upgrade A new migration tab is added to the initial startup wizard to migrate your existing application data from a previous installation of Toad. Upon startup, Toad will attempt to detect the application data paths of previously installed versions. If one is found, it will select the most recent installed version and give you the option of migrating data files from that installation to
- 84. Toad for Oracle User Guide Introduction 82 the current installation. It will also provide the option of specifying a custom location, or the option to skip the migration and perform a clean install. Variables l Variables can now be added within definition filenames in several of the Compare and Generate windows. For example %DATEFILE% and %TIMEFILE% can be used to stamp the date and time of creation (These are included in the default filename). Other user- defined variables may also be added. In the Professional, Xpert, Development Suite, and DBA Suite Editions Code Xpert l Command line XML output now has an additional tag called comment_count to list the number of comments in the code being analyzed. Data Generation l Enhanced data generation ability can now create more realistic data. Generators were added to create various address, geographical, personal, and business data formats. Also included is the ability to reference a foreign field, a hard-coded value, and the ability to enter a custom SQL statement. Straight random and Unicode data are present. An online video tutorial is also available for this feature. This video opens in a new browser window and requires an internet connection. l Three generator engines are supported: o Internal: This will create a script with "n" INSERT statements per table (depending on the individual table's settings). An option is also available to commit every "x" rows. Caution: This will create a very large SQL script, which will take longer to execute, but does not require any packages installed on the database server. o DBMS_RANDOM: This will use the DBMS_RANDOM package to generate data, and is similar to the behavior in Toad 9.7. DBMS_RANDOM will need to be installed on the database server for this option to be available. o TOAD_DATAGEN: This will use a TOAD-specific package to generate data on the server. The advantage is that this will generate a much smaller SQL script, and will perform faster. Note: You will need to install the TOAD_DATAGEN package through Server Side Object Wizard in order to use this feature. This package can be installed locally, or in the global TOAD schema. l Using Toad 10 you can create more meaningful random data for your tables. One way of doing this:
- 85. Toad for Oracle User Guide Introduction 83 o In the Schema Browser, select the tables for which you want to generate data. o Right-click and select Generate Data. o Set General options, including Data Generation Engine. o Click on a table or column node and set options specific for that node. All options must be set individually, although the actual generation can be done all at one time. o Click Show SQL to check the code before running it, or click OK to generate data immediately. In the DB Admin Module and DBA Suite Database Browser l Right-click to execute a Quick Script. Database Health Check l Many new health check items. The Database category has been integrated into new categories: (Config, Alert Log, Storage, and Performance). Settings has been moved to its own tab. New health check items include: o List default initialization parameters o List non-default deprecated initialization parameters. (10g+) o Verify compatible matches version major.minor o Verify optimizer_features_enable matches version major.minor o Verify optmizer_index_caching >= 50 (9i+) o List incompatible parameters if pga_aggregate_target (10g) or memory_target (11g) is set o Verify pga_aggregate_target >+10MB (10g only) o Verify control file count >=2 o Verify CPU count - - (let Oracle determine the value) o Verify cursor_sharing='SIMILAR' (9i+) o Verify cursor_space_for_time='TRUE' (pre 11g) o Verify db_cache_size set instead of db_block_buffers (9i+) o Verify buffer cache >=200MB o Verify Large Pool >=50MB o Verify objects using KEEP buffer pool exist if db_keep_cache_size is set o Verify db_keep_cache_size>=50MB if objects exist which use RECYCLE buffer pool o List db_nk_cache_sizes without corresponding tablespaces (9i+) o List tablespaces without corresponding db_nk_cache_sizes (9i+)
- 86. Toad for Oracle User Guide Introduction 84 o Verify db_block_size<=4K for RAC, >=4K for non-RAC o Verify multiblock_read_count between 4 and 16 o Verify disk_asynch_io is TRUE (pre-11g) o Verify compatibility of db_writer_processes and dbwr_slaves with disk_ asynch_io setting o Verify dml_locks=0 or >=transactions * 4 o Verify filesystemio_options='SETALL' o Verify fast_start_mttr_target is set when log_checkpoint_timeout=0 (9i+) o Verify max_dump_file+size <=20MB o Verify open_cursors >=50 o Verify query_rewrite_enabled = TRUE (9i+) o Verify recyclebin='OFF' (10g+) o Verify remote_login_password_file='SHARED' o Verify session_cached_cursors >=20 o Verify sga_target>=200MB and sga_max_size same value (10g+) o Verify star_transformation_enabled=TRUE o Verify sql_trace = FALSE (pre-11g) o Verify timed_os_statistics = FALSE o Verify timed_statistics = FALSE o Verify trace_enabled = FALSE (9i+) o Verify SYS.AUD$ isn't in SYSTEM tablespace o Verify AWR collection interval >=30 minutes, retention <=90 days (10g and newer) o List connect time, version info, and a few basic ratios o List datafile IO distribution o List objects where number of hash partitions is not a power of two o List segments with <1% of extents remaining and >10 maxextents o List segments with >1000 extents Database Monitor l Alert options have been moved from the main Options window to the Database Monitor screen. l You can now run any action (including scripts) when a specified threshold is hit. l You can configure the monitor to begin collecting data whenever a connection is made. Then, when the window is opened, all data is displayed. l Right-click the DB Monitor Tray icon to launch Spotlight for Oracle or just open the DB Monitor. l Wait events chart has been expanded and updated for Oracle 10g and 11g.
- 87. Toad for Oracle User Guide Introduction 85 Instance Manager Options l Options | Instance Manager - has now been integrated into the Instance Manager window. For example, the grid now includes checkbox columns in each server row to select servers to monitor or alert when down. Introduction to Toad Toad is a powerful application development tool built around an advanced SQL - PL/SQL editor. Using Toad, you can build and test scripts, PL/SQL packages, procedures, triggers, and functions. You can create and edit database tables, views, indexes, constraints, and users. The Schema Browser and Project Manager provide quick access to database objects. Toad comes in several bundles, each offering different functionality. For more information on the different bundles, please see the Quest Software website or your Quest Sales Representative. Toad’s Editor provides an easy and efficient way to write and test scripts and queries, and its powerful data grids provide an easy way to view and edit Oracle data. Each new release of Quest Software's Toad for Oracle product is designed to optimize your abilities to develop applications for and administer to the Oracle database. If Oracle introduces a new data item, feature, or parameter, and if the Toad for Oracle user community desires that new element, you will likely find new functionality within this product to help you with it. Warning! By default, Oracle installs and enables some features in the database which may not be covered by your existing license, such as Partitioning, RAC, Advanced Workload Repository (AWR) and Oracle Tuning Advisor to name a few. Toad for Oracle takes advantage of these features if found installed in your database, and use of these features (including use by Toad for Oracle) may increase your Oracle licensing fees. Being properly licensed by Oracle is your (organization's) responsibility. Using Toad, you can: l View the Oracle Dictionary l Create, browse, or alter objects l Graphically build, execute, and tune queries l Edit PL/SQL and profile stored procedures l Manage your common DB tasks from one central window l Find and fix database problems with constraints, triggers, extents, indexes,and grants l Create code from shortcuts and templates l Create custom code templates l Control code access and development (with or without a third party version control product) using Toad's cooperative source control feature. l Create Projects to more easily manage your work
- 88. Toad for Oracle User Guide Introduction 86 l Step through the code as it executes l Debug PL/SQL, scripts, and Java. DB Admin Module The DB Admin Module adds database administration functionality to Toad. With this module you can manage space, compare schemas, monitor database performance, create new databases, maintain redo logs, perform health checks, and more. See "DB Admin Module" (page 86) for more information. DB Admin Module The DB Admin Module is an optional module for Toad for Oracle that adds additional database administration Note: Some of these features are also available in the Toad Professional Edition. These features are marked with an asterisk (*), and are noted as available in both places in their descriptions. In addition to this list, the same list with screenshots is available on the Toadsoft website. (This will open a new browser window and requires an internet connection.) Show all ADDM/AWR Report Generator Create performance analysis reports from Oracle’s Automatic Workload Repository. Also manage snapshots and baselines. Analyze All Objects This window is available in the base version of Toad, but when the DB Admin module is added, statistics can be easily exported, imported, or copied to another schema or database. ASM Manager Use to manage the Oracle DB file system from within the Oracle database. Create, alter, view contents of, and drop, Disks and Disk Groups. Audit Objects Display the audit monitoring options for selected database objects. Quickly define auditing options for single or multiple objects. Audit SQL/Sys Privs Display the audit monitoring options for SQL Statement Objects, Reserved Words and System Privileges in the database. AWR Browser View Oracle AWR data in predefined or custom charts and grids. Easily observe trends between
- 89. Toad for Oracle User Guide Introduction 87 snapshots. Code Road Map and ER diagram The Create Object scripts button on both of these windows is only available with the DB Admin Module. See Code Road Map and ER Diagram. Compare Databases Compare Database-level objects such as tablespaces, roles, users, etc. between databases or Database Definition Files. Compare Schemas The Compare Schemas screen is available in the base version of Toad, but the DB Admin module allows you to use the synchronization script. The DB Admin module also allows Toad to compare a Schema Defintion File to a live schema, or another Schema Definition File. A Schema Definition File is a propriety, binary file, which stores the metadata of a live schema. Control Files The control file contains information about the associated database that is required for the database to be accessed by an instance, both at startup and during normal operation. A control file's information can be modified only by Oracle; no database administrator or end-user can edit a database's control file. This option allows you to view them. Database Browser Browse databases from server level all the way down to the object level. View aggregated information about multiple databases on the same server. The Database Browser serves as an organization tool and launch point for many tuning/troubleshooting windows within Toad. Database Health Check The Database Health Check performs a series of checks on a selected database and displays the results. Includes a “Vulnerability Assessment” to help find places where your database could be vulnerable to hackers. Includes a differences report to see what has changed since Health Check was last run. Results can be saved to HTML and sent by email. Database Monitor Allows you to monitor database performance with nine charts: Logical IO, Physical IO, Event Waits, Sessions, Call Rates, Miss Rates, SGA Memory Usage, Shared Pool, and Indexed Queries %. There is a horizontal scroll bar to allow you to see all the charts. Database Probe This real-time monitoring window offers a large collection of alerts. You can also create your own alerts. DataPump Import/Export Wizards* This feature is available in either Toad Professional Editions or the DB Admin Module. The
- 90. Toad for Oracle User Guide Introduction 88 Oracle data pump is an import/export utility added in Oracle 10g. It is significantly faster and more efficient at loading large volumes of data than the standard import/export utilities. Toad's Data Pump import/export wizards make using it even easier. In addition, Toad has a data pump job manager to help you manage import/export tasks. DBMS_FLASHBACK Use this window to “look back in time” in your database, using Oracle’s DBMS_FLASHBACK package on Oracle version 9i and up. DBMS_REDEFINITION Wizard Use this wizard to rebuild tables online using Oracle’s DBMS_REDEFINITION package on Oracle version 10 and up. Flat File Export The SQL*Loader tab is only available with the DB Admin Module. Generate Database Script Generate DDL for all (or some) non-schema objects such as tablespaces, roles, profiles, etc. Script can be dependency-sorted. Extract from a live database or Database Definition File. Generate Schema Script Generate DDL for all (or some) objects in a schema. Script can be dependency-sorted. Extract from a live schema or Schema Definition File. Identify Space Deficits This displays tables that do not have enough free disk space to allocate their next extent. Index Monitoring Monitor indexes to determine whether or not they are being used. You can then drop unused indexes to eliminate unnecessary overhead. Instance Manager The Instance Manager is designed to let you check on the status your database instances. The Instance Manager can send email alerts when the status of an instance changes. The Instance Manager can start, stop, and alter your database instances. Log Switch Frequency Map This screen shows when your database performs a log switch. You can use this window to judge the balance of log switches. LogMiner If a System Change Number (SCN) caused a corruption problem, LogMiner lets you easily analyze a database and recover to the transaction exactly before the corruption.
- 91. Toad for Oracle User Guide Introduction 89 New Database Wizard The Toad Database Wizard provides a rapid way for DBAs to create Oracle databases. It offers an easy wizard-style interface consisting of 5 screens prompting the user to select parameter values for the construction of the database parameter file (INIT.ORA) as well as values used in the construction of a SQL file that can then later be executed by either a batch file (Windows) or a script (UNIX) the wizard generates. NLS (National Language Support) Parameters View the Session, Instance, and Database parameter settings, and change the Session and/or Instance parameters. Operating System Utilities l Unix Monitor - You can monitor database performance with three charts and a grid: CPU Usage, Process Queues, Disk IO in Kb/Sec (for the top 10 devices), and a process list grid that breaks the information down by user. The process list displays the top 20 CPU usage processes, sorted by %CPU as a default. l Unix Job Scheduler - You can schedule jobs to a Unix machine. l Unix Kernel Parms - You can easily set Unix Kernel parameters to make Toad and Oracle run more efficiently. l Windows Registry Parms - You can easily set Windows Registry parameters to make Toad and Oracle run more efficiently. l Service Manager - You can start, stop, and check status of services on local or remote PCs running Windows. Oracle Parameters Although you can view Oracle Parameters with Base Toad, the DB Admin Module allows you to Alter Parameters. Pinned Code Pin code into the memory buffer so that it is always accessible and not overwritten by new data. Redo Log Manager Understand your redo log configuration at a glance. Redo log groups and members can be created or dropped. Clear log groups, force a log switch, or perform various "alter system archive log" commands. Resource Plan Scheduling Easily schedule and change schedules for resource plans. Schema Browser and Database|Create Menu Create, alter, compare, drop, view information about, and manage the following object types: l Contexts l Dimensions l Directories
- 92. Toad for Oracle User Guide Introduction 90 l Flashback Archives l Libraries l 10g Scheduler Objects o Chains o Jobs o Job Classes o Programs o Schedules o Windows o Window Groups l Policies l Policy Groups l Profiles l Refresh Groups l Resource Consumer Groups l Resource Plans l Roles l Rollback Segments l System Privileges l Tablespaces Segment Advisor Examine tables, indexes, and partitions to determine if and how much, space can be reclaimed in them with the SHRINK command. Statspack Browser View Oracle Statspack data in predefined or custom charts and grids. Easily observe trends between snapshots. Tablespace Map This map provides a graphical view of the contents of your tablespaces. Top Session Finder You can find the sessions in the database that are consuming the most resources. Oracle tracks hundreds of statistics for each session in the database, and the Top Session Finder lets you easily sort the sessions by their usage of any combination of parameters. Trace File Browser Quickly and easily view the contents of an Oracle Trace File in an interactive utility. Undo Advisor The Undo Advisor provides advice and helps to automate the establishment of the database undo
- 93. Toad for Oracle User Guide Introduction 91 environment. The advisor can inform you about the health of the current undo configuration, either overall or within a given time range. View Tablespaces The Space, Space History, and IO History tabs are only available in the commercial version of Toad with the optional DB Admin Module. History and Compatibility of Toad and Oracle Toad has a rich history. Over its development cycles it has grown with Oracle. As new Oracle versions have added functionality, new Toad versions have added functionality and compatibility as well. Because of this, however, some older versions of Toad for Oracle will not work properly with newer versions of Oracle. In addition, as Oracle versions have added functionality, some older versions of the Oracle client will not work with newer versions of the Database. The following chart describe this history. Toad History The following timeline describes the various features that have been added to Toad for Oracle since version 8.0.
- 94. Toad for Oracle User Guide Introduction 92 Oracle History The following chart describes the growth of Oracle's Client/Server features: Version Terminal Patch Release Date De-support Date 7.3 7.3.4.5 FEB-1996 21-DEC-2000 8.0 8.0.6.3 JUN-1997 30-SEP-2001 8.1 8.1.7.4 FEB-1999 31-DEC-2003 9.0 9.0.1.4 JUN-2001 31-DEC-2003 9.2 9.2.0.8 MAY-2002 31-JUL-2007 10.1 10.1.0.5 JAN-2004 31-JAN-2009 10.2 10.2.0.4 SEP-2005 31-JUL-2010 11.1 11.1.0.6 AUG-2007 31-AUG-2012 Client/Server Compatibility If the version of the Oracle client you are currently using is not compatible with the version of the Oracle server where your database resides, the incompatibilities may cause errors within Toad. For more detailed information about possible compatibility issues, see Oracle's Metalink article 207303.1 "Client / Server / Interoperability Support Between Different Oracle Versions". Toad and Oracle Enterprise Manager Toad for Oracle offers optional features in the DB Admin module (Toad 8.5 and higher) which access the Oracle OEM Diagnostics Pack such as : l ADDM/AWR Report Generator – enables snapshot management and shows both AWR and ASH reports l AWR Browser – graphical representation of data collected from AWR l ASM Manager – enables management of ASM disk groups and clients l Segment Advisor – determines space that can be reclaimed Toad does offer alternate ways to determine performance bottlenecks without the use of ADDM/AWR. These include, but are not limited to: the StatsPack Browser, TK Prof interface, Database Monitor, Session Browser and the Quest SQL Optimizer’s SQL Inspector. However, if you are already licensed to use the OEM Diagnostics Pack and you wish to get additional value from it, you can use the functionality we offer in Toad. If you are using Oracle database 10g and above, you can use the Oracle Tuning Advisor feature in all Toad editions (8.6 and higher), which accesses both the Oracle OEM Tuning Pack and Diagnostics Pack.
- 95. Toad for Oracle User Guide Introduction 93 Alternatively, if you have Toad Xpert, Development Suite or DBA Suite Editions you could use the Quest SQL Optimizer, which does not access any of the Oracle OEM Packs at all. In addition, Quest SQL Optimizer offers a unique way to rewrite your SQL code for maximum performance. NOTE: It is your (organization's) responsibility to ensure you have the appropriate Oracle OEM license. However, there are some steps you can take to mitigate possible risks of using functionality you are not licensed to use. NOTE: The following techniques are mitigation methods only. Oracle licensing can change at any moment, so it is important to know exactly what your license allows and what you are not licensed to use. All of these methods within Toad are easily reversed, and, in some cases, can be ignored by any user invested in using the features regardless of license issues. Disabling Access to OEM Functionality in Toad You can: l Customize your toolbar to hide buttons to Toad functionality. l Use the Toad Options window to hide entire Toad windows. l Use Toad Group Policy Manager to control Toad Use from a centralized location. Customizing Your Toolbar You can remove items from the toolbar by opening the customize window and removing the buttons that open the Toad features in question. To remove items from the toolbar 1. Right-click over the toolbar and select Customize. 2. Drag the buttons and menu items you want to remove off of the toolbar and drop them. Using Toad Options to Hide Windows You can hide Toad functionality from the Options window. For more details about the Toad Options | Windows screen, see the Toad help file. To hide Toad windows 1. From the View | Toad Options window, select Windows in the left hand pane. 2. In the Windows grid, clear the checkbox in the Available? column for the windows you want to hide.
- 96. Toad for Oracle User Guide Introduction 94 Using Toad Group Policy Manager You can also push these settings onto a group by using the Toad Group Policy Manager. See "Group Policy Management" (page 151) for more informationabout details for doing this. To restrict usage from the Group Policy Editor 1. Install Toad Group Policy Editor and the Toad Group Policy Server as described in appropriate documentation. 2. Create groups, and then add users to groups. 3. Create restrictions to be associated with each group. 4. Publish the policy file and other associated files to the policy server. 5. Make sure your windows startup is designed to push the toad.pdl file out to users on login.
- 97. Getting Help Online Resources There are several online resources available to help you enhance your experience with Toad. With an internet connection, you can easily access these resources from within Toad and also from your internet browser. Note: Links in this help topic direct you to external websites and open a new browser window. Toad Online The Toad Online window includes a small web browser so you can access some of these resources directly from Toad. To access Toad Online through Toad » From the Help menu, select Toad Online. Online resources available from Toad Online include: What's New Tab The New in this Release page is located on the Toadsoft website. It provides an overview of new features in the current version of Toad for Oracle and some information on how you can use them to make working with Toad easier. Join Mailing Lists Tab This tab lets you easily join the Toad and Toad beta mailing lists. Click one of the buttons and your email editor opens a new email with the appropriate boxes filled in. Simply send the message and you will be subscribed to the mailing lists. Note: Accuracy of answers and solutions posted on the mailing lists are not monitored by Quest Support. These lists provide peer-to-peer support only. Release Notes Tab Click the release notes tab to display the release notes for Toad. 2
- 98. Toad for Oracle User Guide Getting Help 96 Online Resources Tab ToadWorld.com The Toad World site provides discussion forums, education opportunities, updates and announcements of new Toad products. Share code snippets with your fellow users, and learn valuable tips and tricks for using Toad. ToadWorld (http://toadworld.com) ToadWorld's Tutorial videos. Toadsoft.com Toadsoft.com is the website to search to find information about Toad: l Toad downloads l Toad How-To videos l Links to Quest resources l And more To access Toadsoft, go to http://toadsoft.com AskToad.com AskToad is a user-driven knowledgebase, running on Wiki technology. It is designed to provide answers, tips and hints about using Toad for Oracle. Quest Support Quest Support is available to customers who have a trial version of a Quest product or who have purchased a commercial version and have a valid maintenance contract. Quest Support provides around the clock coverage with SupportLink, our web self-service. Visit SupportLink at http://support.quest.com From SupportLink, you can do the following: l Quickly find thousands of solutions (Knowledgebase articles/documents). l Download patches and upgrades. l Seek help from a Support engineer. l Log and update your case, and check its status. View the Global Support Guide for a detailed explanation of support programs, online services, contact information, and policy and procedures. The guide is available at: http://support.quest.com/pdfs/Global Support Guide.pdf
- 99. Toad for Oracle User Guide Getting Help 97 Help File To access help » Do one of the following: l Press F1 anywhere in Toad for context-sensitive help. l From the Help menu, select Contents to access the main help page. Quick Search Bar You can find help about Toad quickly from various locations in Quest using the Quick Search Bar on the Main Toolbar. To search for Toad resources 1. Click the drop down arrow and select the locations you want to search: l ToadWorld online l ToadWorld and other Toad-related sites l AskToad (Toad wiki) l Knowledge Xpert l Toad Help Index 2. Enter a search term in the box. 3. Press Enter or click to search. Check for Updates If you have an internet connection, you can use the Check for Updates command to check for more recent versions of Toad for Oracle.
- 100. Toad for Oracle User Guide Getting Help 98 To check for updates 1. From the Help menu, select Check for Updates. 2. Click OK to close the message box. Download Toad Tips Toad provides the ability to update the Tips for your Toad tips window. If you have an internet connection, Toad can check for new tips and download them at any point. To download Toad Tips » Select Download Toad Tips from the Help menu. Frequently Asked Questions (FAQ) If what you need to know is not in this help file, a user-driven database of FAQs is located on the web at AskToad.com. You can also search the Toad email lists from this site. See the Toad Support site for more information. Show Tips Toad provides a tips window where you can both find tips to better get the most out of Toad, and also leave notes for yourself about how you best use Toad. The Tips window is window-specific: a new tips window is displayed when you open a new window within Toad. Because of this, you can enter notes for a specific window and have it visible only when you are using that window. The tips window consists of a small browser window (can be resized) containing two or three tabs. If there are tips for the window, the following tabs are displayed: l Tips - displays tips for the selected Toad window. l Notes - displays notes you can enter for the selected Toad window. If there are no tips for the selected window, the Tips tab does not appear, but you can still enter your own Notes and view all the tips for the window. To show the tips window » Do one of the following: l On the main menu, click . l From the Help menu, check Show Tips.
- 101. Toad for Oracle User Guide Getting Help 99 Navigating the tips window You can navigate through the tips for various windows by activating the tips list. To navigate through tips 1. Click the Show tips list button beside the browse buttons. 2. Click a window name in the left hand list to display tips for it. Notes tab Use the notes tab to enter your own notes for the Toad window you have active. Toad saves these notes between sessions, so you can use the Notes tab as a type of scratch pad: bits of code, hints on processes you use, and so on can be stored in this box. Hiding the tips window To hide the tips window » Do one of the following: l On the tips window, select the Do not Show Tips check box and click OK. l From the Help menu, uncheck Show Tips. Toad Advisor Toad is self-diagnosing. If you are having difficulties with Toad that you can't iron out, the Toad Advisor may be able to help you. It offers Warnings, Alerts, Hints and more concerning the current state of your Toad installation. If you are in a managed environment, it will specify which features in Toad are managed, and to what extent. To use Toad Advisor 1. From the Help menu, select Toad Advisor. 2. Check the tree structure for information about how to tweak Toad to work better in your situation: Warnings Describe things that should be fixed immediately Alerts Describe things that may have an impact upon Toad's functionality Hints Provide information about your Toad installation that may affect how Toad works Performance suggestions Describe settings that could be changed to improve speed of performance
- 102. Toad for Oracle User Guide Getting Help 100 About Toad This dialog box displays some helpful contact information. l Note the current version number of Toad. If you contact customer support, they will want to know what version you are using. l Clicking on "www.quest.com" opens your default web browser and navigates directly to the Quest Software, Inc. site. l Clicking on "info@quest.com" opens your default email client software to compose a new email to Quest for more information. Please note the version number of Toad in your email. To access the Help About dialog box » Select Help | About from the menu. Release Notes You can easily access the release notes from the Help menu. The release notes detail the changes made to the current release of Toad for Oracle. To read the release notes » From the Help menu, select Release Notes. Support Bundle Support Bundle Overview If you haven’t been able to find the answer to your question in the User’s Manual, or the Help files, you can contact us directly. An easy way to do this is by choosing Help | Support Bundle. The support bundle window provides information about several aspects of your Oracle and Toad setups. In addition, the Support Bundle lets you easily report problems to our peer-to-peer mailing lists or directly to Quest Support. See "Support Bundle Toolbar" (page 101) for more information. The information collected can be used to greatly improve troubleshooting of any problems. This information includes: l Application Information l Toad Version l Toad Registration Information l Toad Editions Options (Debugger, DBA, Xpert, and so on.) l Installation Type (Network or Local)
- 103. Toad for Oracle User Guide Getting Help 101 l EXE and Client Directories. Client directory only applies to network installations l Knowledge Xpert Version and Location l SPServer.dll Version and Location l Team Coding Information l If Team Coding Installed or not l Team coding settings l Oracle Client Information l Client Location l TNSNAMES.ORA Location l Oracle Server Information l Server Version l Server NLS_CHARACTERSET l Server NLS_NCHAR_CHARACTERSET l Connected User and Connect As (Normal, SYSDBA, SYSOPER) l System Information l Operating System Version l Total and Available Memory (Physical, Virtual, and Swap) l PATH Environment Variable l TNS_ADMIN Environment Variable l Oracle Homes Registry Data l All registry information for each installed home is displayed. This information is found under HKEY_LOCAL_MACHINESoftwareOracle Support Bundle Toolbar From the toolbar of the support bundle, you can accomplish several things. Button Command Copy support bundle to clipboard Save support bundle to file Refresh support bundle information Toad Mailing List This opens your email application with a pre-addressed email to the peer-to-peer Toad mailing list. See "Join Mailing Lists Tab" (page 95) for more information.
- 104. Toad for Oracle User Guide Getting Help 102 Button Command Quest Support This opens your email application with a pre-addressed email to our customer support department. Attach TOAD.INI to email If checked this attaches the TOAD.INI to any email sent through the support bundle, whether it is to the peer-to-peer Toad list or to Quest Support Attach SQL Tuning Support zip to emails If checked, this attaches the SQL Tuning support zip to any email sent through the support bundle, to either the peer-to-peer Toad list or to Quest Support. Use this information in body of email If checked, Toad will include the support bundle information in the body of the email sent to either the peer-to-peer Toad list or to Quest Support Troubleshooting Unicode Troubleshooting Toad now supports Unicode. For people already using Unicode-enabled databases, this should be a seamless transition. Note: Some Oracle features are not Unicode-enabled, or have specific Unicode requirements to function. Please see your Oracle documentation for information about these features. In addition, Toad Group Policy Manager is not Unicode-compliant. Squares in Files Instead of Characters Either the font you are using does not support Unicode, or the character set has not been installed on your computer. Question Marks in Files Instead of Characters Toad attempted to open a file with the wrong encoding setting. This has corrupted the data. Do not save the file. Close it and reopen using the correct Unicode encoding. See "Options - General" (page 661) for more information. Script Output and Compare Files Fonts In the Editor and the Compare Files, the font now defaults to fixed-width "Courier-New" font rather than the System font. In addition, you may only select fixed-width fonts in these windows.
- 105. Toad for Oracle User Guide Getting Help 103 Editor not Working correctly If you are an upgrading user, you may find errors when you attempt to use the Editor in Unicode. For example: object name highlighting, CTRL+Click, mouse over watch hints. This is because in order to maintain your custom settings to the Parser library, Toad did not replace the lexlib.lxl file. To fix the parser file 1. From the View menu, select Options. 2. Click the Editor - Behavior node. 3. Set the language dropdown to PL/SQL and then click . 4. Click the Parser tab and select Any Name. 5. Add (?r) to the beginning of the Regular expression test: 6. Click OK or Apply to save changes. Code Xpert Not Working with Unicode Characters This is a known issue. Code Xpert does not support Unicode. FTP Compatability Issues Toad's FTP feature can be used with Unicode, however, the code pages on the server, file and client must match. Known Issues There are some known issues with Unicode compatibility, both internally to Toad and externally from Oracle. See the release notes for more information. Hints and Tips: Connecting To Personal Oracle If you are having trouble connecting to Personal Oracle or creating a SQL*Net alias for PO7 or PO8, try one of the following four entries for the database name on the Toad login window:
- 106. Toad for Oracle User Guide Getting Help 104 2: BEQ-LOCAL LOCAL TCP-LOOPBACK For Schema/Passwords try one of the following pairs: DEMO/DEMO SCOTT/TIGER SYS/CHANGE_ON_INSTALL SYSTEM/MANAGER Hints and Tips: Table Does Not Exist Errors Toad tables are required for recalling previous Explain Plan results, Profiler, Team Coding, and Toad Security. You do not have to create these tables in order to use Toad, but you will need them for the functions listed above. To create these tables, run the Server Side Object Install Wizard. In addition, many V$ tables are required on other screens. For a list of tables required on a screen by screen basis, see V$ Tables Required.
- 107. Working with other Quest Products Knowledge Xpert You can use Quest Software's Knowledge Xpert as a comprehensive technical resource to find answers to technical questions without the need to search through manuals, books, or internet sites. Just type a keyword to access technical topics, database specific information, and guidance from experts that can help you tune, monitor, and manage your environment more efficiently and develop best practice, high performance database applications. The information Knowledge Xpert displays gives you the background insights, information about SQL commands, working examples, and performance considerations you need to make effective decisions. Knowledge Xpert integrates seamlessly with other Quest products such as Toad and SQL Navigator, which means you never have to shut down to look for answers. Knowledge Xpert is a stand-alone product, and as such has its own help file. To open Knowledge Xpert help 1. Open Knowledge Xpert. 2. Do one of the following: l Press F1 l Click the About dropdown arrow button and select Help Contents. Using Knowledge Xpert in Toad Knowledge Xpert is available from several places within Toad. You can use it to look up information from within the editor, or you can search it from the main toolbar. To use Knowledge Xpert from the toolbar 1. Click the Knowledge Xpert button. 2. Enter a term in the Search box and then click OK. To use Knowledge Xpert within the Editor 1. Select a word or command within the code that you would like information about. 2. Right-click and select Search Knowledge Xpert. 3
- 108. Toad for Oracle User Guide Working with other Quest Products 106 Using SQL Optimizer with Toad This feature is available only in Toad Editions that include the SQL Optimizer. Starting with Toad Xpert 9.5, Quest SQL Optimizer 7.x for Oracle is installed in place of SQL Tuning. SQL Optimizer 7.x is an enhanced version of the previous SQL Tuning for Oracle 6.1.2 (or earlier) with an improved UI, workflow and much more functionality. See "Quest SQL Optimizer Overview" (page 610) for more information. To launch Quest SQL Optimizer for Oracle from various places in Toad l Editor - Click on the Editor toolbar. See "Missing Toolbars " (page 138) for more information. l Create/Alter windows for: l View l Trigger l Snapshot l Query Builder - Generated Query tab toolbar. See "Query Builder Toolbar" (page 933) for more information. l Session Browser - Current Statement Details tab. See "Current Statement Details" (page 561) for more information. l SGA Trace/Optimization Window - SQL Tab. See "SGA Trace/Optimization" (page 567) for more information. l Schema Browser tabs: l Views | Select a view | Right-click and select Optimize View's SQL. l Snapshots | Select a view | Right-click and select Optimize Snapshot's SQL. l Procedures | Details | Code tab | Highlight the SQL you want to tune | Click the Optimize SQL button on the tab's toolbar. l Triggers | Details | Code tab | Highlight the SQL you want to tune | Click the Optimize SQL button on the tab's toolbar. To launch Quest SQL Optimizer for Oracle standalone » Select Start | All programs | Quest Software | Quest SQL Optimizer for Oracle | Quest SQL Optimizer 7.x for Oracle. Note: SQL Tuning for Oracle 6.1.2 (or earlier) can not be launched as a standalone product. Switching between versions of SQL Optimizer You cannot launch both Quest SQL Optimizer (7 or above) and SQL Tuning (6.1.2 or earlier) simultaneously from Toad since there is only one function that calls the SQL optimization
- 109. Toad for Oracle User Guide Working with other Quest Products 107 program. Therefore, if you have both versions installed you can switch between them by using the SQL Optimizer Version Selector. To set the active version 1. Close Toad and SQL Optimizer. 2. Select Start | All Programs | Quest Software | Quest SQL Optimizer for Oracle | SQL Optimizer Version Selector. 3. Select the version you want active. 4. Click Set Active. 5. Click Close. If you select SQL Tuning for Oracle (6.1.2 or earlier), you can still run Quest SQL Optimizer from Start | All programs | Quest Software | Quest SQL Optimizer for Oracle | Quest SQL Optimizer 7.2 for Oracle. SQL Tuning for Oracle can only be launched from within Toad. Benchmark Factory Note: Benchmark Factory is a standalone product. For full information about using Benchmark Factory, please open Benchmark Factory and see its relevant documentation. Benchmark Factory is a database performance and code scalability testing tool that simulates users and transactions on the database and replays production workload in non-production environments. This enables developers, DBAs, and QA teams to validate that their databases will scale as user load increases, application changes are made, and platform changes are implemented. Benchmark Factory is available for Oracle, SQL Server, DB2, Sybase, and MySQL. You can connect to Benchmark Factory from Toad, set Performance Test Settings and send the test to Benchmark Factory for further analysis. Benchmark Factory can be accessed from Toad in several locations: l Schema Browser pages - Right-click on the object to be tested and select Test Performance. l Favorites - See "Favorites" (page 1005) for more information. l Functions - See "Schema Browser: Functions" (page 1008) for more information. l Packages - See "Schema Browser: Packages" (page 1040) for more information. l Procedures - See "Schema Browser: Procedures" (page 1044) for more information. l Triggers - See "Schema Browser: Triggers" (page 1090) for more information. l Code Road Map - Right-click on the object to be tested and select Test Performance. See "Road Map Overview" (page 721) for more information. l Project Manager - Right-click on the object to be tested and select Test Performance. See "Project Manager Overview" (page 472) for more information.
- 110. Toad for Oracle User Guide Working with other Quest Products 108 l Query Builder - In the Generated Query tab, click the Benchmark Factory button. See "Query Builder Overview" (page 933) for more information. l TKPROF Wizard - In the Local Options area of the Wizard, select Send trace files to Benchmark Factory. See "TKProf Interface Wizard" (page 276) for more information. l Trace File Browser - With a Trace file open in the browser, click the Benchmark Factory button on the toolbar. See "Trace File Browser" (page 312) for more information. Note: Sending a trace file to Benchmark Factory will not open the parameters window described below. Setting Benchmark Factory Properties When you choose to send an object to Benchmark Factory, you will need to set Benchmark Factory properties in addition to the parameters required by the database object. For full descriptions of these properties, see the Benchmark Factory documentation. Option Description BMF Tests to Perform Verify Service Level Agreement or Goal Pass information through from Toad to Benchmark Factory to check Service Level Agreement compliance. Test for Scalability based upon User Load Pass information through from Toad to Benchmark Factory to run a scalability test based upon user load. SLA These options apply to the Verify Service Level Agreement or Goal option. Rule to apply Select the rule to apply to the Service Level Agreement or goal. Options include: l Response time - run test until the response time exceeds the specified value. l Throughput - run test until the maximum transactions per second is discovered. Maximum response time (milliseconds) For response time testing, specify the maximum response time in milliseconds. If you have chosen Throughput, this box will be disabled. Minimum number of virtual users Enter the number of virtual users you want to begin the test. Maximum number of virtual users Enter the number of virtual users indicating when the test should stop.
- 111. Toad for Oracle User Guide Working with other Quest Products 109 Option Description Step value for virtual users Step up this number of virtual users for each test iteration until you reach the maximum number. Duration to execute SQL for each userload (seconds) Specify how long each iteration (execution at the above- specified userload) should take to execute. Enter this number in seconds. Scalability These options apply to the Scalability Test based upon User Load. Number of virtual users to execute the SQL statements Enter the number of virtual users that will execute the SQL statements. Execute Each statement Select one of the following options to specify how to time the scalability test: l Number of Times - Enter the number of times each statement should be executed at a specific userload. l Duration (in seconds) - Enter the length of time each iteration should take to execute. Latency Think Time l Duration Model - Select the latency model you want to use. The default is Absolute. l Duration - Enter the duration of think time in milliseconds. The default is 100. Quest Code Tester Integration Quest Code Tester for Oracle automates the process of testing PL/SQL programs, making it possible for you to identify bugs and verify program correctness in a fraction of the time it has taken previously. Rather than write (and maintain) thousands of lines of test code, PL/SQL programmers describe the expected behavior of their programs through a graphical interface. Code Tester then generates the required test code, and runs it whenever you request (either through the interface or via command line execution). If you have a license for the Quest Code Tester and have previously set up your tests, you can launch them from your code in the Toad Editor or from a right-click menu in the Schema Browser. l If you are running Code Tester 1.8 or higher, and have saved your passwords, Toad will automatically log in for you and simply open the results window. l If you are running Code Tester 1.6 or below, Toad will open the login window and you will need to login before the results are displayed.
- 112. Toad for Oracle User Guide Working with other Quest Products 110 For more information about the Quest Code Tester, please see your Code Tester documentation or press F1 from within Code Tester. To launch Quest Code Tester from the Editor 1. Open the code you want to test in the Toad Editor. 2. Click . 3. Click Code Tester to open the full application (Close returns to Toad). To launch Quest Code Tester from the Schema Browser 1. Select the code you want to test in the Schema Browser. 2. Right click in the Source tab and select Code Tester . 3. Click Code Tester to open the full application (Close returns to Toad).
- 113. Toad Basics Toad Tips ToadTips contains easy to follow tips for various windows within Toad. These tips are dynamic, and Toad can check automatically to see if there are new tips. See "Download Toad Tips" (page 98) for more information. To show tips for all windows » From the Help menu, select Show Tips. To hide all tips but the current tip » In the tip window, select both Hide All and Except this check boxes. To display the entire tip file » Click the All tab in a tip window. Errors Toad Error If a command fails, the Toad Error dialog box appears. l Use the Clipboard button to copy the error. You can then Paste it into an email for customer support. See "Support Bundle Overview" (page 100) for more information. l If the error dialog box contains an ORA-number, as the example above does, click Help. Toad calls the Oracle Helpfile and displays the error message topic in a new window. From this window you can print the topic or move to the index or table of contents for Oracle help. 4
- 114. Toad for Oracle User Guide Toad Basics 112 l If you have the Knowledge Xpert installed, click Details for more technical information about the error. l Click OK to close the Toad Error dialog box. Application Error If Toad itself fails, the Error dialog box appears. This type of an error creates a log, saved as toad.elf. This Eureka LogFile (.elf) contains both the application information and the callstack of the error created, and can be very helpful to Quest Support in solving issues you are having with Toad. The elf is displayed when you click as directed. You can copy this file to the clipboard and send it to support. Alternately, it is automatically saved in the Support Bundle, which you can use in various ways to get help. See "Support Bundle Overview" (page 100) for more information. You can copy this file to the clipboard and send it to support. Alternately, it is automatically saved in the Support Bundle
- 115. Toad for Oracle User Guide Toad Basics 113 RAC Support Toad supports Oracle's support for RAC systems. If you have multiple database server boxes, Oracle RAC lets you start an Oracle instance on each server, and have all those instances open the same shared database (or shared set of data files). In this way, you can scale the size of your database server by adding more computers as you add users. Multiple computers, one database. Additional Information for RAC Connections When you log in to a RAC connection, Toad notes this fact and makes additional information available in some of its windows to help you manage that connection. Caption If a RAC connection is in effect, the caption of the Toad Main window will reflect this by showing: TOAD: RAC[n], where n is the session id. Connection bar In the connection bar, RAC connections are listed as SCHEMA@RAC[n], where n is the instance number of the connection. Database Monitor Within the database monitor, all information is provided as per a single connection. However, it is summarized or aggregated for all the instances that compose the RAC cluster. For example, looking at SGA memory - if each RAC instance is 150 MB, and you have two RAC instances, this column will display 300MB. See "Toad Database Monitor" (page 535) for more information. Oracle Parameters Screen RAC database single grid view - The Single Grid checkbox above the grid and to the right of the toolbar toggles whether Toad displays a single grid or a multi-grid. Toad sorts first by default on the option and then by the instance name for easier readability. RAC database multi-grid view - If you choose the multi-grid view, Toad displays a separate tab for each RAC instance. See "Oracle Parameters" (page 357) for more information. Drag-and-Drop You can Drag-and-Drop objects between many Toad windows, and between Toad and some external applications. These possible Drag-and-Drop combinations include:
- 116. Toad for Oracle User Guide Toad Basics 114 From To Action Applicable Objects Project Manager Query Builder Objects added to table model area Tables/Views/Synonyms ER Diagram Objects added to table model area and LHS list Tables/Views/Synonyms Editor Object name added to editor All Objects Editor File loaded in editor, or just file contents loaded in editor Files Editor Object name added to editor All Objects besides PL/SQL Objects and Types Editor Objects loaded into Editor PL/SQL Objects and Types Editor File loaded in Editor Files Text Editor Object name added to editor All Objects Text Editor File loaded in text editor Files Schema Browser - Favorites Tab Objects added to Folder in Favorites tab All Objects supported in Schema Browser besides Synonyms and Types Script Manager File Reference added to Script Manager Files Object Search Query Builder Objects added to table model area Tables/Views/Synonym ER Diagram Objects added to table model area and LHS list Tables/Views/Synonym Editor Object name added to editor All Objects
- 117. Toad for Oracle User Guide Toad Basics 115 From To Action Applicable Objects Editor Object name added to editor All Objects besides PL/SQL Objects and Types Editor Objects loaded into Editor PL/SQL Objects and Types Text Editor Object name added to editor All Objects Project Manager Objects added to Project Manager Project All Objects supported in Object Search Schema Browser - Favorites Tab Objects added to Folder in Favorites tab All Objects supported in Schama Browser besides Synonyms and Types Object Palette Query Builder Objects added to table model area Tables/Views/Synonyms ER Diagram Objects added to table model area and LHS list Tables/Views/Synonyms Editor Object name added to editor Tables/Views/Synonyms/Columns Editor Object name added to editor Tables/Views/Synonyms/Columns Text Editor Object name added to editor Tables/Views/Synonyms/Columns Project Manager Objects added to Project Manager Project Tables/Views/Synonyms Schema Browser - Favorites Tab Objects added to Folder in Favorites tab Tables/Views Schema Browser Query Builder Objects added to table model area Tables/Views/Synonyms ER Diagram Objects added to table model area and LHS list Tables/Views/Synonyms
- 118. Toad for Oracle User Guide Toad Basics 116 From To Action Applicable Objects Editor Object name added to editor All Objects Editor Object name added to editor All Objects besides PL/SQL Objects and Types Editor Objects loaded into Editor PL/SQL Objects and Types Text Editor Object name added to editor All Objects Project Manager Objects added to Project Manager Project All Objects supported in Project Manager Schema Browser - Favorites Tab Objects added to Folder in Favorites tab All Objects supported in Schema Browser besides Synonyms and Types Output Window/Find In Files Project Manager - Project node File reference added to Project Manager Project Files Project Manager - Folder node Reference added Files Project Manager - FTP node File upload to FTP server Files Editor Files loaded in Editor. File name appears in new tab Files Editor Files loaded in Editor. File name appears in new tab Files Text Editor Files loaded in Text Editor. File name appears in new tab Files
- 119. Toad for Oracle User Guide Toad Basics 117 From To Action Applicable Objects Script Manager File Reference added to Script Manager Files Windows Explorer Project Manager File reference added to Project Manager Files Editor File loaded in Editor Files Editor File loaded in Editor Files Text Editor File loaded in Text Editor Files Code Snippets Editor Snippet added to Editor Code Snippet from list Editor Snippet added to Editor Code Snippet from list Text Editor Snippet added to Text Editor Code Snippet from list Archive Window Project Manager - Folder node File unzipped and added to folder. Prompts to add to PM Files inside zip archive Project Manager - FTP node File unzipped and uploaded. Prompts to add to PM Files inside zip archive Toad Task Scheduler Interface Project Manager Windows task node added to Project Manager Scheduled Tasks Task Bar & Status Bar Task Bar This feature is activated or deactivated using View | Toad Options | Toolbars/Menus | Show Connect Strings. See "Show connect strings on Window Bar" (page 685) for more information.
- 120. Toad for Oracle User Guide Toad Basics 118 At the bottom of the main Toad window, Toad displays the various connections currently open. l Click one of these connections to activate the last window you used in that connection. l Hover over them to display the following information: l user l connection type (sysDBA, sysOPER) l sysdate on server l database version l your session ID Note: The SID will only display if you have access to V$session and are not logged in as sysDBA or sysOPER. l If your SQL windows are maximized, right-click one of these connections and Toad displays a menu of options. Status Bar At the bottom of each individual window within Toad is a status bar. This bar provides information about the active window. l The first frame in the status bar is the row and column your cursor is located in the results grid. If you have not opened a results grid, or your cursor is not in the grid, this frame will be blank. l The second frame is the connection used by the active window. l The last frame is the last displayed error. You can hover over the information in this bar to see additional information. This includes the session ID (SID), sysdate, and Oracle version you are using. The SID is displayed only if you have access to V$Session and are not logged in as SysDBA or SysOper.
- 121. Toad for Oracle User Guide Toad Basics 119 Execution time When you execute a script or a command in the Editor, the first frame changes to a time. The timing is the amount of time from the point that Toad sends the query to Oracle and the first result set returns. It does not describe how long it took to fetch the data. ASCII Chart Dec Hex Oct UTS ASCII CharName 0 $00 0000 NUL NUL 1 $01 0001 SOH SOH 2 $02 0002 STX STX 3 $03 0003 ETX ETX 4 $04 0004 EOT EOT 5 $05 0005 ENQ ENQ 6 $06 0006 ACK ACK 7 $07 0007 BEL BEL 8 $08 0010 BS BS 9 $09 0011 HT HT 10 $0A 0012 LF LF 11 $0B 0013 VT VT 12 $0C 0014 FF FF 13 $0D 0015 CR CR 14 $0E 0016 SO SO 15 $0F 0017 SI SI 16 $10 0020 ACK ACK 17 $11 0021 DC1 DC1 18 $12 0022 DC2 DC2 19 $13 0023 DC3 DC3 20 $14 0024 DC4 DC4 21 $15 0025 NAK NAK 22 $16 0026 SYN SYN 23 $17 0027 ETB ETB 24 $18 0030 CAN CAN 25 $19 0031 EM EM 26 $1A 0032 SUB SUB 27 $1B 0033 ESC ESC 28 $1C 0034 FS FS 29 $1D 0035 GS GS
- 122. Toad for Oracle User Guide Toad Basics 120 30 $1E 0036 RS RS 31 $1F 0037 US US 32 $20 0040 1 Space 33 $21 0041 2 ! Exclamation Mark 34 $22 0042 3 " Double Quote 35 $23 0043 4 # Number Sign 36 $24 0044 5 $ Dollar Sign 37 $25 0045 6 % Percent Sign 38 $26 0046 7 & Ampersand 39 $27 0047 8 ' Single Quote 40 $28 0050 9 ( Left Parenthesis 41 $29 0051 10 ) Right Parenthesis 42 $2A 0052 11 * Asterisk 43 $2B 0053 12 + Plus Sign 44 $2C 0054 13 , Comma 45 $2D 0055 14 - Minus Sign 46 $2E 0056 15 . Period 47 $2F 0057 16 / Slash, Virgule 48 $30 0060 17 0 0 49 $31 0061 18 1 1 50 $32 0062 19 2 2 51 $33 0063 20 3 3 52 $34 0064 21 4 4 53 $35 0065 22 5 5 54 $36 0066 23 6 6 55 $37 0067 24 7 7 56 $38 0070 25 8 8 57 $39 0071 26 9 9 58 $3A 0072 27 : Colon 59 $3B 0073 28 ; Semicolon 60 $3C 0074 29 < Less Than Sign 61 $3D 0075 30 = Equals Sign 62 $3E 0076 31 > Greater Than Sign 63 $3F 0077 32 ? Question Mark 64 $40 0100 33 @ At Sign 65 $41 0101 34 A A 66 $42 0102 35 B B 67 $43 0103 36 C C 68 $44 0104 37 D D 69 $45 0105 38 E E
- 123. Toad for Oracle User Guide Toad Basics 121 70 $46 0106 39 F F 71 $47 0107 40 G G 72 $48 0110 41 H H 73 $49 0111 42 I I 74 $4A 0112 43 J J 75 $4B 0113 44 K K 76 $4C 0114 45 L L 77 $4D 0115 46 M M 78 $4E 0116 47 N N 79 $4F 0117 48 O O 80 $50 0120 49 P P 81 $51 0121 50 Q Q 82 $52 0122 51 R R 83 $53 0123 52 S S 84 $54 0124 53 T T 85 $55 0125 54 U U 86 $56 0126 55 V V 87 $57 0127 56 W W 88 $58 0130 57 X X 89 $59 0131 58 Y Y 90 $5A 0132 59 Z Z 91 $5B 0133 60 [ Left Bracket 92 $5C 0134 61 Back Slash 93 $5D 0135 62 ] Right Bracket 94 $5E 0136 63 ^ Circumflex 95 $5F 0137 64 _ Underline 96 $60 0140 65 ` Accent 97 $61 0141 66 a a 98 $62 0142 67 b b 99 $63 0143 68 c c 100 $64 0144 69 d d 101 $65 0145 70 e e 102 $66 0146 71 f f 103 $67 0147 72 g g 104 $68 0150 73 h h 105 $69 0151 74 i i 106 $6A 0152 75 j j 107 $6B 0153 76 k k 108 $6C 0154 77 l l 109 $6D 0155 78 m m
- 124. Toad for Oracle User Guide Toad Basics 122 110 $6E 0156 79 n n 111 $6F 0157 80 o o 112 $70 0160 81 p p 113 $71 0161 82 q q 114 $72 0162 83 r r 115 $73 0163 84 s s 116 $74 0164 85 t t 117 $75 0165 86 u u 118 $76 0166 87 v v 119 $77 0167 88 w w 120 $78 0170 89 x x 121 $79 0171 90 y y 122 $7A 0172 91 z z 123 $7B 0173 92 { Left Brace 124 $7C 0174 93 | Vertical Bar 125 $7D 0175 94 } Right Brace 126 $7E 0176 95 ~ Tilde 127 $7F 0177 96 DEL DEL Toolbars, Menus and Shortcut Keys Configurable Toolbars and Menus - Overview The main Toad toolbar and menu bar is configurable, as are the Editor toolbar and keyboard shortcuts. This lets you arrange Toad to best reflect how you want to work. If you are using a custom configuration, new commands will not be added to your custom toolbars when you upgrade Toad. However, you can see both new commands and commands that have been completely removed from the toolbars and menus. Note: Commands that have been removed from the toolbar and not the menu bar (or the other way around) will not appear in the Unused area. Because of this, it may not be obvious that you have removed a command from one location and not the other. To view and add new/removed commands 1. Right-click over the toolbar and select Customize. 2. Click the Commands tab. 3. Select [New] or [Unused]. 4. Drag a command to the toolbar/menu of your choosing. 5. Click Close.
- 125. Toad for Oracle User Guide Toad Basics 123 Restoring Toolbar Defaults To restore toolbar defaults » Right-click over the toolbar and select Restore defaults. Usage Configuration In addition, Toad menu bars can configure themselves to how you work with Toad. As you work, Toad collects usage data on the commands you use most often. Menus personalize themselves to your work habits, moving the most used commands closer to the top of the list, and hiding commands that you use rarely. See "Personalized Menus and Toolbars" (page 130) for more information. You can: l Alter toolbars, including the menu bar.See "Altering Toolbars" (page 131) for more information. l Display and hide toolbars. You cannot hide the menu bar.See "Show/hide toolbar" (page 134) for more information. l Create a new, custom toolbar. See "Creating Toolbars" (page 131) for more information. l Restore the default toolbar. See "Restoring Lost Toolbars" (page 134) for more information. l Change and add shortcuts for menu commands.See "Menu hotkeys" (page 129) for more information. l Adjust how toolbars display and dock. See "Toolbars/Menus" (page 685) for more information. Shortcut Keys General Shortcut Keys The following is a list of general Toad Shortcut Keys. In addition, there are specific shortcut keys for the Debugger, and Editor. You can also edit your shortcut keys. See "Menu hotkeys" (page 129) for more information. Note: If you have configured your shortcuts, shortcuts added in Toad upgrades will need to be added. You can also revert your customizations to the default to gain access to all shortcuts and new features. See "Toolbars/Menus" (page 685) for more information. Shortcut Key Function F1 Windows Help File F2 Toggle Full screen Editor
- 126. Toad for Oracle User Guide Toad Basics 124 Shortcut Key Function SHIFT+F2 Toggle Full screen grid F3 Find Next Occurrence SHIFT+F3 Find Previous Occurrence F4 Describe Table, View, Procedure, Function, or Package in popup window F5 Editor: Sets or Deletes a Breakpoint in the Editor for PL/SQL debugging Editor: Execute as script F6 Toggle between Editor and Results panel F7 Clear All Text, Trace Into in the Editor F8 Recall previous SQL statement in the Editor, Step Over in the Editor for PL/SQL debugging F9 Execute statement in the SQL editor, Compile in the Editor CTRL+F9 Verify statement without execution (parse) in the Editor, Set Parameters in the Editor for PL/SQL debugging SHIFT+F9 Execute current statement at cursor in the Editor, Execute Current Source in the Editor without PL/SQL debugging F10 Popup Menu F11 Run (continue execution) in the Procedure Editor for PL/SQL debugging F12 Run to cursor in the Editor for PL/SQL debugging. CTRL+F12 Pass the SQL or Editor contents to the specified External Editor (Specified in Options > Editors). CTRL+A Select All Text CTRL+ALT+B Display the PL/SQL Debugger Breakpoints window CTRL+C Copy CTRL+D Display procedure parameters CTRL+ALT+D Display the PL/SQL Debugger DBMS Output window
- 127. Toad for Oracle User Guide Toad Basics 125 Shortcut Key Function CTRL+E Execute Explain Plan on the Current Statement CTRL+ALT+E Display the PL/SQL Debugger Evaluate/Modify window CTRL+F Find Text CTRL+G Goto Line CTRL+L Convert Text to Lowercase CTRL+M Make Code Statement. See "Strip Code Statement and Make Code Statement Functions" (page 893) for more information. CTRL+N Recall Named SQL Statement CTRL+O Opens a Text File CTRL+P Strip Code Statement. See "Strip Code Statement and Make Code Statement Functions" (page 893) for more information. CTRL+R Find and Replace SHIFT+CTRL+R Uses the ALIASES.TXT file to substitute the alias with the associated table name CTRL+S Saves File SHIFT+CTRL+S Save File As CTRL+ALT+S Display the PL/SQL Debugger Call Stack window CTRL+ T Columns Dropdown CTRL+U Converts Text to Uppercase CTRL+V Paste CTRL+ALT+W Display the PL/SQL Debugger Watches window CTRL+X Cut CTRL+Z Undo Last Change SHIFT+CTRL+Z Redo Last Undo ALT+UP Display Previous Statement ALT+DOWN Display Next Statement (after ALT+UP)
- 128. Toad for Oracle User Guide Toad Basics 126 Shortcut Key Function CTRL+HOME In the data grids, goes to the top of the recordset CTRL+END In the data grids, goes to the end of the recordset CTRL+TAB Cycles through the collection of MDI Child windows CTRL+ENTER Execute current SQL (same as SHIFT+F9) CTRL+. (period) Autocompletes tablenames Editor Shortcut Keys Below is a list of Shortcut keys used in the Editor. See "Shortcut Keys" (page 123) for more information about shortcut keys in other areas. Note: If you have configured your shortcuts, shortcuts added in Toad upgrades will need to be added. You can also revert your customizations to the default to gain access to all shortcuts and new features. See "Toolbars/Menus - Shortcuts" (page 686) for more information. Shortcut Key Function F1 Windows Help File F2 Toggle Full screen Editor F3 Find Next Occurrence SHIFT+F3 Find Previous Occurrence F4 Describe Object at cursor. Describe Table, View, Procedure, Function, or Package in popup window F5 Execute as Script F6 Toggle between Editor and Results tabs F7 Clear All Text F8 Toggle Recall SQL statement panel F9 Execute statement CTRL+ F9 Describes statement at cursor SHIFT+ F9 Execute snippet at cursor F10 Popup (right-click) Menu
- 129. Toad for Oracle User Guide Toad Basics 127 Shortcut Key Function F11 Execute code without using the Debugger CTRL+ A Select All Text CTRL+ C Copy CTRL+E Execute Explain Plan on the Current Statement CTRL+F Find Text CTRL+G Goto Line CTRL+H Highlight snippet CTRL+I Init caps for highlighted code. CTRL+L Converts Text to Lowercase CTRL+M Make Code Statement CTRL+N Recall Named SQL Statement CTRL+O Opens File CTRL+P Strip Code Statement CTRL+R Find and Replace CTRL+S Save File SHIFT+CTRL+S Save File As CTRL+T Columns Dropdown CTRL+U Converts Text to Uppercase CTRL+V Paste CTRL+X Cut CTRL+Z Undo Last Change CTRL+. (period) Display popup list of matching tablenames SHIFT+CTRL+Z Redo Last Undo ALT+UP+ Display Previous Statement ALT+DOWN Display Next Statement (after ALT+UP)
- 130. Toad for Oracle User Guide Toad Basics 128 Shortcut Key Function ALT+PageUP Navigate to the previous tab in the editor ALT+PageDOWN Navigate to the next tab in the editor CTRL+ALT+PAGEUP Navigate to the previous results panel tab CTRL+ALT+PAGEDOWN Navigate to the next results panel tab CTRL+HOME In the data grids, goes to the top of the recordset CTRL+END In the data grids, goes to the end of the recordset CTRL+SPACE Display the code template pick list CTRL+TAB Cycles through the collection of MDI Child windows Debugger Shortcut Keys This is a list of keyboard shortcuts used in the Debugger. See "Shortcut Keys" (page 123) for more information about shortcut keys in other areas. Note: If you have configured your shortcuts, shortcuts added in Toad upgrades will need to be added. You can also revert your customizations to the default to gain access to all shortcuts and new features. See "Toolbars/Menus" (page 685) for more information. Shortcut Key Function SHIFT+F5 Set or Delete a Breakpoint on the current line. CTRL+F5 Add watch at cursor. SHIFT+F7 Trace Into. SHIFT+F8 Step Over. SHIFT+F10 Trace Out. SHIFT+CTRL+F9 Set Parameters. F10 Display Right-Click Menu. F11 Run statement using the method appropriate for the debugger selection: l Script debugger - execute as script. l DBMS or JDWP debugger - execute as PL/SQL. F12 Run to Cursor.
- 131. Toad for Oracle User Guide Toad Basics 129 Shortcut Key Function CTRL+ALT+B Display Breakpoints. CTRL+ALT+D Display DBMS_Output. CTRL+ALT+E Evaluate/Modify. CTRL+ALT+S Display Call Stack. CTRL+ALT+W Display Watches. CTRL+PAGE UP Move up in the Navigator Tree. CTRL+PAGE DOWN Move down in the Navigator Tree. CTRL+MouseClick Load source into Editor for object at cursor. Configure Menu Shortcuts You can also configure both types of menu shortcuts: menu hotkeys and shortcut keys. See Configure Menu Shortcuts for more information.See "Shortcut Keys" (page 123) for more information about default shortcut keys in other areas. Note: If you have configured your shortcuts, shortcuts added in Toad upgrades will need to be added. You can also revert your customizations to the default to gain access to all shortcuts and new features. See "Restoring Toolbar Defaults" (page 123) for more information about restoring defaults. Menu hotkeys Menu hotkeys are the keys that you access by pressing the ALT key and then the character in the menu item that is underlined to open that menu or command. You can configure the underlined character. To change the hotkey 1. Right-click over the toolbar and select Customize. 2. Right-click the menu item you want to change. In the name box, notice that the character underlined has an ampersand (&) before it. 3. You can change the underlined character by changing the location of the ampersand. For example, &Tools, underlines the T, while T&ools underlines the o. Shortcut keys Shortcut keys are the keys you type to access a command directly, without going through the menu. For example, you can use CTRL+S to save a file. Toad lets you configure these keys so that you can access commands more easily.
- 132. Toad for Oracle User Guide Toad Basics 130 To configure shortcut keys 1. From the toolbar area, right-click and select Menu Shortcuts. 2. Click the command you want to set a shortcut key for. Type the keystrokes you want to use. This option only allows you to use one keystroke after a control key (such as CTRL or ALT). 3. The shortcut key is changed as you type. If there is a conflict with another shortcut key, an asterisk (*) appears in the Conflict column. You can then find the conflict and remove it. Toolbars Customize Toolbar Options You can customize your display from the Options tab of the Customize dialog box. Toolbars can also be altered. See "Altering Toolbars" (page 131) for more information. An online video tutorial is also available for this feature. This video opens in a new browser window and requires an internet connection. To customize the toolbar options 1. Right click over the toolbar and select Customize. 2. Click the Options tab. Personalized Menus and Toolbars Toad menu bars can configure themselves to how you work with Toad. As you work, Toad collects usage data on the commands you use most often. Menus personalize themselves to your work habits, moving the most used commands closer to the top of the list, and hiding commands that you use rarely. l From the Options tab, select Menus show recently used commands first. l To turn this option off, clear Menus show recently used commands first. Alternatively, hidden commands can be displayed when you select a menu and wait a few seconds, the remainder of the menu appears. This option can be selected or deselected. If it is deselected, you can display the remainder of the menu by clicking the arrow that is the last option on the menu: Other Other customizations you can make to your toolbars are: l Large icons l Show/Hide tooltips on toolbars
- 133. Toad for Oracle User Guide Toad Basics 131 l Show/hide shortcut keys in tooltips l Menu animation, including unfolding menus, sliding menus, random animation, or none Creating Toolbars If you want your Main toolbar to look much different from the Toad default toolbar, it may be easier to create your own custom toolbar than to customize the default toolbar. To create a custom toolbar 1. Right-click over the toolbar and select Customize. 2. Click New. 3. Name your new toolbar, and click OK. 4. Click the Commands tab. 5. Click a category. Note: Commands are separated into Categories. Each Category listed in the left panel corresponds to a menu item in the menu bar, with the exception of Menus, which lets you put an entire menu into your new toolbar. 6. Click and drag the command into the new toolbar. By default, if there is an icon for that command, the icon will display in the toolbar. To display the text instead of the icon, or vice versa, right-click the icon in your toolbar and select the appropriate option. (See Alter Toolbar for more information.) 7. Continue adding and moving commands until the menu is organized as you want it. l Move the commands around in different orders on the toolbar by clicking and dragging the icon or text. l Add a separator between groups of commands, just click one of the commands and drag it slightly to the right. Depending on how your toolbar is organized, the separator will be placed either above the moved command or to the left. l Resize the toolbar by clicking and dragging a side of it. 8. Toolbars can be docked at any side of the screen, or left as floating palettes. Floating palettes remain on top of all Toad windows. Altering Toolbars To change toolbars 1. Right-click the toolbar, and then select Customize. 2. Change commands as desired.
- 134. Toad for Oracle User Guide Toad Basics 132 To change the order of commands » Click and drag the item on the toolbar to where you want it. An I-bar pointer marks where the command will be dropped. Note: You can do this within the menus and submenus as well. See "Rearrange Commands" (page 143) for more information. To add commands » Drag a command from the right panel of the Customize dialog box to the toolbar. An I- bar pointer marks where the command will be dropped. To change icons to text or text to icons 1. Right-click the command you want to change. 2. Select the appropriate option: Default This is the default choice. In toolbars, if there is an icon, the icon will be displayed. If there is no icon attached to the command, the text will be displayed. In menu bars, both the icon and the text will be displayed. Text only (always) This changes the option to display only the text of the command. Icons are hidden. Text only (in menus) This displays only the text of the command if the toolbar is a menu bar. If the command is listed in a toolbar, the default still applies. Image and text This option displays both the icon and the text, whether the command is located in a toolbar or as part of a menu. To change the text on the toolbar Note: This is not the same as the tooltip hints that pop up when you hover your mouse above an icon or command. 1. Right-click the icon or text you want to change. 2. Rename the command in the Name box. If you want a hotkey defined, include an ampersand (&) before the letter you want to define. Note: These are not the same as Toad shortcut keys, but rather the underlined letter for keyboard navigation. See "Menu hotkeys" (page 129) for more information. To remove a command from the toolbar » Click on a command and drag it off of the toolbar.
- 135. Toad for Oracle User Guide Toad Basics 133 To see what has been removed » Select [Removed] in the commands list. To restore commands » Do one of the following: l From the [Removed] list, drag the command back to the toolbar or menu. l From the Toolbars tab, select the toolbar you want to restore and click Restore. Locking Toolbars Once you have customized your toolbars in the manner you want, you can lock the toolbars so that it is more difficult to inadvertently change your customizations. You can also lock them to the default. To lock toolbars » Right-click over the toolbars and select Lock Toolbars. Window Bar The window bar in the main window displays the windows currently open in Toad. The window bar is, by default, located just below the connection bar. Tooltips on the window bar display the full window caption. Options for the window bar appear under Toad Options | Toolbars/Menus. See "Toolbars/Menus" (page 685) for more information. To turn off the window bar » Right-click over it and clear the Window Bar check box. Note: If you are using a read only toolbar configuration and you want the window
- 136. Toad for Oracle User Guide Toad Basics 134 bar to remain turned off, check Options | Toolbars/Menus| Allow docking/hiding of read only toolbars. To turn on the window bar » Right-click over the main toolbar and check Window Bar. To change windows » In the window bar, click the window name you want to activate. Show/hide toolbar Once you have created several custom toolbars, you may find that you want to hide or display a specific toolbar. Note: You cannot hide the menu. To change the toolbars you display 1. Right-click in the toolbar area. 2. Check the toolbars you want to display, and uncheck the toolbars you want to hide. You must do this one toolbar at a time. Note: If you want to show or hide many toolbars, you can right-click in the toolbar area, select Customize, and then check and uncheck toolbars from the Customize dialog box. Reset Default Toolbars To restore default toolbars 1. Right-click the menu bar and select Customize. 2. Click Reset Defaults. 3. Click OK. Restoring Lost Toolbars It is possible to remove all the toolbars from the Editor. If this happens, you can restore the toolbars to your windows without resetting all the default settings.
- 137. Toad for Oracle User Guide Toad Basics 135 To restore lost toolbars from the Editor only 1. Right-click in the Desktop panels tab area. 2. Select Desktop Panels | Customize Toolbar. 3. Click on the Toolbars tab and select the Editor toolbars you want to display. Merging Toolbars With Toad 9.6, the merged toolbar feature has been deprecated. Merged toolbars were designed to display the most commonly-used commands while leaving you room to work in the active Toad window, and to disable customization so that buttons could not be removed or moved accidentally. If you liked the merged toolbar feature, you can set your toolbar to mimic this behavior. Note: Locking the toolbars as described in this procedure will lock ALL toolbars, not just the editor toolbar. To mimic merged toolbars 1. Right-click over the Editor toolbar and select Restore Defaults. 2. Right-click over the Editor toolbar and hide the Macro toolbar by clicking on it so it is no longer checked. 3. Right-click over the Editor toolbar and select Lock Toolbars. Standard Toolbars Default Toolbar The default toolbar on the main Toad window is configurable. If your toolbar appears different from that below, it may have been personalized. See "Configurable Toolbars and Menus - Overview" (page 122) for more information on configuring the toolbar and restoring default settings. Button Command Open a new Editor window with the current active connection. See "Toad Editor" (page 854) for more information. Open a new Schema Browser window with the current active connection. See "Schema Browser Window Overview" (page 978) for more information. Open a new Database Browser window. See "Database Browser" (page 532) for more information. Open a new Session Browser window. See "Session Browser Overview" (page 551) for more information. Open a new Query Builder window with the current active connection. See "Query Builder Overview" (page 933) for more information.
- 138. Toad for Oracle User Guide Toad Basics 136 Open a new Master/Detail browser window. See "Master/Detail Browser" (page 728) for more information. Open a new Project Manager window. See "Project Manager Overview" (page 472) for more information. Open an Output window for the current active connection. See "Various Tabs" (page 879) for more information. Open the Toad Automation Designer. See "Managing Projects" (page 433) for more information. Open a new Object Search window with the current active connection. See "Object Search" (page 967) for more information. Open integrated Knowledge Xpert. See "Knowledge Xpert" (page 105) for more information. Open a new Script Manager window with the current connection. See "Script Manager Overview" (page 503) for more information. Configure or execute an external tool. See "Configure Toad Tools" (page 747) for more information. This icon changes if tools have been recently executed. See "Execute Toad Tools" (page 750) for more information. Open the Toad Optionswindow. See "Toad Options" (page 623) for more information. Save all options normally saved when exiting Toad. Toggle PL/SQL Profiling. See "Using DBMS_PROFILER" (page 602) for more information. Toggle Compiling with Debug. Commit any changes to this schema. Rollback any changes to this schema. Open a new Oracle Connection to the database. l Main button - open Server Login window. l >Arrow - select a previously used connection. See "Server Login Window" (page 177) for more information. End a current active Oracle connection. l Main button - open Select Session dialog. l Arrow - select an active connection. See "Select Session" (page 268) for more information. Toggle the tip windows. See "Show Tips" (page 98) for more information. Desktop Toolbar The desktop toolbar is available from the Editor and the main Toad toolbar.
- 139. Toad for Oracle User Guide Toad Basics 137 Button Command Select desktop dropdown Save current desktop Delete current desktop Saving the desktop When you click the Save current desktop button, the Save Desktop dialog appears. If you find you no longer need the saved desktop, you can delete it. To save the desktop 1. Click . 2. Enter a name for your new desktop and click OK. To delete the current desktop 1. Click . 2. Click OK to confirm the deletion. Editor Toolbars The toolbars in the Toad editor can be arranged and configured in a way that works for you. The standard toolbars for the editor contain minimal commands. There are many other commands available, however, and you can add them to any of the toolbars . See "Altering Toolbars" (page 131) for more information. The standard toolbars found on the editor include: l Standard Editor Toolbar (page 138) l Saving the desktop (page 137) l Current Schema Toolbar (page 139) l Execute Toolbar (page 140) l Edit Toolbar (page 139) l Source Control Toolbar (page 782) l Macro Toolbar (page 141)
- 140. Toad for Oracle User Guide Toad Basics 138 Missing Toolbars See "Restoring Lost Toolbars" (page 134) for more information. Standard Editor Toolbar Button Command Change active session. In the drop down list, the active session is denoted by a check mark. Open new editor tab. Click the button to use the default tab type, click the drop down list to select a tab type. Close the current active editor tab. Load from file. Load from database. Save. Save current file as. Save all files. Reload file from disk. Reload from database. Print tab contents. Tune code using the SQL Tuning Optimization module. Profile the selected code. Send tab contents to Quest Code Tester. Make code.
- 141. Toad for Oracle User Guide Toad Basics 139 Button Command Strip code. Navigate back. Navigate forward. Recall previously saved SQL. Create new PL/SQL Object. Current Schema Toolbar The Current Schema toolbar lets you work with a schema other than the one where you are connected. This can be useful if, for example you have tested a SQL statement in your test schema and now want to execute it on several other schemas without disconnecting and reconnecting. To use this feature, you must have the ALTER SESSION privilege. By default, the current schema is set to your current connection. When you use this command Toad follows this procedure: l Issues an ALTER SESSION SET current_schema command l You can now execute the sql statement against that schema l Toad issues the ALTER SESSION SET current_schema command again to return to the connection schema. Note: This feature does not work with script execution or debugging commands. Button Command Use the dropdown to set the schema. Edit Toolbar Button Command Cut and store on clipboard. Copy to clipboard.
- 142. Toad for Oracle User Guide Toad Basics 140 Button Command Paste from clipboard. Select all text. Clear all. Find text. Find next string. Replace text. Undo last modification. Redo last undo. Convert to upper case. Convert to lower case. Convert to initial caps. Indent right. Indent left. Format the selected code. Execute Toolbar Icon Command Compile. Halt execution.
- 143. Toad for Oracle User Guide Toad Basics 141 Icon Command Execute as script. Dropdown allows selection of Execute in QSR or Execute in SQL*Plus. Run Explain Plan for current statement. See "Explain Plan Overview" (page 716) for more information. Compile Dependent objects. Execute procedure using existing arguments. Set Parameters. See "Setting Parameters" (page 909) for more information. Step over the current line of code. Trace into. Trace out. Run to cursor. Set breakpoint at cursor. See "Setting a Breakpoint" (page 918) for more information. Set watch at cursor. See "Adding a Watch" (page 926) for more information. Debug External Session. See "External Debugging" (page 929) for more information. Macro Toolbar Button Command Select and play macro Record macro Stop recording macro Cancel recording macro Edit macros
- 144. Toad for Oracle User Guide Toad Basics 142 Menus Add a Menu To add a Toad menu 1. Right-click the menu bar and select Customize. 2. Click the Commands tab. 3. Select the Menus category on the left pane. 4. Click the menu you want to add (for example, Team Coding) in the right pane and drag it to the menu bar where you want it located. The pointer changes to a vertical I-bar at the menu bar. To add a customized menu 1. Right-click the menu bar and select Customize. 2. Click the Commands tab. 3. Select the New Menu category on the left side of the window. 4. Click New Menu in the right pane and drag it to the menu bar where you want it located. The pointer changes to a vertical I-bar at the menu bar. 5. Rename your menu. See "Rename a Menu" (page 143) for more information. 6. Add commands. See "Adding sub-menus" (page 143) for more information. Delete a Command To delete command from a menu 1. Right-click the menu bar and select Customize. 2. Click the menu containing the command. 3. Click and drag the command off the menu. Add a Command To add a command 1. Right-click the menu bar and select Customize. 2. Click the Commands tab. 3. Select from any of the categories listed. A list of available commands appears in the right pane. 4. Click a command in the right pane and drag it to the menu where you want it located. The pointer changes to a vertical I-bar at the menu, and to a horizontal I-bar when the menu opens. You can place it anywhere in the menu.
- 145. Toad for Oracle User Guide Toad Basics 143 Adding sub-menus To add an additional menu 1. Right-click the menu bar and select Customize from the menu. 2. Click the Commands tab. 3. Select the New Menu category. 4. In the Commands pane, select New Menu and drag it into the menu where you want it located. The pointer changes to a vertical I-bar at the menu bar, and to a horizontal I-bar when the menu opens. You can place it anywhere in the menu you want. 5. Add commands to the flyout in the same way you would add them to the menu itself. Rearrange Commands You can rearrange the commands on your toolbars and menus. To rearrange commands 1. Open the Customize window: right-click in the menu or toolbar and select Customize. 2. Click and drag the item where you want it in any of the menus. An I-bar pointer marks where the command will be dropped. Rename a Menu If you are using customizable toolbars/menus, you can rename menus to suit your needs. To rename a menu 1. In the toolbar area, right-click and select Customize. Alternately, from the Tools menu, select Customize. The Customize dialog box appears. 2. Right-click the menu or menu item you want to change. Enter a new name for the Menu or Menu item. Note that the menu hotkey can be changed or removed at the same time. See "Menu hotkeys" (page 129) for more information. Delete a Menu To delete a menu 1. Right-click in the menu bar and select Customize to display the customize window. 2. Right-click the menu you want to remove. Select Delete from the menu. The menu is removed.
- 146. Installation and Administration of Toad Window Privileges and Toad At a minimum, in order to install and run Toad, make a connection, and do basic operations, you must be a Power User and have read/write privileges on the Oracle homes directories that you use for your connections. If you are a Power User, you will additionally require read access to the Oracle client folder. If you are running Windows Vista, and your account is under UAC (user account control) with Data Redirection enabled, Toad should be run with administrative privileges. Toad for Oracle, Read-Only Toad can be made read only using the two license files: READONLY.LIC and FULLToad.LIC. What is Toad Read Only? Toad Read Only is a way to allow users to view data and SQL through Toad without making changes to the database. Why use Toad Read Only? Toad Read Only allows administrators to give their users a powerful tool without worrying about a user committing a change to a sensitive production instance. While Toad honors privileges granted to the Oracle user, Toad Read Only will not allow the user to do anything which changes the content of the database. Where to get Toad Read Only? You can make any Toad installation read-only, you can use Toad Security to make selected users or roles read-only, or you can get a special read-only installation that has extra exclusions to prevent users from making changes. How to make any Toad installation Read-Only Using License files Toad can be made read-only using the two license files: READONLY.LIC and FULLToad.LIC found in the installation directory where Toad is installed. Toad.EXE only reads Toad.LIC to determine if it is full Toad or read-only. The license file contains a setting for read only database access. The network administrator can copy 5
- 147. Toad for Oracle User Guide Installation and Administration of Toad 145 READONLY.LIC over the Toad.LIC on an individual workstation to make Toad read-only at that workstation. Remember, the Toad.LIC file must be in the Toad folder. This is the least secure method of limiting Toad. To use read only license files » Copy READONLY.LIC over the TOAD.LIC on an individual workstation. Toad Security Using Toad Security you can make Toad read-only to a selected user or role. This is useful if you have someone who needs to view database objects but does not have the authority to change them. Note: This Toad Security option does not apply to the DB Admin Module. To restrict Toad entirely, you will also need to restrict the DB Admin Module from the appropriate users. To make Toad read-only using Toad Security » Move the Read-only Override function from the Features Non-menu list to the Restricted features list in the Toad Security window. This makes Toad read-only to the selected user. Toad Read Only Installation Quest Software, Inc. can provide a read only copy of Toad. The Toad Standard Edition - READ ONLY install is a read only executable designed to prevent its users from changing the database. For this reason, it does not include Quest ScriptRunner (which lets a user write a script that can update database objects), SQLMonitor (which logs SQL calls using the OCI layer), and Server Side Install (which lets users make changes to Toad schemas). To download the Toad Standard Edition - READ ONLY install » The Toad Standard Edition - READ ONLY install is available for download from the Quest Software Support Download Site. Registering Toad Use the Licensing window to store the Quest Software registration ID. This indicates to Toad that you are an authorized user. To register Toad 1. Select Help | Licensing. 2. Click Modify. 3. Enter your license key in the Keyfield Note: Toad automatically adds the hyphens in the appropriate location.
- 148. Toad for Oracle User Guide Installation and Administration of Toad 146 4. Enter the Site Message in the Site Message Field. 5. Click Apply. To update a license. 1. Select Help | Licensing. 2. Click Modify. 3. Make changes to the Key or Site Message as necessary. 4. Click Apply. To delete a license. 1. Select Help | Licensing. 2. Click Delete License. 3. Confirm that you want to remove the license. 4. Click Apply. Silent Installation Toad for Oracle features the ability to configure a silent install in the same manner you would any MSI command line installation. Extract the installers as described in Extracting the MSI Installer below. Extracting the MSI Installer In order to perform a silent install for Toad for Oracle, you must first extract the MSI file from the Quest Installer. This MSI is then used with the installation variable (ADDLOCAL parameter in the examples below) to define the type of install you want to perform. The Quest Installer must be launched in “extraction mode” from the command line. At this point you can extract the various MSI installers for use with a silent installation. To extract the MSI 1. Run your Toad bundle from the command prompt, including the correct path to the directory where it resides, and the /extract parameter. as the .exe will contain spaces, remember to include the quotation marks. Example: c:>“Toad DBA Suite for Oracle 9.7 Commercial.exe”/extract 2. Your bundle .exe will be one of the following: l Toad DBA Suite for Oracle 9.7 Commercial.exe l Toad Development Suite for Oracle 9.7 Commercial.exe l Toad for Oracle 9.7 Suite Commercial.exe l Toad for Oracle 9.7 Commercial.exe
- 149. Toad for Oracle User Guide Installation and Administration of Toad 147 l Toad for Oracle 9.7 Read Only.exe Note: The Quest installer launches in extract mode, and all references to installing will be replaced with extracting. 3. Change the path for the extracted files if desired. The default path is the current user’s Temp directory: C:Documents and Settings<current user>Local SettingsTempbundle name. 4. Click Next. 5. Select the products you want to extract. By default, all available products are selected. Click Next. 6. Review your selections on the Summary and Confirmation screen. If you want to change a selection, click the Back button and make your changes. Then click Extract. 7. Select one of the two hyperlinks to continue: l Specified Location - opens the directory where your files have been extracted. l Readme.txt - opens the extraction log in Notepad. Note: The extraction log contains verification of the files that have been extracted, along with the command line parameters needed to perform default installations of the products. Full Installation The Windows internal command msiexec.exe launches the MSI and passes command line parameters set by the user. A typical command line might look like this: msiexec /i "<path to msi file, including file name>"INSTALLDIR="<installation folder, including final >" ADDLOCAL=Client,Server/q /l*v <path to install log, including file name> Note: INSTALLDIR must include the final in order for a silent installation to be performed. For example: msiexec /i "C:Documents and SettingsjohndoedesktopToadforOracle97.exe"INSTALLDIR="C:ProgramsQuest SoftwareToad for Oracle" ADDLOCAL=Client,Server/q /l*v "C:install.log" Network Installation For a silent network install, you would first extract the MSI from the Quest Installer then install the server side with a command similar to: msiexec /i "<path to msi file, including file name>"INSTALLDIR="<installation folder, including final >" ADDLOCAL=Server /q /l*v <path to install log, including file name> For example:
- 150. Toad for Oracle User Guide Installation and Administration of Toad 148 msiexec /i "C:Documents and SettingsjohndoedesktopToadforOracle97.exe"INSTALLDIR="Z:ProgramsQuest SoftwareToad for Oracle" ADDLOCAL=Server/q /l*v "C:install.log" Then install the client side by running a command line that looks like the following: msiexec /i "<path to msi file, including file name>"INSTALLDIR="<installation folder, including final >" ADDLOCAL=Client SERVERDIR="<path to server folder, including final >" /q /l*v <path to install log, including file name> Where SERVERDIR is the same as INSTALLDIR from the previous command that silently installed the server side. For example: msiexec /i "C:Documents and SettingsjohndoedesktopToadforOracle97.exe"INSTALLDIR="C:ProgramsQuest SoftwareToad for Oracle" ADDLOCAL=Client SERVERDIR="Z:ProgramsQuest SoftareToad for Oracle" /q /l*v "C:install.log" Note: Both INSTALLDIR and SERVERDIR must include the final in order for a silent installation to be performed. Citrix Installation For a silent Citrix installation, use the Full Installation instructions. Silent Uninstall Uninstalling the MSI is similar. Use an "x" in place of the "i" and do not include the INSTALLDIR property, i.e.: msiexec /x "C:Documents and SettingsjohndoeDesktopToadforOracle91SetupFull.msi" /q
- 151. Toad for Oracle User Guide Installation and Administration of Toad 149 Options, Parameters and Meanings Option Parameter Meaning ADDLOCAL Client, Server Determines the type of install. Parameters denote: l Client - client install only l Server - server install only l client, server - full install /i Package | ProductCode Installs or configures a product. /f [p | o | e | d | c | a | u | m | s | v] Package | ProductCode Repairs a product. This option ignores any property values entered on the command line. The default argument list for this option is 'omus.' p - Reinstalls only if file is missing. o - Reinstalls if file is missing or an older version is installed. e - Reinstalls if file is missing or an equal or older version is installed. d - Reinstalls if file is missing or a different version is installed. c - Reinstalls if file is missing or the stored checksum does not match the calculated value. Only repairs files that have msidbFileAttributesChecksum in the Attributes column of the File table. a - Forces all files to be reinstalled. u - Rewrites all required user-specific registry entries. m - Rewrites all required computer-specific registry entries. s - Overwrites all existing shortcuts. v - Runs from source and re-caches the local package. Do not use the v reinstall option for the first installation of an application or feature. /a Package Administrative installation option. Installs a product on the network. /x Package/ProductCode Uninstalls a product.
- 152. Toad for Oracle User Guide Installation and Administration of Toad 150 Option Parameter Meaning /l [i | w | e | a | r | u | c | m | o | p | v | x | + | ! | *] Logfile Writes logging information into a logfile at the specified existing path. The path to the logfile location must already exist. The installer does not create the directory structure for the logfile. Flags indicate which information to log. If no flags are specified, the default is 'iwearmo.' i - Status messages. w - Nonfatal warnings. e - All error messages. a - Start up of actions. r - Action-specific records. u - User requests. c - Initial UI parameters. m - Out-of-memory or fatal exit information. o - Out-of-disk-space messages. p - Terminal properties. v - Verbose output. x - Extra debugging information. Only available on Windows Server 2003. + - Append to existing file. ! - Flush each line to the log. "*" - Wildcard, log all information except for the v and x options. To include the v and x options, specify "/l*vx". /q n | b | r | f Sets user interface level. q , qn - No UI qb - Basic UI. Use qb! to hide the Cancel button. qr - Reduced UI with no modal dialog box displayed at the end of the installation. qf - Full UI and any authored FatalError, UserExit, or Exit modal dialog boxes at the end. qn+ - No UI except for a modal dialog box displayed at the end. qb+ - Basic UI with a modal dialog box displayed at the end. The modal box is not displayed if the user cancels the installation. Use qb+! or qb!+ to hide the Cancel button. qb- - Basic UI with no modal dialog boxes. Please note that /qb+- is not a supported UI level. Use qb-! or qb!- to hide the Cancel button.
- 153. Toad for Oracle User Guide Installation and Administration of Toad 151 Option Parameter Meaning Note that the ! option is available with Windows Installer 2.0 and works only with basic UI. It is not valid with full UI. Group Policy Management The Toad Group Policy Manager is a free utility which is currently available with a licensed copy of Toad for Oracle. Quest Software reserves the right to remove, change or alter this utility at any time. The Toad Group Policy Manager provides a facility by which multiple copies of Toad within an organization can share the same set of options. It consists of a Windows Service which runs on a common server and publishes subsets of option data to defined groups of Toad users via TCP/IP, and an Editor which is used to define option sets and user groups. Users can be restricted from changing published Toad options or permitted to alter them. Note: Toad Group Policy Management is not Unicode-compliant. Using the Toad Group Policy Editor, policies and standards can be distributed throughout a group environment. The Group Policy functionality consists of three parts: l Group Policy Server l Group Policy Editor l Toad Policy files Additional information is provided in the Toad Policy Editor help file, also available as the GrpPlcyEdtr.pdf file. Toad All installations of Toad will have a toad.pdl file in the installation directory. This file is encrypted, and required to be present and uncorrupt for Toad to function (whether or not Group Policy Management is enabled). If you find Toad functionality limited, check the Toad Advisor. Functionality that has been limited will be noted with a notation of Restricted or Published. See "Toad Advisor" (page 99) for more information. Citrix Support Toad supports installation on Citrix servers.
- 154. Toad for Oracle User Guide Installation and Administration of Toad 152 Installing Toad on a Citrix server Toad must be installed on the Citrix server by the Citrix administrator. Users then connect to this instance through their Citrix logon. Citrix support is enabled with the full installation of Toad. Toad requires write access to the server registry during installation and read access during run-time to achieve Citrix support. Full procedures for installing Toad on a Citrix server are located in the Getting Started Guide. Connecting to Toad through Citrix To connect through a client » Log into the Citrix Program Neighborhood and execute Toad. Note: The first time you execute Toad you will be asked to enter a license key. Your Citrix administrator will provide you with the license key. User Configuration Files in Citrix Toad is installed on the Citrix server, and individual user settings are maintained for each client machine. Individual user settings and properties files are maintained in the user's settings file: C:Documents and Settingsuser_nameApplication DataQuest SoftwareToad Script Manager and Citrix Toad installs packaged SQL Scripts with the Script Manager. When Toad is run in a Citrix environment, the default paths to these script manager files will be wrong. To use these, you may need to manually change these paths once. To change the Script Manager paths for use with Citrix 1. Open Utilities | Script Manager and select the DBA category from the dropdown box. 2. Click the move button and enter your new path: C:Documents and SettingsUser NameApplication DataQuest SoftwareTOADScriptMgrDBA. 3. Repeat for the Schema Objects category and move to C:Documents and SettingsUser NameApplication DataQuest SoftwareTOADScriptMgrSchema Objects. SQL*Net Versions Toad does not require any other support libraries beyond the 32 bit Net client itself.
- 155. Toad for Oracle User Guide Installation and Administration of Toad 153 Oracle Version Name of Client Software Name of DLL Oracle 8 and 8i Net8 Oraclient8.dll Oracle 9i Oracle Net9 Oraclient9.dll Oracle 10g Standard Client Oracle Net10 oraclient10.dll Oracle 10g Instant Client (Universal Installer Version) Oracle Net10 oraociei10.dll Oracle 11g Client Oracle Net11 oraclient11.dll If you have the client above installed and can connect to Oracle using any of Oracle's tools (with the exception of SQL*Plus), Toad should work properly. Note: The most frequent cause of problems is the resetting of the PATH environment variable. To set your default Oracle home, you can use the Oracle Home Selector (provided with Oracle) to set it accurately. (See your Oracle documentation for more information.) Configuration Files V$ Tables Required Note: This list is always expanding. If you receive a "Table does not Exist" error, you can find what table is missing by spooling SQL to screen to see the code Toad is using. See "Spool SQL" (page 744) for more information. Access to V$ synonyms required on some common Toad windows are: AutoTrace (Editor/Query Builder) V_$Sesstat V$Statname V$Session Optimization & Session Info screens The following public synonyms must be present. v$rowcache v$sysstat v$system_event
- 156. Toad for Oracle User Guide Installation and Administration of Toad 154 v$librarycache v$STATNAME v$SESSTAT v$sess_io v$session v$process v$latch Database Browser The following public synonyms must be present. V$DATABASE v$datafile v$filestat V$INSTANCE v$latch v$librarycache V$OPTION V$PARAMETER v$rollname v$rollstat v$sess_io v$session v$sesstat v$sgastat v$sqlarea v$statname v$sysstat v$system_event v$tablespace Database Probe The following public synonyms must be present.
- 157. Toad for Oracle User Guide Installation and Administration of Toad 155 V$ARCHIVE_PROCESSES V$BH v$buffer_pool V$buffer_pool_statistics v$database v$dispatcher V$INSTANCE v$librarycache v$library_cache_memory V$LOG V$LOG_history V$PARAMETER v$pq_slave v$process V$ROWCACHE v$session V$SESSTAT v$sga v$sgastat V$STATNAME v$sysstat v$version Database | Monitor | Database Monitor The following public synonyms must be present. v$sysstat v$system_event v$session v$librarycache x$ksllt v$sgastat
- 158. Toad for Oracle User Guide Installation and Administration of Toad 156 Database | Diagnose | Database Health Check The following public synonyms must be present. v$version v$instance v$sysstat v$librarycache v$rowcache v$sgastat v$parameter v$database v$log_history v$filestat v$datafile v$tablespace Database | Monitor |Index Monitor To see indexes other than your own you must have access to the following: sys.ob$ sys.ind$ sys.user$ sys.object_usage You must also have the ALTER ANY INDEX privilege. Database | Administer | Oracle Parameters The following public synonym must be present: v$parameter Database | Diagnose | LogMiner The following public synonyms must be present. v$logmnr_contents v$logmnr_logs You must also have:
- 159. Toad for Oracle User Guide Installation and Administration of Toad 157 l Execute privileges on DBMS_logmnr l Execute privileges on DBMS_logmnr_d l the Parameter UTL_FILE_DIR set in init.ora (Oracle 8i only) Database | Monitor | SGA Trace The following public synonyms must be present. v$sqlarea v$sqltext_with_newlines You must also have: access to the V$ Oracle Dictionary views Debugging No special public synonyms required. However: DBMS_DEBUG must be valid On 10g databases: Debug Connect Session privileges must be granted Instance Manager | Shutdown The following public synonym must be present. v$parameter V$INSTANCE Toad Server Statistics | Analysis The following public synonyms must be present. V$SESS_IO V$SESSION V$PROCESS V$STATNAME V$ROWCACHE V$SYSSTAT V$SYSTEM_EVENT V$LIBRARYCACHE V$SESSION_PRIVS
- 160. Toad for Oracle User Guide Installation and Administration of Toad 158 Toad Server Statistics | Waits The following public synonym must be present. V$SYSTEM_EVENT Toad Server Statistics | Latches The following public synonym must be present. V$LATCH Toad Server Statistics | Sessions The following public synonyms must be present. V$SESS_IO V$SESSION V$PROCESS V$STATNAME Toad Server Statistics | Instance Summary The following public synonym must be present. V$SYSSTAT Toad Session Browser The following public synonyms must be present: V$SESSION V$PROCESS V$SESS_IO V$SESSION_WAIT V$SESSION_EVENT V$ACCESS V$SESSSTAT V$STATNAME V$OPEN_CURSOR V$SQL V$LOCK
- 161. Toad for Oracle User Guide Installation and Administration of Toad 159 V$SESSION_LONGOPS V$SQLTEXT_WITH_NEWLINES In addition, you must have access to the following: SYS.V_$TRANSACTION SYS.V_$ROLLNAME Space Manager Setup The following public synonym must be present. V$SYSSTAT The Toad schema must have the privileges to create and alter jobs, create and drop its own tables and procedures, and must have SELECT access on the following: DBA_DATA_FILES DBA_FREE_SPACE DBA_JOBS DBA_TABLESPACES V_$FILESTAT The Toad INI file There are only a few settings that require a manual edit of the TOAD.INI file. For all other settings, use the appropriate GUI. SQL Results panel splitter [SETTINGS] SLIDER_TOP=200 If you cannot see the SQL Results panel because of resizing the MDI child window too small, you can quit Toad, edit this value to a low number, like 150 or 200, and restart Toad. There is no default value. Keep users from dropping or truncating tables [SETTINGS] ALLOW_DROP_TBL=0 By default, Toad permits the user to drop tables and truncate tables. If you do not want to give a Toad user this power, put in ALLOW_DROP_TBL=0 into their TOAD.INI file. The default is 1. Put lines of comments between identifier and name of procedure The default to this is not included automatically in the TOAD.INI file. You can add it:
- 162. Toad for Oracle User Guide Installation and Administration of Toad 160 [SETTINGS] PELineOffsetOverride=1 On is 1, set it to 0 to turn it off without deleting it. You should only set this if you want to put lines of comments between the identifier and the name of the procedure, as in: create or replace procedure -- xx -- yy aaa as begin raise no_data_found ; end ; / For Toad to use the correct line number in the above example, this setting must be on ( PELineOffsetOverride=1). However, if this is on (PELineOffsetOverride=1), you will then get the wrong line # for cases where you do this: create or replace procedure aaa -- xx -- yy as begin raise no_data_found ; end ; / How to create your ToadStats.ini file On the Toad Server Statistics window, Analysis tab, if you do not have the Documents and SettingsusernameToad for OracleToadStats.ini threshold file, these are the default threshold values used. See "Toad Server Statistics" (page 517) for more information. INI Entry Min Value Warn Value Max Value Description Warning Message dg_ row -9999 -9999 - 9999 dictionary gets n/a dm_ row 98 - 9999 - 9999 dictionary misses n/a dcr_ row - 9999 - 9999 - 9999 dictionary cache hit rate high dictionary cache miss bcr_ row 90 - 9999 - 9999 buffer cache hit ratio may need to increase
- 163. Toad for Oracle User Guide Installation and Administration of Toad 161 db_block_ buffers dsr_ row - 9999 - 9999 10 disk sort ratio increase SORT_ AREA_ SIZE or tune the SQL bbw_ row - 9999 - 9999 1 buffer busy wait ratio tables with insufficient free lists or too few rollback segments or extents fbw_ row - 9999 - 9999 1 free buffer wait ratio too many disk sorts? lchr_ row 85 - 9999 - 9999 library cache get hit ratio dynamic or unsharable SQL? lcpr_ row - 9999 - 9999 1 redo space wait ratio n/a lcpr_ row 90 - 9999 - 9999 library cache pin hit ratio Shared Pool area too small rswr_ row - 9999 - 9999 1 redo space wait ratio n/a cfr_ row - 9999 - 9999 0.01 chained fetch ratio PCTFREE too low for a table per_ row - 9999 - 9999 20 parse/execute ratio high parse to execute ratio cpo_ row - 9999 - 9999 15 cpu parse overhead high parse cpu overhead tsr_row - 9999 - 9999 - 9999 ratio of rows from idx/total rows low ratios indicate too many full dbwra_ row - 9999 - 9999 255 DBWR avg scan depth # DB_ FILES too high? dbwrs_ row - 9999 - 9999 - 9999 DBWR avg buffers n/a
- 164. Toad for Oracle User Guide Installation and Administration of Toad 162 scanned -9999 = No value To set your own custom thresholds, create an ini file, called ToadStats.ini. Place this file into your Toad for OracleUser Files folder. For each "INI Entry" above, you can set Minimum values, Warning values, and Maximum values. Also, you can specify a custom Title and Set the warning message when the warning value is exceeded. When the warning value is exceeded, the circle is pink. When the maximum value is exceeded, the circle is red. As in standard Windows .ini format, place the "INI Entry" string within left and right brackets. This becomes the section. Then, you can place Min, Warn, Max, Title, and ErrorMsg items into each section. For example: [dm_row] Min=98 [bcr_row] Min=90 [dsr_row] Max=10 [bbw_row] Max=1 [fbw_row] Max=1 [lchr_row] Min=85 Warn=90 ErrorMsg=Dynamic or Unsharable SQL? [lcpr_row] Max=190
- 165. Toad for Oracle User Guide Installation and Administration of Toad 163 Warn=80 Title=library cache pin hit ratio [rswr_row] Max=1 [cfr_row] Max=0.01 [per_row] Warn=17 Max=20 Title=Parse to Execute Ratio ErrorMsg=High parse to execute ratio [cpo_row] Max=15 [dbwra_row] Max=255 Properties Files Options settings for Toad are stored in several different locations. We maintain them this way so that it is easier to reset or share only a small set of options. Location Options file Function Toad for Oracle directory/docs 3rdprtylic.txt Contains copies of our 3rd party lic agreements Toad.chm, Toad.pdf, ReleaseNotes.htm, Tips Folder Help files, User Guides, Release No Tips folder. Toad for Oracle directory beef.dat Export File Browser chc.rev CodeXpert
- 166. Toad for Oracle User Guide Installation and Administration of Toad 164 Location Options file Function CMDLineCEGrid.xslt CodeXpert Command Line - Grid CMDLineCEScripts.xslt CodeXpert Command Line - Scripts CMDLineCETrees.xslt CodeXpert Command Line - Trees cvs.ini Holds options and logins for CVS integration. DatabaseProbe.txt Stores the settings and alerts for the Probe. FmtPlus.opt, FmtOptions.ini Contain options for code formatting install.txt Contains start and end times for To installation. install.log Detailed log file for Toad installati qexplainplan2full.msi Explain plan install file QSR.ini Stores settings for Quest ScriptRunn (qsr.exe). releasenotes.html Toad Release notes rolelog.txt Stores previously created Team Cod RNetPin.ini This stores the full path to the file C This is setup by the installer and on modification if you copy your Toad directory to another location. RuleUniverse.xml Stores CodeXpert rules. SBQueries.dat Stores Custom Queries for the Sche Browser. SettingsLocations.ini Stores the path of the /User Files fo SilentInstallNotes90 Stores the instructions for Silent Ins TNSLoad.xslt TNSNames Editor TNSSave.xslt TNSNames Editor
- 167. Toad for Oracle User Guide Installation and Administration of Toad 165 Location Options file Function TNSValidate.xslt TNSNames Editor unidbmon.cfg Stores settings for Quest SQL Moni (SQLMonitor.exe). Documents and Settingsusername User Files aliases.txt Stores your previously used table a AWRCharts.ini Stores your configurations for displ charts in the AWR browser. See "ADDM/AWR (OEM)" (page 520) information. codemap.ini Stores colors for objects in the Cod Map. See "Road Map Overview" (p for more information. CodeXpert.ini Stores locations and names of all ru used by CodeXpert. It also stores w sizing and position for a modal win CodeXpert uses. coloring.txt Script Engine (QSE.exe) syntax hig coloring1.txt Script Engine (QSE.exe) syntax hig Connectionpwds.ini Stores your server information, and passwords that you choose to have save. These are tied to a single mac Passwords are not observed if you m Toad settings from one machine to connections.ini Stores connect info for the server lo window. See "Server Login Window 177) for more information. DatabaseBrowser.tdb Stores the treeview for the left hand the Database Browser. DatabaseProbe.ini Stores customization and alerts for Database Probe. See "Database Prob Overview" (page 538) for more info
- 168. Toad for Oracle User Guide Installation and Administration of Toad 166 Location Options file Function DataModeler.ini Stores configuration for the Query B <dbname>DefSchema.txt Holds the name of the default schem that database. <dbname><username>_ tablefilters.xml Store filters for the schema browser hand side grids for the specified co <dbname><username> DefSchema.txt Holds the name of the default schem that userdatabase combination DBWizSettings.ini Stores saved settings for the Databa Creation wizard. desktops.xml Holds Toad desktop configurations Editor_toolbars.ini Stores custom toolbar configuration Editor. Editor_toolbars_Default.ini Stores the default toolbar configura the Editor. EditorFooter.txt EditorHeader.txt EditorLayout_hex.lay EditorLayout_PLSQL.lay EditorLayout_Text.lay EditorLayout_XML.lay EditorMacros.bin Explainplancolumndefs.xml Stores Default column settings for E Plan. ExplainPlanGlobalPrefs.xml Stores explain plan text colors and ExplainPlanUserPrefs.XML Stores explain plan column visibili information, widths, and order. ExportWizSettings.ini Stores saved settings for the Export wizard.
- 169. Toad for Oracle User Guide Installation and Administration of Toad 167 Location Options file Function Filters.txt Stores previous filters for the Filter window. See "Filter Condition" (pa for more information. Filecompare.ini Holds options for the Differences V "Viewing File Differences" (page 2 more information. Files with a .FLT extension Store filters for the schema browser side. Files with an SDF extension Store your Categories for the Script Files with a .TMD extension Store configuration info for the Ma Browser. FindDirs.txt Stores find dialog directory saves. ftp.ini Stores user FTP information. Healthcheck.htm DB Health Check File. See "DB He Check" (page 287) for more informa htmlsub.txt Stores html editor autocorrect settin ImportWizSettings.ini Stores saved settings for the Import wizard jobdates.txt Not editable through Toad, but use alter it to change the drop down me the Create/Alter job window. See " and Alter Jobs" (page 1022) for mo information. LexLib.lxl The lexicon library for the Editor fo component. LoginGrd.ini Stores the configuration of the grid Server Login window. See "Server L Window" (page 177) for more infor MainFormLayout_default.lay MenuShortcuts.ini Custom shortcut keys for the main menu. NewEditorBarItems.ini
- 170. Toad for Oracle User Guide Installation and Administration of Toad 168 Location Options file Function NewMainFormBarItems.ini NewCompoundTrig.sql,Newfunc.sql, Newproc.sql, Newpackage.sql, NewPackageBody.sql, NewPkgFunc.sql, NewPkgProc.sql, Newtrig.sql, Newtype.sql, Newtypebody.sql, NewTypefunc.sql, NewTypeproc.sql Your default templates for creating objects in the Editor. Oracle Data Dictionary.sdf Pre-created Script Manager datafile containing Oracle 8i data dictionar See "Script Manager Overview" (pa for more information. OriginalEditorLayout_Hex.lay Original EditorLayout.PLSQL.lay Original EditorLayout.SQL.lay Original EditorLayout.Text.lay Original EditorLayout.XML.lay OriginalMainFormLayout_ default.lay Params.txt Parameters for single line queries in editor. Project.tpr Holds information for the Project M window. Project_bak.tpr Holds information for the Project M window as a backup. ProjectConfig.txt Holds information for the Project M Window. REVWORDS.TXT SavedSQL.dat Stores your Named SQL, Personal S SQL history. SBFilterList.xml Schema Browser filter list. SBProjManFilterList.xml Stores Schema Browser filter list fo Project Manager.
- 171. Toad for Oracle User Guide Installation and Administration of Toad 169 Location Options file Function SchemaCompSummary Stores summary information for the Compare feature. See "Compare Sch (page 260) for more information. SchemaObjects.sdf Script manager datafile containing created Schema objects. Services.ini Stores the list of services for the Se Manager window. See "Service Ma (page 746) for more information. SGATrace.ini Saves the layout of your SGA Trac window's grid. See "SGA Trace/Optimization" (page 567) for information. SQLFILES.TXT SQLLoaderSettings.ini Stores saved settings for the SQL*L wizard. See "Troubleshooting" (pag more information. StatsPackCharts.ini Stores configuration information fo Chart area of the Statspack Browser "StatsPack Browser Overview" (pag more information. Sysviews.txt Preserves system view names. templates.xml Stores MakeCode and CodeSnippet templates. temptxt.txt Stores temporary text for Schema C Terr.sql Contains export grants. If you lose connection while attempting to sav is created. TOAD.INI Stores many of the basic Toad optio including most items from View | T Options. Toad_GUI.ini Stores Toad Session Browser GUI s
- 172. Toad for Oracle User Guide Installation and Administration of Toad 170 Location Options file Function Toad_GUI2.ini Stores GUI settings for other Toad Toad_SessBrowFilters.ini Stores the filters for the Session Bro ToadActions.dat Contains saved ToadActions ToadActions.log Contains the logfile for used ToadA and their results. ToadMAIL.ini Stores settings from View | Toad O Email Settings ToadMONITORS.ini Stores settings from View | Toad O Monitors and View | Toad Options Manager. ToadParams.ini Stores the parameters you have prev entered for the Debugger. ToadRun.txt Toad command-line run file. Toad_SessBrowFilters.ini Stores the filters for the Session Bro toadstats.ini Not editable through Toad, but use change it to affect the DBA | Serve Statistics window. ToadTips.dat Contains any information you have into the note field of the ToadTips toolbars.ini Toolbar and menu configuration fo Toad window. Toolbars_Default.ini Default toolbar and menu configura the main Toad window. TopSess.ini Holds your list of profiles for the T Session Finder. views.txt Preserves user views. <servicename> <username>Syns.txt Holds the lists of synonyms for syn highlighting.
- 173. Toad for Oracle User Guide Installation and Administration of Toad 171 Location Options file Function <servicename> <username>Views.txt Holds the lists of synonyms and vie syntax highlighting. <servicename> projects.lst Holds the configurations of the Fav on the Schema Browser. Documents and Settingsusername ATResults ressume.res Documents and Settingsusername RMAN Templates .rcv files RMAN Template files: Default provided with Toad: l RMANDBHotBackup.rcv l RMANDBHotBackupIncr0. l RMANDBHotBackupIncr1. l RMANSetup.rcv l RMANTSHotBackup.rcv See "RMAN Scripts in Toad" (page more information. Documents and Settingsusername RuleSets Contains RuleSets for CodeXpert. T should not be modified except thro RuleSets dialog box in Toad. See "Configuring RuleSets" (page 327) information. Documents and Settingsusername ScriptMgr DBA folder Schema Objects folder Documents and Settingsusername Unixjobs Files with a .JDF extension Store information for the Unix Sche Transferring Configuration files If you are installing Toad on a new computer, you may want to move your settings, personal SQL, SQL History and Named SQL Statements to the new machine. This will save you the trouble of recreating all of these settings.
- 174. Toad for Oracle User Guide Installation and Administration of Toad 172 To transfer all personalized settings 1. Install Toad on the new machine. 2. Copy the Documents & SettingsusernameUser Files folder from your old machine to the new machine, making sure the file structure remains the same. Server Side Objects Installation Installing Server Side objects Several Toad features require objects installed on the server side of the Oracle instance. These objects can be installed into the Toad schema, an individual schema, or a third, publicly accessible schema. They may not be installed into more than one of these choices, or problems can occur. Features with server side objects Schemas where the features can be installed Toad Individual Publicly Accessible CodeXpert X X Data Generation X X X Explain Plan† X X X Profiler X X X Team Coding X X Space Manager* X Security X †The Explain Plan Server Side Objects can be installed and edited from within Toad itself. They are not included in the Server Side Objects wizard. * The Space Manager wizard helps you set up the privileges for Toad, but the View Tablespaces window will install and administer the objects. See "View Tablespaces" (page 359) for more information. Note: These server side objects apply only to their corresponding features, and Toad's other features will run successfully without the server side objects. Caution: Explain Plan tables and Toad Profiler objects should be installed into EITHER the Toad schema or an individual user schema, not both.
- 175. Toad for Oracle User Guide Installation and Administration of Toad 173 The Server Side Objects Install wizard makes installing and administering these objects easier. It runs when you install Toad, and you can access it from within Toad to create or administer additional objects after installation. Note: The order of steps in the Server Side Objects Install wizard depends upon your choices in each step. Because of this, the descriptions are not numbered as steps in the help file. It is recommended that you use the F1 key to open the appropriate help topic for the step of the wizard where you are located. When the install wizard opens, it looks for an existing TOAD.INI file. If found, the wizard will use the connection options from the Server Login window (Toad Home, Force SQLNet, etc). Using the Server Side Install Wizard In order to install server side objects, you will need to have access to either the account for the Toad user, the account for the schema where you are installing them, or an account with the DBA role. To install server side objects 1. From the Database | Administer menu, select Server Side Objects Wizard. The wizard appears.
- 176. Toad for Oracle User Guide Installation and Administration of Toad 174 2. Select what you want to do: Install, upgrade or remove objects for all users to share Use this to create and administer a special schema called TOAD. This schema gives you a central location from which to maintain the tables needed to run the above- mentioned portions of Toad. You could create some of these objects (Explain Plan and Profiler) in every schema in which you intend to use them (in other words, every schema would have these same tables, see below) but if you have a large number of users, using the Toad schema is more efficient. In addition, Toad Security, ObjectName, and Team Coding must reside in the Toad schema. Install, upgrade or remove objects for an individual schema to use If you do not want to create the Toad user, you can create and administer certain objects in the schemas where you intend to use them. This may be more efficient if you have a small number of users for these special features and you do not want all of your users to have access. Create setup scripts without a database connection You can create the scripts to set up the Toad schema, and so on without access to the database connection you need. Then you can log in later and run the scripts. 3. Refer to the following for more information: Administer TOAD schema Logon information Whether you are using a TNS file or an LDAP server, servers
- 177. Toad for Oracle User Guide Installation and Administration of Toad 175 will be listed in the database list. Dropping the TOAD schema The Toad user and associated public synonyms will be dropped. If you previously set up Team Coding, you will also be prompted to drop any roles created for Team Coding. Administer Private Schema If you choose to administer server side objects on an individual basis, remember that each user will need to have setup done individually. Server Side Objects Code Xpert Allows reports to be saved and retrieved in the database. Toad Security Set up Security administrator who can restrict user access to features of Toad. Caution: Users who have not been granted direct rights to Security Administration may still be able to administer Toad Security if they have been granted the appropriate rights through a role or through system privileges. This can be avoided by maintaining strict control over rights and privileges granted to users. Toad Profiler Caution: Toad Profiler objects should be installed into either the TOAD schema or an individual user schema, but not both. Space Manager From the wizard, you can: l Drop the Space
- 178. Toad for Oracle User Guide Installation and Administration of Toad 176 Manager job and objects, removing the ability to use Toad Space Manager. l Grant Toad the necessary privileges to configure Space Manager. Note: Space Manager must be set up while connected to the Toad Schema. Team Coding Roles This feature must be installed in either the Toad schema, or another publicly accessible schema, such as SQLNAV. See "Using Team Coding in SQL Navigator Environments" (page 785) for more information. Roles must be set for the Team Coding environment. The standard roles are: l Administrator: TC_ Administrator l Project Manager: TC_ ProjectManager l Team Leader: TC_ TeamLeader Creating Scripts without a Database Connection When completed, you can load the script into the Toad Editor and create the necessary objects. 4. Complete the wizard.
- 179. Connecting to Oracle Server Login Window To access the Server Login window » From the Session menu, select New Connection. Troubleshoot the Server Login Window Problem Possible Solution There's an X beside TNSNames Editor or SQLNet Editor. Toad can't find the TNSNames.ora file or the appropriate SQLNet file. Make sure they are in the appropriate directory, and that your path points to them. Toad is connecting with the wrong Oracle Home The default home that Toad uses matches the one you have chosen in the Oracle Home Selector, unless you have previously selected the check box: Make this the Toad default home. All of my past connections are not visible in the grid. Check that the Show favorites only box is not selected. Toad is/is not saving the password for a connection. Make sure the Save Password column is selected or cleared as appropriate in the row for that connection. If Toad is saving all passwords and you do not want them saved, make sure the Save passwords check box beneath the grid is cleared. Using the Connection Grid The connection grid contains connections you have used in the past: User (Schema), Oracle Home, Server (database alias), and Last Connect (date and time). You can define connection options in the grid as well, for example: l auto connect l save the password l connect mode 6
- 180. Toad for Oracle User Guide Connecting to Oracle 178 If you have added connections to your favorites list, you can view only those connections by clicking the Favorites checkbox at the bottom of the screen. l Sort any one of the first three columns in Ascending or Descending order by clicking the column header. l Column widths are automatically adjusted to display entire contents. l Toad saves the grid sort column; order; and the size and placement of the Server Login window between Toad sessions. To connect to a previous connection » Double-click on the connection in the grid. Showing only selected columns in the connection grid If you have a small screen area, you can hide some of the columns that display in the connection grid. To hide or show columns 1. Click in the left hand side of the grid headers. 2. Select the columns you want visible, or clear the check box for columns you want to hide. Showing only connections using the selected Oracle home If you have many connections using different Oracle homes, you may want to display only those using a particular home in the grid. To limit connections to one Oracle home 1. On the right of the login window, select the Oracle home you want to display. 2. Click the Show selected home only check box at the bottom of the window. Refreshing Oracle information At the bottom of the window is a Refresh button. Clicking this will:
- 181. Toad for Oracle User Guide Connecting to Oracle 179 l rebuild your Oracle alias list l refresh your client information with the information stored in the registry and on disk Create New Connection Create a new connection in one of several methods. See "Server Login Window" (page 177) for more information login options. TNSNAMES file Toad can connect using the listings in your Oracle TNSNames file. Toad will populate the database box with the entries from the TNSNames file and let you select the connection you want to use. To create a new connection using the TNS Names file 1. From the Server Login Window, enter the username in the User/Schema box. 2. Enter the password in the password box. Note: For added security, characters will not appear as you type; asterisks will appear instead. 3. Click the TNS tab if it is not active, and select the name of the database from the Database list. Note: If you do not enter a database name in the database box, then Toad will use the ORACLE_SID for the selected home. If there is no ORACLE_SID value, and you do not specify a database, then no connection can take place. 4. Use the Connect As list to connect as either SYSDBA or SYSOPER if you have the appropriate permissions. The default for this box is Normal. 5. If you want to color-code this connection, select a color from the Color box drop down. See "Selecting Connection Color" (page 181) for more information. 6. Click OK. Easy Connect Strings To connect using an easy connect string » Simply enter the string in the database box. (Easy connect strings are formatted: host:portservice_name) Connecting directly to the database To create a new connection directly to the database 1. Enter the name of the user in the box labeled User/Schema. 2. Enter the password for this user in the box labeled Password
- 182. Toad for Oracle User Guide Connecting to Oracle 180 3. Click the Direct tab. 4. Enter the Host, Port and either the Service Name or SID of the database to which you want to connect. 5. The Connect As dropdown allows you to connect as either SYSDBA or SYSOPER if you have the appropriate permissions. The default for this box is Normal. 6. If you want to color-code this connection, select a color from the Color box drop down. See "Selecting Connection Color" (page 181) for more information. 7. Click OK. LDAP Toad officially supports Oracle names directory services. This support includes both Oracle OID and Microsoft Active Directory servers. Oracle Instant Client LDAP support l Instant Client LDAP support is dependant on specific LDAP DLL which Oracle does not install by default. The ORALDAPCLNT10.DLL must be located in the same location as oci.dll file. l TNSNAMES.ora, LDAP.ora, SQLNET.ora must exist in the same location specified by the TNS_ADMIN system variable. l The LDAP dropdown list in the Logon Dialog will not be populated, but connection can be carried out by manually enter the DB name into the ‘Database field’ on the logon screen. To create a new connection using LDAP 1. Enter the name of the user in the box labeled User/Schema. 2. Enter the password for this user in the box labeled Password. 3. Click the LDAP tab. 4. Select the LDAP Descriptor of the database you to which you want to connect. 5. The Connect As dropdown allows you to connect as either SYSDBA or SYSOPER if you have the appropriate permissions. The default for this box is Normal. 6. If you want to color-code this connection, select a color from the Color box drop down. See "Selecting Connection Color" (page 181) for more information. 7. Click OK. Troubleshooting OCI/DLL Not Found If you get this or a similar error when attempting to connect to Oracle, make sure that the Oracle BIN directory is in your system path. This directory will be ORAWINBIN or ORANTBIN or
- 183. Toad for Oracle User Guide Connecting to Oracle 181 something similar. To check your path » Open a command line window, type PATH and then press ENTER. Cannot connect to Oracle Hints You must have a full install of a 32 bit version of SQL*Net. Connecting by SQL*Plus is NOT verification that SQL*Net is installed. If you cannot connect to Oracle using Toad, your Oracle client software is not installed correctly. Re-install the SQL*Net client from the Oracle setup disks or CD ROMs. Or, if you have installed OEM, NetAssist, Oracle Lite, or any other Oracle software recently, remove that software and see if you can connect using Toad. Also make sure that SQL*Net is attempting to use the correct TNSNames files by confirming that the registry setting: HKEY_LOCAL_MACHINESoftwareOracleTNS_ADMIN specifies the correct folder where your TNSNAMES.ORA file lives. Selecting Connection Color When working with Toad you may have multiple connections open at once. Trying to keep track of which open window is related to which connection can be difficult. Color coding the connections can help. When a color is assigned to a particular connection, any open window related to that connection, the window bar buttons and the status bars are outlined with that color. This makes it easy to see at a glance if your SQL editor, for example, is connected to your Test database or your Production database. To select a connection color for a new connection » When creating a connection from the server login window, select the color you want to associate with that connection in the Color box. To change a connection color 1. In the Server Login window connection grid, click in the Color column of the connection you want to color. 2. Select the color you want to use from the list. SET ROLE You can configure Toad to issue a SET ROLE command immediately upon connection, before it checks any privileges. This can be done either by making a manual entry in the toad.ini file,
- 184. Toad for Oracle User Guide Connecting to Oracle 182
- 185. Toad for Oracle User Guide Connecting to Oracle 183 To manually edit the toad.ini file 1. Using Notepad, or another text editor, open toad.ini. 2. Add the following line: [SET ROLE] 3. Enter as many specific SET ROLE entries under this line as needed. The syntax for these parameters is: Entry#=<DB>db_name</DB><USER>User_name</USER><ROLE>role_ name</ROLE><ONFAIL>Fail_action</ONFAIL> Where: Variable Meaning # An identification number that keeps the entries unique. You can have as many entries as you want db_name Corresponds to the database alias in your tnsnames.ora file (or LDAP entry). An asterisk (*) can be User_ name Logon user name. An asterisk (*) can be used to specify "any user." Role_ name Any valid argument to the SET ROLE command. See your Oracle documentation. Fail_ action One of the following: Abort, Message, or ignore. Abort - don't allow the connection Message - display an error message and then allow the connection Ignore -silently ignore the error message Auto Connect Toad can connect to a connection of your choice whenever you start Toad. To create an automatic connection 1. From the Session menu, select New Connection. 2. In the connection grid, select the checkbox in the Auto Connect? column. Note: You can cancel after Toad has begun to auto connect, if you have multiple connections. Toad will finish the current one and abort all that have not yet occurred. To remove an automatic connection 1. From the Server Login window, find the connection in the list of previous connections. 2. Clear the check box in the "Auto Connect?" column.
- 186. Toad for Oracle User Guide Connecting to Oracle 184 Save Passwords for Connections Passwords are saved in an encrypted file called connectionpwds.ini. The encryption is tied to the currently logged in user profile and supports roaming profiles, and Citrix installations. Passwords can be saved as a group or individually, using the Save Pwd column in the connection grid of the Server Login window. See "Server Login Window" (page 177) for more information. Save Pwd? Column A column called Save Pwd? appears in the previously used connections grid. Use this to save the password for the connection in that row. Note: This column is only visible if the option "Save passwords for all Oracle connections" is unchecked. This option can be changed using the check box at the bottom of the window. Save Passwords Check Box The Save Passwords check box at the bottom of the Server Login window directly relates to the Save passwords for all Oracle connections option. If you check it here, that option will be checked. If you uncheck it, the option will be unchecked. See "Passwords" (page 664) for more information. Password Options Two password options are available from the Toad Options | Oracle-General page. All saved passwords are automatically encrypted. See "Passwords" (page 664) for more information. Select and View Favorite Connections If you have a long list of connections you use, but have a relative few that you use consistently, you can select them as favorites and Toad displays only these connections for you, but you can still view the complete list. These can be managed from the Server Login window. To select favorite connections » In the connection grid, select the Favorite check box of the connection you want to make a favorite. To view favorites in the grid » Below the connection grid, select the Show Favorites Only check box.
- 187. Toad for Oracle User Guide Connecting to Oracle 185 To view all connections in the grid » Below the connection grid, clear the Show Favorites Only check box. Organize your login display You can organize how you view visible login information. In addition to limiting it to Favorite connections, you can choose to display the visible connections in grid, dropdown, or tab format, and you can choose to group connections by a single column. You can also add columns to the connection information that you can then use to group connections. To select a view for your connections 1. Click in the Server Login window. 2. Select the type of display you want to use: Grid All connections are listed in the data grid Drop-down Databases or users are provided in a drop-down list: select one to view the connection options in the data grid. Switch between Users or Database by clicking the Options button Tabs Databases are separated into tabs: select one to view the connection options in the data grid. Switch between Users or Database by clicking the Options button To group connections in the data grid 1. In the Server Login window, drag a column header into the grey area above the grid. 2. Repeat this to create a tree structure in the order you want. To add or edit a custom column name 1. In the Server Login window, right-click and select Custom. 2. Click Add or Edit. 3. Enter or change the name for your custom field and then click OK. 4. Add data to the column by clicking in the appropriate cell in the data grid. Use Existing Connection Select an existing connection from the Server Login window to make it active. See "Server Login Window" (page 177) for more information.
- 188. Toad for Oracle User Guide Connecting to Oracle 186 To use a previous connection 1. Do one of the following: l Select a User/Database combination from the dropdown combo box l Double-click the previous connection from the list in the left panel. 2. If the PASSWORD is not the same as the USER, type the PASSWORD. (schemas are often created with the password = schema, for example, DEMO/DEMO. Toad is making a guess at the password, but you can type over it.) If a password has expired and returns a Password Expired error, Toad prompts for a new password and attempts to change it. 3. Click OK. Toad saves the USER/DATABASE combinations between Toad sessions but does NOT save the password by default. Caution: The option View | Options | General | Save passwords for Oracle connections saves passwords on your machine. DO NOT ENABLE THIS OPTION UNLESS YOU HAVE A SECURE ENVIRONMENT. SQLNET Editor From the SQLNET editor you can easily edit your SQLNET.ORA parameters. These are standard Oracle parameters. If you need further information, please see the Oracle documentation for SQLNET.ORA Profile Parameters. To edit your SQLNET connection file 1. From the Server Login window, click SQLNET Editor. 2. Make any necessary changes to your parameters and then click OK. Note: If you are using a multi-threaded server and plan to use the PL/SQL Debugger, make sure you check the USE_DEDICATED_SERVER check box. This allows the PL/SQL Debugger to work. To view the SQLNET.ORA file 1. From the Server Login window, click SQLNET Editor. 2. Click View File as modified Backing up your SQLNET File It is recommended that you create a backup file of your SQLNET.ORA file before you make any changes to it. This assures that if something goes wrong you can restore the original settings. To create a backup copy of the SQLNET.ORA file 1. From the Server Login window,click SQLNET Editor. 2. Click the Create Backup File button.
- 189. Toad for Oracle User Guide Connecting to Oracle 187 3. Note where the backup file was created and click OK. To restore a backup copy of the SQLNET.ORA file 1. From the Server Login window, in the Installed Clients area, click SQLNET Editor. The editor opens in a new window. 2. Click the Restore Backup File button. 3. Select the backup file you want to restore from the Open file dialog that appears. 4. Click Open. 5. Click OK to confirm. LDAP Editor You can use the LDAP editor to edit your LDAP parameters. Toad supports both Oracle LDAP and Windows LDAP servers. To access the LDAP Editor » From the Server Login window, click LDAP Editor. See "Server Login Window" (page 177) for more information. Backing up your LDAP File It is recommended that you create a backup file of your LDAP file before you make any changes to it. This assures that if something goes wrong you can restore the original settings. To create a backup file » Open the editor and click Create Backup File. To restore from backup » Open the editor and click Restore Backup File. Using the LDAP Editor The top of the editor contains the path for the file you are editing. Below this is an editable list of directory servers, and the default administration context. To add a directory server 1. In the Directory Servers area, click Add. 2. Enter the Host, Port and SSL Port information. 3. Click OK. To set default administration contexts Note: The default administration contexts apply to all servers listed in the Directory Servers area.
- 190. Toad for Oracle User Guide Connecting to Oracle 188 » In the Default Admin Context area, enter the contexts you want to use. For more information about Admin contexts and Default admin contexts, please see your Oracle documentation. To set server type Note: The directory server types apply to all servers listed in the Directory Servers area. » In the Directory Server Type box, click the dropdown and select the server type you want to use (either Microsoft Active Directory or Oracle Internet Directory). Oracle Homes Selecting the Oracle Home You can change your Oracle Home from the Server Login window. Only one Oracle home can be in use at one time. This means that once a connection is made, all future connections will automatically be made using the same Oracle home, regardless of default home. Oracle homes can be assigned for each connection, or for Toad overall. See "Selecting a Default Oracle Home" (page 189) for more information on default Oracle Homes. Selecting the Oracle Home With no connections made previously, select an Oracle Home by using the dropdown list of Oracle Homes. To see more information about the home you have selected or change the SID, NLS_LANG, or SQLPATH, click the drilldown button to open the Oracle Home Editor. See "Oracle Home Editor" (page 190) for more information. Note: You must restart Toad to have changes made here take effect. How Toad Finds the Oracle Client DLL 1. Toad first looks in the Toad command line for OCIDLL. 2. If this is not found, Toad looks for the path for the Oracle home as follows: 3. If the command line argument "ORACLEHOME" was passed in, then Toad will use that home. 4. If there is no Toad home defined then Toad will display the home that is set as the default home using Oracle’s Home Selector application as the default in the dropdown. Toad will use the home that is active in the dropdown. 5. To populate the dropdown, Toad searches the registry as follows:
- 191. Toad for Oracle User Guide Connecting to Oracle 189 l First, Toad reads the list of Oracle home names from the keys under HKEY_ LOCAL_MACHINESOFTWAREORACLEALL_HOMES l If no Oracle homes are found there, then the Oracle home is set to HKEY_ LOCAL_MACHINESOFTWAREORACLE l Otherwise, Toad finds the ORACLE_HOME value for each Oracle home, if it exists. Then Toad checks the system environment variable called PATH to see whether it contains the "bin" folder under ORACLE_HOME. Toad selects the Oracle home whose path appears first in PATH. l If Toad still hasn't found an Oracle home, it uses HKEY_LOCAL_ MACHINESOFTWAREORACLE. 6. Toad looks for the client DLL in the "Bin" folder under the path found for the Oracle home l If that fails, Toad looks for the ORACLE_HOME key under HKEY_LOCAL_ MACHINEORACLESOFTWARE, and look for the client dll in the "Bin" folder under that. l If that also fails, Toad looks for the client dll in every bin directory in PATH. Selecting a Default Oracle Home You can select the default Oracle home in much the same way as you would select the connection color. Default homes can be assigned for a connection, or for Toad. When a default Oracle home is assigned to a particular connection, any time you make that connection from the connection grid, Toad will automatically use that Oracle home. When a default Oracle home is assigned to Toad, Toad will automatically use that Oracle home any time you create a connection to a new database. Note: Only one Oracle Home can be in use at one time. All default Oracle homes revert to the home used in the currently active connection. To select an Oracle home for a new connection » In the Server Login window, when no connections have been made, select the Oracle home you want to use with the current connection from the Connect Using dropdown. See "Server Login Window" (page 177) for more information. Note: This Oracle home will now be associated with the selected connection and listed in the home column of the connection grid. To select the Toad default Oracle home 1. In the Server Login window connection grid, with no active connections, select the Oracle home from the Connect Using dropdown. 2. Select the Make this the Toad Default Home checkbox. Note: When you change databases, this connection will be entered in the Oracle home dropdown.
- 192. Toad for Oracle User Guide Connecting to Oracle 190 Oracle Home Editor To use the Oracle Home Editor 1. Click beside the Connect Using box on the Server Login window. See "Server Login Window" (page 177) for more information. 2. Select an Oracle Home by clicking on its node. You can then: l Click Clipboard. This will copy the selected information to the clipboard so you can past it into an email, or another document. l Click Advice. This will tell you if you have a proper SQL*Net installation for this home, or suggest changes to your installation. l Right-click and choose to edit one of the following: l SID for the selected Home l NLS_LANG for the selected Home l SQLPATH for the selected Home
- 193. Toad for Oracle User Guide Connecting to Oracle 191 TNSNames Editor TNSNames Editor Overview From the TNSNames Editor, you can easily edit your TNSNames files. You can add a new service, edit a service, delete a service, or work with two files and transfer services back and forth between the two. There is an online video tutorial for this feature. This opens a new browser window and requires an internet connection. From this window you can: l Load and View TNSNAMES Files (page 192) l Add Service and Details (page 194) l Edit Service (page 196) l Delete Service or Details (page 196) l Testing a Connection (page 197) l Working with Two Files (page 197) NOTE: You can add a UR tag to a CONNECT_DATA tag of a TNS entry. This is available ONLY through the text edit area of the editor, not the Edit Service window. This tag is supported as a patch to Oracle 10g and is no longer necessary in Oracle 11+. To access the TNSNames Editor » Access this window from the Utilities menu | TNSNames Editor. Limitations of the TNSNames Editor The TNSNames Editor supports much of the standard Oracle syntax. See "TNSNames Editor Overview" (page 191) for more information. There are, however, certain old or advanced features that it does not support. Features Toad TNSNames Editor does not support include: l Multiple Description Lists Note: Multiple Description entries are supported, and a DESCRIPTION_LIST will be created automatically to encompass them. l Multiple Address Lists l No ADDRESS_LIST keyword (The editor parses it correctly, but it adds the ADDRESS_ LIST parameter back in to the entry, which produces a completely equivalent
- 194. Toad for Oracle User Guide Connecting to Oracle 192 configuration. Existing entries with multiple ADDRESS_LIST tags are preserved, even if edited in the Editor window. ) In all of these cases, the TNSNames Editor will not change the entry unless the user chooses to edit that particular entry. If you do not try to change a non-supported entry, the file will remain useable. If you do try to edit a service name with one of these unsupported features, the editor does its best to parse the entry into the Edit Service dialog box. It will write the entry into a structure it does support, if you click OK in the Edit Service dialog box and then save the file. Whenever the TNSNames Editor overwrites a file, it first makes a backup of that file in the same directory. So if you do accidentally cause problems to your file, you can revert to the backup. Load and View TNSNAMES Files To load the active TNSNames file 1. Open the TNSNames Editor. See "TNSNames Editor Overview" (page 191) for more information. 2. Click . To load a saved file You can load and view your TNSNames files and specific services within those files. 1. Open the TNSNames Editor. See "TNSNames Editor Overview" (page 191) for more information. 2. Click . 3. Browse to the directory where your TNSNames file is located, and select it. To view a file » Do one of the following: l a particular service entry - click on the entry in the tree view. l the text of the entire TNSNames file - click the Text Editor tab. Switching Views The tree view of the TNSNames Editor can be organized either by Service Name or by Host Name. In either view, selecting the Host node displays the entry for that host in the Text tab. When viewing by Service Name, selecting the Service node displays all host entries for that Service in the Text tab. To switch tree views » Do one of the following:
- 195. Toad for Oracle User Guide Connecting to Oracle 193 l Click . l Click the drop-down arrow next to and select either the View By Host or View By Service option. Pasting Entries into the TNSNames File You can paste entries directly into either side of the TNSNames Editor from either the Project Manager or from a text file. This lets you receive new entries by email, or update from a current project. Copying and Pasting from the Project Manager You can copy connection information from the Project Manager. To copy connections from the Project Manager to the Names Editor 1. Open the Project Manager. 2. In the navigation panel, click on the Sessions tab. 3. Select the connections you want to copy. 4. Right-click and select TNSNames information to clipboard. 5. Open the TNSnames Editor. 6. Click in the pane containing the tnsnames.ora where you want the information. Note: You can past into either tab: Tree View or Text Editor. To copy connections from a text file or email 1. From the text file or email, copy the text of the connection information. 2. Open the TNSnames Editor. 3. Click the Paste button on the side of the window where you want to paste the information. You can past into either tab: Tree View or Text Editor. Checking Syntax At any time you can check the syntax of your TNSNames file from the editor. If there are errors, Toad will list them and suggest ways to fix them. If there are no errors, the message "TNS file is valid" displays in the Message tab. To check syntax » Click on the TNSNames Editor toolbar. Note: Messages about the state of the syntax for the TNS names file are displayed
- 196. Toad for Oracle User Guide Connecting to Oracle 194 in the Messages tab at the bottom of the window. Add Service and Details The TNSNames Editor makes it easy to add a new service entry, or to add details to an entry you have already created. See "TNSNames Editor Overview" (page 191) for more information. This topic only covers unfamiliar information. It does not include all step and field descriptions. To add a service 1. Load your tnsnames.ora file into one side of the editor, and click . 2. Enter the Service Name you want to use for the service. 3. Enter the appropriate information for Address configuration. See "Address Configuration" (page 194) for more information. 4. Enter the appropriate information for Service information. See "Service Information" (page 195) for more information. Address Configuration You can enter the information manually in the box, or click Clone to copy information from the active entry to a new entry in your file. Add additional addresses for this service name by clicking Add.
- 197. Toad for Oracle User Guide Connecting to Oracle 195 Configuration Notes Field Note Address Information Protocol Changing this value will change the information required for the rest of the host address configuration. Port (TCP/IP, TCP/IP with SSL, and SDP) Valid port numbers have values between 1 and 65535. Advanced Options Apply to additional addresses. Enable Failover Instructs Oracle Net to fail over to a different address if the first protocol address fails. Enable Load Balance Instructs Oracle Net to progress through the list of addresses in random sequence to balance the load between the various listener or Oracle connection Manager protocol addresses. Enable Source Route Instructs Oracle Net to use each address in order until the destination is reached. Use options compatible with Net8 8.0 clients If this is checked you can only select options compatible with Net8 clients. If unchecked, all options are available. Service Information Enter the Service Name and Connection type in the appropriate boxes. In addition, you can check the box to use Oracle 8 and previous identification (SID) rather than a more current format. Cloning a Service To clone a service 1. In the TNSNames Editor, select the service you want to clone on your service list. 2. Right-click and select Clone Service from the context menu. Note: When you clone a service, the new service entry will have a blank Net Service Name and will be located at the top of the service list. 3. Select the new service and click to make necessary modifications.
- 198. Toad for Oracle User Guide Connecting to Oracle 196 Delete Service or Details In the TNSNames Editor, you can easily drop a service or details from your TNSNames file. See "TNSNames Editor Overview" (page 191) for more information. Note: When you select a node to delete, all nodes beneath it will also be deleted. To delete a service 1. Select the service you want to delete on your service list. 2. Click on the toolbar (DELETE). Deleting details You can delete details such as entire entries under descriptions, additional addresses, and so on. To delete details 1. In the service list, select the node containing the details. 2. Click (F2). 3. Click the Description tab for the detail you want to delete. 4. Do one of the following: To delete the description and everything below it Click Delete at the bottom of the window. To delete a specific address within the service Click the Address tab of the address you want to delete and then click Delete within the Address Configuration area. Edit Service You can change service information for an existing service in your TNSNames file from the TNSNames Editor. See "TNSNames Editor Overview" (page 191) for more information. To edit a service 1. Select the service node you want to edit and then click (F2). Note: If you select an address node, the edit window will open with that address selected. 2. Make changes to the Service. See "Add Service and Details" (page 194) for more information about address configurations and service information. 3. Click OK to save changes.
- 199. Toad for Oracle User Guide Connecting to Oracle 197 Caution: This only saves changes to the temporary file. To be sure your changes are saved to your TNSNames file, see Saving Changes to TNSnames Files. Saving Changes to TNSNames Files The OK button at the bottom of the screen saves the file and closes the TNSNames Editor. See "TNSNames Editor Overview" (page 191) for more information. Whenever the TNSnames editor overwrites a file, it first makes a backup of that file in the same directory. So if you do accidentally cause problems to your file, you can revert to the backup. To save your file without closing the editor » Do one of the following: l Click on the toolbar to save the file with the current file name l Click the Save as button, to change the file name To cancel without saving » Click Cancel to cancel any edits you have made to the file since it was last saved and close the editor. Testing a Connection From the TNSNames Editor you can test a new connection or changes you have made, using the TNSPing facility. To test a connection 1. Save the file to the location where your TNSping executable reads files. 2. Select one connection in the connection list to test. 3. Click on the toolbar. Working with Two Files You may have two TNSNames files that you want to compare and copy services between. The TNSNames Editor lets you do this easily. These files can be the same file or different ones. Loading the same file into both sides of the editor will allow you to easily duplicate service names before you edit them. To work with two TNSNames files 1. Load one of the TNSNames files in the left hand side of the Editor. 2. Load the other into the right hand side.
- 200. Toad for Oracle User Guide Connecting to Oracle 198 3. You can now select services from either side and copy them to the other using the buttons in the center. Note: The TNSNames Editor does not prevent duplicate entries in the tnsnames.ora file. This allows you to copy a service and then edit it. Icon Action > Move selected service from left side file to right side file. < Move selected service from right side to left side. >> Move all services from left side to right side. << Move all services from right side to left side.
- 201. Tutorials CodeXpert Using the CodeXpert Tutorial Use the CodeXpert to compare your code to specific rules and standards. CodeXpert analyzes the PL/SQL against a set of rules for best practices. These rules are stored in a ruleset. You can define your own rulesets if desired. (See CodeXpert Tutorials | Creating a Ruleset for more information.) In this tutorial, we will take a simple procedure and try out some of the features of the CodeXpert. There are many options and settings you can use to customize how CodeXpert analyzes your code. For more information on these, see the CodeXpert section of the help. Note: If you do not have the Xpert Edition of Toad, just ignore the SQL Scanning portions of this tutorial. 1. If is not already open, open Toad and then open an Editor window. 2. Past the following code into the Editor: CREATE OR REPLACE PROCEDURE loopproc (inval NUMBER) IS tmpvar NUMBER; tmpvar2 NUMBER; total NUMBER; BEGIN tmpvar := 0; tmpvar2 := 0; total := 0; FOR lcv IN 1 .. inval LOOP total := 2 * total + 1 - tmpvar2; tmpvar2 := tmpvar; tmpvar := total; 7
- 202. Toad for Oracle User Guide Tutorials 200 END LOOP; DBMS_OUTPUT.put_line ('TOTAL IS: ' | | total); END loopproc; / 3. In the area below the editor, click the CodeXpert tab. If this is not visible, right-click and choose Desktop Panels | CodeXpert to make it visible. 4. In the CodeXpert tab, make sure the Scan toggle is unselected and then either click the Perform Review button or press F9. Toad analyzed the contents of the editor in its entirety. If part of the code is selected, Toad will review only the selected code. 5. Look at the results. They should appear as follows: 6. Expand the Efficiency Node. Notice that there are three occurrences of the DATA TYPE - 2829 rule. If you expand this node as well, you will see each instance where the rule was violated. The numbers before them correspond to the row and column number of the violation. 7. Click on one of the occurrences. The editor scrolls to that instance, highlighting the line of code in question. 8. Double-click the occurrence and the rule description displays. 9. Click the Reports tab. At the bottom of the panel are tabs for Rules Summary, Crud Matrix, or Code Metrics for this analysis. Click the Rules Summary tab. 10. Notice that the Print icon in the CodeXpert toolbar is now active. You can print these reports with the click of a button, or click the Save button and save them to an html file. Creating a Ruleset Tutorial If the provided rulesets do not meet your needs, you can create your own rulesets. We will create a ruleset from scratch. You can also select an existing ruleset to use as a template.
- 203. Toad for Oracle User Guide Tutorials 201 1. Open the CodeXpert window. Click Database | Diagnose | CodeXpert. 2. Click the Configure Ruleset button. The configuration window opens with a ruleset selected. 3. Click the Rule Sets node to activate it. 4. Click the New Rule Set button. 5. Enter Sample Tutorial Ruleset in the Rule Set Title box. This is the title that will display in the rule set navigator. 6. Toad creates a filename for you based on your title and stores it in the Rulesets folder. You can change this if desired. 7. The author is automatically filled in from your computer information. If this is not correct, change it now. 8. Enter any comments about your ruleset. For this test, enter the following: This is a sample ruleset to learn functionality. 9. Click Next. 10. We will leave the sort order at the default: Severity, then Objective. If you want to view violations of your ruleset in a different way, this dropdown list is where to do it. 11. Select the rules you want to enforce. In this case, open the WARNING node and select the following rules: l VARIABLE - 6411 l VARIABLE - 6413 l GOTO - 4002 12. Click Finished. The ruleset is now listed at the bottom of the navigation panel, with the User-created icon identifying it. PL/SQL Debugger Debugging a Procedure or Function Debugging a Procedure or Function Tutorial Debugging a procedure or function is the most straightforward debugging procedure. Yet there are several ways to go about it. This tutorial will walk you through some of the most common commands and methods. It is not designed to teach you to code in PL/SQL, but it will show you the basic features of the Toad Debugger.
- 204. Toad for Oracle User Guide Tutorials 202 Enter the code in the Editor 1. Open a new Editor tab for PL/SQL: Right-click in the Editor and select New Tab | PL/SQL. 2. In the Desktops toolbar, your desktop should be set to PL/SQL. This will enable the tabs at the bottom of the Editor that are debugger-specific. Enter the following code into the Editor: CREATE OR REPLACE PROCEDURE loopproc (inval NUMBER) IS tmpvar NUMBER; tmpvar2 NUMBER; total NUMBER; BEGIN tmpvar := 0; tmpvar2 := 0; total := 0; FOR lcv IN 1 .. inval LOOP total := 2 * total + 1 - tmpvar2; tmpvar2 := tmpvar; tmpvar := total; END LOOP; DBMS_OUTPUT.put_line ('TOTAL IS: ' | | total); END loopproc; / 3. From the File menu, select Save As to save this procedure. The tab at the top now displays "Loopproc.prc". Click the Compile with Debug button into the depressed position to turn on the debug information. Note: If the compile buttons or the debug menu options are disabled check one of the following:
- 205. Toad for Oracle User Guide Tutorials 203 l Double check that you are connected to a database that allows debugging - you must have access to the DBMS_DEBUG Oracle package. l Make sure that the editor window is associated with the appropriate database connection: click the Change Active Connection button and select the correct database if it is not. 4. Click the Compile button . The code compiles and is now ready to run. The code must be compiled before you can set parameters. Working with Watches Add Watches - Debugging Tutorial There are several ways to add a Watch. In the following steps you will add three watches, each one by a different method. Later, you can choose the method that works best for you. 1. You can only watch variables. Click in the second line of code, in the word TMPVAR and click the Add Watch icon on the Debug toolbar above the Editor window (not the watches tab toolbar). The Watches window becomes active at the bottom of the screen, and a watch is added. 2. Add a watch to TMPVAR2. This time, press <CTRL><F5> to add the watch at the cursor. Note: To watch all variables automatically, select the Smart Watches box on the Watch window. This may not be a good option if your procedure has a large number of variables. However, you can drag watches from the Smart Watches panel to the Watch panel and then close Smart Watches. See "Configuring the Smart Watch window" (page 923) for more information. 3. And finally, add a watch to the TOTAL variable. Click in the TOTAL variable, and then from the Debug menu, select Add Watch at Cursor. Go back to Enter the code in the Editor (page 202) Continue to Set Parameters- Debugging Tutorial (page 203) Set Parameters- Debugging Tutorial Some PL/SQL has variable parameters that need to be set before you can run the code. If values for these variables are not set, running the code will result in an Oracle error. In the Loopproc procedure, the INVAL variable needs to be set. 1. Click button. Note: If you have parameters that need to be set, when you choose to RUN the code, the Set Parameters window will display automatically. There are many more parameters
- 206. Toad for Oracle User Guide Tutorials 204
- 207. Toad for Oracle User Guide Tutorials 205 2. Set parameters appears because there is a user-defined parameter set in the code. In this case, INVAL defines the number of times to run the code. Click in the Value Field for the INVAL variable. NULL is highlighted. 3. Set the value at ten. Enter 10 in the value field. 4. Click OK. The value is set and the Set Parameters window closes. Continue on to Run Code and Display Output - Debugging Tutorial (page 205) Go back to Add Watches - Debugging Tutorial (page 203) Run Code and Display Output - Debugging Tutorial 1. Click the Execute PLSQL with debugger button. A confirmation dialog box appears asking if you want to compile the referenced objects with Debug information. Click Yes. If the Set Parameters dialog appears again, click Execute. The code compiles and then runs, but too quickly to see the watches. 2. Click OK in the termination dialog. To confirm that the code has run, click the DBMS Output tab in the Desktop tabs area. The window should display the following: Change Watch Properties - Debugging Tutorial 1. Change the watch properties for Tmpvar2 to scientific format. Click the Watches tab. In the Watches window, double-click Tmpvar2. The Watch Properties window appears. 2. In the Format area, click Scientific. Click OK to save your changes and close the window. Go back to Run Code and Display Output - Debugging Tutorial (page 205) Continue on to Disable a Watch - Debugging Tutorial (page 205) Disable a Watch - Debugging Tutorial You can disable a watch you do not want to follow. Disable the watch on Tmpvar. 1. In the Watches window, double-click tmpvar. The Watch Properties dialog box appears. 2. Click the Enabled check box. The checkmark disappears. Click OK. The Watch Properties dialog box closes. Tmpvar is now disabled in the Watch window. Note: You can also disable a watch by:
- 208. Toad for Oracle User Guide Tutorials 206 l Selecting the watch and clicking the disable button. l Right-clicking on the watch and selecting Disable Watch. To enable a watch you have disabled, simply reverse one of the above methods. Step Through the Code - Debugging Tutorial 1. To actually see the watches you have set, you will need to step through the code line by line. Press SHIFT+F7 several times to step through the code. Notice how the values for the watches change each time you press SHIFT+F7. 2. The values for the variables you have marked with watches display in the Watches window. However, you may decide you want to check the value for a variable that is not currently being watched. Hover the mouse pointer over the INVAL variable. In a moment, a small popup containing the value of the variable appears. Working with Breakpoints Add Breakpoints - Debugging Tutorial The next sections of this tutorial focus on breakpoints. They assume you have completed the Introductory and Watches sections. Breakpoints cause the execution of your procedure to stop at the specified location. In the breakpoints tab, you will see two different breakpoints column. One is "line" and the other is "Editor line." Line refers to the line within the procedure block you are working with (excluding comments and blank lines from the count), and Editor line refers to the line number within the editor. This is because you can have more than one procedure open in the same tab at the same time. For this tutorial, however, we only have one procedure open. 1. In the desktop tabs area, click the Breakpoints tab. This allows you to see the breakpoints you set. 2. If line numbers are not displayed to the left of your procedure, turn on Display line numbers in gutter as follows: a. From the Edit menu, select Editor Options. The Editor Options – PLSQL window appears. b. In the left panel, click General Options. In the right panel, double-click Display Options. The list of display options appears. c. If the check box beside Display line numbers in Gutter is empty, click it to turn the option on. d. If the check box beside Show Gutter is empty, click it to turn the option on as well. Click OK. Line numbers should now display in the gray gutter beside your procedure. 3. Add a breakpoint to the line containing: FORLCV IN 1...INVAL. In my editor, it is line 12. Click in the gutter beside the line. The line of code is highlighted, and a breakpoint icon appears in the gutter. The breakpoint has been applied. The Editor Line and
- 209. Toad for Oracle User Guide Tutorials 207 Line columns in the breakpoint window may or may not display the same number, depending on how your code is formatted. 4. Add a breakpoint to the line containing TOTAL:=2 * TOTAL +1-TMPVAR2. This time, click in the line of code, and then press Shift+F5. 5. Click . The code stops the line containing the first breakpoint. Click run again, and the code stops at the next breakpoint. Disable Breakpoints - Debugging Tutorial As with watches, you can temporarily disable breakpoints. 1. Disable the second Breakpoint. In the Breakpoints window, double-click the breakpoint. The Breakpoint Properties dialog box appears. 2. Click the Enabled check box. The checkmark disappears. Click OK. The Breakpoint Properties dialog box closes. The second breakpoint is now disabled in the Breakpoints window. Note: You can also disable a watch by: l Selecting the watch and clicking the disable button. l Right-clicking on the watch and selecting Disable Watch. To enable a watch you have disabled, simply reverse one of the above methods. 3. You can delete the breakpoint entirely instead of just disabling it. In the Editor, click the Breakpoint icon in the margin by the first. Edit Line Number Rather than creating a new breakpoint and deleting an old one, you can change the line number for an existing breakpoint. 1. In the Breakpoints window, double-click the line 12 breakpoint. 2. Double-click in the Line number box. The line number is highlighted. Change the number to 11. Enable the Breakpoint. 3. Click OK. The dialog box closes, and the breakpoint moves to line 11. Use Passcount - Debugging Tutorial You can set a breakpoint to only break after a certain number of iterations through the loop. This can be useful when you are working with extremely long loops of code, because you can set it to stop after, for example, seven passes. 1. Replace the first breakpoint. 2. In the Breakpoints window, double-click the breakpoint. 3. Double-click in the Passcount field. Type 7. Click OK.
- 210. Toad for Oracle User Guide Tutorials 208 4. Click the Run icon. The Procedure runs through 6 iterations of the loop and stops just before it reaches line 11 for the 7th time. 5. Click the Call Stack tab. It should say LOOPPROC(11). This marks the line where you stopped execution. 6. Click the Watches tab. Your watches are still set, and since execution has not completed, they will have values. 7. Click the Run icon again. A dialog box appears stating "Execution terminated." This indicates that the Procedure has completed its run. Click OK. Use Conditional Breakpoint - Debugging Tutorial You can set a condition on a breakpoint, so that the execution will not stop until it meets this condition. 1. In the Breakpoints window, double-click the breakpoint that is still enabled. 2. Double-click the Passcount field, and replace the 7 with 0. 3. In the Condition field, add LCV>=7. Execution will now break at this line when LCV is greater or equal to 7. 4. Click OK. 5. Click the Run icon. Execution stops at line 11. Hover the pointer over the variable LCV. The value should be 7. 6. Click the Run icon again. LCV is now 8, which is greater than 7, so execution has stopped again. 7. Disable the breakpoint without deleting it. In the Breakpoints window, select the breakpoint, right-click and select Disable breakpoint. The stop sign icon is unavailable. 8. Click the Run icon to complete execution. When the dialog box appears stating that execution has terminated, click OK. Use Passcount and Conditions together - Debugging Tutorial You can combine passcounts and conditions on breakpoints. When doing this, remember that the passcount counts the number of times the condition is met, not the number of times the code passes the line number. 1. Click the Set Parameters button. Change the value for INVAL to 17 and then click OK. 2. In the Breakpoints window, double-click the breakpoint with the condition added. 3. Check the enabled box to enable the breakpoint. Leave the condition on the breakpoint, but add a passcount of 9. Click OK. The Breakpoints properties window closes. The breakpoint now has a passcount of nine and a condition of LCV>=7. 4. Run the code again. Execution stops at pass 9 of 9. When you hover the curser over LCV, notice that it has a value of 15. This is the 9th time that LCV>=7. 5. Click Run one last time to end the debugging.
- 211. Toad for Oracle User Guide Tutorials 209 Debugging a Package Debugging a Package - Debugging Tutorial Debugging a package works in a similar manner to debugging a procedure or function. You are debugging a group of procedures or functions, however, and how they work together, so it is a little different. This tutorial assumes that you are comfortable with watches and breakpoints, and the features described in the Debugging a Procedure or Function Tutorial. 1. Open a new PL/SQL Editor tab. Enter the code below into the Editor. This is the package we will use. CREATE OR REPLACE PACKAGE trigonometry IS FUNCTION sine ( opposite IN NUMBER, hypotenuse IN NUMBER, MESSAGE OUT VARCHAR2 ) RETURN NUMBER; FUNCTION cosine ( adjacent IN NUMBER, hypotenuse IN NUMBER, MESSAGE OUT VARCHAR2 ) RETURN NUMBER; FUNCTION tangent ( opposite IN NUMBER, adjacent IN NUMBER, MESSAGE OUT VARCHAR2 ) RETURN NUMBER; numcalls NUMBER := 0; END trigonometry;
- 212. Toad for Oracle User Guide Tutorials 210 / CREATE OR REPLACE PACKAGE BODY trigonometry AS FUNCTION sine ( opposite IN NUMBER, hypotenuse IN NUMBER, MESSAGE OUT VARCHAR2 ) RETURN NUMBER IS tmpsine NUMBER; BEGIN numcalls := numcalls + 1; IF (opposite <= 0) OR (hypotenuse <= 0) OR (opposite IS NULL) OR (hypotenuse IS NULL) THEN MESSAGE := 'Opposite and Hypotenuse must be numbers > 0'; RETURN NULL; ELSE /*Calculate the sine*/ tmpsine := opposite / hypotenuse; IF tmpsine BETWEEN -1 AND 1 THEN MESSAGE := 'Success'; RETURN tmpsine; ELSE MESSAGE := 'Unreasonable Sine: ' | | tmpsine; RETURN NULL; END IF;
- 213. Toad for Oracle User Guide Tutorials 211 END IF; END sine; FUNCTION cosine ( adjacent IN NUMBER, hypotenuse IN NUMBER, MESSAGE OUT VARCHAR2 ) RETURN NUMBER IS tmpcosine NUMBER; BEGIN numcalls := numcalls + 1; IF (adjacent <= 0) OR (hypotenuse <= 0) OR (adjacent IS NULL) OR (hypotenuse IS NULL) THEN MESSAGE := 'Adjacent and Hypotenuse must be numbers > 0'; RETURN NULL; ELSE /*Calculate the Cosine*/ tmpcosine := adjacent / hypotenuse; IF tmpcosine BETWEEN -1 AND 1 THEN MESSAGE := 'Success'; RETURN tmpcosine; ELSE MESSAGE := 'Unreasonable Cosine: ' | | tmpcosine; RETURN NULL; END IF; END IF;
- 214. Toad for Oracle User Guide Tutorials 212 END cosine; FUNCTION tangent ( opposite IN NUMBER, adjacent IN NUMBER, MESSAGE OUT VARCHAR2 ) RETURN NUMBER IS BEGIN numcalls := numcalls + 1; IF (adjacent <= 0) OR (opposite <= 0) OR (adjacent IS NULL) OR (opposite IS NULL) THEN MESSAGE := 'Opposite and Adjacent must be numbers > 0'; RETURN NULL; ELSE /*Return the value of the tangent*/ MESSAGE := 'Success'; RETURN opposite / adjacent; END IF; END tangent; END trigonometry; / 2. Click on the toolbar. The code is formatted to the default format, and a comment to this effect is added to the beginning. 3. Compile the package by clicking . The name Trigonometry appears on the tab above the package, and the structure of the package appears in the left panel. 4. Save the file. Close the file and open it again. Toad will ask you if you want to split the file. Select Yes. Now the package body and the package spec are in separate tabs in the
- 215. Toad for Oracle User Guide Tutorials 213 editor. In addition, the comments at the beginning of the code specify that each tab is a "Toad Chunk" of one file. Set Appropriate Options - Debugging Tutorial Before you debug this example package, you need to set the Debugger Options. Note: This may not be necessary when debugging your own packages, or you can set the options at different stages in your debugging procedure. 1. From the View menu, select Toad Options. 2. In the left panel, select Editor | Debug. The debugging options panel appears in the right panel. 3. Make sure Step through package initialization is checked. This specifies that when you step through the code it will also step through the initialization. If it is not checked, Toad will run the initialization and only step through the procedure you have chosen to debug. This defaults to off, so it is a good idea to check it before you start debugging. 4. Click OK to close the Options window. Set Watches and Breakpoints - Debugging Tutorial Set any breakpoints or watches. 1. In the body tab, set a breakpoint at Line 25 (tmpsine := opposite / hypotenuse;). 2. Set a watch on the variable Numcalls in line 14. This is a package variable. In order to watch it, you will have to change the properties. 3. In the Watches window, double-click the watch on Numcalls. Click in the Package Variable check box. Notice that the OK button is now disabled. You must choose a package to activate this option. Note: This may not be available if you are connecting on a RAC. See "Debugging on a RAC" (page 908) for more information. 4. The Owner name is automatically filled in with the current schema owner. Change it using the dropdown menu if necessary. For now, it should be correct. From the dropdown Package menu, select Trigonometry and then click OK. This creates a watch on a package variable. 5. Add a watch on the variable tmpSine on line 25. Select Procedure or Function to Run - Debugging Tutorial When debugging a package, you can only debug one procedure or function at a time. The package will run through its initialization process (or step through it if that option is checked in the Options window).
- 216. Toad for Oracle User Guide Tutorials 214 1. Click within the SINE function. 2. Click the Set Parameters icon on the toolbar. The Set Parameters window appears. 3. In the left pane, click Sine. This selects this procedure. Notice how the arguments in the right pane change. 4. Click in the value field for opposite. Enter 15. 5. Click in the value field for hypotenuse. Enter 20. 6. Click OK. The Set Parameters window closes. Step through Package - Debugging Tutorial 1. Press SHIFT+F7. If the parameters window opens, set variables for the other procedures as desired, or leave them NULL, and then click OK. Toad steps into the Package initialization, opening it in another tab. The watch for the Numcalls shows as NULL. 2. Press SHIFT+F7 again. Toad moves into the SINE procedure. The watch for Numcalls is now 0. 3. Press SHIFT+F7 again. The Numcalls watch moves up to 1, and Toad steps to line 14. 4. Click (Run). Toad stops at the breakpoint at line 22. 5. Click Run again. Toad completes running the SINE procedure, and notifies you that execution has terminated. All watches are returned to "process not accessible". In order to debug the other procedures in the package, set watches and variables as desired and select the appropriate procedure from the left pane in the Parameters window. Then repeat the stepping through the code and making changes until you are satisfied. Debugging an INSERT Trigger Debugging an INSERT Trigger - Debugging Tutorial Debugging a trigger works in a similar manner to debugging procedures, functions and packages. As with debugging packages, most of the changes occur when you are setting trigger parameters. This tutorial assumes that you are comfortable with watches and breakpoints, and the features described in the Enter the code in the Editor (page 202). 1. Triggers always need a table to act upon. For this exercise, create a table called TESTTAB. (See "Altering Tables" (page 1074) for more information.)Include the following columns: l ID - VARCHAR2(3) l FIRST_NAME - VARCHAR2(10) l LAST_NAME - VARCHAR2(30) 2. Open a new PL/SQL Editor tab.
- 217. Toad for Oracle User Guide Tutorials 215 Enter the code below into the Editor. This is the trigger we will use. It simply assigns and declares a variable when you perform an INSERT on the TESTTAB table. CREATE OR REPLACE TRIGGER testtrig BEFORE INSERT ON TESTTAB DECLARE tmpVar NUMBER; BEGIN tmpVar := 0; EXCEPTION WHEN OTHERS THEN NULL; END testtrig; / 3. Make sure the Compile with Debug button is selected. Click the Compile button to compile the trigger. Set INSERT Trigger Parameters - Debugging Tutorial Now that you have a trigger in the editor, you can set parameters for the variables and begin the debugging procedure. Note: Usually, when debugging, you are not going to want to change the data in your database. However, you must act on that data in order to step through a trigger: the trigger must be activated to debug it. In order to prevent data from changing, you may want to change the commit options in View | Toad Options | Debugger | Transaction Control to Rollback or Prompt to keep from altering data. For this tutorial, go ahead and commit the data, as it will be used in the DELETE and UPDATE tutorials later. 1. Press SHIFT+CTRL+F9 or the parameters button on the toolbar. 2. If a dialog asking you to compile with debug information appears, click OK. 3. In the Set Parameters window, Column Values grid, modify the anonymous block so that the trigger will fire. In this case, we are adding values that will be inserted into the table. Notice how as you add these values, the anonymous block in the Code area of the dialog changes. Column Name Value ID 13b
- 218. Toad for Oracle User Guide Tutorials 216 Column Name Value FIRST_NAME JOE LAST_NAME SMITH Entering a value in the WHERE clause for an INSERT trigger will produce no results, so don't make any changes to that column. 4. Click OK. Set INSERT Trigger Watches - Debugging Tutorial Set any watches or breakpoints you want to use for debugging. In this case, we are going to set a watch on the variable TMPVAR. 1. Click in line 4 (tmpVar NUMBER). 2. Click on the toolbar. The watch is displayed in the Watch window. Step through the INSERT trigger - Debugging Tutorial At this point you can proceed with debugging. l Press SHIFT+F7 to step through the code. Note how the TMPVAL watch changes values when you reach line 7. Debugging an UPDATE Trigger Debugging an UPDATE Trigger - Debugging Tutorial For this tutorial, we assume you have already gone through the INSERT tutorial. The UPDATE trigger we will be using acts upon the same TESTTAB table, and looks for the data you inserted in the INSERT Tutorial. The steps for debugging an UPDATE trigger are the same as for an INSERT trigger, but triggering requires different parameters to be included. 1. Triggers always need a table to act upon. For this exercise, we will be using the table we created in the Debugging an INSERT Trigger (page 214), and the data we inserted into it. 2. Open a new PL/SQL Editor tab. Enter the code below into the Editor. This is the trigger we will use. It simply assigns and declares a variable when you perform an DELETE on the TESTTAB table. CREATE OR REPLACE TRIGGER testtrig BEFORE UPDATE ON TESTTAB DECLARE
- 219. Toad for Oracle User Guide Tutorials 217 tmpVar NUMBER; BEGIN tmpVar := 7; EXCEPTION WHEN OTHERS THEN NULL; END testtrig; / 3. Make sure the Compile with Debug button is selected. Click the Compile button to compile the trigger. Set UPDATE Trigger Parameters - Debugging Tutorial Now that you have a trigger in the editor, you can set parameters for the variables and begin the debugging procedure. Note: Usually, when debugging, you are not going to want to change the data in your database. However, you must act on that data in order to step through a trigger: the trigger must be activated to debug it. In order to prevent data from changing, you may want to change the commit options in View | Toad Options | Debugger | Transaction Control to Rollback or Prompt to keep from altering data. For this tutorial, go ahead and commit the data, as it will be used in the DELETE and UPDATE tutorials later. 1. Click on the toolbar(SHIFT+CTRL+F9). 2. If a dialog asking you to compile with debug information appears, click OK. 3. In the Set Parameters window, Column Values grid, modify the anonymous block so that the trigger will fire. In this case, we are adding values that will be changedin the table. As such, we need to specify both an identifier (a WHERE clause) to find the record we want to change, and the value in the column we want to change. We will change "JOE SMITH" to "FRED SMITH". Name Value WHERE Value ID NULL 13b FIRST_NAME FRED NULL LAST_NAME NULL NULL
- 220. Toad for Oracle User Guide Tutorials 218 Set UPDATE Trigger Watches - Debugging Tutorial Set any watches or breakpoints you want to use for debugging. In this case, we are going to set a watch on the variable TMPVAR. 1. Click in line 4 (tmpVar NUMBER). 2. Click the Watch button on the toolbar. The watch is displayed in the Watch window. Step through the UPDATE Trigger - Debugging Tutorial At this point you can proceed with debugging. l Press SHIFT+F7 to step through the code. Note how the TMPVAL watch changes values when you reach line 7. Debugging a DELETE Trigger Debugging a DELETE Trigger - Debugging Tutorial For this tutorial, we assume you have already gone through the INSERT tutorial. The DELETE trigger we will be using acts upon the same TESTTAB table. The steps for debugging a DELETE trigger are the same as for an INSERT trigger, but triggering requires different parameters to be included. 1. Triggers always need a table to act upon. For this exercise, we will be using the table we created in the Debugging an INSERT Trigger (page 214), and the data we inserted into it. 2. Open a new PL/SQL Editor tab. 3. Enter the code below into the Editor. This is the trigger we will use. It assigns and declares a variable when you perform an DELETE on the TESTTAB table. CREATE OR REPLACE TRIGGER testtrig BEFORE INSERT ON TESTTAB DECLARE tmpVar NUMBER; BEGIN tmpVar := 0; EXCEPTION WHEN OTHERS THEN NULL; END testtrig;
- 221. Toad for Oracle User Guide Tutorials 219 / 4. Make sure the Compile with Debug button is selected. Click the Compile button to compile the trigger. Set DELETE Trigger Parameters - Debugging Tutorial Now that you have a trigger in the editor, you can set parameters for the variables and begin the debugging procedure. Note: Usually, when debugging, you are not going to want to change the data in your database. However, you must act on that data in order to step through a trigger: the trigger must be activated to debug it. In order to prevent data from changing, you may want to change the commit options in View | Toad Options | Debugger | Transaction Control to Rollback or Prompt to keep from altering data. 1. Click on the toolbar SHIFT+CTRL+F9). 2. If a dialog asking you to compile with debug information appears, click OK. 3. In the Set Parameters window, Column Values grid, modify the anonymous block so that the trigger will fire. In this case, we are going to delete rows of the table that have an employee last name of SMITH. The value sections of the grid are irrelevant to the trigger, so we need to modify the WHERE values: Column Name WHERE Value ID NULL FIRST_NAME NULL LAST_NAME SMITH Set DELETE Trigger Watches - Debugging Tutorial Set any watches or breakpoints you want to use for debugging. In this case, we are going to set a watch on the variable TMPVAR. 1. Click in line 4 (tmpVar NUMBER). 2. Click the Watch button on the toolbar. The watch is displayed in the Watch window. Step through the DELETE Trigger - Debugging Tutorial At this point you can proceed with debugging. l Press SHIFT+F7 to step through the code. Note how the TMPVAL watch changes values when you reach line 7.
- 222. Toad for Oracle User Guide Tutorials 220 SQL*Loader SQLLoader Tutorials Learning to use the SQL*Loader functionality is something best done by trying it out. These tutorials for using the SQL*Loader are designed to let you do just that in a small steps. Basic SQL*Loader Tutorial Start by creating an Input file, and then move on to telling Toad how to load your data and execute the import. See "Basic SQL*LoaderTutorial" (page 220) for more information. Intermediate Tutorials Move on to some of the more advanced features: l Intermediate SQL*Loader Tutorials (page 228) l Conditional Loads into Partitions - Intermediate SQL*Loader Tutorial (page 230) l Load from Several Files of Different Formats - Intermediate SQL*Loader Tutorial (page 231) Advanced Tutorial Learn about more of the Advanced Features of the SQL*Loader interface. See "Advanced SQL*Loader Tutorial" (page 233) for more information. Basic SQL*LoaderTutorial Create Input File - Basic SQL*Loader Tutorial For this tutorial we will need to create an file containing the data we'll insert into a table, and the table where it will be inserted. 1. Create and populate a sample table. Copy and paste the following script into Toad's editor: create);number Rank ),30(varchar2 Name( MarksFavoriteFoods table insert);1 ,'Tuna'(values MarksFavoriteFoods into insert);2 ,'Salmon'(values MarksFavoriteFoods into insert);3 ,'Broccoli'(values MarksFavoriteFoods into insert);4 ,'Asparagus'(values MarksFavoriteFoods into insert);5 ,'Bell peppers'(values MarksFavoriteFoods into
- 223. Toad for Oracle User Guide Tutorials 221 insert);6 ,'Chicken'(values MarksFavoriteFoods into insert);7 ,'Yogurt'(values MarksFavoriteFoods into insert);8 ,'Brown rice'(values MarksFavoriteFoods into insert);9 ,'Carrots'(values MarksFavoriteFoods into insert);10 ,'Lean ground beef'(values MarksFavoriteFoods into 2. Execute the script. 3. Save the new table as an ASCII file. 4. Open the Schema Browser. Click the Tables tab and then MARKSFAVORITEFOODS. 5. In the right panel, select the Data tab. 6. Right-click, select Save As, choose Delimited Text, enter a filename in the Output area, and set Comma as the delimiter. 7. Click OK. You have now created the data, or input, file. Empty the table by running this small script in the Editor: delete from MarksFavoriteFoods; commit; You can verify in Schema Browser that it is empty. From the Start menu, open the Notepad application and load the data file you just created. You are going to edit the first line to intentionally create "bad" data. Here is how the first three lines from the data file appear: Name,Rank Tuna,1 Salmon,2 8. Remove the first line from the file. 9. In the second line, replace the comma with a tab. The first line should now appear as follows: Tuna 1 10. Save the file and close Notepad. Add Input File - Basic SQL*Loader Tutorial You must add an input file. The input file is the actual data file that is loaded using the SQL*Loader Wizard.
- 224. Toad for Oracle User Guide Tutorials 222 To add an input file 1. From the Database menu, select Import | SQL*Loader Wizard. The first window lets you select, "What would you like to do?" Select Build Control File. ;Leave the Specify Fields box selected and then click Next. 2. The second window is where you enter the list of the data files you want to load into one or more tables. At least one input file is required. Click Add to add a file. 3. In the Add input file dialog, click the drilldown button next to Input filename and choose the data file. In this case, choose the MarksData.txt file that you created in the previous step. The following filenames will be created based on the input file name you enter: l Bad file name – This file will contain rejected records. By default, it gets named the same as the input file, with a .BAD extension. In our example, this file should contain our bad Tuna record because it does not conform to the parameters you will specify. l Discard file name – The discard file contains records that were not inserted during the load because they did not match any of the selection criteria. You will see in a later example that you can actually tell SQL*Loader WHEN you want a record inserted – it must match criteria you specify. Note: When the pointer passes over each field in the Add Input dialog box, "MicroHelp" is displayed in the status bar. 4. Records can be in one of three formats: l Stream - This is the default format. Lines are read until an end-of-record marker is found (end of line character, by default). Streamrecord format, end-of-line character – default: Tuna,1 Fixed -- each record must be a fixed number of bytes in length. Fixed record format - all data records must be same length Variable -- each record may be a different length, as specified by a special field – the first field in each record. The user must specify the length of this field. Variable record format, specifier field is 3 bytes long: 006Tuna,1 Stream is chosen by default. Leave the end of record string box empty, taking the end of line character as the default. 5. The Discard field indicates the maximum number of records to put into the discard file. Leave this empty also, indicating that you want all discarded records. Click OK.
- 225. Toad for Oracle User Guide Tutorials 223 At this point you could choose as many different input files as you want – as long as they all had the same record layout (i.e. they all contained the same fields, in the same order). However, as you will see in a later example, they can have different formats. 6. Click Next. The wizard moves to Set Delimiters. SQL*Loader Tutorial Set Delimiters for Field Mapping - Basic SQL*Loader Tutorial The third window of the SQL*Loader Wizard lets you set the delimiter for the data file. Note: If you have cleared the Specify Fields box on the Add Input File page, this window will not display. 1. Select String and enter a comma as the delimiter (this is the default). 2. The grid below lists the data and separates it by the selected delimiter. You can change the number of lines displayed in this grid. In places where the comma was replaced with a tab, the data does not fit the selection. 3. Click Next. Choose Destination Table - Basic SQL*Loader Tutorial The fourth window of the SQL*Loader Wizard lets you choose your destination tables. If you have selected Specify Fields on the first screen, you can also map fields to columns. These settings are displayed in the upper and lower grids in this window.
- 226. Toad for Oracle User Guide Tutorials 224 1. In the upper area, add a destination table. Click Add. 2. Select MarksFavoriteFoods from the table list, and leave the other settings as defaults. Click OK. 3. Skip the Columns area for now, and in the Field Mapping area, click the Auto Map button. The field numbers are mapped to the columns from the tables. Click the Preview tab to see how the data maps to the columns. Notice that the error we included when creating the input file is reflected in the preview data. You may have to scroll to the top of the data to see this. 4. Click Next to move to the Global options window and set parameters.
- 227. Toad for Oracle User Guide Tutorials 225 Set Parameters - Basic SQL*Loader Tutorial The next window of the Wizard lets you Specify global options and default values. For this tutorial, you are going to use the defaults. » Click Next to specify control file and log file names. Control File At the bottom of all of the previous windows (and this one) is a preview of your control file. It should appear similar to the following (the paths to the various files will reflect where you saved the original input file: LOAD DATA INFILE 'C:marksdata.txt' BADFILE 'C:marksdata.bad' DISCARDFILE 'C:marksdata.dsc' INTO TABLE "MARKSFAVORITEFOODS" FIELDS TERMINATED BY ',' (NAME, RANK) SQL*Loader Specify Control and Log Files - Basic SQL*Loader Tutorial This window lets you enter a name for a control file. 1. Enter a name that you want to use as a control file in the Control file name box. We used c:confile.ctl; you can name it whatever you want. Press <Tab>. 2. The control file name is entered into the log file box with the extension .log. If you want to use a different name for your log file, you can change this now. 3. Click Save Settings. Save these settings as MarksFood. You can now Load them at any time. 4. Click Next to go to the next step and execute SQL*Loader. Execute SQL*Loader - Basic SQL*Loader Tutorial 1. The last window of the wizard lets you choose how to execute your load. Select Execute Now. Be sure the Watch progress option is selected. Click Finish. The SQL*Loader Watch dialog box appears as follows:
- 228. Toad for Oracle User Guide Tutorials 226 The first tab is the output tab, and provides the standard output from running the loader. If any errors occurred when running the loader itself, they would be displayed here. l The first thing listed on the Output tab is some information about SQL*Loader itself – its version and the date and time it was executed. l The last line indicates that 10 rows were inserted into the table. You can verify this with the Schema Browser. 2. Click the Log tab. The log tab contains the text of the log file and presents detailed information about what occurred. The log file contents are loaded into this tab after the SQL*Loader is finished running. The log file contains a lot of data about what happened as the data was loaded. Scroll down in the window to see that one record was rejected and why.
- 229. Toad for Oracle User Guide Tutorials 227 From your Windows Start menu, open Windows Explorer. You will see that the file named "MarksDiet.bad" was created in the same directory as your data file. Open it. It contains one row: Tuna 1 This row did not match the criteria you specified for the load: that each record should be comma delimited. Execute SQL*Loader on a Populated table - Basic SQL*Loader Tutorial Executing the SQL*Loader when the table is populated will generate errors, unless you choose a "load method" of Replace, Append, or Truncate in the global options screen of the wizard. To see this in action, do the following procedure after you have run the SQL*Loader tutorial: To Load data into a Populated Table 1. Close the SQL Loader Watch window. 2. From the Database menu, select Import | SQL*Loader Wizard. In the first window, click Load Settings. 3. Open MarksFood from the dropdown menu. Click OK. The wizard moves to the final stage. Select Execute Now and click Finish. The watch window reopens, containing the line:
- 230. Toad for Oracle User Guide Tutorials 228 SQL*Loader-601: For INSERT option, table must be empty. Error on table "MARKSFAVORITEFOODS" Unless otherwise specified, the SQL*Loader performs the load in INSERT mode and does not load data into a table that already contains rows. 4. You can solve this problem by changing the load method. Return to the SQL*Loader window and open MarksFood as described above, but this time uncheck Proceed to Finish after loading. 5. Click Next three times to get to the Destination table and columns screen. The load method field of the grid is blank, indicating the default of INSERT. 6. Select the Load Method cell, click the dropdown arrow and select Append from the dropdown list. 7. Click Next | Next | Next, Execute Now and Finish. 8. You can read the Messages and Log file (or simply look in Schema Browser) to see that all 9 records (remember that 1 is still bad) were successfully appended into the table. Intermediate SQL*Loader Tutorials Load Logical Records into Multiple Tables - Intermediate SQL*Loader Tutorial This tutorial will demonstrate how you can load data from one data file into multiple tables by using logical records. What is different about this data is that each line of the data file corresponds to more than one physical record (row of a table). There are two logical records in each line. 1. Create an input file identical to the one described in Create Input File. See "Basic SQL*LoaderTutorial" (page 220) for more information. 2. Create another table identical to the MarksFavoriteFoods table. Name it TESTTHIS. Make sure both tables are empty. 3. Edit the input file to make it look like this:
- 231. Toad for Oracle User Guide Tutorials 229 It is important that the data be lined up exactly. Use spaces – no tabs. The first column of numbers should line up as the 14th character. The second column of foods should line up at the 18th character. The second column of numbers should be located at the 35th character. 4. Open the SQL*Loader Wizard, and then select Build control file. Uncheck the Specify Files box. Click Next. 5. Add the new data file as your input file. Click Next. 6. From the Destination Tables grid, add both the MarksFavoriteFoods, and TestThis tables. Clear the Terminated by field. 7. Select MARKSFAVORITEFOODS in the tables grid. In the Columns grid, in the From/To column fields, Name row, enter 1 and 12 respectively. Note: This tells the table to read the first 12 columns in our data file to extract the Name field. 8. In the Rank row, enter 14 and 14 for the From/To. That is where the Rank data resides in our input file for that field. 9. You can also select the column positions graphically. Select TESTTHIS in the tables grid and select its Name column. 10. Click Edit and then click the Position tab. 11. Click in front of the S in Salmon, and then after the f in beef. If you click in the wrong location, you can also drag the marker. Click OK. The From/To columns now contain the numbers 18 and 33. 12. Finally, select the last Rank column, click Edit and then Position, and set the column boundaries around the rank in the second set of data. 13. Click Next twice.
- 232. Toad for Oracle User Guide Tutorials 230 14. Click and select a control file from the Open dialog box, or enter a new name for your control file. Click OK. 15. Click Next. 16. Select Execute Now and Watch Progress and then click Finish. If you open the Schema Browser and check the tables, you will see that the foods ranked 1, 3, 5, 7 and 9 went into the first table, while those ranked 2, 4, 6, 8 and 10 went into the second table. Conditional Loads into Partitions - Intermediate SQL*Loader Tutorial This tutorial demonstrates loading into a partition with conditions. Note: At this time when you select a table the subpartitions field does not get populated with the available subpartitions (as the partitions field does with the tables’ partitions); you must enter the name directly. 1. Drop and recreate your first table with range partitions. Run the following code: DROP TABLE MARKSFAVORITEFOODS; CREATE (MARKSFAVORITEFOODS TABLE NAME ).30(VARCHAR2 RANK )NUMBER PARTITION)RANK(RANGE BY (PARTITION).5(LESS THAN VALUES FoodRank1 PARTITION(MAXVALUE)); LESS THAN VALUES FoodRank2 If you were to re-run the first tutorial on this table, foods with a ranking up through and including four would go into the partition named FoodRank1, and all the rest would go into the partition named FoodRank2. Try it, and verify the contents through the following SQL: SELECT * from MarksFavoriteFoods partition (FoodRank1) SELECT * from MarksFavoriteFoods partition (FoodRank2) For this example, however, you will attempt to load all our data into partition FoodRank1. If you ran the first tutorial again to try out the Note above, empty the table now. 2. Open the SQL*Loader wizard. 3. Select Build control file. Leave the Specify Fields box checked and click Next. 4. Select the original, comma delimited file from the beginning of example 1 and add it to the input file list. Click Next. 5. Click the Add button in the tables area. Select MarksFavoriteFoods from the Table dropdown.
- 233. Toad for Oracle User Guide Tutorials 231 6. Check the Partition box. Click the drop down partition list and you will see the two partitions listed that you created. Choose FOODRANK1. Make sure that the Terminated by box contains a comma (,). NOTE: If the data were tab delimited, you would choose TAB from the dropdown. On the lower right side of the add table window is the Load Rec Condition When area. This means "load the record into the table when the following conditions are present". In this field, enter the following: RANK != "1" This says that you only want records whose RANK field is not equal to the character "1". NOTE: All character data is interpreted automatically by Oracle. If you wanted to enforce certain data types for special conditions you could do so under the Column Parameters data type field. 7. Click OK and then click Next. 8. Leave global options and defaults blank. Click Next. 9. Enter a control file name to create. Click Next. 10. Select Execute Now and Watch progress and then click Finish. The status window opens. Click the Log File tab. Scroll down and you should come to these lines: Record 1: Discarded - failed all WHEN clauses. Record 5: Rejected - Error on table "MARKSFAVORITEFOODS", partition FOODRANK1. ORA-14401: inserted partition key is outside specified partition [and so on for the rest of the records] This says that the first record failed the WHEN clause. It certainly did – it had a rank of 1 and we told Toad not to load any records with that rank. The rest of the rejection lines state that the inserted partition key is outside the partition bounds. This is because records with a rank of 5 and above exceed the partition bounds you chose for FOODRANK1. Look in Schema Browser and you should find the foods ranked 2 through 4 in the data. Load from Several Files of Different Formats - Intermediate SQL*Loader Tutorial This example will use three different data files and demonstrate the three supported format types: stream, fixed and variable. 1. Use the MarksData.txt data file from the previous tutorial. Use Notepad (this is important) as an editor.
- 234. Toad for Oracle User Guide Tutorials 232 2. Split the original file, creating three files, MarksDiet1.dat, MarksDiet2.dat and MarksDiet3.dat. 3. Edit the first file (MarksDiet1.dat). It should look as follows: Tuna,1*Salmon,2*Broccoli,3* Note: There are no extra spaces or new line characters at the end of that line. This sample demonstrates using an asterisk as an end of record marker. Up until now, you have been using the carriage return/new line character combo to designate physical records. 4. Edit MarksDiet2.dat as follows: Asparagus, 4,Bell peppers,5,Chicken, 6, Once again, use no spaces or new line characters at the end of the line. This is going to be our fixed record length file. Each record is fixed at precisely 15 characters. 5. The third file should be named MarksDiet3.dat and look like this: 0009Yogurt,7,0015Brown rice,8, 0010Carrots,9,0019Lean ground beef,10 Note: On SQL*Loader versions prior to 8 (7.3, for example), a space is required after the record length field This is the variable format file. At the beginning of each record is a field that designates how long that record is. Notice Brown Rice on the first line. You may count 13 characters. But Notepad also adds two more characters – a carriage return/line feed pair, so they have to be added into the total. Note: Other editors may only add one line feed character. Once again, make sure there are no extra spaces or carriage returns at the end of the second line. 6. Open the SQL*Loader Wizard and select Build control file. Uncheck the Specify Files check box. Click Next. 7. Add files as follows: File Parameters MarksDiet1.dat Select Stream format, and enter an asterisk into the end of record string field. MarksDiet2.dat Select Fixed format, with a length of 15. MarksDiet3.dat Select Variable format, with a length of 4 bytes long (enter a 4 in the length field). After adding these, your Source Files tab should look like:
- 235. Toad for Oracle User Guide Tutorials 233 8. Click Next. Select the same Destination table. Note: Remember that the table must be empty before you attempt to Execute the command. If your table is not empty, save the settings, empty it and load the settings back into the wizard. 9. Click Next. Leave the global options blank. 10. Click Next. Add a control file. 11. Click Next. Select Execute Now and click Finish. If your table is still partitioned, as mine was, you can use these lines to see the data in each one: select * from MarksFavoriteFoods partition (FoodRank1) select * from MarksFavoriteFoods partition (FoodRank2) Advanced SQL*Loader Tutorial Advanced Features - SQL*Loader Tutorial This final tutorial will demonstrate specifying input data delimiters at the column level, capturing constraint errors and some of the command line options available. For this example, you are going to create a foreign key to a table containing all of our food ranks. 2. In the Editor, execute the following as script: CREATE TABLE FOODRANK (RANK NUMBER PRIMARY KEY); DECLARE I INTEGER; BEGIN I := 1; LOOP INSERT INTO FOODRANK VALUES (I);
- 236. Toad for Oracle User Guide Tutorials 234 I := I + 1; IF I > 10 THEN EXIT; END IF; END LOOP; END; / CREATE TABLE MARKSFAVORITEFOODS (NAME VARCHAR2 (20), RANK NUMBER); CREATE TABLE LOADEREXCEPTIONS (ROW_ID UROWID, OWNER VARCHAR2 (30), TABLE_NAME VARCHAR2 (30), CONSTRAINT VARCHAR2 (30)); ALTER TABLE MARKSFAVORITEFOODS ADD CONSTRAINT CHECK_RANK FOREIGN KEY (RANK) REFERENCES FOODRANK(RANK) EXCEPTIONS INTO LOADEREXCEPTIONS; 3. Create the input data file as follows. Be very careful about copying and pasting into an editor. Make sure you don’t get an empty line at the end. "Grease^#1 "Tuna^#1 "Salmon^#02 "Broccoli^#3 "Asparagus^#4 "Bell peppers^#5 "Chicken^#6 "Yogurt^7 "Brown rice^#8 "Carrots^#9 Lean ground beef#10 "Egg whites^#11
- 237. Toad for Oracle User Guide Tutorials 235 "Congealed Fat^#99 Look at this input file briefly. It is clear that the first field, Food Name, has a double- quote as its first delimiter. Its closing delimiter is a caret. And its ending field specifier is a # character. The Rank field is not delimited. Or is it? Copy and paste that data into an editor and again, make sure there are no hidden characters anywhere. (Incidentally, how did Grease and Congealed Fat make it into the list? You will fix that later.) 4. Save the data file and run the SQL*Loader Wizard, choosing Build control file on the first screen and leaving Specify fields checked. 5. Select the datafile you just created as the input file, leaving all other defaults. Click OK and then click Next. 6. Click Next to skip the Delimiter screen. 7. Add MarksFavoriteFoods as the destination table: 8. In the Exception Table area, enter or pick LOADEREXCEPTIONS as the Exceptions table. Remove any entries in the Terminated By: box. This indicates that you want any constraint exceptions to go into LOADEREXCEPTIONS. The exceptions table must be in the format as shown above. The RowID of the rows that violate the constraint go into this table. In the options area in the upper right area of the Add Table dialog, check Reenable Constraints. This tells the SQL*Loader to re-enable constraints when the load is finished. When the constraints are re-enabled, the referential integrity checks fire, causing some of the data to fail and the row to be marked in our exceptions table. Look back at the data. It is pretty clear that Congealed Fat with a food rank of 99, will violate our referential integrity constraint. You only have ten ranks in our FOODRANK table - 1 through 10, so anything else will not be allowed. 9. In the Columns area grid, select the Name column and click Edit. 10. Enter # in the Terminated by: field. 11. The Field is enclosed by " and ^,so enter those characters in the appropriate fields as well. 12. Not all of the food name fields are delimited, so you will check the Optionally check box. 13. Move to the Null If field. Null If tells the SQL*Loader: "set character columns to null, and number columns to zero, upon this condition". Enter RANK="3" in the Null If field. This will blank out the Food Name column when Rank is 3. The food for that rank is Broccoli, so it will never appear. 14. Move to the Default if field. Enter NAME="Bell peppers". This will set the Food Name column to null whenever the Name is "Bell peppers". The screen should look like this:
- 238. Toad for Oracle User Guide Tutorials 236 15. Click OK. 16. Click NEXT. The command line options are options that can be specified on the executable command line. Enter a 1 into Skip. This tells Toad to skip 1 record. The Grease field will be skipped. 17. Enter 11 into the Load field. This tells Toad to load 11 records from our data file. So the first line will be skipped and the next 11 loaded. The Congealed Fat record will not be loaded. Even if it was, it has a Rank of 99, so it would fail the constraint check. 18. Select the Direct check box, since you want to do a Direct Path Load (a very different style of loading, and does not perform standard SQL Inserts but rather uses buffers. This will permit the constraint to be turned off). Finally, under Silent, check the All check box. This tells loader to suppress all output messages (the log file will still be created). Note: These options are not mutually exclusive – you can disable Feedback and Errors, but not Discards, and so on. 19. Click Next. Enter a control file name (we used D:confile.ctl, but you can name it anything). Click Next. 20. Click Save Settings and save these settings. We’ll want them again later. 21. Select Execute now and Watch progress. Click Finish. Since you suppressed all messages, the Messages tab shows only these lines: SQL*Loader: Release 8.1.6.0.0 - Production on Fri Oct 27 13:57:14 2000 (c) Copyright 1999 Oracle Corporation. All rights reserved. "Yogurt^7 What’s wrong with that line? It has no field termination character - #. Notice that the lean ground beef line: Lean ground beef#10
- 239. Toad for Oracle User Guide Tutorials 237 made it in, even though it does not have delimiters. That’s because you said they were optional. 22. The Log file states that 10 rows were loaded; 1 row was not, due to data errors. Which row was that? Open MarksDiet.bad (or whatever you named the data file, plus the .bad extension). You will find this line: Now, open Schema Browser and look at the Data tab for MarksFavoriteFoods. It looks like this: Broccoli and Bell Peppers were blanked out, as specified. Grease was skipped and Congealed Fat was not loaded because it was beyond our "Loaded" limit. Yogurt was not loaded due to bad data. But Egg Whites had a Rank of 11. Why didn’t the constraint fail? And what’s up with the Rank of 0 for Salmon? It had a rank of 2. Open the log file to find out. Whatever you named the control file, but with a .LOG extension, and in the same directory as the control file is your log file. Near the bottom you will find the following: Column Name Position Len Term Encl Datatype ----------------------------------------------------------------------- ------------------------------ NAME FIRST * # O(") CHARACTER O(^) NULL if RANK = 0X33(character '3') DEFAULT if NAME = 0X42656c6c2070657070657273(character 'Bell peppers') RANK NEXT 1
- 240. Toad for Oracle User Guide Tutorials 238 CHARACTER Len means length. You see a length of * for Name, meaning – read to the end of field marker, (# - the Terminator character). But Rank has a length of 1. That’s why only 1 character was loaded. But why? Well, you never specified a field terminator for Rank. You did for Name, but not Rank. Open an Editor window and remove the records from MarksFavoriteFoods by entering: delete from marksfavoritefoods 23. Open the SQL*Loader Wizard. Load the settings you saved previously (uncheck the Proceed to finish box). Click next until you get to the Destination Tables. 24. Select Rank and change the Field is terminated by field, by selecting WHITESPACE from the dropdown. 25. Execute the SQL*Loader wizard once more. Notice in Schema Browser that all the numeric data is entered properly. In examining the log file, you see that our constraint was disabled, the records loaded, and an attempt was made to re-enable the constraint. But the particular constraint you used – a foreign key constraint – could not be re- enabled because there were orphaned records – the Egg White. Look in the LOADEREXCEPTIONS table and you will find the RowID of the offending record. Team Coding Team Coding Tutorials Team Coding is a cooperative source control feature. You can use Team Coding alone or in conjunction with a third party version control system. Team Coding works with the Editor to control access and development of functions, procedures, packages, triggers and types. There are several ways to use Team Coding, and these tutorials will help you set the feature up in the best way for your situation. Installing Team Coding Database Objects - Team Coding Tutorial (page 238)Team Coding Roles (page 239)Steps (page 241) Installing Team Coding Database Objects - Team Coding Tutorial Before you can use Team Coding as a basis for source control, it must be set up and configured on your Toad instance. This tutorial will walk you through the most basic Team Coding configuration, using only Toad and no external version control software. In order to use Team Coding, a repository must be set up on the database (usually in the TOAD schema), and Team Coding must be configured on your machine. 1. If you haven't already, open Toad. 2. From the Database menu, select Administer | Server Side Objects wizard.
- 241. Toad for Oracle User Guide Tutorials 239 3. On the first page of the wizard, select Install, upgrade or remove objects for all users to share and then click Next. 4. Enter login information for either the TOAD schema or a DBA user (you must have DBA privileges on your account to do this) information and click Next. Toad logs in to the selected schema. 5. The Server Side Objects wizard checks to see if Team Coding has been installed and that all components are valid. If they are, the Team Coding area will display "Found and OK." If they are not there, it will display "Team Coding not Found". Click Add and then Next to install them. 6. Click Next to skip the Space Manager features. 7. Create the Team Coding roles. It is recommended that you create new roles for Team Coding, but you can also assign the team coding privileges to an existing role. When you have selected the options for these roles, click Next. 8. Select the tablespaces where you want to create the Team Coding Objects. Click Next. 9. Click Run Script to create the Team Coding Objects. When the wizard displays "Update of TOAD complete," review the output and click Next. 10. The Server Side Objects wizard checks for other necessary objects and reports on the status. Click Close to finish. Setting up and Enabling TC without Version Control Software Setting up Team Coding without Version Control Software - Team Coding Tutorial Team Coding Roles Grant Users the Team Coding roles as desired. These roles are: Administrator (TC_ADMIN_ROLE) Can configure the instance to define how Team Coding operates, which VCS (if any) is used, and so on. This role is automatically assigned to the Toad user. Project Manager (TC_MGR_ROLE) Can create and delete code control groups (CCGs) and relate them to a VCS project. Team Leader (TC_LDR_ROLE) Can modify CCGs, define the objects or scripts are included in the group, and freeze objects. Can also delete rows from the Team Coding Viewer. Users without a role granted Users not granted one of the three Team Coding Roles hold the default role of developer. They can view the status of objects within the Team Coding Viewer, and check items in and out of source control. 1. Grant Roles as follows:
- 242. Toad for Oracle User Guide Tutorials 240 1. From the Schema Browser | Users tab 2. Select a user in the left panel 3. Click the Alter User button. 4. Do one of the following: l Click the Roles tab. Add or remove roles as desired. You can also grant roles from the Editor. Enter the appropriate SQL and execute it. For example: grant TC_ADMIN_ROLE to ARTHUR grant TC_LDR_ROLE to SUSAN Enabling Team Coding in the Database - No VCS - Team Coding Tutorial 1. On the Team Coding Toolbar, click the View Team Coding Status for this session button. The Team Coding Status dialog box displays, with the connection information in the title bar. If Team Coding is enabled, the Permissions area will display a green check mark beside Team Coding Available and the permissions the current user has. 2. Click Settings to see and edit Team Coding status for this connection. 3. Check Enable Team Coding. Setting up and Enabling Team Coding with Version Control Software Setting up Team Coding using Version Control Software - Team Coding Tutorial The first step is to grant users the Team Coding roles as desired. These roles are: l Administrator (TC_ADMIN_ROLE) l Can configure the instance to define how Team Coding operates, which VCS (if any) is used, and so on. This role is automatically assigned to the Toad user. l Project Manager (TC_MGR_ROLE) l Can create and delete code control groups (CCGs) and relate them to a VCS project. l Team Leader (TC_LDR_ROLE) l Can modify CCGs, define the objects or scripts are included in the group, and freeze objects. Can also delete rows from the Team Coding Viewer. l Users without a role granted
- 243. Toad for Oracle User Guide Tutorials 241 l Users not granted one of the three Team Coding Roles hold the default role of developer. They can view the status of objects within the Team Coding Viewer, and check items in and out of source control. Steps 1. Grant Roles as follows: 1. From the Schema Browser | Users tab 2. Select a user in the left panel 3. Click the Alter User button. 4. Do one of the following: l Click the Roles tab. Add or remove roles as desired. You can also grant roles from the Editor. Enter the appropriate SQL and execute it. For example: grant TC_ADMIN_ROLE to ARTHUR grant TC_LDR_ROLE to SUSAN 5. From View | Toad Options | Team Coding, set the appropriate Team Coding options. See "Source Control Options" (page 682) for more information and descriptions. At the very least you will need to set: l Default Working directory - Enter the full path of the working directory for your Version Control Software. You can browse and select it if necessary by clicking the drilldown button. 6. If you are using CVS, click VCS Provider Options and use CVS_Configurations_ Options to specify the options you want to use for that provider. Other supported providers do not require these options. Enabling Team Coding in the Database - VCS - Team Coding Tutorial 1. On the Team Coding Toolbar, click the View Team Coding Status for this session button. The Team Coding Status dialog box displays, with the connection information in the title bar. If Team Coding is enabled, the Permissions area will display a green check mark beside Team Coding Available and the permissions the current user has. 2. Click Settings to see and edit Team Coding status for this connection. The Configuration tab is active. 3. Check Enable Team Coding. 4. You must use code control groups if you are using 3rd party VCS. Check Use Code Control Groups and Use 3rd party version control. 5. Select your Version Control Provider from the list provided.
- 244. Toad for Oracle User Guide Tutorials 242 6. Click the File extension tab to change default file types associated with using Team Coding, and the General tab to set defaults such as automatic generation of new version numbers. 7. Click OK to save your settings and enable Team Coding. Setting up Code Control Groups - Team Coding Tutorial When Team Coding is enabled and your VCS has been set up, you will need to set up your Code Control Groups. Code Control Groups are like buckets that you can use to separate your code projects. You can put some code into one or more buckets that will be under source control, and you can put some code into a bucket that won't be controlled. In addition, you can sort the code within those buckets into smaller containers using filters. These filters can be applied depending on the developer using the code, as well as globally. Create a code control group as follows: 1. From the Toad menu bar, choose Team Coding | Code Control Groups, or on the Team Coding toolbar, click the Code Control Groups button. 2. In the Code Control Groups toolbar, click the Add Group button. 3. If a login window appears, provide the needed information. 4. In the New Group dialog box, enter a descriptive name for the Group. 5. If you are using a third party Version Control System (VCS), select a VCS project by following the prompts in the dialog boxes that appear. This will vary depending on the product in use. The Code Control Group window appears. 6. If you are not using a VCS, the Code Control Group window appears immediately. 7. In the Code Control Group window, create New Object and script mask definitions for the current CCG. Setting up New Object and Script Masks - Team Coding Tutorial 1. From the Code Control Group window, select the group where you want to add masks and then click the Open Group button. 2. Click the New Database Mask button. 3. Select from the following options: l Object Type - Choose from View, Procedure, Function, Package, Package Body or All. l Schema - Pick a user from the list, or type a schema name. You can use the % wildcard character.
- 245. Toad for Oracle User Guide Tutorials 243 l Object Name - You can type an object name, including the % wildcard. Alternatively, you can launch the Open DB Object dialog box to choose an object matching the Object Type and Schema settings. l Excluded - Select Excluded to exclude any objects matching this object mask from the CCG. Mapping Users to CCGs - Team Coding Tutorial You must be logged in as the user you want to map. 1. From the Team Coding menu, select Code Control Groups. 2. Select the appropriate CCG. 3. Click the Map Current User button on the toolbar. 4. If the CCG contains object masks for multiple schemas, follow the prompts to select the schema you want. 5. If required, perform an Import to update the objects in your schema.
- 246. RMAN Templates RMAN Scripts in Toad This feature is only available in the commercial version of Toad with the optional DB Admin module. You can execute RMAN scripts from Toad. l Edit templates l Add templates to the listing l Execute RMAN scripts See "Working with RMAN Templates" (page 244) for more information. There is an online video tutorial for this feature. This opens a new browser window and requires an internet connection. Templates are edited and created from the Toad Options window. Execution takes place from the Database Browser. RMAN executes outside of Toad and automatically closes when finished. Working with RMAN Templates RMAN templates are stored in a property file within the User Files directory. See "Properties Files" (page 163) for more information and more specific location information. From the Toad Options window, you can add your own files, edit existing ones, and remove them from the listing. To view the RMAN files listing » From the View | Toad Options window, select RMAN templates. To add files to the RMAN files listing 1. From the View | Toad Options | RMAN Templates page, click Add. 2. Enter the name you want displayed in the listing. 3. Do one of the following: l Enter the filename and path in the Filename box l Browse to the file using the drilldown button. 4. Click OK. 8
- 247. Toad for Oracle User Guide RMAN Templates 245 To edit an RMAN file 1. From the Options | RMAN Templates page, select the file you want to edit. 2. Click Edit. 3. Edit the file in the external editor, save it and close the editor. To remove files from the RMAN files listing 1. From the Options | RMAN Templates page, select the file you want to remove. 2. Click Delete. 3. Click Yes when prompted. Executing RMAN Scripts from Toad This feature is only available in the commercial version of Toad with the optional DB Admin module. You can execute RMAN scripts from the Toad Database Browser. To run an RMAN script 1. From the Database Browser, right-click on the target database. See "Database Browser" (page 532) for more information. 2. Select Generate RMAN script and then select the script you want to run. 3. Enter the variables that are not defined automatically, and select the ones you want to apply. Click OK to send the script to the editor. Note: If there are no variables to be defined, the script will be sent directly to the editor. 4. Press F9 to run the script. 5. RMAN opens and runs outside of Toad and then closes independently.
- 248. Comparing Data Duplicates Use this dialog box to view record duplicates based on user input. To view record duplicates 1. Select Database | Compare | Data Duplicates 2. Select the Owner, Object Type and Object from the dropdown lists. A list of columns is displayed below. Now, you can either: Find duplicates on all columns Check the Find duplicates on all columns option button. Do not select any columns in the list. Find duplicates on just selected columns Check the Find dupes of selected columns option button. Select one or more columns in the column list. On the Duplicate Data tabs, an additional column called Occurences is added to the end of the grid to display the number of resulting duplicates. To edit duplicate data 1. From the Table Data Duplicates window, select Owner and Table from the dropdown lists. 2. Click the Duplicate Data (Editable) tab. 3. Click the cell you want to edit and make your changes. 4. Click on the toolbar. Compare Single Objects You can compare single objects from the Schema Browser. All objects accessible from the Schema Browser can be compared. To compare objects 1. In the Schema Browser, right-click on an object. 2. Select Compare with another object. Note: Reference source information will be filled in for you. 9
- 249. Toad for Oracle User Guide Comparing 247 3. Enter comparison source information (a text file or an object in a live schema). Select options to apply: Compare columns only Applies only to tables, views, and materialized views. Alphabetical Arranges columns alphabetically before comparing. Format before comparing Formats both files consistently so that cosmetic differences do not impact your results. 4. If you are using Toad with the optional DB Admin Module, you can choose to view your results in one of two ways: Results as File Compare Use the Differences Viewer to compare the two selected objects. For more information about the differences viewer, see Compare Files. Results as Sync Script Only available if the objects chosen have the same name, and are in different schemas, this option the objects and creates a sync script. Comparing Databases Compare Databases Note: This Toad feature is only available in the commercial version of Toad with the optional DB Admin Module. An online video tutorial is also available for this feature. This video opens in a new browser window and requires an internet connection. To compare databases manually 1. From the Database menu, select Compare | Compare Databases. 2. Make your selections on the Databases and Objects & Options tabs, and then click Compare to display the results tabs. 3. Click the Object Set tab to specify an object set if wanted.
- 250. Toad for Oracle User Guide Comparing 248 To compare databases from the Command line l From the Options tab, you can click the Save all settings to file button and then run the comparison from the command line later. (See "Run Compare Databases from Command Prompt" (page 839) for more information.) Compare Databases - Database Tab Note: This Toad feature is only available in the commercial version of Toad with the optional DB Admin Module. After you have opened the Compare Databases window, click the Database tab to set the following: Option Notes Reference Source The reference source is the source that will not change if you use the sync script. Comparison Source The comparison source is the source that will be changed by the sync script. Database Select the Connection. You can also choose to create a definition file for either source from either source. Definition File Choose definition file to make a comparison with a saved definition file. This option is useful if you have an unchanging database, or you want your various databases to conform to a template. When you create a definition file, you can use variables in the filename. By default, Toad includes the %DATEFILE% and %TIMEFILE% variables, which inserts the current date and time into the filename when the definition file is created. (This ensures that the date and time are inserted accurately if you are creating the definition file from an Action.See "Creating a new action from a Toad window" (page 437) for more information.) Note: Comparing Definition files is only available in the commercial version of Toad with the optional DB Admin Module. See "Generate Schema Script" (page 429) for more information about creating definition files. Switching Comparison and Reference Databases Switching comparison and reference databases is performed within memory, so if you have previously run a compare, Toad can switch without querying the database again. Clicking Switch before you have run the comparison will run the new comparison.
- 251. Toad for Oracle User Guide Comparing 249 Changing options requires an additional query, and you will need to click compare again after making any such changes. To switch comparison and reference schemas » Click the Switch button. Compare Databases - Options Tab Note: This Toad feature is only available in the commercial version of Toad with the optional DB Admin Module. On the options tab of the Compare Databases window, check boxes let you select options and what object types will be compared. (See "Compare Databases" (page 247) for more information about comparing databases.) You can right-click the options tab to check or uncheck all object types. The options tab contains an additional two tabs: Tab Options Object Types to Compare Select the object types you want to compare. By limiting what you are comparing, you can speed up a schema compare. To select a set of options, click the Options tab. See Compare Databases - Options Tab for more information. Options Check boxes let you select options, and you can enter a filename for the Synchronization file in the box at the bottom. Most of the options are self-explanatory, or Oracle related.
- 252. Toad for Oracle User Guide Comparing 250 "Safe Drop" Option If "Safe Drop" on users, tblspaces and profiles is checked: A DROP USER statement will not include the CASCADE keyword. l If CASCADE is not included, then the script will only be able to drop the user if the user owns no objects. A DROP PROFILE statement will not include the CASCADE keyword. l If CASCADE is not included, then the script will only be able to drop the profile if no users have that profile. DROP TABLESPACE statements will not include the INCLUDING CONTENTS keywords, or, if 9i or above, the AND DATAFILES keyword. l If INCLUDING CONTENTS is not included, then the script will only be able to drop a tablespace if the tablespace contains no objects. If "Safe Drop" on users, tblspaces and profiles is unchecked: A DROP USER statement in the migration script will include the CASCADE keyword. A DROP PROFILE statement in the migration script will include the CASCADE keyword. l If CASCADE is included, then any users with the dropped profile will be reassigned to the DEFAULT profile. A DROP TABLESPACE statement in the migration script will include the INCLUDING CONTENTS keywords, plus, if 9i or above, the AND DATAFILES keyword. Compare Databases - Object Set Tab Note: This Toad feature is only available in the commercial version of Toad with the optional DB Admin Module. You can use the Object Set tab of the Compare Databases window to select a specific object set to compare. This lets you limit your comparison even more than the options. You can also specify an object set and save it for later use. This topic only covers unfamiliar information. It does not include all step and field descriptions. See "Compare Databases" (page 247) for more information about comparing databases.
- 253. Toad for Oracle User Guide Comparing 251 To specify an object set 1. In the Database Compare window, click the Object Set tab. 2. Select the Specify Object Set check box. Options with special features include: (Add object) If you already have objects loaded, a confirmation dialog will ask you if you want to clear the grid before loading the new objects. Choose Yes to start over, or No to append the new objects into the grid Like box If you leave it unchecked, all objects of the selected type will be loaded. Auto-check the grid rows Use this if you know you want to compare everything that loads. Select view/edit query Use the view dialog to check the query and alter it if necessary. (Save As) Save the object set so you can use it later. Loading a Saved Object Set If you have saved an object set, you can load it into this window instead of creating a new set. To load a saved object set 1. From the Database Compare window, click the Object Set tab. 2. Click the Load Object Set from File button. 3. Select the object set you want to load and click Open. Compare Databases - Results Note: This Toad feature is only available in the commercial version of Toad with the optional DB Admin Module. Results of comparing databases can be viewed in several different ways. See "Compare Databases" (page 247) for more information about comparing databases. Results of a compare database display the changes required to make the second database look like the reference database. Therefore, if you reverse the order of the databases, there may be differences in the number of objects reported as "missing." You can switch the order of the databases by clicking in the middle of the Compare Database window, Databases tab.
- 254. Toad for Oracle User Guide Comparing 252 The results grid details the differences between the databases in an interactive format. Differences are separated into three groups. Each type of item has an icon assigned to it, making it easy to see at a glance what object it is. Icon Meaning Objects Which Differ Objects in Reference Source not in Comparison Source Objects in Comparison Source not in Reference Source Results Toolbar The toolbar allows easy access to several formatting options, as well as a print preview screen and the migration SQL dialog box. These are also available from the right-click menu. Icon Meaning Expand all Expand to First Level Collapse all Show Sync Script for selected items. Show difference details for one selected and supported object type (for example a table or a directory). See "Viewing File Differences" (page 257) for more information. You can save your comparison to a file. You can choose text, html, or rtf file from the Save As window. NOTE: When you create a results file, you can use variables in the filename. Send to Excel. Display summary view. Print results. Group by Object Type Items within groups can be grouped according to type. Each type of item has an icon assigned to it.
- 255. Toad for Oracle User Guide Comparing 253 Compare Databases - Sync Script Note: This Toad feature is only available in the commercial version of Toad with the optional DB Admin Module. Sync Script tab The Sync Script tab displays the migration SQL for the entire comparison. Running this SQL will change everything in the comparison database. Caution: You will lose data whenever a table is truncated or dropped, so check this script thoroughly before executing it. Sync Script toolbar Icon Meaning Save Sync Script as a text file. Print the Sync Script. Load the Sync Script in the Toad Editor. See "Toad Editor" (page 854) for more information. Execute the Sync Script immediately. Caution: Remember that this SQL is designed to change the comparison schema. Be sure you won’t lose any important data before you execute it. Schedule the Sync Script to run at a later time using Windows Task Scheduler. See "Task Scheduler" (page 762) for more information. Scheduling Compare Databases as Windows Task Note: This Toad feature is only available in the commercial version of Toad with the optional DB Admin Module. You can schedule a Windows task for comparing databases. You can also save your settings to a file and load them at a later time. To schedule a database compare task 1. Set up your options to Compare Databases. See "Compare Databases" (page 247) for more information.
- 256. Toad for Oracle User Guide Comparing 254 2. From the Options tab, click the Schedule button. 3. Select your settings and output options and click Schedule to continue to the Schedule Windows Task wizard. See "Task Scheduler" (page 762) for more information. Saving and Loading Settings You can save your settings to a file and then later reload them from the file. This makes it easier to compare with the same settings in the future. In addition, if you save your settings to a file you can later choose to run the Copy function from the command line. See "Run Compare Databases from Command Prompt" (page 839) for more information. To save settings Options tab Save All Settings Object Set tab Save Object Set To load settings Options tab Load All Settings Object Set tab Load Object Set Comparing Data Comparing Data You can use Toad's Compare Data wizard to compare data between tables within different schemas, or different databases. This can be useful for comparing the data in a production and test environment, for example. This topic only covers unfamiliar information. It does not include all step and field descriptions To access the Compare Data wizard 1. From the Database menu, select Compare | Data. 2. Review the following for additional information: Select data sources page Description
- 257. Toad for Oracle User Guide Comparing 255 Use DB Link box If your first data source is remote, select an existing DB Link. If your first data source is local, leave this box blank. Object Type Tables, Views and Snapshots are supported. Select Performance Options Page Description Sort Area Size This only affects queries going through a Database Link. When selected: l The default area size is 10 MB l You can select to set another sort area size when the first window closes. The default for this is also 10MB. Optimizer Hints - Use parallel hint The default is unchecked. When selected, you can set the amount of parallelism you want. The default amount when checked is 4. Select Columns to Compare Description Column colors Black - Columns appear in both sources and can be compared. Red - Columns cannot be compared. Purple - Columns appear only in Source 1. Teal - Columns appear only in Source 2. Reviewing Differences From the last three windows of the Compare Data wizard you are now ready to view the differences between your data sources. See "Comparing Data" (page 254) for more information. l The first window reviews rows in Source 1 that are not in Source 2. l The second window reviews rows in Source 2 that are not in Source 1. l The last window reviews all differences. You must run the SQL code for each window as described below.
- 258. Toad for Oracle User Guide Comparing 256 Editable Datasets You can edit the dataset from within the grid. In some editions of Toad, you can delete rows from one table, and insert them into the other directly in the grid. To make dataset editable » On the Review Differences page, select the Editable Dataset checkbox. To review rows 1. Perform any desired optional steps: l Click the View/Edit SQL button to view or edit the SQL used to compare differences. You can make changes in the Edit SQL dialog box. l Click Check to verify that the query parses correctly. l Click OK to apply changes to your query. l Click Execute to find differences in the columns you want to compare. To delete selected rows 1. Select the rows you want to delete. 2. Right-click and select Delete Selected Rows. To delete all rows » Right-click and select Delete All Rows. Compare Files (Difference Viewer) Compare Files and Objects You can use the compare files window (File Differences Viewer) to compare the contents of two files from a disk, or an object to a file or to another object. You can access the Differences Viewer from three different areas. Each uses it to compare different objects. To compare two files on disk 1. From the Utilities menu, select Compare Files. 2. Select one or two files. 3. Click OK.
- 259. Toad for Oracle User Guide Comparing 257 To compare objects in the Schema Browser » From either the Procedures or Views page, right-click on an object and select Compare with another object. See "Compare Single Objects " (page 246) for more information. To compare differing objects from a schema compare » From the Schemas | Results (Interactive) tab, right-click an object listed as differing between schemas and select Show Difference Details to compare the scripts of the two objects. See "Compare Schemas" (page 260) for more information. Viewing File Differences When you have specified the objects you want to compare, whether they are files, database objects, or scripts, you can use the Differences Viewer. See "Compare Files and Objects" (page 256) for more information. The Differences Viewer lets you compare database objects in a split window. Differences between the objects are highlighted and the toolbar gives you access to controls for customizing the view and creating reports. File Comparison Rules and Options let you specify the way Toad displays the similarities and differences between two files, or two versions of a file. Differences Viewer Toolbar Button Command Reload files and execute the comparison Open a file Paste contents of clipboard into selected side of viewer Switch sides Go to Previous difference Go to Next difference Show all lines of compared objects Show only lines with differences Show only lines with major differences. See "File Comparison Rules" (page 258) for more information. Show only matching lines Find a text string Find next text string Go to a specific line number Copy to right Copy to left Delete text to left
- 260. Toad for Oracle User Guide Comparing 258 Delete Text to right Undo Generate a report of differences Generate a comparison summary Show space characters using tilde (~) characters Toggle line numbers on or off Show a thumbnail view of the file. See "Thumbnail view" (page 258) for more information. Set file comparison rules. See "File Comparison Rules" (page 258) for more information. Display and set options. See "Difference Viewer Options" (page 260) for more information. Thumbnail view This lets you quickly change sections of the file. The thumbnail view (to the left of the viewing window) is a visual summary of differences. Colored lines show the relative position of line mismatches. A white rectangle represents the part of the text currently visible in the Differences Viewer window. You can click the thumbnail view to position the viewer at that point in the documents. File Comparison Rules To access file comparison rules » Click on the differenced viewer toolbar. See "Compare Files and Objects" (page 256) for more information. Available Rules This topic only covers unfamiliar information. It does not include all step and field descriptions. General Tab Synchronization Settings Synchronization Settings control the comparison engine that reports differences and similarities between files. Unless you are experienced in manipulating comparison synchronization algorithms, you will probably find that the default settings work well enough for most situations. In general, the following principles apply: l Set the synchronization parameters low - Allows more efficient searches for small differences. l Set the synchronization parameters
- 261. Toad for Oracle User Guide Comparing 259 higher - Handle larger files or files with large differences. l Initial Match Requirement - The minimum number of lines that need to match in order for text synchronization to occur. l Skew Tolerance - The number of lines the Differences Viewer will search forward or backward when searching for matches. Smaller numbers improve performance. l Suppress Recursion - Refers to the method used to scan for matches. Recursion improves the ability to match up larger as well as smaller sections of text, but it can take longer. Minor Differences Use the Ignore Minor Differences check box to activate or deactivate the highlighting of minor differences in the Differences Viewer window. (As explained below, you specify what constitutes minor differences in the Rules options under Define Minor Differences.) Define Minor tab You can have the comparison engine either highlight or ignore minor differences—such as comments, or spacing characters and tabs. This gives you the option of focusing only on significant differences, or, alternatively, reviewing even minor differences between versions. Place a checkmark next to the items that you want to classify as minor differences. Then, under the General category, you can select or clear the Ignore Minor Differences check box. Line Weights tab The Line Weights tab lets you assign synchronization priorities to the lines that match. You can use the values listed in the tab, or you can create your own. Miscellaneous tab Use the Miscellaneous tab to make choices about line termination. You can also limit comparisons to specific columns by entering a column range in the comparison boxes.
- 262. Toad for Oracle User Guide Comparing 260 Difference Viewer Options To access options » Click in the Differences Viewer. See "Compare Files and Objects" (page 256) for more information. From this dialog box, you can set the colors and other visual characteristics used to highlight the following elements in the Differences Viewer: l Matching text l Similar text l Different text l Missing text l Horizontal lines between mismatches You can also set Find Next difference to use position only (so as not to obscure color coding), or normal line selection. Comparing Schemas Compare Schemas Use this window to compare two schemas and ascertain what has changed from the original reference source to the comparison source. You can set various options, including choosing schemas, setting options, and selecting object sets. An online video tutorial is also available for this feature. This video opens in a new browser window and requires an internet connection. Note: You can compare schemas in the base Toad editions, but definition files and sync scripts are available only in the commercial version of Toad with the optional DB Admin Module. To compare schemas 1. From the Database menu, select Compare | Compare Schemas. 2. Make your selections on the Schema, Options, and Object Set tabs, and then click Compare to display the results tabs. You can also create an Action and then run the comparison later from within Toad or from the command line. See "Compare Schemas Action" (page 447) for more information. Compare Schemas - Schemas Tab After you have opened the Compare Schemas window, select the Reference Source and the Comparison Source (Target).
- 263. Toad for Oracle User Guide Comparing 261 Radio buttons let you choose either Schema or Definition File. Option Notes Reference Schema (Source) The reference source is the source that Toad will use as the basis for comparison. Schema If you choose Schema, you must select both a connection and a schema. Create Schema Definition File When you create a definition file, you can use variables in the filename. By default, Toad includes the %DATEFILE% and %TIMEFILE% variables, which inserts the current date and time into the filename when the definition file is created. (This ensures that the date and time are inserted accurately if you are creating the definition file from an Action.) Note: Comparing Definition files is only available in the commercial version of Toad with the optional DB Admin Module. See "Generate Schema Script" (page 429) for more information about creating definition files. Target and Output The targets are the schemas that will be compared to the reference. If you run a created sync script, these are the schemas that will be changed. Each target can have a separate output file. To add targets, click +.
- 264. Toad for Oracle User Guide Comparing 262 Defining Targets and Output Option Notes Target Schema Choose one of the following: l Connection - If you choose Connection, enter both a connection and a schema. l Schema Definition File - Choose definition file to make a comparison with a saved definition file. This option is useful if you have an unchanging schema or you want your various schemas to conform to a template. Note: Comparing Definition files is only available in the commercial version of Toad with the optional DB Admin Module. See "Generate Schema Script" (page 429) for more information about creating definition files. Output Output can be created in several ways: l Auto-Complete output File Names - Toad create output filenames for you. l Enter the filenames and paths for output files manually in the appropriate boxes. l Select the Email boxes if you want the output sent by email to the settings specified in the Email Options page. See "Email Settings" (page 652) for more information. Switching Comparison and Reference Schemas Switching comparison and reference schemas is performed within memory, so if you have previously run a compare, Toad can switch the schemas for you without querying the database again. Clicking Switch before you have run the comparison will run the comparison. Changing options requires an additional query, and you will need to click compare again after making any such changes. To switch comparison and reference schemas » Select a schema in the Targets and Output area and select Switch with Reference Schema. Compare Schemas - Options Tab On the options tab of the Compare Schemas window check boxes let you select options and what object types will be compared. You can right-click the options tab to check or uncheck all
- 265. Toad for Oracle User Guide Comparing 263 object types. The options tab contains an additional three tabs: Tab Options Object Types to Compare Select the object types you want to compare. By limiting what you are comparing, you can speed up a schema compare. Object Type Specific Options Use these options to limit how you compare specific objects. Misc Options Select how you want to create your script and what you want to include. Storage Clause Options Use these options to limit the objects based on storage clauses. Compare Schemas - Object Set Tab You can use the Object Set tab of the Compare Schemas window to select a specific object set to compare. This lets you limit your comparison even more than the options. You can also specify an object set and save it for later use. This topic only covers unfamiliar information. It does not include all step and field descriptions. To specify an object set 1. In the Schema Compare window, click the Object Set tab. Select the Specify Object Set check box. Options with special features include: (Add object) If you already have objects loaded, a confirmation dialog will ask you if you want to clear the grid before loading the new objects. Choose Yes to start over, or No to append the new objects into the grid Like box If you leave it unchecked, all objects of the selected type will be loaded. Auto-check the grid rows Use this if you know you want to compare everything that loads. Select view/edit query Use the view dialog to check the query and alter it if necessary.
- 266. Toad for Oracle User Guide Comparing 264 (Save As) Save the object set so you can use it later. Loading a Saved Object Set If you have saved an object set, you can load it into this window instead of creating a new set. To load a saved object set 1. From the Database Compare window, click the Object Set tab. 2. Click the Load Object Set from File button. 3. Select the object set you want to load and click Open. Compare Schemas - Results Results of comparing schemas display the changes required to make the second schema look like the reference schema. Therefore, if you reverse the order of the schemas, there may be differences in the number of objects reported as "missing." For example: Schema A contains 2 tables; one of them has a PK constraint. Schema B contains 1 table that matches the unconstrained table in A. l If A is the reference schema, then the migration script would attempt to change B to make it look like A. In that case, two objects are needed - a table and a constraint. l But if B is the reference schema, then the migration script would attempt to change A to make it look like B. In that case, one object needs to be dropped - the table. The constraint will be dropped automatically with the table. You can switch the order of the schemas by clicking the Switch button in the middle of the Compare Schema window. Results The tree view details the differences between the schemas in an interactive format. Each item has a check box. By default, all items are checked. Clearing a checkbox will remove that item from the main Sync Script. See "Compare Schemas - Sync Script" (page 266) for more information about sync scripts. Differences are separated into three main node groups:
- 267. Toad for Oracle User Guide Comparing 265 Icon Meaning Objects in Comparison Source not in Reference Source Objects in Reference Source not in Comparison Source Objects that Differ Each type of item has an icon assigned to it, making it easy to see at a glance what object it is. Results Toolbar The toolbar allows easy access to several formatting options, as well as a print preview screen and the migration SQL dialog box. These are also available from the right-click menu. Icon Meaning Expand all Expand to First Level Collapse all Show Sync Script for selected items. Show difference details for one selected and supported object type (for example a table or a directory). See "Viewing File Differences" (page 257) for more information. You can save your comparison to a file. You can choose text, html, or rtf file from the Save As window. NOTE: When you create a results file, you can use variables in the filename. Send to Excel. Display summary view. Print results. Group by Object Type Items within groups can be grouped according to type. Each type of item has an icon assigned to it.
- 268. Toad for Oracle User Guide Comparing 266 Compare Schemas - Sync Script Note: This Toad feature is only available in the commercial version of Toad with the optional DB Admin Module. You can create and execute migration SQL (a sync script) for all of the differences in the comparison, or only selected objects. Sync Script tab The Sync Script tab displays the migration SQL for the entire comparison. Running this SQL will change everything in the target schema. Sync Script toolbar Icon Meaning Save Sync Script as a text file. Print the Sync Script. Load the Sync Script in the Toad Editor. See "Toad Editor" (page 854) for more information. Execute the Sync Script immediately. Caution: Remember that this SQL is designed to change the comparison schema. Be sure you will not lose any important data before you execute it. Schedule the Sync Script to run at a later time using Windows Task Scheduler. See "Task Scheduler" (page 762) for more information. Sync Script for Selected Objects You can also display a sync script for one or more selected objects. This does not use the Sync Script tab. To show migration SQL (Sync Script) You can show the migration SQL (Sync Script) for a selected object or objects. Caution: Remember that this SQL is designed to change the comparison schema. Be sure you will not lose any important data before you execute it.
- 269. Toad for Oracle User Guide Comparing 267 1. In the Results tab, select the objects by clicking on them. Multi-select by holding down either CTRL or SHIFT while clicking. Note: You must select objects individually rather than by node to use this feature. 2. Right-click and select Show Sync Script for selected items. The SQL Statement dialog box displays the SQL to migrate only the selected items. You can copy this to the clipboard or save directly to a file. Scheduling Compare Schemas as a Windows Task Note: This Toad feature is only available in the commercial version of Toad with the optional DB Admin Module. You can schedule a Windows task for comparing schemas. You can also save your settings to a file and load them at a later time. Scheduling the Compare You can add your compare schemas task to the task scheduler. To schedule a schema compare task 1. Open the Compare Schemas window and set up your options. See "Compare Schemas" (page 260) for more information. 2. From the Status bar, click the Schedule button to open the Schedule Task wizard. Enter the information requested and Click OK. Saving and Loading Settings You can save your settings as an action, and then later reload them from the file. This makes it easier to compare with the same settings in the future. In addition, if you create an action from your settings, you can later choose to run the Compare function from the command line. See "Run Compare Schemas from a Command Prompt" (page 842) for more information.
- 270. Controlling Sessions Select Session Use this dialog box to select a current session to end. Note: All windows connected to this session will close. To access Select Session » From the Session menu, select End Connection. End Connections You can choose to end connections without closing Toad. You can also use this dialog to change sessions. See "Select Session" (page 268) for more information. To end one connection » Select Session | End Connection. To end several, but not all, connections 1. Select Session | End Connection. 2. Select the connections you want to end. To end all connections » Select Session | End All Connections. Test Connections This command reconnects if Oracle has dropped the session. To test connections » Select Session | Test Connections (Reconnect) Configure User Lists Many databases have hundreds of users, most of which own no database objects and exist only for secure access to the database. You can remove these unwanted users from the dropdown user lists on many screens in Toad by using the Oracle Users List window to select users. 10
- 271. Toad for Oracle User Guide Controlling Sessions 269 The Oracle Users List displays a list of all users for the current database connection. You can select users or groups of users from this window by clicking in the check boxes. Click OK, and Toad will restrict all dropdown user lists to the users you have selected. The user list is stored in an ASCII file, SCHEMA_DATABASE.LST, where SCHEMA is the schema in use, and DATABASE is the current database alias. There is another option to only show users that own objects in the database. See "Schema Browser - Data" (page 674) for more information. To access configure user lists » Select Session | Oracle Users Lists. Session Information This general-purpose utility window displays information about the current Oracle user as well as information on the Oracle connection itself. This window displays: l Session Rights for the current user l Roles assigned to the current user l Access assigned by roles to the current user l Version information for the core Oracle processes l The registry settings for Oracle To view session info » Select the Session | Session Info menu item.
- 272. Toad for Oracle User Guide Controlling Sessions 270 Change Password To change your password for the active Oracle schema 1. Select Session | Change Password. 2. Your old password is entered, but displays only asterisks for security purposes. Enter your new password in the New Password field. 3. Enter it again in the Verify Password field. 4. Click Execute. Commit & Rollback You can commit or rollback recent changes to the database from the Session menu at any time while working with Toad. In addition, there are options to either auto-commit or to prompt to commit on exit To commit your changes l Select Session | Commit. To rollback your changes l Select Session | Rollback. Transaction Processing with Auto-commit You can configure Toad to either Auto Commit or prompt to commit on exit when Auto Commit is disabled. See "Oracle - Transactions" (page 669) for more information. When enabled, Toad will check for the current user's access to DBMS_TRANSACTION. If the user has access, Toad can determine whether there are actual transactions pending and prompt on exit only when necessary. If the user does not have access, the other "Prompt on exit" options are followed.
- 273. Toad for Oracle User Guide Controlling Sessions 271 Checking for system views is optional because of the additional time required at Login time to check for access. You may prefer to commit manually when needed and not have Toad prompt you. Connect and Disconnect Use the connect and disconnect menu items to easily choose to connect or disconnect from a previously-used schema. The schema must be listed in your connection list. See "Server Login Window" (page 177) for more information. To connect to a schema » From the Session menu, select Connect |schema you want to connect. To disconnect from a schema » From the Session menu, select Disconnect | schema you want to disconnect. DBMS_Flashback Note: This Toad feature is only available in the commercial version of Toad with the optional DB Admin Module. Using Oracle's DBMS_FLASHBACK, you can revert to a version of the database at a specified wall-clock time or a specified system change number (SCN). When enabled, the user session uses the Flashback version of the database, and applications execute against the Flashback version of the database. You can use the DBMS_FLASHBACK functionality to restore data to your sessions. You may want to use DBMS_FLASHBACK for the following reasons: l Self-service repair. If you accidentally delete rows from a table, you can recover the deleted rows. l Packaged applications such as email and voicemail. You can use Flashback to restore deleted e-mail by re-inserting the deleted message into the current message box. l Decision support system (DSS) and online analytical processing (OLAP) applications. You can perform data analysis or data modeling to track seasonal demand, for example. DBMS_FLASHBACK is turned off automatically when the session ends, whether by disconnection or by starting another connection. Requirements l You must have EXECUTE privileges for DBMS_FLASHBACK. l This Toad feature is only available in commercial versions of Toad with the DB Admin Module.
- 274. Toad for Oracle User Guide Controlling Sessions 272 Using Wall-Clock time When enabling Flashback using a wall-clock time, the database chooses an SCN that was generated within five minutes of the time specified. Using an SCN You can enable an SCN for finer control of the flashback. An SCN identifies the exact version of the database, and therefor allows you to specify the exact moment you want to flashback. Using Flashback PL/SQL cursors opened in Flashback mode return rows as of the flashback time or SCN, letting you recover data. These cursors will remain open when you disable the Flashback session so that you can transfer the data to the current session. Different concurrent sessions (connections) in the database can perform Flashback to different wall-clock times or SCNs. DML and DDL operations and distributed operations are not allowed while a session is running in Flashback mode. You can use PL/SQL cursors opened before disabling Flashback to perform DML. Note: In a Flashback-enabled session, SYSDATE will not be affected; it will continue to provide the current time. Additional information about DBMS_FLASHBACK, please see your Oracle documentation. To use Toad's Flashback functionality 1. From the Session menu, select DBMS Flashback. 2. If necessary, change the session for the window by selecting the active session . 3. Click . 4. Select either: l >Enable at Timestamp l Enable at System Change Number 5. Enter the timestamp or SCN in the appropriate box. 6. Click OK.
- 275. Diagnosing Problems View Extents To view extents 1. From the Database menu, select Diagnose | Extents. 2. Select the desired Object Type: All Objects, Tables, Indexes, Rollback, or Cluster. 3. Click to fetch results. To see extents for objects owned by SYS » Select SYS from the Owner list. Note: If you have access to the DBA_views, make sure the View | Toad Options | Startup | Check for DBA Views check box is checked. If it is checked, the Owner dropdown list will become active, and a DBA user can select a specific schema owner. Click GO to fetch the results. Identify Space Deficits Note: This Toad feature is only available in the commercial version of Toad with the optional DB Admin Module. You get to this window from Database | Diagnose | Identify Space Deficits. This displays tables that do not have enough free disk space to allocate their next extent. Select tablespaces and act upon them: Option For more Information Alter Tablespace See "Create and Alter Tablespace" (page 1085) for more information. Rebuild See "Rebuild Multiple Objects Overview" (page 612) for more information. Alter Table See "Altering Tables" (page 1074) for more information. 11
- 276. Toad for Oracle User Guide Diagnosing Problems 274 Log Switch Frequency Map Note: This Toad feature is only available in the commercial version of Toad with the optional DB Admin Module. This screen displays log switch records. Many DBAs try to size their redo logs so that there are few log switches per hour. Frequent log switches can drastically decrease performance, and infrequent log switches can increase database startup times. Use this window to judge the balance of log switches. An online video tutorial is also available for this feature. This video opens in a new browser window and requires an internet connection. To access the Log Switch Frequency Map » From the Database menu, select Diagnose | Log Switch Frequency Map. The database schema for the active connection is shown in the grid. Note: Log switches in each hour of the day begin with Midnight to 1:00 a.m. A cell is left empty if there were no log switches during that hour, and days with no log switches do not appear in the grid at all. Every log switch that is recorded in the control file for the database is displayed. To see log switch details » Double-click in any cell for details: l Hour column - Just the selected hour. l Date, day or total column - Details for the entire day. To export the grid » Right-click and choose Save As from the menu. See "Export Dataset" (page 390) for more information. Tablespace Map Note: This Toad feature is only available in the commercial version of Toad with the optional DB Admin Module. Access this window from Database | Diagnose | Tablespace Map on the menu. This map provides a graphic view of how space is allocated to objects in the tablespaces in your database. This lets you view Segment Fragmentation by tablespace. As you move the pointer over cells in the map, Toad displays the segments that consume data blocks represented by that cell. However, if this is a large tablespace that cell might represent hundreds of actual data blocks. Thus they may not overlap at all. Keep in mind that red cells
- 277. Toad for Oracle User Guide Diagnosing Problems 275 really represent segments that consume a high percentage of blocks for their overall size. Thus they may be candidates for object rebuilds. To view tablespace graphically 1. Select a tablespace. Click to fetch the data for the map. Green Areas used by selected Tablespace Red Areas that equal or exceed fragmentation limits (set in View | Toad Options | DBA). Note: Toad measures Internal Fragmentation, a measure of the fragmentation of the object within the tablespace. The actual SQL Toad uses to measure this can be found in the Toad FAQ, under the question "How does the Tablespace Map Work?" To coalesce a fragmented chart 1. Select a tablespace. 2. Click to coalesce and analyze the tablespace. To view segments and extents 1. Click either the Segments or Extents tab. View details for segments and extents as follows: Hover the pointer over the tablespace map. Segments display beside the pointer. Click in a grid cell All segments containing those in the clicked cell display in yellow. Click Now when you hover the pointer, details display in the Segments dialog, along with percentage of fragmentation. To filter the tablespace map 1. Select a tablespace. 2. Click to fetch the data. Cells representing occupied blocks are highlighted in green. Click . Filters are arranged in categories:
- 278. Toad for Oracle User Guide Diagnosing Problems 276 Note: Selected filters are cumulative, whether on the same tab or on multiple tabs. They remain in effect until you clear them. 3. Select the filters you want to see. 4. You can select multiple filters by holding down CTRL while selecting. 5. You can also select filters on multiple tabs. The spaces covered by the filters you choose turn yellow on the Tablespace map. To clear highlighting from View settings and Filters » Click . To restore window size » Click . To Display Tablespace Legend » Click . Quest Space Manager Space Manager can only be launched if you have it installed and licensed. To launch space manager » On the Tablespace Map toolbar, click . TKProf Interface Wizard The TKProf Interface wizard lets you easily use the TKPROF feature of Oracle, creating the necessary scripts to set parameters and options. For details about parameters and options, see your Oracle documentation. This topic only covers unfamiliar information. It does not include all step and field descriptions. To use this wizard 1. Select Database | Diagnose | TKProf Interface. Enter the parameters and options in appropriate fields. Review the following for additional information: Some Helpful information This section displays Ora.ini parameter information. In order to see this information you will need select privileges on v_$parameter. Define Input and Output Description
- 279. Toad for Oracle User Guide Diagnosing Problems 277 Files Input Files These are the trace files that were produced by Oracle when you enabled tracing. Oracle places them in the directory specified by the script USER_DUMP_DEST, also known as the "udump directory". Add Input files Click the drilldown button beside Files at the top right of the Input Files field. l Browse Windows files - select a file from a Windows OS. l Open files with FTP - this lets you select files on a UNIX based server. l UNIX File name Browse (no file transfer) - This lets you select files on a UNIX server without transferring them. If you want to run TKProf against trace files that are still on the server, you will need to copy the code and run it server side. See "TKProf Interface Wizard" (page 276) for more information. Output File Extension The output files are placed in the same directory as the input files. The filenames are the same, but the extension is different. You can change the extension if necessary. Insert File Extension Inserts the results of the trace file into a database table Record Files The record file is a script produced by TKPROF. It records the SQL statements issued by the traced session Sort Options Description Sort Options You can choose more than one sort option, and sort results are cumulative from the top of the list to the bottom. Other Options Description
- 280. Toad for Oracle User Guide Diagnosing Problems 278 Use this table for Explain Plan You must also choose Connect to DB to perform Explain Plan to use this option. Execution Options Description Execute Locally Use the instance of TKPROF located on your computer. If you do not connect to the database to perform explain plans, you can copy files from any Oracle database of the same or earlier version to your machine to run TKPROF. This works as file parsing, with no database activity. Define where your TKPROF is located in Toad Options | Executables. See "Executables" (page 654) for more information. View Output Files When Finished Output files open in your external editor. Just copy the commands to the clipboard Copies all generated commands into the clipboard. You might use this option if you run TKPROF on a Unix machine by telnet. Toad’s TKPROF interface lets you just paste the code in, saving you the time spent typing. Note: If you have not selected at least one input file, clicking finish will do nothing. If you have selected all pertinent options and click Finish, a confirmation dialog box appears. 2. Complete the wizard. Undo Advisor Undo Advisor (OEM) Overview Note: This Toad feature is only available in the commercial version of Toad with the optional DB Admin Module. The Undo Advisor in Oracle versions 10g and above provides advice and helps to automate the establishment of the database undo environment. Note: By default, unless you have instructed Toad to make this window accessible, this functionality is disabled. You can restore functionality from View|Toad Options|Windows and clicking the Available checkbox in the appropriate row of the grid. To access the Undo Advisor » From the Database menu, select Diagnose | Undo Advisor.
- 281. Toad for Oracle User Guide Diagnosing Problems 279 Use the advisor to analyze the health of the current undo configuration, either overall or within a given time range. From this baseline, you can then: l Alter the Undo tablespace l Switch to another Undo tablespace l Adjust the database's retention time l Create projections of required undo space given a retention time that you define The Undo Advisor Toolbar The Undo Advisor toolbar provides an easy way for you to alter undo tablespaces, and manipulate the undo environment. Button Command Alter current undo tablespace Alter undo retention Switch current tablespace Refresh date in screen Altering the Undo Tablespace Note: This Toad feature is only available in the commercial version of Toad with the optional DB Admin Module. The Undo Advisor lets you alter the current Undo Tablespace. You can change some of the basic information options, and also add, edit or remove data files. This topic only covers unfamiliar information. It does not include all step and field descriptions. To alter the undo tablespace 1. Confirm that the current tablespace is the one you want to alter. If not, switch to the correct tablespace before continuing. See "Switching Tablespaces" (page 280) for more information. 2. On the Undo Advisor toolbar, click .
- 282. Toad for Oracle User Guide Diagnosing Problems 280 Altering Undo Retention Note: This Toad feature is only available in the commercial version of Toad with the optional DB Admin Module. Altering the undo retrention time frame may require additional tablespace. Because of this, Toad also provides an estimate of required tablespace so that you can gauge what to add. See "Undo Advisor (OEM) Overview" (page 278) for more information This topic only covers unfamiliar information. It does not include all step and field descriptions. To estimate required tablespace » Enter the desired retention in the For this amount of retention box. Note: The required undo size for the selected options is displayed beneath it. To alter the undo retention 1. Click . 2. Enter the desired retention in the box. Switching Tablespaces Note: This Toad feature is only available in the commercial version of Toad with the optional DB Admin Module. If you have multiple undo tablespaces, you can switch between them from the Undo Advisor. See "Undo Advisor (OEM) Overview" (page 278) for more information. To switch between tablespaces » From the Undo Advisor, click and select a tablespace. Segment Advisor Segment Advisor (OEM) Note: This Toad feature is only available in the commercial version of Toad with the optional DB Admin Module. Active with Oracle 10g and above, this screen is an interface to Oracle's segment advisor. It can examine tables, indexes, and partitions to determine if and how much, space can be reclaimed in them with the SHRINK command.
- 283. Toad for Oracle User Guide Diagnosing Problems 281 Note: By default, unless you have instructed Toad to make this window accessible, this functionality is disabled. You can restore functionality from View|Toad Options|Windows and clicking the Available checkbox in the appropriate row of the grid. To Access Segment Advisor » From the Database menu, select Diagnose | Segment Advisor. The Segment Advisor generates advice at three levels: Object Level Advice is generated for the entire object, such as a table. If the object is partitioned, then the advice is generated on all the partitions of the object. Advice does not cascade to dependent objects such as indexes, LOB segments, and so forth. Segment Level Advice is generated for a single segment, such as unpartitioned table, a partition or subpartition of a partitioned table, or an index or LOB column. Tablespace Level Advice is generated for every segment in the tablespace. Examining Objects Note: This Toad feature is only available in the commercial version of Toad with the optional DB Admin Module. The heart of the Segment Advisor is its ability to examine objects and give recommendations. See "Segment Advisor (OEM)" (page 280) for more information. You can view objects by owner, object type, or tablespace and then select objects to be examined. To examine objects 1. From the Database menu, select Diagnose | Segment Advisor. 2. Click the Examine Objects tab. 3. Select a schema from the Object Owner drop down menu. 4. Select an object type. 5. From the Tablespace dropdown, select a tablespace (or All tablespaces). 6. In the grid, select the objects you want to submit for advice in the grid. 7. Click . 8. Select Segment Advisor options.
- 284. Toad for Oracle User Guide Diagnosing Problems 282 9. Click Execute. 10. Enter connection information if necessary, and click Connect. Advisor Tasks Note: This Toad feature is only available in the commercial version of Toad with the optional DB Admin Module. When you have examined objects, you can view or delete the tasks run by the Segment Advisor. See "Segment Advisor (OEM)" (page 280) for more information. To review tasks » Click the Advisor Tasks tab. To delete tasks 1. Click the Advisor Tasks tab. 2. In the data grid, select the tasks you want to delete. 3. Click . 4. Click Yes to confirm. 5. Enter connection information if necessary and click Connect. Advisor Recommendations Note: This Toad feature is only available in the commercial version of Toad with the optional DB Admin Module. Advisor recommendations is the output of a Segment Advisor task. See "Segment Advisor (OEM)" (page 280) for more information about creating tasks. Toad sorts recommendations into an easy-to-read grid format. You can choose to display either only the tasks you have created, or only tasks entered through Toad. Recommendation Toolbar Button Command Show recommendation script Execute recommendation script
- 285. Toad for Oracle User Guide Diagnosing Problems 283 Button Command Schedule Script Execution Set Status (Accept, Ignore, Implemented, Reject) Delete selected tasks Refresh Grid To act on recommendations 1. Select the recommendation you want to use. 2. Click on one of the toolbar buttons. 3. Complete any required steps. LogMiner Interface LogMiner Overview Note: This Toad feature is only available in the commercial version of Toad with the optional DB Admin Module. The Oracle LogMiner packages DBMS_LGMNR and DBMS_LOGMNR_D help you extract information from the online or archived Oracle redo logs. This information can be used to analyze where problems occurred. With LogMiner, if a System Change Number (SCN) caused a corruption problem, you can analyze the database and recover to the transaction exactly before the corruption. This package is only available in Oracle 8i and above. To access the LogMiner Interface From the Database menu, select Diagnose | LogMiner. See "Logminer Wizard" (page 284) for more information about the wizard itself. Requirements Before Toad starts LogMiner, it checks whether all of the requirements for using the LogMiner have been satisfied. These include: l Execute privileges on DBMS_LOGMNR l Execute privileges on DBMS_LOGMNR_D l Select privileges on V$LOGMNR_CONTENTS
- 286. Toad for Oracle User Guide Diagnosing Problems 284 l Select privileges on V$LOGMNR_LOGS l Parameter UTL_FILE_DIR set in init.ora (required for Oracle 8i only) If any of these parameters are not met, Toad will display a screen listing them, with the missing requirement displayed in red. Troubleshooting l Access to some V$ tables are required to use this option. See "Database | Diagnose | LogMiner" (page 156) for more information about required tables for LogMiner. l If you cannot access V$PARAMETER, V$LOGFILE, V$SESSION, V$VERSION, the screen will still work, but will not do some things automatically for you (such as tell you if utl_file is not set up, automatically determine where your log files are stored, or so on). l If you cannot access things that are actually required (like execute privs on dbms_logmnr) the screen will tell you what is required, and the permissions you are missing will be highlighted. Logminer Wizard Note: This Toad feature is only available in the commercial version of Toad with the optional DB Admin Module. This topic only covers unfamiliar information. It does not include all step and field descriptions. To use the Logminer wizard 1. From the Database menu, select Diagnose | LogMiner. 2. Review the following for additional information: Dictionary You can choose to use DBMS_LOGMNR_D.BUILD to create a new dictionary file, or you can specify the location of an existing file. This window saves its settings. If you enter a path and filename, then close the wizard; the path and filename will still be filled in when you reopen the window. Options vary depending on what version of Oracle you are using: Oracle 8i l Verify UTL_FILE Parameter - This box displays the value of the UTL_FILE_DIR. If it is incorrect, you will need to edit your init.ora file and then shut down and restart the database to make the parameter change take effect. l Dictionary File Name and Path - Enter the file name and directory path of the dictionary. Whether you build a new file or use an existing one, these paths
- 287. Toad for Oracle User Guide Diagnosing Problems 285 must be entered. The dictionary file path must be a path accessible by the database server, and accessible by UTL_FILE. Oracle 9i & up Dictionary l Use Online Data Dictionary - This option is the fastest, because there is no file building required. l Use Dictionary in Redo Logs - This option activates the next area, "Next" button action, letting you choose to build a new dictionary or use an existing dictionary. Files to Mine Click Find Files. l From the dropdown, select Select from Online redo logs to open the browse dialog box in the redo log directory. If you have a network drive mapped to the server, the browse dialog box will show the redo log directory; otherwise it will show the last browsed directory you browsed. l From the dropdown, select Select from Archive Logs to open the browse dialog box in the archive log directory. If you have a network drive mapped to the server, the browse dialog box shows the archive log directory; otherwise it shows the last browsed directory you browsed. l If your database is on a UNIX server, use the FTP- style dialog box. l If you are running Oracle 9i and have written a dictionary to the redo logs, be sure to include the redo log containing the dictionary in your file selection. Note: If your database is running on a Windows server (but not your local PC) it is important to make sure that the drive letters appear as they do on the server when selecting files. For example, if the Browse window adds this file to your file list: Car004555d$oracleoradataCARY9IREDO01A.LOG You may want to change it to this: D:oracleoradataCARY9IREDO01A.LOG You can edit directly in the files list window. 3. Complete the wizard. 4. View results in the Logminer Interface grid.
- 288. Toad for Oracle User Guide Diagnosing Problems 286 LogMiner Interface Grid Note: This Toad feature is only available in the commercial version of Toad with the optional DB Admin Module. To view results in the LogMiner interface grid 1. Click on the toolbar. 2. Select the columns you want displayed. 3. Do one of the following: Execute the LogMiner SQL immediately Click . Note: This can take some time, depending on the size of the LogMiner files. Copy the SQL into the Editor to edit, save and execute later Click 4. Right-click the grid to: Print Grid Open the Print dialog, where you can format and print the grid contents. See "Printing" (page 705) for more information. Save as Export the grid’s contents to a file or to the clipboard. Filter Filter the information retrieved into a format more suited to your needs. You can set Boolean filter conditions and Apply them to the grid. Click Cancel or close the dialog box to continue. The filter remains on the grid until you open the filter dialog box and click Clear. In the Editor Alternatively, you can leave this window open and open a Editor window to view your results. You may need to do this if you want to specify a ‘where clause’ so you can retrieve a more
- 289. Toad for Oracle User Guide Diagnosing Problems 287 focused dataset from v$logmnr_contents. To view results in the Editor 1. Leave the Logminer window open and open an Editor window. 2. In the Editor, SELECT data from v$logmnr_contents. This data is only available from your current session in the database. It will be cleared when you close the LogMiner interface window or click Back. Health Check DB Health Check Note: This Toad feature is only available in the commercial version of Toad with the optional DB Admin Module. The DB Health Check performs a series of checks on a selected database and displays the results. You can save the results to a color-coded RTF or HTML file, or to a plain text file. You can also send the results through email in any of these formats. An online video tutorial is also available for this feature. This video opens in a new browser window and requires an internet connection. Health checks utilize optimizer hints as configured in Toad Options | Oracle | Optimizer Hints. See "Oracle - General" (page 664) for more information. Health checks require access to the DBA_views and to some of the V$ views. See "V$ Tables Required" (page 153) for more information. Note: The DB Health Check opens a separate connection to Oracle, and then closes it after the check, even if Toad already has a connection open to the selected database. This connection will show in the Session Browser as a separate session, and could cause difficulties if you have limited Toad connections. To run a health check 1. From the Database menu, select Diagnose | DB Health Check. 2. In the left pane, select the databases you want to check. 3. In the Checks and Options tab on the right side of the window, select pre-defined health checks. See "DB Health Check - Checks and Options" (page 288) for more information. 4. If you want to email the results, make appropriate settings to the Email Settings tab. See "DB Health Check - Email Results" (page 311) for more information. 5. When all your options have been set, click on the toolbar. 6. View results on the Report Output tab. See "DB Health Check - Saving Results" (page 311) for more information.
- 290. Toad for Oracle User Guide Diagnosing Problems 288 Scheduling Health Check to run later To save your settings as an action from the DB Health Check window Note: See "Managing Projects" (page 433) for more information about ToadApps and Actions. 1. Create your health check as described above in steps 1 through 4. 2. Click in the status bar at the bottom of the window. 3. Select Create, select the ToadApp where you want it to reside, and give it a name. 4. Click OK. To create a DB Healthcheck Action from the Automation Designer 1. From the Automation Designer window, select the app you want to contain the health check. 2. Click the DB Misc tab, click and then click in the app. 3. Double-click on the action icon and set properties as described in DB Health Check (page 287). 4. Click Apply, then Cancel to save your settings and close the window. To schedule your health check l From the command line: See "Running Actions from the Command Line" (page 835) for more information about how to schedule or run your health check. l As a Windows Task: See "Using the Automation Designer to Schedule Actions and Apps." (page 435) for more information. DB Health Check - Checks and Options Note: This Toad feature is only available in the commercial version of Toad with the optional DB Admin Module. In the Checks and Options tab of the Health Check window, you can set many different pre-set conditions. Each of these preset checks represents something that a DBA or Developer should be aware of in their databases. In addition, some of these conditions are adjustable. Finding Specific Checks There are many checks that you can run on your database. Although checks are grouped by settings, database, and schema checks, you may find that it is difficult to locate every check you want to make just by looking down the list. Toad provides a search feature that will highlight the checks that meet your specified criteria. To search for a specific health check » In the Filter: box, enter the word you want to search for.
- 291. Toad for Oracle User Guide Diagnosing Problems 289 Note: Toad searches for entries as they are typed. You can enter entire words, multiple or portions of words. For example, you entering data will find checks containing data, datafile, datatype, and so on. However, if you are using multiple words, Toad sees everything you enter as one word. Therefore, Toad will only find the words that are in the order you enter. For example, if you are looking for the check containing "datafile IO distribution," entering "IO datafile" will not find the check you want. You must enter "datafile IO." Adjusting Conditions in Checks Some of the conditions described in Check Descriptions are adjustable. To change parameters 1. In the Parameters column, click params. 2. Change the condition and click OK. Dropping Synonyms Health check items listing synonyms pointing to nonexistent objects can be dropped using the script provided within the report. The synonyms will be listed, and a script provided. DB Health Check - Check Descriptions Note: This Toad feature is only available in the commercial version of Toad with the optional DB Admin Module. The following is a list of checks that the DB Health Check can perform, separated by category. ( See "DB Health Check" (page 287) for more information.) l Settings tab (page 290) l Checks tab l Configuration (page 293) l Performance (page 297) l Alert Log (page 299) l Storage (page 300) l Schema (page 302) l Vulnerability Assessment (page 307) Note: Actions performed on jobs are not viewable to other connections until they are committed. This means that when it is run the DB Health Check will not catch actions that have been performed, but not committed.
- 292. Toad for Oracle User Guide Diagnosing Problems 290 Settings tab Note: Check numbers are for reference only, and may change between releases of Toad. Items that refer to "item numbers" refer to the check number within the active Toad release. Check Number Check Name Description 1 Show output only for ‘bad’ conditions If this option is checked, Toad displays only items that fail the health check. If your databases are generally in good working order, this can shorten your reports dramatically. 2 Suppress header for a database when the report is empty If this option is checked, and your health check ran on several databases in one report, then only the databases that failed the health check will appear in the report. While this can shorten your reports dramatically, you will not have a record of the databases that pass all aspects of the health check. 3 Include user comments at top of the report output 4 For items 72, 73, and 74, exclude objects in "SYSTEM" tablespaces This option applies to: l List tablespaces that are more than 30% fragmented, having more than 50 total extents l List tablespaces with less than 10% free space remaining. l List segments that can’t extend because there is
- 293. Toad for Oracle User Guide Diagnosing Problems 291 Check Number Check Name Description not enough room in the tablespace. 5 Play a custom script at the end of the health check This option executes a user-supplied script at the end of the health check. The script output is included in health check report. The file name for the script to play is adjustable. 6 Store results in table TOAD.TOAD_HEALTH_ CHECK in database being checked Use this option to populate results into a table on each database being checked, or results of all health checks into a single table in a repository database. Use the adjust option to specify one database, or many. If the table specified does not exist, Toad will attempt to create it when the health check runs. 7 Save results to file: This option automatically saves health check results to a file at the end of the health check. The file name is adjustable, and the type of file is determined by the file extension you specify. l If file extension is "HTM", the file will be HTML format. l If the file extension is
- 294. Toad for Oracle User Guide Diagnosing Problems 292 Check Number Check Name Description "RTF", the file will be a rich- text format. l All other file extensions will result in a non- color coded ASCII text file. 8 Archive results for differences report 9 Save differences report to file: This option saves your differences report to the file specified. Clicking Params lets you change the path to the file location, and the filename. 10 Always send results by email as HTML When selected , this option sets when Toad emails results, and the file format of those results. Click params to change when and how results are sent.
- 295. Toad for Oracle User Guide Diagnosing Problems 293 Checks Tab Check Number Check Name Description Configuration 11 List default initialization parameters 12 List non-default deprecated initialization parameters. (10g+) 13 Verify compatible matches version major.minor 14 Verify optimizer_features_enable matches version major.minor 15 Verify optimizer_index_caching >= 50 (9i+) You can set the value that caching should be greater than or equal to. 16 Verify opitmizer_index_cost_adj >=50 (9i+) When selected, Toad will verify that the optimizer index cost adjustment is greater than or equal to the value you specify. 17 List incompatible parameters if pga_aggregate_target (10g) or memory_target (11g) is set. Lists the following parameters if pga_ aggregate_target is set in 10g, or if memory_ target is set in 11g: l bitmap_merge_ area_size l create_bitmap_ area_size l hash_area_size l sort_area_ retained_size l sort_area_size 18 Verify pga_aggregate_target >=10MB (10g only) On a 10g database, verify the pga_ aggregate_target value.
- 296. Toad for Oracle User Guide Diagnosing Problems 294 Check Number Check Name Description 19 Verify control file count >=2 Verify that the control file count is greater than or equal to the value you set. 20 Verify CPU count - 0 (let Oracle determine the value) 21 Verify cursor_sharing='SIMILAR' (9i+) 22 Verify cursor_space_for_time='TRUE' (pre 11g) This option is only valid on pre-11g databases. 23 Verify db_cache_size set instead of db_block_buffers (9i+) 24 Verify Buffer Cache >=200MB Verify that the buffer cache is set to greater than or equal to the value you set. 25 Verify Large Pool >=50MB Verify that the Large Pool is set to greater than or equal to the value you set. 26 Verify objects using KEEP buffer pool exist if db_ keep_cache_size is set. If db_keep_cache_size parmaeter is set, make sure there are objects that actually use it. 27 Verify db_keep_cache_size>=50 MB if objects exist within the KEEP buffer pool If objects do not exist within the KEEP buffer pool, then this test is ignored. The value of the KEEP buffer pool size is adjustable. 28 Verify objects using RECYCLE buffer pool exist if db_recycle_cache_size is set If db_recycle_cache_ size parmaeter is set, make sure there are objects that actually use it.
- 297. Toad for Oracle User Guide Diagnosing Problems 295 Check Number Check Name Description 29 Verify db_recycle_cache_size>=50MB if objects exist which use RECYCLE buffer pool If objects do not exist within the RECYCLE buffer pool, then this test is ignored. The value of the RECYCLE buffer pool size is adjustable. 30 List db_nk_cache_sizes without correspoinding tablespaces (9i+) If a db_nk_cache_size does not have a corresponding tablespace, then it will be listed in the report. 31 List tablespaces without corresponding db_nk_ cache_sizes(9i+) If a tablespace does not have a corresponding db_nk_ cache_size, then it will be listed in the report. 32 Verify db_block_size<=4K for RAC, >=4K for non- RAC Database block size should be set according to type of database. Values are not adjustable. 33 Verify multiblock_read_count between 4 and 16 Values are not adjustable. 34 Verify disk_asynch_io is TRUE (Pre-11g) 35 Verify compatibility of db_writer_processes and dbwr_slaves with disk_asynch_io setting If disk_asynch_io is true, verify that dbwr_ slaves is 0, and db_ writer_processes >= 2. If disk_asynch_io is false, verify dbwr_io_ slaves >= 2, and db_ writer_processes = 1 . 36 Verify dml_locks=0 or >=transactions * 4 DML locks should be either equal to zero, or greater than or equal
- 298. Toad for Oracle User Guide Diagnosing Problems 296 Check Number Check Name Description to four times the number of transactions. These amounts are not adjustable. 37 Verify filesystemio_options='SETALL' 38 Verify fast_start_mttr_target is set when log_ checkpoint_timeout=0 (9i+) 39 Verify max_dump_file_size <=20MB The size of the dump file is adjustable. 40 Verify open_cursors >=50 The number of open cursors is adjustable. 41 Verify query_rewrite_enabled = TRUE (9i+) 42 Verify recyclebin='OFF' (10g+) On Oracle versions that have recycle bin capability, you can verify that the capability is on or off. The choice of ON or OFF is adjustable. 43 Verify remote_login_password_file='SHARED' 44 Verify session_cached_cursors >=20 The number of cursors you want to check is adjustable. 45 Verify sga_target >=200MB and sga_max_size same value (10g+) The value is adjustable. 46 Verify star_transformation_enabled=TRUE 47 Verify sql_trace = FALSE (Pre 11g) 48 Verify timed_os_statistics = FALSE 49 Verify timed_statistics = FALSE 50 Verify trace_enabled = FALSE (9i+) 51 List DB Links which are inaccessible This option displays
- 299. Toad for Oracle User Guide Diagnosing Problems 297 Check Number Check Name Description any DB links that cannot be accessed, for whatever reason. Some (but not all) possible reasons a link cannot be accessed are: l The linked database is down l The linked database is accessible through the network l That the link is no longer valid 52 Check redo log sizes and quantities (min. groups: 3; min. members per group: 2) Checks for a minimum number of log groups, and that each group has the same size members. 53 Verify SYS.AUD$ isn't in SYSTEM tablespace Checks that SYS.AUD$ isn't located in the SYSTEM tablespace. 54 Verify AWR collection interval >=30 minutes, retention <=90 days (10g and newer) In Oracle 10g or newer databases, checks that AWR collections are set to perform at more than 30 minute intervals, and that they are retained for less than 90 days. Both of these values are adjustable. Performance 55 List connect time, version info, and a few basic ratios If this option is
- 300. Toad for Oracle User Guide Diagnosing Problems 298 Check Number Check Name Description checked, the Health Check report lists the following: l the time it took Toad to connect to this database l database version l how long the database has been up l buffer cache hit ratio l library cache miss ratio l dictionary cache miss ratio 56 List SGA usage stats If this option is checked, the report lists SGA total size in MB, amount used, amount unused, and percent usage. 57 List archive log info This option controls display of the following in the Health Check Report: l archiving is turned on or not l average log switches per day l the predicted amount of disk space necessary to store a day’s
- 301. Toad for Oracle User Guide Diagnosing Problems 299 Check Number Check Name Description worth of archive logs. 58 List datafile IO distribution Lists all datafiles and their tablespaces, and the percentage of the total reads and writes from the database for each datafile. If your datafiles are on different disks, this can show you if you have them properly distributed across your disks. It can also help you determine if your objects are properly distributed across your tablespaces. 59 List rollback segments with a wait ratio > 1% If the wait ratio is above the selected percentage, the rollback segment is included on the report. This percentage is adjustable. 60 List analyzed SYS and SYSTEM Objects (Pre 10g) This option lists all SYS and SYSTEM objects that you have analyzed. 61 List unanalyzed SYS and SYSTEM Objects (10g+) This option lists all SYS and SYSTEM objects that you have not yet analyzed. 62 Verify sequence sys.audses$ has sufficient cache for high login rates Checks that SYS.AUDSES$ has enough cache to handle a high login rate. Alert Log
- 302. Toad for Oracle User Guide Diagnosing Problems 300 Check Number Check Name Description 63 Alert.Log - check for Ora-600 errors (all alertlog items require UTL_FILE access) This shows each error and the three previous lines. 64 Alert.Log - list trace files with errors Parses the alert.log file, and lists lines that start with "Error in file." Double-click the entry in the results to display the trace file. 65 Alert.Log - show summary This displays a count of all the 600 errors, checkpoint not complete messages, database startups, count of each ORA error found in the file, and a count of new trace files reported. 66 Alert.log - Mark file so next Toad Health check against it examines only new items Places a bookmark record in the alert.log file so that the next time you run a Health Check against it, Toad will only display new items. 67 Alert.log - Save local copy in User Files dir This saves a copy of the alert.log file in the Toad for OracleTemps directory. Storage 68 List users with SYSTEM as a temporary tablespace This option displays any users that are using SYSTEM as a temporary tablespace. 69 List users except SYS with SYSTEM as a default tablespace This option displays any users that are using SYSTEM as a default tablespace,
- 303. Toad for Oracle User Guide Diagnosing Problems 301 Check Number Check Name Description with the exception of the SYS user. 70 List users with a non-existent temporary tablespace This option displays any users that are using a temporary tablespace that does not exist. 71 List users with a non-existent default tablespace This option displays any users that are using a temporary tablespace that does not exist. 72 List tablespaces > 30% fragmented having > 50 total extents This options list tablespaces that are more than a stated percentage fragmented and have more than the selected number of total extents. Both the percentage and the number of extents are adjustable. 73 List tablespaces with < 10% free space remaining This option lists tablespaces that have filled. The percentage of free space remaining is adjustable. 74 List segments which can't extend because there is not enough room in the tablespace, including autoextend tablespaces Optionally, using the Adjust column can include objects in autoextend tablespaces. This option takes the maximum size for autoextend datafiles into account. 75 List dictionary managed tablespaces (8i+) In Oracle 8i or newer databases, lists all
- 304. Toad for Oracle User Guide Diagnosing Problems 302 Check Number Check Name Description tablespaces that are dictionary-managed. Schema 76 List tables with no primary key Primary keys uniquely define a record in a database. Most tables should have a primary key. Check this option to alert you of tables that do not have such a key assigned. 77 List tables with no unique key or index Check this option to alert you of tables that do not have a unique key or index assigned to them. 78 List non-system tables with > 6 indexes The number of indexes defined in this check is adjustable. 79 List tables with > 100 columns The number of tables defined in this check is adjustable. 80 List indexes with > 6 columns The number of indexes defined in this check is adjustable. 81 List tables with LONG or LONG RAW datatypes This lists all tables that include LONG or LONG RAW datatypes. 82 List partitioned tables with non-partitioned indexes Lists all partitioned tables with non- partitioned indexes. 83 List tables with max row size > tablespace (or db) block size Lists all tables where maximum row size exceeds tablespace (or database) block size.
- 305. Toad for Oracle User Guide Diagnosing Problems 303 Check Number Check Name Description 84 List redundant indexes (same leading columns) Lists objects that have indexes with the same leading columns: this indicates that the index is redundant. 85 List primary and unique keys using non-unique indexes (9i+) Lists primary and unique key constraints that are using non- unique indexes. This applies to Oracle versions 9i and newer only. 86 List foreign keys with non-matching column definitions (causes poor performance) This option lists foreign keys that have parent table columns with a different type as the child table columns. This situation causes performance degradation. 87 List foreign keys with no matching index on child table (causes locks) This option is listed because without such an index, deletes and updates on the parent table result in table- level locks on the child table until the transaction is complete. 88 List foreign keys with a mix of nullable and not nullable columns Lists all foreign keys on a mix of nullable and not nullable columns. 89 List unique keys with one or more nullable columns Lists all unique key constrains with one or more nullable columns. 90 List objects with mixed-case names Check this option to
- 306. Toad for Oracle User Guide Diagnosing Problems 304 Check Number Check Name Description alert you of tables that have mixed-case names. 91 List object type counts by owner and tablespace One reason to use this option is to see if you have indexes in your "tables" tablespace. Selecting this option lists object l owners l tablespaces l number of storage objects (tables, indexes, and so on) in each tablespace. 92 List analyzed tables with > 5% chained rows and > 500 total rows Both the percentage and the number of total rows are adjustable. Note: To produce accurate results, you must have recently analyzed the tables in the selected database. 93 List analyzed table partitions with > 5% chained rows and > 500 total rows Both the percentage and the number of total rows are adjustable. Note: To produce accurate results, you must have recently analyzed the tables in the selected database. 94 List schemas with unanalyzed tables This option excludes objects owned by SYS, SYSTEM, and
- 307. Toad for Oracle User Guide Diagnosing Problems 305 Check Number Check Name Description other "built in" schemas. 95 List schemas with unanalyzed table partitions This option lists table partitions you have not analyzed, or that have had the analyze statistics deleted. This option excludes objects owned by SYS, SYSTEM, and other "built in" schemas. 96 List schemas with unanalyzed indexes This option lists indexes you have not analyzed, or that have had the analyze statistics deleted. This option excludes objects owned by SYS, SYSTEM, and other "built in" schemas. 97 List schemas with unanalyzed index partitions This option lists index partitions you have not analyzed, or that have had the analyze statistics deleted. This option excludes LOB indexes, and objects owned by SYS, SYSTEM, and other "built in" schemas. 98 List objects where number of hash partitions is not a power of two 99 List segments with a possible poorly sized next extent Lists segments where the NEXT_EXTENT is less than 10% or more than 200% of the object’s total size.
- 308. Toad for Oracle User Guide Diagnosing Problems 306 Check Number Check Name Description These numbers are not adjustable. A small NEXT_ EXTENT can lead to an object with lots of extents, and a large NEXT_EXTENT can lead to an object that takes up more space than it needs. Note: This health check item does not necessarily indicate a problem. 100 List segments with < 1% of extents remaining and > 10 maxextents Lists segments that are approaching maxextents. Both percentage and number of maxextents are adjustable. 101 List segments with > 1000 extents This number is adjustable. This health check item can be used to find "runaway" segments due to extent sizes being too small. 102 List jobs with broken = Y Lists jobs that have failed with an error. 103 List jobs with Next Date < Sysdate Lists jobs that will never run again unless altered. 104 List jobs that have been running longer than 60 minutes The number of minutes is adjustable. 105 List objects for which there is a granted privilege but no corresponding synonym This option displays objects that have a privilege granted to them, but do not have a synonym. This can
- 309. Toad for Oracle User Guide Diagnosing Problems 307 Check Number Check Name Description be useful if you need to check that you’ve granted both a privilege and a synonym or that you’ve dropped both. 106 List unusable indexes This option lists indexes that are unusable until they are rebuilt. 107 List invalid objects This option lists invalid objects, allowing you to easily locate and correct the problem. 108 List package bodies with no associated packages This option lists package bodies that cannot be used because they have no associated package specification. 109 List disabled constraints and triggers This option lists constraints and triggers that are disabled. While there may be good reason for a disabled constraint or trigger, this health check item can help find those that should not be disabled. Vulnerability Assessment 110 List redundant object privileges with conflicting grant options Lists any duplicate object privileges that have conflicting grants. 111 List public synonyms that point to non-existent objects Lists public synonyms that point to objects
- 310. Toad for Oracle User Guide Diagnosing Problems 308 Check Number Check Name Description that have been dropped. 112 List private synonyms that point to non-existent objects Lists private synonyms that point to objects that have been dropped. 113 List roles not granted to any role or user This option displays any roles that are not assigned to roles or users. This can be used to decide if a particular role is unused and can be dropped. 114 List profiles not granted to any user This option displays any profiles that are not assigned to roles or users. This can be used to decide if a particular profile is unused and can be dropped. 115 Check if XML DB is installed Checks to see if Oracle's XML DB is installed. 116 List hidden users 117 List nested roles 118 List db links with passwords 119 List operating system authenticated users 120 List powerful system privileges granted directly to users 121 List powerful roles granted directly to users 122 List object grants granted directly to users with grant option (follows schema settings) 123 List system privileges granted directly to users with
- 311. Toad for Oracle User Guide Diagnosing Problems 309 Check Number Check Name Description admin option (follows schema settings) 124 List roles granted directly to users with admin option (follows schema setting) 125 List grants on V$ views granted directly to users (follows schema settings) 126 List grants on SYS tables granted directly to users (follows schema settings) 127 List usage of vulnerable profiles 128 List powerful sys packages granted to PUBLIC 129 Check for DBA, RESOURCE, CONNECT roles 130 List insecure initialization parameters 131 List built-in users which are not expired and locked 132 List built-in Oracle or 3rd party users with default passwords DB Health Check - Schemas Note: This Toad feature is only available in the commercial version of Toad with the optional DB Admin Module. The Schemas tab on the Database Health Check window provides you with a location to select the schemas you want to examine. From this tab, you can: l Load schemas from the selected database. l Choose how to include schemas (the default is to include all schemas except for SYS, SYSTEM, and so on). Health Check - Differences Since Last Run Note: This Toad feature is only available in the commercial version of Toad with the optional DB Admin Module. Toad's DB Health Check automatically saves health check reports to your user files directory. When a new healthcheck is run on the same database, you can click the Diffs since last run tab
- 312. Toad for Oracle User Guide Diagnosing Problems 310 to display differences in findings. The differences tab can also be used to compare previously saved reports, and can be printed or saved. To view differences since last run Run a second health check on the same database. Note: Settings do not need to be identical. 3. Click the Diffs Since Last Run tab. 4. Change any options in the toolbar as desired. If there are no differences, the differences report will remain blank. To view differences between two saved reports 1. Click on the toolbar. 2. Select two files and click OK. Toad compares the two and provides a difference report in the Diffs Since Last Run tab. Diffs Since Last Run Toolbar You can alter how you view your differences report using the toolbar. You can also save or print the file. Button Command Expand all nodes. Expand to first level. Collapse all nodes. Load two reports and run a differences check on them. Save the differences report to a file. Print the Differences report. Group By Choose to group by run or item. Show Differences Only Show only differences. If there are no differences, the report will be blank.
- 313. Toad for Oracle User Guide Diagnosing Problems 311 Button Command 'Bad' Results only Display only results that fail the health check. DB Health Check - Email Results Note: This Toad feature is only available in the commercial version of Toad with the optional DB Admin Module. To have email sent when you run a health check you must first set up the email pages. From the Database Health Check window, click the Checks and Options tab. You must also have the global Email Options set up with your SMTP server, and recipient addresses. See "Email Settings" (page 652) for more information. To set email parameters 1. From the Checks and Options tab, Settings section, find the setting listed as one of the following: 2. Always send results by email as... 3. Only when "bad" conditions exist send results by email as... 4. Click Params in the Parameters column. 5. Select when and how to send email. 6. Click OK. DB Health Check - Saving Results Note: This Toad feature is only available in the commercial version of Toad with the optional DB Admin Module. When the Database Health Check report has been executed, you can save the results to a file, in Rich Text Format (.rtf), web page (.htm), or plain text (.txt) format. To save the report 1. From the Report Output tab, click on the toolbar. 2. Enter a name for the report in theFile name: box. 3. Select the type of file format you want to use for your report. 4. Click Save.
- 314. Toad for Oracle User Guide Diagnosing Problems 312 Trace File Browser Trace File Browser Note: This Toad feature is only available in the commercial version of Toad with the optional DB Admin Module. The Trace File Browser displays the contents of an Oracle trace file so you can easily isolate problem areas. An online video tutorial is also available for this feature. This video opens in a new browser window and requires an internet connection. These tabs consolidate information from the trace file into categories. Each category is accessed from a separate tab in the browser. The browser displays trace files on four tabs: l Statement Details (page 314) l Wait Summary (page 315) l Query Summary tab (page 316) l File Header (page 316) To access the Trace File Browser and load a trace file 1. From the Database menu, select Diagnose | Trace File Browser. In the Trace File Browser toolbar, click . Note: If your trace file is still located on the server, you will need to use the FTP feature to copy it to your machine where Toad can open it. Click and transfer your file. See "FTP" (page 752) for more information. 2. Select your trace file and click Open. Troubleshooting the Trace File Browser Note: This Toad feature is only available in the commercial version of Toad with the optional DB Admin Module. There are several issues that can interfere with how you trace files using the Trace File Browser. Issue Possible Reason Blank Columns In the last several releases, Oracle has added more information to trace files. If the Trace File Browser is displaying a trace file produced by an older version of Oracle, some columns may be blank. Slow database Performance Your trace files will be most helpful if you set the statistics_level initialization parameter to ALL.
- 315. Toad for Oracle User Guide Diagnosing Problems 313 Issue Possible Reason However, some people in the Oracle community warn that setting it to ALL has an adverse effect on performance. You may want to test it and draw your own conclusions. Timing and Statistics in Trace Files are set to ZERO If you have the statistics level set to BASIC or NONE then many of the timings and statistics will be ZERO. Be sure to set statistics level to TYPICAL or ALL before starting a trace on a session. General Functionality Note: This Toad feature is only available in the commercial version of Toad with the optional DB Admin Module. There are several features that can be found throughout the Trace File Browser to make viewing data easier. See "Trace File Browser" (page 312) for more information. Hiding and moving columns in column grids In many of the grids, right-click in the column header to see a listing of all columns. By default, all columns are visible. If you want to hide certain columns, uncheck them and they will disappear from the grid. Toad remembers changes to column visibility, not only when you open the current trace file, but also when you open others. Change the column order by clicking a column header and dragging the column where you want it. Column position will be remembered. Autosize columns You can also right-click in the column header to manually adjust column sizes. Manually sized columns will be remembered. To manually adjust columns 1. Right-click in a column header and clear the Autosize column selection. 2. Manually resize your columns by dragging the edges to the size you want. To revert to autosize » Right-click in a column header and select Autosize Columns. Saving, Printing and Sending to Excel Right-click in any grid to save, print, or send the contents to Microsoft Excel.
- 316. Toad for Oracle User Guide Diagnosing Problems 314 Advice Toad can provide advice about certain wait events. If a wait event is blue and underlined in the grid, double-click on it to open an advice window. Navigating the Trees and Grids You can use the keyboard to move around in the trees and grids as well as the mouse. Key Command Navigation Arrow Up Previous Node Arrow Down Next Node Arrow Right Next column to the right Arrow Left Prior column to the left HOME Leftmost column END Rightmost column SPACE Expand/Collapse CTRL+HOME First Node, Leftmost column CTRL+END Last Node, Rightmost column CTRL+Arrow Right/Left Scroll horizontally without changing focused node CTRL+Arrow Up/Down Scroll vertically without changing focused node SHIFT+Arrow up Jump to parent node SHIFT+Arrow down Jump to next sibling. If there is no sibling, jump into child nodes Statement Details Note: This Toad feature is only available in the commercial version of Toad with the optional DB Admin Module. In the Trace File Browser, the Statement details tab displays details of each statement. Filtering the statement details grid Within this window, you can filter the statements by wait with a number of predetermined filters. To filter the grid l Click on the Filter by Wait box and select one of the following filters from the drop down list: l None (Show all statements) l SQL*Net message from client l SQL*Net message to client l SQL*Net more data to client
- 317. Toad for Oracle User Guide Diagnosing Problems 315 Viewing Selected Details You can select specific statements and see details of that statement. Details available are displayed on the following tabs in the lower section of the window. In many of these tabs, you can right-click in the grid to hide the idle events. Tab Description SQL Statement Displays the current statement in full, including any bind variables. Some bind variables may show "n/a" for data type and value. This occurs if the variable is used more than once in the query. Explain Plan Displays the execution plan actually used by the query. All timings and totals of each step include child steps. In this way you can see the total for the whole query by looking at the top line. Executions Lists the statistics for each execution of the statement. Fetches Lists each fetch by query. Waits Lists each wait by query. If the "filter by wait" filter is active, then wait types matching the filter are highlighted in blue. Wait Summary Displays the wait types for the selected statement, including min, max and average for each wait type. Transaction Waits Displays each transaction wait by query. If the "filter by wait" filter is active, then wait types matching the filter are highlighted in blue. Raw data Displays the data from the trace file for the selected query. If you want a particular piece of information that is not otherwise displayed in the Trace File Browser, it will appear here. Using these details combined with the aggregate details as provided in the statement grid above it allows you to focus on and diagnose the trouble spots within the trace file. Wait Summary Note: This Toad feature is only available in the commercial version of Toad with the optional DB Admin Module. The wait summary tab in the Trace File Browser displays aggregate wait information for the various types of Wait Events. The summary grid at the top of the window displays each distinct wait time in the trace file and some statistics. For details about Oracle statistics, please see your Oracle documentation. Within this grid, you can right-click to hide idle events.
- 318. Toad for Oracle User Guide Diagnosing Problems 316 Details of wait events The lower portion of the screen displays all statements with at least one wait of the type selected in the summary grid at the top of the screen. A statement will be listed in this area if it has the corresponding wait in the Waits tab, or the Transaction Waits tab of the Statement Details tab. To view details of the wait events l Select a Wait Event in the upper data grid to view details of the statements with that wait in the lower grid. Query Summary tab Note: This Toad feature is only available in the commercial version of Toad with the optional DB Admin Module. The Query Summary tab in the Trace File Browser displays a summary of queries and statistics contained in the open trace file. The Bar graph In addition, the query summary provides a bar graph that charts the Number of queries against the combined exec, parse, fetch and wait times. You can also separate the Recursive queries from the user queries in the bar graph. To separate query types l Right-click over the bar graph and select Display User and Recursive Queries Separately. To aggregate query types l Right-click over the bar graph and clear Display User and Recursive Queries Separately. File Header Note: This Toad feature is only available in the commercial version of Toad with the optional DB Admin Module. Select the File Header tab to view the file header for the open trace file. This information includes information about the database, server, and session. All additional information from the trace file can be found in the other tabs of the Trace File Browser.
- 319. Toad for Oracle User Guide Diagnosing Problems 317 CodeXpert CodeXpert Overview Note: This extended Toad feature is only available in Toad for Oracle Professional Edition and above. CodeXpert analyzes the code against a set of rules for best practices. These rules are stored in a ruleset and can be either user-defined or pre-defined. (See Configuring Rulesets.) CodeXpert can be accessed from various locations within Toad. CodeXpert can store reports within the Toad schema on the database. To enable this feature, CodeXpert objects must be set up using the Server Side Objects window. An online video tutorial is also available for this feature. This video opens in a new browser window and requires an internet connection. Accessing the CodeXpert from the Editor When run in the Editor, the CodeXpert window opens as a tab within the Output Frame. The window consists of the CodeXpert toolbars, the Results tab, the CodeXpert Report tab and the Rules and Statements Totals. To access the CodeXpert from the Editor l If the CodeXpert tab is not displayed, right-click and select Desktop Panels | CodeXpert. Accessing the CodeXpert throughout Toad You can run the CodeXpert in its own window. Do this from the menu at Database | Diagnose | CodeXpert, or from various places in Toad via the right-click menu. Running CodeXpert from these areas allows you work with multiple objects at the same time. When run in areas other than the editor, the CodeXpert opens in its own window. In addition, you can drag and drop objects into this window to analyze code as you work. To access the CodeXpert from the Menu l From the Database menu, select Diagnose | CodeXpert. To access the CodeXpert from other windows l Right-click to run the CodeXpert in: l Schema Browser o - Procedures o - Functions o - Packages o - Triggers
- 320. Toad for Oracle User Guide Diagnosing Problems 318 o - Views o - Users (runs CodeXpert on all objects owned by the selected user) l Project Manager l Code Road Map CodeXpert Icon Legend Note: This extended Toad feature is only available in Toad for Oracle Professional Edition and above. The tree structure of the CodeXpert includes icons to identify the various objects listed. Toad includes an Icon Legend that you can use to easily decipher these images. To access the icon legend » On the CodeXpert Toolbars (page 318), click . CodeXpert Toolbars Note: This extended Toad feature is only available in Toad for Oracle Professional Edition and above. The toolbars at the top of the CodeXpert window let you easily access the features of the advisor. There are two toolbars. Buttons may be rearranged slightly depending on whether you are accessing CodeXpert from the Editor desktop tab or from the CodeXpert window. In general, however, the Main toolbar will be located at the top of the tab or window, and the reports toolbar will be located on the results tab. Main Toolbar Reports Toolbar Button Command Change active session. In the drop down list, the active session is denoted by a check mark. Run the CodeXpert against the selected code or the code in the Editor Load code from file
- 321. Toad for Oracle User Guide Diagnosing Problems 319 Button Command Load code from database Include the selected ruleset Scan for SQL Optimization when running the CodeXpert CodeXpert can store reports within the Toad schema on the database. To enable this feature, CodeXpert objects must be set up using the Server Side Objects window. See "Installing Server Side objects" (page 172) for more information. Schedule a CodeXpert run Create a command file Find a rule in the results tree by rule number View the advice tip for the selected rule Select ruleset Launch the RuleSet Window to configure, edit, create or remove RuleSets Configure SQL Scanning options Email results as an XML attachment. See "Email Settings" (page 652) for more information. Zoom on summary: opens the summary report in a separate window Save the CodeXpert Report to a variety of HTML formats Print Preview Print Code Xpert Options General Options General options are applicable to all of the CodeXpert.
- 322. Toad for Oracle User Guide Diagnosing Problems 320 Prompt for CodeXpert Run names When checked, Toad will prompt you for a name to use for the database insert. If not checked, Toad will insert it with a number followed by the date and time stamp. The default is checked. Use Central Repository for DB Inserts When this option is checked, Toad will use a central database for database inserts. If not checked, it will use the active connection. The default is unchecked. To change the repository connection 1. Select Use Central Repository for DB Inserts. 2. Click Change. 3. Do one of the following: a. Select a connection from the list of current connections. b. Click New and select a connection from the login window. 4. Click OK. SQL Scanning Options Note: This extended Toad feature is only available in Toad for Oracle Xpert edition. To select SQL Scanning options » Click on the CodeXpert toolbar. Scanning tab Scanning options are designed to help you specify how and what the scanner will scan. In this way, you can choose to ignore duplicate statements, skip some SQL, and so on. See "Scanning tab" (page 338) for more information. SQL Classification Options tab The classification of SQL statements is designed to help you quickly identify the SQL statements that are likely to be causing performance problems in your database environment. This classification lets you specify the criteria to analyze your SQL statement. A problematic SQL statement indicates potential performance problem because the SQL statement has characteristics that can contribute to poor performance. Optimizing these SQL statements gives you the best possibility for improving the database performance. These classification settings are used to set the criteria for Simple, Complex, and Problematic SQL statements. See "SQL Classification Tab" (page 339) for more information.
- 323. Toad for Oracle User Guide Diagnosing Problems 321 Running CodeXpert Running CodeXpert in the Editor By running CodeXpert from the Editor window, you can check your code against the desired ruleset while you are developing it. This can streamline the optimizing process and allow you to create better code faster. To run CodeXpert in the Editor 1. From the editor window, open the code you want to scan in the editor window. 2. From the desktop panels at the bottom of the window, click the CodeXpert tab. Note: If you do not see the CodeXpert tab, right-click, select Desktop panels and then select CodeXpert. 3. Select the ruleset you want to use from the ruleset dropdown in the toolbar. 4. Click . Running CodeXpert Alone By running CodeXpert away from the Editor window, you can analyze multiple files (from either the database or saved files) at one time and schedule CodeXpert runs. To run CodeXpert in its own window 1. From the Database menu, select Diagnose | CodeXpert. 2. Load the files you want to analyze into the grid by selecting one of the following: 3. Click the Load Files button to load saved files. 4. Click the Load my Objects button to load objects from the database. Note: you can also click the dropdown arrow beside the load my objects button to choose a group of objects to load. 5. Select the files or objects you want to analyze. You can multi-select using either the < Shift> or <Control> key. 6. In the Ruleset dropdown, select the ruleset you want to use. See "Configuring RuleSets" (page 327) for more information.If you have the Toad Xpert Edition, you can toggle the SQL Scan button on or off as desired. (The default is on.) 7. Click .
- 324. Toad for Oracle User Guide Diagnosing Problems 322 Working with Results Results Tab Note: This extended Toad feature is only available in Toad for Oracle Professional Edition and above. The CodeXpert Results tab displays results of the analysis. This is provided in a tree hierarchy. The main window displays all rules in the selected ruleset, and provides details of the rules that have been violated and where in the code the problem resides. (See "Rules" (page 322) for more information.) For a quick review of the state of the analyzed code, you can glance at the Toad Code Rating line in the tree. Additional Information Beneath the tree, there are three more tabs: l All Rules by Objective (the default display) - lists the results of the rules scan. See "Rules" (page 322) for more information. l Properties - Displays the properties of the code analyzed. See "CodeXpert Properties" (page 324) for more information. l SQL Scan - This displays the results of running a SQL scan on the code. See "SQL Scanning" (page 332) for more information. Note: The SQL Scan tab is visible only if you have run a scan with the review. Rules Note: This extended Toad feature is only available in Toad for Oracle Professional Edition and above. The contents of the CodeXpert Rules area is sorted according to how the sorting option is configured on the RuleSet. The two sorting options are: l Severity, then Objective l Objective, then Severity
- 325. Toad for Oracle User Guide Diagnosing Problems 323 To view rules l Select the results tab and then click the Rules tab at the bottom of the window. The different types of rules issues are represented by icons to the left of the topic. (See Icon Legend for more information.) Moving to the right, the information provided in the second level of the Rules node is: l Icon l Code Element l RuleNumber l (Number of Occurrences) l Rule Title For example, the highlighted occurrence in the screen above, is one occurrence of forty-six for Rule 2609 – ‘Consider using a parameter list to reference variables outside of this cursor’, belonging to the 'Cursor' Code Element group. The numbers in parentheses represent where the occurrence appears in the code: (453, 38) = Line 453, Column 27 of the code By observing the icons in the tree, it can be determined that this rule falls under the Maintainability Objective, and a Warning Severity. Statistical Analysis Note: This extended Toad feature is only available in Toad for Oracle Professional Edition and above. There is a code metrics column in the stand-alone CodeXpert and a tab in the CodeXpert Results panel, both within the Editor and the standalone CodeXpert window, that displays a statistical analysis of your code. See "CodeXpert Overview" (page 317) for more information.
- 326. Toad for Oracle User Guide Diagnosing Problems 324 The code metrics area contains three sections that highlight program units that exceed criteria for: l Computational Complexity (Halstead Volume) l Cyclomatic Complexity (McCabe’s) l Maintainability Index CodeXpert Properties Note: This extended Toad feature is only available in Toad for Oracle Professional Edition and above. The CodeXpert Properties tree contains a profile analysis of the PL/SQL. To view the Properties tree » At the bottom of the Results tab, click the Properties tab. See "Additional Information" (page 322) for more information. Categories include: l Cursor Analysis l Declaration Analysis l DML Analysis l Exception Handling Analysis l Flow of Control Analysis l Module Analysis l Oracle Version Dependencies l Procedure/Function Analysis l Complexity Analysis Overriding Statements Note: This extended Toad feature is only available in Toad for Oracle Professional Edition and above. You can override specific occurrences in CodeXpert. An overridden occurrence is not counted against the total statements ‘Flagged’. This feature is only available in a single-user environment and will be overwritten if source control is used and another user runs an analysis on the code. Toad will add a comment to your code to mark that you want to override certain rules or occurrences of rules violations.
- 327. Toad for Oracle User Guide Diagnosing Problems 325 To override a rule 1. In the Results area, select the rule you want to override. 2. Right-click and select Override Rule. To override an occurrence 1. In the Results area, elect the occurrence of the rule you want to override. 2. Right-click and select Override Occurrence. Reports Tab Note: This extended Toad feature is only available in Toad for Oracle Professional Edition and above. The Reports tab contains graphical displays of the CodeXpert analysis. These reports can be saved as HTML documents, printed, or viewed in a separate viewer through the functionality of the Report Toolbar. Reports available from this tab include: Report Description Rules Summary The Rules Summary displays any best practices rules violated in a graphic form. See "Configuring RuleSets" (page 327) for more information. CRUD Matrix The CRUD (Create (i.e. INSERT), Retrieve (i.e. SELECT), Update and Delete) matrix, can be used to analyze the consistency of functional requirements. This analysis helps to identify performance bottlenecks in the form of unused tables, as well as tables used heavily. Code Metrics Code metrics analyze your code for performance issues under the Halstead Volume (computational complexity), McCabe's (cyclomatic complexity), number of statements and Maintainablity Index (MI). For more information on any of these metric scales, click the appropriate header in the first chart for a detailed description. Report Toolbar Note: This extended Toad feature is only available in Toad for Oracle Professional Edition and above. The CodeXpert Report toolbar consists of the last four buttons in the toolbar area, and are only available when the CodeXpert Report tab is selected. The functions relate specifically to the Report window.
- 328. Toad for Oracle User Guide Diagnosing Problems 326 Button Command Zoom on summary: opens the summary report in a separate window Save the CodeXpert Report to a variety of HTML formats Print Preview Print Toad Code Rating The Toad Code Rating (TCR) is displayed in the CodeXpert | Results | Rules. It provides a quick reference for how your code has performed in the analysis. Toad rates each metric as follows: Metric Status Value Value Existing Metrics 4 >=251 2 101-250 1 <101 Halsted Metric 4 <=3001 2 1000-3000 1 <1000 McCabe's Cyclomatic 4 <=51 3 21-50 2 11-20 1 <=10 Maintainability Index 4 <=64 2 65-85 1 >=85 The TCR is derived from the average rating of all the metrics (TCR always rounds up), and then the numbers are assigned a color as follows:
- 329. Toad for Oracle User Guide Diagnosing Problems 327 l 1 = Green l 2 = Yellow l 3 = Orange l 4 = Red Email Results Note: This extended Toad feature is only available in Toad for Oracle Professional Edition and above. You can email the results of a CodeXpert run to an email of your choice. Settings must be set before using the email feature. To set email settings 1. From the View menu, select Toad Options. 2. On the left hand side, click Email settings. 3. In the Windows area, select CX Results. 4. Enter the settings for to and from, and the global email settings (if they are not already set). 5. Click OK. Configuring RuleSets Configuring RuleSets Note: This extended Toad feature is only available in Toad for Oracle Professional Edition and above. The selected CodeXpert RuleSet determines what rules will or will not be included in a particular Analysis. How a RuleSet is displayed is configured through the CodeXpert RuleSet window. See "Left Pane" (page 328) for more information on creating your own rulesets and otherwise using your ruleset window. To configure custom rulesets 1. Click on the CodeXpert General Toolbar. 2. Check and clear the checkboxes for the rules you want to include or exclude. 3. Click Close. To configure Quest-defined rulesets 1. Click on the CodeXpert General Toolbar. 2. Check and clear the checkboxes for the rules you want to include or exclude.
- 330. Toad for Oracle User Guide Diagnosing Problems 328 3. Change the Sort Order drop down selection. 4. Click Close. RuleSet Window Note: This extended Toad feature is only available in Toad for Oracle Professional Edition and above. The CodeXpert RuleSet Window is divided into two panels with the right panel containing two tabs. Left Pane The left pane contains the RuleSet list, a list of all available RuleSets for CodeXpert. Every RuleSet is uniquely identified by its properties and will be one of two types – User-defined or Quest-defined. Icon Meaning Quest-defined RuleSet User-defined RuleSet Right Panel The right panel contains two tabs: Rules and Summary. Rules Tab The rules tab contains the Rules List, a list of all available rules for the CodeXpert. Every rule is identified by a rule number. These can be sorted, and searched from the Rules Tab toolbar. See "Rules Tab Toolbar" (page 329) for more information. To view the advice tip for a rule » Double-click the item in the list. Summary Tab The Summary tab contains a graphical display of the RuleSet’s properties and characteristics. This summary can be saved as an HTML document, printed, or viewed in a separate viewer. See "Summary Tab Toolbar" (page 330) for more information. RuleSet Toolbars RuleSet Toolbar Note: This extended Toad feature is only available in Toad for Oracle Professional Edition and above.
- 331. Toad for Oracle User Guide Diagnosing Problems 329 The CodeXpert CommandRuleSet toolbar lets you adjust and optimize RuleSets for the way you work. Button Command Create new RuleSet. Only available if have the RuleSet node active. Deletes the selected user-defined RuleSet. Note: Toad RuleSets cannot be deleted. Load an existing RuleSet. Save RuleSet. Save RuleSet with new name. Save all RuleSets. Add new folder. Rules Tab Toolbar Note: This extended Toad feature is only available in Toad for Oracle Professional Edition and above. From the CodeXpert Rules tab toolbar, you can: l Change the sort order for the selected rule. l Find a rule by rule number l View the icon legend Button Command Sort Order Select a sort order from the drop down menu. Find a rule by its number. View icon legend. See "Icon Legend" (page 980) for more information.
- 332. Toad for Oracle User Guide Diagnosing Problems 330 Button Command Open CodeXpert Options. See "Code Xpert Options" (page 319) for more information. Save Ruleset to Text, CSV, or HTML. Summary Tab Toolbar Note: This extended Toad feature is only available in Toad for Oracle Professional Edition and above. The CodeXpert Summary tab toolbar provides the means to save or print the summary in various ways. See "CodeXpert Overview" (page 317) for more information. Button Command Zoom in on Summary by launching in a separate viewer Save the Summary to a variety of HTML formats Print Preview Print Creating RuleSets Creating a RuleSet Note: This extended Toad feature is only available in Toad for Oracle Professional Edition and above. You can create custom CodeXpert RuleSets that include the rules your company wants code to follow. RuleSets can be organized into folders under the RuleSets node on the RuleSet tree. To create a new folder » Right-click in the tree structure and then select New Folder. Name your folder. To create from a blank RuleSet 1. Select the folder or node where you want your ruleset created. 2. Click on the Ruleset toolbar.
- 333. Toad for Oracle User Guide Diagnosing Problems 331 To create from a template 1. Select the folder or node where you want your ruleset created. 2. Near , click the dropdown arrow to the right of the button. 3. Select an existing RuleSet to use as a template. All rules selected in the existing RuleSet are selected for the new template. 4. Make changes as desired by selecting or clearing boxes in the tree. Create Ruleset Wizard If the provided CodeXpert RuleSets do not meet your needs, you can create your own. 1. Click . The configuration window opens with a RuleSet selected. 2. Click the RuleSets node. 3. Click . Note: If you want to base your ruleset on another ruleset, click the dropdown button beside the New Rule Set button and then select the ruleset you want to use as a template. Rules will be pre-selected using this method. 4. Enter a title in the Rule Set Title field. 5. Toad creates a filename for you based on your title and stores it in the Rulesets folder. You can change this if desired. 6. The author is automatically filled in from your computer information. If this is not correct, change it now. 7. Enter any comments about your ruleset. 8. Click Next. 9. Change the sort order if desired. 10. Select the rules you want to enforce. 11. Click Finished. The ruleset is now listed at the bottom of the navigation panel, with the User-created icon identifying it. RuleSet Properties Note: This extended Toad feature is only available in Toad for Oracle Professional Edition and above. When a CodeXpert RuleSet is newly created, it appears as a generic node on the RuleSet tree, usually possessing a name such as RuleSet0*. This indicates that the properties have not been set for this RuleSet and they must be done before a save can be performed.
- 334. Toad for Oracle User Guide Diagnosing Problems 332 When the RuleSet has had properties set, rules selected, and been saved it is available for selection and use in the RuleSet drop-down found on the CodeXpert General Toolbar. To select RuleSet properties 1. Right-click the RuleSet and select Properties. Set the properties: Rule Set Title The title identifies the RuleSet in the tree Author The author of the RuleSet Comments Comments about the RuleSet can be entered here SQL Scanning SQL Scanning Overview Note: This extended Toad feature is only available in Toad for Oracle XPert edition. Including a SQL Scan within your CodeXpert ruleset can find additional ways to improve your code. You can attach a SQL scan to all rulesets, or you can attach it to limited numbers of them. To include a SQL Scan 1. Click on the CodeXpert tab at the bottom of the editor. 2. Toggle into the depressed position. 3. Click and select any SQL Scanning Options. 4. Run CodeXpert against the chosen code with whatever ruleset, if any, you want to use. SQL Scanning Results Note: This extended Toad feature is only available in Toad for Oracle XPert edition. When you choose a CodeXpert Ruleset that includes SQL Scanning, the results nodes in the Report tab will include a SQL Scan Results node. Results are divided into four areas: l Invalid SQL l Problematic SQL l Complex SQL l Simple SQL
- 335. Toad for Oracle User Guide Diagnosing Problems 333 The numbers in parenthesis refer to the location of the SQL statement in the code. For example, the notation (10,1) means that the code in question begins at line 10, column 1. In addition, if Toad has had to convert any code (see SQL Conversion Overview), it will appear here. The notation Double-click for more information displays. When you double click on that line, a dialog with details on the conversion appears. Any other pertinent information will display in the line below the entry. SQL Scanning Conversions SQL Conversion Overview Note: This extended Toad feature is only available in Toad for Oracle XPert edition. When the SQL Scanning process identifies a SQL statement, it retrieves the execution plan. If it is unable to retrieve the execution plan, it checks to see if a SQL conversion can be applied to the SQL statement in order to render the SQL statement as a valid standalone SQL statement. The following conversions may be applied: l Indicator Conversion l External Parameter Conversion l PL/SQL Conversion l Date Conversion l COBOL Conversion l Local Variable Conversion If any of the above conversions were applied to the SQL statement during the scanning process, the results panel shows what conversions were applied and what changes were made to the SQL text. Indicator Conversion Note: This extended Toad feature is only available in Toad for Oracle XPert edition. Within SQL Scanning, for Pro*C or similar programming languages, every host variable can be associated with an optional indicator variable. There are two cases in which the Indicator Conversion is applied by the SQL scanning algorithm. INDICATOR keyword found in an INTO clause When the INDICATOR keyword is found in an INTO clause, it is concatenated with the variable name. For example:
- 336. Toad for Oracle User Guide Diagnosing Problems 334 Original SQL statement SELECT EMP_ID, EMP_NAME INTO :v_empid INDICATOR :I_emp_id, :v_empname INDICATOR :I_empname FROM EMPLOYEE WHERE EMP_ID = 100 After conversion SELECT EMP_ID, EMP_NAME INTO :v_empid_INDICATOR_:I_emp_id, :v_empname_INDICATOR_:I_empname FROM EMPLOYEE WHERE EMP_ID = 100 TWO Variables found in the INTO clause without a separator When two variables are found in the INTO clause without a comma separator, it is concatenated together. For example: Original SQL statement SELECT EMP_ID, EMP_NAME INTO :v_empid :I_emp_id, :v_empname :I_empname FROM EMPLOYEE WHERE EMP_ID = 100 After conversion SELECT EMP_ID, EMP_NAME INTO :v_empid_:I_emp_id, :v_empname_:I_empname FROM EMPLOYEE WHERE EMP_ID = 100
- 337. Toad for Oracle User Guide Diagnosing Problems 335 External Parameter Conversion Note: This extended Toad feature is only available in Toad for Oracle XPert edition. In some source codes, a question mark (?) is used to define external parameters. In order to make it possible to use unique referencing for individual parameter, the SQL Scanner adds a number so that each parameter has a unique name within the SQL statement. For example: Original SQL statement SELECT EMP_ID FROM EMPLOYEE WHERE EMP_ID = ? AND EMP_NAME = ? After conversion SELECT EMP_ID FROM EMPLOYEE WHERE EMP_ID = ?1 AND EMP_NAME = ?2 PL/SQL Conversion Note: This extended Toad feature is only available in Toad for Oracle XPert edition. This conversion in SQL Scanning simulates the behavior of PL/SQL by adding a /*+CHOOSE*/ hint when the optimizer_mode is FIRST_ROWS. For example: Original SQL statement SELECT EMP_ID FROM EMPLOYEE WHERE EMP_ID = 100 After conversion SELECT /*+CHOOSE*/ EMP_ID FROM EMPLOYEE WHERE EMP_ID = 100 Date Conversion Note: This extended Toad feature is only available in Toad for Oracle XPert edition.
- 338. Toad for Oracle User Guide Diagnosing Problems 336 The Date conversion within SQL Scanning adds the TO_DATE function to a date variable parameter. See "SQL Scanning" (page 332) for more information. If there is an "Inconsistent datatype" error returned when the execution plan is retrieved from your original SQL, then the SQL Scanner checks for a variable calculation using a date (for example: var_date – date_field) and applies the conversion since only a date can perform a calculation using another date. If there is still an "Inconsistent datatype" error, then the SQL Scanner checks all remaining variable names for "'%date%" and converts all variables whose name includes the word "date", (for example datefield – lastdateused). An expression with the pattern date_field – var_a, where the variable name is on the right side of the expression and does not include the word “date”, is not converted. This is because the variable can be a date, a number, or even a string. Oracle can perform an implicit conversion on this variable or on the result of this expression, therefore making it difficult to detect if the variable on the right-side of the expression is actually a date. The following are examples when the conversion is applied. Example 1 Original SELECT 1 FROM dual WHERE a – sysdate = 1 Conversion SELECT 1 FROM dual WHERE to_date(a) – sysdate = 1 Example 2 Original SELECT 1 FROM dual WHERE sysdate – mydate = 1 Conversion SELECT 1 FROM dual WHERE sysdate – to_date(mydate) = 1 Example 3 Original SELECT 1 FROM dual WHERE sysdate – a = 1 Conversion No conversion
- 339. Toad for Oracle User Guide Diagnosing Problems 337 COBOL Conversion The COBOL conversion within SQL Scanning searches for three items within the syntax of a SQL statement that are allowed in the COBOL, but are not valid SQL syntax: 1) a dash or minus in a variable name, 2) comments in the middle of the SQL statement, and 3) the ]] (double right square bracket) as the concatenate symbol. See "SQL Scanning" (page 332) for more information. Conversion for variable name If a variable name contains "-" minus sign, then it will be replaced with an "_". Conversion for comment If the 7th column of the line is an "*" (asterisk) then the complete line will be recognized as a line comment. Conversion for concatenate character If "]]" (two right square brackets) are used to concatenate column names, they will be replaced with a "+". For example: Original SQL statement: SELECT * FROM EMPLOYEE * Get the department number WHERE EMP_ID > :employee-id AND ENAME]]JOB = :name-job After conversion: SELECT * FROM EMPLOYEE -- * Get the department number WHERE EMP_ID > @employee_id AND ENAME | | JOB = @name_job Note: If your COBOL file has tags at the beginning of the lines of code, you need to use the "Number of characters to be skipped at the beginning of every line for all files" option found on the SQL Scanner tab page in the Preferences window. This conversion is only applied when the Scanner Job is added to the Job Manager window using the COBOL option under the Source Codes tab in the Add Jobs window. Local Variable Conversion Note: This extended Toad feature is only available in Toad for Oracle XPert edition.
- 340. Toad for Oracle User Guide Diagnosing Problems 338 The local variable conversion within SQL Scanning is only applied to the Single Command Line Dynamic (SCLD) SQL files and database objects. See "SQL Scanning" (page 332) for more information. If a local variable is detected in the SQL statement, the SQL Scanner encloses the variable name with "&[" and "]". For example: Original source SQL statement before scanning: "SELECT " + VEMPID + " FROM EMPLOYEE WHERE EMP_ID > 100" After conversion: SELECT &[VEMPID] FROM EMPLOYEE WHERE EMP_ID > 100 Note: The local variables in a scanned SQL statement should be treated as replacement or substitute variables rather than bind variables. Therefore, you should hard code the values before you optimize the SQL statement. The reason for hard coding the values is that the local variables may be literals and when the application is run, these values are replaced before the SQL is sent to the database. That’s why the SQL Scanner uses "&[" and "]" to differentiate the local variables from the bind variables. This conversion is only applied if the SCLD option is selected from the Summary tab page in the Add Jobs window or from the Modify option from the Pop-up menu in the Job Manager window. SQL Scanning Options Scanning tab Note: This extended Toad feature is only available in Toad for Oracle XPert edition. The Scanning tab is part of Code Xpert options.See "Code Xpert Options" (page 319) for more information. Skip SQL within comments Specify that the scanning algorithm ignore any SQL statement within comments using the /* */, // or –- comment format. Otherwise, the scanning algorithm finds SQL statements that are not currently being executed in the application. It may also attempt to build a SQL statement if it finds the word SELECT, INSERT, UPDATE, or DELETE within the text of a comment. Skip SQL that only involves the SYS.DUAL table Specify to ignore any SQL statement that only references the SYS.DUAL table.
- 341. Toad for Oracle User Guide Diagnosing Problems 339 Ignore duplicate SQL statements Specify to include a SQL statement only once in the scanning results when it is found multiple times in the text. Whole word matching for the first SQL keyword Specify to search for SELECT, INSERT, UPDATE, or DELETE as a whole word. When this option is selected, these keywords must be preceded and followed by a space or end of line character and, therefore, the SQL Scanner will not find the word INSERT in text like PROCEDUREINSERT and then attempt to build a SQL statement from it. Maximum scanned word size (Bytes) Specify the largest size (in bytes) for scanned word. If a word is larger than this size, the SQL is ignored, and the scan resumes in the next position. The default is 1024KB. Choose from 30 to 9,999,999. SQL Classification Tab Note: This extended Toad feature is only available in Toad for Oracle XPert edition. SQL Scanning Classification lets you specify the criteria to analyze your SQL statement. A problematic SQL statement indicates potential performance problem because the SQL statement has characteristics that can contribute to poor performance. Optimizing these SQL statements gives you the best possibility for improving the database performance. To access the SQL Classification options 1. From the Code Xpert toolbar, click . 2. Click the SQL Scanning tab. 3. Click the SQL Classification tab. Simple SQL Number of table scan operations less than This read-only field indicates the number of table scan operations referenced in the execution plan. If the total number of table scan operation is less than this value, then this SQL statement is classified as Simple. This value is the same as the lower limit of the Complex table scan operations range. The default is 2.
- 342. Toad for Oracle User Guide Diagnosing Problems 340 Complex SQL Number of table scan operations Specify the number of table scan operations referenced in the execution plan for Complex SQL statements. The default is 2 /3 and the range is 2 to 99. Including SYS.DUAL table Select this box to include the SYS.DUAL table when counting the number of tables referenced by the SQL statement. With Full Index Scan Specify whether SQL statements with full index scans are classified as Complex SQL statements. Problematic SQL Number of table scan operations greater than This is a read-only field indicating the number of table scan operations referenced in the execution plan. If the total number of table scan operation is greater than this value, then the SQL statement is classified as Problematic. This value is the same as the upper limit of the Complex table scan operations range. The default is 3. With full table scan Specify to classify, as Problematic, a SQL statement with one or more full table scans when the table size is greater than or equal to the defined table size (in Kbytes) or the specified number of rows. For a detailed explanation for setting the table size or number of rows see the Full Table Scan Threshold topic. Option Description Table size The default is 8 and the range available for selection is 8 to 9,999,996. With the Table size (KBytes) option, the unit of comparison is Kbytes. The value specified for the Table size (KBytes) option should be divisible by 4. Number of rows Select either Table size or the Number of rows in the table to determine how large the table must be before the SQL statement is classified as Problematic. The default is 1000. Note: If a more precise table size calculation is required, then the use of the Table size (KBytes) is recommended. Including SYS.DUAL table Specify to investigate the full table scans referencing the SYS.DUAL table.
- 343. Toad for Oracle User Guide Diagnosing Problems 341 With full table scan iterated by nested loop Specify to classify as Problematic, SQL statements with a full table scan inside a nested loop. This classification depends upon the size of the table. For a detailed explanation for setting this table size or number of rows see the Full Table Scan Threshold topic. Option Description Table size The default is 8 and the range available for selection is 8 to 9,999,996. With the Table size (KBytes) option, the unit of comparison is Kbytes. The value specified for the Table size (KBytes) option should be divisible by 4. Number of rows Select either Table size or the Number of rows in the table to determine how large the table must be before the SQL statement is classified as Problematic. The default is 1000. Note: If a more precise table size calculation is required, then the use of the Table size (KBytes) is recommended. Including SYS.DUAL table Specify to investigate the full table scans referencing the SYS.DUAL table. Retrieve table size by counting: SYS.DBA_SEGMENTS To calculate the table size using SYS.DBA_SEGMENTS, the SQL Scanner counts the total number of bytes allocated for a table. This information is obtained with the following SQL statement: SELECT SUM(BYTES)/1024 AS "KB" FROM SYS.DBA_SEGMENTS WHERE OWNER = :OWNER AND SEGMENT_NAME = :TABLE_NAME AND SEGMENT_TYPE LIKE 'TABLE%' Retrieve table size by counting: System tables To calculate the table size the SQL Scanner utilizes the information on table blocks. This information can be obtained with the following SQL statement:' SELECT SUM(SEG.BLOCKS * TS.BLOCKSIZE)/1024 AS "KB" FROM SYS.USER$ USR, SYS.OBJ$ OBJ, SYS.TS$ TS, SYS.SYS_OBJECTS TAB,
- 344. Toad for Oracle User Guide Diagnosing Problems 342 SYS.SEG$ SEG WHERE SEG.FILE# = TAB.HEADER_FILE AND SEG.BLOCK# = TAB.HEADER_BLOCK AND SEG.TS# = TAB.TS_NUMBER AND SEG.TYPE# = TAB.SEGMENT_TYPE_ID AND SEG.TS# = TS.TS# AND TAB.OBJECT_ID = OBJ.OBJ# AND TAB.OBJECT_TYPE_ID = OBJ.TYPE# AND OBJ.OWNER# = USR.USER# AND TAB.OBJECT_TYPE_ID IN (2, 19, 34) AND USR.NAME = :OWNER AND OBJ.NAME = :TABLE_NAME Applying the Classification Options Note: This extended Toad feature is only available in Toad for Oracle XPert edition. When performing a SQL Scan, you can specify if full table scans should be analyzed in execution plans to categorize SQL statements as Problematic. You can access the classification options from the CodeXpert Options window. Click the SQL Scanner tab and then the SQL Classification tab. For more information about these options, see the SQL Classification tab topic. Full Table Scan Threshold Since each database environment is unique, you can specify the threshold (size of the table) for the full table scan to be considered a problematic operation. If the full table scan threshold is exceeded and the execution plan has a full table scan operation, then the SQL statement is classified as Problematic. Default values The default table size threshold for the full table scan operation is 8 KB. This threshold may be too low for production systems. It is recommended to review the SQL Classification options before using the SQL Scanner. Calculating Table Size To calculate the table size that is compared against the full table scan threshold, the SQL Scanner uses one of the following methods depending on your selection in the Retrieving table size by counting option:
- 345. Toad for Oracle User Guide Diagnosing Problems 343 l Method 1 - Utilizing the table information from SYS.DBA_SEGMENTS system view l Method 2 - Utilizing the table information from the system tables SYS.SEG$, SYS.OBJ$, SYS.TS$, SYS.SYS_OBJECTS, and SYS.USER$. The table size reported by each of these methods may differ according to the information available in Oracle in the system view or tables utilized. The performance of retrieving the table information under each method could be different according to the specific database environment, thereby affecting the time it takes to scan. To use SYS.DBA_SEGMENTS or system tables, select the corresponding option in the Problematic SQL section of the SQL Classification Preferences. Example – Determining the Full Table Scan threshold using SYS.DBA_SEGMENTS This example illustrates how it was determined what number of Kbytes to use for the Full table scan threshold to classify SQL statements. It was decided that a full table scan on the EMPLOYEE table was not a performance problem for this database and should not be classified as Problematic. First, it was decided that a full table scan on the EMPLOYEE table was not a performance problem for this database and should not be classified as a Problem. Second, the table size of the table EMPLOYEE was obtained by running the SQL statement from Method 1 above using SYS.DBA_SEGMENTS. SELECT SUM(BYTES)/1024 AS "KB" FROM SYS.DBA_SEGMENTS WHERE OWNER = OWNER_NAME AND SEGMENT_NAME = EMPLOYEE AND SEGMENT_TYPE LIKE 'TABLE%' The result of this SELECT statement showed that the table size for the table EMPLOYEE is 64,804 KB. Third, in the CodeXpert – SQL Classification Options, the SYS.DBA_SEGMENTS option was selected and the full table scan threshold was set to 64,800 KBytes (or slightly higher to allow for growth).
- 346. Database Administration Audit SQL/Sys Privs Note: This Toad feature is only available in the commercial version of Toad with the optional DB Admin Module. The Audit SQL/Sys Privs window displays the audit monitoring options for SQL Statement Objects, Reserved Words and System Privileges in the database. To access Audit SQL » From the Database menu, select Administer | Audit SQL/Sys Privs. Note: To use auditing functionality within Toad, AUDIT_TRAIL must be set to DB. From this window, you can enter and modify monitoring levels for each type or for groups of types. You can also view the audit trail records for the selected schemas. Note: Certain privileges are required to use this screen. These include: l To audit occurrences of a SQL statement, you must have the AUDIT SYSTEM privilege. l To audit operations on a schema object, the object you choose for auditing must be in your own schema or you must have AUDIT ANY system privilege. In addition, if the object you choose for auditing is a directory object, even if you created it, then you must have AUDIT ANY system privilege. Audit SQL/Sys Privileges Toolbar Button Command Change active connection Schema Choose schema Audit Options View Audit Options Audit Trail View Audit Trail 12
- 347. Toad for Oracle User Guide Database Administration 345 To view audit details 1. From the Database menu, select Administer | Audit SQL/Sys Privs. 2. From the Schema drop down menu, select the schema you want to audit. 3. Click one of the following: l Audit Options l Audit trail NLS Parameters Note: This Toad feature is only available in the commercial version of Toad with the optional DB Admin Module. This window is used to view the Session, Instance, and Database parameter settings, and to change the Session and/or Instance parameters. The window includes tabs for Session, Instance, and Database. To access NLS Parameters From the Database menu, select Administer | NLS Parameters. To change a NLS (National Language Support) setting » Do one of the following: l Double-click a parameter; enter the new setting. l Single-click the parameter line, click ; enter the new setting. If a parameter cannot be edited, the Edit button will be disabled. Session parameters are all editable. Other parameters may not be editable. Notice that changing a value in one cell can cause a change in other cells. For example, if you change the NLS_TERRITORY from America to Japan, the NLS_CURRENCY symbol changes from the dollar to the yen. Toad Features Security This feature restricts Toad users from having access to specific Toad features. By default users are granted access to all features of Toad. You can restrict individuals or groups of users from accessing some Toad features. In addition, you can make Toad read-only for individuals or groups of users. Caution: Toad Security Read-only only affects Base Toad. If you have the DB Admin Module, those module components will remain fully accessible.
- 348. Toad for Oracle User Guide Database Administration 346 To set up the security mechanism 1. Run the Server Side Objects Install Wizard to create the Toad_RESTRICTIONS table in the Toad schema. This is REQUIRED to be in the Toad schema, not another schema with synonyms pointing back. See "Installing Server Side objects" (page 172) for more information. 2. Run Toad, log in as the DBA_USER (as you set it in step 1), and then select the Administer | Toad Security menu item to bring up the Toad Features Security window. 3. Select the user or role, and then select the features you want to deny to that user or role. All other Toad Security features will be granted to this user. Since other non-DBA users only have SELECT privileges to the Toad_RESTRICTIONS table, they cannot make changes to the security. 4. Click the Grant Select button so that the user or role can see the Toad.Toad_ RESTRICTIONS table. 5. If the user cannot "see" the Toad_RESTRICTIONS table (in other words, they do not have SELECT access granted to them), then they have FULL access to all Toad features. 6. If the user has SELECT privilege on the Toad_RESTRICTIONS table, then the security is in effect. 7. Move any commands you do not want the user to have from the Features list to the Restricted Features list. Not all buttons, menus, or functions in Toad are contained within this security scheme. If you need to restrict other functionality, please let us know. 8. When you have completed restricting features, click OK to save your changes. You can also create collections of Toad features using existing Oracle roles. Grant the features to a role (for example, DEVELOPER_ROLE), then those Toad users will get the collections of Toad functionality without having to set up the same list of Toad features for multiple users. Example To set up a list of different kinds of Toad Features, and then revoke that list of features from select groups of users, do the following. 1. Start Toad, log in as user Toad, go to Administer | Toad Security. 2. Select a role, for example "DEVELOPER_ROLE" from the user/role dropdown list. These are standard Oracle roles. Have your DBA create the roles if necessary. Caution: DO NOT use the DBA role for users subject to Toad Security. When Toad starts, if the user has the DBA role, then that overrides everything else, security included. 3. Ensure that DEVELOPER_ROLE has SELECT privilege to the Toad.Toad_ RESTRICTIONS table. If the Grant Select button caption is "Grant Select", then click it to execute the grant. If the button caption is "Revoke Select" then the grant already exists. 4. Copy the desired features to the "Restricted Features" list.
- 349. Toad for Oracle User Guide Database Administration 347 5. Click OK. Toad will "grant select on toad_restrictions to developer_role" and write these records into the Toad_RESTRICTIONS table: USER_NAME FEATURE DEVELOPER_ ROLE CHANGE A PASSWORD DEVELOPER_ ROLE CREATE ROLLBACK SEG DEVELOPER_ ROLE CREATE SNAPSHOT LOG DEVELOPER_ ROLE CREATE USER 6. Ensure that the Oracle Roles have been granted to the user: [grant developer_role to scott]. 7. Have user SCOTT log off/on to Toad. Scott’s Toad features should be limited as specified. 8. Repeat setting up restricted features for the other desired roles, e.g., TUNER_ROLE, MAINTENANCE_ROLE, and so on.
- 350. Toad for Oracle User Guide Database Administration 348 Disable Saving Oracle Passwords by Toad This option is in the Features | Non-menu list as Save passwords. Moving it to the Restricted list lets you disable the ability to save passwords. Read-only You can make Toad read-only to a selected user or role. This is useful if you have someone who needs to view database objects but does not have the authority to change them. To make Toad read-only, move the Read-only Override function from the Features | Non-menu list to the Restricted features list. This makes Toad read-only to the selected user. Note: This Toad Security option does not apply to the DB Admin Module. To restrict Toad entirely, you will also need to restrict the DB Admin Module from the appropriate users. ASM Manager ASM Manager Overview Note: This Toad feature is only available in the commercial version of Toad with the optional DB Admin Module. To access the ASM manager » From the Database menu, select Administer | ASM Manager. In Oracle 10g and above, Oracle provides a means for managing the Oracle DB file system from within the Oracle database: Automatic Storage Management (ASM). In ASM, a standalone Oracle instance collects Raw server disks into disk groups and performs management functions necessary to make ASM files available to database instances. Oracle database files are then stored in these disk groups. A template, or collection of file attributes, is used by ASM during file creation. Templates simplify file creation by mapping complex file attribute specifications into a single name. A default template exists for each Oracle file type. You can modify the attributes of the default templates or create new templates. For full information about ASM, Raw server disks, and templates, please see your Oracle documentation. Toad's ASM Manager gives you an easy interface to the Oracle ASM features, and lets you easily manage your disk groups. Note: Connection to the ASM instance is created through the Toad ASM Manager from the Database | Administer menu. Toad does not support creating a connection to this instance in any other way.
- 351. Toad for Oracle User Guide Database Administration 349 The ASM Manager window is divided into two pages, accessible by tabs: Disk Groups and Clients. You can view by database instance or ASM Instance, which opens a new connection to that instance while you are viewing and working with information. Using the ASM instance will display more data and allow you to make changes to your disk groups. From the Disk group tab, you can: l View disk groups l Create disk groups l Alter disk groups l Drop disk groups From the Clients tab you can see the client information for the various disk groups. Viewing Disk Groups Note: This Toad feature is only available in the commercial version of Toad with the optional DB Admin Module. You can view disk groups from Toad's ASM Manager. See "ASM Manager Overview" (page 348) for more information. Disk group information is divided into summary information and detail information. Summary information is displayed in the upper grid, and includes the group number and disk group name. Detail information is provided in the lower grid when you when you select a disk group in the upper panel. To view disk groups 1. From the Database menu, select Administer | ASM Manager. Select either the database instance or the ASM instance you want to use. Note: The ASM instance provides more data and allows changes. 2. If it is not selected, click on the Disk Groups tab. In the upper panel, select the disk group you want to view. Note: Data for that disk group is displayed in the lower pane. Signing in with an ASM instance Using an ASM instance instead of a database instance provides more data and allows changes. To select an ASM instance When you select ASM instance from the Connected to box, the Connect to ASM Instance dialog appears. Note: You must log in as SYS to use the ASM instance. This username cannot be edited.
- 352. Toad for Oracle User Guide Database Administration 350 3. Enter the password. Select the database. Note: ASM instances are designated as +databasename and appear near the top of the list. 4. Host and Connect As information is static and cannot be changed. 5. Click OK. Summary information You can view summary information about a particular disk group in the upper area of the grid. Information provided includes Group number, Disk Group name, sector size, block size, allocation unit size, state, type, total MB, free MB, Required mirror free MB, and so on. Using the toolbar, you can create, drop, and alter disk groups if you are connected to the ASM instance (see related topics). Disk Group Toolbar Button Command Refresh Upper Pane Create disk group Alter disk group Drop disk Group Detail dropdown Refresh Lower Pane Detail information Detail information is provided in the lower panel grids. Information is separated into five data grids: Disks; Templates; Operations; Files, Directories, and Aliases; and Usage. If connected by ASM Instance, changes can be made to the Files, Directories, and Aliases area by use of the provided toolbar. Files, Directories and Aliases toolbar
- 353. Toad for Oracle User Guide Database Administration 351 Button Command Create alias for selected file Create directory in selected directory Rename selected object. Drop selected object. Creating Disk Groups Note: This Toad feature is only available in the commercial version of Toad with the optional DB Admin Module. If you are connected through an ASM instance, you can create and drop disk groups from the Disk Groups toolbar. Creating disk groups You can create a disk group quickly using the combination of Oracle ASM and Toad's ASM Manager. To create a disk group 1. From the Database menu, select Administer | ASM Manager. 2. Select an ASM Instance in the Connected To box. 3. Click . 4. Enter a Disk Group Name. 5. If it is not already selected, click the Basic Info tab. 6. Select the redundancy of the disk group: Select an availability from the Status after creation drop down box. Note: The Alter Actions section will be disabled when creating a disk group. See "Altering Disk Groups" (page 352) for more information. 7. If you are using Oracle 11g, you can also set several attributes. 8. Click the Disks tab. 9. Click Add Disks and select any disks you want to include in this disk group. Click OK. 10. Click OK to add the disk group.
- 354. Toad for Oracle User Guide Database Administration 352 Dropping Disk Groups Note: This Toad feature is only available in the commercial version of Toad with the optional DB Admin Module. You can drop disk groups from the ASM Manager. See "ASM Manager Overview" (page 348) for more information. To drop a disk group 1. From the ASM Manager | Disk Group tab, select the disk group you want to drop. 2. Click . In the Confirm ialog, choose to include or exclude contents when you drop the disk group. Note: if you are using Oracle 11g or later, you can also apply the FORCE option. 3. Click OK. Altering Disk Groups Note: This Toad feature is only available in the commercial version of Toad with the optional DB Admin Module. To alter a disk group 1. From the Database menu | Administer | ASM Manager, click the Disk Groups tab. 2. Make sure the ASM instance is selected in the Connected To drop down box. 3. Select the disk group you want to alter and then click. Make any changes you need to make. You can change disk groups in any one of the three tabs: Basic Info tab Information Availablility The availability of the disk group can be changed with the Alter command. Toad displays the current status of the disk group and provides a change to drop down to select a new status easily. Alter Actions For detailed information regarding these options, please see your Oracle documentation): Check All Disks - l Repair
- 355. Toad for Oracle User Guide Database Administration 353 Rebalance - can be used alone or with Add/Drop/Resize disk commands l Specify power l Wait Disks tab Information Add or Drop Select the disk you want to alter, click Add or Drop. Alter Click in the cell you want to alter and make changes. Note: You can alter some, but not all data. Templates Tab Information Add or Drop Select the disk you want to alter, click Add or Drop. Alter Click in the cell you want to alter and make changes. Note: You can alter some, but not all data. 4. Click OK to commit changes. Viewing Clients Note: This Toad feature is only available in the commercial version of Toad with the optional DB Admin Module. You can use the ASM Manager to view client information for each disk group. As for disk groups, if you are connected to an ASM instance you will see more information than if you are connected via the database instance. To view client information 1. From the Database menu, select Administer | ASM Manager. 2. From the Connected to drop down, select either the Database instance (default) or an ASM instance. 3. Click the Clients tab. Information is displayed in the grid. 4. Refresh the grid if necessary by clicking .
- 356. Toad for Oracle User Guide Database Administration 354 Audit Objects Audit Objects Note: This Toad feature is only available in the commercial version of Toad with the optional DB Admin Module. To access the Audit Objects window » From the Database menu, select Administer | Audit Objects. Note: To use auditing functionality within Toad, AUDIT_TRAIL must be set to DB. The Audit Objects window displays the audit monitoring options for selected database objects. You can enter and modify monitoring levels for each individual object or for groups of objects. Note: Audit parameters for objects are also available in the Schema Browser | Object Page | RHS Auditing tab. Audit Objects Toolbar The audit objects toolbar gives you control of the objects you are auditing. Button Command Change active connection Clear Object List Load Objects from Database Object Type Select object type to audit from the drop down menu. Apply Changes Apply changes you have made to the grid To populate the audit object data grid 1. From the Database menu, select Administer | Audit Objects. 2. From the Object Type drop down, select the type of object you want to audit. 3. Click the drop down, and select what you want to load.
- 357. Toad for Oracle User Guide Database Administration 355 Setting an Object Audit Note: This Toad feature is only available in the commercial version of Toad with the optional DB Admin Module. To view the Audit Objects window » From the Database menu, select Administer | Audit Objects. Audits display in the grid in an abbreviated code. Audit options for when successful come first, followed by a slash, followed by when not successful. Option Abbreviation By Access A By Session S No Audit - Therefore, an audit pattern will display in the grid as follows: A/S - audit records when successful by access, and when not successful by session To set audit options 1. Populate the audit object grid. Note: This must be something other than All Object Types, which is read-only. 2. In the row containing the object you want to audit, click in the column of the audit you want to perform. Note: For example, if you want to audit on Alter commands, click in the Alter box. 3. Click . 4. Select the options you want to audit when the command is successful or when it is not successful. 5. Click OK. Multiple Object Privileges Multiple Object Privileges You can manage privileges for multiple objects from the Multiple Object privileges screen. You can grant or revoke privileges on multiple objects at once. To access multiple object privileges » From the Database | Administer menu, select Multiple Object Privileges.
- 358. Toad for Oracle User Guide Database Administration 356 To grant privileges » Click the Grant tab. See "Granting Multiple Privileges" (page 356) for more information. To revoke privileges » Click the Revoke tab. See "Revoking Multiple Privileges" (page 356) for more information. Granting Multiple Privileges You can grant multiple privileges at once, either from selected objects, or from all objects on the screen. See "Multiple Object Privileges" (page 355) for more information. To grant all objects to selected grantees 1. From the Objects Owned by dropdown, select the schema owning the objects you want to grant. 2. In the Grantees area, select the users or roles to whom you want to grant privileges. 3. In the toolbar, click . 4. Choose All or specify privileges you want to grant on the objects. 5. Choose to include Grant or Hierarchy options. To grant selected objects to selected grantees 1. From the Objects Owned by dropdown, select the schema owning the objects you want to grant. 2. In the Objects area, select the objects you want to grant. 3. In the Grantees area, select the users or roles to whom you want to grant privileges. Note: You can select or clear the Users and Roles check boxes to limit the list to one or the other or both. 4. In the toolbar, click . 5. Select privileges you want to grant on the objects. 6. Choose to include the Grant or Hierarchy options. Revoking Multiple Privileges To revoke privileges 1. From the Multiple Object Privileges screen, select the schema that owns the objects with privileges you want to revoke. See "Multiple Object Privileges" (page 355) for more information. 2. Click the Revoke tab.
- 359. Toad for Oracle User Guide Database Administration 357 3. Do one of the following: l Select All. l Select Objects I granted. 4. In the grid, select the privileges to revoke. Note: You can filter the grid by any column by clicking the arrow in the column header. Select Custom and set the filter. 5. Click Actions. 6. Do one of the following: l Select either: l Revoke all l Revoke selected. Oracle Parameters Oracle Parameters Note: Oracle parameters are available to view in Base Toad editions. To alter them requires the DB Admin module. Oracle Parameters allows you to modify or edit the System Modifiable and Session Modifiable options. To access the Oracle Parameters window » From the Database menu, select Administer | Oracle Parameters menu item. The grid provides information about the Oracle parameters in the active session. Note: Access to some V$ tables are required to use this option. See "Database | Administer | Oracle Parameters " (page 156) for more informationand a list of these permissions. When you change a parameter, you are presented with a window listing the current setting and boxes to change it, adding comments if desired. In addition, if applicable, you can set the scope, choose where to apply the change, and, if on a RAC, whether to make the change in all instances, or only the current instance. Parameters Toolbar Button Command Change the active session.
- 360. Toad for Oracle User Guide Database Administration 358 Button Command Refresh the grid data. Edit parameter. Note: Editing parameters is only available in the commercial version of Toad with the optional DB Admin Module. See "Changing a Parameter String" (page 359) for more information. Print the parameter grid. Export the dataset. See "Export Dataset" (page 390) for more information. Default Use this dropdown to quickly filter the grid by the Default column contents to Yes, No or All. Filter Use the QuickFilter box to filter the grid by contents you specify. See "Using the QuickFilter Box" (page 993) for more information. Single Grid Toggles whether Toad displays a single grid or a multi-grid when connected to an Oracle RAC database. In single-grid view, Toad sorts first by default on the option and then by the instance name for easier readability. If you choose the multi-grid view, Toad displays a separate tab for each RAC instance. Viewing Parameter Strings Viewing a Parameter Setting If you do not have the DB Admin Module, you can view the parameters but not change them. To view a parameter setting » Double-click on the parameter you want to view. Searching for a Parameter Setting There are several ways to search for a parameter string. For example, l You can search for a specific Oracle setting in any column of the grid using incremental search. l You can use the QuickFilter to filter the grid. See "Using the QuickFilter Box" (page 993) for more information.
- 361. Toad for Oracle User Guide Database Administration 359 To find a parameter setting using incremental search 1. Click in the column describing the parameter you want to find. 2. Enter the first few characters of the entry you want to find. The cursor will jump to the entry as you enter characters. Changing a Parameter String Note: This Toad feature is only available in the commercial version of Toad with the optional DB Admin Module. If a parameter is both session modifiable and system modifiable, Toad modifies at the system level. You can change Oracle Parameter settings individually. See "Oracle Parameters" (page 357) for more information. If you are using a RAC-based database, you will also have the option to choose whether to apply the change to all instances or only the current instance. Note: Some parameters may not allow changes. The Change Parameter Setting button will remain disabled even if you select one of these parameters. To change a setting using the mouse 1. Do one of the following: l Double-click the parameter you want to change. l Click the parameter you want to change and then click . 2. Make any changes to your setting and click OK. To change a setting using the keyboard 1. Double click the parameter you want to change. 2. Make any changes to your setting and click OK. Tablespaces View Tablespaces To view tablespace information » From the Database menu, select Administer | Tablespaces. Note: This feature requires SELECT access to the DBA_ Oracle dictionary views. Without access, you will get an error dialog box, "This function requires access to: dba_free_space, dba_ data_files, and dba_tablespaces".
- 362. Toad for Oracle User Guide Database Administration 360 From either the Space or Data Files tab, double-click a tablespace to see details. (Note: This Toad feature is only available in the commercial version of Toad with the optional DBA module. ) See "Tablespace Details" (page 361) for more information. Tabs Note: The Space, Space History, and IO History tabs are only available in the commercial version of Toad with the optional DB Admin Module. On each of these tabs, to sort the information in ascending order, click the desired column header. To sort in descending order, click the same column header a second time. Double clicking on the divider between two column headings, where the mouse pointer turns into a vertical line with left and right arrows, will size the column to the width of the data. Tab Description Space Note: The Space, Space History, and IO History tabs are only available in the commercial version of Toad with the optional DB Admin Module. Lists each tablespace by name, including Usage, Size Mgs, Free Mgs, Used Mgs, Free Pct, Used Pct, and Used Pct of Max. Files Lists each tablespace by name, including Type, Status, Used MB, Free MB, Reclaimable MB, Min MB, Initial Extent, Next Extent, Min Extents, Max Extents, Percent Increase, and Filename. Note: By default, Reclaimable MB and Min MB are not filled in. The query used to calculate this data can be slow. Click Calculate Reclaimable MB to populate these columns. In addition, you can right click on one or more datafiles and choose Shrink to Min MB to shrink the selected datafiles. Free Space (in KB) Lists each tablespace by name, including Blocks, Min, Average, Max, and Total. Objects Select a Tablespace from the dropdown list. Toad will display all objects contained within the selected tablespace, including Owner, Object Name, Object Type, Size (MB), Initial Extent, Next Extent, Num Extents, and Size (bytes). The totals of Size (MB), Num Extents, and Size (bytes) will be listed on the "TOTAL SIZE" line, at the bottom of the list. Fragmentation This tab describes the fragmentation of your tablespace, including the number of total blocks, empty blocks, how many fragments (pieces) there are, the sizes of those pieces (largest, smallest and average) and the number of extents are below the high water mark. Space History Note: The Space, Space History, and IO History tabs are only available in the commercial version of Toad with the optional DB
- 363. Toad for Oracle User Guide Database Administration 361 Tab Description Admin Module. From the Space History tab, Space Manager tracks and forecasts database usage over time, displaying the results in an easy to read, and easily configured graph format. For more information, see Using Space Manager. IO History Note: The Space, Space History, and IO History tabs are only available in the commercial version of Toad with the optional DB Admin Module. From the Space History tab, Space Manager tracks and forecasts datafile usage over time, displaying the results in an easy to read, and easily configured graph format. For more information, see Using Space Manager. Tablespace Details Note: This Toad feature is only available in the commercial version of Toad with the optional DB Admin Module. The Tablespace Details window displays the same information that is found in the Schema Browser | Tablespaces tab. However, because it is displayed in a unique window, the majority of the grid can be seen without scrolling. To Access Tablespace Details » From the View Tablespaces window, in either the Space or Data Files tab, double-click a tablespace. Datafiles tab Lists general information about the file, for example, number of files in each file, a usage graph, the percentage used, and so on. Free Space tab Displays the statistics for the free space parameters of the datafile. Fragmentation tab Displays the number of files and information about the general fragmentation of those files, including number of pieces, the size of those fragments, and the number of empty blocks remaining. Objects tab Displays a list of all objects in the datafile and their pertinent statistics.
- 364. Toad for Oracle User Guide Database Administration 362 Quotas tab Displays a list of quotas and space-used statistics by user for the selected datafile. Extents tab Displays a list of segments, owners and ID numbers for extents. Space Manager Space Manager Setup Note: This Toad feature is only available in the commercial version of Toad with the optional DB Admin Module. The Toad Space Manager is a part of the View Tablespaces window. In order to use Space Manager, you must have certain objects in the TOAD Schema. To access Space Manager You must have SELECT access on several V$ tables to use this option. To see a list of required permissions, see Space Manager Setup. 1. From the Database menu, select Administer | Tablespaces. 2. Space Manager consists of the final two tabs on the Tablespaces window: Space History and IO History. Click one of these tabs to access Space Manager. Setting up Space Manager Before you can use Space Manager, you must set up specific objects in the Toad schema. These objects can be created from Space Manager, or from the Server Side Objects wizard. To Set up Space Manager 1. Click the Create/Recreate Toad Space Manager Tables button . If you are not logged in under the Toad Schema, the following dialog box appears: 2. Click OK and then log in under the Toad schema. Note: The Toad schema must have the privileges to create and alter jobs, create and drop its own tables and procedures, and must have SELECT access on: DBA_TABLESPACES, DBA_DATA_FILES, DBA_FREE_SPACE, and V_$FILESTAT.
- 365. Toad for Oracle User Guide Database Administration 363 3. From the Toad schema, View Tablespaces, click the Create/Recreate Toad Space Manager Tables button . If there are already Space Manager tables present, a confirmation dialog box appears. Selecting yes will lose all existing data. Click Yes. 4. The Collection Status area shows the status of the existing Space Manager job: Active, Inactive, or Not Present. When the Space Manager tables are recreated, the job will be created or activated if necessary. 5. Set collection schedule information: Field Additional Information Execute Enter the starting date to the job. Click the drop down to display a calendar, or edit the day and year directly in the edit box. l If the collection job is not present, then the default is a few minutes in the future. l If the collection job is active, then the default is the Next Execution date of the existing collection job. If the collection job is inactive, then the default is many years in the future (this is what Oracle stores as the Next Execution date of the existing job)
- 366. Toad for Oracle User Guide Database Administration 364 Field Additional Information At this time l Select a choice from the drop down menu below the At this time: field, l Or you can enter the formula by hand in the field beneath the Execute this job on: field. Each time after the job is executed, Toad will use this formula to calculate the next date of execution. Note: Whatever formula is entered in these fields, Space Manager cannot collect information more frequently than once daily. 6. Set the History Retention information. 7. Set the Data initialization information: Start with empty tables Data is presented from the first collection only. No attempt is made to back-fill history. Back fill tables with generated values indicating positive growth Data is presented with a generated history: this history is created by Toad, and indicates an increase in space usage over time. Toad creates the necessary tables to maintain the Space Manager history. The information in these tables provides the basis for the graphs displayed on the Space Manager tabs. To edit Space Manager setup information You can edit Space Manager information in a similar manner to setting it up. If the collection job has been dropped, Collection Status will display as Not Present. Altering the Space Manager settings will recreate the job. 1. You must be logged in under the Toad schema. From the Database | Administer menu, select Tablespaces. The Tablespace window appears. 2. Click either the Space History or IO History tab. 3. Click . Change the information as described in Setting Up Space Manager and then click OK. Using Space Manager Note: This Toad feature is only available in the commercial version of Toad with the optional DB Admin Module.
- 367. Toad for Oracle User Guide Database Administration 365 The Toad Space Manager is a part of the View Tablespaces window. In order to use Space Manager, you must have certain tables created in the TOAD Schema. Space Manager can add these tables automatically. See "Setting up Space Manager" (page 362) for more information about how to add these tables to the TOAD Schema. Space Manager tracks and forecasts database usage over time, displaying the results in an easy to read, and easily configured graph format. To access Space Manager You must have DBA privileges to view the Space Manager windows. 1. From the Database menu, select Administer | Tablespaces. 2. Space Manager consists of the final two tabs on the View Tablespace window: Space History and IO History. Click one of these tabs to access Space Manager. Space History Tab Note: This Toad feature is only available in the commercial version of Toad with the optional DB Admin Module. The Space History area of the Space Manager graphs usage in several different ways. In addition, you can print the graphs, and forecast future usage. See "Using Space Manager" (page 364) for more information. Graph Usage The graph on the Space History tab displays the tablespace usage. To change the display configuration » Do one of the following: View all the Tablespaces Uncheck the By datafile box and select <All> from the Tablespaces dropdown. Select a specific tablespace Uncheck the By datafile box and select a tablespace from the dropdown Tablespaces: menu. View tablespaces by Datafile Check the By datafile box and select a datafile from the dropdown Datafile menu.
- 368. Toad for Oracle User Guide Database Administration 366 View all the Datafiles Check the By datafile box and select ALL from both dropdowns. To find a single line 1. Click the tablespace in the legend and highlight the line you want to see. 2. Click the line and highlight it. Move your mouse over a line. The status bar displays the tablespace name, the date and # mb for that date. For example: SYSTEM (12/11/2002, 123 mb) Forecast Usage You can forecast usage of tablespaces and datafiles using the Forecasting tool. You can set the number of days in the future and Toad uses linear regression (continuation of a line based on its slope or trend) to extrapolate the tablespace and datafile space usage at the specified time. To forecast usage 1. Create your graph as described above in Graph Usage to create the graph you want to forecast. 2. On the Space Manager toolbar, click . 3. At the bottom of the forecast window, you can select the number of days (the default is 30) in the future you want to forecast. The estimated number of MB appears, and the graph changes as you change the number of days. 4. Click Print to print the forecast. 5. Click OK to close the forecast window. Zoom To zoom a graph » Zoom in on a specific area by dragging a rectangle from left to right. around the area you want to zoom. To restore a graph » Drag a rectangle from the right to left, and the chart will zoom back to 100%. Print Graph When you have selected the graph view you want, you can print it from the toolbar above the graphs.
- 369. Toad for Oracle User Guide Database Administration 367 To print a graph » Click and the graph is sent directly to the default printer. IO History Tab Note: This Toad feature is only available in the commercial version of Toad with the optional DB Admin Module. The IO History portion of the Space Manager tracks datafile I/O history. To select datafiles » Select the datafile to view by clicking the dropdown menu at the top of the tab, and selecting the datafile (or All Datafiles) from the list. The graph changes immediately to display the information for the new datafile. To print a graph » Click and the graph is sent directly to the default printer. Zoom To zoom a graph » Zoom in on a specific area by dragging a rectangle from left to right. around the area you want to zoom. To restore a graph » Drag a rectangle from the right to left, and the chart will zoom back to 100%. Redo Log Manager Redo Log Manager Note: This Toad feature is only available in the commercial version of Toad with the optional DB Admin Module. The Oracle background process log writer (LGWR) stores information about database changes in redo log files. These files can be used to recover the database in case of failure by reapplying the changes. The redo records are stored in the redo log buffer in the SGA and then written to the redo log files when either the buffer is full or the associated transaction is committed. To access the Redo Log Manager » From the Database menu, select Administer | Redo Log Manager.
- 370. Toad for Oracle User Guide Database Administration 368 The DBA defines "groups" of identical (same size) redo logs, so that LGWR simultaneously writes identical information in parallel to each member of a group and switches between groups in a circular fashion. Each redo log within a group is called a "member". An Oracle database must have at least two groups, so that one group can be active while the other group can be archived (if in ARCHIVELOG mode). The lower pane displays the members of the selected group. Upper pane The upper pane displays groups and information pertaining to them at a glance. Tip: The current Group is highlighted in blue. If a log group is unbalanced, then the Members column will display in red and a suggestion for fixing it displays above the grid. In addition, you can use the toolbar to: Button Command Change sessions Refresh the screen Add log group Drop selected log group Clear selected log group Switch logs Alter system archive log Lower Panel The lower panel contains the details for the members of each log group. From the toolbar you can access each member, make changes to it or drop it. Button Command Refresh grid
- 371. Toad for Oracle User Guide Database Administration 369 Button Command Add log group member Drop log group member Balancing Redo Log Groups Note: This Toad feature is only available in the commercial version of Toad with the optional DB Admin Module. Redo Log groups can be managed from the Redo Log Manager. Each redo log group must have an equal number of members (redo log files), and each redo log file must be the same size as all others. If either of the above conditions is not met, the entry is considered out of balance and displayed in red. For example: In this example, Group 4 does not meet the member condition: there is only one member contained in it, rather than the 2 members of each of the other groups. Add another member using the Add button below the grid in the lower panel. The Members grid will now appear as follows, entirely in black:
- 372. Importing and Exporting Data Data Pump Data Pump Overview Note: This Toad feature is only available in the commercial version of Toad in either the Professional Edition or with the optional DB Admin Module. The Oracle data pump is an import/export utility added in Oracle 10g. It is significantly faster and more efficient at loading large volumes of data than the standard import/export utilities. Note: The data pump can only handle parameter files with ANSI encoding. In order to use the data pump in a Unicode environment, your character set must be the same as that of the data in the file. Key differences between the two import/export engines are as follows: Import/Export Data Pump Runs on the client machine Runs on the database server Accesses files on client machine Accesses files on the database server Transfers data across SQL*Net No data transfers across network Modal utilities (cannot initiate a process and then detach) Non-modal utilities (can initiate a process and then detach) Works with any version of Oracle client Works only with Oracle clients version 10g and up Because data pump client processes can detach from a session running on a server, you can close the import/export execution window without killing the job. The import/export will continue. Note: The data pump engine generates files that are incompatible with the old import/export utilities. This also means that the Toad Export File Browser cannot be used to open or review data pump generated export files. To access the data pump » Please see: l Import Wizard (page 375) l Export Wizard (page 385) 13
- 373. Toad for Oracle User Guide Importing and Exporting Data 371 Data Pump Requirements You must have read/write permissions to the export directory to use the data pump. Local directories must be shared, have read/write permissions and be indicated by the network path. In addition, you must have the import/export utilities in your client Oracle bin directory. Some 10g installations may not automatically install these utilities. The utilities required are: l IMPDP.EXE is the Data Pump client import utility l EXPDP.EXE is the Data Pump client utility Note: These utilities are not the same as the old import/export utilities. If you need to import data from an older version of Oracle, you will need the old utilities. (See Import Utility Wizard (page 419)or Export Utility Wizard (page 410) for more information.) The paths for these utilities are stored in the Toad.ini file. You can view and change them from View | Toad Options | Executables. If the Import/Export Utility Wizard is opened and no path has been specified for the export utility, Toad will search for the path and enter it automatically, if it exists. Data Pump Job Manager Overview Note: This Toad feature is only available in the commercial version of Toad in either the Professional Edition or with the optional DB Admin Module. The Data Pump Job Manager provides a way of tracking your data pump jobs. Because the Data Pump is not limited to a connection, the windows can be closed after starting a job. The job manager gives you the ability to manage these jobs and start, stop and kill them after the Data Pump wizard window has been closed. To open the Data Pump Job Manager » From the Database | Import menu, select Data Pump Job Manager. Data Pump Job Manager Toolbar Button Command Change active session. In the drop down list, the active session is denoted by a Start selected jobs Stop selected jobs Kill selected jobs
- 374. Toad for Oracle User Guide Importing and Exporting Data 372 Button Command Refresh grid Setting up an Import/Export Directory Note: This Toad feature is only available in the commercial version of Toad in either the Professional Edition or with the optional DB Admin Module. You must have an import/export directory set up in order to use the Data Pump. To use the Data Pump, you must have Read/Write permissions to the import/export directory. Local directories must be shared, have read/write permissions, and be indicated by the network path. See "Data Pump Overview" (page 370) for more information. Create a directory, on the network or locally, being sure that the users you want to use the data pump have read/write permissions, and that the directory is shared. See Setting up an Import/Export Directory for more information. Remapping Schemas, Tablespaces, and Datafiles Note: This Toad feature is only available in the commercial version of Toad in either the Professional Edition or with the optional DB Admin Module. You can remap schemas, tablespaces, and datafiles depending on the mode and choices you have made. The tabs for these will usually all appear. However, if you choose one that is inappropriate to the choices made, it will fail when run by Oracle. The remapping grid requires the following: l A source can only appear once in each remapping grid. l A row must contain both a source and a target. To remap 1. From the remapping screen of the Data Pump Import wizard, click the tab of the type of object you want to remap (Remapped Schemas, Remapped Tablespaces, or Remapped Datafiles). 2. Click in the Source column and enter the name of the schema, tablespace or datafile you want to remap. 3. Do one of the following: l Press TAB l Click in the Target column. 4. Enter the name of the schema, tablespace or datafile where you want the data in the Source column to be placed. 5. Click the + button to add additional remappings.
- 375. Toad for Oracle User Guide Importing and Exporting Data 373 To remove a remap from the grid » Select an item in the grid and then click the - button to remove it. Filtering Data with Queries Note: This Toad feature is only available in the commercial version of Toad in either the Professional Edition or with the optional DB Admin Module. When importing or exporting data using the data pump, you can use queries to filter the data you import or export. See "Data Pump Overview" (page 370) for more information about the various features of the data pump. The format of these queries is important and will have an effect on the data you import or export. The query statement must be in the following format: [[schema_name.]table_name:]"query_clause" The schema name and table name are optional. The query_clause is a WHERE statement. If the table name is not specified, the query will be applied to all tables. Some sample query statements are as follows: Statement Definition DEPT:"WHERE DName='ACCOUNTING'" Limits the import for the DEPT table to just those rows where the column DName='Accounting'. SCOTT.EMP:"WHERE EName='SMITH'" Limits the SCOTT.EMP table. "WHERE Col1=10" Limits ALL table sin the dump file. Each table will have to have a "Col1" for this query to work. Effect of remapping on queries Remapping a schema to a different schema when importing can affect the results of queries. For example, in the second query above, that limits the SCOTT table, if you remap the SCOTT schema to JSMITH, then the query will fail, and all data will be imported. See "Remapping Schemas, Tablespaces, and Datafiles" (page 372) for more information. In this scenario, the first and third queries will still function. Failure versus no Results A query fails when it cannot be resolved. For example:
- 376. Toad for Oracle User Guide Importing and Exporting Data 374 l When you remap a schema to a new schema and then look for the old schema, all data will be imported. l If, in the third query example above, some tables did not have a Col1, all data would be imported/exported. If the query is valid, but results in no matches, no data will be imported/exported. For example: l In the first query example, there is a column DName, however there are no entries where DName=Accounting. No data will be imported/exported from the DEPT table. l In the third query example above, all tables have a Col1, but none of them have an entry of 10. No data will be imported/exported from any table. Using the Metadata Filter Grid Note: This Toad feature is only available in the commercial version of Toad in either the Professional Edition or with the optional DB Admin Module. One of the distinct advantages to the Data Pump is that you can filter data using a metadata filter: you can filter by object type. See "Data Pump Overview" (page 370) for more information. Using the metadata filter page of the import/export wizards, you can choose to include or exclude entire categories of objects. You can further filter those categories by adding a name qualifier to the grid in the Clause box. (For more information, please see your Oracle documentation). To use the metadata filter grid 1. Select the check boxes beside the types you want to filter. 2. In the Clause box, enter any further selection criteria you want to use. (See "Example" (page 374) for more information.) 3. Select whether you want to: l Include - include only selected data types. l Exclude - exclude only selected data types. 4. No metadata filter (this is the default). Example You want to import Table metadata from only tables that match a specific criteria. 1. Select TABLE in the grid, by clicking in the check box. 2. Click INCLUDE. This limits the import to table metadata only. Note: If you clicked EXCLUDE, then only table metadata would be excluded from the export, and all other types would be included.
- 377. Toad for Oracle User Guide Importing and Exporting Data 375 3. To filter the metadata further, enter a filter criteria. This is optional, and is a further refinement of how you can control what gets put into the import or export. The criteria must be a SQL expression, and operates on the metadata. In this example, enter “LIKE ‘SCRIPT%’.” Note: In the dumpfile, there are only two tables in the JSMITH schema whose names match this criteria and none in the SCOTT schema so Oracle returns only the metadata for the two JSMITH tables imported. Import Wizard Data Pump Import Wizard Note: This Toad feature is only available in the commercial version of Toad in either the Professional Edition or with the optional DB Admin Module. The Data Pump Import wizard lets you use easily use Oracle's Data Pump to import data into the database on a large scale. There are five import modes to the Data Pump: l Full Import l Schema l Table l Tablespace l Transportable Tablespace The Toad wizard supports all of these, and adds support for loading and running an existing parameter file. To access the data pump import wizard 1. From the Database menu, select Import. 2. Select Data Pump Import Wizard. Performing a Full Import Note: This Toad feature is only available in the commercial version of Toad in either the Professional Edition or with the optional DB Admin Module. The default mode for importing is "Full." This means that Oracle will import the entire dumpfile in whatever export mode was used to create it. So if you have exported as "tablespaces" doing a full import will import it in its entirety, in "tablespace" mode. Note: Most parameters in the following procedure are defined by Oracle. Please see your Oracle documentation for more detailed information about them.
- 378. Toad for Oracle User Guide Importing and Exporting Data 376 To perform a full import This topic only covers unfamiliar information. It does not include all step and field descriptions. 1. From the Database menu, select Import | Data Pump Import Wizard. 2. Select Import, and select Entire Dumpfile from the drop down menu. Refer the following for additional information: Queries Information Enter Queries See "Filtering Data with Queries" (page 373) for more information about queries. Schemas Information Remap Schemas See "Remapping Schemas, Tablespaces, and Datafiles" (page 372) for more information. Specify Additional Parameters Information Provide status every n seconds Enter the number of seconds you want between display of status reports. Enter 0 to update only on completion of each object type. Object types to INCLUDE OR EXCLUDE Information Specify object types to INCLUDE or EXCLUDE See "Using the Metadata Filter Grid" (page 374) for more information. Source Directory & Input file name Information Directory See "Setting up an Import/Export Directory" (page 372) for more information. Directories must be set up in this manner. Input file Must exist in the selected directory. Log file Will be created in the selected
- 379. Toad for Oracle User Guide Importing and Exporting Data 377 directory. SQL file If provided, the import will not occur: the DDL necessary to perform the import will be generated and stored in a file of the given name, and the file will be created in the directory specified by the Directory selection. 3. Complete the wizard. Entering Table Names Note: This Toad feature is only available in the commercial version of Toad in either the Professional Edition or with the optional DB Admin Module. When importing tables using the Data Pump Import wizard, you must enter the table names into the grid. The format of these table names is very important to the import. The format for table names is as follows: [SCHEMA].TABLENAME:[partition name] The schema and partition name is optional; however, if no schema is designated in the entry, the current user is assumed. Therefore, if you are logged in as JSMITH, and importing tables from the SCOTT schema, you must prefix the table name with SCOTT, as follows: SCOTT.SCOTTSTABLE You can also import partitions using this feature. An example of a partition syntax is as follows: SCOTT.SCOTTSTABLE:scotts_partition Importing Tables Note: This Toad feature is only available in the commercial version of Toad in either the Professional Edition or with the optional DB Admin Module. You can use the Data Pump Import wizard to import tables. If you are importing all the tables from a dumpfile, you may prefer to do a "full import" and just specify Tables - Include at Step 14. See "Import Wizard" (page 375) for more information. Using the Import tables mode gives you the opportunity to specify which tables you want to import. Note: Most parameters in the following procedure are defined by Oracle. Please see your Oracle documentation for more detailed information about them.
- 380. Toad for Oracle User Guide Importing and Exporting Data 378 To import tables This topic only covers unfamiliar information. It does not include all step and field descriptions. 1. From the Database menu, select Import | Data Pump Import Wizard. 2. Select Import, and select Tables. Refer to the following for additional information: Add Table Names Information Add table names See "Entering Table Names" (page 377) for more information about formatting. Enter queries Information Add queries See "Filtering Data with Queries" (page 373) for more information about queries. Remapping Information Remapping to different areas See "Remapping Schemas, Tablespaces, and Datafiles" (page 372) for more information. Additional Parameters Information If a table exists: Select the appropriate aciton. This is equivalent to the TABLE_EXISTS_ACTION parameter. Provide status every n seconds Enter the number of seconds you want between status reports. Status reports are displayed in the Data Pump watch window. Enter 0 to only update upon completion of each object type. Object Types to INCLUDE or EXCLUDE Information Object types to include or exclude See "Using the Metadata Filter Grid" (page 374) for more information.
- 381. Toad for Oracle User Guide Importing and Exporting Data 379 Source Directory and File Information Information Directory See "Setting up an Import/Export Directory" (page 372) for more information. Directories must be set up in this manner. Input File Must exist in the selected directory. Log File Will be created in the selected directory. SQL File If provided, the import will not occur: the DDL necessary to perform the import will be generated and stored in a file of the given name, and the file will be created in the directory specified by the directory selection. 3. Complete the wizard. Importing Users Note: This Toad feature is only available in the commercial version of Toad in either the Professional Edition or with the optional DB Admin Module. You can use the Data Pump Import wizard to import users. If you are importing all the users from a dumpfile, you may prefer to do a "full import" and just specify Users - Include at Step 14. See "Import Wizard" (page 375) for more information. Using the Import Users mode gives you the opportunity to specify which users you want to import. Note: Most parameters in the following procedure are defined by Oracle. Please see your Oracle documentation for more detailed information about them. To import users This topic only covers unfamiliar information. It does not include all step and field descriptions. 1. From the Database menu, select Import | Data Pump Import Wizard. 2. Select Import, and select Users from the drop down menu.
- 382. Toad for Oracle User Guide Importing and Exporting Data 380 Refer to the following for additional information: Add Users Information Add users Users not currently in the database can be manually entered by typing the user name and pressing ENTER. Enter queries Information Add queries See "Filtering Data with Queries" (page 373) for more information about queries. Remapping Information Remapping to different areas See "Remapping Schemas, Tablespaces, and Datafiles" (page 372) for more information. Additional Parameters Information If a table exists: Select the appropriate aciton. This is equivalent to the TABLE_EXISTS_ACTION parameter. Provide status every n seconds Enter the number of seconds you want between status reports. Status reports are displayed in the Data Pump watch window. Enter 0 to only update upon completion of each object type. Object Types to INCLUDE or EXCLUDE Information Object types to include or exclude See "Using the Metadata Filter Grid" (page 374) for more information. Source Directory and File Information Information Directory See "Setting up an
- 383. Toad for Oracle User Guide Importing and Exporting Data 381 Import/Export Directory" (page 372) for more information. Directories must be set up in this manner. Input File Must exist in the selected directory. Log File Will be created in the selected directory. SQL File If provided, the import will not occur: the DDL necessary to perform the import will be generated and stored in a file of the given name, and the file will be created in the directory specified by the directory selection. 3. Complete the wizard. Importing Tablespaces You can use the Data Pump Import wizard to import tablespaces. If you are importing all the tablespaces from a dumpfile, you may prefer to do a "full import" and just specify Tablespaces - Include at Step 14. See "Import Wizard" (page 375) for more information. Using the Import Tablespaces mode gives you the opportunity to specify which tablespaces you want to import. Note: Most parameters in the following procedure are defined by Oracle. Please see your Oracle documentation for more detailed information about them. To import tablespaces This topic only covers unfamiliar information. It does not include all step and field descriptions. 1. From the Database menu, select Import | Data Pump Import Wizard. Select Import, and select Tablespaces from the drop down menu. Enter queries Information Add queries See "Filtering Data with Queries" (page 373) for more information about queries. Remapping Information
- 384. Toad for Oracle User Guide Importing and Exporting Data 382 Remapping to different areas See "Remapping Schemas, Tablespaces, and Datafiles" (page 372) for more information. Additional Parameters Information If a table exists: Select the appropriate aciton. This is equivalent to the TABLE_EXISTS_ACTION parameter. Provide status every n seconds Enter the number of seconds you want between status reports. Status reports are displayed in the Data Pump watch window. Enter 0 to only update upon completion of each object type. Object Types to INCLUDE or EXCLUDE Information Object types to include or exclude See "Remapping Schemas, Tablespaces, and Datafiles" (page 372) for more information. Source Directory and File Information Information Directory See "Setting up an Import/Export Directory" (page 372) for more information. Directories must be set up in this manner. Input File Must exist in the selected directory. Log File Will be created in the selected directory. SQL File If provided, the import will not occur: the DDL necessary to perform the import will be generated and stored in a file of the given name, and the file will be created in the directory
- 385. Toad for Oracle User Guide Importing and Exporting Data 383 specified by the directory selection. 2. Complete the wizard. Importing Transportable Tablespaces Note: This Toad feature is only available in the commercial version of Toad in either the Professional Edition or with the optional DB Admin Module. The transportable tablespace allows you to quickly move a subset of an Oracle database from one Oracle database to another. You can create a transportable tablespace through the Data Pump Import wizard. To import a transportable tablespace This topic only covers unfamiliar information. It does not include all step and field descriptions. 1. From the Database menu, select Import | Data Pump Import Wizard. Select Import a transportable tablespace. Datafile Path and filenames Information Directory path and filename for each datafile. Enter a fully qualified directory path and filename for each datafile. Note: An Oracle DIRECTORY object cannot be used for this step. Enter queries Information Add queries See "Filtering Data with Queries" (page 373) for more information about queries. Remapping Information Remapping to different areas See "Remapping Schemas, Tablespaces, and Datafiles" (page 372) for more information. Additional Parameters Information If a table exists: Select the appropriate aciton. This is equivalent to the TABLE_EXISTS_ACTION
- 386. Toad for Oracle User Guide Importing and Exporting Data 384 parameter. Provide status every n seconds Enter the number of seconds you want between status reports. Status reports are displayed in the Data Pump watch window. Enter 0 to only update upon completion of each object type. Source Directory and File Information Information Directory See "Setting up an Import/Export Directory" (page 372) for more information. Directories must be set up in this manner. Input File Must exist in the selected directory. Log File Will be created in the selected directory. SQL File If provided, the import will not occur: the DDL necessary to perform the import will be generated and stored in a file of the given name, and the file will be created in the directory specified by the directory selection. 2. Complete the wizard. Importing from an Existing Parameter File Note: This Toad feature is only available in the commercial version of Toad in either the Professional Edition or with the optional DB Admin Module. You can load any existing parameter file that you have created from a previous import. This lets you prepare your import in advance, load the parameter file later and import your data. To load an existing parameter file This topic only covers unfamiliar information. It does not include all step and field descriptions. 1. From the Database menu, select Import | Data Pump Import Wizard. 2. Select Load Existing Parameter File.
- 387. Toad for Oracle User Guide Importing and Exporting Data 385 3. Complete the wizard. Related Topics Data Pump Overview (page 370) Import Wizard (page 375) Export Wizard (page 385) Performing a Full Import (page 375) Importing Tables (page 377) Importing Users (page 379) Importing Tablespaces (page 381) Importing Transportable Tablespaces (page 383) Export Wizard Data Pump Export Wizard Note: This Toad feature is only available in the commercial version of Toad in either the Professional Edition or with the optional DB Admin Module. There are five export modes to the Data Pump: l Full Export l Schema l Table l Tablespaces l Transportable Tablespaces The Toad wizard supports these modes, and adds support for loading and running an existing parameter file. To open the data pump export wizard » From the Database menu, select Export and then Data Pump Export Wizard. Exporting Tables Note: This Toad feature is only available in the commercial version of Toad in either the Professional Edition or with the optional DB Admin Module. See "Export Wizard" (page 385) for more information.
- 388. Toad for Oracle User Guide Importing and Exporting Data 386 Note: Most parameters in the following procedure are defined by Oracle. Please see your Oracle documentation for more detailed information about them. To export tables This topic only covers unfamiliar information. It does not include all step and field descriptions. 1. From the Database menu, select Export | Data Pump Export Wizard. Select Export, and select Tables from the drop down menu. Tables Information Selections tab Lists the tables you have selected. Queries Information Enter any queries you want to use to limit the data exported See "Filtering Data with Queries" (page 373) for more information about queries. Destination Directory and Output file names Information Directory See "Setting up an Import/Export Directory" (page 372) for more information. Directories must be set up in this manner. 2. Complete the wizard. Exporting Users Note: This Toad feature is only available in the commercial version of Toad in either the Professional Edition or with the optional DB Admin Module. You can export users with the Data Pump Export wizard. Note: Most parameters in the following procedure are defined by Oracle. Please see your Oracle documentation for more detailed information about them. To export users This topic only covers unfamiliar information. It does not include all step and field descriptions. 1. From the Database menu, select Export | Data Pump Export Wizard. 2. Select Export, and select Users from the drop down menu.
- 389. Toad for Oracle User Guide Importing and Exporting Data 387 You can choose to display in the available users panel only those users that own objects. Refer to the following for additional information: Queries Information Enter any queries you want to use to limit the data exported See "Filtering Data with Queries" (page 373) for more information about queries. Object Types to INCLUDE or EXCLUDE Information Select any object types to include or exclude in the dumpfile. See "Using the Metadata Filter Grid" (page 374) for more information. Destination Directory and Output file names Information Directory See "Setting up an Import/Export Directory" (page 372) for more information. Directories must be set up in this manner. 3. Complete the wizard. Exporting Databases Note: This Toad feature is only available in the commercial version of Toad in either the Professional Edition or with the optional DB Admin Module. See "Export Wizard" (page 385) for more information. Note: Most parameters in the following procedure are defined by Oracle. Please see your Oracle documentation for more detailed information about them. To export the current database This topic only covers unfamiliar information. It does not include all step and field descriptions. 1. From the Database menu, select Export | Data Pump Export Wizard. 2. Select Export, and select Database from the drop down menu. Refer to the following for additional information: Queries Information
- 390. Toad for Oracle User Guide Importing and Exporting Data 388 Enter any queries you want to use to limit the data exported See "Filtering Data with Queries" (page 373) for more information about queries. Object Types to INCLUDE or EXCLUDE Information Select any object types to include or exclude in the dumpfile. See "Using the Metadata Filter Grid" (page 374) for more information. Destination Directory and Output file names Information Directory See "Setting up an Import/Export Directory" (page 372) for more information. Directories must be set up in this manner. 3. Complete the wizard. Exporting Tablespaces Note: This Toad feature is only available in the commercial version of Toad in either the Professional Edition or with the optional DB Admin Module. You can export tablespaces with the Data Pump Export wizard. Note: Most parameters in the following procedure are defined by Oracle. Please see your Oracle documentation for more detailed information about them. To export tablespaces This topic only covers unfamiliar information. It does not include all step and field descriptions. 1. From the Database menu, select Export | Data Pump Export Wizard. Select Export, and select Tablespaces from the drop down menu. Queries Information Enter any queries you want to use to limit the data exported See "Filtering Data with Queries" (page 373) for more information about queries. Object Types to INCLUDE or EXCLUDE Information Select any object types to See "Using the Metadata Filter
- 391. Toad for Oracle User Guide Importing and Exporting Data 389 include or exclude in the dumpfile. Grid" (page 374) for more information. Destination Directory and Output file names Information Directory See "Setting up an Import/Export Directory" (page 372) for more information. Directories must be set up in this manner. 2. Complete the wizard. Generating a Transportable Database Note: This Toad feature is only available in the commercial version of Toad in either the Professional Edition or with the optional DB Admin Module. The transportable tablespace allows you to quickly move a subset of an Oracle database from one Oracle database to another. You can generate a transportable tablespace through the Data Pump Export wizard. See "Export Wizard" (page 385) for more information. Note: Most parameters in the following procedure are defined by Oracle. Please see your Oracle documentation for more detailed information about them. To generate a transportable database This topic only covers unfamiliar information. It does not include all step and field descriptions. 1. From the Database menu, select Export | Data Pump Export Wizard. Select Generate a Transportable Database. Queries Information Enter any queries you want to use to limit the data exported See "Filtering Data with Queries" (page 373) for more information about queries.. Destination Directory and Output file names Information Directory See "Setting up an Import/Export Directory" (page 372) for more information. Directories must be set up in this manner.
- 392. Toad for Oracle User Guide Importing and Exporting Data 390 2. Complete the wizard. Loading an Existing Parameter File (page 390) Loading an Existing Parameter File Note: This Toad feature is only available in the commercial version of Toad in either the Professional Edition or with the optional DB Admin Module. You can load any existing parameter file that you have created from a previous export. This lets you prepare your export in advance, load the parameter file later and export your data. To load an existing parameter file 1. From the Database menu, select Export | Data Pump Export Wizard. 2. Select Load Existing Parameter File. 3. Complete the wizard. Export Dataset Export Dataset Use this dialog box to export the current SQL results panel to the clipboard or a file. In addition, you can set your choices here and then run the actual export of the results from the command line later. See "Export Tables, Views, SQL Queries from the Command Line" (page 828) for more information. To save grid contents » Right-click over a data grid and select Export Dataset. Note: Save As includes CLOBs and BLOBs automatically. LONG columns are not saved using this method. See "Editing LONG and LONG RAW columns" (page 957) for more information. When you have opened the Export Dataset window, you can customize how you save your data. You can customize the Format, and the file path. See "File Formats and Options" (page 391) for more information. To customize the file path 1. Enter the correct file path in the Save to file box at the bottom of the Save Grid Contents window. 2. Dynamic filenames are supported using variables. You can embed a date or a timestamp within a filename.
- 393. Toad for Oracle User Guide Importing and Exporting Data 391 Sorted Grids If you have chosen to sort a grid dataset (by clicking the column header, rearranging column order, and so on), the exported data remains in the sorted order (as shown in the grid). File Formats and Options Saving Formats When exporting a dataset from a grid, you have the choice of several different formats. Each format provides different options to customize your file. These formats include: Some of these formats let you copy to the clipboard; for others you are required to save the document to a file. The options vary depending on which format you choose. l Access Database File (page 391) l Text Options (page 392) (delimited text) l Fixed Field Spacing (page 393) l HTML Options (page 393) l Insert Statements Options (page 394) l Commit Intervals (page 394) l SQL*Loader Options (page 395) l XLS File Options (page 392) l XLS Instance Options (page 393) l XML (Plain) Options (page 395) l XML (With XSL) Options (page 396) Note: There may be problems with your export in the following formats if your table contains columns containing XML data: l SQL Loader l XML (with XSL) l XML (Plain) Access Database File Select this option in the Export Dataset window to save your data as an MDB (Access Database) file. See "Export Dataset" (page 390) for more information. You can also set the following options: l Change file where doc is saved l Compress file in zip format l Launch File after Creation
- 394. Toad for Oracle User Guide Importing and Exporting Data 392 l Data Substitutions (for columns) l Display all exported results in grid l Export selected rows l If MDB file exists.. l Create table in MDB file l Prompt for overwrite/abort l Automatically detect table name l Name l If Table exists... l Append rows (if columns match) l Overwrite l Abort Text Options When you select text from the Export Dataset window, you can set the delimiter to your choice. The default is a pipe ( | ). See "Export Dataset" (page 390) for more information. To change to a common delimiter » Right click in the delimiter box and then select the delimiter you want to use, or type the delimiter in using the keyboard. When you change this delimiter, Toad will remember your choice. XLS File Options If, from the Export Dataset window, you choose to export to an XLS file, you can choose from a long list of options. You can: l Display all exported results in grid l Export selected rows l Include null text l Include column headers l Lowercase l Quoted l Include SQL statement l Include cell borders l Use only "General" cell formatting l Match cell fonts to grid l Hide time portion of date if zero
- 395. Toad for Oracle User Guide Importing and Exporting Data 393 l Write wide strings (This feature can help Unicode export correctly. It is unchecked by default because it can slow the XLS writer down dramatically.) l Auto column width l Click the Data Substitutions button (See Substitutions for more information.) l Set date or number formats l Set papersize l Name worksheet XLS Instance Options Selecting Instance options from the Export Dataset window creates an Excel file within the current Excel instance running on your machine. The following options are available: l Include NULL text l Export selected rows l Start at active cell - if selected, this places the exported data (the top left corner) in the active cell in MS Excel. Using this option you can place the data anywhere you want, verically or horizontally on any sheet. When unchecked, the data will start in the A1 cell of a new sheet. l Treat string fields as strings - if selected, Toad sends a single quote before a string field making Excel treat it as a string. Leading zeros are preserved. l Include column headers -if selected, lowercase column headers become available. l Specify a Sheet name l Click the Data Substitutions button (See Substitutions for more information.) Fixed Field Spacing You can export your grid from the Export Dataset window with a fixed field width. See "Export Dataset" (page 390) for more information. Widths are derived from the column definitions. Note: Widths come from the definition of the table in the database, not the way it looks in the grid. l Click the Substitutions button HTML Options You can choose to export your results from the Export Dataset window as an HTML table. If you choose this format, you can choose from the following options: l Export selected rows l Include null text
- 396. Toad for Oracle User Guide Importing and Exporting Data 394 l Include column headers - Lowercase or quoted l Include cell borders l Word wrap l Substitute column values Insert Statements Options If you choose to export your results from the Export Dataset window as INSERT statements, column headers will automatically be included. See "Export Dataset" (page 390) for more information.You can also set the following options: l Display all exported results in grid l Export selected rows l Include null text l Include schema name l Include SQL Statement l Include "set define off" l Lowercase column names l Column names in values clause l Set commit interval Note: A commit inteval of 0 (zero) will produce one insert statement after all of the SQL statements. A commit interval of -1 will leave off the commit entirely. l Automatically detect schema and name l Set Schema and name l Set Data Substitutions. (See Substitutions for more information.) Merge Statements Select this option to save the grid from the Export Dataset window as a series of MERGE statements. This merge is created based on the table's primary key. If no primary key is found, you can select columns to merge on. Invisible grid columns are excluded from the merge statement. See "Export Dataset" (page 390) for more information about exporting grid contents. Commit Intervals A commit inteval of 0 (zero) will produce one insert statement after all of the SQL statements. A commit interval of -1 will leave off the commit entirely. Note: You can generate these statements from any version of Oracle, but can run them only in Oracle 9i and newer.
- 397. Toad for Oracle User Guide Importing and Exporting Data 395 SQL*Loader Options Choosing SQL Loader from the Export Dataset window creates a SQL Loader file. See "Export Dataset" (page 390) for more information. Select from the following options: l Display all exported results in grid l Export selected rows l Parallel load l Include schema name l Include SQL Statement l Operation l Insert l Truncate l Append l Replace l Allowable Discards l All l Set Maximum l Direct path load l Recoverable l Unrecoverable l Field separator (default ;) l Enclose string fields in (default ") l Table l Automatically detect schema and name l Set schema and name l Click the Substitutions button. See Substitutions for more information. XML (Plain) Options This format option from the Export Dataset window exports the results to a plain XML file. You can also set other options such as: l Display all exported results in grid l Export selected rows
- 398. Toad for Oracle User Guide Importing and Exporting Data 396 l Include null fields l Click Data Substitution (See Substitutions for more information.) XML (With XSL) Options This formatting option from the Export Dataset window exports the results to an XML file with XSL. You can choose to zip the resulting file. You can also click the Substitutions button and specify substitutions for data. See Substitutions for more information. Export DDL Export DDL Use this dialog box to export selected DDL to a file, the clipboard, or the editor. To export DDL 1. Select the Database | Export | DDL menu item. 2. Click the Objects & Output tab and select objects to export. See "Select Objects to Export as DDL" (page 396) for more information. 3. Set your Output choices. See "Export as DDL Output" (page 396) for more information. 4. Click the Options tab and set your options. See "Export DDL Script Options" (page 397) for more information. 5. Click to export. Select Objects to Export as DDL You can easily find and select objects to export as DDL. See "Export DDL" (page 396) for more information. To select objects to export 1. From the Export DDL window, Objects and Output panel, click Add. 2. Use the Object Search window to search for the objects you want to export. See "Object Search" (page 967) for more information. 3. From the Results tab on the Object search window, multi-select the objects you want to export. 4. Click OK. Export as DDL Output You can export DDL as different types of output.
- 399. Toad for Oracle User Guide Importing and Exporting Data 397 » Select how you want to output your DDL in the Output area. You can output your DDL in several different ways: l Single file l One file per schema l One file per object type l One file per object l To screen l To clipboard l To Editor - as a script l To Editor - one object per tab l If you are sending the output to a file, enter the directory where you want the files saved in the Directory box. l Include "Build All" script l Use relative paths Export DDL Script Options Export DDL Script Options You can select from many options when exporting DDL. See "Export DDL" (page 396) for more information. These are organized on tabs, including: l Create and Drop (page 398) l DDL - Options - Storage Objects (page 398) l Tables (page 399) l Online (page 399) l No parse (page 399) l Indexes (page 400) l Extract both spec and body when only one is selected in objects grid (page 400) l Queues (page 400) l Grants to the role (page 401) l Start with minval (page 401) l General options (page 401) l Parse triggers for schema name (page 402) l DDL - Options - Users tab (page 402) l DDL - Options - Views tab (page 403)
- 400. Toad for Oracle User Guide Importing and Exporting Data 398 DDL - Options - Common tab The Common tab is found on the Export DDL window, on the Script Options tab. See "Export DDL" (page 396) for more information. The options on the common tab are common to any DDL created. Create and Drop Schema name When selected, Toad will include the schema name in the DDL. Drop statement When selected, Toad will include a drop statement as well as the create statement. Use purge option for tables When checked, Toad will include the Oracle purge option when dropping tables in Oracle version 10g and newer. Related Objects Select the related objects you want to include: l Audit statements l Grants l Public synonyms l Private synonyms Formatting Use the formatting area to specify special formatting options for the DDL to include. l Script comments l List dependencies l Row counts for tables l Always use "/" to end SQL statements l One line per statment l SQL*Plus "Prompt" comments l Format PL/SQL objects l "Show Errors" commands DDL - Options - Storage Objects The Storage Objects tab is found on the Export DDL window, on the Script Options tab.
- 401. Toad for Oracle User Guide Importing and Exporting Data 399 Select the storage objects you want to include: l Storage clauses l Tablespace only l LOB storage l Monitoring l Cache l Parallel l Logging l Compression DDL - Options - Clusters tab The Clusters tab is found on the Export DDL window, on the Script Options tab. Tables Selected, Toad will include associated Tables. Indexes Selected, Toad will include associated Indexes. DDL - Options - Indexes tab The Indexes tab is found on the Export DDL window, on the Script Options tab. Online When selected, Toad includes the ONLINE Option in the index statement. Compute Statistics When selected, Toad includes the COMPUTE STATISTICS in the index statement. DDL - Options - Jobs tab The Jobs tab is found on the Export DDL window, on the Script Options tab. No parse When selected, Toad includes the NO PARSE option in the call to dbms_job. Force When selected, Toad includes the FORCE Option in the call to dbms_job (RAC only).
- 402. Toad for Oracle User Guide Importing and Exporting Data 400 Use interval expression for next date When selected, Toad uses the value for INTERVAL as the parameter for NEXT_DATE in the call to dbms_job (otherwise, uses the literal date value in dba_jobs.next_date). DDL - Options - Materialized Views tab The Materialized Views tab is found on the Export DDL window, on the Script Options tab. Indexes When selected, Toad includes indexes. Format When selected, Toad formats the SQL statement part of the materialized view statement. Materialized view comments When selected, Toad includes object level comments. Column Comments When selected, Toad includes column level comments. DDL - Options - Packages tab The Packages tab is found on the Export DDL window, on the Script Options tab. Extract both spec and body when only one is selected in objects grid If the objects grid has only a package spec or package body listed, and the option is checked, then Toad extracts DDL for both spec and body. Always keep spec and body in the same file or editor tab When checked, the package spec and package body will never be separated into different files or editor tabs. DDL - Options - Queue Tables tab The Queue Tables tab is found on the Export DDL window, on the Script Options tab. Queues When selected, Toad creates the queues relating to the selected queue table. DDL - Options - Roles tab The Roles tab is found on the Export DDL window, on the Script Options tab.
- 403. Toad for Oracle User Guide Importing and Exporting Data 401 Grants to the role When selected, Toad includes grants made to the role. To include grants of the role to other users or roles, use the Grants checkbox on the “Common” tab. DDL - Options - Sequences tab The Sequences tab is found on the Export DDL window, on the Script Options tab. Start with minval When selected, Toad uses the MINVAL value as for START WITH in the CREATE SEQUENCE statement. When unchecked, the value for START WITH will be the value in dba_ sequences.last_value. DDL - Options - Tables tab The Tables tab is found on the Export DDL window, on the Script Options tab. General options Explicitly specify NULL in table DDL When selected, Toad will explicitly specify NULL for columns that can have nulled values. Rebuild FK's referencing selected tables When selected, foreign keys that reference the selected tables will be rebuilt. Insert statements When selected, Toad includes table data in the form of insert statements. Table comments When selected, Toad includes comments on the table. Column comments When selected, Toad includes comments on the columns of the table. Constraints The constraints area contains options that specifically relate to constraints on the objects selected. Choose to include any or all of the following: l Check constraints l Foreign key constraints l Primary key constraints l Unique key constraints
- 404. Toad for Oracle User Guide Importing and Exporting Data 402 List constraints after columns When selected, constraints will be listed immediately after columns in the DDLs. Individual "Alter Table" commands When selected, each constraint will be created by an individual ALTER TABLE command. Single "Alter Table" command When selected all constraints will be created by a single ALTER TABLE COMMAND. Other Related Objects When any of these are selected, the object in question will be included in the DDL. Additional options limit these selections. l Policies l Policy Groups l Indexes l No constraint indexes l Triggers l Parse triggers for schema name DDL - Options - Triggers tab The Triggers tab is found on the Export DDL window, on the Script Options tab. Parse triggers for schema name When selected, Toad will parse selected triggers for the associated schema name. When unchecked, Toad will include the schema name in the DDL for the selected triggers. The default is checked. DDL - Options - Users tab The Users tab is found on the Export DDL window, on the Script Options tab. The users tab provides options related to creating DDL from a selected user. Select options to include the listed parameters, uncheck to exclude. l Grants on the user's objects to other users/roles l Limited to grants by the user l Grants to the user l System privileges l Tablespace quotas l Roles l Proxies
- 405. Toad for Oracle User Guide Importing and Exporting Data 403 DDL - Options - Views tab The Views tab is found on the Export DDL window, on the Script Options tab and provides options related to creating DDL from a selected view. Select the parameters to include, clear the parameters to exclude. l Query only - extracts only the view's query. When this option is checked, Format is the only other option. l Format - Format the query or "create view" statement. Select the parameters to include, clear the parameters to exclude. l Force l Columns l Comments l Triggers l Constraints l Policies l Policy groups Export File Browser Export File Browser Toolbar Note: The Export File Browser is only available in Toad Professional Editions, or with the optional DB Admin module. Caution: While the scripts produced by the Export File Browser are very good for giving you a glimpse into the objects contained in the export file, Oracle meant for these scripts to run only in the context of Oracle's IMP utility. Many extracted DDLs will run as standard SQL, and some will not. Please examine scripts produced by the Export File Browser very carefully before running them. Button Command Open Export File Expand all nodes Collapse all nodes
- 406. Toad for Oracle User Guide Importing and Exporting Data 404 Button Command Create script from entire export file Extract DDL for selected nodes and subnodes Save tree info as XML Toggle database compare mode Adjust dataset row limit Viewing an Export File Note: The Export File Browser is only available in Toad Professional Editions, or with the optional DB Admin module. An online video tutorial is also available for this feature. This video opens in a new browser window and requires an internet connection. Use the Export File browser to view the contents of an export file before you import it. To open an export file 1. From the Database menu, select Export | Export File Browser. 2. On the Export File Browser toolbar, click . 3. Select a file from the Open Export File window. See "Open Export File Window" (page 405) for more information. 4. Click OK. Note: If the file has not been parsed before, it may take a few minutes to process it. Processing progress will be displayed in the status area at the bottom of the window. Finding Information in an Export File Note: The Export File Browser is only available in Toad Professional Editions, or with the optional DB Admin module. Use the right hand side tree view of the Export File Browser to select a portion of the export file to view. Nodes are organized by: l Schema l Storage l Security
- 407. Toad for Oracle User Guide Importing and Exporting Data 405 l Code l Tuning and Configuration Object nodes are displayed with the number of objects of that type in parentheses beside it. For example, Schemas (6). If you expand the Schemas node, you will find six schemas beneath it. In the left hand side, you can click the DDL tab to view the code. If the selected object has data, such as a table, click the Data tab to view the data within that object. Filtering Data You can use the Quickfilter in the same way as it works in the Schema Browser. See "Using the QuickFilter Box" (page 993) for more information. However , it will display results in the tree view slightly differently. Reading the Treeview With NO filter applied (* in the Quickfilter box), you will see a node like Tables (42) if there are 42 tables in a certain schema, for example. If a filter is applied that only makes 10 of these tables visible, that node displays one of the following: Tables (? of 42) or Tables (10 of 42). l ? indicates that the you have not expanded the node yet, so how many pass the filter is not known. l (10 of 42) indicates that the node has been expanded (or is currently expanded) You will never see Tables (0 of 42) because if all tables are filtered out, then the Tables node is hidden too. Schema-level nodes are never hidden, even if everything under them is hidden. To find something quickly 1. Open the export file in the Export File Browser. 2. Type its name or an appropriate filter in the Quickfilter box. 3. Click the Expand All button. Open Export File Window Note: The Export File Browser is only available in Toad Professional Editions, or with the optional DB Admin module. The Export File Browser window is more than just a file selection screen. It provides you with information about the export files, including basic file information, who created them, and whether or not they have been parsed. See "Viewing an Export File" (page 404) for more information about the Export File Browser. To open an export file » Click on the Export File Browser toolbar.
- 408. Toad for Oracle User Guide Importing and Exporting Data 406 Window Layout The left hand side of the Open Export File window is the directory tree. Use this to find the file you want to open. It works in the same manner as the Windows Explorer. When you have selected a directory the files are listed on the right hand side. By default Toad displays only the .dmp files in a directory. To see all files in a directory » Select All Files from the File Type box. If you have selected all files, the info grid will be more sparsely populated for the files that are not export (extension .dmp) files. Non-export files display only File Name, File Size, and File Date. Parsed File color Toad keeps track of files you have previously parsed by changing their color. By default, all unparsed files are displayed in black. Parsed files are displayed in Green. To change the color of parsed files 1. Click the Settings button in the lower left of the screen. 2. Select Set pre-parsed color. 3. Select the color you want to use and click OK. To remove parsing information for the selected file 1. Click the Settings button in the lower left of the screen. 2. Select Remove pre-parsed information. To remove parsing information entirely » In the Toad Directory | ParsedExportFiles directory, remove all files. DB Compare Mode DB Compare Mode Overview Note: This Toad feature is only available in the commercial version of Toad with the optional DB Admin Module. You can use the Export File Browser to compare an export file with the objects in a database. This is a cursory compare and will not indicate deep, data-level differences. For any selected nodes and databases, check boxes will indicate whether the object is in the file, the database, or both.
- 409. Toad for Oracle User Guide Importing and Exporting Data 407 To compare a file to a database 1. Open a data export file in the browser. See "Viewing an Export File" (page 404) for more information. 2. Click . 3. In the right hand side compare screen, select a connection from the connection drop down to compare to the file. Note: If the connection you want to use is not listed in the dropdown, you can either: l Click the connection drill down and then click New and open a new connection. l From the Session menu | New Connection, open a new connection. 4. In the left hand side, select one or more nodes to compare to the selected database. Reading the Compare Grid Note: The Export File Browser is only available in Toad Professional Editions, or with the optional DB Admin module. The compare mode grid in the Export File Browser provides basic information for both the database and the selected nodes. You can print or export the compare grid from the Export Dataset menu item. Troubleshooting Because of the way Toad parses .dmp files, some items will be listed as in the database but not in the file. These include: l Constraints that were created inline with the table DDL, as follows: CREATE TABLE WK$DOC_RELEVANCE ( URL_ID NUMBER NOT NULL ENABLE, TERM VARCHAR2(500) NOT NULL ENABLE, SCORE NUMBER NOT NULL ENABLE, CONSTRAINT WK$DOC_RELEVANCE_PK PRIMARY KEY ("TERM", "URL_ID") ENABLE ); l System named constraints. l Indexes created by Oracle when a user created a constraint.
- 410. Toad for Oracle User Guide Importing and Exporting Data 408 l Many objects in the SYS, MDSYS, etc, schemas. Certain objects are created automatically when you create a database do not go into export files even when you do a "full database export." l System named hash partitions and subpartitions. Freezing the Compare Grid Note: This Toad feature is only available in the commercial version of Toad with the optional DB Admin Module. You can freeze the compare grid in the Export File browser so that you can view other items without losing the data from the compare you are doing. See "Viewing an Export File" (page 404) for more information. This will hold the Compare Grid steady while you toggle Compare mode off, and view DDL or data in Browser mode. When you return to Compare DB mode, the last compare you performed will be active in the grid regardless of what is selected in the left hand side. To freeze the compare grid 1. In the Export File Browser, compare a node or nodes to a database connection. See "DB Compare Mode" (page 406) for more information 2. Select the Freeze Grid checkbox to freeze the grid. DDL Operations Copying DDL to Clipboard Note: The Export File Browser is only available in Toad Professional Editions, or with the optional DB Admin module. You can copy DDL from the right hand side of the Export File Browser to the clipboard and then paste it wherever you need it, including other editors.See "Viewing an Export File" (page 404) for more information. To copy DDL from the right hand side to the clipboard 1. Select an object from the left hand tree view and click the DDL tab on the right hand side. 2. Select any or all of the DDL. Press CTRL+C. Note: Scripts for a few objects will look wrong. The reason for this is that the export files we are browsing were meant only to be used by Oracle's IMP utility. Things that may look wrong in script form because of this include: l Materialized views and materialized view logs. l Queue tables
- 411. Toad for Oracle User Guide Importing and Exporting Data 409 l Any object that has storage (tables, indexes, etc) when the export was done in "Transportable tablespace" mode. Saving DDL as a File Note: The Export File Browser is only available in Toad Professional Editions, or with the optional DB Admin module. From the Export File Browser, you can save the DDL in the right hand side to a file for later use. To save DDL from the right hand side to a file 1. Select an object from the left hand tree view of the Export File browser and click the DDL tab on the right hand side. 2. Right-click and select "Save to File." 3. Name the file and click Save. Note: This method saves all of the DDL for an object to a file. You cannot be selective as you can with the copy method. Extracting DDL from Multiple Nodes Note: The Export File Browser is only available in Toad Professional Editions, or with the optional DB Admin module. You can extract DDL from multiple nodes of the Export File browser to the clipboard and then paste it wherever you need it, including other editors. To extract DDL from multiple nodes 1. Select one or more nodes from the left hand tree view. These can be objects, or groups of objects. 2. Right click on the tree and select "Extract DDL For Selected Nodes and SubNodes." 3. Select your options. 4. Click OK. General Export Export Table as Flat File Use this function to create a flat file, which is a file that does not contain TAB characters or "," (comma) characters between values. Note: The SQL*Loader tab in this feature is only available in the commercial version of Toad with the optional DB Admin Module.
- 412. Toad for Oracle User Guide Importing and Exporting Data 410 To export a table 1. From the Database | Export | menu, select Table as Flat File. 2. On the options tab, select the table to export. You need to set up the Specifications File, which will define the table name, table owner, how many lines in the output file will be covered by a single record of data, the columns of data, what line they will appear on, the starting column, and the length of each column of data. Example Specifications File TABLENAME=EMPLOYEE TABLEOWNER=DEMO LINESPERRECORD=1 COL1=EMPLOYEE_ID,1,1,5 COL2=LAST_NAME,1,6,15 COL3=FIRST_NAME,1,21,15 COL4=MIDDLE_INITIAL,1,36,1 COL5=JOB_ID,1,37,4 COL6=MANAGER_ID,1,41,5 COL7=HIRE_DATE,1,46,22 COL8=SALARY,1,68,10 COL9=COMMISSION,1,78,10 COL10=DEPARTMENT_ID,1,88,3 Sample flat file as exported 7369 SMITH JOHN Q667 7902 12/17/1984 800 20 7499 ALLEN KEVIN J670 7698 2/20/1985 1600 300 30 7505 DOYLE JEAN K671 7839 4/4/1985 2850 13 7506 DENNIS LYNN S671 7839 5/15/1985 2750 23 7507 BAKER LESLIE D671 7839 6/10/1985 2200 14 Export Utility Wizard Note: This extended Toad Feature is only available in Toad Professional Editions, or with the optional DB Admin module.
- 413. Toad for Oracle User Guide Importing and Exporting Data 411 This wizard lets you easily transfer data objects between Oracle databases using Oracle’s export utility. The path to the Oracle utility is configured under View | Toad Options | Executables. To export data objects This topic only covers unfamiliar information. It does not include all step and field descriptions. 1. From the Database menu, select Export | Export Utility Wizard. Refer to the following for additional information: For all Exports Information Objects to export Triggers are only available if you have Oracle 8.1 or above. Watch Progress If you select Watch Progress (Feedback = 1000) on the last screen of the wizard, the Export Watch window displays and you can immediately view the results of the export. In addition, the Log tab on the Watches window, will let you send the log directly to the printer. 2. Complete the wizard. Troubleshooting The Export Utility wizard is an interface to Oracle's utility, usually named Exp.exe, Exp73.exe, or Exp80.exe and located in your Oracle home's bin folder. If Toad cannot find this executable, the error "The Oracle Export Utility executable must be specified" appears. To specify the location of the Oracle Export Utility 1. Select View | Toad Options | Executables. Enter the path in the Export box. Note: If you do not know where this executable resides, or it is not on your computer, you may need to install the Database Utilities from the Oracle CD. Data Subset Wizard This window lets you copy a portion of data from one schema to another while maintaining referential integrity, so that you can work with a smaller set of data.
- 414. Toad for Oracle User Guide Importing and Exporting Data 412 To access the data subset wizard » From the Database menu, select Export | Data Subset Wizard. The wizard creates a script that will copy a specified percentage of data beginning with all parent tables or from all tables with no constraints. You can specify a minimum number of rows. The wizard then continues with tables that have foreign key constraints, the rows copied are those whose parent rows have been copied into the parent tables. The data is then inserted into the destination tables with INSERT SELECT statements. Because of this, tables containing columns of datatype LONG will not be inserted. Note: For Oracle 7.3, an Oracle bug sometimes prevents the INSERT SELECT statement from inserting rows. If the destination schema is in a different database, the script is designed to run in the destination database. A database link must exist to the source schema, and there must be select privileges on the source data through that link. To use the Data Subset wizard This topic only covers unfamiliar information. It does not include all step and field descriptions. 1. From the Database menu, select Export | Data Subset Wizard. 2. Refer to the following for more information: Define Source and Target Databases Information Target Connection The target schema name will be included in the object DDL and data inserts. The target connection will add a connection string at the beginning of the script if the Include a Connect Command option is checked on . Select Objects to Create in the Script Information Note: Right-click to select or unselect all objects. Create these objects and copy the data Note: This Data Subset option is only available in the commercial version of Toad with the optional DB Admin
- 415. Toad for Oracle User Guide Importing and Exporting Data 413 Module. The DBA module is required because this creates a schema script with embedded insert statements. See "Generate Schema Script" (page 429) for more informationon alternate methods of generating a schema script. This option assumes the objects are not in the target schema, and the script creates the selected objects and insert data. In the Create Objects mode, clusters are excluded. If you want to subset a schema containing clusters, you will have to create the objects first, and then run the wizard with the Do not create any objects, Just truncate tables and copy data option selected. How much data do you want to copy? Information Percentage of Data to move to target The percentage or minimum number of rows will be accurate on the parent tables and tables with no foreign key relationships (except for situations with long columns and for the Oracle 7.3 bug mentioned in the Overview). Data integrity is preserved
- 416. Toad for Oracle User Guide Importing and Exporting Data 414 in the child tables of foreign key relationships based on the rows which were inserted in the parent tables. So, the percentage of rows copied in the child tables will vary based on the data distribution of the individual tables. Min # of Rows in Lookup Tables Specify a minimum number of rows that you want moved to your target in case the percentage selected yields a lower number than the minimum desired. Control Options Information No Logging If checked, this option adds an ALTER TABLE statement before the data inserts for each object, to specify No Logging. If checked, the wizard will run faster, but the actions of the script (the insert statements) will be unrecoverable. Use Parallel DML If checked, this option adds optimizer hints to the insert statements. It also adds an ALTER SESSION statement before the data inserts for each object to enable Parallel DML. If checked, the script produced by the
- 417. Toad for Oracle User Guide Importing and Exporting Data 415 wizard will run faster, but you may end up with a few more extents. Script Options Information Include a Spool command If checked, the script includes a SPOOL command. A SET ECHO ON command is issued after the SPOOL command. At the end of the script a SPOOL OFF command is included. Include a Connect command If checked, adds a CONNECT command to the beginning of the script and uses a connection string that is based on the target connection specified on the first wizard screen. Make individual Constraint commands This option appears only if you have chosen to create Constraints on the Create Objects page. If checked, constraints are created as individual alter table commands. This serves to circumvent an Oracle bug that can create the following error when constraints are not created individually: "ORA- 01948 Identifiers name length exceeds max." Adjustments to Extents and Tablespaces Information
- 418. Toad for Oracle User Guide Importing and Exporting Data 416 Note: The options in the Extents/Tablespaces tabs are enabled when the wizard is set to create objects (when you select the Create these objects and copy the data option in the Select Objects to create in the script of the wizard). Extents tab The Extents tab lets you specify extents for objects created by the generated script. You can specify PCTINCREASE parameters, make Next Extent=Initial Extent, and scale extent sizes to apply to all objects created that allow storage parameters. The lower part of the screen lets you change extent sizes using IF- THEN statements. Tablespaces tab The Tablespaces tab lets you specify the tablespaces to create indexes, tables, and their partitions. You can place all of an object type (tables. table partitions, indexes, index partitions) into one tablespace or distribute them across different tablespaces based on their size. 3. Complete the wizard. General Import Import Table Data You can import table data without importing table structure. This must be imported into an existing table, although you can use the Create Table feature to create a new table for the import. See "Altering Tables" (page 1074) for more information.
- 419. Toad for Oracle User Guide Importing and Exporting Data 417 Note: Datasets to be loaded must be small enough to fit in memory. For large datasets, convert your data to a text file (if it is not already a text file) and use the SQL Loader wizard. See "Troubleshooting" (page 420) for more information. In addition, you can import table data directly into a data grid from the clipboard. To do this the datagrid must be editable. See "Viewing and Editing Data" (page 955) for more information. An online video tutorial is also available for this feature. This video opens in a new browser window and requires an internet connection. To import table data This topic only covers unfamiliar information. It does not include all step and field descriptions. 1. From the Database menu, select Import and then Table Data. 2. Refer to the following for additional information: Select Destination Information Show Data View existing data in the grid before truncating or importing. Truncate table before importing. Disable or Enable constraints before importing. Disable or Enable triggers before importing. Select Source Information Import from In addition to the obvious choices, you can also import an old .SMI file from Toad 9.5 or prior. Right-click and select Import settings from SMI file. Text File Details Information Importing from Clipboard? At the Text File Details window, if the clipboard contains cells from an MS Excel spreadsheet, choose tab-delimited. Otherwise, select the appropriate delimiter. Text qualifier The character you place around text to specify that it should stay in the same field. Choose between double, single quotes, or none.
- 420. Toad for Oracle User Guide Importing and Exporting Data 418 Select Destination Information Source Data Details Information Apply format to timestamp fields Apply format to timestamp fields, when clear, timestamp format should be the same as it is in your data grids. If selected, the expected format is the same as the date fields, and also customizable. Preview File and Define Files Information Automap Data is displayed in the grid, as it will be entered in the Oracle table. Mapping Manually You can also map columns manually. l Click on a column header and then select the column where you want to map the column of data to go. l Continue in this way until all the columns are mapped. Field Mapping Dialog If you are importing an xml file, and have elected to begin on row 2 in the previous screen, then Toad will display the Field Mapping dialog. Select one of the following options: l Map fields by matching field names - The default. Toad looks in the first row of the spreadsheet to find the column names, and uses those for the field names. l Map fields sequentially - The columns of the spreadsheet are imported into the Stable in the same order as they appear. Column 1 maps to the first table column and so on. Sizing the grid columns In addition to the sizing buttons, you can manually resize the columns by clicking between the headers and dragging them to the size you want. 3. Complete the wizard.
- 421. Toad for Oracle User Guide Importing and Exporting Data 419 Import Utility Wizard Note: This extended Toad Feature is only available in Toad Professional Editions, or with the optional DB Admin module. This window design is similar to the Export Utility Wizard. This wizard helps you to transfer data objects between Oracle databases using Oracle’s Import utility. You can configure this wizard from View | Toad Options | Executables. You can also automatically unzip files before importing them. To import data This topic only covers unfamiliar information. It does not include all step and field descriptions. 1. From the Database menu, select Import | Import Utility wizard. Refer to the following for additional information: Import Tables Information Select Show only users who own objects to limit your schema selection to schemas that have objects. This will limit selections for both the from and to user areas. File Record Length If left blank this value defaults to use the platform's BUFSIZ value. Import Users Information Select Show only users who own objects to limit your schema selection to schemas that have objects. This will limit selections for both the from and to user areas. File Record Length If left blank this value defaults to use the platform's BUFSIZ value. Watching Progress If you select Watch Progress (Feedback = 1000) on the last screen of the wizard, the Import Watch window displays and you can immediately view the results of the import. In addition, the Log tab on the Watches window, will let you send the log directly to
- 422. Toad for Oracle User Guide Importing and Exporting Data 420 Import Tables Information the printer. 2. Complete the wizard. SQL*Loader Wizard SQL*Loader Wizard Overview You get to this window from the Database | Import | SQL*Loader Wizard menu item. With the Toad SQL*Loader wizard you can: l graphically build a control file for use with the SQL*Loader, a database server application. l schedule the SQL*Loader execution as a Windows job for later execution. l run the SQL*Loader with the control file running in either the foreground or the background. You can configure the location of the utility from View | Options | Executables. See "Executables" (page 654) for more information. Troubleshooting If you have difficulty running SQL*Loader, make sure that you have the correct version installed. You can do this by running the executable with no parameters in a command prompt window. The executable on the server can only be run from the server. Using the SQL*Loader wizard The best way to learn to use the SQL*Loader wizard is to actually use it. The SQL*Loader Wizard tutorial lets you do this in a step by step method, starting with the most common uses and moving into the more advanced features. See "Basic SQL*LoaderTutorial" (page 220) for more information. At any time during the process you can load settings from a file or save the current settings. To use SQL*Loader wizard 1. From the Database menu, select Import | SQL*Loader Wizard. Note: Using "Watch Progress" with an 8.0.x version of SQL*Loader on Windows 2000 causes a 100% CPU usage. It is recommended that you uncheck "Watch Progress" on the last screen of the SQL*Loader Wizard, so that the SQL*Loader is launched outside of Toad. 2. Complete the wizard.
- 423. Toad for Oracle User Guide Importing and Exporting Data 421 Save Settings for SQL*Loader At any time during your use of the SQL*Loader Wizard you can save your settings or load previously saved settings. See "Troubleshooting" (page 420) for more information. To save settings 1. Click the Save settings button at the bottom of the window to save your settings. 2. You are prompted for a name for your settings file. You can either add a new name or select one from the dropdown menu. If you select one from the dropdown menu, the new file will overwrite the old one. The SQL*Loader wizard will keep track of your settings files for you. To load settings 1. Click the Load settings button at the bottom of the SQL*Loader wizard to Load a set of previously saved settings. 2. Select the settings file you want to load. 3. If the file is complete, leave Proceed to finish after loading checked and click OK. You will be taken directly to the last screen of the SQL*Loader wizard. 4. If the file is not complete, uncheck Proceed to finish after Loading and click OK. You will remain on current screen of the SQL*Loader wizard and Toad will let you make changes to your settings. Note: When you load settings, input file and destination table files are cumulative. Rather than overwriting previous settings, Toad appends the new information to the wizard settings. Scheduling SQL*Loader Tasks Included in SQL*Loader Wizard is a scheduler that provides the ability to schedule the load as a Windows task. See "Troubleshooting" (page 420) for more information. To schedule a SQL*Loader task 1. From the last step of the SQL*Loader wizard, select Schedule and then click Finish. This opens the Scheduler wizard. 2. Select the time and frequency you want SQL*Loader to run. 3. Click OK and you are informed that a job has been added. To see that the task has been added 1. Open Windows Explorer. On the left side, after your hard drive and CD ROM letters, you will see Control Panel, Printers and Scheduled Tasks (and maybe other things, depending on your system). The screenshot below shows NT 4.0. In Windows 2000, "Scheduled Tasks" appears under "Control Panel" in the tree view.
- 424. Toad for Oracle User Guide Importing and Exporting Data 422 Click Scheduled Tasks. On the right side you will see the newly added job, as in the image below. Right-click and then select Properties and look in the Run field to see just what is going to happen at that time. It should contain something similar to the following: D:ORACLEORA81BINSQLLDR.EXE userid=MLERCH/MLERCH@ORA8I control=d:confile.ctl log=d:confile.log SQLLoader Global Options The Global options and default values screen of the SQL*Loader Wizard lets you enter command line options and some default values. These will be overridden by anything you enter in the Destination Table or Columns fields. See "Troubleshooting" (page 420) for more information. Any of these options may be left blank. Oracle will then use the default values for them. "Command Line" options Skip Enter the number of logical records to skip at the beginning of your input file, or leave blank to load all of them. Load Enter the number of logical records to load. Any records beyond this point will not be entered. Errors Enter the number of errors to allow. The default is 50. If there are more than this number of errors when loading your data, the SQL*Loader will stop. Rows Enter the number of rows in conventional path bind array or between direct path data saves. Read size Enter the size (in bytes) you want to use for the read buffer.
- 425. Toad for Oracle User Guide Importing and Exporting Data 423 Bind size Enter the size of conventional path bind array in bytes. The default is dependent on your system. This size, if specified, overrides the default size and any size determined by ROWS. Stream Size Enter the size of direct path stream buffer in bytes (Oracle's Default is 256000) Resumable timeout If this load will be designated Resumable, enter the wait time (in seconds). The default is 7200. Resumable name Enter a text string to help identify a resumable statement. Column array rows Enter the number of rows for direct path column array. The default is 5000. Direct Check this box to assign this load as a direct path load. Parallel Check this box to assign this load as a parallel direct path load. This is more restrictive than a direct path load. Resumable Check this box to enable resumable for this load. Multithreading Check this box to use multithreading in direct path. Skip index maintenance Check this box to specify: do not maintain indexes, and to mark affected indexes as unusable. Silent Use the silent options to suppress error messages in the output and log tabs of the Watch dialog as follows: Header Hide the SQL*Loader header message that displays in the Output tab. Header messages will still appear in the Log file and on the Log tab. Discards Hide the message in the log file that corresponds to each record written in the discard file. Feedback
- 426. Toad for Oracle User Guide Importing and Exporting Data 424 Hide the messages relating to "commit point reached". Partitions Disable writing the per-partition statistics to the log file. This is an Oracle 8i option. Errors Hide the data error messages in the log file. These occur when a record generates an Oracle error that writes it to the bad file. Rejected record count still displays, even if the individual error messages are suppressed. All Implements all of the keywords. Skip unusable indexes Check this box to disallow unusable indexes or index partitions. Unchecked (the default) unusable indexes will be allowed. Load Statement Database redo Log Specify whether the load is recorded or not recorded. Load Type Select LOAD or CONTINUE_LOAD. Load Method Select INSERT, APPEND, REPLACE or TRUNCATE as your load method. Length Specify the length type: CHAR, BYTE, CHARACTER. Byte order Specify the byte order: Little Endian or Big Endian. Byte order mark Specify the byte order mark: check or nocheck. Character set Specify a datafile character set other than the default: for example, AL16UTF16 or JA16EUCFIXED. Read buffers Specify the number of buffers to be used during a direct path load. Preserve blanks Select this checkbox to preserve leading and trailing whitespace if necessary.
- 427. Toad for Oracle User Guide Importing and Exporting Data 425 Combine Physical Records Area Use this option to combine physical records. Fill in the various boxes to create the option statement. l Concatenate every ____ records to form logical record l Continue if: l this record = ___ in cols ___ l next record = ___ in cols ___ l last non-blank character = _____ SQL Loader Field Mapping You can automatically map your fields as you specify your destination tables in the SQL*Loader Wizard. See "Troubleshooting" (page 420) for more information. This provides a graphic display of how your data will map to the columns in your table. Field Delimiters Field mapping is done based on the delimiters you set in the field delimiter screen. To set up field mapping 1. From the first screen of the wizard, select Build Control File, and make sure that Specify Fields is checked. Click Next. 2. Enter your input file name and click Next. 3. Select the method of delimiting you want to use. 4. At the bottom of the window, specify how many rows of data you want to display in the Number of lines displayed box. This number also defines the number of lines displayed in the Preview Fields tab. By Field On the table destination screen, the Field Mapping grid defines the columns in the table, and includes a column for Field. The field column begins without entries. Click Auto Map to fill this column. When filled, the Field mapping grid appears as follows:
- 428. Toad for Oracle User Guide Importing and Exporting Data 426 Note that the Field column says "field1" and "field2" rather than defining any data. Preview Fields To preview the data and see how it will be included in the columns you have selected, click the Preview fields tab. The results displayed will be similar to the following: Of course, you may have more columns or more data. The amount of data displayed in the Preview fields screen is set in the Field Delimiters screen as described above. Filler Columns When mapping columns to your datafile in the SQL*Loader Wizard, there may be reasons not to include all of the data available in the load. See "Troubleshooting" (page 420) for more information. You can use Filler columns to skip some of the data in the input file; you also can use a filler column to read data from the input file without mapping it to an actual column in the table (to "hold" a file name).
- 429. Toad for Oracle User Guide Importing and Exporting Data 427 To use a filler column to skip data 1. From the Columns area of the Select the destination columns and specify the load parameters for each screen, click Filler. 2. Select the appropriate filler type: l Filler l Bound Filler 3. Enter a column name. 4. Set any properties or position. Click OK. Note: The filler column is added to the columns grid and designated as FILLER. Generate Database Script Generate Database Script Note: This Toad feature is only available in the commercial version of Toad with the optional DB Admin Module. The Generate Database Script window lets you create a script to create a new database similar to an original. You can create the script by extracting the definition information from the original database or from a previously saved database definition file. Caution: This script simply reverse-engineers the DDL for individual objects in the database. This lets you add pieces of this DDL to your own database script. This window does not create a full script to reproduce the selected database, and should NOT be used for backup purposes. To generate a database script This topic only covers unfamiliar information. It does not include all step and field descriptions. 1. From the Database menu, select Export | Generate Database Script. Specify Source and Output for the script. DDL Filename You can use variables in the filename. For example, you can include the %DATEFILE% and %TIMEFILE% variables, which inserts the current date and time into the filename when the file is created when you create the schema script. Definition filename When you create a definition file, you can use
- 430. Toad for Oracle User Guide Importing and Exporting Data 428 variables in the filename. By default, Toad includes the %DATEFILE% and %TIMEFILE% variables, which inserts the current date and time into the filename when the def file is created. (This ensures that the date and time are inserted accurately if you are creating the def file from an Action.) Create Individual Object DDL Files If you choose this option, you must enter the top-level directory for your new files. This is not a filename. Toad will create an individual DDL file for each object in the database. 2. Click the Objects and Options tab. Inc Undoc Parms Stands for "Include Undocumented Initialization Parameters". These are the parameters whose names start with "_" and do not appear in Oracle's documentation. You must be connected as SYS in order to retrieve these parameters. It is not advisable to alter these parameters unless directed to do so by Oracle support. Options Notes Sort for Creation Selecting this ensures that objects are created in an order that avoids problems with dependencies. 3. Click the Object Set tab. To specify an object set, select the Specify Object Set box. You must have one or more object types selected in the Objects and Options tab before you do this. 4. Click . Scheduling a Database Script as a Windows task Note: This Toad feature is only available in the commercial version of Toad with the optional DB Admin Module. To generate a database script 1. Set up your script options and settings as in Generate Database Script, but don't click Create Script. See "Generate Database Script" (page 427) for more information.
- 431. Toad for Oracle User Guide Importing and Exporting Data 429 2. Click . 3. Select or create a filename for a settings file. 4. Enter the information as required for the Add Task wizard. See "Add Task Wizard" (page 763) for more information. Generate Schema Script Generate Schema Script Note: This Toad feature is only available in the commercial version of Toad with the optional DB Admin Module. This window lets you select one or more schemas and builds DDL for all objects you select. To generate a schema script 1. From the Database menu, select Export | Generate Schema Script. 2. Select the appropriate options from the following tabs: Note: This topic only covers unfamiliar information. It does not include all step and field descriptions. Source and Output tab Notes DDL Filename box You can use variables in the filename. For example, you can include the %DATEFILE% and %TIMEFILE% variables, which inserts the current date and time into the filename when the file is created when you create the schema script. You can also insert a user variable. Create Individual Object DDL Files If this option is selected, Toad will create individual DDL files for each object. You will need to set the following options as well: l Use SQL extension for all files - if selected, .sql will be used as the extension for all created files. l Use extension as configured in TOAD options - if selected, Toad will check
- 432. Toad for Oracle User Guide Importing and Exporting Data 430 Toad Options | Files | General and use the extension specified for SQL. l Use relative path in "build all" script - when selected, Toad will use the relative path. When this option is not selected, Toad will hard code the path names into the script. l Top Level Directory box - Specify the top level directory for the saved files. File will be used for HTML schema doc generation Def files are not compatible between different versions of Toad. If this check box is selected, the .def file that is produced will include the queries necessary to create a complete HTML schema document. If this check box is clear, on large databases the generation may go faster, and the .def file can still be used to generate the HTML schema document; however, the resulting HTML file will leave the following items blank: l Size and Number of Extents columns in the Table summary, Index summary, and Snapshot summary l # of Objects in the Package Summary l # of Arguments in the Procedure Summary and Function Summary Objects Tab Notes Specify the user information and object types that you want to extract. You can extract multiple objects, or just one (for example, Grants) depending on your selections. Note: To select or unselect all
- 433. Toad for Oracle User Guide Importing and Exporting Data 431 checkboxes, right-click and select the appropriate option. Object Set Tab Notes Add objects to grid You must have only one source schema selected before adding objects. 3. Click the Create Script button. 4. View the script or objects from the Objects Listing tab. See "Object Listing Tab" (page 431) for more information. Object Listing Tab Note: This Toad feature is only available in the commercial version of Toad with the optional DB Admin Module. In the Generate Schema Script window, the Object Listing tab appears after the script has been generated and provides a tree view of the objects included in the Schema Script. See "Generate Schema Script" (page 429) for more information. You can use Object listing toolbar to manipulate and view the objects. Object Listing toolbar Icon Meaning Expand all Collapse all Show Sync Script for selected items. Show DDL for all objects. Save your script to a file. You can choose text, html, or rtf file from the Save As window. Send to Excel. Print results.
- 434. Toad for Oracle User Guide Importing and Exporting Data 432 Icon Meaning Group by Object Type Items within groups can be grouped according to type. Each type of item has an icon assigned to it. Scheduling a Schema Script as a Windows Task Note: This Toad feature is only available in the commercial version of Toad with the optional DB Admin Module. To generate a schema script 1. Set up your script options and settings as in Generate Schema Script, but don't click Create Script. See "Generate Schema Script" (page 429) for more information. 2. Click . 3. Select or create a filename for a settings file. 4. Enter the information as required for the Add Task wizard. See "Add Task Wizard" (page 763) for more information.
- 435. Managing Projects Using Automation Designer to Control Toad About the Automation Designer Automation Designer Overview You can use Automation Designer to automate and control processes you perform regularly. Connection information, window settings, and queries can be saved, shared, scheduled, and run from the command line or batch files to simplify repetitive tasks. The Automation Designer makes use of several categories to control Toad. These include: l Action -The basic unit of a ToadApp. It consists of the settings used to control one command, such as import table data, FTP a file, or Ping a server. l App -One or more actions designed to work together as a mini -Toad application. See "ToadApps" (page 469) for more information. l Scheduled Item -An app or action that has been scheduled using the Windows Task Manager. See "Using the Automation Designer to Schedule Actions and Apps." (page 435) for more information. l Execution Log - A log file containing the execution status of recently-run apps. It is automatically generated as you run actions, and contains data up to 7MB. When it reaches 7MB, old data is trimmed back to 5MB, and then it continues accruing. In this way it remains a current log of the most recent action execution. See Execution Log for more information. To access the Automation Designer The Automation Designer is the central location for running and creating Actions and Apps. While actions can be created from and loaded to many of the other windows within Toad, the power of actions is located in the Apps Designer. Within the Apps Designer you can: l Create new actions l Organize actions into sets (apps) l Run actions and apps l Store actions and apps l Schedule actions and apps l Copy actions and apps to and from the clipboard 14
- 436. Toad for Oracle User Guide Managing Projects 434 To access save/load window snapshot from a Toad window 1. In the status bar of the window, click . 2. Select Save as Action or Load Toad Action. In addition, as with SQL Recall, actions are saved automatically when you perform a task that is action-enabled. See "Setting the number of actions saved in the vault " (page 438) for more information. Recalling an app gives you the ability to perform a distinct operation or sequence of operations in Toad on demand. Actions that can be used in the Automation Designer are listed in the Action Catalog. Automation Designer Toolbar Button Command Run selected apps Run selected actions Run from selected action Create New app Schedule active app Delete selected app Refresh selected app Import app from file Export app to file Refresh window Running Actions from the Automation Designer You can run actions from the Automation Designer.
- 437. Toad for Oracle User Guide Managing Projects 435 Using this ,method, you can run one or more actions from the same ToadApp. Multiple actions are run in the order they appear in list view. See "Ordering an App" (page 472) for more information.) To run actions 1. Do one of the following: l Right-click on the action you want to run l Multi-select several actions within the same ToadApp and then right-click. 2. Select Run Selected Actions. To run a series of actions (partial App) 1. Open the ToadApp containing the series. 2. Select the first action you want to run. 3. On the toolbar, click . To run an entire App » Do one of the following: l Select the app you want to run and then click . l Right-click on the app you want to run and select Run. To run actions with connections Note: In this case, the connection you assigned to the action will not be used. The action will be executed once, for each connection you select, using that connection. 1. Select the actions you want to run. 2. Right-click and select Run with Connections. 3. Select the connections you want to use. These can be multi-selected using SHIFT or CTRL. 4. Click OK. Scheduling Actions and Apps Use the Automation Designer to schedule actions using Toad's Task Scheduler. You can schedule actions or apps. In addition, you can use the scheduler button directly from the Toad window of some functionality. Using the Automation Designer to Schedule Actions and Apps. To schedule actions 1. In the Automation Designer, select the actions you want to schedule. 2. Right-click and select .
- 438. Toad for Oracle User Guide Managing Projects 436 3. Complete the Task Scheduler wizard. See "Task Scheduler" (page 762) for more information. To schedule a ToadApp 1. In the Automation Designer, select the App you want to schedule. 2. Click . 3. Complete the Task Scheduler wizard. See "Task Scheduler" (page 762) for more information. Scheduling from a Toad Window When you have finished scheduling an action in this way, you can view them from the Task Scheduler window, or the Scheduled Items area of the Automation Designer. To schedule an action 1. In the status bar of the feature you want to make an action, click . 2. Complete the Schedule Action wizard. Apps and Actions on the Toolbar You can add ToadApps and actions to your toolbar so you can execute them with one click. To add actions to the toolbar 1. Right-click on the main toolbar and select Customize. 2. Click the Actions tab. 3. Click on an app in the left hand side to display the actions contained in it. 4. Drag and drop the action on the toolbar. To add apps to the toolbar 1. Right-click on the main toolbar and select Customize. 2. Click the Actions tab. 3. Click [All Apps] in the left hand side. 4. Drag and drop the appropriate app onto the toolbar. Searching the Automation Designer You can search the Automation Designer to find apps or actions that you have created. This panel supports both standard searches and regular expressions To search the Automation Designer 1. In the Automation Designer's left hand panel, click Search panel. 2. In the Text to find box, enter the text you want to find.
- 439. Toad for Oracle User Guide Managing Projects 437 3. If you want to use regular expressions, select the Regular expressions box. 4. Select or clear the Search for apps box as desired. l Choose a filter from the Look In dropdown if you want to limit the search to a specific folder. 5. Select or clear the Search for actions box as desired. l Choose a filter from the Look In dropdown if you want to limit the search to a specific app. 6. Click Search. Using Actions Creating New Actions You can create new actions from many locations within Toad. You can create them directly from the feature you are using, or from the Automation Designer. Creating a new action from a Toad window Toad windows that support actions include a camera button in the status bar of the window. Simply using these features will create an action automatically for you and store it in the action recall area (See "Setting the number of actions saved in the vault " (page 438) for more information.). To create or load an action 1. In the status bar of the feature you want to make an action, click . 2. Select the appropriate option. Creating a new action from the Automation Designer You can also create a new action directly from the Automation Designer. At the top of the right pane are tabs containing actions you can create. To create a new action from the designer 1. From the Utilities menu, select Automation Designer. 2. In the Navigation Tree, select Apps and then click the ToadApp node where you want to create the action. 3. Click the tab that contains the action button and then click the button for the action you want to create. (See "Import Export" (page 441) for more information on the various available actions.) Click in the app where you want the action to reside.
- 440. Toad for Oracle User Guide Managing Projects 438 For example, click the Import/Export tab, and then click and then click in the app where you want the import table data action (this includes as a child node). A new action is created at the location where you click. 4. Double-click the new action and set up required. 5. Click one of the following: l Run - apply changes to properties and run the action l Apply - apply changes to properties l Cancel - cancel the changes to properties, but leave action in Automation Designer 6. Right-click the new action, select Rename, and enter a name for the action in the Name box. Using Action Recall Toad automatically creates an action for you when you use a window that supports them. Toad stores these actions for you in the vault, so that when you need them they can be retrieved. You can use the Action Recall node the same way you would use the other apps, except that it cannot be deleted. You can, however, clear it. Setting the number of actions saved in the vault By default, Toad stores 10 actions per action type (for example, 10 export DDLs, 10 export dataset actions, and so on. However, this number can be changed easily. To change the default number of actions automatically created per action type » Select Toad Options | General and change the number in the Toad Actions per action type box. Clearing the Action Recall Node You can easily clear out all the actions that have been saved in the vault so that it is easier to navigate. To clear the action recall node 1. Click the Action Recall node. 2. Select the actions you want to remove. (CTRL+A to select all.) 3. Right-click and select Delete. 4. Click Yes. Action Parameter Files Some actions can accept parameter files. These parameter files are saved in an INI format.
- 441. Toad for Oracle User Guide Managing Projects 439 You can use the parameter file to override some settings in an action so that you can run various permutations without creating multiple actions. An action parameter INI file contains property=value pairs for the settings that can be overridden. When originally created, these will correspond to the properties saved within the actions. To create an action parameter file 1. In the Automation Designer, right-click on an Action or an App and select Create Parameter file. Note: If an action does not support a parameter file, then this option will not be available on the popup menu. 2. Name the parameter file and save it to a folder. You do not need to save it in the default folder. 3. Modify the parameter file if necessary. You can save multiple versions of the same file with slightly different names. Example The Execute Script action is enabled for parameter files. An ExecuteScript.ini file created as a parameter file might look like the following: Content of ini File Line Meaning [47] Internal identifier. There will be one of these identifiers for each action within a selected App. Name=Execute Script1 This is the name you have given the action so you can find it within a longer App file. Type=Execute Script This is the type of action. ItemCount=2 Number of items to execute. Item0=c:try1.sql First item to execute. Item1=c:try2.sql Second item to execute. Output=1{1=SingleFile, 2=SeparateFile, 3=Clipboard, 4=Discard} Output type. Note: In some cases, explanatory information will be included in braces within the line itself. Output Location=C:somefolderoutput.txt Output destination. Connection=user@database Connection associated with this
- 442. Toad for Oracle User Guide Managing Projects 440 Content of ini File Line Meaning action. When a connection is specified in the parameters file, it will override the bound connection of the Action. If this line is not included, then the bound connection is used. Parameter files for ToadApps will contain multiple [Key] sections: one for each action within the app. These can be removed as needed to use a particular action's default properties. Running Actions with Parameter Files Parameter files can be used from within the Automation Designer or from the command line. If connections are included in a parameter file and/or the command line, Toad will use connections in the following order: 1. Connections specified on the command-line always override everything else. 2. If a connection is not present on the command line, then those specified in a parameter (ini) file are used. 3. If there are no connections on the command-line or defined from the Automation Designer's Run with connections option, then the connection bound to the action is used. To run an action/parameter file set from the Automation Designer 1. In the Automation Designer, right-click on the action you want to run and select Run with parameter file. 2. Select the parameter file you want to use and click OK. To run an action/parameter file set from the command line » Enter the command line as you would normally, and then use a pipe to separate the Action/App name from the parameter filename. For example: toad.exe -a "App->Export Dataset1 | c:data filesExportDataset1.ini" Sharing Actions One of the advantages to using actions and apps to manage your processes is that they can be shared easily with others. Sending Actions by email Sending an action from the clipboard 1. From the window you want to share (such as Export Dataset) click in the status bar. 2. Select Save to Clipboard.
- 443. Toad for Oracle User Guide Managing Projects 441 3. In your email, select Paste. 4. Send your email. Sending actions from the Automation Designer 1. In the Automation Designer, select the actions you want to send. Note: If you want to send the entire ToadApp, select all the actions in that App tab. 2. Right-click and select Copy (CTRL+C). 3. In the email body, press CTRL+V. 4. Complete and send the email. Receiving Actions by email Receiving actions - clipboard to Toad feature window 1. From the email you receive, copy the action code to your clipboard. 2. Open the window where the settings reside (such as Export Dataset, or other) 3. Click the camera button in the status bar. 4. Select Load from Clipboard and click OK. 5. Settings are now loaded in your window and you can complete the action as you would normally. Receiving an action - clipboard to Automation Designer 1. From the email you receive, copy the action code to your clipboard. 2. If it is not already open, open the Automation Designer. See "Managing Projects" (page 433) for more information. 3. Create a ToadApp or click the tab for the App where you want the actions to reside. See "Creating Apps" (page 471) for more information. 4. Right-click in the Automation Designer and select Paste (CTRL+V). 5. Rename the pasted action to something descriptive. 6. Run the action at will. Action Catalog Action Catalog Toad Features that can be used in the Automation Designer are included in the tabs at the to of the Automation Designer right hand side Designer pane. These include: Import Export l Export Dataset Action (page 443) l Export DDL (page 396)
- 444. Toad for Oracle User Guide Managing Projects 442 l Import Table Data (page 416) DB Misc l ANSI Join Syntax (page 444) l Actionable Query (page 444) l Compare Schemas Action (page 447) l DB Health Check Action (page 446) l Execute Script (page 445) l HTML Schema Doc Generator Action (page 446) l Object Search Action (page 447) Utilities l Archive Action (page 449) l Email Action (page 447) l Format Files Action (page 451) l FTP Action (page 449) l Ping Action (page 450) l Service Action (page 451) l Execute Shell Action (page 448) l TNS Ping Action (page 450) File Management These actions control your file structure. You can use them to create and move files and directory structures, check to see if files exist, and delete files and directories. l Copy File Action (page 455) l Create Directory Action (page 451) l Create File Action (page 453) l Delete Directory Action (page 452) l Delete File Action (page 454) l File Exists Action (page 456) l Move Directory Action (page 453) l Move File Action (page 455) Control These items are used only within the Automation Designer. They can be used to control how an app behaves. l File Iterator Action (page 463) l Folder Iterator Action (page 465)
- 445. Toad for Oracle User Guide Managing Projects 443 l If...Then...Else Action (page 457) l List Iterator Action (page 467) l Log Comment (page 469) l Message Action (page 462) l Pause Action (page 463) l Repeat...Until Action (page 457) l Set Variable Action (page 461) l Test Variable Action (page 461) l Variable Prompt Action (page 462) l While...Do Action (page 459) Import/Export tab Import Table Data Action The Import Table Data action lets you import table data without importing table structure. This must be imported into an existing table, although you can use the Create Table feature to create a new table for the import. See "Altering Tables" (page 1074) for more information. Set Import Table Data properties. See "Import Table Data" (page 416) for more information. Export DDL Action The Export DDL ( ) action lets you run a query and export the dataset to a file at any time. When setting properties for the Export DDL action, you can run the action by clicking Run at the bottom of the window. Clicking Apply will apply your changes. The Export DDL properties window options are equivalent to the Export DDL window. To set Export DDL options, please see the Export DDL topic. Export Dataset Action The Export Dataset action lets you run a query and export the dataset to a file at any time. The Export Dataset properties window options are equivalent to the Save As (Export Dataset) window. See "Export Dataset" (page 390) for more information about setting options. Dataset When you are selecting Save As from the data grid, Toad automatically includes the query that was used to create the dataset. Note: If you load a previously created action into this window all settings EXCEPT the dataset will be loaded. In this way, you can use the export dataset action to export different datasets without setting options each time.
- 446. Toad for Oracle User Guide Managing Projects 444 When setting properties for the Export Dataset action, you will need to insert the query or objects you want to export manually. To set dataset specifications 1. Select either Export query or Export objects. 2. Do one of the following: l Enter the query in the box. l Click Add and select the objects you want to export. DB Misc tab ANSI Join Syntax You can convert one or multiple SQL files to ANSI Join syntax using the ANSI Join action, or using the ANSI button in the Query Builder. Note: SQL files to be converted must consist of only one query per file. To convert a query using the ANSI converter action 1. In the Automation Designer, click the Misc action tab. 2. Click and then click in the app. 3. Double-click the new action. 4. Click Add and select the saved SQL files you want to convert. 5. Specify the output directory for the converted statements. 6. Do one of the following: l Click Apply to apply property changes l Click Run to apply property changes and run the action. To convert a SQL statement in the Query Builder » In the Generated Query tab, select the query to convert and click . Note: You can set the Query Builder to create ANSI syntax automatically from Toad Options | Query Builder. See "Query Builder" (page 671) for more information. Actionable Query You can create a query that can be used as an action. This Actionable query produces a boolean result, which can then be used to conditionally execute any number of Actions. This is a powerful action whose possibilities are limited only by your creativity. The actionable query can be a SQL query or an anonymous PL/SQL block.
- 447. Toad for Oracle User Guide Managing Projects 445 l If you choose a SQL query, Toad enforces a boolean result by using the prefix "SELECT 1 FROM DUAL WHERE" before your query. l If you choose an anonymous PL/SQL block, use a bind variable named :RESULT, passing it a 1 for a True condition, a non-1 for a False condition. When you run the action, Toad will return a results message: l Query is correct and returned TRUE l Query is correct and returned FALSE l an error message resulting from an incorrect query To create an actionable query 1. From the Automation Designer navigation pane, click DB Misc. 2. Open the ToadApp tab where you want the query to reside, and then click . 3. Select either: l SQL l PL/SQL anonymous block 4. Enter the query in the text box provided. Restrictions/Validations The SQL must be valid. The PL/SQL block must use an integer bind variable named :RESULT. For example: begin :RESULT:=-1; end; Execute Script Using the execute script action ( )you can execute one or more scripts at a time, schedule them to run at a specified time, and so on. Properties of the Execute Script action let you add any number of scripts to the action, and specify output type and location. Script Source Select the source of the script you want to run. File list If you select File list, scripts will be selected from a list of files and variables. Using this you can run multiple scripts. Create the list in the List File area. In the file list area, add the scripts and variables you want this action to execute.
- 448. Toad for Oracle User Guide Managing Projects 446 To enter scripts » Click Add and then select the scripts you want to add. Use Remove to remove any scripts from the script grid, and Clear to clear the grid of all scripts. To enter variables » Click Add Var and then select the variables you want to add. These can be system variables, or variables created by other actions. Text If you select text, you enter the SQL you wish to run directly in the Text box. Output Use the output area to specify how you want output generated by the script delivered. l Use single file l Use separate file for each script l Clipboard l Discard Directory If you have chosen output to be sent to a file, enter the directory where the file should be located in the Directory box. DB Health Check Action To create a DB Healthcheck Action from the Automation Designer 1. From the Automation Designer window, select the app you want to contain the health check. 2. Click the DB Misc tab, click and then click in the app. 3. Double-click on the action icon and set properties. See "DB Health Check" (page 287) for more information. 4. Click Apply, then Cancel to save your settings and close the window. HTML Schema Doc Generator Action To create an HTML Schema Doc Generator action 1. From the Automation Designer window, select the app you want to contain the HTML Schema Doc generator action. 2. Click the DB Misc tab, click and then click in the app.
- 449. Toad for Oracle User Guide Managing Projects 447 3. Double-click on the action icon and set properties as described in HTML Schema Doc Generator. 4. Click Apply, then Cancel to save your settings and close the window. Object Search Action To create an object search action 1. From the Automation Designer, DBMisc tab, click . 2. Click in the app where you want the action. 3. Set action properties. Compare Schemas Action To create a compare schemas action from the Automation Designer 1. From the Automation Designer, open the app where you want to use Compare Schemas. 2. Click the DB Misc tab. 3. Click and then click in the app. 4. Set properties. See "Compare Schemas" (page 260) for more information. 5. Click Apply. Utilities tab Email Action You can create an action that will email specific information to the recipient of your choice. This action can then be scheduled, shared, and treated like any other action. The email action is available only from the Automation Designer toolbar. To create an email action 1. Open the app where you want the action to reside. 2. From the Automation Designer Utilities tab, click . 3. Enter the Properties for the action. 4. Rename the email action to a relevant name. 5. Schedule or run as desired. Email properties This topic only covers unfamiliar information. It does not include all step and field descriptions.
- 450. Toad for Oracle User Guide Managing Projects 448 Recipients Enter the email addresses of the recipients you want to receive this email. Multiple email addresses may be separated by semicolons. From Enter your email address. If you have already set the host under Toad Options | Email Settings, those settings are entered for you. Append Clipboard Contents Adds the contents of your clipboard to the bottom of the email. Note: This appends the contents of the clipboard at execution of the action. SMTP Server and Port Enter the host and port for your email account. If you have set the host under Toad Options | Email Settings, those settings are entered for you. Execute Shell Action To create an execute shell action 1. Open the app where you want the action to reside. 2. From the Automation Designer Utilities tab, click . 3. Click in the app. 4. Double-click the action and enter the Properties for the action. 5. Rename the email action to a relevant name. 6. Schedule or run as desired. Properties This topic only covers unfamiliar information. It does not include all step and field descriptions. Parameters Enter any Parameters. These specify configurations of the program, and can be combined. Some standard parameters are listed in the macro box at the bottom of the window. Macros These variables can be added to the parameters area by selecting and clicking insert. l $UID - enters the current Toad User ID l $UPW - enters the current Toad User password
- 451. Toad for Oracle User Guide Managing Projects 449 l $SID - enters the current Toad database ID l $CWD - enters the current Toad working directory l $TMP - enters the windows temporary directory l $FIL - enters the file in the active editor Archive Action The Archive window lets you create zip files from within Toad. Use the archive action to create archives on a scheduled basis. You can choose to zip or unzip files, append to existing files and so on from this window. To create an archive action 1. Open the app where you want the action to reside. 2. Click on the Automation Designer Utilities tab. 3. Enter the Properties for the action. 4. Rename the action. 5. Schedule or run as desired. Properties This topic only covers unfamiliar information. It does not include all step and field descriptions. Zip tab To select files l Click Add Files and then select the file or files you want to archive. To select entire folders » Click Add Folders and then select the folder or folders you want to archive. Unzip tab To extract files 1. Select the location where you want to extract the files in an existing archive. 2. Enter the pathname in the Extract to box. 3. Select when you want to overwrite existing files: l Always - always overwrite with the extracted files. l Never - never overwrite a file. l Newer files - only overwrite if the extracted file is newer than the existing file. l Older files - only overwrite if the extracted file is older than the existing file.
- 452. Toad for Oracle User Guide Managing Projects 450 FTP Action Use FTP actions to save FTP settings and perform specific FTP actions whenever needed without entering all the information repeatedly. You can choose to upload or download from the FTP server, and specify files and directories. To create an FTP action 1. Open the app where you want the action to reside. 2. From the Automation Designer Utilities tab, click . 3. Click in the app. 4. Double-click the action and enter the Properties for the action. 5. Rename the action to a relevant name. 6. Schedule or run as desired. To set up FTP action properties 1. Click and enter settings as described in the Server Settings topic. 2. Select Upload or Download. 3. Click Add and add any files you want to upload or download. 4. For upload, enter the absolute path of the remote directory. 5. For download, enter or browse to the absolute path of the local download directory. 6. Do one of the following: a. Click Run to save and run the action b. Click Apply to save changes. Ping Action To create a ping action 1. Open the app where you want the action to reside. 2. From the Automation Designer Utilities tab, click . 3. Click in the app. 4. Double-click the action and enter the Properties for the action (see Ping). 5. Rename the email action to a relevant name. 6. Schedule or run as desired. TNS Ping Action To create a TNS ping action 1. Open the app where you want the action to reside. 2. From the Automation Designer Utilities tab, click .
- 453. Toad for Oracle User Guide Managing Projects 451 3. Click in the app. 4. Double-click the action and enter the Properties for the action (see TNS Ping). 5. Rename the email action to a relevant name. 6. Schedule or run as desired. Service Action The Service Action gives you control of services in a ToadApp. You can start, stop or toggle a selected service using this action. To create a service action 1. From the Automation Designer, select the Utilities tab. 2. Open or create the ToadApp where you want the action to reside. 3. Click . 4. Click in the app. 5. Double-click the new action and set properties as desired. To set service properties 1. In the ToadApp containing the service action, double-click the action. 2. To select the service you want to control, click Select. 3. Enter the computer name you want to control (leave blank for the local computer) 4. Click Search. 5. Select the service from the list of available services. 6. Click OK. 7. In the Action box, select one of the following: l Start - starts the service l Stop - stops the service l Toggle - switches a service from started to stopped or from stopped to started. Format Files Action To create a Format Files action 1. From the Automation Designer, click the Utilities tab. 2. In the navigation panel, select the App where you want formatting to occur. 3. Click . 4. Click in the app. 5. Double-click the new action and set properties.
- 454. Toad for Oracle User Guide Managing Projects 452 File Management tab Create Directory Action Use this action to create a new directory (folder) in the hard drive hierarchy. This allows you to create a new directory to store results, logs, and so on created by your ToadApp. To create a create directory action 1. From the Automation Designer, select File Management. 2. Open or create the ToadApp where you want the action to reside. 3. Click and then click in the app. 4. Double-click the new action and set properties as desired. To set create directory properties 1. Enter the full path of the desired new directory. 2. Click one of the following: l Run - Applies changes, runs the action, and closes the properties window. l Apply - Applies changes to the action and closes the properties window. l Cancel - cancels changes and closes the properties window. Tips l Wildcards are supported. l Variables are supported. Delete Directory Action CAUTION: Using this action will delete files from the selected hard drive without prompting. To create a delete directory action 1. From the Automation Designer, select File Management. 2. Open or create the ToadApp where you want the action to reside. 3. Click and then click in the app. 4. Double-click the new action and set properties as desired. To set delete directory properties 1. Enter the full path of the directory to be deleted, or click and select the directory. 2. Click one of the following: l Run - apply changes to properties and run the action l Apply - apply changes to properties
- 455. Toad for Oracle User Guide Managing Projects 453 l Cancel - cancel the changes to properties, but leave action in Automation Designer Tips l Wildcards are supported. l Variables are supported. Move Directory Action Use this action to move a directory within your drive hierarchy. This action can also be used to rename a directory. CAUTION: Using this action will move files on the selected hard drive without prompting. To create a move directory action 1. From the Automation Designer, select File Management. 2. Open or create the ToadApp where you want the action to reside. 3. Click and then click in the app. 4. Double-click the new action and set action properties as desired. To set move directory properties 1. In the Current box, enter the full path of the directory to be moved, or click and select the directory. 2. In the New box, enter the full path where you want the directory to be located. Note: This action can also be used to rename a directory. Enter the same basic path in the New box, but with a different directory name. 3. Click one of the following: l Run - Applies changes, runs the action, and closes the properties window. l Apply - Applies changes to the action and closes the properties window. l Cancel - cancels changes and closes the properties window. Tips l Wildcards are supported. l Variables are supported. l The destination can be either a folder or a destination file. Create File Action Use this action to create a new file. You can use this to log actions as you run a ToadApp.
- 456. Toad for Oracle User Guide Managing Projects 454 To create a create file action 1. From the Automation Designer, select File Management. 2. Open or create the ToadApp where you want the action to reside. 3. Click and then in the app. 4. Double-click the new action and set action properties as desired. To set create directory properties 1. Enter the full path of the desired new file, including the filename and extension. 2. Enter any desired contents of the file. 3. Click one of the following: l Run - Applies changes, runs the action, and closes the properties window. l Apply - Applies changes to the action and closes the properties window. l Cancel - cancels changes and closes the properties window. Tips l Wildcards are supported. l Variables are supported within content (will be expanded when the file is created.) See "Using Variables" (page 853) for more information. l This creates a text file and can include content: Delete File Action Use this action to delete a file within your drive hierarchy. CAUTION: Using this action will delete files from the selected hard drive without prompting. To create a delete file action 1. From the Automation Designer, select File Management. 2. Open or create the ToadApp where you want the action to reside. 3. Click and then in the app. 4. Double-click the new action and set properties as desired. To set delete file properties 1. In the ToadApp containing the delete file action, double-click the action. 2. Enter the full path of the file to be deleted, or click and select the file.
- 457. Toad for Oracle User Guide Managing Projects 455 3. Click one of the following: l Run - apply changes to properties and run the action l Apply - apply changes to properties l Cancel - cancel the changes to properties, but leave action in Automation Designer Tips l Wildcards are supported. l Variables are supported. Move File Action Use this action to move a file within your drive hierarchy. This action can also be used to rename a file. CAUTION: Using this action will move files on the selected hard drive without prompting. To create a move file action 1. From the Automation Designer, select File Management. 2. Open or create the ToadApp where you want the action to reside. 3. Click and then in the app. 4. Double-click the new action and set properties as desired. To set move file properties 1. In the Current box, enter the full path of the file to be moved, or click and select the file. 2. In the New box, enter the full path where you want the file to be located. Note: This action can also be used to rename a file. Enter the same basic path in the New box, but with a different file name. 3. Click one of the following: l Run - Applies changes, runs the action, and closes the properties window. l Apply - Applies changes to the action and closes the properties window. l Cancel - cancels changes and closes the properties window. Tips l Wildcards are supported. l Variables are supported. l The destination can be either a folder or a destination file.
- 458. Toad for Oracle User Guide Managing Projects 456 Copy File Action You can use this action to log actions as you run a ToadApp. To create a copy file action 1. From the Automation Designer, click the File Management tab. 2. Open or create the ToadApp where you want the action to reside. 3. Click and then in the app. 4. Double-click the new action and set properties as desired. To set copy file properties 1. In the source filespace box, enter or select the full path of the file you want to move, including the filename and extension. 2. In the destination box, enter or select the directory path where you want to copy the file. 3. Choose whether or not to overwrite existing files of the same name. 4. Click one of the following: l Run - Applies changes, runs the action, and closes the properties window. l Apply - Applies changes to the action and closes the properties window. l Cancel - Cancels changes and closes the properties window. Tips: l Wildcards are supported. l Variables are supported. See "Using Variables" (page 853) for more information. l The destination can be either a folder or a destination file. File Exists Action Use this action to check that a file exists. When you run it, if the file exists, the run will be completed, if it does not exist, you will be given a run status of Failed execution. To create a file exists action 1. From the Automation Designer, select File Management. 2. Open or create the ToadApp where you want the action to reside. 3. Click and then in the app. 4. Double-click the new action and set action properties as desired. To set create directory properties 1. Enter or select the full path of the desired file, including the filename and extension. Note: If there is a typo in the path of the file, the file exists action will fail. 2. Click one of the following:
- 459. Toad for Oracle User Guide Managing Projects 457 l Run - apply changes, run the action, and close the properties window l Apply - apply changes to the action and close the properties window l Cancel - cancel changes and close the properties window Tips l Wildcards are supported. l Variables are supported. Control Tab If...Then...Else Action You can use the if...then...else action to control the flow of your ToadApps. Using this action, you can set up conditions and controls that utilize other actions. To use the if...then...else action 1. From the Automation Designer, select the Control tab, and then click and then in the app. 2. Create the action you want to set as the IF condition. 3. Drag it into the IF node in the app: 4. Do the same for the Then and Else nodes. Else is optional. 5. If necessary, double-click your conditional actions and adjust their properties. Repeat...Until Action Use the Repeat...Until action to control the flow of your ToadApps. Using this action, you can have a ToadApp repeat an action until a specified condition is met.
- 460. Toad for Oracle User Guide Managing Projects 458 Read this action in English as “Repeat these actions Until any of these actions return False.” In other words, while all the actions under the “Until” node return True, execute all the actions under the “Repeat” node. The moment any action under the Until node returns False, stop execution of the actions under the Repeat node and continue processing the rest of the Toad App, setting the return value of the Repeat..Until action to True. Furthermore, if any of the actions under the “Repeat” node return False, set False as the return value of the main ‘Repeat..Until’ node and halt further execution of the Toad App. You may use multiple UNTIL actions. You may need only one. It is probable that only one UNTIL action will be used though many are supported. To use the repeat...until action 1. From the Automation Designer, select Control, and then double-click . 2. Create the actions you want to repeat, and the actions that you want to test. Drag the action you want to repeat into the new Repeat node in the app: 3. Do the same for the Until node. 4. If necessary, double-click your conditional actions and adjust their properties. Example This is an example of one possible use of this action. 1. Create a Repeat..Until action and name it “Parse Log Files”. 2. Create an FTP action to download files from the FTP server. 3. Create Shell Execute action to search for a specific string. 4. Drag the FTP action under the Repeat node and drag the Shell Execute action under the
- 461. Toad for Oracle User Guide Managing Projects 459 Until node. You now have a functional ToadApp which continually downloads files from an FTP server until one of them contains a particular string we are looking for. The moment the string is found execution ends. While...Do Action Use the While...Do action to control the flow of your ToadApps. Using this action, you can have a ToadApp repeat an action until a specified condition is met. A While action is similar to a Repeat...Until action, except that the conditional actions are executed before the statement actions are executed. Hence, if any of the conditional actions are false, the statement actions are never executed. Read this action in English as “While these actions return true, execute (Do) these actions.” In other words, while all the actions under the While node return True, execute all the actions under the Do node. As soon as any action under the While node returns False, stop execution of the actions under the Do node and continue processing the rest of the ToadApp, setting the return value of the While..Do action to True. Furthermore, if any of the actions under the Do node return False, set False as the return value of the main While..Do action and halt further execution of the ToadApp. You may use multiple WHILE actions. You may need only one. It is probable that only one WHILE action will be used though many are supported. To use the While...Do action 1. From the Automation Designer, select Control, and then click . Click again in the app where you want to use the action. 2. Create the actions you want to test, and the actions that you want to repeat. Drag the action you want to use as a test into the new While node in the app:
- 462. Toad for Oracle User Guide Managing Projects 460 3. Drag the action you want to repeat into the Do node in the app. 4. If necessary, double-click your conditional actions and adjust their properties. Example This is an example of one possible use of this action. l Create a While...Do action and name it Run Maintenance Script. l Create a TNS Ping action to download files from the FTP server. l Create an Execute Script action to search for a specific string. l Drag the TNSPing action under the While node and drag the Execute Script action under the Do node. You now have a functional ToadApp which executes a maintenance script on the database until the database listener stops.
- 463. Toad for Oracle User Guide Managing Projects 461 Test Variable Action The test variable action can test the value of a Windows, Toad or user-defined variable. Variables themselves cannot be referenced in the "value" section, as this would construe the value as formulaic, which it is not. Test Variable supports numbers and strings as values. It does not support formulas and variables in the value section. Variables will typically be strings. Supported operands are <, <=, =, <>, > and >=. To create a test variable action 1. From the Automation Designer, select Control. 2. Open or create the ToadApp where you want the action to reside. 3. Click and then click in the app. 4. Double-click the new action and set properties as desired. Example This is one possible use of a test variable action: l Create a Test Variable action and name it Check Session Count. l Enter the variable name in the Variable box. In this case, Session Creation Count. l Enter the Variable. (<) l Enter the value you want to test. This tests the value of the user-defined variable, "Session Creation Count," and returns True if the value is less than 4, and False otherwise. This return value can then be used in subsequent actions. If the action returns false (Session Creation count value is less than four) execution of the ToadApp halts. Set Variable Action Set the value of a user-defined variable. Windows environment variables and internal Toad system variables cannot be set, only those variables which the user added from the Options | Variables window. To create a set variable action 1. From the Automation Designer, select Control. 2. Open or create the ToadApp where you want the action to reside. 3. Click and then click in the app. 4. Double-click the new action and set properties as desired. Variable Support Existing variables cannot be used as a variable value, because variable support is not formulaic.
- 464. Toad for Oracle User Guide Managing Projects 462 Only numbers and strings can be values. Neither formulas nor variables are supported as variables. Example This is one possible use of a Set variable action: 1. Create a Set Variable action and name it Establish Session Count. 2. Enter the variable name in the Variable box. In this case, Session Creation Count. 3. Enter the value for the variable. This Establish Session Count action sets a value of 5 into the Session Creation Count variable. Subsequent actions can then reference this variable instead of hard-coding the value of 5. Variable Prompt Action Use this action to have an app prompt for a variable value before continuing. For example, you could use this action for "on-the-fly" alteration of variable values. Acceptable variables are provided in a drop-down list in the properties window. To create a variable prompt action 1. From the Automation Designer, select Control. 2. Open or create the ToadApp where you want the action to reside. 3. Click and then click in the app. 4. Double-click the new action and set properties as desired. Message Action Displays a text box of a particular style (Warning, Error, Information & Confirmation). The text box will contain either an OK/Cancel or a Yes/No button combination. Clicking OK or Yes resumes execution of subsequent actions, clicking Cancel or No stops execution of any remaining actions. To create a message action 1. From the Automation Designer, select Control. 2. Open or create the ToadApp where you want the action to reside. 3. Click and then click in the app. 4. Double-click the new action and set properties as desired. Variable Support Variables are supported in the Message. Example This is an example of a warning message box.
- 465. Toad for Oracle User Guide Managing Projects 463 1. Create a Message action. 2. In the properties dialog, select the Message Type - Warning. 3. Select the button combination you want to use. In this case, OK/Cancel. 4. Enter the message you want to display. You can use environment variables as in the following example: %CURRENTUSER% is the active user. Please disconnect session before continuing. Pause Action The Pause action pauses execution of further actions by a specified amount of time. To create a pause action 1. From the Automation Designer, select Control. 2. Open or create the ToadApp where you want the action to reside. 3. Click and then click in the app. 4. Double-click the new action and set properties as desired. Example This Wait for Server action performs a sleep for 3 minutes. It could be used in a loop which includes a Ping to wait an adequate period of time for a server to be started before continuing the execution of the rest of the ToadApp. » Create a Pause action with the following properties: l Pause box: 3 l Time dropdown: Minutes l Rename the action Wait for Server. File Iterator Action In the control section of the Automation Designer, you can choose to iterate a file. This provides a means to work through the contents of the file, executing child actions for every line in the Iterate Actions file. Child actions can reference each line in the file by means of a temporary variable which the iterator creates as it works. To create a file iterator action 1. From the Automation Designer, select Control. 2. Open or create the ToadApp where you want the action to reside. 3. Click and then click in the app. 4. Double-click the new action and set properties as desired.
- 466. Toad for Oracle User Guide Managing Projects 464 Variable Support A temporary Variable is created and assigned to each line in the file the user specifies. This temporary Variable is visible only within the context of a File Iterator execution and would typically be used by child actions. Part or all of the File Iterator filename itself can be a Variable. Example This simple example uses a master file of script names, with each line in the file designating a different script to execute. The File Iterator action sends each line item to an Execute Script action for execution. This keeps the list of scripts to execute in an external disk file for easy updating, and prevents the need to hard-code it into the Execute Script action itself. In the properties window for a File Iterator, enter the filename. The output variable is taken from the name you gave the action when you created it. This is the variable that Toad may use for child actions as it steps through the file. Child actions do not necessarily have to reference the file items, making the output variable optional. You can also control the number of times child actions are executed with lines in the file. For example 1. The “ScriptCollection.txt” file contains a list of files to execute: c:runme.sql c:AlsoRunMe.sql 2. Create a File Iterator action, naming it Iterate Script Files. 3. Add an Execute Script action under the Iterator. See "Execute Script" (page 445) for more information. 4. Modify the Execute Script action properties to reference the line items from the parent action: a. Open the Execute Script properties window. b. In the File List area, click Add Variable. c. Select Use Parent Output Variable. d. Click OK. 5. Click Apply and then click Cancel. Now when you run Iterate Script Files Toad opens the file ScriptCollection.txt, reading line by line, placing the line into a temporary variable named “Iterate Script files” then execute all child actions for each line. In this case, the Execute Script action will execute c:runme.sql and then c:AlsoRunMe.sql
- 467. Toad for Oracle User Guide Managing Projects 465 Folder Iterator Action The folder iterator action provides a way to step through all the files in a folder, executing child actions for each file in the specified folder (and optionally, subfolder). Child Actions can reference each file in turn by means of a temporary variable created by the iterator. To create a folder iterator action 1. From the Automation Designer, select Control. 2. Open or create the ToadApp where you want the action to reside. 3. Click and then click in the app. 4. Double-click the new action and set properties as desired. Variable Support A temporary variable is created and assigned to each filename in the designated Folder. This temporary variable is visible only within the context of a folder iterator execution and will typically be used by child actions. To use the folder iterator 1. In the folder iterator properties dialog, the following properties are set: l Folder - the directory to iterate. l File Types - a semicolon delimited list of file extensions to use as a filter. Iterator's child actions will execute for each file matching the list of extensions. If no file types are specified, all files (*.*) will be iterated. l Recurse -check to iterate all child folders as well. l Output Variable - this is the name of the temporary variable assigned to each filename. It is the same as the name of the action. Child actions can reference this variable. 2. Create and drag child actions to the Iterate Folder node. Any number of child actions can be added. Example The folder iterator action can be used for many things related to execution of actions for each file in a directory. This simple example will send an email with an attachment for each SQL source file. 1. First set up the folder iterator action with the directory and file types desired. In this case, we used the directory where we store Toad project files and SQL code:
- 468. Toad for Oracle User Guide Managing Projects 466 2. Create a single action as an iterator child. In this case, an email action (See "Email Action" (page 447) for more information): 3. Set up or edit the email properties as follows: Notice that the Message contains the temporary Variable “%Iterate Toad Projects%”. At runtime, this Variable will be replaced with the filename of each file in the folder. 4. You can also add the Variable as an attachment. Click Add var… to display a Select Variable form:
- 469. Toad for Oracle User Guide Managing Projects 467 The Use Parent Output Variable dropdown lists the names of all temporary Variables contained by the Action’s parentage. Note: Folder Iterators can be nested. If the Email Action had multiple Folder Iterator parents above it, this dropdown would display the name of each. This allows fine control over which parent Variable to use. 5. If the “Use Standard Variable” radio button is selected, the grid becomes available and the normal list of Variables can be selected. List Iterator Action The list iterator action provides a means to step through a list of strings provided by the user, executing child actions for each item in the list. Child actions can reference each item by means of a temporary variable. To create a list iterator action 1. From the Automation Designer, select Control. 2. Open or create the ToadApp where you want the action to reside. 3. Click and then click in the app. 4. Double-click the new action and set properties as desired. Variables A temporary variable is created and assigned to each item in the list. This temporary variable is visible only within the context of a List Iterator execution and would typically be used by child actions. Further, any item in the list can itself be a variable. To use the list iterator » In the list iterator properties dialog, the following properties are set: l List - enter strings to act on directly in the Items box. Separate items with a carriage return.
- 470. Toad for Oracle User Guide Managing Projects 468 l Filenames - enter filenames by either entering the path as above, or by clicking Add filename box and searching for the file. l Directories - enter directories by either entering the path as a string, or by clicking Add directory and searching for the directory. Example A List Iterator is useful for many things related to execution of actions for each item in a user- provided list. This simple example sends an email with an attachment for each SQL file to every developer in a given list. 1. In the Properties window for a List Iterator, we built a simple list of strings, organizing it in the order wanted. If something is out of place, you can cut and paste it into the correct location. Note that there is a Variable included in the list. 2. We added our List Iterator to the Automation Designer, making it a child of a Folder Iterator. This will cause the List Iterator to execute for each file in the specified directory. 3. In the Properties dialog for the Email Action (Email Developer Source Files) we reference each of the Output Variables from the two parents above it. 4. In the To field we reference %Toad Developer List%, the name of the direct parent. This will be substituted with each email address in our list.
- 471. Toad for Oracle User Guide Managing Projects 469 The Attachments list references the Output Variable from the Folder Iterator Action two levels up. This will be substituted with every filename provided by the Folder Iterator. Log Comment The log comment action inserts a comment into the execution log of the ToadApp. This can be useful when you want to note why an execution went a specific direction, as in an if...the...else statement, or note when or where something failed. Variables are not supported within this action. To create a log comment action 1. From the Automation Designer, select Control. 2. Open or create the ToadApp where you want the action to reside. 3. Click and then click in the app. 4. Double-click the new action and set properties as desired. ToadApps Managing ToadApps ToadApps (apps) are central to the efficient use of actions. You can use apps to store and manage actions you have created. By ordering the actions within an app, you can run the actions in them from the command line, or use the Windows Scheduler to schedule them to run at a particular time. The order in which they are specified will be the order in which they are run.
- 472. Toad for Oracle User Guide Managing Projects 470 l Creating Apps (page 471) l Naming Apps (page 471) l Viewing App Contents (page 472) l Setting the number of actions saved in the vault (page 438) l Ordering an App (page 472) Copying or Moving Actions Between ToadApps To move an action 1. Cut the action from one app by pressing CTRL+X (or right-clicking and selecting Cut). 2. Paste the action into the new location by pressing CTRL+V (or right-clicking and selecting Paste). To copy an action 1. Copy the action from one app by pressing CTRL+C (or right-clicking and selecting Copy). 2. Paste the action into the new location by pressing CTRL+V (or right-clicking and selecting Paste). Within a ToadApp To move an action » Drag and drop the action to the new location in the app. To copy an action Note: A copied action will always be pasted at the bottom of the action list. You will need to move it if it needs to be in a different location. 1. Copy the action from one app by pressing CTRL+C (or right-clicking and selecting Copy). 2. Paste the action into app by pressing CTRL+V (or right-clicking and selecting Paste). Linking and Moving Apps You can move apps from one category to another, and you can link them so that they are present in more than one category. To move an app between categories 1. In the right hand pane, if it is not active, click Apps. 2. Drag and drop the app from one category to the other.
- 473. Toad for Oracle User Guide Managing Projects 471 Linking apps Linking apps does more than just copy the app into multiple categories. A change in a linked app in one category results in the same change in the app in linked categories. To link apps in multiple categories 1. In the right hand pane, if it is not active, click Apps. 2. Hold down the CTRL key, and drag and drop the app from one category to the other. Creating Apps An app is a set of actions that can be run as a unit to automate tasks. To create an app 1. If the Automation Designer is not open, select Utilities | Automation Designer from the menu. Select a category node. Note: If you do not select a category node, the app will be created in the Default node. 2. Right-click and select New. 3. Enter a name for the new app and then click OK. Creating App Categories You can create Categories of Applications within the Automation Designer. Use these categories to organize your ToadApps. For example, you could have a category for actions used on your Dallas server, and one for those on your Atlanta server. Alternately, you could organize them by type: apps governing import/export for example, or apps related to server control. To create an app category 1. From the Automation Designer (Utilities | Automation Designer), right-click in the navigator. 2. Select Folder | New Folder from the popup menu. 3. Name your new folder. 4. Click OK. Naming Apps If you aren't happy with the name you have given a category, an app or an action, you can change it. Note: You cannot rename Action Recall or the Default category.
- 474. Toad for Oracle User Guide Managing Projects 472 To rename a ToadApp 1. In the tree view, right-click on the node representing the category, app or action. 2. Do one of the following: l Select Properties. l Select Rename. 3. Enter the new name. 4. Click OK. Ordering an App You can change the order of the actions within an app. This is useful if you are planning on running actions as a set from the command line, or on a schedule. By putting them in the order you want them to run, for example, you can define emails that should be sent before, during, and after the process, and can specify actions that belong within other actions (for example, the action that relates to the If, Then, or Else statements). To order a ToadApp 1. Activate the app you want to order. 2. In the right-hand application panel, drag and drop the actions in the list into the order you want them to run. Viewing App Contents You can view the actions contained in apps. To view a different ToadApp l In the Apps area of the navigation pane, click on the node corresponding to the app you want to view. Project Manager Project Manager Overview You can use the Project Manager to easily organize your work area. The window is organized in a tree structure, with every item in the tree being a node that points to a different object. You can combine several different Oracle connections and FTP connections into one project to make it easy to upload, download, and work with your databases. You can add subproject folders to your projects to further organize your work. If you have recently upgraded Toad and you want to view newly available Project Manager actions, such as right-click menus, select the Configuration screen. See "Reset all Defaults" (page 476) for more information.
- 475. Toad for Oracle User Guide Managing Projects 473 Unless you have a highly configured Project Manager environment you may want to consider performing a Reset all defaults to see all the new actions within the window itself. An online video tutorial is also available for this feature. This video opens in a new browser window and requires an internet connection. To access the Project Manager » From the View menu, select Project Manager. Connection Panel The connection pane ( tab) is an area to work with various connections. You can create new connections, end connections, run scripts from a particular connection, and so on from this area. See "Connection Panel" (page 487) for more information. Nodes The Project Manager ( tab) uses the following types of nodes and tabs to let you arrange your work: Project Folder The overlaying organizational unit is the Project Folder tab. This can contain other project folders, other types of folder, or other content. Multiple project folders can be created and arranged to suit your work style. The connections tab cannot be moved. The order of tabs is preserved when you close and reopen the Project Manager. Hovering your pointer over a project tab will display the full path to the project file. See "Project Nodes" (page 489) for more information. File Folder Use a File Folder node to represent a folder on a local or network disk. See "Folders" (page 497) for more information. File Use a folder item node to represent a file on a local or network disk. These can include .sql files, .html files, .doc files, and so on. This node is located beneath a file folder node. See "Adding Folder Items" (page 497) for more information. FTP Folder Use an FTP folder node to represent a folder on an external FTP server. Contains FTP files. See "FTP Folder Actions" (page 499) for more information. FTP File Use an FTP file node to represent a file on an external FTP server. This node will always be beneath an FTP folder.
- 476. Toad for Oracle User Guide Managing Projects 474 See "Add FTP Folder Items" (page 499) for more information. DB Schema You can add a Database Schema node to represent a connection to a schema on a database. Can contain database objects. See "Schema Nodes" (page 491) for more information. DB Object Within schema nodes, you can include database object nodes. These represent objects residing on a database. Must be contained in a DB Schema node. See "Adding" (page 491) for more information. Task Use the Project Manager to schedule tasks using the Windows Task Scheduler. See "Task Scheduler" (page 762) for more information. To Do List Represents an user-created checklist. To do items are added beneath it. See "To Do Lists" (page 500) for more information. URL Represents an URL and can act like a shortcut to that site. Acting on Nodes The Project Manager is highly configurable, letting you easily work with various objects at one time. You can configure its behavior for: l PM - Drag and Drop Operations (page 481) l PM - Double-click Operations (page 481) l Resetting Defaults (page 482) (right-click) l Project Manager Sorting (page 485) If you are just starting out with the Project Manager, reading the Working with the Project Manager book (beginning at Working with the Project Manager (page 482)) in this help file will give you an overview of the types of things you can do in this window. Then move on to Configure Project Manager, which will give you an idea of how to customize the window to work in the best way for you. Project Manager Toolbar The toolbar lets you perform Project Manager actions with just a click of the mouse.
- 477. Toad for Oracle User Guide Managing Projects 475 Button Command Select the drop down menu to choose an item to add. Loads a Project File. Creates a new Project File. Saves Project File as…. Saves Current Project File. Print project Toggles Reorder Mode so you can move items around within the Project Manager. By default, items are included in the hierarchy in the order they are added. Remove Dead Links. Access Project Manager Options to configure the Project Manager. Removing Dead Links In the Project Manager, you can remove any dead links in your project. These can include nodes which no longer exist in the schema, windows tasks which are no longer present and so on. When you select a type of link to remove, all dead links of that type will be removed. To remove limited numbers of them, you will need to remove the appropriate nodes manually. When you remove dead links, all subnodes are removed as well as the dead node. To remove dead links 1. Click on the Project Manager toolbar. 2. In the Remove Dead Links dialog, select the types of dead link you want to remove. 3. Click OK.
- 478. Toad for Oracle User Guide Managing Projects 476 Configuring the Project Manager Configuring the Project Manager The Project Manager can be configured to work in the way you work. You can specify the command Toad executes when you drag a file onto another file, or onto a node. Double-clicking is also customizable, as are the menu items that appear in the right-click (pop up) menu. See "Drag-and-Drop" (page 484) for more information. To configure the Project Manager 1. Click on the Project Manager toolbar. 2. Select or clear the options you want to configure. Note: You can also choose to Reset all Defaults or Use defaults for a particular tab. 3. Click OK. Reset all Defaults Clicking Reset all Defaults at the bottom of this dialog box will reset defaults on ALL tabs. Use Defaults Click the Use Defaults button on an individual tab to return to the default settings for that tab only. General Options General options let you change the options for the entire Project Manager. To access General options 1. Click on the Project Manager toolbar. 2. If it is not selected, click the General tab. Editor file load options The default is Load into new window. Reload into existing window Select this option to load editor contents into the existing Editor window. If this option is selected, you must choose to either append the new data to the data existing in the window, replace the contents of the window entirely, or create a new tab and load the SQL there. The default is unselected.
- 479. Toad for Oracle User Guide Managing Projects 477 Load into new window Select this option to open a new Editor window in which to load your file. This is the default option for file loading. Generate Script for Multiple check box - if checked and multiple scripts are selected for loading, Toad creates a script referencing the selected scripts as follows (assuming employees 1 through 3 are selected for loading) @"c:onetwoemployees.sql" @"c:onetwoemployees1.sql" @"c:onetwoemployees2.sql" The default is checked. Navigate to previous invocation When selected, if you choose a file to load into the Editor that is already there, TOAD will navigate to that Editor tab. In addition, this option finds the Editor in which the file was previously loaded, brings it to the top, and makes the tab in which its loaded the active tab (navigates not just to the tab but to the SE if there are multiple open). Prompt each time When selected, TOAD will prompt you to select one of the above options each time you choose to load a new file. Export Options Compress export file (.zip) When this option is selected, Toad compresses the exported file into a .zip format. The default is unchecked. Watch progress When this is selected, Toad watches the progress of long exports. The default is checked. FTP server passwords Save encrypted passwords When checked, Toad saves the passwords for your FTP sites in an encrypted format. The default is checked. To-Do Past due color drop down A to do item displays in black text by default. When it is past due, the color changes as an instant reminder. Choose the color you want past due items to be from the drop down color
- 480. Toad for Oracle User Guide Managing Projects 478 menu. The default is red. Server side compression Utility for 'compress' action Select the utility you want to use for server side compression from the compress drop down. Choices are compress, zip or gzip. The default is compress. Web Browser You can select the web browser you want Toad to use for web based activity. Filename If you know the location of your web browser, you can enter the entire path in the filename box. Browse Click the Browse button to locate your web browser using a standard Windows Open dialog. Find default Click the Find default button and Toad will find your default browser and enter it in the filename box for you. Dragging and Dropping Prompt if multiple actions are available If you have checked this option, and multiple actions are available, Toad will display a dialog for you to choose the action you want to perform. From this dialog, you can also make the action the default, and turn off prompting. This is the default. Use user setting When checked, Toad uses the value you chose (or the default) on the "Drag and drop operations" tab in the Project Manager Options window. Refresh folder links Include subdirectories When checked, a refresh includes all subdirectories of the folders in the nodes. The entire folder tree will be built in the Project Manager. Unchecked, only files under the folder's main directory are displayed. Subfolders are not added. The default is checked.
- 481. Toad for Oracle User Guide Managing Projects 479 Refresh after changing properties When checked, if you set a filter, or otherwise change the properties of a folder, all folder links are refreshed when you click OK. Unchecked, folder links are not refreshed. The default is unchecked. Prompt before rebuilding When checked, Toad will prompt you for confirmation before rebuilding any links when you refresh a folder item. If unchecked links will be built without notifying you. The default is checked. Shell for remote file execution You can select a shell for use when executing a file remotely. Select from the drop down menu. The following common shells are available: l Bourne shell (sh) l Korn shell (ksh) l CSH In addition, you can supply your own shell choice by entering the appropriate shell name in the box. The default is no shell selected. Tree Font Click the Font button for a standard Font dialog to select the font and font properties Toad uses in the Project Manager. The default is MS Sans Serif. SmartExpand Select this check box to only allow one top-level project node to be expanded at one time. Expanding one node will collapse the others. The default is unchecked. PM - Associations The Application Properties dialog box is accessible from the Project Manager. See "Project Manager Overview" (page 472) for more information. To set application properties 1. On the Project Manager toolbar, click . 2. Click the Associations tab.
- 482. Toad for Oracle User Guide Managing Projects 480 3. Click Add, or select an association and click Edit. The Application Properties dialog box appears. From this dialog box you can easily create or edit associations. Property Descriptions Title Enter the title you want the association to have in the Project Manager. Program Enter either the full path name of the program, or click to search for it. Working dir Enter the full path name for the directory you want to specify as the working directory for this application, or click to search for it. Parameters You can use one or more of the following parameter variables to configure your application: l $UID - enters the current Toad User ID l $UPW - enters the current Toad User password l $SID - enters the current Toad database ID l $CWD - enters the current Toad working directory l $TMP - enters the windows temporary directory l $FIL - enters the file in the active editor l %S (or "%S") - specifies where the filename should appear (otherwise Toad uses the standard convention of "app.exe -options filename". These parameters can be used individually, or combined. For example, if you wanted to automatically open Notepad with the current file in the active editor, you would enter the information to open Notepad as above, and enter $FIL in the Parameters field. You could also enter the command: sqlplusw.exe $UID/$UPW@$SID which starts sql plus with the current toad connection. Extensions Enter the extensions you want to associate with this application. Run Enter the parameters for how you want the application to run when accessed, as follows: Window type Specify the window type you want to open: Normal, Minimized or Maximized.
- 483. Toad for Oracle User Guide Managing Projects 481 Launch new Start a new instance of the application when the Project Manager accesses it. Use existing if possible If an existing instance of the application is running, Toad will try to use that instance before moving to start the application again. Icon Choose an icon you want to associate with files that use this application. PM - Drag and Drop Operations Use the drag and drop operations screen to configure the action Toad takes when an item is dragged within the Project Manager. The grid is organized in a simple, "when source is, and destination is, then do this" format. The action performed can easily be set to other possibilities. To change the action performed on dropping 1. Click on the action you want to change. An arrow appears in the right of the cell. 2. Click the arrow to display a menu of possible actions. 3. Click the action you want to select. PM - Double-click Operations Use the double-click operations screen to configure the action Toad takes when an item is double-clicked within the Project Manager. The grid is organized in a simple, "when source is this, then do this" format. The action performed can easily be set to other possibilities. To change the action performed on double-click 1. Click on the action you want to change. An arrow appears in the right of the cell. 2. Click the arrow to display a menu of possible actions. 3. Click the action you want to select. PM - Popup Menus Each different type of object in the left pane of the Project Manager has an associated pop up (right-click) menu. This means that if you have an FTP folder selected, the items selected under FTP appear on the menu, and so on. For the most part, items you add are added to the topmost area of the right-click menu, in addition to the standard items in the lower regions (Add, Remove, Rename, Copy, and Properties, for example).
- 484. Toad for Oracle User Guide Managing Projects 482 Note: For database objects under a schema node with an open connection, the topmost part of the right-click menu is the Schema Browser menu for that object type. This is not customizable. Any changes you make will occur below the Schema Browser menu. In addition, from time to time certain menu items may appear which are specific only to certain file types, such as the Run in Quest ScriptRunner item, which appears only for SQL files. These items are specific to the file type, as defined by their extension, and are not customizable. To customize the popup menus 1. Click on the Project Manager toolbar. 2. Click the Popup menus tab. 3. Select menu items you want to appear on the various menus, and clear items you do not want to appear. 4. Click OK. Resetting Defaults You can reset defaults in only the popup menu area, or throughout the Project Manager. To reset defaults in popup menus only » Click Use Defaults. To reset defaults throughout the Project Manager » Click Restore Defaults. Working with the Project Manager Using Different Types of Objects Simultaneously One of the great advantages to using the Project Manager is that you can work with multiple types of objects at the same time. This lets you drag-and-drop them to access functions. After you have added a variety of different types of database objects under one or more schema nodes, you can: l Multi-select database objects, right-click and choose DDL to clipboard, DDL to file, Load DDL into Editor or Describe (Describe may not be available depending upon the object type) l Drag objects onto one another to compare them l Drag objects onto a local or remote file folder link to generate a DDL file which will be placed into the local or remote folder l Drag objects onto a local or remote file to generate the DDL for the objects and overwrite the destination file with the DDL
- 485. Toad for Oracle User Guide Managing Projects 483 Working with Server Directories and Files Another of the many strengths of the Project Manager is its ability to easily work with FTP server directories and files. After you have created an FTP folder and added server information to it you can create additional nodes and servers quickly by using the copy nodes feature. You can also right-click and select Rename to rename the node for a more logical representation of what the directory contains, such as Toad UNIX Scheduler log files. From here you can: l Select one or more server nodes, right-click and select Refresh server links. This builds shortcuts to all the files underneath the selected server directories. Whenever you want to get an updated list of the server directory contents simply select refresh to rebuild the nodes. l Drag-and-drop server file links to local directories to download the files. l Drag-and-drop local file links to server directories to upload the files to the server. l Drag files into the trash can to move them to the Recycle Bin. Loading Local or Server Files into Toad Windows or External Applications If you frequently work with files in Toad or other applications you can add links to them in the Project Manager. You can then associate their file extensions with either Toad windows or defined external applications. (See Configure Project Manager for more detailed information about associating extensions.) Toad windows with which you can associate files include: Editor, Offline Editor, SQL*Loader, Query Builder, TNSNames Editor, Export File Browser and the Project Manager itself. When double-clicking or right-clicking and selecting Load, files that match pre-defined extensions for these windows will be loaded. Note: To be sure you see all options, click the Add defaults button. You can use the Associations tab in the Project Manager options to change the default extensions for the Toad windows, or add external applications yourself. For instance, you could add Internet Explorer as an application and associate it with htm and html files. To access the extension configuration window 1. From the Project Manager toolbar, click . 2. Click the Associations tab. To restore all file types you can associate » In the Options | Associations tab, click Add defaults.
- 486. Toad for Oracle User Guide Managing Projects 484 To load multiple files 1. Select the files in the Project Manager. 2. Right-click and select Load. If loading into the Editor, a separate tab is created for each item. Pressing the Enter key loads only one file, because the enter key is tied to the double-click event, which can only occur on one node/file at a time. Working with Local Files and Directories Use Windows Explorer to drag-and-drop folders onto Projects to create links to local folders and files in the Project Manager. You can also right-click a Project and select Add | Folder and Add | Folder Items. Once you have shortcuts to local folders and files you can: l Right-click folders and select Refresh folder links to automatically build a list of shortcuts to all files in that folder l Drag files onto one another to perform Toad’s file compare. l Drag files and folders onto server directories to upload them. Dragging a folder onto a server folder will upload all the underlying files. l Drag files into the trash can to move them to the Recycle Bin. Changing the Default Behavior The Project Manager is entirely user-programmable. That is, you can think of the Project Manager as having a number of pre-defined actions. These actions occur during three different types of user operations: Drag & Drop, Double-click and Right-click. You can change the behavior of the Project Manager when you perform one of these operations. This is an overview of the types of actions you can perform. See "Reset all Defaults" (page 476) for more information, and for specific instructions on changing the action for each operation. Drag-and-Drop When specifying the action for a drag-and-drop operation, first think of the node types you are dragging, and the type of node you are dropping onto. You can then tell the Project Manager what you want to happen when the drop occurs. For example, when you drag a file folder item onto a file folder, you can tell Project Manager whether you want the file moved or copied. Double-Click There are more possibilities for the double-click operations. The default for many database object types is to open the ‘Describe’ window. But this can be changed, per database object node type, to other actions such as ‘DDL to clipboard,’ ‘DDL to file’ and ‘Load DDL into Editor’. For source code there is also ‘Load into Editor.’ Right-click Menu The right-click menu is configurable as well. You can select which items appear in the menu as well as their order. Note that the bottom portion of the menu is static. Also, for some database
- 487. Toad for Oracle User Guide Managing Projects 485 object node types, the right-click menu also includes the full Schema Browser right-click menu for that object type. Copy Nodes Between Projects If you have more than one project going at once, and need links to the same files, FTP connections, or schemas, you can copy them from one project to another in the Project Manager. This Copy feature applies to second-level nodes: Schemas, Folders, and FTP Folders. It copies the selected nodes and all items below them. To copy nodes between projects 1. Select the nodes you want to copy. You can use SHIFT or CTRL to multi-select. 2. Right-click and select Copy from the menu. The Destination Projects dialog box appears. This dialog box has a list of all other Project Folders you have set up in your Project Manager, including the one where the nodes already reside. 3. Select one or more of the projects. You can use the All or None buttons to select or clear all of the projects. 4. Click OK. The nodes you have selected are copied to the other projects, and you are returned to the Project Manager. Project Manager Sorting You can easily sort the items under any node in the Project Manager. 1. Select the node you want to sort. Note: Select only one node at a time. If multiple nodes are selected, none will be sorted. 2. Right-click and select Sort. The nodes directly beneath the selected node are now in alphabetical order. Searching for Nodes When you have your Project Manager configured and stocked with many files and schemas, you can still find what you have entered. Click anywhere in the left hand tree view and start typing. Toad will search for and highlight the first occurrence of what you type after the cursor. Formatting Files You can format your files from within the Project Manager, or as an Action in the Toad Automation Designer. This lets you more easily convert scripts, procedures, functions, and so on to fit your company's formatting requirements. Note: In version 9.7, the Formatter component was replaced with a new component that supports Oracle 10g and 11g functionality. Some formatter options have moved or changed slightly. See "Changes in the Formatter" (page 622) for more information.
- 488. Toad for Oracle User Guide Managing Projects 486 Files to be formatted must be included in the Project Manager as nodes. See "Adding Folder Items" (page 497) for more information. Note: Formatting is not immediately accessible from the popup menu. You must add it to the menu as described in Reset all Defaults (page 476). The files are automatically formatted and the results of the formatting process are displayed in the Output window, Formatting Results tab. If there are syntax errors within the code that prevent proper formatting, Toad will list these as well. To format one file from the Project Manager 1. In the Project Manager, select the file you want to format. 2. Right-click and select Format Files. To format multiple files from the Project Manager 1. Do one of the following: l In the Project Manager, select the files you want to format. l Select the folder or project nodes that directly contain the files you want to format. 2. Right-click and select Format Files. To create a Format Files action Note: See "Format Files Action" (page 451) for more information. 1. From the Automation Designer, click the Utilities tab. 2. In the navigation panel, select the App where you want formatting to occur. 3. Click and then click in the app. Checking Files for Syntax You can check the syntax of your files from the Project Manager tree. You can check multiple files, or check them one at a time. Results display in the Output window, on the Syntax Check Results tab. To check files for syntax errors 1. Do one of the following: l Select one or more files from the Project Manager tree. l Select the folder or project nodes containing the files you want to check. 2. Right-click and select Check Syntax. File to FTP You can upload a file directly from the Editor to FTP using the Project Manager.
- 489. Toad for Oracle User Guide Managing Projects 487 To move a file from Editor to FTP » From the Editor, click and drag the tab of a loaded file from the Editor to an FTP node in the Project Manager. Connection Panel Using the Connection Panel Click the Connection tab to see the connection panel. From the connection panel, you can easily manage your connections. You can: l Select an active session and drag it into a project folder to create a new schema node l Create new connections l Execute a quickscript against the selected connections l Execute a named sql against the selected connections l Copy TNS Names information to the clipboard l Create objects across multiple databases Creating New Connections You can use the Connection Panel of the Project Manager in several ways to create new connections. Note: The connection panel is a two-way mirror to the Session Login window. Any connections you create here will be reflected in your connection list and the same in reverse. To create a new connection 1. Right-click in the Connection Panel. 2. Select New Connection. 3. Log in as usual. To create a quick connection 1. Right-click in the Connection Panel. 2. Select Quick Connect. 3. Do one of the following:
- 490. Toad for Oracle User Guide Managing Projects 488 l Select All to list all the connections you have available l Select a server and then select the connection from the server menu. 4. If the password has not been saved, you will be prompted to provide login information and the Server Login window appears. Otherwise the connection will be made automatically. See "Server Login Window" (page 177) for more information. Executing QuickScripts From the Project Manager's Connection Panel, you can execute a any configured QuickScript against selected connections. To execute QuickScripts 1. In the Connection Panel, select one or more connections to execute against. 2. Right-click and select Execute QuickScript. 3. Select the script you want to execute. Executing Named SQLs From the Project Manager's Connection Panel, you can execute a named SQL against selected connections. See "Project Manager Overview" (page 472) for more information. To execute named SQLs 1. In the Connection Panel, select one or more connections. 2. Right-click and select Execute Named SQL. 3. Select the SQL you want to execute. Creating Objects in Multiple Databases You can create objects in multiple databases using the Project Manager Connection Panel. This is very useful when you need identical objects in various schemas. Create them at once and save time. When you create an object in multiple databases, the Create window that is opened corresponds to the lowest Oracle version you have selected. Therefore, if you have selected a connection to an Oracle 8i database and another to an Oracle 10g database, the options on the Create window will be 8i compatible. All DB information loaded into the window, such as the schema list and available data types will be loaded from the lower Oracle version. This means that the Create is owned by the lowest Oracle version and then the generated SQL is run against the other connections selected in the Connection Panel. To create objects in multiple databases 1. In the Connection panel, select the connections where you want to create an object. 2. Right-click and select Multi-database Create. 3. Select the type of object you want to create:
- 491. Toad for Oracle User Guide Managing Projects 489 l Policy - See "Create Policy Definition" (page 1043) for more information. l Policy Group - See "Create Policy Group" (page 1044) for more information. l Profile - See "Create and Alter Profile" (page 1047) for more information. l Resource Consumer Group - See "Create and Alter Resource Consumer Group" (page 1058) for more information. l Resource Plan - See "Create and Alter Resource Plan" (page 1060) for more information. l Role - See "Create and Alter Role" (page 1062) for more information. l Table - See "Altering Tables" (page 1074) for more information. l User - See "Create and Alter User" (page 1098) for more information. 4. Enter the appropriate information in the Create window that appears. 5. Click Create. You can also use the Schedule button to run the scripts against the databases at a later time. Copying TNS Names Info to Clipboard From the Project Manager, you can copy TNS Names information for one or more selected connections into the clipboard. From the clipboard you can paste the information wherever you need it. To copy TNS Names information 1. Select one or more active connections in the connection panel. 2. Right-click and select TNS Names info to clipboard. 3. Paste where needed. Project Nodes Project Nodes Project nodes are the heart of the Project Manager window. They are central to easily organizing your files. Within each project node you can store links to FTP folders, regular folders, connection links, and database objects. Different project nodes can contain links to the same items. This lets you have, for example, one project for development and one for production, possibly containing links to the same files. Adding a Project Node You can add a project node to the Project Manager in two ways.
- 492. Toad for Oracle User Guide Managing Projects 490 To add a project node 1. Do one of the following: l Right-click and choose Add Project. l Select Project from the Add Item dropdown on the toolbar. 2. Enter the name you want to use for the Project and press ENTER. Note: When you are adding an item from the Schema Browser, you can create a new Project by typing the project name into the Name box instead of choosing from the dropdown list. Saving a Project You can save the organization of the Project Manager to a file. This way if you have a project that has gone into maintenance, you can save its settings to a new file, keeping your Project Manager window clear for current projects. Then you can reload it again when you need it. This helps keep your Project Manager window streamlined. To save a project » Click on the toolbar to save the contents of the Project Manager with a new filename. Tip: If you have already saved a project, and just want to update it, you can click on the toolbar instead. The current Project Manager file is also saved automatically when you close the Project Manager window. Renaming a Project When a project is first added to your Project Manager, it is called Toad Project, but it is created in Rename Mode. You will want to change this to something more appropriate to your work environment. Just type the new name and press Enter. To change a project name 1. Do one of the following: l Select the project in the project hierarchy and press F2. l Right-click the project and select Rename. 2. Enter a new project name and press ENTER. Removing a Project You can also remove a project entirely from the Project Manager. To remove a project from the Project Manager 1. Select or multi-select a project or projects, right-click and select Remove from the menu. 2. Click Yes to remove the Project Node.
- 493. Toad for Oracle User Guide Managing Projects 491 This removes the node and any of the links to items beneath it from the Project Manager. It does not remove your files from your hard drive. Schema Nodes Schema Nodes You may use several different schemas or users within each project. You can use the Project Manager to access your connections, see if you are connected, and to connect if the connection is not current. You can also configure the Project Manager so that when you drag a schema node into another schema node Toad will automatically run a schema compare on the two. In addition, you can right-click a schema node for a list of possible actions, including: l Opening a Schema Browser window l Opening an Editor window l Opening a Query Builder window l Connecting to the schema l Disconnecting from the schema See "Reset all Defaults" (page 476) for more information and other configuration options. Database Objects Adding You can add a database object within a schema node. There are several ways to do this, and they depend on the object you are adding. Some objects can be added in one way but not another. See "Database Object Functionality" (page 492) for more information and a list of database objects and how to add them to your projects. l Right-click the schema name and then select Add | Database Object…. l Drag-and-drop the object from the Schema Browser to a project node in the Project Manager. l In the Schema Browser, select the object you want added, right-click and select Add to Projects window. For the last two options, Toad will automatically find any schema node within the selected Project node that matches the current schema in the Schema Browser. If an appropriate node is not found, Toad will create one and add the objects under that schema. Right-click The right-click menu displays the Schema Browser right-click menu for the database object you have selected. In addition, it adds the selections you have selected from Pop up menus below the Schema Browser selections. See "Resetting Defaults" (page 482) for more information.
- 494. Toad for Oracle User Guide Managing Projects 492 Note Property You can add a Note to any Database Object Node. This note can be displayed as a hint. To add a note 1. Right-click on a database object. 2. Select Properties. 3. Enter the note and then click OK. 4. Hover over the object in the tree to see the node. Database Object Functionality The Project Manager lets you easily add database objects to your projects. However, some objects can be added only from the Object Browser. See "Project Manager Overview" (page 472) for more information. The table below describes the possible database objects, how to add them, and what functionality is associated with them at this time. For Schema Browser accessibility, unless otherwise noted, you can either drag-and-drop the object into the Project Manager, or right-click and select Add to Project Manager. Object Type How to Add to Project Manager Drag & Drop Operations Double- click Operations Popup Menu Operation Clusters Object Search/Schema Browser/Drag- and-Drop Y Y Y Constraint Object Search/Drag-and- Drop Y Y Y Columns (table) Cannot Add N N N DB Link Object Search/Schema Browser/Drag- and-Drop Y Y Y Dimension Object Search/Schema Browser/Drag- and-Drop Y Y Y
- 495. Toad for Oracle User Guide Managing Projects 493 Object Type How to Add to Project Manager Drag & Drop Operations Double- click Operations Popup Menu Operation Directory Object Search/Drag-and- Drop Y Y Y Function Object Search/Schema Browser/Drag- and-Drop Y Y Y Index Object Search/Schema Browser/Drag- and-Drop Y Y Y Java Class Object Search/Drag-and- Drop Y Y Y Java Resource Object Search/Drag-and- Drop Y Y Y Java Source Object Search/Drag-and- Drop Schema Browser/Drag- and-Drop Y Y Y Job Schema Browser/Drag- and-Drop Y Y Y Library Object Search/Schema Browser/Drag- and-Drop Y Y Y Package Object Search/Schema Browser/Drag- and-Drop Y Y Y Package Body Object Search/Schema Y Y Y
- 496. Toad for Oracle User Guide Managing Projects 494 Object Type How to Add to Project Manager Drag & Drop Operations Double- click Operations Popup Menu Operation Browser Policy Object Search/Schema Browser/Drag- and-Drop N N N Policy Groups Cannot Add N N N Procedure Object Search/Schema Browser/Drag- and-Drop Y Y Y Profile Drag-and-Drop Y Y Y Queue Object Search Y Y Y Queue Table Object Search N N N Recycle Bin Cannot Add N N N Refresh Groups Cannot Add N N N Resource Groups Cannot Add N N N Resource Plans Cannot Add N N N Role Schema Browser/Drag- and-Drop N Y Y Rollback Segment Object Search/Drag-and- Drop Y Y Y Scheduler Job Classes Object Search/Schema Browser/Drag- and-Drop N N N
- 497. Toad for Oracle User Guide Managing Projects 495 Object Type How to Add to Project Manager Drag & Drop Operations Double- click Operations Popup Menu Operation Scheduler Jobs Object Search/Schema Browser/Drag- and-Drop N N N Scheduler Window Groups Object Search/Schema Browser/Drag- and-Drop N N N Scheduler Windows Object Search/Schema Browser/Drag- and-Drop N N N Scheduler Schedules Object Search/Schema Browser/Drag- and-Drop N N N Scheduler Programs Object Search/Schema Browser/Drag- and-Drop N N N Scheduler Chains Object Search/Schema Browser/Drag- and-Drop N N N Sequence Object Search/Schema Browser/Drag- and-Drop Y Y Y Snapshot Schema Browser/Drag- and-Drop Y Y Y Snapshot Log Schema Browser/Drag- and-Drop Y Y Y Synonym Object Y Y Y
- 498. Toad for Oracle User Guide Managing Projects 496 Object Type How to Add to Project Manager Drag & Drop Operations Double- click Operations Popup Menu Operation Search/Schema Browser/Drag- and-Drop System Privilege Object Search/Schema Browser/Drag- and-Drop Y Y Y Table Object Search/Schema Browser/Drag- and-Drop Y Y Y Tablespace Object Search/Schema Browser/Drag- and-Drop Y Y Y Trigger Object Search/Schema Browser/Drag- and-Drop Y Y Y User Schema Browser/Drag- and-Drop Y Y Y User Type Object Search Y Y Y User Type Body Object Search Y Y Y User Collection Object Search N N N View Object Search/Schema Browser/Drag- and-Drop Y Y Y
- 499. Toad for Oracle User Guide Managing Projects 497 Folders Adding Folders You can add as many folders as you like to a project. Each folder must already exist on your hard drive or the network drive. Adding a folder to the Project Manager maps the folder path. Note: Refresh folder list functionality is limited for a network folder node. Only the parent directory of the network folder node will be refreshed, but its subfolders and their contents will not be refreshed. To add a folder 1. Right-click on a project node in the left pane of the Project Manager. 2. Select New | Folder. 3. Do one of the following: l Enter the path to the folder in the path box. l Click and browse to the folder you want to add. 4. Add any filters in the Filter box. See "Filtering Folder Items" (page 498) for more information. By default, double-clicking on the folder will open the Windows Explorer to that folder, so you can easily browse through the contents. You can also add items contained in the folder to the Project Manager window so they are accessible directly. See "Adding Folder Items" (page 497) for more information. Removing Folders You can remove folders from the Project Manager just as easily as you can add them. To remove a folder » Select one or more folders, right-click and select Remove. Note: The folders are removed from the Project Manager listing. They are not deleted from your hard drive. Caution: Be sure you select Remove from the right-click menu and not Delete. Delete will delete your folder entirely. Adding Folder Items Adding folder items to folders you have mapped in the Project Manager makes it easier to open them. You no longer have to open the Windows Explorer, but can open them directly from the Project Manager.
- 500. Toad for Oracle User Guide Managing Projects 498 Project Manager automatically names these folders with their entire path name. You can also rename these folders to something more easily remembered within the Project Manager. To rename a folder 1. Do one of the following: l Right-click the folder and select Rename. l Select the folder and press F2. 2. Enter a new name for the folder and click OK. The pathname is retained, but the folder name is now more manageable in the Project Manager. Filtering Folder Items In the Project Manager, when adding or viewing the properties of a file folder you can filter the file list appearing in the folder. This can be useful if you have many file folder items displayed, and you need to easily find a specific file. To change file folder properties 1. Right-click the file folder and select Properties. 2. Change the directory information by browsing for it using , or by entering a path directly. 3. Enter filter information in the Filter box using standard DOS wildcard characters. For example, *.txt will display only .txt files, fill* will find only files beginning with the letters "fill" and so on. 4. Right-click and select Refresh folder links from the menu. Note: After a confirmation, all current links will be removed, and only those files that match the provided filter will be created as links under the folder. This does not create new links, but only filters existing links. 5. Returning to the properties dialog box and restoring it to all files (*.*), and again refreshing it, will restore all your links.
- 501. Toad for Oracle User Guide Managing Projects 499 Removing Folder Items You can remove folder items from the Project Manager. To remove a folder item » Select one or more items, right-click and select Remove. Note: The folders are removed from the Project Manager listing. However, they are not deleted entirely. Caution: Be sure you select Remove from the right-click menu and not Delete. Delete will delete the item entirely. FTP Folders FTP folders represent connections to a remote server. These are located as sub-nodes to a Project Folder you create. See "Project Nodes" (page 489) for more information.You can add a separate folder for each server directory you want mapped. To add FTP folders 1. Select the project where you want the FTP Folder to reside. 2. Right-click and select Add | FTP Folder. 3. Set up an FTP connection as described in FTP Logon. 4. Click OK. To remove FTP folders 1. Select the folder or folders you want to remove. 2. Right-click and select Remove from the menu. 3. Confirm by clicking OK. FTP Folder Actions When an FTP folder has been added, you can perform several actions from the right-click menu. Right-click the FTP folder and select from: l Browse - This opens an FTP connection and lets you browse the contents of the FTP connection. It uses the client dir as the local directory. l Refresh Server Links l Add Folder item (See below) Add FTP Folder Items FTP Folder items represent files on the remote server. Adding them to your FTP folder tells Toad where they are located, and what they are called. When you act on them, you are connecting to
- 502. Toad for Oracle User Guide Managing Projects 500 the server, downloading the item and editing it. You can then use FTP to send them back to the server. To add FTP folder items 1. Select the FTP Folder where the files are located. 2. Right-click and select Add | FTP Items from the menu. 3. Select the files you want to add to your folder. You can easily select all or none by clicking the corresponding buttons. 4. Click OK. The files are added to the FTP Folder node you had selected. To remove FTP folder items 1. Select the folder or folders you want to remove. 2. Right-click and select Remove from the menu. Caution: Be sure to select Remove and not Delete Server File. Delete Server File will remove the file from your server directory. To Do Lists To Do Lists You can create a "To Do" list in the Project Manager to keep track of your projects and what needs to be completed. To Do items can be listed under a node, or under another To Do item. So if you need to break a task into its component parts, you can create multiple sub-items. To create a To Do node » Over a Project Node, right-click and select Add | To Do List. The new list appears with the name selected so you can immediately change it. To create a To Do item 1. Right-click on a To Do List or a To Do Item and select Add | To Do Item. 2. Name the item. 3. Right-click on the item and select Properties. From here you can: l mark the item completed l add notes about the item l change the due date (the default is three days from the current date) 4. Click OK to accept the changes to the properties.
- 503. Toad for Oracle User Guide Managing Projects 501 Query Viewer Query Viewer The Query Viewer displays currently running background queries, the database where they are running, their current execution time and the SQL. Queries are automatically displayed in their order of execution. From this window you can cancel queries, or display the Editor page where they are running and view them in detail. The Query Viewer is available as an individual window within Toad, or you can access it from the dockable panel in the Editor. To access the Query Viewer » Do one of the following: l From the View menu, select Query Viewer. l From the Editor, right click, select Desktop Panels and select Query Viewer. Query Toolbar Button Command Cancel Query Find Query in Context. See "Finding Queries in Context" (page 501) for more information. Apply Query Viewer Filter. See "Query Viewer Filters" (page 502) for more information. Clear inactive queries (those queries that do not have active datasets) Finding Queries in Context Finding queries in context lets you move from the Query Viewer to the Editor tab where the query is running and view it there. To find a query in context 1. In the query viewer grid, select the query you want to find. 2. Click .
- 504. Toad for Oracle User Guide Managing Projects 502 Query Viewer Filters You can easily filter the Query Viewer grid in order to find specific queries. See "Query Viewer" (page 501) for more information. To filter the viewer grid 1. From the Query Viewer toolbar, click the Filter button. 2. Select the method you want to use to filter the grid: l SQL contains. l Runtimes longer than n minutes. l Started in last n hours. 3. Click OK. Using the Query Viewer The Query Viewer displays queries that have run or are currently running, in grid format. See "Query Viewer" (page 501) for more information. The grid view includes columns that display: l Database l Status l Start Time l Stop Time l Execution Time l Type l SQL The panel below the grid includes two tabs. One displays the SQL that is selected in the grid. The other displays any errors that were encountered while running that SQL. To view SQL 1. In the grid area of the Query Viewer, click on the SQL entry you want to view. 2. In the lower pane of the Query Viewer, click the SQL tab. To view Errors 1. In the grid area of the Query Viewer, click on the SQL entry you want to view. 2. In the lower pane of the Query Viewer, click the Errors tab.
- 505. Toad for Oracle User Guide Managing Projects 503 SQL Command Recall SQL Statement Recall (History - F8) This command opens the SQL Statement Recall window and activates the History tab. To recall SQL History » Select the View | SQL Command Recall | History menu item, or press F8. Toad saves all statements in this list between sessions of Toad, in a file named PERSSQLS.DAT. SQL Statement Recall (Personal) This command opens the SQL Statement Recall window and activates the Personal SQL tab. To recall a personal SQL » Select the View | SQL Command Recall | Recall Personal SQL menu item Note: You can add a statement to this list from the Editor | Add to Personal SQLs. Toad saves all statements in this list between sessions of Toad, in a file named PERSSQLS.DAT. SQL Statement Recall (Named) Use this dialog box to pick a SQL statement from your named list of SQLs, then copy it back to the Editor window for execution. To recall a named SQL » From the View menu, select SQL Command Recall | Named SQL. SQL statements are stored in the NAMEDSQL.DAT file in the Users Files folder. Script Manager Script Manager Overview The Script Manager is a centralized location in Toad where you can manage your frequently used scripts. Using the Script Manager you can: l Organize your scripts into various categories l Access scripts easily l Execute scripts against multiple connections at once
- 506. Toad for Oracle User Guide Managing Projects 504 l Execute multiple scripts at once l Execute multiple scripts against multiple connections By default, the active connection when you open Script Manager is used as the default connection for executions, unless you specify a different connection in the connections grid. This is also used to check any Toad Security settings you may have active. Therefore, Script Manager cannot be used without an active connection. Main Script Manager Areas The Script Manager is divided into a connections grid and three tabs: scripts, output and messages. Connections grid The connections grid is tied to the Server Login window. If you execute a script against a connection in the Script Manager, the connection will also become active on your main connections. Scripts Use the script area to sort, categorize, load and run your scripts. See "Reorder Grid" (page 508) for more information. Output The output area displays the output of the selected scripts. Tabs at the bottom let you navigate between outputs. One tab is created for each script run. In addition, additional sub-tabs are added within the script tabs for each select statement contained in that script. Messages The messages area displays any system messages regarding the scripts you run. Messages are separated by a dashed divider line, and contain the script path and the message. Opening Script Manager From File Menu » From the Utilities menu, select Script Manager. Open Script Manager at Startup To set Script Manager to open at startup 1. From the View menu, select Toad Options. 2. In the left panel, select Windows. 3. In the Script Manager row, select the Auto open checkbox.
- 507. Toad for Oracle User Guide Managing Projects 505 Scripts Provided with Toad Several scripts for use with Script Manager are provided with Toad. Toad installs a folder called ScriptMgr in the main install directory for easy access to scripts. Script datafile (.sdf) files are generally saved in the user files directory; however, you can save them wherever you wish. DBA Scripts The scripts that relate to DBA work are listed in an .sdf (category) file called DBA.sdf. This file is installed in the User Files subdirectory. A folder called "DBA" will be placed in the ScriptMgr folder. The DBA related scripts provided by Toad are installed in this folder. See "Properties Files" (page 163) for more information about exact locations. By default, DBA.sdf expects Toad to be installed in "C:Program FilesQuest SoftwareToad for Oracle", which is the default directory for the installation. If this is your location for Toad, you can load DBA.sdf and proceed to use the scripts. To set script location if Toad is installed elsewhere 1. First load DBA.sdf into the Script Manager. 2. Right-click and select Batch Directory Change to change the directory for the scripts. See "Changing Script Directories" (page 510) for more information. Oracle 8i Data Dictionary scripts The .sdf (category) file Oracle 8i Data Dictionary.sdf will be installed into the same directory as Toad.exe. By default "Oracle 8i Data Dictionary" expects Oracle 8i and its associated scripts to be installed in "D:ORACLEORA817", which is a reasonable location for an Oracle 8i installation. If this is your location for Oracle 8i, you can load the Oracle 8i Data Dictionary and proceed to use the scripts. However, if Oracle 8i is installed elsewhere: 1. First load Oracle 8i Data Dictionary.sdf into the Script Manager 2. Click Move and change the directory for the scripts. See "Changing Script Directories" (page 510) for more information. Script Manager Toolbar The Script Manager toolbar lets you perform several actions with just a click of the mouse. Button Command Runs the selected scripts. Click the drop down list to run with another application, such as Quest ScriptRunner.
- 508. Toad for Oracle User Guide Managing Projects 506 Button Command Load a datafile. Use the dropdown menu to select from most recently used files. Create new Datafile. See "Appropriate Script Datafile names" (page 506) for more information. Save Datafile. Open the script options window. See "Script Manager Options" (page 513) for more information. Select the connections to use when running scripts. You can select multiple connections from the drop down list. See "Using Connections with Scripts" (page 507) for more information. Managing Script Datafiles Create New Script Datafile Script datafiles let you store your scripts for later retrieval. Each datafile can contain multiple scripts. You can use these datafiles to organize your scripts into categories, making it easier for you to find the script you need at any time. Datafiles are ASCII text files, with one line per script. Datafiles are, by default, stored with an extension of .sdf. To create a datafile 1. Open Script Manager. See "Opening Script Manager" (page 504) for more information. 2. In the Script Manager toolbar, click . 3. In the box, navigate to the appropriate directory and then enter the name you want to use for the datafile: for example, "Toad Setup Scripts". Click Save. Note: You are immediately taken to the Add Script Entry window. You do not need to add scripts at this time, you can wait and add them later. See "Adding Script Entries" (page 509) for more information. Appropriate Script Datafile names All characters used in the name must be acceptable Windows filename characters. For example, you could not name a category SQL*Plus Scripts, because the * is not a recognized character. If you attempt to name a datafile using one of these characters, the file will not be created.
- 509. Toad for Oracle User Guide Managing Projects 507 Save Datafile As You can save the current datafile with a new name. To save a datafile with a new name 1. In the Script Manager, open the datafile you wish to rename. 2. In the Script Manager toolbar, click . 3. Enter the new name for the datafile. Note: This does not delete the original datafile. Deleting a Script Datafile You can delete script datafiles from the Windows Explorer, as you would any other file. Using Connections with Scripts In the Script Manager, you can use different connections with scripts. These can be saved with each datafile, or as a global value for use with all scripts. If the directory contains the path to Toad, it is stored as a relative directory. Connections you use for execution can be stored as defaults and saved in the datafile. To use the datafile defaults 1. Click . 2. Select Set to datafile defaults. To save a datafile default 1. Load the datafile to which you want to add connection defaults. 2. Click the Script Manager options button. 3. In the Default Execution Connections area, click Add and add the connections you want these scripts to execute against. 4. Click OK. 5. Click . 6. Name the datafile and click Save.
- 510. Toad for Oracle User Guide Managing Projects 508 Manage Script Entries Using the Script Grid The script grid in the Script Manager works in much the same way as many of the other data grids in Toad. See "Editing Script Entries" (page 509) for more information about editing entries in the grid. To access the script grid » Click the Scripts tab. Reorder Grid You can reorder the script entries using the arrows above the grid. While clicking in the column header will temporarily sort the grid, using these buttons will permanently change the order. This allows you to specify the order scripts will execute. Selected scripts execute from the top of the permanent grid order to the bottom. To reorder scripts in the grid 1. Select the script you want to move. 2. Click to move the script up in the list. 3. Click to move the script down in the list. Print Grid To print the script grid for a datafile 1. Open the datafile you want to print. 2. From the Grid menu, select Print Grid. 3. Select the options you want and click OK. The grid prints. Script Grid Toolbar The script grid toolbar is located on the Scripts tab of the Script Manager. From this toolbar, you can act on any of the scripts listed within the grid. Button Command Add Script to datafile - See "Adding Script Entries" (page 509) for more information. Edit scripts - See "Editing Script Entries" (page 509) for more information. Delete selected scripts - See "Removing Script Entries" (page 510) for more information.
- 511. Toad for Oracle User Guide Managing Projects 509 Combine selected scripts - See "Combining Script Entries" (page 512) for more information. Schedule scripts to run - See "Scheduling Scripts" (page 510) for more information. Print the script grid - See "Reorder Grid" (page 508) for more information. Move row up Move row down Group by Size Columns Adding Script Entries After you have created script datafiles in the Script Manager, you can add scripts to the categories. To add a script entry 1. Open the datafile where you want to file the script. 2. Click the Scripts tab, and then . 3. The Save As dialog box appears. This allows you to browse for the scripts you want to add with this Description and Use. Select the scripts you want (you can multi-select by holding down <Ctrl> as you click them) and then click Save. Enter a group in the Group box. For example, if you use this script for quality assurance, you can create a QA group: enter "QA". Note: More than one script can share the same description. Press Tab or click in the Description box. 4. Enter a Description of the script. More than one script can share the same Description. Click Add to continue adding scripts. Note: The scripts you have selected are listed in the filenames area of the Add Script Entry dialog box. 5. Click OK. The scripts are now added to the grid. The Use and Description are the same for all the scripts you added. Editing Script Entries Once scripts have been entered into categories in the Script Manager, you can edit the entries. To edit entries 1. From a datafile that contains scripts, click in a script name and click (right-click and select Edit).
- 512. Toad for Oracle User Guide Managing Projects 510 2. Change the description, use, or pathname for the script. Note: The script must exist in the new location before you change the pathname. Removing Script Entries To remove script entries 1. From a datafile that contains scripts, select and highlight the scripts you want to remove. 2. Click on the Scripts tab toolbar (right-click and select Remove Scripts). Confirm that you want to permanently remove the scripts from the datafile by clicking Yes. Note: This does NOT remove scripts from your hard drive. Only from the datafile you have selected. Changing Script Directories You can change the directory for all the scripts in a selected Script Manager category. To change all script directories 1. In the script column of the script grid, select a g(top) node. 2. Right-click and select Batch Directory Change. 3. Do one of the following: l Enter the new pathname of the directory. l Click the drill down button and select the correct directory. 4. Click OK. The directory for all the scripts in this category is changed. Note: Using this command does not actually move scripts from one directory to another. If the directory column is pointing to the wrong directory, this procedure allows you to easily point to the correct directory to access your scripts. Scheduling Scripts You can use Script Manager to schedule scripts to be run at a later time or date. Note: Scripts scheduled for execution will execute using Quest ScriptRunner. To schedule scripts 1. In the Script Manager, select the scripts you want to schedule. 2. Click on the Scripts tab toolbar. 3. If you have selected multiple scripts, you are asked to decide to combine or not. Click Yes or No.
- 513. Toad for Oracle User Guide Managing Projects 511 4. Complete the scheduling process using the Add Task wizard that appears. See "Add Task Wizard" (page 763) for more information. Grouping Scripts To group scripts 1. In the Scripts tab toolbar, click the Group by button. 2. Choose one of the following: l Group by <none> Choosing None does not group your scripts at all. They are simply listed in the order you have chosen to display them (this order is, by default, the order they were added to the datafile, but you can change it by using the move up and move down buttons in the script grid toolbar). l Group by Use Choosing Use groups all of your scripts by the Use field that you have designated. Each use field is displayed as a node, with scripts listed below it. This is one of the most powerful selection options. l Group by Extension Choosing Extension groups all your scripts by extension. Each extension (.sql, .prc, etc) becomes the top node and all scripts are grouped under it. l Group by Directory Choosing Directory groups all your scripts by their directory. The directory becomes the top node and all scripts are grouped under it. Viewing Scripts Once you have scripts entered in your Script Manager, you can view your scripts easily. To view a script 1. From the Script Manager, Scripts tab, open the datafile where your script is located. 2. If necessary, expand the top-level node to display your scripts. 3. Select the scripts you want to view. 4. Right-click and select View from the menu. Note: A copy of Notepad opens for each script you have checked.
- 514. Toad for Oracle User Guide Managing Projects 512 Loading Datafiles You can load a datafile of a Script Manager category. This can be useful if someone sends you a category and the scripts used in it. To load the datafile (category) 1. In the main Script Manager toolbar, click the Open Datafile button. 2. Select the datafile you want to load. The extension for datafile is .sdf. The loaded file appears in the Script Manager. Check the pathnames in the Directory column of the new scripts. If these pathnames do not correspond to how your computer is organized, you will have to either change the pathnames or move the scripts, or the scripts will be inaccessible. See "Editing Script Entries" (page 509) for more information. Combining Script Entries You can use the Script Manager to combine two or more scripts into one. The scripts must reside in the same datafile to combine them. Once combined, the new script is automatically added to the active datafile. To combine scripts into a single script 1. From the Script Manager, select the datafile where your scripts reside. 2. In the script grid, select the scripts you want to combine. Click on the Scripts tab toolbar. Note: the default pathname is the same as that of the scripts you have combined. If you want to put the scripts in a different directory, you can enter a full pathname here. Execute Scripts Execute Scripts using Options When you execute a script from the Script Manager you can set various options that define how the script is run. To select scripts to execute 1. From the Script Manager, select the datafile you want to work with. 2. Select the scripts you want to run. To set options 1. In the Script Manager toolbar, click . 2. Set options and click OK.
- 515. Toad for Oracle User Guide Managing Projects 513 Execute the Scripts You can execute scripts from the Script Manager within Toad or by using Quest ScriptRunner. You can execute scripts against any of your databases. If you do not have a live connection, Toad will open a connection and close it when the script has completed running. To execute the scripts 1. Select the scripts you want to run. 2. Do one of the following: l Right-click and select Run. l Right-click and select Run in Quest Scriptrunner. Script Manager Options This topic only covers unfamiliar information. It does not include all step and field descriptions. To set options 1. From the Script Manager toolbar, click . 2. Refer to the following for additional information: Option Information Execution Options Use single file Include entire path in the filename. Use separate file for each script (autonamed) This option creates a separate file for each script. In this case, Toad will name the files for you. You do, however still need to specify the directory where you want the files saved. Caution: Files are saved as the original script name, with a .txt extension. If your original scripts had a .txt extension and you choose the directory where they are located, they will be overwritten by the new files. Filename Can be global or specific to the datafile (.sdf). Run from Grid If you do not want to go through the options steps (See "Execute the Scripts" (page 513) for more information), you can run your scripts directly from the grid, using the Editor or Quest ScriptRunner.
- 516. Toad for Oracle User Guide Managing Projects 514 To run a script from the grid 1. From the Script Manager, select the category that houses the script you want to execute. 2. Right-click the script, and select Run from the menu, or click the run button on the toolbar. Note: If you are running a long script and want to continue working as it executes, you may prefer to select Run using Quest ScriptRunner. This will allow you to run the script in the background and continue working. 3. SQL Editor or Quest ScriptRunner opens the selected script and executes it. Execute Scripts against Multiple Connections You can execute your scripts in multiple connections at one time. The Connections to Use Grid contains the connections you can use when you run scripts. If a connection you want to use is not displayed in the grid, you can add it. If a connection is not active at the time you execute the script, Toad will create a new connection and then close it when the script has executed. To Execute scripts against multiple connections 1. In the connection grid, click Add and add the connections you want to use for execution. (Unless you have saved specific connections with the .sdf file you are using) Note: Connections are tied to the Server Login window: you must have connected to the server you want to use previously for it to be displayed here. 2. Click and set the following options: a. Select Spool output to file. b. Select Use single file. c. Enter the filename you want to use for the execution. Because the settings on this window are remembered, you can set this either as a global filename for all scripts, or as a filename specific to the datafile (.sdf) you are using. d. Select the connections you want to use. l Save and load from each datafile will use the connections you have saved with the datafiles containing your scripts. l Save and load from a single list will use the list you created in step 1. e. Click OK to apply options. 3. Click to execute the scripts. Output When you have executed a script against multiple connections, output is displayed in the Script Manager window as well as saved to file.
- 517. Toad for Oracle User Guide Managing Projects 515 Messages Tab The messages tab becomes active when scripts are executed. This tab lists errors, and which scripts have been run against which databases Note that these messages are NOT saved to file automatically. If you want a record of the messages tab, you will need to save it manually by copying and pasting into another document. Output tab The output window includes tabs for Output and any Grid output provided, as well as environment information. Each script instance is listed on a tab at the bottom of the window, by script name. This means, for example, if you ran the script version.sql against two databases, there will be two tabs named "version.sql". Clicking on them will provide the output for that execution. The text file you saved will include detailed output for each execution. Quick Scripts Configure QuickScripts List The QuickScripts list is a dropdown menu found on the File | Run Script menu. See "Running or Loading QuickScripts" (page 515) for more information. Before you can run a QuickScript, you must configure the QuickScripts List. To configure the QuickScripts list 1. Scripts can be selected from more than one datafile. From the Script Manager, select the datafile where the script resides. 2. In the script grid, click in the On File Menu check box for the scripts you want listed. This adds them to the QuickScript list. Note: To list all of scripts in a Use group, select the box for that node. All scripts within it are selected. 3. Repeat steps 1 and 2 for all datafiles and scripts you want to list. Running or Loading QuickScripts Once QuickScripts are configured from the Script Manager, you can run or load them from the toolbar or the File menu.
- 518. Toad for Oracle User Guide Managing Projects 516 To run a QuickScript from the toolbar 1. On the main toolbar, click (the arrow). 2. Select one of the datafiles. 3. Select the script from the list. Note: The script is run in a new Editor tab. To run a QuickScript from the File menu 1. Select File | Run Script. 2. Select a datafile from the submenu. Select the script you want to run. Note: The script is run in a new Editor tab. To load a QuickScript from the toolbar or the file menu 1. In the Script Manager Options page, make sure Load Only (no execute) is selected. See "Script Manager Options" (page 513) for more information. 2. Follow the instructions listed above for running QuickScripts. Scripts will be loaded instead of run. To run a QuickScript from other areas in Toad » In other areas of Toad (for example, Project Manager and Database Browser) right-click and select Execute Quick Scripts to run a selected script.
- 519. Monitoring Toad Server Statistics You get to this window by the Database | Monitor | Server Statistics menu item. Use this window to view information about how the Oracle instance is performing. All grids can be exported, printed, sorted, and incrementally searched. This window displays: Analysis Click the Analysis tab to see information analyzing the various statistics, including comments and warning lights. See "How to create your ToadStats.ini file" (page 160) for more information about setting the warning light threshold values. See "Toad Server Statistics | Analysis" (page 157) for more information about required permissions. Waits Click the Waits tab to see total waits and timeouts by event. See "Toad Server Statistics | Waits" (page 158) for more information about required permissions. Latches Click the Latches tab to see gets, misses, and sleeps data for all latches. See "Toad Server Statistics | Latches" (page 158) for more information about required permissions. Sessions Click the Sessions tab to display information on the sessions. More detailed information can be found by clicking one of the sessions in the top grid. Details are displayed in the lower grid. See "Toad Server Statistics | Sessions" (page 158) for more information about required permissions. 15
- 520. Toad for Oracle User Guide Monitoring 518 Instance Summary Click the Instance Summary tab to display information about the various statistics. This grid includes the statistic number, statistic name, and value. See "Toad Server Statistics | Instance Summary" (page 158) for more information about required permissions. Monitor If you do NOT have the DB Admin module, the monitor tab appears here as well. This monitor tab displays several small graphs that let you monitor memory usage across time. Each refresh adds more data to the right hand portion of the graph. Data left of the vertical blue line shows what was most recently added. These charts are an overview only. If you need consistently reliable data about the memory usage of your database, using the Database Monitor in the DB Admin Module is recommended. SQL Monitor You can use the SQL Monitor to monitor SQL statements that are working on your database. This is a separate utility from Toad, and you can get help for it after you open it by pressing F1, or selecting Help | Contents. Toad UNIX Monitor Note: This Toad feature is only available in the commercial version of Toad with the optional DB Admin Module. To access the Toad UNIX Monitor » From the Database menu, select Monitor | UNIX Monitor menu item. The UNIX Monitor lets you monitor database performance with three charts and a grid: CPU Usage Rracks CPU usage by system and user Process Queues Monitors runnable and blocked/waiting processes (these vary by UNIX system; they may be blocked on I/O wait or timed out of CPU usage for its timeslice) Disk IO in Kb/Sec For the top 10 devices. Process list grid Breaks information down by user. The process list displays the top 20 CPU usage processes, sorted by
- 521. Toad for Oracle User Guide Monitoring 519 %CPU as a default. Click a column header to sort that column. You can sort, zoom and print grid columns. UNIX Monitor fully supports AIX, HP, Linux, and Solaris. UNIX Monitor supports TRU64; however, the Disk I/O Graph will remain empty for this UNIX version. Note: The server must be running Rexecd in order to use this utility. See "RExec" (page 759) for more information about RExec; or see your UNIX administrator. The UNIX Monitor mustbe launched and connected in order to work. So, you can launch it in the morning, minimize the window, and later in the day if a threshold is crossed you will be alerted. Requirements To use the UNIX Monitor, no special permissions are required. However, the user must be able to get through any firewall present. The following commands are used, and need to be installed and enabled on the UNIX machine: l RExec - Used to drive the monitor. Note: The server must be running Rexecd in order to use this utility. In addition, some variants of UNIX may handle an rexec as an rlogin. These may automatically execute login files such as ".profile". In this case, extraneous output commands such as echoing "motd" (message of the day) may interfere with Toad's parsing of the output. l lostat - Used to get the disk io information. l vmstat - Used to obtain cpu information l ps - Used to process queues and lists. Troubleshooting There are potential connection issues with UNIX that are beyond our control. As part of the connection process, the rexecd daemon performs a "reverse name lookup" by default. This means the server verifies the rexec source machine’s IP address against its own/etc/hosts file, and denies the connection if the source IP address is not found. For server-to- server rexecs, this makes sense because the servers often have hard coded and well known IP addresses. For network clients, this is often not the case. Few companies want to deal with placing the IP addresses of every PC in each server’s/etc/hosts file. Many companies use DHCP for their network clients. The IP addresses are not well known and are not constant. The solution is to turn off "reverse name lookup" by editing the /etc/inetd.conf file and adding the –c parameter to the rexecd command. Then either reboot the server or refresh –s inetd.
- 522. Toad for Oracle User Guide Monitoring 520 Refresh rate To automatically refresh the data in the charts, you must do two things. To set the automatic refresh 1. Check the Auto refresh check box. 2. Select a refresh interval from the Refresh rate dropdown menu. You can manually refresh the data by clicking the Refresh button. Zoom To zoom a graph » Zoom in on a specific area by dragging a rectangle from left to right. around the area you want to zoom. To restore a graph » Drag a rectangle from the right to left, and the chart will zoom back to 100%. Connecting In order to use the UNIX monitor, you must be connected to the UNIX server you want to monitor. To connect to the UNIX server 1. To connect, click the Connect button. 2. Enter the appropriate information in the Server Settings dialog. See "Server Settings" (page 750) for more information. 3. Click OK to connect. Viewing Graph History The graphs take two or three iterations of the selected refresh cycle to initialize and then quickly fill in. After the graphs are full (one hour), the data scrolls off screen but is not cleared. You can see a two hour history using right-click | Zoom. (This is also true for the Database Monitor. See "Toad Database Monitor" (page 535) for more information.) Select Zoom.
- 523. Toad for Oracle User Guide Monitoring 521 ADDM/AWR ADDM/AWR (OEM) Note: This Toad feature is only available in the commercial version of Toad with the optional DB Admin Module. In Oracle versions 10g and up, the Automatic Database Diagnostic Monitor (ADDM) provides a holistic tuning solution. ADDM analysis can be performed over any time period defined by a pair of Automatic Workload Repository (AWR) snapshots taken on a particular instance, as long as the following requirements are met: l Neither snapshots encountered any errors during creation and neither have been purged. l There were no shutdown or startup actions between the two snapshots. ADDM and AWR reporting can document both problem areas and areas of the database that are running smoothly. For full information about ADDM/AWR reporting, please see your Oracle documentation. Note: By default, unless you have instructed Toad to make this window accessible, this functionality is disabled. You can restore functionality from View|Toad Options|Windows and clicking the Available checkbox in the appropriate row of the grid. Toad's ADDM/AWR window in Toad lets you: l Generate reports - For more information, see: l Generating an ADDM Report (page 523) l Generating an AWR Report (page 524) l Generating an AWR SQL Report (page 524) l Generating an AWR Diff Report (page 525) l Generating an ASH Report (page 526) l Copy reports to clipboard. l Print reports. l Save reports to file. l Manage Snapshots (view stats, create, delete). l Manage Baselines (view, create, delete). ADDM also documents the non-problem areas of the system. For example, wait event classes that are not significantly impacting the performance of the system are identified and removed from tuning consideration at an early stage, saving time and effort that would be spent on items that do not impact overall system performance.
- 524. Toad for Oracle User Guide Monitoring 522 In addition to problem diagnostics, ADDM recommends possible solutions. When appropriate, ADDM recommends multiple solutions for the DBA to choose from. ADDM considers a variety of changes to a system while generating its recommendations. To access the ADDM/AWR window » From the Database menu, select Monitor | ADDM/AWR AWR Browser (OEM) Overview Note: This Toad feature is only available in the commercial version of Toad with the optional DB Admin Module. The Toad AWR Browser supports AWR in Oracle 10g and newer. It displays performance metrics between AWR snapshots in great detail. You can use this ability to track, compare and organize your statistics. From the AWR Browser window, you can select snapshots; create new snapshots; select, display and print charts; program custom charts; and various other combinations. The browser window makes it easy to access the power of the data collected by Oracle's AWR feature. For the most part, the AWR Browser works in the same way as the Statspack Browser, and all but two of the same charts are available. For more detailed information on working with snapshots and charts, please see the Statspack Browser help topics. Note: By default, unless you have instructed Toad to make this window accessible, this functionality is disabled. You can restore functionality from View|Toad Options|Windows and clicking the Available checkbox in the appropriate row of the grid. To access the AWR Browser » From the Database menu, select Monitor | AWR Browser. The Browser Window The AWR Browser window is divided into three areas: a list of snapshots, a list of charts, and a right hand panel where charts and advice are displayed. These areas work together to display the metrics you need to see. Snapshot List Area The snapshot list area lists the snapshots that have been collected by the AWR. To create charts based on these snapshots, you can select or clear the checkbox to the left of the snapshot name. By default, the AWR browser will select up to the most recent 24 hours worth of snapshots with the same database start time. Chart List Area Several charts and grids have been built into the window, or you can easily add your own in addition to those provided. Select or clear the checkbox to the left of the chart you want to view
- 525. Toad for Oracle User Guide Monitoring 523 or hide. Selected charts are created for the selected snapshots. Right-click to select all, none, and so on. Chart Display You can display up to nine charts at a time, in a three by three chart area. See "Configuring the viewing area" (page 576) for more information on configuring the viewing area. Advice Display Toad displays advice in the right hand panel. When two snapshots are selected (not checked, but highlighted), click the Advice tab for information about the top wait event during the selected interval. You can also double-click the top waits grid in the chart display area to display advice about that wait. Generating an ADDM Report Note: This Toad feature is only available in the commercial version of Toad with the optional DB Admin Module. You can easily generate an ADDM report from Toad. To generate an ADDM report 1. From the Database menu, select Monitor | ADDM/AWR Reports. 2. Click the ADDM/AWR Report tab. 3. Select the appropriate Instance from the Instance drop down box. 4. Click to select: l Starting snapshot l Ending snapshot Baseline range Note: To shorten the list of snapshots in the data select dialog, you can select Filter by ID and use the Quickfilter box to filter the list. 5. Click OK. 6. Click on the Report Generator toolbar. The report displays in the ADDM Report tab below the selection fields. Working with ADDM Reports Note: This Toad feature is only available in the commercial version of Toad with the optional DB Admin Module. After you have generated an ADDM report, you can read it on screen in Toad, or alternately, you may want to work with it in another format.
- 526. Toad for Oracle User Guide Monitoring 524 To copy the ADDM report to the clipboard » Run an ADDM report, and then click button. To print the ADDM report » Run an ADDM report, and then click button. To save the ADDM report to a file » Run an ADDM report, and then click . Generating an AWR Report Note: This Toad feature is only available in the commercial version of Toad with the optional DB Admin Module. You can easily generate an AWR report from Toad. To generate an AWR report 1. From the Database menu, select Monitor | ADDM/AWR. 2. Click the ADDM & AWR Reports tab. 3. Select the appropriate instance from the Instance list. 4. Click to select: l Starting snapshot l Ending snapshot Baseline range Note: To shorten the list of snapshots in the data select dialog, you can select Filter by ID and use the Quickfilter box to filter the list. 5. Click OK. 6. Click on the Report Generator toolbar. 7. Select the AWR Report - HTML Format tab or the AWR Report - Text Format tab to view the report in either of those formats. Generating an AWR SQL Report Note: This Toad feature is only available in the commercial version of Toad with the optional DB Admin Module. If you are using Oracle 10.2 or higher, you can generate an AWR SQL report from Toad.
- 527. Toad for Oracle User Guide Monitoring 525 To generate an AWR SQL report 1. From the Database menu, select Monitor | ADDM/AWR. 2. Click the AWR SQL Report tab. 3. Select the appropriate instance from the Instance drop down box. 4. Click to select: l Starting snapshot l Ending snapshot Baseline range Note: To shorten the list of snapshots in the data select dialog, you can select Filter by ID and use the Quickfilter box to filter the list. 5. Click OK. 6. Click and select a SQL ID. 7. Click OK. 8. Click on the AWR Report Generator toolbar. 9. Select the HTML tab or the Text tab to view the report in either of those formats. Generating an AWR Diff Report Note: This Toad feature is only available in the commercial version of Toad with the optional DB Admin Module. If you are using Oracle 10.2 or higher, you can generate an AWR differences report from Toad. To generate an AWR Diff report 1. From the Database menu, select Monitor | ADDM/AWR. 2. Click the AWR Diff Report tab. 3. In the Compare This area, select the appropriate instance from the Instance drop down box. 4. Click to select: l Starting snapshot l Ending snapshot Baseline range Note: To shorten the list of snapshots in the data select dialog, you can select Filter by ID and use the Quickfilter box to filter the list. 5. Click OK. 6. In the To This area, select the appropriate Instance from the Instance drop down box.
- 528. Toad for Oracle User Guide Monitoring 526 7. Click to select: l Starting snapshot l Ending snapshot Baseline range Note: To shorten the list of snapshots, you can select Filter by ID and use the Quickfilter box to filter the list. See "Using the QuickFilter Box" (page 993) for more information. 8. Click OK. 9. Click on the AWR Diff Report Generator toolbar. 10. Select the HTML tab or the Text tab to view the report in either of those formats. Generating an ASH Report Note: This Toad feature is only available in the commercial version of Toad with the optional DB Admin Module. You can generate an Active Session History (ASH) report from Toad. To generate an ASH report 1. From the Database menu, select Monitor | ADDM/AWR. 2. Click the ASH Report tab. 3. Select the appropriate Instance from the Instance drop down box. 4. Select the Starting date and time from the appropriate boxes. 5. Select the Ending date and time from the appropriate boxes. 6. Click on the ASH Report Generator toolbar. 7. Select the HTML tab or the Text tab to view the report in either of those formats. Data Select Dialog Use the Data select dialog to select the snapshot to use in the selected ADDM/AWR report. See "ADDM/AWR (OEM)" (page 520) for more information.You can use this dialog to select starting and ending snapshots, or a baseline snapshot. To access data » In one of the ADDM/AWR report tabs, click a drill-down button to select a snapshot, SQL ID, or baseline. Filtering the Data Grids You can filter the data grid using the Quickfilter box at the bottom of the dialog.
- 529. Toad for Oracle User Guide Monitoring 527 To filter the grid 1. Select the Filter by check box. 2. Enter your filter criteria in the Quickfilter box below the check box. See "Using the QuickFilter Box" (page 993) for more information. Selecting data Only one row may be selected at one time. To select data 1. Select data by clicking on a row in the data grid. 2. If desired, edit the query, or insert variables. 3. Click OK. Editing the SELECT query When you have selected a row, you can edit the query before it is sent to Oracle. You should limit yourself to editing the WHERE and ORDER BY clauses. To edit the query 1. Select data. 2. Click the Edit Query button. 3. Edit the Where or Order By clause. 4. Optionally, click the Check button to check your query for syntax errors. 5. Click OK. Snapshot Management ADDM/AWR Snapshot Management Note: This Toad feature is only available in the commercial version of Toad with the optional DB Admin Module. The ADDM/AWR Snapshot Management tab lets you manage your snapshots. The Snapshot Management tab is divided into two areas: collection settings, and snapshot details. Collection Settings Collection settings are the settings that Oracle uses to define how often to take a snapshot and how long to keep it. The format is: +dd hh:mm:ss:nnnnnnn.
- 530. Toad for Oracle User Guide Monitoring 528 Snapshot Interval Snapshot interval specifies the interval at which Oracle will take snapshots. The default is one hour: +00 01:00:00:000000 Retention Retention specifies how long the snapshot will be maintained. The default is seven days: +07 00:00:00.000000 Top N SQL For the Top SQL to flush for each SQL criteria, you can choose to use: Default Uses Top 30 for statistics level TYPICAL, and Top 100 for statistics level ALL. Maximum Captures the complete set of SQL in the cursor cache. Specify Uses the number you specify: Enter the value into the number box. This value is not affected by the statistics or flush level. It will override system default behavior for AWR SQL collection. Snapshots The Snapshots area displays snapshots information in a data grid. In addition, from the toolbar you can: l View Snapshot Statistics l Create a New Snapshot l Drop a Snapshot Range The options change with the selection you make. View Snapshot Statistics Note: This Toad feature is only available in the commercial version of Toad with the optional DB Admin Module. From the Snapshot Management tab you can view aggregate Snapshot statistics for snapshots on the current connection. In addition, if you are connected as SYS, you can also deallocate unused AWR space or shrink AWR objects.
- 531. Toad for Oracle User Guide Monitoring 529 To view snapshot statistics 1. From the ADDM/AWR window, click the Snapshot Management tab. 2. In the Snapshots area, statistics are displayed in a data grid. Statistics display in the columns to the right of the list of snapshot numbers. To deallocate unused AWR space 1. From the ADDM/AWR window, click the Snapshot Management tab. Note: You must be connected as SYS to perform this function. 2. In the Snapshots area, click . To shrink AWR objects Note: You must be connected as SYS to perform this function. 1. From the ADDM/AWR window, click the Snapshot Management tab. 2. In the Snapshots area, click View Snapshot Statistics. 3. Click . ADDM/AWR Create New Snapshot Note: This Toad feature is only available in the commercial version of Toad with the optional DB Admin Module. You can create a new snapshot from the ADDM/AWR window. See "ADDM/AWR (OEM)" (page 520) for more information about the ADDM/AWR window. To create a new snapshot 1. From the ADDM/AWR window, click the Snapshot Management tab. 2. In the Snapshots area, click . 3. Select one of the following: l Flush Level: Typical l Flush Level: All 4. Click OK to create the snapshot. Note: An information window displays listing the Snapshot ID of the new snapshot: for example, "Snapshot ID 6517 has been created." 5. Click OK.
- 532. Toad for Oracle User Guide Monitoring 530 ADDM/AWR Drop Snapshot Range Note: This Toad feature is only available in the commercial version of Toad with the optional DB Admin Module. To drop a snapshot range 1. From the ADDM/AWR window, click the Snapshot Management tab. See "ADDM/AWR (OEM)" (page 520) for more information about the ADDM/AWR window. 2. Select the snapshots you want to drop. 3. In the Snapshots area, click Drop Selected Snapshots. 4. Beside the Starting Snapshot box, click . 5. In the Data Select Dialog, select the starting snapshot and click OK. 6. Beside the Ending Snapshot box, click . 7. In the Data Select Dialog, select the ending snapshot and click OK. 8. Click OK to confirm. Baseline Management ADDM/AWR Baseline Management Note: This Toad feature is only available in the commercial version of Toad with the optional DB Admin Module. You can use the Baseline Management tab to view and control various baselines for ADDM/AWR reports. See "ADDM/AWR (OEM)" (page 520) for more information. You can view established baselines from the navigator on the left side of the window. Baselines are listed by name in the grid. Baselines are listed by Database ID, but the grid can be sorted by any column by clicking in the column header. To view a baseline » In the Baselines navigator, click on a baseline name. The baseline information displays in the right hand area, and includes: l Baseline ID. l Baseline Name. l Starting Snapshot ID. l Starting Snapshot time. l Ending Snapshot ID. l Ending Snapshot time.
- 533. Toad for Oracle User Guide Monitoring 531 Creating a Baseline Note: This Toad feature is only available in the commercial version of Toad with the optional DB Admin Module. You can create a new baseline range of snapshots from the ADD/AWR window. When creating a baseline, the Baseline ID, starting Snapshot Time and ending snapshot time are set automatically. To create a new baseline 1. From the ADDM/AWR window, click the Baseline Management tab. 2. Click . 3. Enter a name for the baseline in the Baseline Name box. 4. Enter a starting Snapshot ID, or click and select one from the Data Select Dialog. 5. Enter an ending Snapshot ID, or click and select one from the Data Select Dialog. 6. Enter the number of days you want to leave the baseline active in the Expiration box. If you do not want to the baseline to expire, leave this box blank. 7. Click OK. Dropping a baseline Note: This Toad feature is only available in the commercial version of Toad with the optional DB Admin Module. You can easily drop a baseline from the ADDM/AWR Reports | Baseline Management tab. To drop a baseline 1. In the Baselines grid select the baseline you want to drop. 2. Click . 3. Choose to either: l Drop Baseline only Drop Baseline and all Associated Snapshots Note: Dropping all associated snapshots could impact other baselines. 4. Click OK. Baseline Template Management Note: This Toad feature is only available in the commercial version of Toad with the optional DB Admin Module.
- 534. Toad for Oracle User Guide Monitoring 532 If you are using Oracle 11g or higher, you can use the ADDM/AWR reports page to track your baseline templates. Viewing Baseline Template Information When you view the baseline template information, Toad places all templates into a data grid To track baseline template management information. 1. From the Database | Monitor menu, select ADDM/AWR. 2. Click the Baseline Template Management tab. 3. You now can sort the template grid by any column desired: click on the column heading to do so. Creating New Templates You can create a new baseline template directly from this window. For details about baseline templates and how to use them, see your Oracle documentation. To create a new template 1. From the ADDM/AWR window, click the Baseline Template Management tab. 2. Click . 3. In the Create Baseline Template window, enter a name for both the template and the baseline in the appropriate boxes. 4. Select either Expression or Literal for the start time, and select a start date and time from the drop down boxes. 5. Select either Expression or Literal for the end time, and select an end date and time from the drop down boxes. 6. In the Expiration box, enter the number of days until the baseline template expires, or leave it blank for no expiration. 7. If the template will be repeating, select the Repeating check box and enter the Day, Hour and duration the template should repeat. 8. Click OK to create the template. Dropping a Baseline Template 1. From the ADDM/AWR window, click the Baseline Template Management tab. 2. Select the template you want to drop. 3. Click . 4. Click Yes to confirm.
- 535. Toad for Oracle User Guide Monitoring 533 Database Browser Database Browser Note: This Toad feature is only available in the commercial version of Toad with the optional DB Admin Module. This window lets you see information across multiple schemas or servers. You can select multiple schemas or servers; view a variety of summary information for them; perform pings and tnspings on them; or open common Toad windows for them. Note: Some V$ synonyms are required for this feature. See "V$ Tables Required" (page 153) for more information. An online video tutorial is also available for this feature. This video opens in a new browser window and requires an internet connection. To access the Database Browser » From the Database menu, select Monitor | Database Browser. Tree view The left side tree view is initially created from your tnsnames file and then saved into a file called DatabaseBrowser.tdb in your Toad directory. You can add or delete server and schema nodes to make the tree more manageable. You can also check the Connected servers only box to display only the connected servers. Database Nodes You can set properties for individual nodes by selecting a node, right-clicking it and choosing Properties. You can also perform the following operations on nodes: l Connect l Disconnect l Associate with a schema (valid only for schema nodes) l Rename l Remove l Startup l Shutdown l Alter l View and modify properties, including default schema and choosing to auto connect
- 536. Toad for Oracle User Guide Monitoring 534 These operations can be performed on multiple database nodes at the same time. For instance you can connect to multiple servers by selecting them and choosing Connect. If you choose Connect while on a server node, connections will be created for all the database nodes under that server. Database Objects nodes Beneath the database node is a group of object nodes for that database. Click on one of these to open an embedded Schema Browser for that object type in the right hand side of the Database Browser. See "Schema Browser Window Overview" (page 978) for more information. In addition to the standard objects, there is also a Schema Objects node. Click this node to open an embedded schema browser in which you can limit your browsing by schema as well as object type. Summary Information Select a node or group of nodes from the tree view. On the right hand side of the window, summary information is displayed for the connections you have selected. In some cases you can get "roll up" information for all of your databases or servers at once. For example l Space Usage tab displays totals for Megs Allocated, Used and so forth l Datafile IO tab displays the Total IO of all your selected databases. Tabs provide access to the summary information as follows: l Overview l Instance l Database l Options l Parameters l Sessions l Top Sessions l RBS Activity l Space Usage l Datafile IO The Instance and Database tabs offer two views: single record and grid view. The single record view is useful on these tabs because of the number of columns displayed. The Top Sessions tab has a SQL tab at the bottom. This tab allows you to view the full, formatted SQL statement of the current record selected on the Grid tab.
- 537. Toad for Oracle User Guide Monitoring 535 Database Browser Toolbar Note: This Toad feature is only available in the commercial version of Toad with the optional DB Admin Module. Button Command New Server New Database Refresh Data Perform Ping or TNS Ping on selected objects Open a Schema Browser for selected databases Open an Editor for selected databases Find Object Open Server Side Object Wizard Open DB Health Check Open Database Monitor Database Monitor Toad Database Monitor Note: This Toad feature is only available in the commercial version of Toad with the optional DB Admin Module. The Database Monitor lets you track database performance with nine charts: Logical IO, Physical IO, Event Waits, Sessions, Call Rates,Miss Rates,SGA Memory Usage,Shared Pool, and Indexed Queries %. There is a horizontal scroll bar to allow you to see all the charts.
- 538. Toad for Oracle User Guide Monitoring 536 The Database Monitor must be launched in order to track performance. So you can launch it in the morning, minimize the window, and later in the day if a threshold is crossed you will be alerted. Note:Access to some V$ tables are required to use this option. See "Database | Monitor | Database Monitor " (page 155) for more information about these permissions. To access the Database Monitor » From the Database menu, select Monitor | Database Monitor. RAC Connection Within the database monitor, all information is provided by single connections. However, it is summarized or aggregated for all the instances that compose the RAC cluster. For example, looking at SGA memory - if each RAC instance is 150 MB, and you have two RAC instances, this column will display 300MB. SYS view warning When you first log into the Database monitor, you may get a warning dialog box stating that you are missing the "SYS view, X_$KSLLT" view. Without this view, the Latch series on the Miss rates chart will be zero. l If this dialog box appears, you can check the "Don’t show this message again" check box in the lower left corner and it will not display again. In order to obtain data for the latch series, connect as SYS and execute the following SQL: CREATE OR REPLACE VIEW x_$ksllt AS SELECT * FROM x$ksllt; GRANT SELECT ON sys.x_$ksllt TO PUBLIC; l Click Close to continue using the Database Monitor. Zoom To zoom a graph » Zoom in on a specific area by dragging a rectangle from left to right. around the area you want to zoom. To restore a graph » Drag a rectangle from the right to left, and the chart will zoom back to 100%.
- 539. Toad for Oracle User Guide Monitoring 537 Print To print a graph » Right-click the graph you want to print and select Print. The job is automatically sent to the printer. Save To save a graph 1. Right-click the graph you want to save and select Save. 2. Select the format you want the file to have: l XLS l HTML l Bitmap 3. Enter a filename for the graph, or use the default. 4. Click OK. Database Monitor Toolbar Note: This Toad feature is only available in the commercial version of Toad with the optional DB Admin Module. The Database Monitor toolbar provides access to the features of the entire database monitor. Icon Command Change Active session. Flush the Cache. Refresh Data. Alerts. Save chart Options Instance If you are connected to a RAC instance, use this drop down menu to select
- 540. Toad for Oracle User Guide Monitoring 538 Icon Command the instance you want to monitor. Database Monitor Email Alerts Note: This Toad feature is only available in the commercial version of Toad with the optional DB Admin Module. The alerts window displays all alerts that have occurred since you either opened the monitor or last cleared the window. Emails are listed at the bottom of the window. To view email alerts 1. On the toolbar, click . 2. Click one of the following: l Clear to clear the alerts l Close to close the window Save to save the alerts as a text file Note: In addition, you can choose to enable or disable alerts. If you have enabled email alerts, you will need to set up your email options from the View | Options | Email window. Flushing the SGA or Buffer Cache Note: This Toad feature is only available in the commercial version of Toad with the optional DB Admin Module. From the Database Monitor you can flush the SGA or the buffer cache. » Click and select either Flush SGA or Flush Buffer Cache (Oracle 10g and up only). Database Monitor Options Note: This Toad feature is only available in the commercial version of Toad with the optional DB Admin Module. These options control how the Database Monitor displays data. Refresh rate The graphs and the monitor refresh at an adjustable interval.
- 541. Toad for Oracle User Guide Monitoring 539 l Select the appropriate interval from the dropdown Refresh rate menu. If you have checked the auto refresh check box, the window will automatically refresh at the interval you select. You can also refresh the window manually by clicking the Refresh button. Window Use the Window box to specify how much graph data to display in the graphs. Options include one, two, six, twelve and twenty-four hours. Note: The zoom amount will be twice the selected number. TNS Ping check box If checked, Toad will ping the Oracle server (using TNS ping) before it runs the query to refresh the data on the charts. Ping check box If checked, Toad will perform a TCP/IP ping to the Oracle server before it runs the query. Database Probe Database Probe Overview Note: This Toad feature is only available in the commercial version of Toad with the optional DB Admin Module. The Toad Database Probe is a real-time monitoring window that offers a large collection of alerts. You can also create your own alerts. The database probe does not automatically do a full refresh upon opening. If you would like it to do so, you can change the probe Settings. To access the database probe » From the Database menu, select Monitor | Database Probe. Troubleshooting l Some V$ synonyms are required for this feature. See "V$ Tables Required" (page 153) for more information. l This feature is only available in the commercial version of Toad with the optional DB Admin module.
- 542. Toad for Oracle User Guide Monitoring 540 Reading the probe information The probe window is divided into five zones, or collections of display controls. These roughly correspond to the layout of the window. See "Database Probe Settings" (page 540) for more information. The database probe has its own toolbar as well as status bar. A warning icon can appear to the left of each data control when an alert is tested and fired and you have chosen that area of the screen to show an icon. To read an alert 1. When an alert fires, the warning icon appears to the left of the data control. 2. Click the icon to display a dialog box revealing details about the alert. l The group box caption shows the name of the alert. l The detail window shows the alert description. l Below the detail window the alert expression displays. l A check box offers the possibility to turn the alert off. The Database Probe alert definitions and options are stored in an INI file called "DatabaseProbe.INI". Information gathered from the database regarding the alerts is displayed as follows: l The information displayed reflects standard Oracle statistics. For more information about what the areas on the database probe represent, see your Oracle documentation. l The result of number/number represents used/max l For example, 2/170 is 2 total sessions out of a possible 170. l - represents either a NULL value or "invalid for the current connection version" Upgrading definitions and options The Database Probe alert definitions and options are kept in an INI file called "DatabaseProbe.INI". Future upgrades to Toad may include an updated DatabaseProbe.ini file as well. If you have made changes to your alerts, you may want to back them up in a separate file. When a new DatabaseProbe.ini is provided, you can compare the files and only add the parts of the new ini file that you want to include in your alerts. See "Compare Files and Objects" (page 256) for more information. Database Probe Toolbar & Status Bar Note: This Toad feature is only available in the commercial version of Toad with the optional DB Admin Module.
- 543. Toad for Oracle User Guide Monitoring 541 Toolbar Icon Command Select a different session. Refresh all five zones and reset the refresh timers. The dropdown offers a list of each zone. Selecting an individual zone will refresh just that zone. Flush SGA or Flush Buffer Cache (Oracle 10g only). Open Quest Spotlight (if you have it installed) to the active connection. Display the Settings dialog box. Status bar The status bar displays the names of queries as they are executing during zone refreshes. It also displays the connection string for the active window connection. Database Probe Settings Note: This Toad feature is only available in the commercial version of Toad with the optional DB Admin Module. From the Settings dialog box of the Database Probe, you can change several types of settings for the Database Probe. These include refresh rates, alerts, and several miscellaneous settings. To access settings » Click on the DB Probe toolbar. Settings tab Refreshes The Refresh tab of the Settings window allows the user to set a refresh rate or no refresh at all. The available refresh rates are 15 seconds, 30 seconds, 1 minute, 5 minutes, and 15 minutes. Note: The Lock check box in the SGA area is only applicable on non-Windows servers. l DBWR, LGWR, ARCH, Phys reads/writes l Files l Overhead
- 544. Toad for Oracle User Guide Monitoring 542 Gauges Use the Gauges area to set the colors used for alerts, and warning levels for the Redo logs and data files. Active Alert Count The Active Alerts count displays the number of active alerts. An alert can be active or inactive. It is only active alerts that potentially impact the performance of a zone refresh. Alerts The Alerts tab of the Settings dialog box displays all the alerts currently in Probe, including l active or inactive (Only active alerts are tested during their relevant zone refresh.) l name l description An alert is a user-defined event. It reads the data on the main window and issues a warning by a display icon. An alert consists of an expression representing a formula. The formula is then used to determine whether to fire the alert. For example, you may want an alert to fire if the number of active sessions matches the number of total sessions. An Alert can be inactive; inactive alerts are not tested when operands are refreshed. Alerts can be tested, fired, and extinguished. You can add alerts, edit or delete selected alerts, activate or deactivate them individually or all at once. Activate or deactivate alerts by clicking in the check box in the Active column. Alternately, click the Activate All or Deactivate All buttons to the right of the alert grid. Tested When a refresh occurs on an operand that is being used by an alert, then the alert for that operand is tested. This means the alert expression is evaluated. Evaluation consists of a process whereby the operand identifiers in the expression are replaced with their on-screen data values and any embedded queries within the expression are executed and the resulting value is substituted. l If the resulting expression evaluates to TRUE, then the Alert is fired. l If it evaluates to FALSE, the Alert is extinguished. Fired This happens when an alert is tested and evaluates to TRUE. When an alert fires, the warning display icon for it becomes visible.
- 545. Toad for Oracle User Guide Monitoring 543 Extinguished This is what happens when an alert is tested and evaluates to FALSE. When an alert is extinguished the warning icon for it is hidden. Alert Map You can check the map of alerts by clicking the Show Map button. The Alert Map is a convenient way to see the operands on the main window that have alerts associated with them. When the cursor is passed over alert icons, the alert expression for it is displayed as the hint text. Adding and Editing Alerts Note: This Toad feature is only available in the commercial version of Toad in either the Professional Edition or with the optional DB Admin Module. See "Database Probe Overview" (page 538) for more information. To add an alert 1. From the Database Probe window, click on the toolbar. 2. Click the Alerts tab. 3. Click Add. Enter the information in the dialog box to create an alert as described below. General Area Name Enter the alert name. This is used to identify the name of the alert for display purposes within the Alerts grid in the Settings dialog box. Alert names must be unique. Active This determines whether the alert is tested during relevant zone refreshes. Alert position This is the on-screen position of the icon, appearing when the alert fires. A dropdown list of possibilities is offered. Alternately, you can choose from a graphic display: l Click , to access the Alert Icon Selection window. This window looks like the main probe window but with all available alert icons visible. l Click on one of the available icon positions to use. The current one, if one has already been selected, blinks. When an icon is clicked, this dialog box is closed and the name for that icon is chosen in the Alert position drop down. Note: Only unused alert positions or inactive alert positions are available choices.
- 546. Toad for Oracle User Guide Monitoring 544 Description Enter a description of the alert. Refreshes before computing Each alert is associated with one or more zones. The zone(s) associated with an alert is determined by the Probe operands used in the Alert Expression. When an alert is associated with more than one zone, the zone with the fastest refresh rate determines when the alert fires. This value determines how many actual refreshes of that zone must occur before the alert is tested. For example, if the alert is associated with a zone. This zone is refreshed every 15 seconds and you may not want the alert to be tested every time (testing each time can slow down the refresh). It may be more useful to have the alert tested every 2 minutes, and you would enter an 8 here. Expression Builder Expressions are the driving force behind an alert; the expression tells Toad what should be tested when it tests an alert. An alert expression consists of one or more Probe operands, one or more queries (must be enclosed in double-quotes), and operators listed. The relational operator in the center of the expression determines how the sides of the expression are compared to each other to determine if the evaluation is true. l Each operand, query, and operator in the expression must be separated by spaces. l Query SELECT statements must be enclosed in double-quotes and must return a numeric value in the first field. This value is then used as the substitution value in the expression. An example of this is the provided alert named "Mismatched Redo Log Size". To use the expression builder 1. Drag-and-drop one or more Probe operands from the treeview into the left and/or right sides of the expression. Note: Operands are grouped by zone. Operators can also be dragged and dropped, or typed directly. 2. Choose a relational operator. 3. Click Test to test the expression to see if the math expression evaluator can turn the string expression into a mathematical formula. Index Monitoring Index Monitoring Note: This Toad feature is only available in the commercial version of Toad with the optional DB Admin Module.
- 547. Toad for Oracle User Guide Monitoring 545 Oracle versions 9i and later provide a means of monitoring indexes to determine whether or not they are being used. You can then drop unused indexes to eliminate unnecessary statement overhead. To access Index Monitoring » From the Database menu, select Monitor | Index Monitoring. Information such as monitoring status, start time, end time and usage are available in the Index Monitoring grid. Whenever you enable monitoring, Toad resets these statuses for the specified index. You can always see your own indexes. To see another user’s indexes you must have access to the SYS.OB$, SYS.IND$, SYS.USERS$ and SYS.OBJECT_USAGE views and the ALTER ANY INDEX privilege. Index Monitoring Toolbar Button Command Monitor Indexes - Select from monitoring all indexes or selected indexes. End monitoring indexes - Select from ending all indexes or selected indexes. Display the create script for selected indexes Drop selected indexes Refresh grid data Indexes Owned By Select the schema that owns the indexes you want to view Activating Index Monitoring (page 545) Activating Index Monitoring Note: This Toad feature is only available in the commercial version of Toad with the optional DB Admin Module. You can monitor all indexes, or only selected indexes. To monitor all indexes 1. From the Database menu, select Monitor | Index Monitoring. 2. Select a schema from the Indexes Owned By drop down menu.
- 548. Toad for Oracle User Guide Monitoring 546 3. Click and select Begin monitoring all indexes. To monitor selected indexes 1. From the Database menu, select Monitor | Index Monitoring. 2. Select a schema from the Indexes Owned By drop down menu. 3. Select one or more indexes in the data grid. 4. Click and select Begin monitoring selected indexes only. Deactivating Index Monitoring Note: This Toad feature is only available in the commercial version of Toad with the optional DB Admin Module. When you have completed monitoring for a period, you can turn off Index Monitoring. To deactivate index monitoring on all indexes 1. From the Database menu, select Monitor | Index Monitoring. 2. Select a schema from the Indexes Owned By drop down menu. 3. Click and select End monitoring all indexes. To deactivate index monitoring on selected indexes 1. From the DBA menu, select Index Monitoring. 2. Select a schema from the Indexes Owned By drop down menu. 3. Select one or more indexes in the data grid. 4. Click and select End monitoring selected indexes only. Instance Manager Instance Manager Note: This Toad feature is only available in the commercial version of Toad with the optional DB Admin Module. The Instance Manager is designed to allow you to check on the status of the various databases you can access. All databases in your TNS Names file are displayed. The main window allows you to change the general options for the Instance Manager as described below. To access the Instance Manager » From the Database menu, select Monitor | Instance Manager.
- 549. Toad for Oracle User Guide Monitoring 547 Refresh Rate Select the time interval for automatically refreshing your data. If the Auto refresh data check box is unchecked, it doesn’t matter what is selected here, as the data will not be refreshed. Auto refresh data Checked, this option automatically refreshes the data according to the rate you have set in the Refresh Rate dropdown. Unchecked, you will have to refresh the data manually, no matter what is set in the Refresh Rate box. Polling Priority The thread cycling through the database will be assigned the operating system priority you select from the dropdown. If you select Idle the thread will only execute when the system is idle; Windows will not interrupt other threads. Start Click this button to start monitoring the info about your databases. If you have Auto refresh cleared, you can use this button to monitor selected databases manually. When Toad is gathering , this button changes to read Stop so that you can stop polling. Tabs In addition, there are three tabs to see the status. The Status tab displays the status of the Node, Listener and Database. See "Instance Manager - Status Tab" (page 547) for more information. The Status change history displays any changes made to your databases in a grid format. The Detail log displays all reports from the Server Manager or SQL. Buttons You can Startup or Shutdown a database using the Startup or Shutdown button at the bottom of the Status Tab. Note: The database to be shutdown/started requires a password file and remote_login_ passwordfile=EXCLUSIVE must be set in the pfile (typically INIT.ORA or INIT<sid>.ORA. If you have created the database with the New Database Wizard, it will already have this file built. If you created the database in another manner, you will need to be sure it has the password file set properly. In addition, you can: l Build init.ora... - This button builds an init.ora file for the currently selected username. l Refresh current - This button manually refreshes the display of current connections.
- 550. Toad for Oracle User Guide Monitoring 548 Instance Manager - Status Tab Note: This Toad feature is only available in the commercial version of Toad with the optional DB Admin Module. The Status tab in the Instance Manager displays the status of your databases. Data Status Toad pings the Listener, the Node, and the Database and displays the results as follows: Icon Meaning Unknown. Toad can’t determine the status. For example, no database connect information is specified, and Instance Manager cannot test the status of the database. Could not connect. l Database: an Oracle test connection failed. l Listener: tns ping did not return a response. l Node: unable to ping the server. Connected. l Database: the database is started, mounted, and open. l Listener: tns ping successfully pinged and listener is up. l Node: server successfully pinged and node up. Started. This checkmark is only seen in the Database column, when the database has been started, but not mounted or opened. Mounted. This checkmark will only be seen in the Database column, when the database has been started and mounted, but is not currently open. You can select one of the various database connections accessible from your machine and adjust the Startup, Shutdown, or Alter information for checking the instances. Grouping databases You can group your databases in the grid to more easily differentiate them. For example, you could group by whether or not you are monitoring the database so that you have a smaller grouping to watch. To group the data grid » Drag the header of the column you want to group by into the Group by area at the top of the data grid.
- 551. Toad for Oracle User Guide Monitoring 549 Checking a Database In order to retrieve information about a particular database, you must enter login information for that database. Toad will use this information to check that the database is up. The connection will then be immediately closed. To enter login information 1. In the grid, click in the logon info for database test column and then click the dropdown arrow for the appropriate database. 2. Select one of the previous connections OR select New. 3. If you selected New, the New connection dialog box appears. 4. Enter the appropriate information in the Username and Password boxes and then click OK. 5. Click Refresh to force Instance Manager to check the database immediately. Instance Manager – Startup Note: This Toad feature is only available in the commercial version of Toad with the optional DB Admin Module. You can start databases from the Instance Manager in several different modes. Be aware, however, that Instance Manager uses SQL*Plus to start up and shut down databases. Caution: Because of this, you cannot start up an Oracle 7 database from an Oracle 8i or above client. This is because SQL*Plus is used to start up and shut down databases from an Oracle 8i or above client, but SQL*Plus cannot start up or shut down Oracle 7 servers. To start a database 1. From the Instance Manager’s Status tab, select the server/database you want to start. 2. Click Startup. Enter a username and password that can connect as SYSDBA or as SYSOPER. Note: Passwords are only saved if View |Toad Options | Oracle |Save passwords for Oracle connections is checked. 3. Select SYSDBA or SYSOPER from the dropdown. Select the startup options you want to use. Open Select open to open a database completely. This is the standard selection and allows all authorized users to log in and use the database. Mount Select Mount if you want to mount the
- 552. Toad for Oracle User Guide Monitoring 550 database but not actually Open it. Mount allows you to do some basic Oracle alterations that you cannot perform if the database is completely opened. Nomount Select Nomount if you want to put the database into the started mode. Force If you try to Startup an instance of a database that is already running, the command will result in an error. In some cases, however, you may want to restart a database, for example during debugging or under abnormal circumstances. To do this, check the Force box. This will shut down the current Oracle instance using the Shutdown mode Abort. Then Toad will continue with its startup procedures. Exclusive If Exclusive is checked, the database can only be mounted and opened by the current instance. It cannot be opened simultaneously by multiple instances. Exclusive cannot be used with SHARED, PARALLEL, OR NOMOUNT. If no mounting option is specified, EXCLUSIVE will be assigned by default. Unchecked, the database can be opened simultaneously by multiple instances, making SHARED, PARALLEL and NOMOUNT possible. Enter the full pathname for the parameter file you want to use, or click Browse and select it from the browse window. Note: If you have shut down this database from Toad, Toad has saved the parameter file in the Toad directory. This file is the default pathname when you restart the database. 4. Click OK. Instance Manager - Shutdown Note: This Toad feature is only available in the commercial version of Toad with the optional DB Admin Module. In order to shut down a database, you must have SYSDBA or SYSOPER privileges. Be aware, however, that Instance Manager uses SQL*Plus to start up and shut down databases.
- 553. Toad for Oracle User Guide Monitoring 551 Caution: Because of this, you cannot shut down an Oracle 7 database from an Oracle 8i or above client. This is because SQL*Plus is used to start up and shut down databases from an Oracle 8i or above client, but SQL*Plus cannot start up or shut down Oracle 7 servers. Note: Access to some V$ tables are required to use this option. See "Instance Manager | Shutdown" (page 157) for more information about these permissions. To shut down a database 1. From the Status tab, select the database you want to shut down, and then click Shutdown. Enter the Username and Password in the appropriate boxes and select either SYSDBA or SYSOPER from the dropdown menu. Note: Passwords are only saved if View | Toad Options | Oracle | Save passwords for Oracle connections is checked. 2. Choose the Oracle mode you want to use to shut down the database: Normal, Immediate, or Abort 3. Click OK. The dialog box closes and the database shuts down. This is displayed in a status line in the lower right corner of the Instance Manager window as it is occurring. When the Database has been shut down, an entry is made in the Status change listing, and the Server Manager or SQL report is appended to the Detail Log. When you shut down a database, Toad creates a folder called DBA in the Toad directory. In that folder, Toad stores an .ora file for the parameters that are not default parameters. In addition, a file called startupshutdownlog.txt is created and contains the contents of the detail tab. When Instance Manager performs a shut down, it queries the v$parameter table to build an INIT.ORA file for subsequent startups. This file is stored in ToadDBA and is named pfile_ SID.ora (where SID is the database alias). To perform this query, a temporary database connection is created, using the shutdown connection information provided on the "shutdown" dialog box. Note: On 7.3.4 clients, if the database is not already open, in other words, if it is unmounted or mounted, this SYSDBA/SYSOPER temporary connection is not supported. Thus, on 7.3.4 clients you cannot shut down a database that is not open. ALTER operations continue to work, however, because they use server manager only, and do not attempt to create this temporary database connection. Instance Manager - Alter Note: This Toad feature is only available in the commercial version of Toad with the optional DB Admin Module. Using the Alter command from the Instance Manager allows you to alter the state of the selected database. In order to alter the status of a database, you must have SYSDBA or SYSOPER privileges.
- 554. Toad for Oracle User Guide Monitoring 552 To use the alter command 1. From the Status tab, select the database you want to change status, and then click Alter. Enter the Username and Password in the appropriate boxes and select either SYSDBA or SYSOPER from the dropdown menu. Note: Passwords are only saved if View | Options | Oracle | Save passwords for Oracle connections is selected. Choose the operation you want to perform on the database. You can either Mount or Open the database. Note: If the database is in Start mode, you must manually mount the database before you can open it. In order to open the database, mount it, then select it in the Status tab and select Alter again to open it. Session Browser Session Browser Overview The Toad Session Browser lets you easily view and work with sessions. Information on all sessions is organized in grid form, and the session that opened the Session Browser is displayed in red. An online video tutorial is also available for this feature. This video opens in a new browser window and requires an internet connection. From the Session Browser you can: l Organize session views l View detailed information, including advice about selected waits. l Kill sessions l Start traces l Stop traces l View locks being held or acquired by sessions l View transaction information for online rollback segments To access the Session Browser » From the Database | Monitor menu, select Session Browser. Session Browser Toolbar The Session Browser toolbar lets you configure your Session Browser.
- 555. Toad for Oracle User Guide Monitoring 553 Button Command Change active session. In the drop down list, the active session is denoted by a check mark. Refresh data Filter sessions. See "Filtering Sessions" (page 554) for more information. Set the refresh rate (in seconds) for Auto Refresh Toggle auto refresh Toggle auto fetch of details. Flip the Session Browser Layout The Session Browser default is laid out in two vertical panes, the left containing the tree view and the right containing details. If this makes it too difficult to view all the provided information, you can flip the layout so that the panes are on top of each other. If you choose to flip the form layout, references to the left pane will now refer to the top pane, and right pane to the bottom pane. To flip the form layout » From the main Session Browser toolbar, click . Viewing Sessions There are potentially thousands of sessions in a database at any one time. It is therefore practical to organize and present them for easier management. The left side of the Session Browser displays one or more columns queried from V$SESSION. From this panel, you can l Group the rows returned from V$SESSION in seven different ways l Filter the rows to display a smaller subset of rows Sessions Toolbar Use the commands on the Session Browser toolbar to control sessions. Button Command
- 556. Toad for Oracle User Guide Monitoring 554 Disconnect Sessions Kill Session Trace ON Trace OFF Filter Sessions (Grey, no filter assigned. If a filter is selected, this icon will be red.) See "Filtering Sessions" (page 554) for more information. Group By Visible columns Flip layout of window. See "Flip the Session Browser Layout" (page 552) for more information. Refresh detail panel Limit... to Limit a selected column to your filter Grouping Sessions Grouping sessions in the Session Browser is a matter of choosing which field you want to use to view sessions. For example, you choose to view all the sessions for a given user, and the left pane tree will be organized by user. You can group your sessions by l program through which the session is running l user l session status l server on which the session is running l session type l resource consumer group l operating system user To group sessions » Do one of the following: l Right-click in the top pane and choose Group by. l Select the drop-down on . The tree will refresh and group sessions according to the column you have chosen, with the caption of the first column updated to reflect the new organization.
- 557. Toad for Oracle User Guide Monitoring 555 Filtering Sessions Filtering Sessions You can filter the sessions shown in the top panel of the Session Browser in two ways: user defined filters or static filters. User Defined Filters User defined filters represent either a condition or a subquery which is performed on the result set. You define the criteria and name it. It is then saved to disk in a file called Toad_ SESSBROWFILTERS.INI which resides in the same directory as TOAD.INI. See "Properties Files" (page 163) for more information about locations of these files. Static Filters You can also choose a static filter. A static filter is a pre-defined, read-only filter which is used in combination with a user-defined filter. User Defined Filters User defined filters in the Session Browser represent either a condition or a subquery which is performed on the result set. You define the criteria and name it. It is then saved to disk in a file called Toad_SESSBROWFILTERS.INI which resides in the same directory as TOAD.INI. See "Properties Files" (page 163) for more information about locations of these files. To create and manage user defined filters » Click on the Sessions tab. Note: If there is a filter in effect, this button will be red. Left Side Panel The left side of the Filters dialog box displays a list of currently defined filters. Minimum version When a filter is created, the list of columns which have been included in the expression is parsed and checked against the known list of columns for the various Oracle versions. If you choose a column which is not in an earlier version of Oracle, the expression will be evaluated and the minimum Oracle version required will be stored as part of the filter. When a user opens the Session Browser, only filters which are valid for the current Oracle connection are presented in the drop down filter list at the top of the window. Right Side Panel The right side shows the filter expression as it has been evaluated by the Session Browser, and in essence represents the query which will be executed to populate the top panel tree view in the Session Browser. This area is read-only.
- 558. Toad for Oracle User Guide Monitoring 556 For convenience, the name and location of the filters INI is shown in the status bar of this window. Adding a User Defined Filter You can define your own filters to organize your sessions in the Session Browser. To add a filter 1. Click on the toolbar. 2. Click Add. 3. Enter a name in the Filter Name box. This should be descriptive enough that the filter is easily identifiable. 4. Enter the expression in the Expression box. 5. When you have created the expression, click Test to build a query around it and show the results in the Filter Test window. This is a simple way to ensure you have built a query expression with correct syntax and that you are getting the result set you expect. 6. When you have a filter completely defined, click OK to save it to the Toad_ SESSBROWFILTERS.INI file. See "Properties Files" (page 163) for more information about locations of these files. Features of the Add Filter dialog box Expression box You can enter text manually or use the selection boxes beneath it to drag-and-drop or double- click elements to include in the expression. Columns The columns tree displays all the columns for each of the three views that can be included in the filter. When selecting columns from the tree view, an alias is prefixed onto the column name according to its originating view. View Prefix V$SESSION .s V$PROCESS .p V$SESS_IO .io Note: If you manually type columns into the expression box, this alias convention must be followed for the filter to work.
- 559. Toad for Oracle User Guide Monitoring 557 Lookup The lookup button performs a distinct select of the values for the column on the underlying view. For example, if you want to restrict the sessions returned for a list of users, you could select the Username column under the session tree view node and click Lookup. You can have multiple lookup windows open at once. This window can be useful for large lists or for number columns on which you want to perform a range check, as it will display the lower and upper limits currently in the database. To use lookup » Select a column in the columns area and click Lookup. A small stay-on-top window appears, containing the values found in the column. From this small window you can: l double-click values to copy them to the expression box l drag and drop values into the expression box l multi-select and then drag-and-drop the selected values into the expression box l choose to close the window immediately after making your selection. In the case of string values, the values will be delimited by single quotes when copied to the expression box. Editing a User Defined Filter You edit a user defined filter in the Session Browser in much the same way as you add a new one. Any part of the filter can be edited, including the name. To edit a user defined filter » From the Session Browser Filter dialog box, select the filter you want to edit and then click Edit. When the Edit Filter dialog box displays, you can use the same tools described in the Adding a User Defined Filter topic. Deleting a User Defined Filter You can delete a user defined filter in the Session Browser, whether it is one you have created or a standard filter provided with Toad. To delete a user defined filter 1. From the Session Browser Filters dialog box, select the filter you want to delete and then click Delete. See "Filtering Sessions" (page 554) for more information. 2. Click OK.
- 560. Toad for Oracle User Guide Monitoring 558 Note: If you edit or delete standard filters they will be removed from the toad_ sessbrowfilters.ini file. It is recommended that you keep a backup of this file if you change these. (See Properties Files for more information about locations of these files.) Static Filters In the Session Browser, a static filter is an internal condition which can be applied on its own or in conjunction with a user defined filter. To apply a static filter: l On the Sessions tab, click (click the arrow) and select one of the following: l Exclude NULL and SYSTEM OS Users l Exclude parallel slaves l Exclude background TOAD sessions When you select a static filter that filter is marked with a check and the filter icon turns red. You can select more than one static filter at a time, and they can be combined with a user defined filter (in which case they are included as an AND condition at the end of the user defined filter expression). See "Adding a User Defined Filter" (page 555) for more information. Exclude NULL ( (s.USERNAME is not null) and (NVL(s.osuser,''x'') <> ''SYSTEM'') and (s.type <> ''BACKGROUND'') ) Exclude slaves (s.ownerid = 2147483644) See "Parallel Slave Processes" (page 557) for more information. Parallel Slave Processes Oracle can parallelize certain SQL operations. This involves breaking the task into smaller units, each of which are handled by a separate process. These separate processes show up in the V$SESSION view yet they cannot be killed or traced, as they are owned by the processes which spawned them. On the left side tree view they appear as subnodes under the process which owns them. Parallel slave processes are the only nodes which appear on the third level in the tree. Note: When a top-level node in the treeview (such as program name) is selected, the detail tabs do not automatically show information for the sessions for parallel slaves. If you want to see details for a parallel slave, you will need to select the master session or the slave itself. When a parallel slave process is fetched from the pool of available slaves, they appear in V$SESSION until the task is complete and then they return to the pool. An example query which creates these processes might be:
- 561. Toad for Oracle User Guide Monitoring 559 select /*+ parallel(x,4) parallel(y,4) */ * from all_objects x, all_ objects y; Slaves appear in V$SESSION with an ownerid which is not equal to 2147483644. That is, all non-slave sessions have an ownerid of 2147483644. For slaves, the value of ownerid is a 4 byte value, the low-order 2 bytes of which represent the session number of the owning session and the high order bytes are the query coordinator. There is a static filter which can prevent these from appearing in the tree. See "Static Filters" (page 557) for more information. Viewing Information Sessions Selecting Columns to Display Most of the columns from V$SESSION can be included for display in the left side tree view of the Session Browser. If you have selected more than one column, you may need to scroll to view them. Columns may be rearranged by dragging and dropping them in the location you want. However, the first column cannot be repositioned, and you cannot drag a column to replace the first column. To display V$SESSION columns 1. Select the Sessions tab. 2. Do one of the following: l Right-click in the top panel tree view, select Visible Columns and then select the column you want to display. From the right-click menu, columns must be selected individually. l Click on the toolbar to select multiple columns at once. Calculated V$SESSION column Included in the list is one calculated column as well: Last_call. This is computed as: SYSDATE-Last_call_et Last_call_et is the number of seconds since the last session call and Last_call is a more useful presentation of this value. Last_call essentially tells you how idle a connection has been. Viewing Sessions Detail Information The right side of the Session Browser reflects detail information for the selected sessions on the left side. You can select one session, or multiple sessions to view aggregate information. To view sessions information » In the top panel, click the Sessions tab. Select one or more sessions.
- 562. Toad for Oracle User Guide Monitoring 560 The right side displays tabbed pages that let you see detail information. Session Details Session details in the Session Browser are provided using the following query: SELECT * FROM V$SESSION WHERE {currently selected left side SIDs} You can use the tabs at the bottom of the Session page to select single view or multi- view. Single Record View The single SID view provides you with more columns of information about the selected session. To view information for a single record 1. In the left panel, select the session you want to view. 2. On the right panel, click the Session tab. 3. At the bottom of the page, click the Single tab. Multi Record View The multi-record view provides you with aggregate information for all selected sessions. To view information for multiple records 1. In the left panel, multi-select the sessions you want to view. All sessions must be within the same node. 2. On the right panel, click the Session tab. 3. At the bottom of the page, click the Multi tab. Process Details Process details in the Session Browser are provided using the following query: SELECT * FROM V$PROCESS WHERE {currently selected left side process addresses} If you select a single session from the top panel, you can use the tabs at the bottom of the Process page to select single view or multiple view. Single Record View The single record view provides you with more columns of information about the selected session. To view information for a single record 1. In the left panel, select the session you want to view. 2. On the right panel, click the Process tab. 3. At the bottom of the page, click the Single tab.
- 563. Toad for Oracle User Guide Monitoring 561 Multi Record View The multiple record view provides you with aggregate information for all selected sessions. To view information for multiple records 1. In the left panel, multi-select the sessions you want to view. All sessions must be within the same node. 2. On the right panel, click the Process tab. 3. At the bottom of the page, click the Multi tab. IO Details Tab IO details in the Session Browser are provided using the following query: SELECT * FROM V$SESS_IO WHERE {currently selected left side SIDs} If you select a single session from the top panel, you can use the tabs at the bottom of the IO page to select single view or multi- view. Single Record View The single record view provides you with more columns of information about the selected session. To view information for a single record 1. In the left panel, select the session you want to view. 2. On the right panel, click the IO tab. 3. At the bottom of the page, click the Single tab. Multi Record View The multi- record view provides you with aggregate information for all selected sessions. To view information for multiple records 1. In the left panel, multi-select the sessions you want to view. All sessions must be within the same node. 2. On the right panel, click the IO tab. 3. At the bottom of the page, click the Multi tab. Waits Details You can use the waits details to provide possible tuning considerations for your database in the Session Browser. The page consists of various columns selected from V$SESSION_WAIT and V$SESSION_EVENT. Note: The WAIT_TIME column will contain a value of -2 on platforms that do not support a fast timing mechanism. If you are running on one of these platforms and you want this column to
- 564. Toad for Oracle User Guide Monitoring 562 reflect true wait times, you must set the TIMED_STATISTICS parameter to TRUE. Remember that doing this has a small negative effect on system performance To view details about waits 1. If it is not active, click the Sessions tab. 2. Select a session or multiple sessions. 3. In the details area (right panel), click the Waits tab to view the resources or events for which the selected sessions are waiting. You can sort the waits data by clicking in the column header. Current Statement Details Use this page of the Session Browser to see the current SQL statement for the selected session. You can only view data for one selected session at a time. If you select more than one session, the message "Multiple sessions selected" will appear in the data area. To view statement details 1. Select a session from the top panel. 2. Click the Current Statement tab to display the current statement for the selected session. 3. Click the Explain Plan tab to display the explain plan for the current statement, for tuning or troubleshooting purposes. 4. Click the Information tab to display data from the V$SQL view, which contains statistical data on the shared SQL area. Current Statement toolbar The toolbar on the Current Statement tab lets you manipulate the statement in several ways. Button Command Copy script to Clipboard Load script in Editor Tune Statement using SQL Tuning/Optimizer. See "Using SQL Optimizer with Toad" (page 106) for more information. Open Cursors Details Use this page of the Session Browser to see data from V$OPEN_CURSOR, which lists cursors which each selected session has opened and parsed. It can show data from multiple sessions at once.
- 565. Toad for Oracle User Guide Monitoring 563 To view open cursors details 1. Select one or more sessions in the left panel tree view. The statements containing the cursors opened and parsed display in the bottom panel. 2. Click the Explain Plan tab to see an explain plan for the currently selected statement in the Open Cursor data grid above it, for tuning or troubleshooting considerations. 3. Click the Information tab to see data from the V$SQL view, which contains statistical data on the shared SQL area. Access Details This page of the Session Browser displays data from V$ACCESS, and lists objects in the database currently locked by the selected sessions. To view access details 1. Select one or more sessions in the top panel tree view. 2. Click the Access tab. Locks Details User locks and system locks are displayed in the locks details page of the Session Browser. For user locks, transaction, user and blocking locks are shown. This data is queried from V$LOCK. Note: Information displayed by the following procedure is individual database information. See "Types of Locks" (page 564) for more information about viewing aggregate locks details. Types of Locks In the locks page, locks are separated into two groups: Transaction, DML & PL/SQL locks; and Blocked or Blocking locks. Blocking and Blocked locks are dependent upon the transaction selected in the top area. In the bottom part of the page you can choose to see locks that are blocking you or locks that are blocked by you for the selected user. To view lock details 1. Click on the Sessions tab, if it has not been selected. 2. Select one or more sessions from the sessions tree view in the top panel. In the bottom panel, click the Locks tab. Note: You may have to scroll through the tabs on the bottom panel to see the Locks tab. To view user locks » At the bottom of the Locks page, select the User tab. To view system locks » At the bottom of the Locks page, select the System tab.
- 566. Toad for Oracle User Guide Monitoring 564 RBS Usage Details Select this Session Browser tab to display transaction information for online rollback segments for the selected sessions. It is queried from SYS.V_$TRANSACTION and SYS.V_$ROLLNAME. Information provided by this procedure is for individual RBS usage information. See "Types of Locks" (page 564) for more information about aggregates. To view RBS usage details 1. Click on the Sessions tab, if it has not been selected. 2. Select one session from the sessions tree view in the left panel. In the right hand panel, click the RBS Usage tab. Note: You may have to scroll through the tabs on the right hand side to see the RBS usage tab. Flipping the layout can alleviate this. See "Flip the Session Browser Layout" (page 552) for more information. Long Ops Details The Session Browser displays data from V$SESSION_LONGOPS for the currently selected sessions in the Long Ops Details page. Oracle defines long ops as operations that run for longer than six seconds in absolute time, including some backup and recovery functions, statistics gathering, and query execution. For more information about what is included in Long Ops, please see your Oracle documentation. To view Long Ops details 1. Click on the Sessions tab, if it has not been selected. 2. Select one or more sessions from the sessions tree view in the top panel. In the bottom panel, click the Long Ops tab. Note: You may have to scroll through the tabs in the bottom panel to see the Long Ops tab. Percent Column Calculation The Percent column is calculated as: decode(totalwork, 0, 0, round(100 * sofar/totalwork, 2)) Statistics Details This tab of the Session Browser displays data from V$SESSTAT, which is session statistics for the currently selected sessions.
- 567. Toad for Oracle User Guide Monitoring 565 To view statistics details 1. Click on the Sessions tab, if it has not been selected. 2. Select one or more sessions from the sessions tree view in the top panel. In the bottom panel, click the Statistics tab. Note: You may have to scroll through the tabs on the bottom panel to see the Statistics tab. You can sort the waits data by clicking in the column header. Viewing Locks Aggregate Information User locks and system locks are displayed here, depending on the tab you select at the bottom of the Session Browser. Note: Information displayed here is aggregate database information. See "Locks Details" (page 562) for more information about viewing locks details for individual sessions. Types of Locks In the locks page, locks are separated into two groups: Transaction, DML & PL/SQL locks; and Blocked or Blocking Locks. Blocking and Blocked locks are dependent upon the transaction selected in the top area. In the bottom part of the panel you can choose to see locks that are blocking you or locks that are blocked by you for the selected user. User Locks Ttransaction, user and blocking locks are shown for user locks. This data is queried from V$LOCK. As the row in the Transaction Lock grid changes, the user and blocking lock grids are updated for the selection. In addition, you can use the drop down filter to limit the grid to displaying: l All Locks (Show All) l Blocking Only l Blocked Only To view user locks 1. At the top of the Session Browser, click the Locks tab. 2. At the bottom of the panel that appears, click the User tab.
- 568. Toad for Oracle User Guide Monitoring 566 System Locks To view system locks 1. At the top of the Session Browser, click the Locks tab. 2. At the bottom of the panel that appears, click the Session tab. Viewing RBS Usage Aggregate Information This Session Browser page displays transaction information for online rollback segments, queried from SYS.V_$TRANSACTION and SYS.V_$ROLLNAME. NOTE: Information on RBS Usage presented here is aggregate database information.See "RBS Usage Details" (page 563) for more information on individual RBS Usage. To view RBS usage information » At the top of the top panel, click the RBS Usage tab. Viewing Waits The main waits tab in the Session Browser displays information about events and waits. The top panel displays aggregate information, while the bottom grid displays details of the selected events. Changing the View You can change the groupings of how waits are displayed. To change the wait view l On the Waits tab, click the appropriate sub-tab to view waits grouped by: l Last 60 seconds l By Session l By Wait Advice You can view advice on some waits by double-clicking them in the lower panel. Waits that have advice available are highlighted with a blue color and an underline:
- 569. Toad for Oracle User Guide Monitoring 567 Performing Actions on Sessions Kill or Disconnect Sessions Your ability to kill sessions in the Session Browser depends on your permissions status. For most non-slave sessions, you can kill sessions in one of the following ways. l Kill a selected session l Use multi-select and kill multiple sessions at once l Kill a top level node, which kills all sessions below it For example, you can kill all sessions for a selected user. You can even multi-select top level nodes and kill all those and their sub-nodes. See "Parallel Slave Processes" (page 557) for more information on slave sessions. To kill a session 1. Filter and/or group the sessions so you can easily see the sessions you want to kill. 2. In the top panel tree view, select the session, multiple sessions, or node you want to kill. 3. Do one of the following: l In the toolbar, click . l Right-click and select Kill Sessions. 4. Click OK to confirm your choice and kill the sessions. To disconnect a session 1. Filter and/or group the sessions so you can easily see the sessions you want to kill. 2. In the top panel tree view, select the session, multiple sessions, or node you want to kill. 3. Do one of the following: l In the toolbar, click . l Right-click and select Disconnect Sessions. 4. Click OK to confirm your choice and disconnect the sessions. Queries Used to Kill Sessions For later versions of Oracle, the following query is used: ALTER SYSTEM DISCONNECT SESSION <sid, serial#> IMMEDIATE For earlier versions of Oracle the syntax is: ALTER SYSTEM KILL SESSION <sid, serial#>
- 570. Toad for Oracle User Guide Monitoring 568 Trace Sessions You can turn tracing on or off for the selected sessions in the Session Browser. Toad uses the following procedure to trace sessions: SYS.DBMS_SYSTEM.SET_SQL_TRACE_IN_SESSION( sid, serial#, TRUE/FALSE ) Note: The trace file is written to the INIT.ORA parameter user_dump_dest which is typically the bdump directory on the server. If you cannot locate them there, check your Oracle Parameters to see if the pathname for user_dump_dest has been changed. To turn trace on 1. Filter and/or group the sessions so you can easily see the sessions you want to trace. 2. In the top panel tree view, select the session, multiple sessions, or node. 3. Do one of the following: l In the toolbar, click . l Right-click and select Start Trace. l In the confirmation window, click OK. To turn trace off 1. Filter and/or group the sessions so you can easily see the sessions you want to trace. 2. In the top panel tree view, select the session, multiple sessions, or node. 3. Do one of the following: l In the toolbar, click . l Right-click and select Stop Trace. l In the confirmation window, click OK. SGA Trace/Optimization SGA Trace/Optimization The SGA Trace/Optimization window displays SGA information for you so that you can easily optimize your database. You can view information, utilize client-side filtering of the grid, and check session currently executing the selected query. To access SGA Trace/Optimization » From the Database menu, select Monitor | SGA Trace/Optimization. Use this window to view information about SQLs executed and how they performed.
- 571. Toad for Oracle User Guide Monitoring 569 Requires access to the V$ Oracle Dictionary views. See "V$ Tables Required" (page 153) for more information and a list of required permissions. There are four tabs in this dialog box: l SQL Shared Pool l Execution Stats l SQL l Explain Plan Statistics Area In the statistics area you can view Execution stats and the SQL within the shared pool. In addition, you can: Search for SQL Enter text of the SQL you want to limit the shared pool area to SQL starting with the letters you enter. Hide Zero Stats When checked any stats with a value of 0 are hidden in the execution stats area. Select an Instance If you are on a RAC system, you can limit the display to a particular RAC instance. Execution Stats Execution stats are displayed in the left side panel. This panel shows information about the selected SQL statement in the SQL Shared Pool tab. SQL Shared Pool The Shared Pool SQL is displayed at the top of the right hand side. This panel shows information about the SQL Shared Pool. You can also filter the SQL statements you want to view using the SGA Trace Toolbar. See "SGA Trace Toolbar" (page 569) for more information. SQL tab This shows the entire SQL for the selected SQL statement in the SQL Shared Pool tab. If you get the "SQL Body Unavailable" message when clicking on the SQL tab, then the SQL is not present in Oracle's SGA (System Global Area), which is a pool of the most recently used SQL statements. Not all SQL statements can be retained in the SGA forever, because it is a limited size. The least frequently used statements are discarded in favor of new ones. From the toolbar on this tab you can do the following:
- 572. Toad for Oracle User Guide Monitoring 570 Button Command Copy script to Clipboard Load script in Editor Tune Statement using SQL Tuning/Optimizer Explain Plan tab This shows the Explain Plan for the selected SQL statement in the SQL Shared Pool tab. The total cost of the statement is displayed in the Total cost for statement label. If the cost information is not available because of rule-based optimization, then this label will be blank. You can also right-click and select Explain Plan options for this Explain Plan. See "SGA Trace Explain Plan Options" (page 569) for more information. Sessions tab The sessions tab displays any active sessions that remain in the SGA pool. SGA Trace Toolbar You can perform several commonly used commands from the SGA Trace Toolbar. Icon Command Change active session. In the drop down list, the active session is denoted by a checkmark. Filter by statement type, grants or parameters. Filter by users or cursors. Refresh grids Load selected statement in Editor Flush SGA SGA Trace Explain Plan Options There are two special options for using the Explain Plan that appear on the right-click menu of the Explain Plan tab in the SGA Trace window. See "SGA Trace/Optimization" (page 567) for
- 573. Toad for Oracle User Guide Monitoring 571 more information. Always set session to statement user This option performs an "ALTER SESSION SET CURRENT_USER=..." before it runs the Explain Plan. Use connected user/schema This does not perform the ALTER SESSION command. Example You are logged in as user DBAUSER and select a session belonging to the SCOTT user in the Kill/Trace window. You see that SCOTT has run the statement "Select * from EMP". Under Toad Options | Oracle | General | Table name, you have set the name to Toad_PLAN_TABLE. See "Oracle - General" (page 664) for more information. Always set session to statement user Set this option and do an Explain Plan. When Toad does the Explain Plan, Oracle makes the following two assumptions: l The EMP table belongs to SCOTT. l The Toad_PLAN_TABLE also belongs to SCOTT, unless there is a public synonym called Toad_PLAN_TABLE and SCOTT does not have a Toad_PLAN_TABLE. The Server Side Objects wizard creates a public synonym to Toad_PLAN_TABLE when it installs the Explain Plan objects to the Toad schema, but not when it installs the Explain Plan objects to a private user schema. If you don’t have a Toad_PLAN_TABLE public synonym but you want to make sure that Oracle always looks for the plan table in a certain schema, you can include the user name with the plan table in the options – for example, DBAUSER.Toad_PLAN_TABLE. Use connected user/schema Set this option and do an Explain Plan. When Toad runs the Explain Plan, Oracle also makes two assumptions. l The EMP table belongs to you (DBAUSER in this example). l The Toad_PLAN_TABLE belongs to DBAUSER. If you are explaining the statement "SELECT * FROM SCOTT.EMP", then Oracle knows that the EMP table belongs to SCOTT, regardless of the option you choose.
- 574. Toad for Oracle User Guide Monitoring 572 StatsPack Browser StatsPack Browser Overview Note: This Toad feature is only available in the commercial version of Toad with the optional DB Admin Module. The Toad Statspack Browser supports Statspack in Oracle 8i and newer. It displays performance metrics between statspack snapshots in great detail. You can use this ability to track, compare and organize your statistics. From the Statspack browser window, you can select snapshots, create new snapshots, select, display and print charts, program custom charts, and various other combinations. The browser window makes it easy to access the power of the data collected by Oracle's Statspack feature. An online video tutorial is also available for this feature. This video opens in a new browser window and requires an internet connection. To access the Statspack Browser » From the Database menu, select Monitor | Statspack Browser. Using the Statspack Browser In order to use the Statspack Browser in Toad, you must have Oracle's Statspack package installed on the database in question. It is not automatically installed with Oracle, so you may need to install it. Please see your Oracle documentation for information about how to accomplish this. If you do not have the privileges on the PERFSTAT schema, or the PERFSTAT schema does not exist, Toad will notify you when you try to open the Statspack Browser. The Browser window The Statspack Browser window is divided into three areas, including a list of snapshots, a list of charts, and an area where the charts are displayed. These areas work together to display the metrics you need to see. Snapshot List Area The snapshot list area lists the snapshots that have been collected by the Statspack. To create charts based on these snapshots, you can select or clear the checkbox to the left of the snapshot name. By default, the Statspack browser will select up to the most recent 24 hours worth of snapshots with the same database start time. Chart List Area Several charts and grids have been built into the window, or you can easily add your own in addition to those provided. Select or clear the checkbox to the left of the chart you want to view
- 575. Toad for Oracle User Guide Monitoring 573 or hide. Selected charts are created for the selected snapshots. Right-click to select all, none, and so on. Chart Display You can display up to nine charts at a time, in a three by three chart area. See "Configuring the viewing area" (page 576) for more information on configuring the viewing area. Working with Snapshots Working with Statspack Snapshots The Snapshots area of the Statspack Browser gives you the power to select, create, group and schedule snapshots. Statspack Snapshots Toolbar Button Command Change active session. In the drop down list, the active session is denoted by a New snapshot. See "Creating a New Snapshot" (page 573) for more information. Change snapshot parameters. See "Changing the Statspack Parameters" (page 574) for more information. Find snapshot job in Schema Browser, or schedule the job. See "Finding Job Schedules" (page 574) for more information. Save selected shapshot group. See "Saving a Selected Snapshot Group" (page 575) for more information. Load a snapshot group. See "Loading Saved Snapshot Groups" (page 575) for more information. Refresh just the snapshot listing. Refresh the entire browser. Refresh just the charts. Viewing Snapshot Information You can view groups of snapshot information using the charts provided in the Statspack Browser, or charts and datagrids you program yourself. See "Working with Charts and Datagrids" (page 575) for more information.
- 576. Toad for Oracle User Guide Monitoring 574 You can adjust the visible columns in the snapshot display by right-clicking the column header and choosing the columns you want to see. The columns can be reordered by dragging and dropping. In addition, you can sort by any column: click the column by which you want to sort. In addition, you can see more detailed information for a specific chart using the Detailed Hint command. Hover your cursor over the snapshot you want to see and the hint will display detailed information. If it does not, check to make sure detailed hints are activated as described below. To activate detailed hints » Right-click in the Snapshot area and select Detailed hints from the popup menu. Selecting Groups of Snapshots You can select groups of snapshots in multiple ways. In order to save a group, snapshots must be chosen by selecting the check box to the right of the snapshot in the list. You can select groups of snapshots by: l automatically by right-clicking over the list of snapshots and choosing a pre-defined grouping. l by selecting the check box to the left of the snapshot entry. Viewing advice for snapshot intervals Toad displays advice in the right hand panel. When two snapshots are selected (not checked, but highlighted), click the Advice tab for information about the top wait event during the selected interval. You can also double-click the top waits grid in the chart display area to display advice about that wait. Creating a New Snapshot You can create a new Statspack snapshot directly from the Statspack Browser. Snapshots created in this manner take a single snapshot. Parameter value fields display the default values for each parameter. These are either the values set by Oracle, or the default values you have set using the Change Statpack Parameters command. To create a new snapshot 1. Open the StatsPack Browser. 2. In the Snapshots area (upper left corner) select New Snapshot from the toolbar. 3. Make any necessary changes to the default parameters. 4. Click OK. Deleting a Snapshot You can delete a snapshot that you no longer need directly from the Statspack Browser.
- 577. Toad for Oracle User Guide Monitoring 575 To delete a snapshot 1. In the Snapshot tree, select the Snapshots you want to delete. Note: The delete is performed on selectedsnapshots, not on checked snapshots. 2. Right-click and select Delete selected snapshots. 3. Confirm the deletion by clicking OK. Commenting on Snapshots You can add comments to snapshots in the Statspack Browser, which are displayed in the detailed hints, and in the comments field of the snapshot. To comment on snapshots 1. Select the snapshots you want to comment. Note: The snapshots that will be commented are those that are selected by highlighting, not those that have check marks. 2. Right-click and select Comment Selected Snapshots. 3. Enter a comment and then click OK. Changing the Statspack Parameters Oracle sets basic thresholds for Statspack Snapshots. These are described in detail in your Oracle documentation. Within Toad's Statspack Browser you can change these default parameters so that each time you create a snapshot your custom parameters are set without needing to reset them. For information about each individual parameter, please see your Oracle documentation. To change Statspack parameters 1. Click in the snapshot area of the Statspack Browser. 2. Click on the value you want to change and make your changes. 3. Click OK to save your new defaults. Finding Job Schedules You can use Toad's Statspack Browser to find a scheduled Statspack job within the Schema Browser, where you can then work with them and edit, reschedule, and so on. To find a job » Right-click in the snapshot area and then select Find Collection Job in Schema Browser. Note: Toad searches procedures for the string STATSPACK.SNAP within the
- 578. Toad for Oracle User Guide Monitoring 576 code, allowing you to name your job in a way meaningful to you. l If there are statspack collection jobs in multiple connections, Toad will find the one in the connected session and stop looking. l If Toad cannot find a statspack collection job, Toad will open the Create Scheduler Job window, pre-filled in for a collection job that runs every half hour on the half hour. Saving a Selected Snapshot Group It can be beneficial to save groups of selected snapshots. When you do this, you can come back to charts created from these snapshots easily and quickly. For example, you might save a group called "Peak hours: Date" You could have several of Peak Hours charts over several weeks, and later come back to compare the different groups. To save a snapshot group 1. In the Statspack Browser, select the snapshots you want to group together. 2. Click on the toolbar. 3. Name your group and click OK. Loading Saved Snapshot Groups You can load snapshot groups that you have previously saved. When you load a snapshot group, all snapshots remain available, but the loaded snapshots are selected and the remainder are cleared. To load a saved snapshot group » In the snapshot area of the Statspack Browser, click . Working with Charts and Datagrids Generating Programmed Charts and Datagrids Several popular charts and datagrids are programmed into Toad's Statspack Browser. You can choose one chart or you can choose multiple charts to view at one time. See "Configuring the viewing area" (page 576) for more information about the effects of viewing multiple charts. To generate a programmed chart or datagrid 1. From the snapshot area, select the snapshots you want to include in your chart. 2. Select the charts you want to see for this group from the list in the Charts and Datagrids area. 3. As you select charts, the charts will display in the Chart area to the right. See "Configuring the viewing area" (page 576) for more information.
- 579. Toad for Oracle User Guide Monitoring 577 Displaying Charts There are several ways you can configure charts and datagrids from the Statspack Browser. You can generate and display as many charts as you have available, but you can configure the window to display a total of nine at a time. Any more and scrolling is necessary to view them. If you have many charts open in the viewing area, you can double-click the chart name in the tree view. Toad will navigate to the chart in the display area. Configuring the viewing area The more charts or datagrids you view per screen, the smaller the actual chart. If the charts you want to see are very detailed, you may want to configure your viewing area to only display two or even one chart at a time. Charts are displayed in the order in which they were checked. Newly checked items are added to the end of the display. You can change the order of the chart/grid display. To configure the viewing area » In the Chart display toolbar, select the number of columns and rows you want to display. Each of these values may be from 1 to 3. To change the order of the chart/grid display » In the chart display area, right-click and select Change Chart Order. To enlarge a chart » In the chart display area, right-click over the chart you want to enlarge and select full-screen. Viewing Series within Charts Some charts can be very complicated, depicting many different series of data within them. In such a case, you can click the name of a series in the legend and that data will be highlighted in the chart. For example, in this image, the OS CPU (System) series is selected, and the corresponding line in the chart is bold.
- 580. Toad for Oracle User Guide Monitoring 578 To restore it to normal display mode, click the item in the chart again. Synchronizing Wait Times Charts The Top Waits grid will synchronize with the Wait times by Event chart. When both are displayed in the display panel, the Wait times chart graphs whatever is selected in the Top Waits grid. Refreshing the viewing area You can add snapshots to your chart view at any time. Select them from the chart list. To display the data including the new snapshot data » Click on the chart display toolbar. Creating New Charts You can develop new charts and grids that reflect the information you need to extract from statspack snapshots and the Statspack Browser. To create new charts 1. At the bottom of the Chart area, select the sub-node where you want the chart or datagrid to reside. Note: If you do not choose a node, the new chart will be created directly in the Custom node. You can then drag it to its final category. 2. Enter a name for the chart or grid in the Node Name box. Note: The parent node is displayed. This is the node that you have selected in step 1. If it is not correct, you can drag the chart to the correct parent node later. 3. Select the type of output. 4. Select the minimum version of Oracle. 5. Click Next.
- 581. Toad for Oracle User Guide Monitoring 579 6. Enter the query you want to use to base your chart upon. Click Example to see an example query for the chart type you have selected. 7. Click Next. 8. Enter the titles for your chart: which information is required will differ depending on the type of chart or grid you have selected. 9. Click Next. 10. Check the preview output. This should display the chart the way you want it. l If the chart is incorrect, click Back and make changes. l In the chart is correct, click Finish to create it. Reorganizing the Custom Tree View The custom node of the chart and datagrid area of the Statspack Browser can be organized and reorganized as you want it. You can add categories (sub-nodes); edit them; drag and drop charts and datagrids between them; and delete them altogether. To add a category 1. Select a node in which to create the category and then click . Note: If you do not select a custom node, or you have a built-in category selected, the new category will be created within the main Custom node. 2. Enter a name for the category in the Name box and click OK. To edit a category name 1. Select a category in the Custom node, and then click . 2. Make changes and then click OK. To Reorder categories in the Custom Node » Drag and drop categories to the node where you want them to reside. To delete a category 1. Select the category you want to delete. 2. Click the Delete button and then click OK. Caution: If you delete a category with charts in it, all charts will be deleted as well. There is no undo option.
- 582. Toad for Oracle User Guide Monitoring 580 Printing and Exporting Charts and Grids You can print or export created charts and grids. You can export grid or chart information from the Statspack Browser directly to MS Excel, or copy to the clipboard to paste it elsewhere. To print charts or grids » In the Chart and Grid display area, right-click and select Print. To export charts or data to Excel » In the Chart and Grid display area, right-click over the chart you want to export and select either: l Send data to Excel - Sends the data for the selected chart to an Excel worksheet. l Send all charts to Excel - Opens Excel and sends the data for all active charts to a worksheet. Top Session Finder Top Session Finder Note: This Toad feature is only available in the commercial version of Toad with the optional DB Admin Module. This window lets you find the sessions in the database that are consuming the most resources. Oracle tracks hundreds of statistics for each session in the database, and the Top Session Finder lets you easily sort the sessions by their usage of any combination of parameters. An online video tutorial is also available for this feature. This video opens in a new browser window and requires an internet connection. To access the top session finder » From the Database menu, select Monitor | Top Session Finder. Modes There are two modes for viewing data: single parameter mode and multiple parameter select mode. You can select which mode to view from the Options area. See "Top Session Finder - Options" (page 581) for more information. Single Parameter Mode Clicking the parameter name will list each database session in descending usage order of the selected parameter. Weights for parameters are not used in this mode.
- 583. Toad for Oracle User Guide Monitoring 581 Multiple Parameter Select Mode The multiple parameter select mode includes a Stored Profile dropdown and a Weight column next to the parameter column. You assign weights to two or more parameters, and the sessions are sorted by the weighted sum of the statistics The weights help reflect a true picture of resource usage. For example, if you are doing a session run on sorts, you might want to assign a weight of 100 to the resource intensive disk sorts and a weight of 1 to memory sorts. To assign or change a weight, click in the weight column and type the new weight. Click the List Sessions green arrow button at the top of the window, and the sessions will be listed in order of the weighted usage of the selected (weighted) parameters. A right-click menu lets you Reset all weights to zero. Stored Profile dropdown The Stored Profile dropdown lets you recall and store profiles. Some profiles are already included. When you first enter the multiple parameter select mode, the Overall profile is selected by default. It has weights assigned to CPU usage, memory usage, session logical reads, network traffic, and redo usage. The dropdown includes other built-in profiles including CPU, Cursors, Memory, Network Traffic, and Redo. These profiles can easily be modified. You can create new profiles using the Create New Profile button and save profile settings using the Save Profile Settings button. You can save the current settings to a new profile by clicking the Create New Profile button and then saving the settings to the new name. The Delete button lets you delete the selected profile. The profiles are stored in a file called Topsess.ini, so if you want to revert to the default settings, just delete that file. (See "Properties Files" (page 163) for more information about locations of these files.) Top Session Finder toolbar Note: This Toad feature is only available in the commercial version of Toad with the optional DB Admin Module. This toolbar provides access to various commands found in the Top Session Finder. Icon Command Top Session Finder Options List Sessions New Profile
- 584. Toad for Oracle User Guide Monitoring 582 Icon Command Save Profile Options Drop Profile Instance Select RAC Instance (only available if you are connected to a RAC instance) Top Session Finder - Options Note: This Toad feature is only available in the commercial version of Toad with the optional DB Admin Module. This topic only covers unfamiliar information. It does not include all step and field descriptions. To display the options for the window » Click . Short Parameter List If selected, the parameter list is shortened to approximately 35 statistics that will be checked more often such as CPU and cursors. This provides an alternative to going through the entire list of parameters. When cleared, the parameter list includes everything in the v$statname. Exclude Inactive Sessions If selected, only sessions marked as "ACTIVE" in v$session will be included. Exclude Sessions Inactive for the past ___ Minutes If selected, only sessions that have been active within the specified time period will be included. This can be used to exclude "idle" connections. Limit Pie Chart to top ___ sessions Use this option to limit the pie chart to show only a portion of sessions. The pie chart can handle a maximum of 1050 sessions. Top Session Finder - Viewing Data Note: This Toad feature is only available in the commercial version of Toad with the optional DB Admin Module. The data can be displayed in a Dataset (data grid) or a Pie Chart. Dataset tab In single parameter select mode, click a parameter in the list, and the grid displays each database session in descending usage of the selected parameter. It also displays session specific
- 585. Toad for Oracle User Guide Monitoring 583 information such as machine name and logon time. See "Single Parameter Mode" (page 579) for more information. In multiple parameter select mode, after you press the List Sessions button, the grid displays a list of SIDs (System Identifier Names) that are connected to the database instance, session specific information for each SID listed, and it also displays the unweighted value of each statistic along with the weighted sum of all statistics. See "Multiple Parameter Select Mode" (page 580) for more information. Some columns might not be populated. For example, you could optionally populate the action column if you have populated the module column. In the following: dbms_application_info.set_module('abc','def') "abc" would display under the Module column and "def" would display under the Action column. Right-click options If you right-click in the dataset grid the menu includes: l Print Grid l Export Grid Pie Chart tab The biggest slice of the pie chart protrudes slightly from the rest of the pie for easy identification. l In single parameter select mode the pie chart displays the percentage of selected resource usage. l In multiple-parameter select mode the pie chart displays the percentage of weighted resources. If you left-click a slice, information for that session will display. Right-click options If you right-click a slice, a right-click menu includes: l Print. l Save As Bitmap File. l Copy image to clipboard. l Find selected session in Session Browser. l Info on session, info on another session (useful for when a slice is too thin to click). l Remove skinny slices. The Remove skinny slices item will prompt you for a percentage. Any session using less than that percentage of the pie will be removed from the pie. However, this does not actually remove rows from the data grid.
- 586. Toad for Oracle User Guide Monitoring 584 Finding a Specific Session To find a specific session in the Session Browser 1. In the Top Session Finder, select the session you want to locate. 2. Right-click and select Find Selected Session in Session Browser. Note: The Session Browser will open with the session selected.
- 587. Optimizing (Tuning) DBMS_REDEFINITION Wizard Note: This Toad feature is only available in the commercial version of Toad with the optional DB Admin Module. DBMS_REDEFINITION is a package supplied by Oracle. Using DBMS_REDEFINITION you can redefine and rebuild tables online. See your Oracle documentation for details on the package. The DBMS_REDEFINITION Wizard is an interface to DBMS_REDEFINTION. The Toad interface is limited to Oracle 10 and newer. All portions of the wizard directly relate to the Oracle package. For information on the parameters you supply, please see your Oracle documentation. To use the DBMS_REDEFINITION wizard This topic only covers unfamiliar information. It does not include all step and field descriptions. 1. From the Database menu, select Optimize | DBMS_REDEFINITION wizard. 2. Refer to the following for more information: Select Tables If you use "Create Like" to create an interim table, when you click OK to execute the create table command, the table will be created and entered in the Interim Table Name field. Order By You can move selected columns from pane to pane, or move them up and down in the Desired Order list. Start/Sync Set the degree of Parallelism before you click Start. This applies to both start and sync. 3. Complete the wizard. 16
- 588. Toad for Oracle User Guide Optimizing (Tuning) 585 Estimate Index Size Use this window to estimate how much disk space a particular index occupies. You can enter indexes into the grid and then choose to estimate the size of all or some of them. Note: Estimates can be done on bitmap indexes as well. However, if the column used is not a good candidate for bitmap indices, the estimate will be several times too small. This occurs because the bitmap indices columns are much larger than they should be. You should attempt to choose good candidate columns to achieve accurate bitmap index results. To access the index size estimator » Select Database | Optimize | Estimate Index Size. Load and Scan Indexes When you load indexes, the avr_row_len column in dba_indexes (if your indexes have been analyzed), and the DDL row size are loaded into the grid automatically. If you want indexes scanned to achieve those averages, you will need to see step 4 below. Scans can be slow, so it is not done automatically. Note: These estimation values are based on how much disk space the index data occupies. These values differ from the EXTENTS values displayed on the Schema Browser | Indexes page | Stats/Size tab, because EXTENTS are containers that store data. Extents are created with a certain container size (for example, 1MB). Each extent could be empty, half full, three quarters full, or full. In all of these cases the EXTENT size remains the same, 1MB, but the amount of disk space occupied by data changes. To load and scan indexes 1. Click the dropdown arrow on on the Estimate Index Size toolbar. 2. Select one of the following: Load my Indexes Load all indexes from the currently connected schema Load Indexes Like Add a LIKE clause to the query that selects and loads the indexes. Load Indexes by User Select an index owner and loads the indexes from the appropriate schema. Load Indexes by Tablespace Select a tablespace and load all indexes contained in it. Load Indexes by Table Select a table and load all the indexes for that table.
- 589. Toad for Oracle User Guide Optimizing (Tuning) 586 Import Grid from Text file Load indexes and open a grid that you have previously saved. 3. When the indexes are in the grid, check the box next to the indexes you want to estimate. 4. Click on the toolbar. A confirmation dialog box appears, letting you change the percentage of rows scanned if necessary. The default is 10 percent. When finished, the Average Row length and the Estimated Size are entered into the grid. Caution: This may take a while because the virtual storage size for all data must be summed and averaged. The more data you have in the index and the higher the percentage you choose, the longer this will take. Using the Grid When you have scanned sizes into it, the grid works like a spreadsheet. You can change the values of: l num_rows l pct_free l ini_trans l block_size Estimated index size will update as soon as you click outside of that row on the grid. Saving the grid If you need to leave before you are finished, you can save the grid to a text file and reopen it later. To save the grid to a text file 1. Click the dropdown arrow on . 2. Select Export grid to text file. 3. Enter a name for the file and click Save. Estimate Table Size Use this dialog box to estimate how much disk space a particular table occupies (or will occupy after more rows are loaded into it). You can enter tables into the grid and then choose to estimate the size of all or some of them. To access the table size estimator » From the Database menu, select Optimize | Estimate Table Size.
- 590. Toad for Oracle User Guide Optimizing (Tuning) 587 Load and Scan Tables When you load tables, the avr_row_len column in dba_tables (if your tables have been analyzed), and the DDL row size are loaded into the grid automatically. If you want tables scanned to achieve those averages, you will need to see step 4 below. Scans can be slow, so it is not done automatically. Note: These estimation values are based on how much disk space the table data occupies. These values differ from the EXTENTS values displayed on the Schema Browser | Tables page | Stats/Size tab, because EXTENTS are containers that store data. Extents are created with a certain container size (for example, 1MB). Each extent could be anywhere between empty and full. In any case, the EXTENT size remains the same, 1MB, but the amount of disk space occupied by data changes. To load and scan tables 1. On the Estimate Table Size toolbar, click the dropdown arrow on . 2. Select one of the following: Load my tables Loads all tables from the currently connected schema. Load tables Like Add a LIKE clause to the query that selects and loads the tables. Load tables by User Select a table owner and loads the tables from that schema. Load tables by Tablespace Select a table and load all the tables contained in it. Import Grid from Text file Load tables and open a grid that you have previously saved. 3. When the tables are in the grid, check the box next to the tables you want to estimate. 4. Click on the toolbar. A confirmation dialog box appears, letting you change the percentage of rows scanned if necessary. The default is 10 percent. When finished, the Average Row length and the Estimated Size are entered into the grid. Caution: This may take a while because the virtual storage size for all data must be summed and averaged. The more data you have in the table and the higher the percentage you choose, the longer this will take. Using the Grid There are four ways of estimating table size. These numbers are defined as follows when you click Scan on the toolbar.
- 591. Toad for Oracle User Guide Optimizing (Tuning) 588 l Avg Row Len (Scan) calculates avg row len based on the data that is currently in the table l Avg Row Len (Stats) pulls the avg row length that stored by Oracle the last time the statistics on the table were gathered (based on data in the table at the time the stats were gathered). l Max Row Len (DDL) pulls the maximum row length, based on the types and number of columns. l If none of these methods are applicable, you can enter your own number in the Avg Row Len (User). For example, if you have sample data, but you know that the sample data has values in the fields that are too small, then you might take a scan, and then put a number slightly larger than Avg Row Len (Scan) into Avg Row Len (User). When you have scanned sizes into it, the grid works like a spreadsheet. You can change the values of: l Num Rows l Pct Free l Ini Trans l Block Size l Avg Row Len (User) Estimated table size will update as soon as you click outside of that row on the grid. Estimating Index Size To estimate index size 1. Check tables that have indexes you want to estimate. 2. Right-click and select Launch Index Size Estimator for Indexes on Checked Tables. Saving the grid To save the grid to a text file 1. Click the dropdown arrow on the Load tables button. 2. Select Export grid to text file. 3. Enter a name for the file and click Save. Explain Plan You can easily view previously run explain plans and compare them against a new one. In order to view previously run explain plan history you must have Save previous explain plan results selected in the options page. See "Saving Explain Plans" (page 719) for more information.
- 592. Toad for Oracle User Guide Optimizing (Tuning) 589 The history page is divided into two panels. The top area lists all saved explain plans. When you select one of these plans, it appears in the bottom panel, with the SQL statement directly above it. The displayed explain plan can be viewed and manipulated in the same way as an explain plan in the editor. (SeeExplain Plan Overview (page 716) and associated topics for more information.) To display explain plan history » From the Database menu, select Optimize | Explain Plan. Pinned Code Note: This Toad feature is only available in the commercial version of Toad with the optional DB Admin Module. When the Oracle SGA fills, Oracle overwrites parts of the buffer with new data. Pinning a PL/SQL object in the SGA will keep Oracle from overwriting it. If you frequently use a particular PL/SQL object you have loaded from your database, pinning it to the SGA will improve Oracle performance. To pin an object 1. From the Database menu, select Optimize | Pinned Code. Note: Each PL/SQL object in the SGA cache is listed in the upper grid, as well as its owner and whether or not it is pinned. 2. The tree view on the bottom lets you browse all the source code for the schema as displayed in the dropdown. You can select source code for pinning that is not currently in the SGA cache. l If the object is in the SGA cache, select the object in the upper grid. l If the object is not in the SGA cache, select the appropriate schema from the dropdown in the middle of the page and then select the object from the tree view. 3. Click on the toolbar. To unpin an object 1. Select the pinned object in the SGA cache grid. 2. Click on the toolbar. Flushing the SGA Cache The SGA is the shared SQL pool where Oracle caches the most recently executed statements. This results in faster reprocessing. The Flush the SGA button removes everything that is not pinned from the SGA cache.
- 593. Toad for Oracle User Guide Optimizing (Tuning) 590 To flush the SGA cache » Click . Refreshing the SGA Cache view To refresh manually » Click . To auto refresh 1. In the Pinned Code toolbar, Refresh (secs) field, enter the number of seconds you want to wait between refreshes. The default is 5. 2. Check the Auto Refresh box. Repair Chained Rows To access repair chained rows » From the Database menu, select Optimize | Repair Chained Rows. When data for a row in a table cannot fit into a single data block, it is stored in a chain of data blocks (more than one data block). The original row of data points to the new block or blocks of data. A result of chained rows is that Oracle must scan more than one block of data to retrieve information. The repair chained rows function basically rejoins rows of data blocks that were split across more than one block. In order to use the Repair Chained Rows functionality, you will need to have a Chained Rows table defined as described by Oracle. If there is no repair chained row table (chained_rows), Toad notifies you and gives you the option to create one. Analyze tab Click the ADD button to display a Select Tables to Analyze menu where you can select the schema (from dropdown) and tables (from a list of tables in the schema) to analyze. Click the check box preceding the tables to select or unselect the tables. Select All and Select None buttons help with quick selection. Caution: The Chained Rows table field contains the name of the table where Toad tells Oracle to store the row ids of the chained rows that are found. It is NOT the table to analyze. Remember, Toad will truncate the chained rows table before it analyzes the tables in the list. Data tab After you have analyzed your tables, click the data tab to display the schema, table name, and the number of rows chained in the table.
- 594. Toad for Oracle User Guide Optimizing (Tuning) 591 Repair tab Note: You might need to increase the existing tables' data block size to eliminate chaining completely. Clicking repair: 1. Creates an intermediate, temporary table (Toad_tmp_xxxx) in your default tablespace Note: This temporary table is dropped if there are no errors. If there are errors, the table remains so you can troubleshoot. 2. Copies chained rows to it 3. Deletes the chained rows from the existing tables 4. Copies the rows back into the existing tables. You can also select a rollback segment from the dropdown. Results appear beneath each repaired table. Results tab The results tab lists any tables not repaired and the reasons. Rebuild Table Use this function to rebuild a table, optionally dropping columns, and/or renaming columns. This window will create a complete script to rebuild a table, after which you can further edit to customize, if desired. To rebuild a table Note: You must own the schema you are browsing in order to rebuild a table from it. 1. From the Database menu, select Optimize | Rebuild Table. 2. Select a table to rebuild. Note: You must be logged on as the table owner: therefore you cannot change owners from the owners dropdown list.) 3. Check the desired options on the Options tab. 4. On the Table Storage and Index Storage tabs, select storage parameters. Note: You can either use the original storage parameters or use the current table size as the initial extent, which will combine all extents together into one extent, for faster disk performance.
- 595. Toad for Oracle User Guide Optimizing (Tuning) 592 5. On the Columns tab, double-click a column on the upper list to exclude it (drop it) from the table. Note: To rename a column, click to select it, wait until after the mouse double-click time, then click it again. Enter the new name for the column. 6. Click the SQL tab. Note: The rebuild table script will be constructed and displayed. Now you can either save the script to a file, or copy it to the clipboard. Unix Kernel Parms Note: This Toad feature is only available in the commercial version of Toad with the optional DB Admin Module. If you are managing a database on a Unix server, updating some critical kernel settings can improve database performance. From this screen you can quickly generate the steps you need to modify your UNIX kernel and the critical kernel parameters to greatly increase Oracle performance. You may recognize these settings as being discussed in Oracle’s "UNIX Installation Guide" in the "UNIX Configuration Section" of the "Pre-Installation chapter". This screen simplifies the configuration process. This screen produces a recipe of what to do and the parameter values to set. You will need to FTP the output to the UNIX server, paste the parameter values where they need to go, and manually perform the indicated steps to reconfigure the UNIX kernel. To Access UNIX Kernel Parms 1. From the Database menu, select Optimize. 2. Select UNIX Kernel Parms. Options UNIX Type Specify the variant of UNIX your database server is running. This setting directly controls generation of both the steps and parameters. For example, different UNIX variants accomplish kernel configuration differently. Likewise, different UNIX variants implement different parameters and recommended settings. Concurrently Active Databases Specify how many databases will be up and running at the same time for that database server. For example, a database server may have production database instances for the following three database applications: Payroll, Accounting and HR. In this example the database server will have three concurrently running database instances.
- 596. Toad for Oracle User Guide Optimizing (Tuning) 593 Concurrent Processes Per Database Specify the average number of processes to be concurrently active at any given moment per database. For example, the Payroll application may average 40 concurrent users, the Accounting application may average 100 concurrent users, and the HR application my average 100 concurrent users. The average concurrent process count would be 80 (40 + 100 + 100 = 240 / 3 = 80). Average Degree of Parallelism Specify what degree of parallel operations should be supported. This should only be used on servers with excess CPU bandwidth (for example, SMP, MMP and NUMA architectures) and/or excess disk IO bandwidth (e.g. RAID, SAN and NAS). You must have either tables or indexes with a default degree of parallelism greater than one or DML with hints. Assuming these conditions are met, Oracle will consume much more in resources as it spawns additional processes to perform parallel operations. The UNIX kernel must be configured to support these additional needs. Calculate Click Calculate and Toad will produce the parameter modifications to optimize performance. Windows Registry Parms Note: This Toad feature is only available in the commercial version of Toad with the optional DB Admin Module. If you are managing a database on a Windows NT/2000/XP server, updating some critical registry settings can greatly improve overall database performance. For example, you can run any of the industry standard database benchmarks, such as the TPC, using Quest's Benchmark Factory® for Oracle and obtain a raw score for your Windows server and its Oracle database. Then you can change the settings of the Windows Registry and run the benchmark again so as to obtain a new score- this can improve Oracle database performance anywhere from 50% to 150% . You could manually define these settings using REGEDIT, but the registry keys and values are somewhat obscure. The Windows Registry Parms window lets you define these settings easily and quickly. It is recommended you check all four check boxes (two in Memory Management and two in NTFS fileSystem) and then select the IO Page Lock Limit that best corresponds to the size of your Windows server. The more memory your server has, the higher you can set the value. You'll have to experiment to be sure, but most servers should benefit from a value of 8K or larger. To Access Windows Registry Parms » From the Database menu, select Optimize | Windows Registry Parms.
- 597. Toad for Oracle User Guide Optimizing (Tuning) 594 Reading Registries This screen works with both local and remote Windows NT/2000/XP registries. Remote registries must be configured to permit remote registry access. Note: accessing remote registries requires the remote computer name to be entered in the form of computername. The double backslash prefix is mandatory. Updating Registries You can update registries with changes you have made to these screens. Note: Changes will not take effect until you reboot your computer. Registry Export Files These text files can be opened and modified with any text editor. Double-clicking on them from within the Windows Explorer will update the local registry with their content. This is useful when you want to create the files locally and then copy them to remote servers for manual application. To create a registry export file » Click Create ".Reg" file to produce a Windows standard registry export file. Analyze All Objects Analyze All Objects Note: This Toad feature is only available in the commercial version of Toad with the optional DB Admin Module. You can analyze multiple tables, indexes, and partitions, see chained rows, and see the data Oracle stores as the result of the analysis. If you are using Oracle 10g or above, you can lock and unlock the table and schema stats that you are working with. You can override the lock by using the Force option. To access analyze all objects » From the Database menu, select Optimize | Analyze All Objects. When using this dialog box to analyze selected tables from the tables object list, this collects statistics so that COST based query optimization can be used and the optimizer can run better queries. When you first open this window, the grids in the tabs are empty.
- 598. Toad for Oracle User Guide Optimizing (Tuning) 595 Analyze Tables and Indexes tabs Note: See Set Options below for information on the default settings for this basic analysis, and information on how to personalize this analysis. To analyze tables or indexes 1. Click the appropriate tab. 2. Load the grid by clicking or selecting a method for loading data from the dropdown beside it. 3. Select one or more objects in the grid using the check boxes. 4. Click on the toolbar. Confirm if necessary. Columns(Histograms) tab From this window you can: l Delete statistics using dbms_stats l Export/import/copy statistics Chained Rows tab To view chained rows » On the toolbar, click . Note: You must have select privileges on the CHAINED_ROWS table to use this feature. To repair chained rows » After chained rows data is displayed in the grid, click on the toolbar.See "Repair Chained Rows" (page 590) for more information. Set Options Analysis of objects can be customized. Click the Options tab to customize them and select Use Analyze or Use DBMS_STATS. Toad saves the options you set in this window so if you do the same Analyze or DBMS_STATS command repetitively; you do not have to reset all of your options each time. For details on these options see either: l Analyze Options (page 596) l DBMS_STATS functions (page 596)
- 599. Toad for Oracle User Guide Optimizing (Tuning) 596 Analyze Options The analyze functions area of the Analyze All Objects window lets you choose what type of analyze statement you want to create. Some of these options allow you to include a "For Clause" and some do not. Note:This topic only covers unfamiliar information. It does not include all step and field descriptions.s. Option Description Compute Statistics This is the most detailed and accurate method of analyzing a table. Statistics are computed from data in the table. Estimate Statistics You can use Estimate Statistics to save the time and resources required to compute them. Some statistics may be slightly different than their computed counterparts. You can change the number of the sample Oracle uses to create that estimate and whether that refers to rows or percentages in the boxes beneath the Analyze Functions area. This is the default setting. Delete Statistics Use Delete Statistics to delete all analyze statistics from your table. This leaves the table as if it had never been analyzed. List Chained Rows If a table has chained rows, select the table and analyze using this function to display the chained rows in the Chained Rows tab. Note: This feature requires you have an appropriate Chained Rows table defined. Validate Structure Select this option to validate the structure of a table or index. If all is well, the analyze command proceeds. If there is a problem, Toad will display the ORA- error. DBMS_STATS functions The DBMS_STATS functions area lets you choose what to collect and how to arrange and organize the DBMS_STATS you collect from the Analyze All Objects window. See "Analyze All Objects" (page 594) for more information. Using DBMS_STATS gives you many options for collecting information. Note:This topic only covers unfamiliar information. It does not include all step and field descriptions. Option Description Do not invalidate dependent cursors If this is unchecked, and Oracle has execution plans for queries against tables you analyze, it will discard them and create a new execution plan. When checked, it will keep and use the old execution plans.
- 600. Toad for Oracle User Guide Optimizing (Tuning) 597 Option Description Block Sample Oracle will randomly sample blocks of data as opposed to rows. Random block sampling is more efficient, but if the data is not randomly distributed on disk, then the sample values may be somewhat correlated. This option is only pertinent when doing estimate statistics. For all … Hidden … Indexed Columns l Indexed columns - Collects data on all indexed columns. l Hidden columns - A table can have a maximum of 1000 columns. When you create an object table (or a relational table with columns of object, nested table, varray, or REF type), Oracle maps the columns of the user-defined types to relational columns. This creates the effect of "hidden columns" that count toward the 1000- column limit. Copying Statistics - On different databases If the schemas are on different databases, then Toad uses the following procedure to copy statistics. 1. Creates a temporary table to hold stats 2. Exports the stats to that table 3. Copies the stats to the other database 4. Imports the stats from the table to the schema (Use the dropdowns to choose a tablespace.) Copying Statistics - On the same database If the schemas are on the same database, then Toad does not create a temporary table. The entire copy can be done with PL/SQL blocks. Profilers Profilers Toad can facilitate profiling of your code in many ways. It provides graphic access to the data provided by the DBMS_Profiler package, and, in Oracle 11 and later the information provided by the DBMS_HPROF package. You can view the information from the two profilers either in the desktop panel area of the Editor window, or in more detailed, graphical form in the Profiler Analysis window. For information about the two profilers and how to use them in Toad, see the following:
- 601. Toad for Oracle User Guide Optimizing (Tuning) 598 l Using DBMS_PROFILER (page 602) - There is an online video tutorial for this feature. This opens a new browser window and requires an internet connection. l Hierarchical Profiler (page 605) For information about how to read the profiler analysis window, see Profiler Analysis. See "Profiler Analysis" (page 598) for more information. Profiler Analysis The Profiler Analysis window provides data on profiler runs that is consistent with the data displayed in the Profiler tab of the editor. You can open the profiler window from the Toad menu, or by clicking the details button on the Profiler Editor tab toolbar. The top half of the window is a graph of the showing the percent of time required to run each component of the procedure. Note: If you can see the pie chart labels but not the pie chart itself, resize the window horizontally to give it more space to draw. In addition, labels on the chart show actual execution time for the fastest, slowest, and average unit or line of code. The bottom half of the window lists the runs, including Run Number, Procedure, Timestamp, Comment, and Total Time to execute. You can sort on the columns by clicking on the column headers. To access the Profiler Analysis window » From the Database menu, select Optimize | Profiler Analysis. Run Details Opening a run Selecting displays the graph for all units within that run. Expanding a run in the tree view will list the details of the run including Unit Type, Owner, Unit Name, and Total Time to execute. Opening a unit You can also select a specific unit of the selected run. When drilling down on a unit, we see the lines of code executed and profiled. The column headers include Line Number, Passes (how many times each line of code was executed), Total Time to execute the line, Min Time, Max Time, and the line of Code itself. The graph changes to display the information within that unit. Analysis Toolbar Between the top half of the window and the bottom half, there is a toolbar of functions:
- 602. Toad for Oracle User Guide Optimizing (Tuning) 599 Button Command Collapse all nodes. Expand all nodes. Open a selected procedure or line item in the Editor. (This can also be achieved by double-clicking the selected procedure.) Refresh data - If you switch to other windows to execute procedures for profile analysis, and switch back to the Profiler Analysis window, click to requery the profiler tables. Filter by schema. Delete a selected run from the profiler tables. Display as a pie chart. Display as a bar chart. Rotate chart. Graph properties - Change the visual display of the graph and/or group together values below a certain percentage or value. This is useful when you have several small pie wedges or bars. In the Graph Properties dialog box, you can also set the background color gradient, for example, from Blue to Black left to right. Hiding Profiler Data If you right-click the list, you can temporarily hide some data so that a better analysis of the remaining data can be performed. For example, if a particular statement takes 95% of the overall execution time, hide it, and the remaining statements, which were under 1% each will blow up to a larger relative percentage on the graph. Displaying in Editor If you select a valid unit in the tree view, right-click and select display in Editor, the editor displays the selected unit. Toggle PL/SQL Profiling To toggle PL/SQL Profiling » From the Session menu, select Toggle PL/SQL Profiling.
- 603. Toad for Oracle User Guide Optimizing (Tuning) 600 Editor Profiler Tab Within the Editor, the Profiler tab displays profiler runs, as root nodes, and profiler units as child nodes. The latter are the actual code units that were executed during a profiler run. They can include anonymous blocks, procedures, functions, and packages executed while the profiler run data was being collected. In the line item profiler, child nodes contain the actual line data. In the hierarchical profiler, child nodes contain sub program calls. This tab provides an overview of the data, but does not offer the graphs that the Profiler Analysis window does. Navigating the Editor Profiler Selecting a line item within the nodes automatically opens the referenced SQL source and displays the line referenced by the profiler. Note: Because each editor tab is associated with a separate Profiler instance, navigating through your code this way may reset the node display in the Profiler tab. To display the Profiler Analysis window for the current data » Click Details. Executable line indicators When you open a profiler run or unit into the Editor and have the option show executable line indicators in gutters selected, executable line indicators display as follows: Indicator Meaning Blue dot with green square Line was executed Blue dot with red circle Line was not executed If Toad cannot determine when the unit was last executed, then the standard blue dot line indicators will appear. Editor Profiler Nodes Each level of node within the Profiler Analysis window has a slightly different meaning to the column contents. See "Profiler Analysis" (page 598) for more information. Column Contents Profiler Runs Run Comment Root node is designated by the profiler run comment, followed by the user that executed the profiler run in parentheses. For example, AA_TEST_1 (MICHAEL).
- 604. Toad for Oracle User Guide Optimizing (Tuning) 601 Column Contents Total Execution Time (secs) Total time (in seconds) it took to execute all units included in that run. Avg Execution Times This will be blank for this level. Run Date The date and time that the run was completed. Profiler Units Run Comment Unit owner followed by the unit name. The unit type is also discernable by the icon for that node. If the unit says anonymous block it is not an object that actually appears in your database. Total Execution Time (secs) Total time (in seconds) it took to execute that unit. Avg Execution Times Average Execution time (in seconds) for a particular profiler Unit. Note: For the Line Item Profiler, this column will be blank for this level. Run Date The last DDL time (for non-anonymous blocks only) This is the date and time that the object was last modified and committed to the database. Last DDL time is queried from the ALL_OBJECTS view. Note: If a unit appears in red, it was last modified after the profiler run was executed, and Toad cannot display the profiler line map in the Editor for that object. Profiler Data Lines (Only displayed in the Line Item Profiler Run Comment The line number of that line in the unit's source code. Total Execution Time (secs) The execution time of that line for all passes (executions) followed by the number of executions in parentheses. For example, if the line in question is within a loop then it may be executed numerous times. Avg Execution Times Average execution time (in seconds) for one execution of that line. Run Date Source text for the line.
- 605. Toad for Oracle User Guide Optimizing (Tuning) 602 Editor Profiler Tab Toolbar Icon Command Refresh data. Remove selected profiler run from the database. Collapse all nodes. Expand all nodes. Display the Profiler Analysis window with details of this profiler run. Profiler Analysis (page 598) Profiler Filters You get to this window from the Profiler Analysis window, Filter toolbar button. See "Using DBMS_PROFILER" (page 602) for more information. Use this window to filter in or out schemas for a specific user. To hide schemas » Select schemas in the right hand side and click > to hide. Line Item Profiler Line Item Profiler Analysis Overview Oracle8i provides a Probe Profiler API to profile existing PL/SQL applications and to identify performance bottlenecks. The collected profiler (performance) data can be used for performance improvement efforts or for determining code coverage for PL/SQL applications. Application developers can use code coverage data to focus their incremental testing efforts. The profiler API is implemented as a PL/SQL package, DBMS_PROFILER, that provides services for collecting and persistently storing PL/SQL profiler data. Caution: Statistics may not be collected properly if you are running the Profiler on an Oracle server on a Tru64 platform. Using DBMS_PROFILER Improving application performance is an iterative process. Every iteration involves the following: l Exercising the application with one or more benchmark tests, with profiler data collection enabled. l Analyzing the profiler data, and identifying performance problems. l Fixing the problems.
- 606. Toad for Oracle User Guide Optimizing (Tuning) 603 To support this process, the PL/SQL profiler supports the notion of a run. A run involves executing specified SQL commands through benchmark tests with profiler data collection enabled. To start a run » Click in the main Toad toolbar so that it is in the depressed position. To end a run » Click in the main Toad toolbar so that it is in the non-depressed position. DBMS_PROFILER Session A typical session involves: l b>Starting profiler data collection in session. l Executing PL/SQL code for which profiler/code coverage data is required l Stopping profiler data collection. Some PL/SQL operations, such as the very first execution of a PL/SQL unit, may involve I/O to catalog tables to load the byte code for the PL/SQL unit being executed. Also, it may take some time executing package initialization code the first time a package procedure or function is called. To avoid timing this overhead, you should warm up the database before collecting profile data. Warming up involves executing SQL once without gathering profiler data. Collected Data With the Probe Profiler API, you can generate profiling information for all named library units that are executed in a session. The profiler gathers information at the PL/SQL virtual machine level that includes the total number of times each line has been executed, the total amount of time that has been spent executing that line, and the minimum and maximum times that have been spent on a particular execution of that line. The profiling information is stored in database tables. This enables the ad-hoc querying on the data: It lets you build customizable reports (summary reports, hottest lines, code coverage data, and so on) and analysis capabilities. Using DBMS_PROFILER with the Java debugger Toad lets you use the Profiler in connection with the Java debugger as well as when debugging PL/SQL. Output, however is different. When you profile Java code, all of the code is wrapped into an Anonymous Block, and then only that block is profiled. When debugging PL/SQL you are given the time per statement. In JDWP debugging, Toad returns the time for the entire procedure. Setting Up the Line Item Profiler You can set up the line item profiler to run from the Toad schema, or any private user’s schema. Each case has a different script to run, as explained in the steps below.
- 607. Toad for Oracle User Guide Optimizing (Tuning) 604 Note: The minimum Oracle database version required for the PL/SQL Profiler is Oracle8i. The SYS.DBMS_PROFILER package Make sure you have the SYS.DBMS_PROFILER package. If this has not been loaded, you will need to create it as follows. 1. Login to an Oracle database through Toad as SYS. 2. Load the Oracle home>RDBMSADMINPROFLOAD.SQL script into the Editor. 3. From the SQL Editor menu, select Execute as Script (F5). 4. Make sure that GRANT EXECUTE on the DBMS_PROFILER package has been granted to PUBLIC or to the users that will use the profiling feature. Install Profiler Server Side Objects To install the server side objects required for the profiler » Run the Server Side Objects Install wizard. See "Installing Server Side objects" (page 172) for more information. Using the Line Item Profiler This section explains how the profiler works, and some of the options you can use to filter and delete data to create a customized profile. See "The SYS.DBMS_PROFILER package" (page 604) for more information if you have not yet set up the profiler. Note: If you are using an Oracle 11g database, you have the option of using the Line Item Profiler or the Hierarchical Profiler. To use the line item profiler, from View | Toad Options | Execute/Compile | Behavior, clear the Use hierarchical profiler on Oracle 11g and newer checkbox. To use the Profiler 1. Start Toad. 2. Click on the main Toad toolbar to turn on profiling. Note: Execute a procedure from the Schema Browser or the Editor using the Execute (lightning bolt) button. Set Profiler descriptions on the Set Parameters window. You will be prompted to enter a description of the procedure being executed. This appears in the Profiler Analysis window or the Editor Profiler tab when you are analyzing the results. Run the procedure several times to get some data into the profiling tables. 3. Click to turn off profiling. Note: Be careful to not leave the profiler toggled on when you switch to other Toad windows. Otherwise, profiler data will be collected from the queries Toad performs to populate those windows. 4. Do one of the following:
- 608. Toad for Oracle User Guide Optimizing (Tuning) 605 l Click the Profiler tab beneath the editor, l Select the Database | Optimize | DBMS Profiler Analysis menu item. The Profiler Analysis window appears. For more information on reading the information provided, see Profiler Analysis. Anonymous Blocks and Lines Not Executed By default, anonymous blocks and lines not executed are not displayed. You can display them by right-clicking in the tree-view and selecting them from the popup menu. Hierarchical Profiler Hierarchical Profiler The hierarchical profiler is available beginning with Oracle 11g. The PL/SQL hierarchical profiler organizes data by subprogram calls, and stores the results in database tables letting you create custom reports. Information provided includes: l Number of calls to the subprogram l Time spent in the subprogram l Time spent in the subprogram and descendent subprograms l Detailed parent-child information For detailed information about the hierarchical profiler, please see your Oracle documentation. Setting up the Hierarchical Profiler You can set up the hierarchical profiler to run from the Toad schema, or any private user’s schema. Each case has a different script to run, as explained in the steps below. Note: The minimum Oracle database version required for the PL/SQL Profiler is Oracle 11g. The DBMS_HPROF package Make sure you have the DBMS_HPROF package. If this has not been loaded, please see your Oracle documentation for instructions on where to find it. 1. Login to Oracle through Toad as SYS. 2. Make sure that GRANT EXECUTE on the DBMS_HPROF package has been granted to PUBLIC or to the users that will use the profiling feature. Install Profiler Server Side Objects There are several database tables and other data structures that are required to use the analyzing functionality of the hierarchical profiler.
- 609. Toad for Oracle User Guide Optimizing (Tuning) 606 To install the database objects 1. Login to Oracle through Toad in the schema where you want the database objects created. These can be created in each individual schema, or alternately, this can be executed in a common schema (such as Toad) and synonyms can be made as described in step 4. 2. From the Oracle home, RDBMS/ADMIN directory, load the DBMSHPTAB.SQL script into the Editor. 3. From the SQL Editor menu, select Execute as Script (F5). 4. If you have created them in a common schema, create Synonyms to the following objects and either grant them to each schema requiring them, or make them PUBLIC. l DBMSHP_FUNCTION_INFO (table) l DBMSHP_PARENT_CHILD_INFO (table) l DBMSHP_RUNS (table) l DBMSHP_RUNNUMBER (sequence) 5. Check to make sure each schema using the Hierarchical profiler has the WRITE privilege on the directory that specified when you start profiling. Using the Hierarchical Profiler Note: If you are using an Oracle 11g database, you have the option of using the DBMS Profiler or the Hierarchical Profiler. From View | Toad Options | Execute/Compile | Behavior, select Use hierarchical profiler on Oracle 11g and newer. To use the Hierarchical profiler, there are several steps you will need to take: l Set up the profiler. l Set parameters for your code, checking the Hierarchical profiling options as well as code variables. l Toggle Profiling on (on the main toolbar, make sure that is depressed on the toolbar). l Filter and View analysis in the Profiler tab below the Editor. Or View analysis charts in the Profiler Analysis window. Note: If the Profiler tab is not visible, you can display it by right-clicking in the tab area and selecting Desktop Panels | Profiler. Setting Hierarchical Profiler Parameters Like the Line Item Profiler, the Hierarchical profiler has parameters that can be set from the Editor parameter page. Options set here persist on a per object basis.
- 610. Toad for Oracle User Guide Optimizing (Tuning) 607 To view and change parameters 1. Click on the Debugger toolbar in the editor, or execute the procedure to open the parameters window. 2. Click the Profiler tab. 3. In the Hierarchical Profile area, make changes to the parameters described below. Parameters Note:This topic only covers unfamiliar information. It does not include all step and field descriptions.s. Parameter Information Directory Select the directory from the pre-defined list of Oracle directory objects. The list of possible directories is derived directly from your database, and cannot be altered here. Note: You must have WRITE privileges on the directory you use. Limit call depth to n levels If desired, limit the call depth to the specified number. Entering a "1" will give you only a top-level profile. Entering a higher number will give greater depth to your analysis. Hierarchical Profiler Filters You can filter the results of your hierarchical profiling session. This can be useful in making sure that you only see the results that are useful for you. See "Hierarchical Profiler" (page 605) for more information. Toad will automatically filter out the system information that is added when the profiler is active. You can manually turn these on if you want to see that information. To create a filter 1. From the Profiler tab at the bottom of the Editor, right click over the grid and select Filter. Note: If you do not see the filter option, make sure you are actually using the Hierarchical Profiler. 2. Click Add to add a new filter to the filter grid. Enter the criteria you want to use to hide data. You may use the % wildcard within the filter. 3. Enable or disable any filters desired by selecting or clearing the Enable box. 4. Repeat steps 2 and 3 if necessary. 5. Click OK.
- 611. Toad for Oracle User Guide Optimizing (Tuning) 608 Oracle Tuning Oracle Tuning Advisor (OEM) Overview If you are using Oracle 10g and higher, you can tune using the Oracle Tuning Advisor. Or, if you have the SQL Optimizer module, you can use Quest's SQL Optimizer. See "Using SQL Optimizer with Toad" (page 106) for more information. The Oracle Tuning advisor window provides a tabbed interface where you can create tuning tasks, drop tuning tasks, and set automatic tuning configuration. There is an online video tutorial for this feature. This opens a new browser window and requires an internet connection. Note: By default, unless you have instructed Toad to make this window accessible, this functionality is disabled. You can restore functionality from View|Toad Options|Windows and clicking the Available checkbox in the appropriate row of the grid. Sending a SQL Statement directly to the Tuning Advisor You can send your SQL statement directly to the Oracle Tuning advisor. This feature can be accessed from the: l Editor window l Create/alter windows for l Views l Triggers l Snapshots l Schema Browser l Views l Triggers l Snapshots l Session Browser l SGA Trace/Optimization Accessing the Tuning Advisor In addition, Toad's Oracle Tuning Advisor window can display, open, delete, and create SQL Tuning jobs. To access the Oracle Tuning Advisor window » From the Database menu, select Optimize | Oracle Tuning Advisor.
- 612. Toad for Oracle User Guide Optimizing (Tuning) 609 Creating Oracle Tuning Tasks You can use Toad to access the Oracle Tuning Advisor and create tuning tasks. Toad's Tuning Advisor window provides a means to view, create and delete tuning tasks. The Tuning advisor can be accessed from several places within Toad. In most cases, Toad will open the advisor after creating a new SQL Tuning job from selected code. For information on parameters and how Oracle Tuning works, please see your Oracle documentation. To use the Oracle tuning advisor from existing code 1. Put your cursor within the statement you wish to tune, or highlight the code you wish to tune. 2. In the toolbar, click the drop down. 3. Select Oracle Tuning Advisor. 4. Make any changes to parameters and click OK. Notes: Results are displayed in the Oracle Tuning Advisor window. Creating a Tuning Task from the Tuning Advisor Window You can also create a tuning task from the tuning advisor window. You might want to do this if you had several files that you wanted to tune, or if you have been reviewing results from tuning another piece of SQL code. To create a tuning task from the window 1. From the Database menu, select Optimize | Oracle Tuning Advisor. 2. Click in the left pane. Viewing Oracle Tuning Tasks When you create a tuning task from another location in Toad, when you click OK you are taken directly to the results tab of the Oracle Tuning Advisor. See "Oracle Tuning Advisor (OEM) Overview" (page 608) for more information. You can view previous results directly from the Oracle Tuning Advisor window. To view tuning results 1. If the Oracle Tuning Advisor is not open, from the Database menu, select Optimize | Oracle Tuning Advisor. 2. In the left hand side of the window is a list of all Oracle tuning tasks that have been created. Click on the one you want to view.
- 613. Toad for Oracle User Guide Optimizing (Tuning) 610 3. If the Results tab is not active, click on it to view results. 4. Change the level of results you can see by selecting the desired level in the Level box. Viewing SQL Profiles You can view SQL Profiles from the SQL Profiles tab. In addition, you can modify or delete the SQL Profile. To view SQL profiles 1. From the Oracle Tuning Advisor, in the right hand side of the window, click the SQL Profiles tab. 2. Select a profile to display details for it in the lower panel. Viewing Tuning Scripts You can also view a recommended script for altering your code to suit the Tuning recommendations presented in the Results tab. For any tuning result there may or may not be a suggested script available for viewing. If there is no script, you will see the message "There are no recommended actions for this task under the given filters." In addition, you can also choose to send the script to the editor, or execute it directly from the advisor. Click the appropriate toolbar button to perform one of these actions. To view tuning script 1. From the Oracle Tuning Advisor, select the tuning task you want to view. 2. In the right hand side of the window, click the Script tab. Quest SQL Optimizer Quest SQL Optimizer Overview Quest® SQL Optimizer for Oracle maximizes SQL performance by automating the manual, time- intensive, and uncertain process of ensuring that SQL statements are performing as fast as possible. Quest SQL Optimizer automatically analyzes, rewrites, and evaluates SQL statements within multiple database objects, files, or collections of SQL statements from the SGA. Quest SQL Optimizer also provides you a complete index optimization and plan change analysis solution, from index recommendations for multiple SQL statements to simulated index impact analysis, through comparison of multiple SQL execution plans. The complete help file for Quest SQL Optimizer is available when you launch the program or from Start | All programs | Quest Software | Quest SQL Optimizer for Oracle | Documentation | Help. Quest SQL Optimizer consists of the following:
- 614. Toad for Oracle User Guide Optimizing (Tuning) 611 Batch Optimizer (available in version 7.0 and above) The Batch Optimizer enables you to submit files or database objects for batch processing. It first scans the code to extract the SQL statements, then optimizes each SQL statement and tests the SQL alternatives to find the best performing SQL for your database environment. It provides the replacement code with the optimized SQL statements. SQL Scanner The SQL Scanner identifies SQL statements from source code and database objects without requiring the execution of the SQL statements. Once the SQL statements are identified, the SQL Scanner analyzes and categorizes them according to suspected levels of performance problems. SGA Inspector (formerly called SQL Inspector) The SGA Inspector offers an easy way to view and analyze previously executed and currently running SQL statements from Oracle’s system global area (SGA). You can specify your own criteria to retrieve the SQL statements and their corresponding statistics to review SQL performance. Tuning Lab The Tuning Lab contains the SQL Optimizer, the Index Expert, Deploy Outline, Test for Scalability and Best Practices along with the testing of the alternative SQL statements and the index candidates. Tuning Lab-SQL Optimizer The SQL Optimizer automates the optimization of SQL statements. It first analyzes the original SQL statement and then uses Artificial Intelligence to exhaustively rewrite the syntax of the SQL statement and apply the Oracle optimization hints. It produces a list of semantically equivalent and syntactically correct SQL statements. By test running these SQL statements, it is then possible to identify which SQL statement best suits the needs of your database environment. Tuning Lab-Find Best SQL Alternative The execution of the SQL statements enables you to test run the original and optimized SQL statements to select which SQL statement gives the best performance. The execution times and run time statistics help you identify which SQL statement is most suitable for the needs your database application environment. Tuning Lab-Deploy Outline Deploy Outline stores an Oracle stored outline for a specific SQL statement. Oracle will use the stored outline when executing the SQL statement in place of using the execution plan.
- 615. Toad for Oracle User Guide Optimizing (Tuning) 612 Tuning Lab-Index Expert The Index Expert enables you to determine the best possible indexes for your SQL statements. It analyzes the syntax of a SQL statement and the relation between tables to generate index alternatives. It provides all the alternative index sets that generate a unique execution plan for a SQL statement. It creates these index sets without physical creating the indexes in your database. Tuning Lab-Find Best Index Alternative The performance of a SQL statement can be tested to help you determine which indexes should be permanently created in your database. Tuning Lab-Best Practices Best Practices proposes common techniques to improve performance on your database. Test for Scalability The user workload that SQL statements may encounter can be simulated with Quest Benchmark Factory to see how the best SQL alternatives will perform under differenct workload conditions. Global Indexing (formerly called Cross Index Analysis) Global Indexing analyzes a group of SQL statements and determines the best common index set for all of those selected SQL statements. Impact Analyzer (formerly called Plan Change Analzyer) The Impact Analyzer helps you to ensure reliable database performance by tracking execution plan and Oracle cost changes for SQL statements. It keeps track of execution plan changes to allow you to estimate the impact on the SQL statements' performance due to database changes. You can simulate different database scenarios with a selected group of SQL statements that will give you a good representation of what will happen if a proposed database change actually occurred. Or, you can track the actual changes in the execution plan over time or as the result of actual changes in the database environment. Outline Manager The Outline Manager organizes the stored outlines used to improve the performance of SQL statements when you cannot or do not want to change the SQL syntax in the source code. Rebuild Multiple Objects Rebuild Multiple Objects Overview Over time, indexes become fragmented. As the underlying table grows and shrinks, an index’s storage parameters sometimes become inappropriate. When this happens, the index no longer
- 616. Toad for Oracle User Guide Optimizing (Tuning) 613 enhances the performance of the database. For this reason, indexes need to be periodically rebuilt. From the Rebuild Multiple Objects window you can analyze indexes in order to determine which ones need to be rebuilt, and then to rebuild those indexes. You can also rebuild multiple tables at a time, if necessary. To access Rebuild Multiple Objects » From the Database | Optimize menu, select Rebuild Multiple Objects. Indexes In addition to the basic examine and rebuild features of this window, you can also perform the following on your indexes: l Move indexes into various tablespaces based on the size of their extents. l Adjust extent sizes to minimize the number of extents. l Adjust extent sizes to a standard, to minimize the number of extents and decrease tablespace fragmentation. l Specify criteria before analysis When you rebuild multiple indexes, you will generally work in the following order: 1. Load a list of indexes. 2. Select criteria and indexes and analyze the index. See "Rebuilding Indexes" (page 614) for more information. 3. Rebuild indexes as necessary.See "Rebuild Recommended Indexes" (page 614) for more information. Tables You can easily rebuild several tables at once. In addition, you can use Conditional Thresholds to limit rebuilds to rows that meet certain criteria. See "Setting Conditional Thresholds" (page 618) for more information. Email Notification - Rebuild Multiple Objects You can choose to have email notification when you have completed rebuilding indexes. This can be useful if the rebuild will take some time. Set the indexes to rebuild, and Toad will notify the appropriate person when they are complete. To set email notification 1. Click the Email Notification tab, and check the appropriate boxes. Choose to notify by email, and then check either HTML results or plain text summary to specify what to include in the email. HTML email is the default.
- 617. Toad for Oracle User Guide Optimizing (Tuning) 614 2. Set email options. Select View | Options | Email Settings and set the appropriate options for recipients and email accounts as described in Email Settings. Rebuilding Indexes Examining Indexes Once you have selected a list of objects in the grid, you can examine them to determine if they need rebuilding. Tables do not need examining, however, you can set Conditional Thresholds to limit the number of tables you look at for rebuilding purposes. See "Setting Conditional Thresholds" (page 618) for more information. To examine indexes 1. Select the indexes you want to examine. Click a grid row to check the boxes to the left of the index owner. 2. Click the Thresholds and Performance Options tab and set any standard thresholds. See "Height > " (page 618) for more information. These define when an index needs rebuilding. This tells Toad what parameters to look for in the index. 3. Click on the toolbar. When Toad is finished examining your indexes, it displays a recommendation in the index list, in the row under the index listing. These recommendations appear as follows: No Rebuild Recommended Rebuild Recommended - and a description of why You can now rebuild some or all of the indexes. See "Rebuild Recommended Indexes" (page 614) for more information. Index Rebuilding Once you have examined your indexes, or if you know already which ones you want to rebuild, you can rebuild the indexes. When you rebuild indexes, you can also change storage clause parameters. See "Change Extent Sizes" (page 620) for more information. There is an online video tutorial for this feature. This opens a new browser window and requires an internet connection. Rebuild Recommended Indexes When you examine the indexes in your index list, some of them may be marked Rebuild Recommended. These can be rebuilt at one time, with no other marking necessary. To rebuild recommended indexes » From the Indexes tab toolbar, click .
- 618. Toad for Oracle User Guide Optimizing (Tuning) 615 The indexes that have been analyzed and marked for rebuild are rebuilt and the status of the index is displayed below the index name in the grid. Create Script to Rebuild Recommended Indexes You do not have to rebuild indexes immediately. You can create a script to do it for you later. To create script to rebuild recommended indexes » From the Indexes tab toolbar, click . The script is copied to the clipboard. You can paste it into the Editor and save it for use later, if you want to run the rebuild from the command prompt. See "Run Rebuild Objects from the Command Prompt" (page 846) for more information. Rebuild Checked Indexes You can also select indexes manually to be rebuilt. To rebuild checked indexes 1. On the Indexes tab, select the indexes to rebuild, by checking the box in the left-hand column of the grid. 2. On the toolbar, click . Note: The status of the index is displayed below the index name in the grid. Create Script to Rebuild Checked Indexes You do not have to rebuild indexes immediately. You can create a script to do it for you later. To create script to rebuild checked indexes » From the Indexes tab toolbar, click . The script is copied to the clipboard. You can paste it into the Editor and save it for use later, if you want to run the rebuild from the command prompt. Rebuilding Tables Loading and Clearing Tables and Indexes You can load tables and indexes into the Table list (of the Rebuild Multiple Objects window) in several ways. Loading tables and indexes is cumulative. By selecting different Load Tables (Indexes) buttons on the toolbar, you can build a custom list. See "Rebuild Multiple Objects Overview" (page 612) for more information. Load My... This option loads all tables in the active schema into the Table list. If there are any partitioned indexes, each partition is a placed in a separate row of the grid.
- 619. Toad for Oracle User Guide Optimizing (Tuning) 616 To load tables 1. Click either the Tables or Indexes tab, and then click Load My… on the toolbar. 2. When you have loaded the tables or indexes, the button is disabled. You can enable the button again by Clearing the entire list as described below, or by changing active sessions within this window. 3. If you change active sessions within this window, the list is immediately cleared. Load... Like To create and use a like clause 1. Click either the Tables or Index tab, and then click Load … Likeon the toolbar. 2. Choose the Table Owner from the dropdown menu. 3. Enter the condition you want the index or table name to be LIKE. The text you supply will be directly used in an Oracle query. This field is case sensitive, and the following wildcards characters apply: l % For multiple characters l _ For a single character 4. Select a schema, or multi-select several schemas using the CTRL or SHIFT keys. 5. Click OK. Load by User If you have the DBA role, you can also load tables belonging to more than one schema. To load tables by user 1. Click either the Tables or Indexes tab, and then click Load … by Useron the toolbar. 2. Select a schema, or multi-select several schemas using the CTRL or SHIFT keys. 3. Click OK. Load by Tablespace If you have the DBA role, you can load tables belonging to a particular tablespace. To load tables by tablespace 1. Click either the Tables or Indexes tab, and then click Load … by Tablespaceon the toolbar. 2. Select a tablespace, or multi-select several schemas using the CTRL or SHIFT keys. 3. Click OK.
- 620. Toad for Oracle User Guide Optimizing (Tuning) 617 Reload To reload 1. Click the Tables or Indexes tab. 2. From the grid, right-click and select Reload all. 3. All storage information is reloaded and updated to its current state. Clear Selected Rows To clear selected rows 1. In either the table or index grid, select the indexes you want to remove. Use CTRL or SHIFT to multi-select. 2. Right-click the grid and select Remove Selected Rows from the menu. A confirmation dialog box appears. 3. Click Yes to remove the rows. Clear Entire List To clear entire list » Click either the Tables or Indexes tab and then click . The index is cleared, and the Load my … button is enabled, if it had been disabled. Table Rebuilding After you have loaded and selected your tables, you can either rebuild them immediately or create a script to rebuild them later. To rebuild selected tables » After selecting your tables, click . Toad will display a status report in the grid when finished. Status for tables that were rebuilt successfully displays in green, while if there were problems, the status report will be in red. To create a rebuild script » After selecting your tables, click . The script is copied to the clipboard, and you can paste it in the editor. Thresholds and Performance Options Standard Thresholds When rebuilding multiple objects, you can set thresholds for your examinations. There are two types of thresholds: standard and conditional. See "Setting Conditional Thresholds" (page 618) for more information about conditional thresholds used to limit the Index list.
- 621. Toad for Oracle User Guide Optimizing (Tuning) 618 At least one standard threshold must be set in order to Examine selected indexes. Standard thresholds are found in the middle of the Thresholds tab, in the area labeled Mark Indexes for Rebuild only if:. By default, all three thresholds are marked. Height > Height grows when there are splits to the index. If the height is high, consider rebuilding the index to reduce these splits. The default for this option is 4, but Toad can look for a height greater than any number you specify. ? Deleted Rows > If you have deleted rows in the database, the markers for those deleted rows still take up space in the index. Rebuilding the index to eliminate these markers can speed up usage. The default percentage is set to 25. You can adjust this up or down as needed. % Storage used < and % Storage used > If your index has too much storage space for the amount of information it stores, or if it uses too much of the storage space it has, it can also slow down database performance. Use these two options to select an optimum range for storage space for your index, and mark those indexes that do not comply with your choice for rebuilding. Conditional Thresholds When rebuilding multiple objects, conditional thresholds let you eliminate indexes in your index list from consideration before you analyze them. This lets you shorten your index list immediately, without taking the time to run a full analysis on every index. To use conditional thresholds 1. From the Thresholds tab, set conditional thresholds as described above. 2. Click the Indexes or Tables tab, right-click the grid and select Remove items that fail consideration thresholds. Failed items are removed from the grid, letting you analyze only the indexes you want to analyze. See "Rebuilding Indexes" (page 614) for more information. Setting Conditional Thresholds In the Thresholds tab area labeled "Consider Objects for Rebuild only if:" select one or more of the following options. Size is greater than This option lets you eliminate any tables or indexes where the size of the index is less than the specific amounts. Toad will only analyze sizes greater than what you specify. You can specify this number in MB or KB.
- 622. Toad for Oracle User Guide Optimizing (Tuning) 619 # Extents is greater than This option lets you eliminate any indexes where the number of extents is lower than the specified amount. Using Conditional Thresholds Use conditional thresholds when you have a long index list and you do not want to run a full analysis on the entire list. Performance Options When rebuilding multiple objects, the Performance options let you set parameters that affect the performance of your object rebuilding session. Performance options are located in the bottom section of the Thresholds and Performance Options tab. See "Rebuild Multiple Objects Overview" (page 612) for more information. Tables and Indexes Use ‘Online’ option If you check this option, Toad can rebuild or move the table or index while it is in use. Parallel Check this command to use the PARALLEL keyword when rebuilding indexes. When checked, the following check boxes become active. l Degree - Check this box and set the degree in the number field beside it. l Alter indexes to noparallel after rebuild - When checked, Toad issues an "alter index … no parallel command" after the index has been rebuilt. Refresh Index Data These radio buttons allow you to choose how you refresh the index data after a rebuild. l Do not refresh index info after rebuilds - This option does not reload the index data at all. l Refresh info for each index after each rebuild - This option reloads the data for one index immediately after that index has been rebuilt. l Refresh info for all indexes after all rebuilds are complete - This option reloads index data for all rebuilt indexes after all the selected indexes have been rebuilt. This is the equivalent of choosing "Reload all" from the right-click menu. l Rebuild associated indexes with tables - Select this box if you want to rebuild any indexes that are associated with the tables you have selected. Indexes Only Nologging Check this command to use the NOLOGGING keyword when rebuilding indexes. When checked, the following check box becomes active.
- 623. Toad for Oracle User Guide Optimizing (Tuning) 620 Alter indexes to logging after rebuild When checked, Toad issues an "alter index … logging command" after the index has been rebuilt. Change Sort Area Size for this session to: This command allows you to set the index sort area size for the rebuild session. This can be set in KB or MB, and set in increments of one. The default is 10 MB. After Rebuilds, change sort area size to: This check box lets you set the sort area size to a specified size after the rebuild session. Storage Clauses During any rebuild of multiple objects, whether it was a recommended or a manual rebuild, you can change storage clause parameters. Use this to keep extent sizes fairly uniform and appropriately sized or to move indexes to another tablespace. You can adjust the storage clause as follows: l Specify the PCTINCREASE l Set Next Extent = Initial Extent l Scale Extent Sizes by a specified percentage, specifying the minimum and maximum sizes l Define Extent Size Change Extent Sizes In addition, you can Change Extent Sizes. If you opt to use this feature, make sure you examine the index before you use it. Because the %used is a factor, this value can only be obtained by examining the indexes. Note that this is not the PCTUSED storage parameter. This refers to the actual percentage of allocated storage space for the index being used. This option overrides any options set in the top part of the window. To adjust extent size to minimize # of extents When this option is selected, the new extent size for each index is calculated as follows: 1. Working size=total size * % used. 2. This working size is then passed through the "Make Extent this size, or "Just Round All Extent Sizes to the Nearest Power of..." algorithm, as selected. The resulting value is the new initial_extent size. It is also the new next_extent size. Pctincrease is set to zero. l If you do not want to run the working value through either algorithm, select the "Just Round" and set the number to use as the closest power of 1. This is not recommended however, as it will result in each index being a different size, and this is a good way to fragment your tablespaces.
- 624. Toad for Oracle User Guide Optimizing (Tuning) 621 l If you have configured to adjust tablespaces base on extent sizes, Toad uses the new calculated size, not the original size. Caution: If some indexed tables are used as large temporary tables, and are usually empty, but are sometimes filled, they may be marked as "rebuild recommended" when you examine them, because they have zero percent used. In this case, if you use Adjust Extent Sizes during the rebuild, the index will be built with small extents that may not hold all your data later. Avoid this by either using global temporary tables, or do not rebuild indexes with a percent used of zero. Tablespaces From this tab, you can choose to move all indexes to different tablespaces, or selectively dependent upon their size. l If you choose to move indexes to a tablespace based upon the size of the index, and have chosen "By Index Size" on the Extents tab, size is based on the total size of the index. l If you choose to move indexes to a tablespace based upon the size of the index, and you have chosen "By Extent Size" on the Extents tab, then the size is based on the INITIAL extent size, as opposed to the NEXT extent size.
- 625. Options Formatting Options You can set how Toad formats code when you select Formatting Tools. See "Code Statistics" (page 875) for more information. An online video tutorial is also available for this feature. This video opens in a new browser window and requires an internet connection. To set formatting options 1. From the View menu, select Formatting Options. 2. In the left panel, select the node that corresponds with what you want to set. 3. If you select a high-level node, the right panel will display a description of the kind of formatting included under that node. If you select a detail node, the settings will display in the right panel. 4. Make your changes. Option nodes that have been changed are displayed in bold type. 5. Click . 6. Close the window. To reset all options to default settings » Click . Changes in the Formatter In Toad 9.7, the Formatter component was replaced with a new component that supports new Oracle functionality. Some formatter options have moved or changed slightly. When loading a Formatter Plus options file, the new component preserves options as much as possible. If no exact match is possible then the following matches are made: Formatter Plus option Converted as follows Parenthesis "open and close brackets in stacked lists" on same line In the new group "Position around Multi-line Lists" a closely matching option is selected Style of Parameter declaration and passed parameters Parameter declarations and Parameters list arrangements Wrap or Stack on 1 column, or Stack on Overflow on 99 colums 17
- 626. Toad for Oracle User Guide Options 623 Formatter Plus option Converted as follows AND-OR and Plus-Minus-Mul-Div "operators right and aligned" "operators right" AND-OR: Align top level OR or AND with keywords Not converted, but the user can select a new radio button: l Operators left l All conditions aligned when stacked l Operators aligned with the DML keyword SELECT keywords left aligned Keywords aligned LEFT (DML statements tab) SELECT align lists at column Middle margin (DML statements tab) SELECT INTO style SELECT list arrangement (similar) SELECT TABLE, ORDER BY, GROUP BY, RETURNING style Table Reference, ORDER BY and GROUP BY list arrangements (similar) INSERT column values style VALUES list arrangement (similar) Default list arrangement (Other Lists tab) set to Stack on Overflow Toad Options Toad Options To use options 1. From the View menu, select Toad Options. 2. Select a category on the list at the left 3. Set options in the detail pane on the right. Option settings are saved in TOAD.INI and restored the next time Toad is opened. Some of these options are set when you first create the TOAD.INI file (when you open Toad for the first time). See "Searching Options" (page 623) for more information about searching the options. Searching Options You can search the options lists for the option you want. This can be useful if you remember a basic option, but cannot remember where it falls in the categories.
- 627. Toad for Oracle User Guide Options 624 To search for an option 1. From the View menu, select Options. 2. At the bottom of the Options window is a Find box. Enter several characters from a keyword in this box. 3. Click Search. 4. Click a search result or select a result and press ENTER and the options window displays the page with that option, with the option in bold. The Option Window search dialog box remains open so you can look at all the results before moving on. 5. If you want, you can close the search results area by clicking the arrow beside the Search button. Example You know there is an option for making your passwords default to the username. But you cannot remember where it is in the Options windows. 1. In the Find box, enter pass. Press Enter, or click Search. 2. The search results window displays the following options: l Password Required l &Passwords l Save passwords for Oracle connections l Remember passwords for Oracle reconnects 3. Click the appropriate option, in this case Default Passwords to User name. The Options window displays the option. Data Grids - Data These options can be found at View | Toad Options | Data Grids - Data. Behavior Use Read-Only Queries This option controls the ability to fetch updatable result sets in the Schema Browser and Master/Detail Browser windows. If unchecked, then you automatically get editable grids in the Schema Browser and Master/Detail Browser. If checked, then grids are not editable in the Schema Browser and Master/Detail Browser. Note: Grids in the Editor are editable only if you include ROWID in the query or run an EDIT statement. See "Viewing and Editing Data" (page 955) for more information. The default is unchecked.
- 628. Toad for Oracle User Guide Options 625 Confirm record deletions If checked, will confirm each record deletion before deleting the record. This option also affects the data grids on the Schema Browser "Data" tabs. The default is unchecked. Warn of cascading constraints on deletions This option applies only to the Schema Browser. If checked, when you attempt to delete a row from a grid, Toad will check for an "ON CASCADE DELETE" foreign key constraint. This constraint may cause rows from other tables to be deleted as well. If it is present, Toad will warn you before deleting. The default is unchecked. Preview CLOB and LONG data When checked, Toad will preview CLOB and LONG data in the data grids. When unchecked, there will be no preview. Checking this option can sometimes cause performance problems. The default is unchecked. Deferred LOB read When checked, LOBs are read as they are displayed. This results in faster initial load, but slower grid performance. When unchecked, LOBs are read in with the rest of the fields. This results in slower initial load, but faster grid performance. NOTE: This option is ignored when CLOB/LONG preview is unchecked. The default is unchecked. Stop data fetches when available memory becomes less than n MB You can change the number of megabytes that triggers Toad stopping data fetches. This number includes all available memory, both physical and pagefile. Display Show ROWID in editable grids If checked, the row id will display in data grids. The default is unchecked. Trim string data in CHAR and NCHAR columns If checked, for CHAR and NCHAR columns, when data is retrieved from Oracle, any trailing spaces will be trimmed off, showing only actual data. The default is unchecked.
- 629. Toad for Oracle User Guide Options 626 Display large numbers in Scientific Notation If checked, then numbers with over 15 digits are displayed in scientific notation in the data grids, and numbers with more than 15 decimal places are displayed rounded to the 16th place. If unchecked, then all numbers in the data grids are fully displayed and the Calculator drop down will be disabled in number cells. This option is set at the time that you establish your connection in Toad, so if you change the option, you will need to log off and make a new connection in order to see it in effect. This option can affect exporting to MS Excel. When checked, numbers are sent to excel formatted as numbers, with a possible loss of precision. When unchecked, numbers are sent formatted as strings, and with no loss of precision (# of Decimals for Numbers option is ignored). Toad exports numbers up to 15 digits in Number format, and exports anything over as a string format to maintain precision. Note: If you have the "use only general cell formatting" option selected, then all datatypes are exported as strings. The default is checked. Keeping this default is recommended. Date format: (dropdown list) Normally, the data in Toad for date columns will display in the format selected in the Windows Control Panel. Selecting a different format will override the Windows Control Panel setting. The default is your Windows Control Panel, Regional Settings, Short Date Style Format. Time format: (dropdown list) Select a different time format if desired. The default is h:mm:ss AMPM. Sliding window for entering two digit years This option lets you change the sliding window value for using the current century in two-digit dates. It is the current system date minus the number of years specified in the sliding window option. The range of choice is 0 to 49. For example, if you specify a 30 year window (which is the Toad default) and enter 1/1/87, the date produced will be Jan. 1, 1987; if you enter 1/1/57 that is outside of the 30 year window so the date produced will be Jan. 1, 2057. Refresh Grid Data Select when you want data grids to refresh: After Inserts Useful to keep grid data current as it changes because of default values and constraints. These options are selected by default.
- 630. Toad for Oracle User Guide Options 627 After Updates Before Edits Useful to keep records in sync in the situations mentioned above wand when other users change records. Note: Certain situations exist where a record level refresh is not possible because the record no longer exists, or its ROWID has changed. For these situations, you may wish to disable some or all of these options. Data Grids - Visual The Data Grid – Visual options control how the grid appears and works visually. These options can be found at View | Toad Options | Data Grids - Visual. Behavior Tabs When checked, the tabs option allows you to tab through one record. The default is checked. Note: You cannot tab through multiple records unless Tab Through is also selected. Tab Through When checked you can tab through more than one record. The default is unchecked. NOTE: In order to tab through the records you must also have Tabs checked. Row Select With the Row Select option checked, clicking in a cell in the data grid will select the entire row rather than only one cell. Unchecked, clicking will select one cell only. The default is unchecked. Multi Select Checking the Multi Select box automatically engages row select. Multi select allows you to select more than one row at a time, using the SHIFT or CTRL keys to select while clicking on rows. Unchecked, only one row at a time may be selected. The default is unchecked.
- 631. Toad for Oracle User Guide Options 628 Immediate Edit If this option is checked, as soon as you click a data cell in the grid, an editor dropdown will appear. If unchecked, you must select the cell twice to place the grid in edit mode. The default is unchecked. Confirm sorts when clicking on column header With this option selected, the Sort Options box appears when you click a column header. This allows you to select how you want to sort the data in that column. Unchecked, the column is sorted immediately without displaying any options. The default is checked. Column Sizing Size to header Checking this option sizes all columns to the width of the column headers. So if the data is wider than the header, it will be truncated. The default is unselected. Size to data Checking this option sizes all columns to the width of the data contained in them, rather than to the size of the column header. This allows you to see even the widest data in the table. Unless "Allow columns to be less than the header width" is checked (see below), the column will never be narrower than the column header. The default is checked. Allow columns narrower than header width If this option is checked, you can make columns narrower than the width of the column header. This can allow you to fit more data on the screen. If this option is not checked, columns will never be narrower than the header for the column, although this may be narrower than the data contained in it. The default is unchecked. Allow columns wider than grid width Check this option to prevent columns from automatically being resized greater than the grid size. This prevents column widths from becoming excessively wide due to LONG data. The default is unchecked.
- 632. Toad for Oracle User Guide Options 629 Preview column height n Changing the number of lines included in the preview column. Select any number of extra lines from zero to five (0-5). The default is 1. Display Show Focus Rectangle When this selection is checked, if you select an item in the data grid and then click outside the grid, the item you selected is marked with a black rectangle. Unchecked, the selected item is no longer selected or marked in any way when you click outside the grid. The default is unchecked. Show grid selection When checked, if you select an item in the data grid and then click outside the grid, the item remains highlighted. If unchecked, the selected item is no longer selected when you click outside the grid. The default is checked. Show grid lines When selected, a grid appears around data in the results grid: lines divide rows and columns. If left unchecked, the grid lines do not display. The default is checked. Grid line width n This option controls the thickness of the lines between rows on the data grid. The measurement is in points. The default is 1. Show row numbers When this option is checked, a column containing the row numbers is displayed as the first column of the data grid. The default is unchecked. Use grid border color With this option checked, the row numbers are shaded in the same color as the lines in the grid. The default is unchecked.
- 633. Toad for Oracle User Guide Options 630 Show Group Summaries When selected, if the data grid is grouped by a column header (by dragging into the Group by area) a summary of group contents displays beside the group heading. Unchecked, only the group heading, such as ENAME: SMITH is displayed. The default is checked. Null columns You can select how null columns are displayed. Options include: l Blank - null columns display as a blank cell. This is the default. l {null} - null columns contain the word {null}. l Yellow - null columns display in yellow. Data font Clicking Grid in this area displays the font selection dialog box. Changing the font here affects the entire data grid, with the exception of the preview column and headers. All data grids will have the same font. The default is MS Sands Serif 8 point. Data Background Select a color from the drop down menu for the background to the data. This will affect all data grids within Toad. Header font Clicking Header in this area displays the font selection dialog box. Changing the font here only affects the font displayed in the headers of the Data grids. The default is MS Sands Serif 8 point. Header Background Select a color from the drop down menu for the background to the header. This will affect all data grids within Toad. Preview Column font Clicking Font in this area displays the font selection dialog box. Changing the font here only affects the font displayed in the preview column. The default is MS Sands Serif 8 point. Colors Select the colors you want to use in the data grid. You can set background and header colors. Data Types The Data Types Options page is accessed through the View | Toad Options | Data Types item. The options that are checked will appear as items in the Data Types dropdown in the Create
- 634. Toad for Oracle User Guide Options 631 Table and Alter Table windows. Types are listed in the Native Oracle Types panel and the ANSI Types panel. Select All and Select None buttons are in each panel. You can check and uncheck the individual types. The types checked are the only ones that will be included in the Table Data Types dropdown. In addition, there are check boxes for: Include Object Types (Oracle 8) This option is available on Oracle 8 databases and above. The default is unchecked. Cache Object Type list per Connection Caching the object type list prevents Toad from having to query and load everything in DBA_ TYPES whenever you open the create/alter table (or index) screen. Memory usage of this cache should be insignificant. You may want to clear the cache manually if you just created some new object type and want to start using it in the create table screen. The cache automatically clears when the session is ended. Include Byte/Char spec when creating DDL scripts from 9i databases This option is available on Oracle 9i databases and above. For example, the script generated from SCOTT.EMP would have these differences: Checked Unchecked CREATE TABLE EMP ( EMPNO NUMBER(4), ENAME VARCHAR2(10 BYTE), JOB VARCHAR2(9 BYTE), MGR NUMBER(4), HIREDATE DATE, SAL NUMBER(7,2), COMM NUMBER(7,2), DEPTNO NUMBER(2) ) CREATE TABLE EMP ( EMPNO NUMBER(4), ENAME VARCHAR2(10), JOB VARCHAR2(9), MGR NUMBER(4), HIREDATE DATE, SAL NUMBER(7,2), COMM NUMBER(7,2), DEPTNO NUMBER(2) ) The default is checked. DBA Access this window through the View | Toad Options | DBA menu item.
- 635. Toad for Oracle User Guide Options 632 Tablespace map This area allows you to modify colors and set fragmentation levels used on the Tablespace Map. See "Tablespace Map" (page 274) for more information. You can add multiple fragmentation levels. To add new fragmentation levels 1. Click Add to add a new Fragmentation level. 2. Select the fragmentation percentage. You can either type the number in the box or select it by clicking the up and down arrows until the correct number appears. The cells whose segments equal to or exceeding this fragmentation level will be colored the color you choose. 3. Click to select the color to highlight cells whose segments equal or exceed the fragmentation level you have set. The color selection dialog box appears. Click the color you want to use and click OK. 4. Click OK to add the level and close the Add Level dialog box. To edit colors or fragmentation levels 1. To edit a color choice or fragmentation level, click the item you want to change and click Edit. l If you have selected a fragmentation level, the Add Level dialog box appears. l If you have selected another option, the Color Selection dialog box displays. 2. Make the desired changes and click OK. Delete You can delete Fragmentation Levels that you have added. You must retain at least one fragmentation level. You will not be able to delete the last fragmentation level. To delete fragmentation levels l Select the level you want to delete and click Delete. No warning will display. The fragmentation level is simply removed from the list. Show segment names on grid hint If this box is checked, the segment names will display when you run your mouse over the Tablespace Map. The default is checked. Remember legend window state Check this box to remember the state of the legend window when you close the Tablespace map. When checked, opening the map again will leave the legend where you had it last. (Visible or hidden).
- 636. Toad for Oracle User Guide Options 633 The default is checked. Remember segments window state Check this box to remember the state of the segments window when you close the Tablespace map. When checked, opening the map again will leave the segments window where you had it last, either visible or hidden. The default is checked. Remember filters window state Check this box to remember the state of the filters window when you close the Tablespace map. When checked, opening the map again will leave the filters window where you had it last, either visible or hidden. The default is checked. Confirm before overwriting Export/Import Files When these options are checked, Toad will prompt you to confirm that you want to overwrite a file when you Export or Import. Unchecked, Toad will overwrite the file without asking. The defaults are checked. Refresh Instance Manager database version during every poll This determines whether the Instance Manager queries for the database version every time it polls a database. Normally, the database version for a database does not change, so there is no need to refresh it once it has been retrieved. However, this option will allow you to refresh the database version in case of a database upgrade. The default is unchecked. Debugger Options All the Option settings are saved in TOAD.INI and restored the next time Toad is opened. These options can be found at View | Toad Options | Debugger. Allow watches on package variables Provided because the Oracle Probe API call for watching package variables acts differently on Oracle7 and Oracle8 databases. On Oracle7 databases, you have to step into the procedure BEFORE adding a watch on a package variable. On Oracle8, you can set up the watch on the package variable before or after stepping into the procedure. If you do not want to inspect package variables, then uncheck this option. The default is checked.
- 637. Toad for Oracle User Guide Options 634 Enable Trace Output while debugging Creates trace information while the Debugger is running, which will help debug the Debugger interactions with the database. This is normally unchecked and is used for tech support or DBA. The default is unchecked. Enable DBMS_OUTPUT before debug session If this box is checked, then DBMS_OUTPUT will be made available for your debug session. If the DBMS_OUTPUT window is not visible and there is DBMS output data, you will need to open it to view your output. If this box is unchecked, DBMS_OUTPUT will not be displayed. The default is checked. This option can also be enabled/disabled from the DBMS Output window in the Debugger. Step through package initialization When you have a package that includes package variables, the first time you execute a procedure in the package the variables are initialized. If this option is checked, the Debugger will step to the lines of code where the variables are declared and initialized. If the option is unchecked, the Debugger will never step into the package initialization. The default is unchecked. Notify when debugging terminated If checked, when debugging execution has terminated a message box with confirmation will display indicating Execution has terminated. If unchecked, no message will display at the end of debugging execution. The default is checked. Break on exceptions This option causes the Debugger to stop when it hits a procedure exception (such as zero divide) and display a message. You can then continue debugging the exception handler code or stop. The default is checked. Debugger Choose the debugging package you want to use. DBMS Selected, Toad will use the DBMS debugging package.
- 638. Toad for Oracle User Guide Options 635 Note: To use either DBMS or JDWP you must have the appropriate package installed properly in the database, and database permissions to a use it. JDWP Selected, Toad will use the JDWP debugging package. l Host- Enter the host used by JDWP. l Port - Select the port you want to use for Java debugging. l Allow stepping into Java Source - When selected, you can step into Java source. Unchecked, Java source will be executed but not stepped through. Script Selected, Toad will use its internal script debugging abilities. Transaction Control These buttons let you choose how Toad deals with transactions in the Editor. l Commit – a COMMIT statement is added to the anonymous block that is used to execute or debug code in the Debugger. Triggers do not default to rollback: they obey the settings for this option. l Rollback – a ROLLBACK statement is added to the anonymous block that is used to execute or debug code in the Debugger. l Prompt – when you finish executing/debugging code in the Debugger, Toad will prompt you to answer the question "Commit changes to debug session?" Answer Yes to commit, No to rollback. The default is Commit. Note: If the object has its own rollbacks/commits, the Debugger can only Rollback or Commit anything done since the last commit was performed. Compile Dependencies Yes/No/Prompt This will conditionally compile procedures called by your procedure with debug information just before the debugging begins. l YES - compiles all procedures that your procedure calls with debug information. l NO - does not compile those procedures with debug info. l PROMPT - prompts you before debugging each time. The default is Prompt. Enable DBMS_JAVA Output Default Buffer size Select the buffer size when DBMS_Java output is enabled. The default is 20000.
- 639. Toad for Oracle User Guide Options 636 Display Use this area to specify how debugging items will display. Select the item in the box at the left, and then specify foreground and background colors for that object. Debug session timeout (in seconds) box This option limits the amount of time that the Debugger will wait for the database to respond with debug information. You can enter the number of seconds. For a slow database, poor network speeds, or connection by modem, increase the number of seconds. The default is 180 seconds. Date format for Watches dropdown list Allows you to select the date format for watched variables. Options are DD/MON/YY, MON/DD/YY, and MON/DD/YYYY. The default is DD/MON/YY. NOTE: Date format does not affect the NLS DATE FORMAT for the Toad sessions/ connections. It only affects the Debugger session. Editor - Behavior These options can be found at View | Toad Options | Editor - Behavior General Apply commit/rollback to all tabs (threaded queries) When selected, any commit or rollback selections made in the Editor will apply to all tabs, not just the active one. When unchecked, commit and rollback will only apply to the active tab. The default is checked. Auto Indent When selected, Toad will automatically indent lines after you have indented the first. Use this option with optimal fill and Tab Stop settings to specify how the indent is created. The default is checked. Backspace unindent When selected, you can use the backspace to unindent a selection. When unselected, pressing the backspace key will delete the selected text. The default is unchecked.
- 640. Toad for Oracle User Guide Options 637 Backup editor every n minutes When selected, Toad will back up editor contents at the interval you have specified. The default is checked and every 3 minutes. Block select When selected, you can select a block of text anywhere on the screen by using your mouse to drag a box around it. When unchecked, text selection works in the standard manner. The default is checked. Clear grid on editor clear If checked, when you clear the grid using the Edit menu or F7, the query grid will also be cleared. Note: This does not clear the gird if you select all text and press DELETE, BACKSPACE, or perform a CUT operation. The default is checked. Collapse empty lines When selected, any lines that are empty of text are collapsed to save screen space. Unchecked, these empty lines are displayed. The default is checked. Confirm Clear All Text If clear, you can press F7 to clear all text from the Editor window without a confirmation dialog box. If selected, Clear All will prompt for confirmation from both F7 and the Edit menu. The default is unchecked. Copy text in rich text format If checked, when you copy text formatting will be preserved, and the text pasted in RTF format. When unchecked, all formatting is stripped and the code you have selected is pasted as plain text. The default is checked. Cursor beyond end of line When checked, the cursor can extend beyond the end of line. This is especially useful when using the block select option, as you can make your block as large as you need it. When unchecked, the selection will not extend beyond the end of the first section you have selected. The default is unchecked.
- 641. Toad for Oracle User Guide Options 638 Double click line select When checked, you can select a line by double-clicking on it. When unchecked, you must drag to select the entire line. The default is unchecked. Enable code folding When checked, code folding will be enabled. Nodes will then be visible at the sides of the code that let you easily collapse or expand the code as desired. The default is checked. Find text at cursor If checked, when opening a Find and Replace dialog box, Toad will automatically look for the word currently under the cursor. Otherwise, Toad will default to the word you searched for most recently. The default is unchecked. Group redo/undo When selected, Toad will redo or undo text changes in groups of keystrokes. Groups are marked by a carriage return or by the change from typing to backspacing. When unselected, Toad redoes or undoes items one at a time. The default on both these options is unchecked. Hide cursor when typing When selected, Toad will hide the cursor when you are typing. When you stop typing and move your mouse, the cursor reappears. When unselected, the cursor is visible at all times. The default is unchecked. Preload objects on "Load Object from DB" window If checked, the Object Type filter is bypassed, and all objects from all object types are displayed right away. The default is checked. Scroll past last line When this option is checked, you can scroll until the last line in the editor is at the top of the editor. Unchecked, Toad stops scrolling as soon as the last line is visible in the editor. The default is checked.
- 642. Toad for Oracle User Guide Options 639 Treat underscore char as a word character If selected, Toad treats all underbar characters, "_", as part of the object name. This can be useful if you often double click object names. With this option checked, a name such as ALL_TAB_ COLUMNS will be highlighted. With it unchecked, only the word you click is highlighted (for example: COLUMNS). The default is checked. Use lower case object names from select windows If checked, will return selected column names into the editors in lowercase. Otherwise they are returned in uppercase. The default is unchecked. Note: Only uppercase object names obey this option. Mixed-case and lowercase object names do not change case, regardless of the option. l Lowercase object names are, of course, already in lowercase. l Mixed case names must be double-quoted and cased correctly, as opposed to the situation where an uppercase name is submitted to Oracle in lowercase and automatically interpreted as uppercase. Use single Editor instance for PL/SQL if possible Toad can attempt to locate an editor that contains PL/SQL when loading it from outside of the Editor. This will cycle through all open Editors and find one that contains PL/SQL. If found then Toad will use that Editor. PL/SQL is determined to exist in an Editor if the parser has successfully identified a procedure, function, package, package body, type, type body, trigger, or Java source object within it. If multiple Editor windows contain PL/SQL then the first one found is the one chosen. If no editor is found Toad will open a new Editor window. The default is unchecked. Word wrap When selected, the editor will use word wrap on long lines, wrapping the text to the next line in the editor. When unchecked, the editor will place all text on one long line. The default is unchecked. Word break on right margin When checked, if word wrap is selected, the line wraps at the right margin (light gray line in the editor) if it is too long. When unchecked, the line wraps at the end of the visible editor. The default is checked.
- 643. Toad for Oracle User Guide Options 640 Tabs Mode Select the mode you want to use for tabs (spaces, tabs, or smart tab). The default is Use Spaces. Tab Stops Select the number of tab stops you want to use. The default is 4. Block indent Enter the number of spaces you want to use for an indent when you use the block indent command. The default is 4. Optimal fill When checked, Toad begins every auto indented line with the minimum number of characters possible, using tabs and spaces as necessary. When unchecked, Toad begins every auto indented line with enough spaces to move the cursor where it needs to be. The default is unchecked. Languages The Languages area allows you access to the language management windows, where you can make changes to the language parsers in the Toad editor. See "Language Management Overview" (page 688) for more information. Code Templates Opens the Language Management screen and activates the Code Template tab. See "Code Completion Templates" (page 700) for more information. Syntax Highlighting Opens the Language Management screen and activates the Syntax Highlighting tab. See "Syntax Highlighting" (page 690) for more information. Key Mapping Click the Key Mapping button to select shortcut keys for various editor commands. These shortcuts, limited to the editor commands, are superceded by any shortcuts set in the Toolbars/Menus | Shortcuts section. If you want to use the navigation keys as shortcuts, uncheck the Enable Navigation Keys in the Grid box. See "Toolbars/Menus - Shortcuts" (page 686) for more information.
- 644. Toad for Oracle User Guide Options 641 Auto Replace Click the Auto Replace button to set up options for auto replace. The grid provided lets you specify what keystrokes should be replaced by what text. For example, you can choose to replace all instances of "teh" with "the" automatically. When you have finished making changes and additions, click OK to return to the options page. Editor - Code Assist These options can be found at View | Toad Options | Editor - Code Assist. Toad Insight Objects Use this list to filter the Toad Insight lists by object type. Check the object types you want to include. By default, all object types except Types (Collection and Object) and Synonyms are selected. Code Snippets You can use the Code Snippets area to add, edit, or remove any of the code snippets. See "Code Snippets" (page 857) for more information and details about maintaining snippets. Toad Insight Cache Code Insight results If checked, code insight results will be cached for quicker retrieval during multiple uses. Note: Caching does use more memory. If this is a factor for you, you may want to clear this option. The default is checked. Ctrl+Click jumps to PLSQL objects This option enables the CTRL+Click functionality in all PL/SQL Objects. When the hotkey is activated, clicking on the object name will load that object in the editor. The default is checked. Jump to package and type body Use this option to enable the CTRL+Click functionality in package or type specs. Using this hotkey will take you directly to the body of the selected package, type or procedure. The default is checked.
- 645. Toad for Oracle User Guide Options 642 CTRL+Click describes objects When this is checked, objects are described when you press <CTRL> and click on them. If both this option and CTRL+Click jumps to PLSQL objects are checked, then Toad first attempts to load the object into the Editor. Failing that, the object will be described. The default is checked. Show object types as text in pick list When checked, the pop-up pick list will display the object type as text instead of a graphic icon. The default is unchecked. Display parameter hints after typing open parenthesis If checked, when you are entering parameters in your code, and type the first paren "(", Toad will display hints for the parameter as described. The default is checked. Display pick list after typing object name followed by a period If checked, will display the columns dropdown list. If unchecked, will not display the columns dropdown list. See Toad Insight Picklist for more information. The default is checked. Sort pick list alphabetically If checked, columns popups are sorted alphabetically. The default is checked. Delay popups ... milliseconds Use this to select the number of milliseconds Toad should wait before displaying popup hints. The default is 1500 milliseconds. SQL Recall Save only valid statements When checked, only valid SQL statements are saved in the SQL Recall area. Unchecked, all SQL statements, valid or invalid, are saved. The default is checked. Show only statements for the active session When checked, only statements associated with the active session will be displayed. The default is unchecked.
- 646. Toad for Oracle User Guide Options 643 Write statements to disk prior to execution When checked, Toad will write SQL statements to the disk before it executes them. This allows you to keep your SQL statement and recall it if something goes wrong in the execution. The default is unchecked. Statements to save: Enter the number of statements Toad should save to SQL Recall. When the number of statements exceeds this number, the oldest ones will be deleted as new statements are added. The default is 500. Limit per connection When checked, the option to limit saved statements will affect history per session. If it is set to 40, then the active session can have 40 saved statements. There may be more saved statements associated with other sessions. The default is unchecked. Make Code You can change the language used when you select Make Code from the toolbar. You also can create your own language template for use in the Editor. MakeCode format list From this list, you can select the language syntax for Toad to convert a SQL statement into (Make Code Statement function) and out of (Strip Code Statement function). Currently, Delphi, VB, C++, Java, and Perl are automatically supported. The default is VB. Creating and Editing MakeCode languages You can create your own templates so that you can switch between more languages than Toad automatically provides, or you can change our own with the Make Code command. Templates are stored with the Code Snippets options in the file templates.xml. See "Creating Make Code Templates" (page 895) for more information and examples of Make Code language. To create your own language template 1. From the Options page, select Editor | Make Code. 2. Click Add. 3. Enter a name for the template in the Name box. Note: Toad uses the basic language name for this name, but if you wanted to make slightly different templates for the same language you can name them as desired. 4. Enter the Escape character (if any) that you want to use.
- 647. Toad for Oracle User Guide Options 644 5. Enter the delimiter required by the language you are using. 6. Enter the codes for the language template as described in Creating Make Code templates. To edit a language template 1. From the Options page, select Editor | Make Code. 2. Click Edit. 3. Make your changes and click OK. MakeCode Variable Name Enter the Variable name you want to use for MakeCode commands. The default is SQL. Select Statement based on cursor position When selected, Toad will parse the code and select the statement residing at the cursor position. The default is unchecked. Strip Code copies to clipboard When selected, if you choose to strip code, the code you strip is copied to the clipboard so that you can easily undo the operation. If you go on to strip additional statements, or perform other tasks that place data on the clipboard, the code is overwritten: only the most recent action is saved. The default is checked. Editor - Display These options can be found at View | Toad Options | Editor - Display. General Highlight execution line when not debugging When selected, the line being executed will be highlighted as it is executed. This can be very useful when stepping through code. If unchecked, execution will occur without highlighting the entire line. The default is unchecked. Lock results tab When selected, the active results tab will remain active between editor tabs. When unchecked, each editor tab can have a different results tab active. For example: You have an Editor opened with two tabs. You make the Data Grid results tab active on Tab 1 and switch to Tab 2 and make DBMS Output results tab active on there.
- 648. Toad for Oracle User Guide Options 645 l If Lock Results Tab is selected, when you switch back to Tab 1 the DBMS Output results tab is active, since it was locked as the focused tab. l If Lock Results Tab is not selected, when you switch to Tab 1 the Data Grid tab is active because it was the last used results tab for Tab 1. The default is checked. Persist display of execution time When checked, the leftmost area of the status bar displays the execution time of the last executed query. If this option is cleared, the execution time is shown until the caret position is changed in the editor. At that time the display changes from execution time to the LINE:COL position of the caret. The default is unchecked. Persist dynamic highlighting when not focused When checked, Toad will keep dynamic highlighting when you move focus into another panel or window within Toad. When unchecked, dynamic highlighting will not be applied when you are not actively using the code that is highlighted. The default is checked. Persist selection when not focused When checked, Toad will keep selected code highlighted when you move focus into another panel or window within Toad. When unchecked, selected code will not be highlighted when you are not actively using the code. The default is checked. Persist selection when using navigation keys When checked, Toad will keep selected code highlighted when you use arrow keys to navigate. When unchecked, selected code will not be highlighted when you arrow keys to navigate. The default is unchecked. Show word wrap indicator When selected, visual indicators (arrows) display at the end of lines that have been wrapped to the next line in the editor . When unselected, no indicators are present. The default is unchecked.
- 649. Toad for Oracle User Guide Options 646 Show control characters When selected, control characters (such as spaces, tabs, carriage returns) are displayed within your code. When unselected, no control characters are displayed. The default is unchecked. Show current line focus rectangle When selected, in PL/SQL tab the line of code that has focus will also have a rectangle around it. When unselected, the rectangle will not display. The default is checked. Show executable line indicators in gutter When this option is checked, a blue dot appears in the gutter of lines that have executable code. The default is checked. Show line numbers When checked, line numbers will display to the left of your code. When unchecked, no line numbers will display. The default is checked. Show results tab toolbars If checked then any toolbars that results tabs have will show. If clear then they are not shown. When checked, this option displays the toolbars in the Debug windows. Uncheck this option to hide the toolbars in the Debug windows. For example, the Editor Data Grid tab has a toolbar with VCR style navigation bars and this toolbar will be shown or not shown based on this option. The default is checked. Use multi-line editor tabs This option lets you choose whether all of the tabs will appear in one line (unchecked) or whether they will be shown in multiple rows when the list of tabs is too wide for the window (checked). The default is unchecked.
- 650. Toad for Oracle User Guide Options 647 Syntax Highlighting Highlight table names If checked, will show table names in the Editor window, using the syntax-highlighting feature. If unchecked, table names will appear in black text. The default is checked. Highlight view names When checked, view names will be highlighted. The default is unchecked. Highlight stored procedure names When checked, stored procedure names will be highlighted. The default is checked. Use when printing When checked, syntax highlighting will be printed. Unchecked, code will be printed in plain text. The default is checked. Fonts Editor Set the main editor font. Line number Use this to set the font for line number display. Gutter and Margin Use these to set the width and position of visible gutters and right margins. Visible gutter width: Specify the width of the gutter you see to the left of your code. The default is 50. Visible right margin position: Specify the position of the right margin on your screen to make your coding area wider or narrower. The default is 80.
- 651. Toad for Oracle User Guide Options 648 Background Color Set the background color for the windows in your editor. You can select from any of the default Windows settings or specify your own color scheme. The default is Window background, which corresponds to the Window Background setting for Windows. Hex Editor Bytes per line: n Use this option to specify how many bytes per line will display. The default is 20. Editor - Open/Save Options These options can be found at View | Toad Options | Editor - Open/Save. Opening Files File splitting was designed to accommodate users with multiple PL/SQL objects in a single file. This feature lets you load multiple objects from one file and save package specs and bodies to one file. When a file is loaded, the editor checks to see whether more than one PL/SQL object is created in the file. If so, the editor takes action depending upon which of the options listed below is set. The default is Prompt to split files. Automatically split files when multiple objects separated by "/" This option will automatically split files when Toad comes across a "/". Toad assumes you want to split different objects onto different tabs. Each section using a forward slash as a statement terminator will be placed in a separate tab. See "Editor - Open/Save Options" (page 648) for more information about saving files that Toad has split. Prompt to split files When this option is checked, Toad will ask if you want to split a file into separate tabs. Splitting the file is recommended, but you can choose at the prompt to keep the file as one. Never split files When this option is checked, Toad will always load files into one tab and never split a file into body and spec.
- 652. Toad for Oracle User Guide Options 649 Saving Files When a package spec and body are both loaded from database into the editor, and you choose to save to file, Toad’s behavior depends on these options. If only the spec or only the body is loaded, then only the object that is loaded will be saved to file. The default is Never combine spec/body. Automatically combine spec/body when saving object to file Puts spec and body into the same file. Prompt to combine spec/body Prompts you every time you close the files. Never combine spec/body Saves only the object on the currently active tab. Use file splitting tags "/* <TOAD_FILE_CHUNK */" This option lets you re-save your split files into one file. Toad inserts the tag in the location where the file was split as a remark, so that it can easily split the file back out into separate tabs later. This allows you to save your files as single files, but still compile them and work in separate tabs within Toad. Note: If file splitting tags are used, Toad will not scan the document to split the file at "/". Using the file splitting tags is more efficient for future file splitting, but it should not be used if the file might be modified outside of Toad to include additional PL/SQL objects. The default is checked. Save to separate files after splitting If you have chosen to split a file into multiple tabs, Toad’s treatment of the file depends upon this option to separate files after splitting. l Unchecked: Keeps the original filename and load the contents of the file into separate tabs, so that there is one tab per object. Toad then keeps track of the fact that the tabs are all associated with the same file. You can choose whether or not to use "Toad file splitting tags". See "Editor - Open/Save Options" (page 648) for more information. l Checked: Split the contents of the file into separate tabs so that there is one tab per object, but don’t associate the tabs with any filename. This lets the user specify the filename when saving the tab. The default is unchecked.
- 653. Toad for Oracle User Guide Options 650 File Loading/saving Prompt for reload on activation if timestamp has changed If checked, this allows editing in an external editor. When an Editor window containing a file is reactivated (gets focus), Toad will check the date stamp of the file to see if it was modified by the external program. If the file was modified, Toad will display a prompt dialog box that will say that the file date/time has changed and ask you if you want to reload it. Select Yes, and the file will reload. The default is unchecked. Prompt to save on editor close If checked, Toad will prompt you to save any text you typed in the editor. Note: Even if this option is cleared, a loaded and modified file will always prompt you to save the contents. The default is checked. Format files when opened If selected, this option will automatically format any file opened in the Editor, using Toad's built-in formatting capabilities. Formats can be customized using the View | Formatting Options window. The default is unchecked. Object Loading Owner Name Select when to include the owner name when listing an object. l Always include - always include the owner name automatically. For example, JSMITH.TABLENAME. This is the default. l Never include - never include the owner name automatically. For example, TABLENAME. l Include on loads from other schemas - include the owner name automatically only when the object is loaded from a different schema. Packages/Types l Load Spec and Body as pair (Package or User Type) - If this option is checked, when you load a package or a type spec or body into the Editor, the associated spec or body will also be loaded. The default is checked. l Separate Tabs - When checked, the spec and body will be loaded in separate tabs. When unchecked, the associated spec or body will be loaded into the same tab. The default is checked.
- 654. Toad for Oracle User Guide Options 651 Editor - Printing Use the Printing options to specify how the editor contents are printed. These options can be found at View | Toad Options | Editor - Printing. Options Word wrap When selected, text entered into the Editor will wrap to the next line when it reaches the margin. When unchecked, text will not wrap, but remain on the same line until it reaches an end of line code (line feed, carriage return, and so on). The default is checked. Hide collapsed When selected, collapsed (folded) text will not be printed. When unchecked, all text prints. The default is unchecked. Transparent When selected, if you have line highlighting selected in Language Management | Highlighting, the highlighting will not print. See "Highlighting tab" (page 692) for more information. When unchecked, line highlighting will be printed. The default is unchecked. Colors Select the color scheme you want to use to print: RGB (color), Gray-scale, or black and white. The default is RGB. Line Numbers Select whether to print line numbers, and where they should be placed. The default is Left. Fonts Use the fonts area to set the printing fonts for specific parts of the editor printout. l Header - sets the font for printing the header. l Footer - sets the font for printing the footer. l Line Numbers - sets the font for printing line numbers.
- 655. Toad for Oracle User Guide Options 652 Header and footer Use these areas to set a header or a footer to print when you print the editor contents. You can include tags to specify that certain things should be included. They are: l #page# - Include the page number. l #title# - Include the filename. l #date# - Include the date. l #time# - Include the time. l #datetime# - Include both date and time. Both header and footer can contain multiple lines. They are saved in EditorHeader.txt and EditorFooter.txt, in the User Files folder. By default, the header contains #title# and the footer #datetime# and Page #page#. Email Settings These options can be found at View | Toad Options | Email Settings. Global Settings These are the settings that are applicable for all of the email windows. Enter your SMTP server information and user name here. The default port number is 25. You can change it if the port you use is different from the standard. If a password is required you can select that and enter it as well. You can also send test email to test settings you have configured. To send Test Mail 1. Fill out your email settings. All required fields (*) must be entered. 2. Click the Send Test Mail button. Toad will either send the test mail, or notify you as to why it could not be sent. Window Settings Set email options globally for the various Toad tools and managers that allow email notification from this options page. These tools and managers include: l Analyze Objects. See "Analyze All Objects" (page 594) for more information. l CodeXpert (CX) Results. See "Email Results" (page 327) for more information. l Database Comparison. See "Compare Databases" (page 247) for more information. l Database Monitor. See "Toad Database Monitor" (page 535) for more information. l Health Check. See "DB Health Check" (page 287) for more information.
- 656. Toad for Oracle User Guide Options 653 l Instance Manager. See "Instance Manager" (page 546) for more information. l Rebuild Multiple Objects. See "Rebuild Multiple Objects Overview" (page 612) for more information. l Schema Comparison. See "Compare Schemas" (page 260) for more information. To select settings 1. In the Windows box, click the Toad window you want to adjust. For example, click Health Check. Health check is highlighted, and the rest of the boxes display the options for the Health Check window. 2. The Subject and the From Name boxes have default entries. These can be changed. 3. You will need to enter the Reply To address and the From Address. 4. You can also change the priority from Normal. To add recipients You can add an email address to the To, CC or BCC boxes. 1. Do one of the following: l Click the "+" (plus) button. l Press <Insert> on the keyboard. An Add Recipient dialog box appears. 2. Enter the address and click OK. The address appears. To delete recipients 1. Do one of the following: l Highlight one or more email addresses in the To, CC or BCC box and click the "-" (minus) button. l Press Delete on the keyboard. A confirmation dialog box appears. 2. Click Yes and the addresses are removed. To copy settings You can copy all of the settings from one window to another: 1. In the Window box, select the name of the window that has the appropriate settings. 2. Drag it to the name of the window you where you want to assign those settings. A confirmation dialog box appears. 3. If the windows are correct, click Yes to copy the settings. This copies all setting except the Subject line. In addition, you can copy any of the recipient addresses between the To:, CC:, or BCC: boxes by clicking and dragging them.
- 657. Toad for Oracle User Guide Options 654 To clone settings You can copy all settings except the subject from one window to all other windows that require email settings. » From the Toad Options | Email Settings page, click Clone Settings. A confirmation dialog box appears. Executables Access this page from the View | Toad Options | Executables menu item. It contains boxes for the paths of the following executables: l SQL*Plus l SQL*Loader l Import used in the Import Utility Wizard) l Export (used in the Export Utility Wizard) l TKProf l TNS Ping (used in the Database Monitor window) l Wrap l Export Pump l Import Pump l RMAN l Ping (used in the Database Monitor window) l Editor (external editor) l XML Editor (external XML Editor) Auto#detect paths for current Oracle Home You can click the find buttons to use the autofind feature and the executable location will be filled in or you can click the drilldown button to search through your directories. Execute/Compile These options can be found at View | Toad Options | Execute/Compile. Behavior Poll for DBMS Output when detected When selected, Toad will automatically poll for DBMS Output if output is detected when executing a script. If unchecked, you must tell Toad to poll for DBMS output. The default is unchecked.
- 658. Toad for Oracle User Guide Options 655 Prompt for substitution variables When checked, the Editor will prompt you for variable values when it encounters a substitution variable in the SQL to be executed. Variable formats are: &VAR, &&VAR, and :VAR. The default is checked. Always open Parameters window When checked, the parameters window will open for changes whenever you debug or execute a procedure. When unchecked, the parameters window will not open automatically, but can be opened manually using the Set Parameters button on the debugger toolbar. The default is checked. Save proc parameters between sessions When checked, the parameters you enter for PL/SQL objects are saved to your ToadParams.ini file when you set parameters for debugging and are restored from the ToadParams.ini file for your next debugging session. The default is checked. Save profiler Settings between sessions When checked, the parameters you enter for the profiler are saved when you exit the profiler and loaded when you start a new session. The default is checked. Use hierarchical profiler on Oracle 11g and newer When checked, if you are connected to an Oracle 11g database or newer Toad will automatically default to the newer hierarchical profiler rather than the line item profiler. If you are connecting to a 10g or lower database, Toad will continue to use the line item profiler. The default is unchecked. Compiling Allow compiling when source is loaded from database If checked, this allows you to compile the code immediately when source is loaded from the database. If unchecked, you must first save it to disk before recompiling, and a dialog box will display, announcing, "You may not recompile directly from database." The default is checked.
- 659. Toad for Oracle User Guide Options 656 Compile Spec and Body as pair (Package or User Type) If you have both spec and body loaded in the editor, when you press Compile (F9), this option compiles the spec and then the body. This option is especially useful if you use file-splitting for packages and want to compile both objects at the same time. The default is unchecked. Default to "Compile with Debug" If this option is checked, the Toggle button will begin in the on position each session. The default is checked. Use "CREATE" instead of "CREATE OR REPLACE" when loading database objects If this option is checked, the Create Procedure will not overwrite an existing object. When loading PL/SQL into the Editor, the Create clause will read, "Create Procedure/Function/Package ...". This is useful if, when compiling this procedure, a different object of the same name already exists in the database, hence the compile will fail, instead of overwriting it. If unchecked, the Create clause will read, "Create or Replace Procedure/Function/Package" and overwrite any existing objects that have the same name. The default is unchecked. Notification when compile process is complete When checked, this plays the ToadLOAD.WAV (croak sound) when the compile of a procedure has completed. The default is unchecked. Set optimizing compiler value (10g only) Enter a 0, 1, or a 2 in the box. If checked, Toad executes the following query on a new connection and also when the options window options are applied for any 10g connections: ALTER SESSION SET plsql_optimize_level=X where X is the value entered in the dropdown. The values set the level of optimization that Oracle uses to compile PL/SQL library units. For more information, see your Oracle documentation. 2 is the Oracle default. Set Modified Flag off after compiling from database When checked, whenever you compile source from the database, Toad will toggle the Modified flag, allowing you to tell when source has been modified.
- 660. Toad for Oracle User Guide Options 657 Note: It is strongly recommended that if you are using Team Coding features you leave this checked. The default is checked. Login Scripts Glogin.sql (traditionally for group login settings) and login.sql (user’s personal login setitngs) are Oracle standards and used by SQL Plus as well as other applications. TOAD supports these for Editor script executions. These boxes are read-only. Toad uses a SQL Plus algorithm to locate them. Note: glogin.sql is executed first and then login.sql is executed. Therefore, anysettings in login.sql will take precedence over any settings that coexist in glogin.sql. For example, if SET LINESIZE 100; resides in glogin.sql and SET LINESIZE 150; resides in login.sql then 150 will be used for LINESIZE. glogin.sql glogin.sql is most often located in the ORACLE_HOMEsqlplusadmin folder. You can edit this file by clicking the Edit File button. The file will open in your selected text editor. login.sql Login.sql can be used to store initial settings for a script execution session. Toad finds login.sql by first searching the initial working directory of Toad upon startup. This is usually the installation folder, but may be another if you have changed the start location. If login.sql is not found there Toad searches the SQLPATH for the active home. SQLPATH, like a PC’s PATH variable, can contain many directories each separated by a semi-colon. For example: 'C:Oracledbs;C:MyPersonalOracleScripts;C:TOADUser Files' In this example, Toad first searches C:Oracledbs is searched for login.sql then continues on to C:MyPersonalOracleScripts and so on. When login.sql is found, searching is aborted and that is the one used. Execute login scripts When this option is selected, login scripts will be executed. When clear, they will be bypassed. The default is unselected. Restore SET defaults prior to script execution When checked, the settings in the default settings file will be restored prior to every execution of a script in the Editor. If unchecked, they are loaded at Editor startup and any changes persist for all executions that follow. The default is selected.
- 661. Toad for Oracle User Guide Options 658 Script Output Limit results to Selecting this option and entering a number in this box will limit your SELECT to that number of rows. Any results beyond that number of rows will be truncated. Entering 0 in the box will show all rows. The default is unchecked. Warn when available memory becomes less than n MB When selected, if the result set takes up too much memory, Toad will warn you and give you the option of continuing or ending your query. The default is checked and 50 MB. Show Script Grids When checked, script queries that return row results (for example: Select * from MyTable) send results to the Script output tab and a Grid. To disable the Grid output, clear this check box. The default is checked. Maintain Script History When checked, Toad will maintain a script history. When clear, Toad will not maintain one. The default is unchecked. Show Script Start/End times When checked, the start and end times of the script are displayed in the output area. The default is unchecked. Font Select the font you want to use for script output. The default is Courier. Error Font Select the font you want to use for script errors. The default is Courier in red. Using this you can see the error message within the script output much easier than if the same font is used. Files - General These options can be found at View | Toad Options | Files - General.
- 662. Toad for Oracle User Guide Options 659 File Types: Nearly all - but not all - of the File Open, File Save and Export file dialog windows displayed through Toad are for the purpose of manipulating SQL files. The grid dialog box lets you customize the file extensions that display in the system dialog box windows. To add another filter, begin typing in a blank row. To delete a filter, highlight the text and press the DELETE key. The default filters include: File Type Filter Function *.fnc HTML *.html, *.htm, *.asp, *.xml, *.xsl, *.xsd Ini *.ini Java Source *.jvs Java *.java, *.jvs Package Body *.pkb Package *.pks PL/SQL *.sql, *.prc, *.fnc, *.pks, *.trg, *.vw, *.tps, *.tpb Procedure *.prc RMAN *.rcv SQL *.sql Text *.txt Trigger *.trg Type Body *.tpb Type *.tps View *.vw All Files *.* To create a file association 1. Click Add. 2. Enter a description in the type box.
- 663. Toad for Oracle User Guide Options 660 3. Enter the extensions you want associated with that type in the Extensions box. If you want these associated with Toad on a windows level, check the "Open with Toad" check box. Note: This creates a Windows file association for the specified file extensions. If you double-click in the file explorer on a *.SQL file, for example, then Toad will startup automatically. 4. Click OK. Save source files in Unix format When this is checked, CR-LF character pairs are saved as LF, making the source compatible with Unix. The default is unchecked. Use Universal Naming Convention (UNC) for file and folder names If checked, Toad will convert file and folder names to UNC. This affects all open/save dialogs and the Project Manager. The default is checked. Number of files to save in recently used file lists This option designates how many recently used files to maintain in the files list. Less recently used files over this number of files will drop off the list. The default is 10. Files - Open/Save Dialogs These options can be found at View | Toad Options | Files - Open/Save Dialogs. This screen controls the "Favorites" box on the open/save dialogs. You can specify favorites or remove them from your list here as well as from an Open/Save dialog. Favorite Folders Manage your favorite directories from this option window. You can Add, Edit, or Delete entries. If Sort alphabetically is not checked, you can select a directory and move it up or down in the list. Sort Alphabetically If this is checked, all directories will be listed in alphabetical order. This makes them easier to organize. If unchecked, entries are listed in the order in which they were added, and you can rearrange the order
- 664. Toad for Oracle User Guide Options 661 The default is checked. Options - General These options can be found at View | Toad Options | General. Confirm before closing Toad If checked, Toad will confirm whenever you attempt to close Toad. The default is unchecked. Flash TOAD when inactive and messages are written to the output window When this option is checked, if Toad is inactive Toad's taskbar icon will flash when output messages are written. The default is unchecked. Flash the output window when messages are written to it When this option is checked, if Toad is the active application the output window will flash when messages are written to it. The default is unchecked. Save Settings every n minutes When selected, Toad will save your settings at the interval you set. Choose a number of minutes to save settings. The default is unchecked. When selected, the default is 3 minutes. Save n Toad Actions per action type Use this option to limit the number of actions of each type (email, export ddl, and so on) Toad saves. The default is 10. Default Encoding Use this to specify the default encoding of Unicode files. Unless manually changed in the affected window, Toad uses this setting for encoding saved files in places where you can specify encoding (for example, Save As dialogs, Editor tabs among others). Select from:
- 665. Toad for Oracle User Guide Options 662 l ANSI (default) l UTF-16 (Big Endian) l UTF-16 (Little Endian) l UTF-8 Application Data Directory The default installation directory for new installs enables roaming profile support by default. Use Default activates to your main application data folder. Use Local Default activates your local application data folder, which does not support roaming profiles. You must restart Toad for a change in this option to become active. Exception Logging Log File Enter the full path and filename for the log file. If you leave this blank, the log file will be sent to the main TOAD.EXE directory. Number of errors to log Specify the number of errors you want to maintain in the log file. The last n errors are saved. The default is 10. Numeric characters Use these options to set the decimal and thousands separator for display purposes. Both must be set, and they must be different. Options in the dropdowns for both include: l , (comma) l . (period) l (space) Temp Files Directory Use this to set the directory Toad uses to store your temporary files. The default is the Windows temporary file folder. Network Utilities Network Utilities Options allow you to set some of the parameters for using the tools provided by the Network Utilities window. These options can be found at View | Toad Options | Network Utilities.
- 666. Toad for Oracle User Guide Options 663 Adding and Editing Host, User names, and Default Directories You can add, edit and delete Host and User names for use in several windows. These names will appear in the dropdown menus in Telnet, Rexec, and Ping. You can set a default directory for each host. l Click Add to add new host information in the Server Settings window. Add your host, user name and directory and then click OK. You can have more than one user per server host.See "Server Settings" (page 750) for more information. l Select an existing Host name and click Edit to change it. The host information dialog box appears. Make changes and click OK. l Select an existing Host name and click Delete to delete it. The name is deleted. Caution: When deleting an existing Host and User name, there is no warning. If you click Delete, the selected name will be deleted immediately. FTP ASCII Extensions You can define FTP extensions for ASCII files to control the transfer mode while using FTP. If you have listed an extension under ASCII, then files of that type by default will be sent using ASCII. Any extensions not listed in this box will be sent using binary. Add additional extensions by clicking Configure and selecting from the list. You can also add new extensions by clicking Configure | Add New. FTP View Extensions You can assign extensions that will open in the Editor when you fetch them using the FTP feature. Any extensions not listed will be sent but not opened in the editor. Add additional extensions by clicking Configure and selecting from the list. You can also add new extensions by clicking Configure | Add New. Telnet and SSH Font You can change the font used for the telnet utilities. 1. In the appropriate area (Telnet or SSH), next to the Sample Telnet font, click Font. 2. Select the font formats you want to use when using the telnet utility. Click OK. The sample Telnet font changes to the font you have chosen, and the next time you telnet, this font will be used. Background Color You can change the background color used for the telnet utilities.
- 667. Toad for Oracle User Guide Options 664 1. In the appropriate area (Telnet or SSH), next to the Sample Telnet font, click Color. 2. Select the background color you want to use when using the telnet utility. Click OK. The background of the sample Telnet font changes to the color you have chosen, and the next time you telnet, this color will be used. Oracle - General These options can be found at View | Toad Options | Oracle - General. Passwords Save passwords for all Oracle connections Normally, only the schema and database are saved to the TOAD.INI file for each new Oracle connection. Checking this option will save the passwords, too. Be sure you work in a secure environment where your TOAD.INI file will not fall into the wrong hands. All passwords in Toad are encrypted using AES encryption. This option can be toggled from the Save Passwords check box on the Server Login window as well. See "Save Passwords for Connections" (page 184) for more information. The default is unchecked. Remember passwords for Oracle reconnects If this option is checked, then Session | Test Connections will not prompt for a password. To remember passwords when you close Toad, see Save passwords for Oracle connections, above. If this option is unchecked, then Session | Test Connections will prompt for a password, and the Server Login window will prompt for a password every time you connect, unless Save passwords for Oracle connections is checked. Caution: Checking this option keeps your passwords in Toad’s memory if a connection is broken. This may be a security risk. The default is checked. Newline format for character data These options apply to the Popup Text Editor in the data grids. See "Popup Editors" (page 963) for more information. Windows style (convert all newlines to CR/LF) If selected, when Toad reads data from Oracle into the data grids, it will retrieve it without converting LF's or CRLF's. But when the text from a column is opened in the popup text editor, any linefeeds found in the text will be converted to CRLF's, and if the data is altered, Toad will post any CRLF's or LF's it finds in that data as CRLF's. The default is cleared.
- 668. Toad for Oracle User Guide Options 665 Unix style (convert all newlines to LF) If selected, when Toad reads data from Oracle into the data grids and the popup text editor, it will read linefeeds (LF) as carriage return-linefeed pairs (CRLF). Then if data in the text columns is altered, Toad will post any CRLF's or LF's it finds in that data as LF's. The default is checked. Explain plan Schema This is the schema name that will be used when writing out and fetching Explain Plan data. The default is the windows logon name. Table This is the table name you want Toad to use when saving Explain Plan results. See "Installing Server Side objects" (page 172) for more information. The default is "Toad_PLAN_TABLE". Save previous Explain Plan results (requires Toad tables) If checked, will save the Explain Plan outputs in the Toad tables, viewable in the "Database | Optimize | Explain Plan" window. The default is unchecked. Chained rows Schema/Table boxes This option allows you to choose the schema and tablename for chained rows by entering it in the box. The default tablename is CHAINED_ROWS. See "Repair Chained Rows" (page 590) for more information. Caution: The Chained Rows table is where Toad tells Oracle to store the row ids of the chained rows that are found. It is NOT the table that you are supposed to analyze. Remember, Toad will truncate the chained rows table before it analyzes the tables in the list. DBMS Output DBMS Buffer Size Set the size of the DBMS buffer here. When the buffer exceeds this size you will receive a buffer overflow error. If you are using Oracle 10g, this buffer size is automatically set to unlimited and disabled from change.
- 669. Toad for Oracle User Guide Options 666 DBMS Output Font Click this button to set the font for DBMS output displays. See "DBMS Output Window" (page 963) for more information. Default Schema Default schema for connections to: current connection You can enter a default schema in this box. When a connection is made to this database, the Schema Browser will open to this default schema if it exists on the Database. If the schema does not exist on the connected database, the Schema Browser will open to the connected schema. This option can also be changed using the Schema Browser popup menu | Set current schema as default or Clear default schema. The default is no schema selected. Default schema for connections to: current schema@current connection You can enter a default schema in this box. When a connection is made to the database, the Schema Browser will open to the specified schema if it exists on the Database. If the schema does not exist on the connected database, the Schema Browser will open to the connected schema. This option can also be changed using the Schema Browser Popup menu | Set current schema as default or Clear default schema. The default is no schema selected. Used in Click the Used in button to specify which windows will obey the default schema options. All default to OFF except the Schema Browser.
- 670. Toad for Oracle User Guide Options 667 Double Quote Object Names If you select: These will be enclosed in double-quotes Minimal l Mixed case words l Reserved words l Words starting with any of the following: 0123456789#$_~`'%^&*(),- =+}{][:;<.>?/ or space l Words containing any of the following: ~`'%^&*(),-=+}{][:;<.>?/ or space Non- ASCII Everything minimal double-quotes, plus words containing non-ASCII characters All Everything OCI Array Buffer size number box This option lets you set the size of the OCI Array buffer. When a SELECT query is executed, Toad retrieves the rows from the Oracle server. Toad retrieves the rows in blocks. The number of rows retrieved in each block is the number of rows you specify with the OCI Array Buffer Size option. You can set the buffer up to a value of 999. The disadvantage to a higher setting of OCI Array Buffer Size is that Toad must allocate memory to hold that many rows prior to each fetch. If that many rows are actually fetched, there is no loss. On the other hand, if not that many rows are retrieved, then some memory is allocated that will not be released until the cursor is freed. Overall, this amount of allocated memory is generally unnoticeable. The default is 500. CR/LF Example You can use the following script to demonstrate the Newline options: CREATE TABLE crlf_comp (textcol VARCHAR2(20)); INSERT INTO crlf_comp VALUES ('crlf'| | CHR(13)| | CHR(10)| | 'char'); /*Carriage return linefeed combo*/ INSERT INTO crlf_comp VALUES ('line'| | CHR(10)| | 'feed'); /*Linefeed only*/ COMMIT; See "Oracle - General" (page 664) for more information
- 671. Toad for Oracle User Guide Options 668 Windows style l The cells in the grid will show two black characters for a CrLF, and one black character for a LF. l The memo editor will start a new line when it encounters a CrLF, but will just show a black character when it encounters a LF. l When you post data from the memo editor, the line separator will be a carriage return + linefeed. Unix style With the option checked: l The cells in the grid will show two black characters for a CrLF or a LF. l The memo editor will go to a new line whenever it encounters a CrLF or a LF. l When you post data from the memo editor, the line separator will be just a linefeed. Oracle Optimizer Hints These options can be found at View | Toad Options | Oracle Optimizer Hints. This option screen lets you select the best optimizer hint for the DDL queries that Toad executes. You can choose between Default, /*+ CHOOSE */, /*+ RULE */, and /*+ FIRST_ROWS */. Optimizer hints for several DDLs are built into Toad. You can edit these, or add others if necessary. The screen is laid out in grid format, with the DDL, Oracle version and rule. All Others At the bottom of the window is a dropdown field. Use this to select an optimizer hint to use for any view not specified in the main Optimizer hint grid. For example: l Toad is about to run a query against DBA_TABLES on Oracle 8i. l First it looks in the grid: if dba_tables for 8i is specified in the grid, then it will use the hint specified there. l If dba_tables for 8i is NOT specified, Toad will use the hint specified by the "all others" combo box. To edit an optimizer hint 1. Put the grid into Edit mode by checking the Edit check box at the bottom of the window. 2. Click in the Optimizer Hint column of the record you want to edit. 3. From the dropdown, select the hint you want to use.
- 672. Toad for Oracle User Guide Options 669 To add an optimizer hint 1. Put the grid into Edit mode by checking the Edit check box at the bottom of the window. 2. Click at the top of the window. A new record is inserted above the location of your cursor in the grid. 3. Click in the View Name column of the new record and then select the view name from the dropdown list. 4. Click in the Oracle Version column of the new record and then select the Oracle version from the dropdown list. 5. Click in the Optimizer Hint column of the new record and then select the optimizer hint you want to use from the dropdown. 6. Click at the top of the window to complete your edit. Oracle - Transactions These options can be found at View | Toad Options | Oracle - Transactions. Execute queries in threads (Creates a separate session) When checked, Toad will create a separate session specifically to execute queries. A new session will be created for each query being run from the Editor, Schema Browser, or Object Search window. The default is unchecked. Execute scripts in Toad session When unchecked, Toad will create a separate session specifically to execute scripts. When checked, Toad will execute scripts within the main session. This provides considerably more flexibility for how scripts perform. For example, you can now execute a script with a DISCONNECT command in it: l If the option is checked, it will disconnect the Main Toad session. l If the option is unchecked, the disconnect will execute correctly in its separate session, having no adverse affect on the main Toad session. The default is unchecked. Commit after every statement When checked, Toad will commit every time a statement is run, after any posted edits are made in the grid, and after a row is deleted in the grid. The default is unchecked.
- 673. Toad for Oracle User Guide Options 670 Use a separate connection when Toad itself is generating transactions When Toad is putting data into the Explain Plan tables, this setting will force Toad to use a separate connection. Note: When using this option and connecting to a RAC instance, you must have the TNSNAMES entry for the instance where the server directed the transaction. Or, you must connect directly to an instance of the cluster without letting the server assign an instance. The default is unchecked. When Closing Connections Commit When selected, Toad will automatically commit when closing a connection. Rollback When selected, Toad will automatically roll back any changes before closing a connection. Prompt For Commit/Rollback when changes detected, or detection is not possible due to lack of privileges on dbms_transaction When selected, Toad will always prompt you when you close a connection if any changes are detected, or if detection is not possible. This is the default. Reminder: Oracle will perform a commit after any DDL modifications. Proc Templates This option lets you add and remove templates. You can add as many or as few as you need. To access proc templates » Access this option from View | Toad Options | Proc Templates. To add a template Note: Templates must be created before you add them. Include the CREATE OR REPLACE statement. The macro %TriggerOpts% will receive the trigger options you select when creating a new trigger. 1. Click Add. 2. Select the Object type for this template. 3. Click in the Display Name field for the new template and edit the name to something descriptive. 4. Enter the filename of the SQL file that contains your template, or select it. 5. Click OK.
- 674. Toad for Oracle User Guide Options 671 Note: There are two template types that you can use only within packages. These are Package Function and Package Procedure. You can create and edit these templates from the Toad Options | Proc Templates page, but you cannot access them directly from the Create PL/SQL Object window. See "Using a package function or package procedure template from the Create PL/SQL Object Window" (page 902) for more information. To delete a template 1. Select the template you want to remove by clicking on it. 2. Click Delete. A confirmation dialog box appears. 3. Click OK to remove the template. To edit a template You can easily edit a template through an external editor (configure from Toad Options | Proc Templates). 1. Select the template you want to edit by clicking on its name. 2. Click Edit File. The external editor opens with the template loaded. Note: you must have an external editor specified in Toad Options | Executables to use the edit feature. See "Executables" (page 654) for more information. 3. Edit your template and save it. Substitution variables This lets you add and remove template substitution variables. These variables are used to populate the New Procedure templates with default values or values in addition to the Toad defined variables (for example, %DATE%, %TIME%). You can add any substitution string you like and a default value for that string. Value for %username% variable This value you enter in the box will be substituted automatically for %USERNAME% when new procedure templates are read up into the Editor. The default is blank. Query Builder These options can be found at View | Toad Options | Query Builder. Behavior Automatic AutoJoin When selected, this feature will automatically check foreign key constraints and join tables that are dropped into a model with other tables. If this option is unchecked, then you can manually
- 675. Toad for Oracle User Guide Options 672 join tables with the table popup menu. The default is checked. Include schema in generated SQL When checked, this feature will always precede the table name with the schema name (such as, myschema.mytable) in the generated SQL. Schema names are always used if the table belongs to a different login. The default is unchecked. Automatically Select All Columns When checked, this feature automatically selects all columns when a table is added to the Query Builder. If unchecked, no columns are selected, and must be selected manually. The default is unchecked. Allow Cartesian Joins This option, when checked, lets you allow cartesian joins between tables. The default is unchecked. Warn When selected, Toad will warn you when you have created a cartesian join. The default is selected, but only in effect if Allow Cartesian Joins is selected. Use ANSI Syntax If checked, the join syntax will be ANSI if the database is 9i or higher. If the database is less than 9i, ANSI syntax will not be used in any case as versions earlier than 9i do not support ANSI syntax. The default is checked. Open full screen from Schema Browser This option, when checked, has Toad open the Modeler in full screen mode instead of minimized when opened from the Schema Browser. The default is unchecked. Limit visible columns to n when adding tables to the model area When checked, this option limits how many columns display in the table model at one time. Other columns are available by scrolling. This can be useful if you want to model large numbers of tables. The default is unchecked.
- 676. Toad for Oracle User Guide Options 673 Display Use these dropdown boxes to change the color of the joins in your model. In this way you can easily view join types: l Inner join l Outer join l Auto join Object Font Click this option to change the font used in the Query Builder for displaying the names of objects. Functions This is the list of functions displayed in the Field Definition dialog boxes. l To add a function to the list, enter it in the box and click the Add button. Added functions appear at the bottom of the list. l To remove a function from the list, select it and click the Remove button. Caution: Removing a Function happens immediately, without warning. However, the text remains in the box. If you click ADD immediately after removing a function you can restore it. RMAN Templates This screen provides a central location to list your RMAN templates and the path to them so that you can run them from Toad. To add a template to the list 1. Click Add. 2. Enter the display name for this template. This is the name that Toad will display when you choose to Generate an RMAN script. 3. Enter the full path to where the template resides, or click and navigate to it. 4. Click OK. To delete a template from the list 1. Select the template you want to delete. 2. Click Delete. 3. Confirm that you want to delete the template by clicking Yes.
- 677. Toad for Oracle User Guide Options 674 To edit a template 1. Select the template you want to delete. 2. Click Edit File. 3. When the file opens in your external editor, make your changes, and then save the file. Schema Browser - Data These options can be found at View | Toad Options | Schema Browser - Data. Data Tab Save layouts When checked, Toad automatically saves the Data tab grid layouts with respect to column order, and columns to exclude. Note: Sorting and Filtering are a function of the data filters and are automatically saved, whether or not this option is checked. The default is unchecked. Set focus to table data grid after selecting table If this option is selected and you have the data tab selected in the right hand side, when you change tables in the Schema Browser focus will remain on the table data grid. The default is unchecked. Highlight columns populated by sequence/trigger pair When a sequence/trigger pair has been created, selecting this option will highlight any columns populated by that method. See "Highlighting columns populated with a trigger/sequence pair" (page 951) for more information. The default is checked. Enable value lookup for foreign key constraints When checked, you can look up foreign keys in the data grids. The default is checked. Include disabled FK constraints This option is only available when Enable FK lookup is checked. When checked, this option includes disabled Foreign Key constraints in the data grid lookup window. See "The Foreign Key Lookup Window" (page 1081) for more information. If unchecked, only enabled constraints will display when you perform a look up. The default is checked.
- 678. Toad for Oracle User Guide Options 675 Use NOPARALLEL hint On tables that have parallelism (degree or instances <> 1), Oracle runs multiple processes when you query them. In this case, the processes are not removed until the cursor is closed (in other words until you close the Schema Browser or move to a different table). Since the Schema Browser Tables Data page does not do any heavy processing, these processes can be better used elsewhere. When checked, Toad will use the NOPARALLEL hint in the data grids, making the queries consume less of Oracle's resources. The default is unchecked. Don't select BLOB/CLOB fields in data grids When checked, the data panel of the data grids will not display BLOB or CLOB fields. This can save loading time. When unchecked, the field is selected and displayed. The default is unchecked. Warn after n fetches (n records) When selected, Toad will warn you when n number of fetches have been made. The default is unchecked. Fetch 25 rows at a time through db links Use this option to limit how many rows Toad fetches through a db link. Limiting this can improve performance. The default is unchecked. Schema Browser - Left Hand Side These options are found at View | Toad Options | Schema Browser | Left Hand Side. Refresh Schema Browser After an object is created When checked, if you create a new object from the Schema Browser window, Toad will refresh the window after the object has been created, listing the object in the object pane. The default is unchecked. After an object is altered When checked, if you create a new object from the Schema Browser window, Toad will refresh the window after the object has been created, listing the object in the object pane with any changes made to it. The default is unchecked.
- 679. Toad for Oracle User Guide Options 676 History Limit to nn Items Use this box to select the number of items the browser history will remember. See "Details Pane Toolbars" (page 981) for more information about the Browser History. The default is 25 items. Restore History on connection If this option is checked, if you disconnect and reconnect Toad will remember your Browser history. If unchecked, when you end the connection the Browser history will be lost. The default is checked. User/Schema Lists Show All Users This is the default. All users are displayed in the user list. Only Show Users That Own Objects If checked, Toad will only show users who own objects. This is an alternative to the Oracle User List selection process. (See "Configure User Lists" (page 268) for more information about Oracle User list selection.) For example, if your environment includes only a few schemas that own objects granted to hundreds of schema names for security reasons, then checking this option will list only the few schemas that own objects instead of a long list of all the schemas. So, this filter makes the list more manageable. The default is unchecked. Only show users that own objects excluding Synonyms If checked, Toad will only show users who own objects, but exclude synonyms. So if a user owns synonyms, but nothing else, that user will not be displayed. Only show users that own objects excluding Synonyms and Temporary Tables If checked, Toad will only show users who own objects, but exclude synonyms and temporary tables. So if any user owns synonyms and/or temporary tables, but nothing else, that user will not be displayed. The default is Show All Users. Filters Save Filters for object lists If checked, Toad will save the browser filters to disk, in files named SCHEMA.FLT in the Toad for OracleTemps folder.
- 680. Toad for Oracle User Guide Options 677 If you want to reset your Schema Browser filters each time you close and open Toad, then uncheck this option. The default is checked. Show Filter dialog before refreshing If checked, before the Schema Browser window is loaded, a Filter dialog box appears. Enter filter criteria, and then the Schema Browser will load with only those objects matching the filter. The default is unchecked. When Copying object names to clipboard Items separated by commas When this option is selected, the list of objects will be pasted all on one line, separated by commas. One item per line When this option is selected, the list of objects will be pasted on multiple lines, one object to a line. This is the default. Visual Toolbars above object lists When checked, the toolbar of commands appears above the object lists in the left hand side of the Schema Browser. When unchecked, the toolbar is hidden. The default is checked. Tab/Drop-Down Icons When checked, the icon associated with the object in question is displayed on the object tab or beside the name in the drop-down object list. Unchecked, the graphic is hidden. The default is unchecked. Item Hints When checked, hovering your pointer over an object on the left hand side provides a pop up hint describing the object. The default is checked. Font & Color Use the font and color buttons to change the font and set a background color for the Schema Browser left hand side. Use same schema after changing sessions If checked, when you change sessions the schema will be the same.
- 681. Toad for Oracle User Guide Options 678 The default is unchecked. Fetch table names from Oracle as needed If this option is selected, when you change a detail, Toad will automatically refresh the table name list in the Object list. If left unchecked, table name lists will not be refreshed until you refresh them manually. The default is unchecked. Milliseconds for list search timer on LHS lists The number entered in this spinner sets the amount of time that Toad waits between keystrokes when you type an object name and before it goes to it on the left hand side. This option applies to tabs that allow multi-selection of objects and are not tree views. The default is 900 milliseconds. Schema Browser - Right Hand Side The options on this page are found on the View | Toad Options | Schema Browser | Right Hand Side page. Packages Sort package procedures If this is checked, when you expand the hierarchical view of packages in the Schema Browser, procedures and functions in the specification and body display in alphabetical order. When unchecked, they display in the order they appear in the code. The default is unchecked. Show Body when Package Name is Selected The default is unchecked. Omit SYS objects from Procedure Dependencies List The default is checked. Compile Mode… Click this button to select how Toad refreshes the Schema Browser when you compile an object from the following options: l Refresh items one by one l Refresh entire Left Hand side when complete l Don't ask before compiling in the Schema Browser (unchecked) The default is Refresh items one by one.
- 682. Toad for Oracle User Guide Options 679 Tables - Columns Tab List primary key columns When checked, Toad will display the list of Primary Key columns, on the Tables/Columns tab, to the right of the Show Comments drop down list. For some tables with long column names, and/or compound primary keys, this label might not be long enough. Toad now places a small black triangle next to each column in the columns list that is a Primary Key column. The default is checked. Include hidden columns When checked, Toad will display hidden columns as well. The default is unchecked. Show Column length info with Column data type If checked, columns will show, in the columns tab, in the format "VARCHAR2(20)" including max length, scale, and precision (if applicable). If unchecked, length, scale, and precision will display in separate columns in the grid. The default is checked. Allow extra lines for column comments If checked, the comments are shown in the grid and are wrapped so that you can see the full text of the comments. The rows of the grid are resized so that the full column comments are shown. If unchecked, the columns take up one row each, and are no longer wrapped, so only what fits on one line is shown. The default is checked. General Show Create/Alter dates If checked, create and update dates for an object selected on the left panel in the Schema Browser will display at the top of the right panel. Unchecked, these dates do not display. The default is checked. Update RHS on database object selection in LHS If this option is selected, when you select an object from the Objects panel in the left hand side, Toad will automatically refresh the details in the details pane. If this is unchecked, details will not be refreshed until you refresh them manually. The default is checked. Only show top-level grants for Users, Roles, Sys Privs, and Resource Groups tabs When unchecked, the entire hierarchy of dependencies is displayed for all grants, regardless of level. For example, if you have been granted a DBA role, you will be able to expand that role and see the grants indirectly provided by this role (for example, CONNECT).
- 683. Toad for Oracle User Guide Options 680 If this option is checked, only grants that have been directly granted to the user are shown. Checking this option greatly improves the loading time of those Schema Browser tabs, but clearing it gives you a detailed view of what privileges a user/role has been given. The default is unchecked. When copying column names to clipboard Items separated by commas When this option is selected, the list of objects will be pasted all on one line, separated by commas. One item per line When this option is selected, the list of objects will be pasted on multiple lines, one object to a line. This is the default behavior. Schema Browser - Types Tab These options can be found at View | Toad Options | Schema Browser - Types tab. Capitalize keywords during code generation If checked, when code is generated to create the objects, keywords will be capitalized. The default is checked. Autoload Tables Based On Object If checked, will automatically load and display the tables based on the selected object and display them on the Properties tab. The default is unchecked. Autoload Columns Implementing Object If checked, will automatically load and display the columns implementing the selected object on the Properties tab. The default is unchecked. Autoload Dependencies If checked, will automatically load and display the objects that the selected object is dependent upon. The default is unchecked.
- 684. Toad for Oracle User Guide Options 681 Name New Objects This is the name that will be given to a new object, until you rename it to something more meaningful. For each successive object, a number will be appended to this name, for example, NEWOBJECT1, NEWOBJECT2, and so on. Name New Attributes This is the name that will be given to a new attribute within a given object, until you rename it to something more meaningful. For each successive attribute, a number will be appended to this name, e.g., NEWATTRIB1, NEWATTRIB2, etc. Name New Methods This is the name that will be given to a new method within a given object, until you rename it to something more meaningful. For each successive method, a number will be appended to this name, e.g., NEWMETHOD1, NEWMETHOD2, etc. Name New Collections This is the name that will be given to a new collection of objects, until you rename it something more meaningful. For each successive collection, a number will be appended to this name, e.g.: NEWCOLLECTION1, NEWCOLLECTION2, etc. Default Method Restrictions Select the desired method restrictions: WNDS, WNPS, RNDS, and/or RNPS. The default is all items unselected. Default Attribute Type This is the default data type for a new attribute. The default is VARCHAR2. Default Method Type This is the default method type for a new method when the New Method button is clicked. Alternate method types can be selected from the drop down menu. The default is Procedure. Default Function type This is the default function type for a new function. The default is INTEGER.
- 685. Toad for Oracle User Guide Options 682 Source Control Options These options can be found at View | Toad Options | Team Coding/Source Control. Access this window from View | Toad Options | Team Coding. This is where you set up the user parameters for using Team Coding with Toad. In addition, there are some options that relate only to Toad’s legacy source control functionality. Third Party File Based Source Control Source Control Provider Choose the source control provider from the dropdown menu. This list is populated from your computer's registry. If you do not have a source control provider installed, this menu will only contain the word <none>. You cannot use source control with Toad unless you have a provider installed. See "Third Party File Based Source Control" (page 780) for more information about providers that have been tested with Toad. Prompt for Check Out comment Check this box if you want Toad to prompt you for a comment when you check out a file. The default is unchecked. Prompt for Check In comment Check this box if you want Toad to prompt you for a comment when you check in a file. The default is unchecked. Prompt for Add File comment Check this box if you want Toad to prompt you for a comment when you add a new file to source control. The default is unchecked. Team Coding Disable login prompt on connection This option is applicable only when Team Coding is configured to work with a third-party provider. It prevents the VCS provider login from displaying when you connect to a Team Coding enabled database. The default is unchecked. Automatic Check-Out Select automatic check-out to force developers to check out an item when they open it. The default is unchecked.
- 686. Toad for Oracle User Guide Options 683 Automatic Check-In Select automatic check-in to force developers to check in an item when they close it. The default is unchecked. Prompt for Check Out Comment The default is checked. Prompt for Check In Comment The default is checked. Prompt for Check In All on Exit The default is checked. Schema Replacement for Stored Code, Triggers and Views These options work in two ways. When checked: 1. When you use the Import to database function to import code from one schema to another in the Code Control Groups window anywhere the original schema's name appears in the code, Toad replaces it with the destination schema. See "Importing Objects" (page 809) for more information. 2. If you have a user mapped to a code control group, where the master owner's schema appears in the code, Toad replaces it with the mapped user's schema name in the mapped user's schema. For example, If you check out an object into the mapped user's schema and change it, then check it in, the copy in the version control repository will be updated, with the master user's schema instead of the mapped user's schema. Schema replacement defaults are as follows: l Schema Replacement for Stored Code - The default is checked. l Schema Replacement for Triggers - The default is checked. l Schema Replacement for Views - The default is checked. Enable Actions in Schema Browser & Project Manager The default is checked. Simultaneously Check Out/In Spec and Body The default is unchecked. Default: Force New Revision on Check-In Select this option to automatically save the object that is being checked in as a new revision, regardless of whether it has changed. The default is unchecked
- 687. Toad for Oracle User Guide Options 684 Default Working Directory Enter the path of the working directory or click the browse button to select it from a browse window. VCS Provider Options See "CVS Configurations Options" (page 814) for more information about these options. Startup These options can be found at View | Toad Options | Startup. Show login window When checked, the login window is displayed at startup to let you log in to an Oracle instance. The default is checked. Allow multiple copies of TOAD to be loaded When checked, you can open multiple copies of Toad at one time. Unchecked, only one copy of Toad can be open on your desktop at any one time. The default is checked. Check for Access to DBA Views If you have access to the DBA views, such as DBA_TAB_COLUMNS, then check this option. At session startup, Toad will see if DBA views are available to that particular user schema. If so, Toad will query the Oracle Dictionary using the DBA views instead of the ALL views such as ALL_TAB_COLUMNS. DBA views are much faster than ALL views because the DBA views do not have the security checks. No security checks means faster queries. Note: If you are running the DB Admin Module, Toad will always query to see if you have the DBA role, SELECT ANY TABLE, or specific access to the DBA view. The default is checked. Play Toad Wave File If checked, Toad will "croak" when starting. Note: If you are using any software which places the sound device in exclusive/locked mode, Toad will hang on startup. If you are experiencing this, or having sound card problems, uncheck this option. The default is checked.
- 688. Toad for Oracle User Guide Options 685 Download Toad Tips once a month When selected, Toad will access the Toad internet site and download any new ToadTips for you once a month. This will not turn Toad Tips back on if you have told Toad to hide them. See "Toad Tips" (page 111) for more information about tips. The default is checked. File To AutoLoad on startup This file will automatically be loaded into the first Editor window that appears after a database Login. Click to choose a file. The default is blank (display no file). File to AutoExecute on new connections This lets you set application info upon startup. The selected script file will execute after each new connection and the output displays after the normal "do you want to see output" prompt. Toolbars/Menus These options can be found at View | Toad Options | Toolbars/Menus - Toolbars. Behavior Auto-save current desktop When checked, Toad will save the current desktop. Toad saves at three points: on close of Toad, when you change tabs, and when you change the desktop layout. See "Configuring your Desktop" (page 858) for more information.If you have multiple desktops open, the last one active is the one that is saved. The default is checked. Display Show window titles on Window Bar If checked, Toad will show the window title, for example "Editor" on the window caption. If unchecked, it will display only the icon for that window type. The default is checked. Show connect strings on Window Bar If checked, will show the schema username, the "@" symbol, and the database alias in the window caption on the applicable windows. If unchecked, will show just the schema username. The default is unchecked.
- 689. Toad for Oracle User Guide Options 686 Use Vertical Text when Toolbars are Vertical This option controls the horizontal/vertical orientation of text on the toolbars when docked vertically. If the option is checked, text on the toolbars will be displayed vertically. If the option is unchecked, the text is displayed horizontally, widening the toolbar. The default is checked. Multi-Line Window Bar When selected, if you have many windows open, Toad displays the window bar in multiple lines when it runs out of room on the first line. The default is unchecked. Multi-Line Connection Bar When selected, if you have many connections open, Toad displays the connection bar in multiple lines when it runs out of room on the first line. The default is unchecked. Quick connect/disconnect dropdown count Enter the number of connections that should be listed in the Quick Connect dropdown in the main toolbar. The default is 9. Connection Bar and Window Bar Fonts Set the fonts for the connection bar and window bar descriptions here. You may want to change the font or the font size so that your descriptions fit on the buttons or are easier to read. Visual Style Select the visual style you want to use in Toad's display. Options include: l Standard l Enhanced l Flat l Office 2003 l XP The default is Enhanced. Toolbars/Menus - Shortcuts These options can be found at View | Toad Options | Toolbars/Menus - Shortcuts. Use this window to change the shortcuts for various commands.
- 690. Toad for Oracle User Guide Options 687 See "Menu hotkeys" (page 129) for more information on changing command shortcuts. Variables Use the Variables options window to set any user variables and values that you want to use on a regular basis. In addition, there is a list of system variables that you can use within ToadApps, settings, and other places throughout Toad. To add a new variable 1. From View | Toad Options, click Variables. 2. Click the Add button. 3. Enter the variable name in the Variable column in the grid 4. Enter any value you want to include. 5. Enter a Description of the variable in the Description column. Windows These options can be found at View | Toad Options | Windows. Behavior The windows options let you specify which settings Toad should save for each major window. You can check individual windows to: l Available - makes the selected Toad feature available for use. Clearing the check box hides it from general use, although you can come back to the options window and select it at any time. l Save Size - saves the window size as you set it l Save Position - saves the last window position l Auto open - opens the window upon making a connection l One/connection - only opens one of that window per connection l One/Toad - only opens one of that window per instance of Toad Auto-open bring to front If you have several windows selected for auto open, you can choose which of them you want to be active on opening Toad. Describe windows Select the way you want Describe windows to behave. The default is Stay on Top. MDI If selected, the F4 popup Object Describe windows will be created as an MDI child window. This means that they will be accessible from the Windows menu, and
- 691. Toad for Oracle User Guide Options 688 you can open as many as you want and they will not get lost behind the main Toad window. Note: MDI stands for multiple document interface. In an MDI application, more than one document or child window can be opened within a single parent window. This is common in applications such as spreadsheets or word processors - one window, usually called the MDI parent or MDI container, contains many other windows, usually called child forms. Stay on top If selected, the DESCRIBE window will stay on top of all other windows in Toad until you close it. This is the default. Scroll pinned windows at n millisecs When selected, pinned windows will scroll out and open when rolled over by the pointer at the rate specified. You can specify the rate at which a pinned window will open. The default is 300 milliseconds. Display Show USER@DATABASE in captions When selected, the User and database is displayed in window captions. Unchecked, only the window title is displayed. The default is checked. Use Alias instead of database (set in login window) The default is unchecked. Show spec and body in package describes If checked, both the spec and the body will be included in the describe. The default is unchecked. Language Management Language Management Overview The Toad Editor is an extremely powerful editor, and parts of this power come from its ability to manage language use. You can choose to have the editor parse in PL/SQL, Java, C++, HTML, or any number of other languages, including custom language.
- 692. Toad for Oracle User Guide Options 689 Toad takes the source, and parses it according to the categories you have set up, breaking it into Tokens (parts of code defined by type). It then applies the rules you have set in order to apply such things as syntax highlighting and code folding. Managing these languages has an effect on many areas of Toad. Syntax highlighting is based upon defined command words, as is code folding and the make code functionality. The ability to set up sub languages means that you can define capitalization effects that apply only to your PL/SQL code, and not embedded java, perl, or other languages. The Language Management area of Toad Options provides you the ability to set language and highlighting rules, define tokens (including statements, comments, and other defined areas), set up code templates and sub languages, among other things. To access the language management window 1. From View | Toad Options, select the Editor - Behavior node. In the Language Management area, select the language you want to edit and click one of the following: Edit the selected language. Add Create a new language. Delete Delete the selected language. Clone Create a new language based on the selected one. Code Templates Go directly to the Code Templates tab. Syntax Highlighting Go directly to the Syntax Highlighting tab. Language Management Tabs The component parts of languages can be edited from several tabs in the language management area. Information on these tabs is interrelated, and settings in one tab can affect settings in the others. This creates extremely powerful and configurable parsing capability. Tabs include: l General tab (page 692) l Highlighting tab (page 692) l Tokens Tab (page 693) l Parser Tab (page 694) l Rules Tab (page 695) l Sub Languages Tab (page 698)
- 693. Toad for Oracle User Guide Options 690 l Code Templates Tab (page 699) l Grammar (page 700) Syntax Highlighting The Editor supports flexible syntax highlighting. The highlighting is language-specific, and is configurable in the Language Management area of the Toad Options. The list of reserved words used in each language is also customizable. If during a Toad session you have used any window or function that retrieves the table names for the active Oracle session, table names will be colored as well. Syntax highlighting is based on your selection of languages. You can do this from either the options window, or from the editor itself. To select a language for highlighting » Do one of the following: l From the Toad Options | Editor - Behavior page, in the Language Management area, select the language you want to apply and then click OK. l In the editor, right-click and select Language. From the menu provided, select the language you want to use. Syntax Highlighting Table names, Views and Procedures Toad can syntax highlight the table names, views and procedures in the current schema. If the highlight table names (or views, or procedures) option is selected Toad will load and highlight these objects from your schema automatically. If it is not checked when you make a connection, but you turn it on while you are working, names will be highlighted as soon as you load them (by opening the Object Palette, or pressing CTRL+. or so on). If not checked, they will not be highlighted even when the object palette is loaded, loaded in the Schema Browser, and so on. To highlight table names » From View | Toad Options | Editor - Display, select Highlight Table names in the Syntax Highlighting area. To customize table names colors 1. From View | Toad Options | Editor - Behavior, select the language you want to use in the Language Management area. 2. Click Syntax Highlighting and in the Styles list select Toad_UserTables. 3. Change the styles as described in the Highlighting tab topic. See "Highlighting tab" (page 692) for more information. 4. Click OK.
- 694. Toad for Oracle User Guide Options 691 Syntax Highlighting SYS View Names Toad can also syntax highlight SYS View names (for example, ALL_TABLES). To initially populate SYS view names » Using either the SYS schema or a schema with the DBA role, open the Schema Browser window to the Views tab, and if necessary select SYS from the username dropdown list. Toad queries all SYS views, and cache the list in Toad for OracleTempsDATABASE_ ALIASSYSVIEW.TXT. If you want to reload the list, simply delete the appropriate SYSVIEWS.TXT file and repeat the above steps. Be aware that different databases have different lists of SYS views, e.g., Oracle7, Oracle 8.0.5, Oracle 8i, Personal Oracle, and so on. To customize table names colors 1. From View | Toad Options | Editor - Behavior, select the language you want to use in the Language Management area. 2. Click Syntax Highlighting and scroll down in the Styles list to Toad_SYSViews. 3. Change the styles as described in the Highlighting tab topic. See "Highlighting tab" (page 692) for more information. 4. Click OK. Parser Scripts The primary configuration for syntax parsing and highlighting in Toad comes from a parser script file that is loaded at runtime. This is the lexer.lib file, and is edited when you use the Language Management options. See "Language Management Overview" (page 688) for more information. You can modify the list of reserved words. To modify reserved/keywords 1. From the Language Management | Rules tab | Keywords, click the Conditions tab. 2. Modify keywords in the tokens panel. You can delete words, add new words, make words case sensitive, and so on. You may want to add too that they should go to the reserved words rule (check that name, not sure that is what it is called exactly) and go to the conditions tab to modify the list of words Removing Reserved and Keywords If you want to add or remove Oracle SQL Reserved words, PL/SQL Reserved words, or Oracle keywords from the lists that are syntax highlighted, it can be done from the Language Management | Rules tab. Highlighting options may be changed from the Language Management | Highlighting tab.
- 695. Toad for Oracle User Guide Options 692 Language Types Language types are defined in the Toad Options | Editor - Behavior | Language Management area. You can create a new language by cloning one of the provided ones, or manually. The general tab specifies which file extensions are used with which language. General tab Within the Language Management options area, the general tab defines the basic areas of the language you are editing. See "Language Management Overview" (page 688) for more information. Within this tab, you can specify file extensions that will automatically use this language when opened, the default block comment and style for the text; and the line style you want to use. Name The name box contains the name you want to use for this parser. For example, if you are coding in PL/SQL, there is a PL/SQL language defined. File extensions Any file extensions entered in this box will affect how Toad parses the code that you are opening. For example, the SQL, FNC, PKB file extensions will always be opened and parsed with the PL/SQL language unless you specify otherwise. Block comment Enter the default marker for creating a block comment. This is the marker that Toad will use to view the following text as a comment. Default Style This is the default text style you want to use for text when working in this language. For the most part, the token that identifies this style should be default. Line Style This style applies when the line is active (the cursor is located in it) in the editor. Highlighting tab Within the Language Management options area, use the highlighting tab to configure highlighting settings for specified styles. These styles can then be applied to tokens or rules as necessary. See "Language Management Overview" (page 688) for more information. In the styles list, you can add, edit, delete, copy from (clone) or disable styles. Note: The default highlighting style cannot be renamed or removed.
- 696. Toad for Oracle User Guide Options 693 Style Settings Style type Select a style type for this style setting. The default is default, which means that it reverts to the style set in the default style. You can choose a custom font, which allows you to change all of the font settings as described below, or a limited custom font, such as background/foreground (which lets you set only the background and foreground colors). Background Choose a color for the background of the text. Font color Select a color for the text itself. Capitalization effect Select the capitalization format you want for the text: l Unchanged l Uppercase l Lowercase l Initial Caps Custom Font If you have selected Custom Font under Style type, click the Custom Font button to set the font. Font Style Select one or more of the following styles: l Bold l Italic l Underline l Strike Out Borders You can choose to place a border on one or more sides of the text in the selected style. In this area, select the line type and thickness for each border (left, right, top or bottom) and the color Toad should make that border. Tokens Tab Within the Language Management options area, use Tokens tab to define tokens that can be used within rules and parser specifications. These are specific language constructs: for example, PL/SQL has Strings, Integers, Comments, etc.
- 697. Toad for Oracle User Guide Options 694 Parser Tab Within the Language Management options area, use the parser tab to define the way in which Toad finds tokens within the code. See "Language Management Overview" (page 688) for more information. The window is separated into three areas: Categories, Parse, Advanced. Toad uses regular expressions to define where a token starts and ends. Tokens must be defined in the Token tab before they can be applied to a category. Categories area The category list contains the categories that are available for definition. They will be parsed in the order they are listed. When working through code, Toad will stop attempting to match the definitions as soon as one of the rules met. In this area, you can: l Add new categories - create a new category that you can define as desired. l Edit a category - display an edit dialog so you can rename the category. l Delete a category - delete the selected category. No warning is issued. l Copy from a category - display the copy from dialog. Select the language and any categories you wish to include in the definition. You can choose multiple categories. l Disable a category - disable the selected category until you enable it. l Move categories up or down in the list - change the priority of a selected category. Parse tab Use the parse tab to specify the regular expression test for the selected category, and set the token type and default highlighting style. See "Examples of Regular Expressions" (page 971) for more information. Select a category and the details for that category are displayed here. Regular expression test Edit or add a regular expression in this box. This expression will define what Toad looks for when attempting to apply the category to code. Evaluates to token type Select a token type from the dropdown list. See "Tokens Tab" (page 693) for more information. Default Highlighting style Select a default highlighting style to be used on this category of code. The default highlighting style will be applied only if the code does not also satisfy any rules as defined on the Rules tab. See "Rules Tab" (page 695) for more information.
- 698. Toad for Oracle User Guide Options 695 Advanced tab While the settings on the Parse tab provide enough information to locate simple tokens, you may want to narrow the focus even more. The advanced tab provides methods to require specific parents, or to enable only within a certain character position. Parent block Use the parent block box to set the range for a parent limitation. When this is set, the category only applies to sections of code that begin with the selected range. By default, this affects code where the code either directly follows the parent range, or is included in another range nested within that parent range. You can also specify the following amendments to this: Strict Only includes code that fits the regular expression defined on the Parse tab, and that directly follows the parent range. For example, is directly within a "CREATE OR REPLACE procedure" definition: not within an IF clause within that CREATE category. Not a parent Only includes code that fits the regular expression defined on the Parse tab, and is NOT part of the specified parent block. Enabled from character position: _____ to ______ When a range of character positions is included, only code which fits the defined regular expression, the parent rules (if any) and is between those character positions will be included in the category. Rules Tab Within the Language Management options area, the rules tab contains all rules applied to tokens after parsing is complete. See "Language Management Overview" (page 688) for more information. These rules supersede any previous designations of categories, defaults, or tokens. As such, code folding is determined by these rules, as is much of the syntax highlighting specifications. Rules can have multiple conditions, or only one. All conditions are applied in numerical order, from 1 to 2, and so on. Rules are, like Parser categories, applied in the order they are listed in the Rules Names list. If a higher priority rule is satisfied, Toad will not apply later rules. Conditions tab The conditions tab provides an area for you to specify the conditions to define the rule selected in the rules list. You can specify any number of conditions.
- 699. Toad for Oracle User Guide Options 696 To add a new condition 1. Click + in the Condition: area. 2. Select one or more token types where the condition should apply. 3. Select an operator. 4. Select the tokens you want bound by the condition. 5. Repeat until all conditions you want established have been added. To delete a condition 1. Select the condition you want to delete in the condition list. 2. Click the - button. Properties tab The properties tab is the active tab by default. This tab specifies the rule type, style, and highlighting to apply if the rule is met. Rule type Specify the type of rule. This can include tag detector, line separator, range start or range end. Change token type You can use this option to change the identifier to a different token type. For example, for syntax highlighting purposes, you can take an "IF" token and apply "SELECT" highlighting to it. Style Select the style you want to apply to code that matches this rule. Styles are defined on the Highlighting tab. Range Highlighting Select any range highlighting you want to apply to this code. Range highlighting is defined by the styles on the Highlighting tab. Collapsed text string When you collapse text for code folding, the node created can have a collapsed text string displayed upon it for identification. Enter this string here. You can have Toad display the first token, or any token after by using the syntax: %s0%s-1 where 0 is the first token, -1 is the next, -2 is the third, and so on. Anything after the last number will be displayed in its entirety. For example, if you have a range beginning with "IF", %s0woo! will display as "IF woo!" when you fold the code.
- 700. Toad for Oracle User Guide Options 697 Active Highlighting Toad can highlight a range when it is active. When this is activated, highlighting will take place when the caret is positioned as specified. Caret position box Specify the caret position when Toad should highlight the code as active. You can choose it to be marked active when the caret is in the range, always highlight it, or highlight when the caret is within specific tokens. Use this dropdown to select the desired caret position. Select minimal range When checked, if ranges are nested, Toad will only highlight the first range where the caret is located, ignoring any parent ranges. When unchecked, Toad will highlight the entire range, including any parent ranges. Draw block staple When checked, a grey staple will be drawn around the range of code that can be folded. When unchecked, no staple will be displayed. The default is checked. Self Closing Range A self closing range is useful if you have a type of range where there is no consistent end of range marker. When checked, Toad will not look for a close range rule to close the range. Instead, the close of the range is defined by the start of the next range. The default is unchecked. Advanced tab While the settings on the Parse tab provide enough information to locate simple tokens, you may want to narrow the focus even more. The advanced tab provides methods to require specific parents, or to enable only within a certain character position. Parent block Use the parent block box to set the range for a parent limitation. When this is set, the category only applies to sections of code that begin with the selected range. By default, this affects code where the code either directly follows the parent range, or is included in another range nested within that parent range. You can also specify the following amendments to this: Strict Only includes code that fits the regular expression defined on the Parse tab, and that directly follows the parent range. For example, is directly within a "CREATE OR REPLACE procedure" definition: not within an IF clause within that CREATE category. Not a parent
- 701. Toad for Oracle User Guide Options 698 Only includes code that fits the regular expression defined on the Parse tab, and is NOT part of the specified parent block. Gramma If you have created specific grammar, you can add individual gramma to the rule. Select the gramma you want to use from the dropdown list. Range Offset Range offsetting changes what Toad considers the beginning (or end) of a range for code folding purposes. Ranges are defined by starting and ending tokens. For example if you have a string of tokens as follows: Token A B C D E F Range Position 2 1 0 -1 -2 -3 Token G H I J K L Range position 3 2 1 0 -1 -2 The Range starts at "C", then the token type C is position 0 for start of range. The Range ends at "J", then the token type J is position 0 for end of range. If you have set the beginning range offset at B, then Toad will hide all tokens to the right of it when you fold the code. Cancel next rules When this is set, Toad will cancel further processing of rules conditions when the condition is met. When it is clear, Toad will process all rules in order. Relative to end of condition This sets the parsing relative to the end of the condition: for example, if the condition specifies "CREATE OR REPLACE FUNCTION", when checked, Toad sets the 0 position at FUNCTION (the end of the condition). When unchecked, Toad will set the 0 postion at CREATE (the beginning of the condition). Sub Languages Tab Within the Language Management options area, the Sub Languages tab defines any languages you want to use within the primary language. For example, PL/SQL can have Java embedded within it. If you have styles and rules defined that will change the capitalization of PL/SQL, you do not want it to affect Java in the same way, since Java is case-sensitive. In this case, you can set up a sub language of Java so that Toad can differentiate between the two and use different highlighting and code folding rules as appropriate.
- 702. Toad for Oracle User Guide Options 699 To set up a sub language 1. From the editing screen of the main language, select the Sub Languages tab. 2. In the Sub Language box, select the language you want to embed. 3. Select a default style for the sub language. This can be any style defined on the Highlighting tab, or <none>.See "Highlighting tab" (page 692) for more information. 4. Use the parent block box to set the range for a parent limitation. When this is set, the category only applies to sections of code that begin with the selected range. By default, this affects code where the code either directly follows the parent range, or is included in another range nested within that parent range. l Select Strict to include only code that directly follows the parent range. For example, is directly within a "CREATE OR REPLACE procedure" definition: not within an IF clause within that CREATE category. l Select Not a parent to include only code that is NOT part of the specified parent block. 5. Choose to start at the beginning or end of the text. Set the start and end conditions. Note: These should be regular expressions that define a starting marker and an ending marker for the language you want to embed. Code Templates Tab Within the Language Management options area, you can set up and delete code templates from this tab. See "Language Management Overview" (page 688) for more information. Different code templates can be developed for different languages. To add a template 1. From the Toad Options | Editor - Behavior page, select the language where you want to add a code template and click Code Templates. 2. Click Add. 3. Enter a shortcut name and a description. Click OK. 4. Click in the editor window below the template list and enter the text you want to be included. You can include substitution variables and cursor placement as described in Code Completion Templates. 5. Click OK. To edit a template 1. From the Toad Options | Editor - Behavior page, select the language where you want to add a code template and click Code Templates. 2. Select a completion template and then click Edit. 3. Change the shortcut name and a description. Click OK.
- 703. Toad for Oracle User Guide Options 700 4. Click in the editor window below the template list and edit the code template. 5. Click OK or Apply. Advanced Templates An advanced template allows you to use pipe characters literally in the code template. A simple (not advanced) template uses the pipe character to determine caret placement when the template has been inserted into the editor. An advanced template uses <caret> to determine where the caret will go. Advanced templates also support inserting data from clipboard. Clipboard data is inserted where <paste> appears. To use the advanced template 1. In the View | Toad Options | Editor - Behavior page, click Code Templates. 2. In the template grid, select the advanced check box beside the template you want to use in the advanced mode. Grammar Within the Language Management options area, the grammar tab is used for more detailed specifications than you can make easily from the rules tab. See "Language Management Overview" (page 688) for more information. In fact, you can create a rule with no conditions, and from the Advanced tab select a gramma from the list, making it your only rule. See "Advanced tab" (page 697) for more information. To access the grammar demo 1. From Toad Options | Editor | Behavior, in the Language Management area select Pascal. 2. Click Edit. 3. Click the Grammar tab. Code Completion Templates Code Completion Templates use a manual keystroke (CTRL+SPACE) to perform the substitution. Code templates are more than a single phrase and can contain line feeds, substitution variables and a cursor position indicator. You can edit the Code Completion templates directly in the Language Management, Code Templates tab. See "Code Templates Tab" (page 699) for more information. Example One of the code templates defined in Language Management is: entire cursor block (crbl) DECLARE
- 704. Toad for Oracle User Guide Options 701 CURSOR c1 IS SELECT | FROM WHERE; c1rec IS c1%ROWTYPE; BEGIN OPEN c1; LOOP FETCH c1 INTO c1rec; EXIT WHEN c1%NOTFOUND; END LOOP; CLOSE c1; END; Where: l "crbl" is the macro for the template (the text YOU type) l "entire cursor block" is the description of the template l everything following until the next template is the body of the template Note: Do not leave spaces between the end of the template description and the final right bracket! NT4.0 API calls to manage profile strings have a bug that will cause reading of the templates file to fail. Keyboard Shortcuts The default keyboard shortcut for Code Completion templates is CTRL+SPACE. Enter the template name (such as crbl) and press the shortcut to expand it. Using a Template When you enter the name of a template and press the shortcut key, Toad follows the following procedures: l If the name you have entered does not match any of the names on the code template list, a dropdown listing of available code templates appears so you can choose the correct template. l A dialog box appears listing the substitution variables and prompting you to enter values. l Expands the code and replaces variables. l Removes the cursor placement marker, and places the cursor there.
- 705. Toad for Oracle User Guide Options 702 To use the code template » Type the macro (for example, crbl) and then press CTRL+SPACE to load the body of the template and place the cursor at the position of the vertical pipe character. If the word or phrase under the cursor does not match an existing macro exactly, a dropdown list of all macros is displayed. Cursor Placement If Toad finds a single pipe ( | ) in the template body, then when the substitution of the template is complete, the cursor is positioned at that point in the code. The pipe is removed, as it is used only as a marker for the cursor position. Only one pipe can be used this way in a code template. Substitution Variables The Code Completion templates also support substitution variables. Enter the substitution variable in the form of an ampersand followed by a valid simple Oracle identifier. For example, &1 is not a substitution variable, but &a is. When a template containing substitution variables is selected, you will be prompted to enter values. Any occurrence of the substitution variable is then replaced with the entered value. Editing the Code Template List Toad provides a list of default templates. As you use this feature, however, you will create templates that work better for your purposes, and you will want to edit the default templates. You can edit and add templates to suit your needs in the Language Management window. Auto Replace Substitutions A substitution is a text phrase that corresponds to replacement text. For example: l If you specify a substitution pair of ACT = ACTIVITY_CENTERS, when you type ACT and press space (or other word delimiters), ACT is automatically replaced by ACTIVITY_CENTERS l If you specify a substitution pair of NDF = NO_DATA_FOUND and you type NDF and press a delimiter, NDF is automatically replaced by NO_DATA_FOUND Auto Replace Substitutions are different from aliases in that you can use any group of characters to define and complete the replacement. Aliases do not change the text in the SQL. They are a method of referring to a table by a different name. Substitutions will actually change the text within your code to match the target keystrokes. To edit Auto Replace entries 1. From the Toad Options | Editor - Behavior page, click Auto Replace. 2. Make changes in the Auto Replace grid.
- 706. Toad for Oracle User Guide Options 703 Using Substitutions When auto-replace is active, Toad uses several characters as auto replace activation keys. Toad will automatically replace an activation key with the substitution value when it reaches a terminator, for example the space key. For example, "teh" is by default set to replace with "the" in the editor. Or, you can enter "pack" and Toad will expand it to "package". An activation key will cause a matched "replace" string immediately before the cursor to be replaced by the "with" substitution value. For example, if you have dept = DEPARTMENT in your auto replace file, you can enter the following: dept[space] and the editor will expand to DEPARTMENT . Or, you can enter dept: and the editor will expand to DEPARTMENT:. Or you can enter dept; and the editor will expand to DEPARTMENT;. Note: The activation key is always included in the expanded substitution. You can edit this list of keys in the box if you have other needs. Importing and Exporting Files Also from the Editing options window, you can import and export auto substitution files. Toad comes with a handful of substitution pairs. You can edit and add to the list from the Auto Replace dialog. You can then export the settings to a text file. Alternately, you can create or edit a substitutions file manually and then import it. Export Saves the auto replace settings to a separate text file. If you make many changes to your auto replace settings, it is recommended that you export them regularly for back up. Note: If you do not export your settings to a file before you import a file, they will be lost. Import You can import a text file into Toad. This file can be created independently or by exporting the settings you have created in Toad. Importing a file overwrites the current settings. Editing a substitutions file Because it can be tedious to add large amounts of information to the substitution file directly from the interface, you may want to edit or create a text file directly. Use the format of string=replacement string. For example: aax=AAX_ACCESSGROUP_APPLICATION aca=ACA_ACTIVITY_ACTION
- 707. Toad for Oracle User Guide Options 704 acc=ACC_ACTIVITY_CATEGORY acd=ACD_ACTION_DESCRIPTION acp=ACP_ACTIVITY_CONTACT_PARTIC
- 708. Printing Printing You can send data to the printer in several different ways from Toad. You can print text or code located in the editors, you can print the data from the data grids, and you can print reports using Reports Manager. See "Reports Manager Overview" (page 733) for more information. Printing editor contents When you print Editor text or Editor code, Toad will attempt to print in color by default. If you uncheck the View | Toad Options | Editor -Display | Syntax Highlighting | Use when printing, the code will be printed in standard black and white. To print Editor text or Editor code » From the File menu, select Print. Printing a Data Grid You can print a data grid easily by following the procedure below. To customize the printed grid, see the Print Grid and Report Link Designer topics for more information on printing options. To print a data grid » Right-click over the data grid and select Print Grid. Print Grid When choosing to print the results grid, you can choose one of two ways to print. You can print either the grid contents (the results of the query) only, or include the query that returned those results. To include the grid query 1. Select the Print Grid menu item from the File menu or the popup menu. 2. In the Query area, select the Print box. Choose whether to print the query before or after the results. 3. Click Print Preview to access the Report Link Designer dialog box for more options before sending the data to the printer. 18
- 709. Toad for Oracle User Guide Printing 706 To print grid results 1. Select Print Grid from the File menu or the popup menu. 2. In the Query area, clear the Print box if necessary. 3. Click Print Preview to access the Report Link Designer dialog box for more options before sending the data to the printer. Report Link Designer You can change how you want to print from a data grid on the Report Link Designer. To access Report Link Designer 1. Select Grid | Print Grid. 2. Click Print Preview. 3. Click . Using the ReportLink Designer Use this dialog box to select grid print options, and then print the grid contents to paper. There are five tabs on this screen: Options, Colors, Fonts, Behaviors, and Miscellaneous. Any changes you make on these tabs are previewed in the right panel. Title Properties Clicking Title Properties opens a dialog box that lets you set a title for your report, and specify where it will print (such as the top of every page). Click the Properties tab to set the font, color and alignment of the title. Options Tab Show l Bands - When checked, Toad adds a blank band (bar) to the top of the grid. The default is unchecked. l Header - If checked, the column headers are included in the printout. If unchecked, column headers are not included. The default is checked. l Footers – Not applicable to data grids l Group Footers – Not applicable to data grids
- 710. Toad for Oracle User Guide Printing 707 Preview If checked and if you have activated Preview Current Column, the preview columns will print. See "Working with Results" (page 877) for more information. If unchecked, or if checked and you have not activated Preview Current Column, the preview columns will not print. The default is unchecked. Grid l Node Grid - If checked, will print the column lines in a data grid. If unchecked, the column lines will not print in the data grid. The default is checked. l Grid - If checked, the grid lines (the lines between the rows and columns) will print. If unchecked, the grid lines will not print. The default is checked. Colors tab The Colors Tab lets you set colors. You can set colors for the grid background, the preview column, the band, the header, and the grid line. The Transparent check boxes remove the colors and disable the associated color dropdowns. l Group Node and Group Footers (and their color choices) are not applicable to data grids. l Extended Management by Colors – Not implemented at this time Fonts tab The Change Font button lets you change fonts for the selected area of the grid. This includes band, font, header, and preview. Behaviors tab The Behaviors tab lets you change where bands and headers are placed, how much of the selection prints, whether or not any nodes automatically expand. You also have the option of choosing to use three-dimensional effects. The Graphics area is currently not applicable to any printable grid in Toad. Miscellaneous tab The Miscellaneous tab lets you choose effects for tree view grids and checkmarks.
- 711. Reporting Toad Control Files Note: This Toad feature is only available in the commercial version of Toad with the optional DB Admin Module. You can view information about the Control files record sections for your database by selecting: Database | Report | Control Files from the main menu bar. The Control Files window appears. The control file contains information about the associated database that is required for the database to be accessed by an instance, both at startup and during normal operation. A control file's information can be modified only by Oracle; no database administrator or end-user can edit a database's control file. A control file contains information including: l database name l timestamp of database creation l names and locations of associated datafiles and online redo log files l tablespace information l datafile offline ranges l log history l archived log information l backup set and backup piece information l backup datafile and redo log information l datafile copy information l current log sequence number l checkpoint information When you create a database, Oracle creates the database name and timestamp. The database name is taken from either the name specified by the initialization parameter DB_NAME or the name used in the CREATE DATABASE statement. Whenever a datafile or an online redo log file is added to, renamed in, or dropped from the database, the control file is updated to reflect this physical structure change. These changes are recorded so that: 19
- 712. Toad for Oracle User Guide Reporting 709 l Oracle can identify the datafiles and online redo log files to open during database startup. l Oracle can identify files that are required or available in case database recovery is necessary. Therefore, if you make a change to your database's physical structure, you should immediately make a backup of your control file. Control files also record information about checkpoints. Every three seconds, the checkpoint process (CKPT) records information in the control file about the checkpoint position in the online redo log. This information is used during database recovery. It marks entries not necessary for database recovery because they have already been written to the datafiles. Dependencies This feature allows you to: l View the database objects that reference a selected database object or l View the database objects that the selected object is dependent on. The Dependencies function does not rely on the Toad_DEP_TEMP table. The tree views can be completely expanded by CTRL+SPACE. There is also a tab to view the dependencies on all objects. Indented objects are depen