


![Security Overview
Assurance Levels Description
on the part of the developer than is consistent
with good commercial practice. As such it should
not require a substantially increased investment
of cost or time. EAL2 is therefore applicable
in those circumstances where developers
or users require a low to moderate level of
independently assured security in the absence of
ready availability of the complete development
record. Such a situation may arise when securing
legacy systems.
EAL3: Methodically Tested and Checked EAL3 permits a conscientious developer
to gain maximum assurance from positive
security engineering at the design stage
without substantial alteration of existing sound
development practices. EAL3 is applicable in
those circumstances where developers or users
require a moderate level of independently assured
security, and require a thorough investigation of
the TOE and its development without substantial
re-engineering.
EAL4: Methodically Designed, Tested, and EAL4 permits a developer to gain maximum
Reviewed assurance from positive security engineering
based on good commercial development
practices which, though rigorous, do not require
substantial specialist knowledge, skills, and
other resources. EAL4 is the highest level at
which it is likely to be economically feasible
to retrofit to an existing product line. EAL4
is therefore applicable in those circumstances
where developers or users require a moderate to
high level of independently assured security in
conventional commodity TOEs and are prepared
to incur additional security-specific engineering
costs. Commercial operating systems that provide
conventional, user-based security features are
typically evaluated at EAL4. Examples of such
operating systems are AIX[1], HP-UX[1],
FreeBSD, Novell NetWare, Solaris[1], SUSE
Linux Enterprise Server 9[1][2], SUSE Linux
Enterprise Server 10[3], Red Hat Enterprise
Linux 5[4], Windows 2000 Service Pack 3,
Windows 2003[1][5], Windows XP[1][5],
Windows 2008[1], and Windows Vista[1].
Operating systems that provide multilevel
security are evaluated at a minimum of EAL4.
Examples include Trusted Solaris, Solaris 10
Release 11/06 Trusted Extensions,[6] an early
version of the XTS-400, and VMware ESX
version 3.0.2[7].
EAL5: Semiformally Designed and Tested EAL5 permits a developer to gain maximum
assurance from security engineering based upon
4](https://image.slidesharecdn.com/unixadmin-1-4-pub-130107014155-phpapp02/85/Unixadmin-1-4-pub-11-320.jpg)
![Security Overview
Assurance Levels Description
rigorous commercial development practices
supported by moderate application of specialist
security engineering techniques. Such a TOE will
probably be designed and developed with the
intent of achieving EAL5 assurance. It is likely
that the additional costs attributable to the EAL5
requirements, relative to rigorous development
without the application of specialized techniques,
will not be large. EAL5 is therefore applicable in
those circumstances where developers or users
require a high level of independently assured
security in a planned development and require a
rigorous development approach without incurring
unreasonable costs attributable to specialist
security engineering techniques. Numerous
smart card devices have been evaluated at EAL5,
as have multilevel secure devices such as the
Tenix Interactive Link. XTS-400 (STOP 6) is a
general-purpose operating system which has been
evaluated at EAL5 augmented. LPAR on IBM
System z is EAL5 Certified.[8]
EAL6: Semiformally Verified Design and Tested EAL6 permits developers to gain high assurance
from application of security engineering
techniques to a rigorous development
environment in order to produce a premium
TOE for protecting high value assets against
significant risks. EAL6 is therefore applicable to
the development of security TOEs for application
in high risk situations where the value of the
protected assets justifies the additional costs.
An example of an EAL6 certified system is
the Green Hills Software INTEGRITY-178B
operating system, the only operating system to
achieve EAL6 thus far.[9]
EAL7: Formally Verified Design and Tested EAL7 is applicable to the development of
security TOEs for application in extremely high
risk situations and/or where the high value of
the assets justifies the higher costs. Practical
application of EAL7 is currently limited to TOEs
with tightly focused security functionality that is
amenable to extensive formal analysis. The Tenix
Interactive Link Data Diode Device has been
evaluated at EAL7 augmented, the only product
to do so.
Table 1.4. EAL Security Component Acronyms
Acronym Description
TCSEC Trusted Computer System Evaluation Criteria
LSPP Labelled Security Protection Profile
5](https://image.slidesharecdn.com/unixadmin-1-4-pub-130107014155-phpapp02/85/Unixadmin-1-4-pub-12-320.jpg)


![RAID Overview
that RAID 1+0 creates a striped set from a series of mirrored drives. In a failed disk situation, RAID
1+0 performs better because all the remaining disks continue to be used. The array can sustain multiple
drive losses so long as no mirror loses all its drives.
• RAID 5+0: stripe across distributed parity RAID systems.
• RAID 5+1: mirror striped set with distributed parity (some manufacturers label this as RAID 53).
Non-standard levels
Many configurations other than the basic numbered RAID levels are possible, and many companies,
organizations, and groups have created their own non-standard configurations, in many cases designed to
meet the specialised needs of a small niche group. Most of these non-standard RAID levels are proprietary.
Some of the more prominent modifications are:
• Storage Computer Corporation uses RAID 7, which adds caching to RAID 3 and RAID 4 to improve
I/O performance.
• EMC Corporation offered RAID S as an alternative to RAID 5 on their Symmetrix systems (which is
no longer supported on the latest releases of Enginuity, the Symmetrix's operating system).
• The ZFS filesystem, available in Solaris, OpenSolaris, FreeBSD and Mac OS X, offers RAID-Z, which
solves RAID 5's write hole problem.
• NetApp's Data ONTAP uses RAID-DP (also referred to as "double", "dual" or "diagonal" parity),
which is a form of RAID 6, but unlike many RAID 6 implementations, does not use distributed parity
as in RAID 5. Instead, two unique parity disks with separate parity calculations are used. This is a
modification of RAID 4 with an extra parity disk.
• Accusys Triple Parity (RAID TP) implements three independent parities by extending RAID 6
algorithms on its FC-SATA and SCSI-SATA RAID controllers to tolerate three-disk failure.
• Linux MD RAID10 (RAID10) implements a general RAID driver that defaults to a standard RAID 1+0
with 4 drives, but can have any number of drives. MD RAID10 can run striped and mirrored with only
2 drives with the f2 layout (mirroring with striped reads, normal Linux software RAID 1 does not stripe
reads, but can read in parallel).[4]
• Infrant (Now part of Netgear) X-RAID offers dynamic expansion of a RAID5 volume without having
to backup/restore the existing content. Just add larger drives one at a time, let it resync, then add the next
drive until all drives are installed. The resulting volume capacity is increased without user downtime.
(It should be noted that this is also possible in Linux, when utilizing Mdadm utility. It has also been
possible in the EMC Clariion for several years.)
• BeyondRAID created by Data Robotics and used in the Drobo series of products, implements both
mirroring and striping simultaneously or individually dependent on disk and data context. BeyondRAID
is more automated and easier to use than many standard RAID levels. It also offers instant expandability
without reconfiguration, the ability to mix and match drive sizes and the ability to reorder disks. It is
a block-level system and thus file system agnostic although today support is limited to NTFS, HFS+,
FAT32, and EXT3. It also utilizes Thin provisioning to allow for single volumes up to 16TB depending
on the host operating system support.
14](https://image.slidesharecdn.com/unixadmin-1-4-pub-130107014155-phpapp02/85/Unixadmin-1-4-pub-21-320.jpg)


![Solaris Security
syscall::uname:entry
{
self->addr = arg0;
}
syscall::uname:return
{
copyoutstr("SunOS", self->addr, 257);
copyoutstr("PowerPC", self->addr+257, 257);
copyoutstr("5.5.1", self->addr+(257*2), 257);
copyoutstr("gate:1996-12-01", self->addr+(257*3), 257);
copyoutstr("PPC", self->addr+(257*4), 257);
}
Before running the dtrace script:
# uname -a
SunOS homer 5.10 SunOS_Development sun4u sparc SUNW,Ultra-5_10
While running the dtrace script
# uname -a
SunOS PowerPC 5.5.1 gate:1996-12-01 PPC sparc SUNW,Ultra-5_10
Example killing a process when it trys to read a file
#cat read.d
#!/usr/sbin/dtrace -ws
ufs_read:entry
/ stringof(args[0]->v_path) == $$1 /
{
printf("File %s read by %dn", $$1, curpsinfo->pr_uid);
raise(SIGKILL);
}
# more /etc/passwd
Killed
# ./read.d /etc/passwd
dtrace: script './read.d' matched 1 probe
dtrace: allowing destructive actions
CPU ID FUNCTION:NAME
0 15625 ufs_read:entry File /etc/passwd read by 0
IPFilter Overview
1. Background With the release of Solaris 10, ipfilter is now supported. Before Solaris 10, EFS or
SunScreen Lite was the default firewall. IPfilter is a mature product traditionally found in BSDish
Operating Systems
2. Configure an ippool if list of firewalled hosts is large enough - use /etc/ipf/ippool.conf
# /etc/ipf/ippool.conf
# IP range for China
20](https://image.slidesharecdn.com/unixadmin-1-4-pub-130107014155-phpapp02/85/Unixadmin-1-4-pub-27-320.jpg)


![Solaris Security
Command Line Description
ipfstat Show summary
ipfstat -i Show input list
ipfstat -o Show output list
ipfstat -hio Show hits against all rules
ipfstat -t -T 5 Monitor the state table and refresh every : 5
seconds. Output is similar to : 'top' monitoring the
process table.
ipmon -s S Watch state table.
ipmon -sn Write logged entries to syslog, and : convert back
to hostnames and servicenames.
ipmon -s [file] Write logged entries to some file.
ipmon -Ds Run ipmon as a daemon, and log to : default
location. : (/var/adm/messages for Solaris) : (/var/
log/syslog for Tru64)
IPSec with Shared Keys
Note
Information collected from http://www.cuddletech.com/
Creating Keys
Using the ipsecalgs command we can see the available algorithms, including DES, 3DES, AES, Blowfish,
SHA and MD5. Different alogithms require different key lengths, for instance 3DES requires a 192 bit
key, whereas Blowfish can use a key anywhere from 32bits up to 448 bits.
For interoperability reasons (such as OSX or Linux), you may with to create keys that are both ASCII and
hex. This is done by choosing a string and converting it to hex. To know how long a string should be,
divide the number of bits required by 8, this is the number of ASCII chars you need. The hex value of
that ASCII string will be double the number of ASCII chars. Using the od utility we can convert ASCII-
to-hex. Here I'll create 2 keys, one for AH which is a SHA1 160bit key (20 ASCII chars) and another for
ESP which is a Blowfish 256bit key (32 ASCII chars):
benr@ultra ~$ echo "my short ah password" | od -t x1
0000000 6d 79 20 73 68 6f 72 74 20 61 68 20 70 61 73 73
0000020 77 6f 72 64 0a
0000025
benr@ultra ~$ echo "this is my long blowfish esp pas" | od -t x1
0000000 74 68 69 73 20 69 73 20 6d 79 20 6c 6f 6e 67 20
0000020 62 6c 6f 77 66 69 73 68 20 65 73 70 20 70 61 73
0000040 0a
0000041
my short ah password
6d792073686f72742061682070617373776f7264
this is my long blowfish esp pas
23](https://image.slidesharecdn.com/unixadmin-1-4-pub-130107014155-phpapp02/85/Unixadmin-1-4-pub-30-320.jpg)


![Solaris Security
MIICOzCCAaSgAwIBAgIFAJRpUUkwDQYJKoZIhvcNAQEEBQAwTzELMAkGA1UEBhMC
[ ... some lines omitted ... ]
oi4dO39J7cSnooqnekHjajn7ND7T187k+f+BVcFVbSenIzblq2P0u7FIgIjdlv0=
-----END X509 CERTIFICATE-----
3. Do the same on the other host.
$ ikecert certlocal -ks -m 1024 -t rsa-md5 -D
"C=de, O=moellenkamp, OU=moellenkamp-vpn, CN=theoden"
-A IP=10.211.55.200
Creating private key.
Certificate added to database.
-----BEGIN X509 CERTIFICATE-----
MIICOzCCAaSgAwIBAgIFAIRuR5QwDQYJKoZIhvcNAQEEBQAwTzELMAkGA1UEBhMC
[ ... some lines omitted ... ]
UHJ4P6Z0dtjnToQb37HNq9YWFRguSsPQvc/Lm+S9cJCLwINVg7NOXXgnSfY3k+Q=
-----END X509 CERTIFICATE-----
4. Okay, now we have to tell both hosts to use IPsec when they talk to each other:
$ echo "{laddr gandalf raddr theoden} ipsec
{auth_algs any encr_algs any sa shared}"
>> /etc/inet/ipsecinit.conf
5. This translates to: When i´m speaking to theoden, i have to encrypt the data and can use any negotiated
and available encryptition algorithm and any negotiated and available authentication algorithm. Such
an rule is only valid on one direction. Thus we have to define the opposite direction on the other host
to enable bidirectional traffic:
$ echo "{laddr theoden raddr gandalf} ipsec
{auth_algs any encr_algs any sa shared}"
>> /etc/inet/ipsecinit.conf
6. Okay, the next configuration is file is a little bit more complex. Go into the directory /etc/inet/ike and
create a file config with the following content:
cert_trust "10.211.55.200"
cert_trust "10.211.55.201"
p1_xform
{ auth_method preshared oakley_group 5 auth_alg sha encr_alg des }
p2_pfs 5
{
label "DE-theoden to DE-gandalf"
local_id_type dn
local_id "C=de, O=moellenkamp, OU=moellenkamp-vpn, CN=theoden"
remote_id "C=de, O=moellenkamp, OU=moellenkamp-vpn, CN=gandalf"
local_addr 10.211.55.200
remote_addr 10.211.55.201
p1_xform
27](https://image.slidesharecdn.com/unixadmin-1-4-pub-130107014155-phpapp02/85/Unixadmin-1-4-pub-34-320.jpg)
![Solaris Security
{auth_method rsa_sig oakley_group 2 auth_alg md5 encr_alg 3des}
}
7. Okay, we are almost done. But there is still a missing but very essential thing when you want to use
certificates. We have to distribute the certificates of the systems.
$ ikecert certdb -l
Certificate Slot Name: 0 Key Type: rsa
(Private key in certlocal slot 0)
Subject Name:
Key Size: 1024
Public key hash: 28B08FB404268D144BE70DDD652CB874
At the beginning there is only the local key in the system. We have to import the key of the remote
system. Do you remember the output beginning with -----BEGIN X509 CERTIFICATE----- and ending
with -----END X509 CERTIFICATE-----? You need this output now.
8. The next command won´t come back after you hit return. You have to paste in the key. On gandalf
you paste the output of the key generation on theoden. On Theoden you paste the output of the key
generation on gandalf. Let´s import the key on gandalf
$ ikecert certdb -a
-----BEGIN X509 CERTIFICATE-----
MIICOzCCAaSgAwIBAgIFAIRuR5QwDQYJKoZIhvcNAQEEBQAwTzELMAkGA1UEBhMC
UHJ4P6Z0dtjnToQb37HNq9YWFRguSsPQvc/Lm+S9cJCLwINVg7NOXXgnSfY3k+Q=
-----END X509 CERTIFICATE-----
[root@gandalf:/etc/inet/ike]$
9. After pasting, you have to hit Enter once and after this you press Ctrl-D once. Now we check for the
successful import. You will see two certificates now.
$ ikecert certdb -l
Certificate Slot Name: 0 Key Type: rsa
(Private key in certlocal slot 0)
Subject Name:
Key Size: 1024
Public key hash: 28B08FB404268D144BE70DDD652CB874
Certificate Slot Name: 1 Key Type: rsa
Subject Name:
Key Size: 1024
Public key hash: 76BE0809A6CBA5E06219BC4230CBB8B8
10.Okay, switch to theoden and import the key from gandalf on this system.
$ ikecert certdb -l
Certificate Slot Name: 0 Key Type: rsa
(Private key in certlocal slot 0)
Subject Name:
Key Size: 1024
Public key hash: 76BE0809A6CBA5E06219BC4230CBB8B8
$ ikecert certdb -a
-----BEGIN X509 CERTIFICATE-----
MIICOzCCAaSgAwIBAgIFAJRpUUkwDQYJKoZIhvcNAQEEBQAwTzELMAkGA1UEBhMC
28](https://image.slidesharecdn.com/unixadmin-1-4-pub-130107014155-phpapp02/85/Unixadmin-1-4-pub-35-320.jpg)

![Solaris Security
6. Create a Certificate Directory and a Key Directory.
# mkdir /etc/apache2/ssl.crt
# mkdir /etc/apache2/ssl.key
7. Generate a RSA Key.
# /usr/local/ssl/bin/openssl genrsa -des3 1024 >
/etc/apache2/ssl.key/server.key
Generating RSA private key, 1024 bit long modulus
……………………..++++++
………++++++
e is 65537 (0×10001)
Enter pass phrase: ********
Verifying - Enter pass phrase: ********
8. Generate a Certificate Request.
# /usr/local/ssl/bin/openssl req -new -key /etc/apache2/ssl.key/server.key
> /etc/apache2/ssl.crt/server.csr
Enter pass phrase for /etc/apache2/ssl.key/server.key: ********
You are about to be asked to enter information that will be
incorporated into your certificate request.
What you are about to enter is what is called a Distinguished
Name or a DN.
There are quite a few fields but you can leave some blank
For some fields there will be a default value,
If you enter ‘.’, the field will be left blank.
—–
Country Name (2 letter code) [US]::US
State or Province Name (full name) [Some-State]:OR
Locality Name (eg, city) []:Blodgett
Organization Name (eg, company) [Unconfigd OpenSSL Installation]:DIS
Organizational Unit Name (eg, section) []:IT
Common Name (eg, YOUR name) []:Big Cheese
Email Address []:meljr@meljr.com
Please enter the following ‘extra’ attributes
to be sent with your certificate request
A challenge password []: ********
An optional company name []: Live Free or Die
9. Install a Self-Signed Certificate. If you are going to install a certificate from an authoritative source,
follow their instructions and skip this step.
# /usr/local/ssl/bin/openssl req -x509 -days 3650 -key
> /etc/apache2/ssl.key/server.key
> -in /etc/apache2/ssl.crt/server.csr >
30](https://image.slidesharecdn.com/unixadmin-1-4-pub-130107014155-phpapp02/85/Unixadmin-1-4-pub-37-320.jpg)

![Solaris Security
# usermod -A solaris.admin.logsvc.read user_account
4. Converting root to a role and adding access to root role to a user
Fundamentals - login as a user and assume root; then modify the root account as type role and add the
root role to a user; test with fresh login before logging out
$ su - # usermod -K type=role root # usermod -R root useraccount
remote> ssh useraccount@host_with_root_role_config $ su - root
#
Secure Non-Global Zone FTP Server
Millage may vary on this one, since secure ftpd is not supported in a local zone as of Solaris 10 Update
3. Also note that this configuration uses BSM, and Roles for additional security. It is unknown to me if
BSM Audit trails are supported on ZFS filesystems. If you are evaluating this for production, I would
recommend not using ZFS for audit trails without confirmation from Sun Microsystems. The same basic
procedures can be adapted to VxVM and VxFS or UFS Filesystems.
1. Disable Unwanted Network Services
# svcadm disable sendmail
# svcadm disable rusers
# svcadm disable telnet
# svcadm disable rlogin
# svcadm disable rstat
# svcadm disable finger
# svcadm disable kshell
# svcadm disable network/shell:default
# svcadm disable snmpdx
# rm /etc/rc3.d/S76snmpdx
# rm /etc/rc3.d/S90samba
# Review /etc/rc2.d/S90* for deletion
2. Set Up Zone and Audit ZFS Pools
Unused Disk List
36GB Disk c0t2d1
36GB Disk c1t2d1
# zpool create zones c0t2d1
# zfs create zones/secftp
# zfs create zones/ftp-root
[Must run ftpconfig before setting mountpoint legacy]
# ftpconfig -d /zones/ftp-root
# mkdir /zones/ftp-root/incoming
# chown go-r /zones/ftp-root/incoming
# zfs set mountpoint=legacy zones/ftp-root
32](https://image.slidesharecdn.com/unixadmin-1-4-pub-130107014155-phpapp02/85/Unixadmin-1-4-pub-39-320.jpg)

![Solaris Security
zonecft:secftp:net> end
zonecft:secftp> add attr
zonecft:secftp:attr> set name=comment
zonecft:secftp:attr> set type=string
zonecft:secftp:attr> set value="Secure FTP Zone"
zonecft:secftp:attr> end
zonecft:secftp> verify
zonecft:secftp> commit
zonecft:secftp> exit
zoneadm -z secftp verify
zoneadm -z secftp install
zoneadm -z secftp boot
# zlogin -C secftp
[Connected to zone 'secftp' ]
Enter Requested Setup Information
[Notice Zone Rebooting]
secftp console login: root
# passwd root
7. Disable Unwanted Network Services in Local Zone
# svcadm disable sendmail
# svcadm disable rusers
# svcadm disable telnet
# svcadm disable rlogin
# svcadm disable rstat
# svcadm disable finger
# svcadm disable kshell
# svcadm disable network/shell:default
# svcadm disable snmpdx
# rm /etc/rc3.d/S76snmpdx
# rm /etc/rc3.d/S90samba
## Review /etc/rc2.d/S90* for deletion
8. Add a user for secure ftp access
[create same accounts and role changes as in global - you can set these to different names if you like]
/etc/passwd:
secxfr:x:2002:1::/ftp-root/./incoming:/bin/true
# pwconv
# passwd secxfr
# set ot secxfr
# Add /bin/true to /etc/shells
# configure /etc/ftpd/ftpaccess
34](https://image.slidesharecdn.com/unixadmin-1-4-pub-130107014155-phpapp02/85/Unixadmin-1-4-pub-41-320.jpg)


![Solaris Virtualization
Copyright 2008 Sun Microsystems, Inc. All rights reserved. Use is subject
to license terms. Installation of <SUNWldm> was successful. pkgadd -n
-d "/export/home/rlb/LDoms_Manager-1_1/Product" -a pkg_admin SUNWjass
Copyright 2005 Sun Microsystems, Inc. All rights reserved. Use is subject
to license terms. Installation of <SUNWjass> was successful. Verifying
that all packages are fully installed. OK. Enabling services: svc:/
ldoms/ldmd:default Solaris Security Toolkit was not applied. Bypassing
the use of the Solaris Security Toolkit is _not_ recommended and should
only be performed when alternative hardening steps are to be taken. You
have new mail in /var/mail/root
Configure Primary Domain
# export PATH=/opt/SUNWldm/bin:$PATH
# ldm add-vds primary-vds0 primary
# ldm add-vcc port-range=5000-5100 primary-vcc0 primary
# ldm add-vsw net-dev=bge0 primary-vsw0 primary
# ldm set-mau 1 primary
# ldm set-vcpu 8 primary
# ldm set-memory 3968m primary
# ldm add-config baseline
# shutdown -y -g0 -i6
Create DOM1
# svcadm enable vntsd
# ldm add-domain dom1
# ldm add-vcpu 8 dom1
# ldm add-memory 2048m dom1
# ldm add-vnet pub0 primary-vsw0 dom1
# ldm add-vnet isan0 primary-vsw1 dom1
Adding RAW Disks and ISO Images to DOM1
# ldm add-vdiskserverdevice /dev/rdsk/c1t65d0s2 vol1@primary-vds0
# ldm add-vdiskserverdevice /export/home/rlb/sparc-dvd.iso
iso@primary-vds0
# ldm add-vdisk vdisk0 vol1@primary-vds0 dom1
# ldm add-vdisk iso iso@primary-vds0 dom1
Bind DOM1 and set up for booting
# ldm bind-domain dom1
# ldm start-domain dom1
LDom dom1 started
# telnet localhost 5000
Trying 127.0.0.1... Connected to localhost.
Escape character is '^]'.
Connecting to console "dom1" in group "dom1" ....
40](https://image.slidesharecdn.com/unixadmin-1-4-pub-130107014155-phpapp02/85/Unixadmin-1-4-pub-47-320.jpg)
![Solaris Virtualization
Press ~? for control options ..
{0} ok boot iso
Install OS Image and Clean up DOM1
After proceeding through the SysID Configuration halt the domain and set the auto-boot varable to true,
assuming that you want the domain to boot when starting it Otherwise the LDOM will wait at the ok>
prompt when recieving the start command from ldm start ldom
// Remove iso image for use with LDOM #2
# ldm stop dom1
# ldm rm-vdisk iso dom1
// Set the LDOM to autoboot else will boot
// into ok> prompt
# ldm set-variable auto-boot?=true dom1
Create LDOM #2
# ldm add-domain dom2
# ldm add-vcpu 8 dom2
# ldm add-memory 2048m dom2
# ldm add-vnet pub0 primary-vsw0 dom2
# ldm add-vdiskserverdevice /dev/rdsk/c1t66d0s2 vol2@primary-vds0
# ldm add-vdisk vdisk0 vol2@primary-vds0 dom2
# ldm add-vdisk iso iso@primary-vds0 dom2
# ldm set-variable auto-boot?=false dom2
# ldm bind dom2
# ldm start dom2
LDom dom2 started
# telnet localhost 5001
Trying 127.0.0.1...
Connected to localhost. Escape character is '^]'.
Connecting to console "dom2" in group "dom2" ....
{0} ok boot iso // Continue as with LDOM#1
Backup or Template LDOM Configurations
primary# ldm list-constraints -x ldg0 > /var/tmp/ldg0.xml
primary# cp /var/tmp/ldg0.xml /var/tmp/ldg1.xml
primary# ldm add-domain -i /var/tmp/ldg1.xml primary
primary# ldm bind ldg1
primary# ldm start ldg1
Add one virtual disk to two LDOMs
A virtual disk backend can be exported multiple times either through the same or different virtual disk
servers. Each exported instance of the virtual disk backend can then be assigned to either the same or
41](https://image.slidesharecdn.com/unixadmin-1-4-pub-130107014155-phpapp02/85/Unixadmin-1-4-pub-48-320.jpg)
![Solaris Virtualization
different guest domains. When a virtual disk backend is exported multiple times, it should not be exported
with the exclusive (excl) option. Specifying the excl option will only allow exporting the backend once.
Caution - When a virtual disk backend is exported multiple times, applications running on guest domains
and using that virtual disk are responsible for coordinating and synchronizing concurrent write access to
ensure data coherency.
Export the virtual disk backend two times from a service domain by using the following commands. Note
the "-f" that forces the second device to be defined. Without the "-f" the second command will fail reporting
that the share must be "read only".
# ldm add-vdsdev [options={ro,slice}] backend volume1@service_name
# ldm add-vdsdev -f [options={ro,slice}] backend volume2@service_name
Assign the exported backend to each guest domain by using the following commands.
# ldm add-vdisk [timeout=seconds] disk_name volume1@service_name ldom1
# ldm add-vdisk [timeout=seconds] disk_name volume2@service_name ldom2
Example: note that SVM was tested, but LDOM's would not recognize the disks
# zfs create -V 1g shared/fence0
# zfs create -V 1g shared/fence1
# zfs create -V 1g shared/fence2
# ldm add-vdsdev /dev/zvol/rdsk/shared/fence0
vsrv1_fence0@primary-vds0
# ldm add-vdsdev -f /dev/zvol/rdsk/shared/fence0
vsrv2_fence0@primary-vds0
# ldm add-vdsdev /dev/zvol/rdsk/shared/fence1
vsrv1_fence1@primary-vds0
# ldm add-vdsdev -f /dev/zvol/rdsk/shared/fence1
vsrv2_fence1@primary-vds0
# ldm add-vdsdev /dev/zvol/rdsk/shared/fence2
vsrv1_fence2@primary-vds0
# ldm add-vdsdev -f /dev/zvol/rdsk/shared/fence2
vsrv2_fence2@primary-vds0
# ldm add-vdisk fence0 vsrv1_fence0@primary-vds0 vsrv1
# ldm add-vdisk fence1 vsrv1_fence1@primary-vds0 vsrv1
# ldm add-vdisk fence2 vsrv1_fence2@primary-vds0 vsrv1
# ldm add-vdisk fence0 vsrv2_fence0@primary-vds0 vsrv1
42](https://image.slidesharecdn.com/unixadmin-1-4-pub-130107014155-phpapp02/85/Unixadmin-1-4-pub-49-320.jpg)


![Solaris Virtualization
# zoneadm -z myzone boot
# zlogin -e @. -C myzone
Using Dtrace to monitor non-global zones
Current defined zone states from zone.h
/* zone_status */
typedef enum {
ZONE_IS_UNINITIALIZED = 0,
ZONE_IS_READY,
ZONE_IS_BOOTING,
ZONE_IS_RUNNING,
ZONE_IS_SHUTTING_DOWN,
ZONE_IS_EMPTY,
ZONE_IS_DOWN,
ZONE_IS_DYING,
ZONE_IS_DEAD
} zone_status_t;
Dtrace code - can be run via cron with output to a monitored file
/usr/sbin/dtrace -qs
BEGIN
{
state[0] = "Uninitialized";
state[1] = "Ready";
state[2] = "Booting";
state[3] = "Running";
state[4] = "Shutting down";
state[5] = "Empty";
state[6] = "Down";
state[7] = "Dying";
state[8] = "Dead";
}
zone_status_set:entry
{
printf("Zone %s status %sn", stringof(args[0]->zone_name),
state[args[1]]);
}
Example output of dtrace code above
# ./zonestatus.d
Zone aap status Ready
Zone aap status Booting
Zone aap status Running
Zone aap status Shutting down
Zone aap status Down
Zone aap status Empty
Zone aap status Dying
54](https://image.slidesharecdn.com/unixadmin-1-4-pub-130107014155-phpapp02/85/Unixadmin-1-4-pub-61-320.jpg)

![Solaris Virtualization
ZONE_IS_DEAD
} zone_status_t;
Dtrace code - can be run via cron with output to a monitored file
/usr/sbin/dtrace -qs
BEGIN
{
state[0] = "Uninitialized";
state[1] = "Ready";
state[2] = "Booting";
state[3] = "Running";
state[4] = "Shutting down";
state[5] = "Empty";
state[6] = "Down";
state[7] = "Dying";
state[8] = "Dead";
}
zone_status_set:entry
{
printf("Zone %s status %sn", stringof(args[0]->zone_name),
state[args[1]]);
}
Example output of dtrace code above
# ./zonestatus.d
Zone aap status Ready
Zone aap status Booting
Zone aap status Running
Zone aap status Shutting down
Zone aap status Down
Zone aap status Empty
Zone aap status Dying
Zone aap status Ready
Zone aap status Dead
Zone aap status Booting
Zone aap status Running
Zone aap status Shutting down
Zone aap status Empty
Zone aap status Down
Zone aap status Dead
Non-Global Zone Commands
Poor mans version of container migration between two or more systems. This article is an overview of
how to migrate zones from one server to another. Examples will include how to simulate this within two
servers and SAN or iSCSI sharing storage.
1. CLI Interaction with Non-Global Zones
a. Force Attachment
56](https://image.slidesharecdn.com/unixadmin-1-4-pub-130107014155-phpapp02/85/Unixadmin-1-4-pub-63-320.jpg)
![Solaris Virtualization
Used when a zone will not attach due to manifest incompatabilities such as missing patches. Buyer
be ware.
# zoneadm -z inactive_local_zonename attach -F
b. Detach non-global zone
# zoneadm -z inactive_local_zonename detach
c. Dry Run for attach and detach
# zoneadm -z my-zone detach -n
# zoneadm -z my-zone attach -n
d. Dry Run to see if a non-global zone can be moved from one system to another
# zoneadm -z myzone detach -n | ssh remote zoneadm attach -n -
e. Update on Attach
Can be used durring round-robin upgrades or moving from one architecture to another.
# zoneadm -z my-zone attach -u
f. Verbose Non-Global Zone boot
# zoneadm boot -- -m verbose
g. Importing a Non-Global Zone on a host without the zone.xml/index definition
Host1# zoneadm -z myzone halt
Host1# zoneadm -z myzone detach
[move storage to host2]
Host2# zonecfg -z myzone "create -F -a /zone/myzone"
Host2# zoneadm -z myzone attach -u
2. Creating the ZFS Storage Pool for local zone installation
# zpool create zones c6t0d0
# zfs create zones/webzone
# chmod go-rwx /zones/webzone
3. Create Zone “webzone”
# zonecfg -z webzone
webzone: No such zone configured
Use 'create' to begin configuring a new zone
zonecfg:webzone> create
zonecfg:webzone> set zonepath=/zones/webzone
zonecfg:webzone> exit
# zoneadm -z webzone install
# zoneadm -z webzone boot
# zlogin -e @. -C webzone
## Finish the sysid questions
57](https://image.slidesharecdn.com/unixadmin-1-4-pub-130107014155-phpapp02/85/Unixadmin-1-4-pub-64-320.jpg)


![Solaris Virtualization
Common Commands Global Zone Non-Global Zone
hagrp -state yes yes
halogin yes no
hagrp -online/-offline yes no
hares -online/-offline yes no
hares -clear yes no
Non-Global Zones and Custom VCS Application Agent
1. Custom Zone Agent Scripts
a. Zone Monitor Script
# StartProgram = "/opt/VRTSvcs/bin/myzone/start ZNAME ZHOME"
# MonitorProgram = "/opt/VRTSvcs/bin/myzone/monitor ZNAME"
# StopProgram = "/opt/VRTSvcs/bin/myzone/stop ZONENAME ZNAME"
# Monitor Code
VCSHOME="${VCS_HOME:-/opt/VRTSvcs}”
. $VCSHOME/bin/ag_i18n_inc.sh
ZONE=$1
SYS=`cat /var/VRTSvcs/conf/sysname`
INDEX=/etc/zones/index
ZONE_XML=/etc/zones/${ZONE}.xml
if [ ! -f $ZONE_XML ] ; then
VCSAG_LOG_MSG "N" "ZONE: $ZONE Configuration file:
$ZONE_XML not found on $SYS.
Must run failover test before being considered
production ready" 1 "$ResName"
fi
STATE=`grep ^$ARG1':' $INDEX | awk '{print $2}'`
if [ -z $STATE ] ; then
VCSAG_LOG_MSG "N" "ZONE: $ZONE is not in $INDEX, and
was never imported on $SYS.
Must run failover test before being considered production
ready" 1 "$ResName"
# Exit offline
exit 100
fi
case "$STATE" in
running)
60](https://image.slidesharecdn.com/unixadmin-1-4-pub-130107014155-phpapp02/85/Unixadmin-1-4-pub-67-320.jpg)
![Solaris Virtualization
# Zone is running
exit 110
configured)
# Zone Imported but not running
exit 100
installed)
# Zone had been configured on this system, but is not
# imported or running
exit 100
*)
esac
b. Zone StartProgram Script
#########################
## StartProgram
#########################
VCSHOME="${VCS_HOME:-/opt/VRTSvcs}”
. $VCSHOME/bin/ag_i18n_inc.sh
$ZONE=$1
$ZONE_HOME=$2
# This start program forces an attach on the zone, just
# incase the xml file is not updated
SYS=`cat /var/VRTSvcs/conf/sysname`
zonecfg -z $ZONE "create -F -a $ZONE_HOME"
S=$?
if [ $S -eq 0 ] ; then
# Creation was a success, starting zone boot
VCSAG_LOG_MSG "N"
"ZONE: $ZONE Success in attaching to system $SYS" 1 "$ResName"
VCSAG_LOG_MSG "N"
"ZONE: $ZONE Starting Boot sequence on $SYS" 1 "$ResName"
zoneadm -z $ZONE boot
ZB=$?
if [ $ZB -eq 0 ] ; then
VCSAG_LOG_MSG "N"
"ZONE: $ZONE Boot command successful $SYS" 1 "$ResName"
else
VCSAG_LOG_MSG "N"
"ZONE: $ZONE Boot command failed on $SYS" 1 "$ResName"
fi
else
# Creation Failed
VCSAG_LOG_MSG "N"
"ZONE: $ZONE Attach Command failed on $SYS" 1 "$ResName"
fi
61](https://image.slidesharecdn.com/unixadmin-1-4-pub-130107014155-phpapp02/85/Unixadmin-1-4-pub-68-320.jpg)
![Solaris Virtualization
c. Zone StopProgram Script
##########################
## StopProgram
##########################
VCSHOME="${VCS_HOME:-/opt/VRTSvcs}”
. $VCSHOME/bin/ag_i18n_inc.sh
SYS=`cat /var/VRTSvcs/conf/sysname`
VCSAG_LOG_MSG "N" "ZONE: $ZONE Shutting down $SYS" 1 "$ResName"
$ZONE=$1
$ZONE_HOME=$2
zlogin -z $ZONE init 0
ZSD=$?
if [ $ZSD -eq 0 ] ; then
# Shutdown command sent successful
VCSAG_LOG_MSG "N"
"ZONE: $ZONE Success in zlogin shutdown $SYS" 1 "$ResName"
VCSAG_LOG_MSG "N"
"ZONE: $ZONE Going through init 0 on $SYS, expect
normal shutdown delay" 1 "$ResName"
else
# zlogin shutdown Failed
VCSAG_LOG_MSG "N"
"ZONE: $ZONE Failed zlogin shutdown command on $SYS" 1 "$ResName"
fi
STATE=`grep ^$ARG1':' $INDEX | awk '{print $2}'`
while [ "$STATE" == "running" ] ; do
sleep 4
STATE=`grep ^$ZONE':' $INDEX | awk '{print $2}'`
done
VCSAG_LOG_MSG "N"
"ZONE: $ZONE Detach In Progress on $SYS" 1 "$ResName"
zoneadm -z $ZONE detach
sleep 2
while [ "$STATE" == "configured" ] ; do
sleep 4
STATE=`grep ^$ZONE':' $INDEX | awk '{print $2}'`
done
VCSAG_LOG_MSG "N"
"ZONE: $ZONE Detach Is Complete $SYS" 1 "$ResName"
exit
62](https://image.slidesharecdn.com/unixadmin-1-4-pub-130107014155-phpapp02/85/Unixadmin-1-4-pub-69-320.jpg)


![Solaris and Linux General Information
Pathname: /kernel/misc/sparcv9/diaudio
Pathname: /kernel/misc/sparcv9/mixer
SSH Keys
Common issues:
1. Permissions on .ssh
2. Hostnames for multiple interfaces
ssh-keygen -t dsa
scp ~/.ssh/id_dsa.pub burly:.ssh/authorized_keys2
ssh-agent sh -c 'ssh-add < /dev/null && bash'
RHEL 5.2 NIS Client
Common issues:
1. Edit /etc/yp.conf
domain dynlab.net server infsrv
2. Update authconfig
# authconfig --update --enablenis --nisdomain=dynlab.net --nisserver=infsrv
Stopping portmap: [ OK ]
Starting portmap: [ OK ]
Binding to the NIS domain: [ OK ]
3. Update /etc/nsswitch.conf
# authconfig --update --enablenis --nisdomain=dynlab.net --nisserver=infsrv
Stopping portmap: [ OK ]
Starting portmap: [ OK ]
Binding to the NIS domain: [ OK ]
Redhat Proc FS Tricks
Force a panic on RHEL
Used for testing H/A times. Note that there is a 10-20 second overhead.
# echo c > /proc/sysrq-trigger
Adjust swap of processes
Default value is 60, 0 = try hard not to swap, 100 = swap everything possible
# echo 60 > /proc/sys/vm/swappiness
76](https://image.slidesharecdn.com/unixadmin-1-4-pub-130107014155-phpapp02/85/Unixadmin-1-4-pub-83-320.jpg)


![Solaris and Linux General Information
If the driver cannot be unloaded and loaded again, and you know the host, bus, target and LUN IDs for
the new devices, you can add them through the /proc/scsi/scsi file using the following command:
echo "scsi add-single-device H B T L" > /proc/scsi/scsi
For Linux 2.6 kernels, devices can also be added and removed through the /sys filesystem. Use the
following command to remove a disk from the kernel’s recognition:
echo “1” > /sys/class/scsi_host/hostH/device/H:B:T:L/delete
or, as a possible variant on other 2.6 kernels, you can use the command:
echo “1” > /sys/class/scsi_host/hostH/device/targetH:B:T/H:B:T:L/delete
To reregister the disk with the kernel use the command
echo “B T L” > /sys/class/scsi_host/hostH/scan
Note
The Linux kernel does not assign permanent names for the fabric devices in the /dev directory.
Device file names are assigned in the order in which devices are discovered during the bus
scanning. For example, a LUN might be /dev/sda. After a driver reload, the same LUN might
become /dev/sdce. A fabric reconfiguration might also result in a shift in the host, bus, target and
LUN IDs, which makes it unreliable to add specific devices through the /proc/scsi/scsi file.
Solaris 10 - Mapping a process to a port
#!/bin/ksh
#
# find from a port the pid that started the port
#
line='------------------------------------------'
pids=`/usr/bin/ps -ef | sed 1d | awk '{print $2}'`
# Prompt users or use 1st cmdline argument
if [ $# -eq 0 ]; then
read ans?"Enter port you like to know pid for: "
else
ans=$1
fi
# Check all pids for this port, then list that process
for f in $pids
do
/usr/proc/bin/pfiles $f 2>/dev/null
| /usr/xpg4/bin/grep -q "port: $ans"
if [ $? -eq 0 ] ; then
echo "$linenPort: $ans is being used by PID: c"
81](https://image.slidesharecdn.com/unixadmin-1-4-pub-130107014155-phpapp02/85/Unixadmin-1-4-pub-88-320.jpg)
![Solaris and Linux General Information
/usr/bin/ps -o pid -o args -p $f | sed 1d
fi
done
exit 0
Network and Services Tasks for Linux
1. List what run levels start what services
#chkconfig --list | grep on
amd 0:off 1:off 2:off 3:off 4:on 5:on 6:off
apmd 0:off 1:off 2:on 3:off 4:on 5:off 6:off
arpwatch 0:off 1:off 2:off 3:off 4:off 5:off 6:off
atd 0:off 1:off 2:off 3:on 4:on 5:on 6:off
autofs 0:off 1:off 2:off 3:off 4:off 5:off 6:off
named 0:off 1:off 2:off 3:off 4:off 5:off 6:off
bootparamd 0:off 1:off 2:off 3:off 4:off 5:off 6:off
keytable 0:off 1:off 2:on 3:on 4:on 5:on 6:off
crond 0:off 1:off 2:on 3:on 4:on 5:on 6:off
syslog 0:off 1:off 2:on 3:on 4:on 5:on 6:off
netfs 0:off 1:off 2:off 3:on 4:on 5:on 6:off
network 0:off 1:off 2:on 3:on 4:on 5:on 6:off
2. Change RedHat hostname
# cd /etc/sysconfig/
# vi network
HOSTNAME=newhostname
# hostname newhostname
# service network restart
3. Get NIC Information
# ethtool eth0
Settings for eth0:
Supported ports: [ TP MII ]
Supported link modes: 10baseT/Half 10baseT/Full
100baseT/Half 100baseT/Full
Supports auto-negotiation: Yes
Advertised link modes: 10baseT/Half 10baseT/Full
100baseT/Half 100baseT/Full
Advertised auto-negotiation: Yes
Speed: 100Mb/s
Duplex: Full
Port: MII
PHYAD: 32
Transceiver: internal
Auto-negotiation: on
82](https://image.slidesharecdn.com/unixadmin-1-4-pub-130107014155-phpapp02/85/Unixadmin-1-4-pub-89-320.jpg)


![Solaris 10 Notes
# stmsboot -L
non-STMS device name STMS device name
------------------------------------------------------
/dev/rdsk/c1t50060E801049CF50d0
/dev/rdsk/c2t4849544143484920373330343031383130303030d0
/dev/rdsk/c1t50060E801049CF52d0
/dev/rdsk/c2t4849544143484920373330343031383130303030d0
4. /var/adm/messages example output
Dec 18 11:42:24 vampire mpxio: [ID 669396 kern.info]
/scsi_vhci/ssd@g600c0ff000000000086ab238b2af0600
(ssd11) multipath status: optimal, path
/pci@9,600000/SUNW,qlc@1/fp@0,0
(fp1) to target address: 216000c0ff886ab2,0 is
online.
Load balancing: round-robin
5. Disable MPXIO on a 880
kernel/drv/qlc.conf:
name="qlc" parent="/pci@8,600000" unit-address="2"
mpxio-disable="yes";
6. Raw Mount Disk Name Example
Filesystem bytes used avail capacity Mounted on
/dev/dsk/c6t600C0FF000000000086AB238B2AF0600d0s5
697942398 20825341 670137634 4% /test
7. Display Properties
# luxadm display
/dev/rdsk/c6t600C0FF000000000086AB238B2AF0600d0s2
DEVICE PROPERTIES for disk:
/dev/rdsk/c6t600C0FF000000000086AB238B2AF0600d0s2
Vendor: SUN
Product ID: StorEdge 3510
Revision: 413C
Serial Num: 086AB238B2AF
Unformatted capacity: 1397535.000 MBytes
Write Cache: Enabled
Read Cache: Enabled
Minimum prefetch: 0x0
Maximum prefetch: 0xffff
Device Type: Disk device
Path(s):
/dev/rdsk/c6t600C0FF000000000086AB238B2AF0600d0s2
/devices/scsi_vhci/ssd@g600c0ff000000000086ab238b2af0600:c,raw
Controller /devices/pci@9,600000/SUNW,qlc@1/fp@0,0
99](https://image.slidesharecdn.com/unixadmin-1-4-pub-130107014155-phpapp02/85/Unixadmin-1-4-pub-106-320.jpg)
![Solaris 10 Notes
Device Address 216000c0ff886ab2,0
Host controller port WWN 210000e08b14cc40
Class primary
State ONLINE
Controller /devices/pci@9,600000/SUNW,qlc@2/fp@0,0
Device Address 266000c0fff86ab2,0
Host controller port WWN 210000e08b144540
Class primary
State ONLINE
USB Wireless Setup WUSB54GC
Model: Link Sys WUSB54GC ; Driver: rum Operating System: Solaris Express Community Edition, B95
Additional ; Packages: SUNWrum
Bugs/Features:
1. New GUI based Network utility is buggy and probably should not be used with this device. Instead
use a wificonfig profile
2. If attached during boot and shutdown, I get a flood of debugging output and it will not properly start or
stop. I have to detach before halting and keep disconnected during the boot.
Problems during initial configuration beyond the bugs above: I had to track down the device alias and
assign it to the rum driver, this did not happen automatically.
1. Here’s how to get it recognized by the OS:
# prtconf -v >/tmp/prtconf.out
# vi /tmp/prtconf.out
[-cut-]
value='Cisco-Linksys'
[-cut-]
name='usb-product-id' type=int items=1
value=00000020
name='usb-vendor-id' type=int items=1
value=000013b1
[-cut-]
2. Combine these two numbers with the device type in order for mapping in the /etc/driver_aliases file
rum “usb13b1,20”
3. Disconnect and reboot
# init 6
4. Use wificonfig to create a profile for your wireless network
# wificonfig createprofile myXXXX essid=rover encryption=WEP
wepkey1=12345
5. Connect to your profile
# wificonfig connect myXXXX
100](https://image.slidesharecdn.com/unixadmin-1-4-pub-130107014155-phpapp02/85/Unixadmin-1-4-pub-107-320.jpg)
![Solaris 10 Notes
6. Start an IP on your device, or replace dhcp with an appropriate IP address and configuration
# ifconfig rum0 dhcp
7. Note that you might want to disable svcs service physical:
# svcadm disable physical:default
# svcadm disable physical:nwam
VCS MultiNICB without probe address - link
only
Link Only Probes are specific to Solaris 10 and will not work on solaris 8-9.
1. Device configuration files
$ cat /etc/hostname.fjgi0
whpsedwdb2 netmask + broadcast + group ipmp0 up
$ cat /etc/hostname.fjgi1
group ipmp0 standby up
2. VCS MultiNICB Resource Definition
MultiNICB mnicb (
Critical = 0
UseMpathd = 1
MpathdCommand = "/usr/lib/inet/in.mpathd"
Device = { fjgi0, fjgi1 }
ConfigCheck = 0
GroupName = ipmp0
IgnoreLinkStatus = 0
)
3. Move IPMP Interface
# /usr/sbin/if_mpadm -d ce0#
Feb 13 14:47:31 oraman in.mpathd[185]: Successfully
failed over from NIC ce0 to NIC ce4
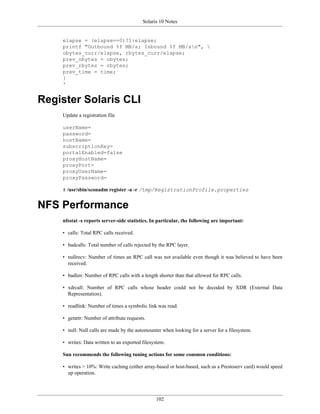
Network IO in/out per interface
Roch's Bytmeter: bytemeter ce0
AWKSCRIPT='
NF == 0 {getline line;}
$1 == "obytes64" { obytes = $2; }
$1 == "rbytes64" { rbytes = $2; }
$1 == "snaptime" {
time = $2;
obytes_curr = obytes - prev_obytes;
rbytes_curr = rbytes - prev_rbytes;
elapse = (time - prev_time)*1e6;
101](https://image.slidesharecdn.com/unixadmin-1-4-pub-130107014155-phpapp02/85/Unixadmin-1-4-pub-108-320.jpg)

![Solaris 10 Notes
change on SXCE update the /lib/svc/method/svc-iscsitgt file and replace the /usr/
sbin/iscsitgtd execution with the following:
/usr/bin/optisa amd64 > /dev/null 2>&1
if [ $? -eq 0 ]
then /usr/sbin/amd64/iscsitgtd
else /usr/sbin/iscsitgtd
fi
Then restart the iscsitgtd process via svcsadm restart iscsitgt. Note that opensolaris, Solaris 10
U6 and SXCE b110 all handle the start of this process differently.
Performance
• iSCSI performance can be quite good, especially if you follow a few basic rules
• Use Enterprise class NICs (they make a HUGE difference)
• Enable jumbo frames on storage ports
• Use layer-2 link aggregation and IPMP to boost throughput
• Ensure that you are using the performance guidance listed in bug #6457694 on opensolaris.org
• Increase send and receive buffers, disable the nagle algorithm and make sure TCP window scaling
is working correctly
• Ttcp and netperf are awesome tools for benchmarking network throughput, and measuring the impact
of a given network tunable
• As with security, performance is a complete presentation in and of itself. Please see the references if
your interested in learning more about tuning iSCSI communications for maximum
Setting up an iscsi target on a solaris server with and without ZFS
1. Create iscsi ‘base’ directory (config store)
• The base directory is used to store the iSCSI target configuration data, and needs to be defined prior
to using the iSCSI target for the first time
• You can create a base directory with the iscistadm utility
# iscsitadm modify admin -d/etc/iscsitgt
2. Configure a backing store
• The backing store contains the physical storage that is exported as a target
• The Solaris target supports several types of backing stores:
• Flat files
• Physical devices
• ZFS volumes (zvols for short)
• To create a backing store from a ZFS volume, the zfs utility can be run with the create subcommand,
the create zvol option (“-V”), the size of the zvol to create, and the name to associate with the zvol:
104](https://image.slidesharecdn.com/unixadmin-1-4-pub-130107014155-phpapp02/85/Unixadmin-1-4-pub-111-320.jpg)


![Solaris 10 Notes
Savecore enabled: yes
# dumpadm -d /dev/md/dsk/d0
8. Next is to make sure you can boot from the mirror - SPARC ONLY
a. The final step is to modify PROM. First we need to find out which two physical devices c1t0d0
and c1t1d0 refer to
# ls -l /dev/dsk/c1t0d0s1
lrwxrwxrwx 1 root root 43 Mar 4 14:38 /dev/dsk/c1t0d0s1 ->
../../devices/pci@1c,600000/scsi@2/sd@0,0:b
# ls -l /dev/dsk/c1t1d0s1
lrwxrwxrwx 1 root root 43 Mar 4 14:38 /dev/dsk/c1t1d0s1 ->
../../devices/pci@1c,600000/scsi@2/sd@1,0:b
b. The physical device path is everything starting from /pci…. Please make a note of sd towards the
end of the device string. When creating device aliases below, sd will have to be changed to disk.
Now we create two device aliases called root and backup_root. Then we set boot-device to be root
and backup_root. The :b refers to slice 1(root) on that particular disk.
# eeprom “use-nvramrc?=true”
# eeprom “nvramrc=devalias root /pci@1c,600000/scsi@2/disk@0,0
devalias backup_root /pci@1c,600000/scsi@2/disk@1,0#
# eeprom “boot-device=root:b backup_root:b net”
c. Enable the mirror disk to be bootable
# installboot /usr/platform/`uname -i`/lib/fs/ufs/bootblk
/dev/rdsk/c0t1d0s0
9. Next is to make sure you can boot from the mirror - Intel/AMD ONLY
a. Enable the mirror disk to be bootable
# /sbin/installgrub /boot/grub/stage1
/boot/grub/stage2 /dev/rdsk/c0d0s0
10.If you are mirroring just the two internal drives, you will want to add the following line to /etc/
system to allow it to boot from a single drive. This will bypass the SVM Quorum rule
set md:mirrored_root_flag = 1
Example full run on amd system; disks are named after d[1,2-n Drive][partition number] And Metadevices
for the mirrors are named d[Boot Number]0[partition number] - example disk: d10 is drive 1 partition 0,
metadevice d100 is the 1st boot environment (live upgrade BE) partition 0. If applying the split mirror
alternate boot environment I would have the split off ABE as d200.
// Use format fdisk to label and
// partition the drive
# format c1t1d0
// Original Partition looks like
Current partition table (original):
108](https://image.slidesharecdn.com/unixadmin-1-4-pub-130107014155-phpapp02/85/Unixadmin-1-4-pub-115-320.jpg)


![Solaris 10 Notes
• If a future memory requirement is significantly large and well defined, then it can be advantageous
to prevent ZFS from growing the ARC into it. So, if we know that a future application requires 20%
of memory, it makes sense to cap the ARC such that it does not consume more than the remaining
80% of memory.
• If the application is a known consumer of large memory pages, then again limiting the ARC prevents
ZFS from breaking up the pages and fragmenting the memory. Limiting the ARC preserves the
availability of large pages.
• If dynamic reconfiguration of a memory board is needed (supported on certain platforms), then it is
a requirement to prevent the ARC (and thus the kernel cage) togrow onto all boards.
For theses cases, it can be desirable to limit the ARC. This will, of course, also limit the
amount of cached data and this can have adverse effects on performance. No easy way exists to
foretell if limiting the ARC degrades performance. If you tune this parameter, please reference
this URL in shell script or in an /etc/system comment. http://www.solarisinternals.com/wiki/
index.php/ZFS_Evil_Tuning_Guide#ARCSIZE You can also use the arcstat script available at http://
blogs.sun.com/realneel/entry/zfs_arc_statistics to check the arc size as well as other arc statistics
4. Set the ARC maximum in /etc/system
This syntax is provided starting in the Solaris 10 8/07 release and Nevada (build 51) release. For
example, if an application needs 5 GBytes of memory on a system with 36-GBytes of memory,
you could set the arc maximum to 30 GBytes, (0x780000000 or 32212254720 bytes). Set the
zfs:zfs_arc_max parameter in the /etc/system file:
/etc/system:
set zfs:zfs_arc_max = 0x780000000
* or
set zfs:zfs_arc_max = 32212254720
5. Perl code to configure ARC cache at boot time - init script
#!/bin/perl
use strict;
my $arc_max = shift @ARGV;
if ( !defined($arc_max) ) {
print STDERR "usage: arc_tune <arc max>n";
exit -1;
}
$| = 1;
use IPC::Open2;
my %syms;
my $mdb = "/usr/bin/mdb";
open2(*READ, *WRITE, "$mdb -kw") || die "cannot execute mdb";
print WRITE "arc::print -an";
while(<READ>) {
my $line = $_;
if ( $line =~ /^ +([a-f0-9]+) (.*) =/ ) {
$syms{$2} = $1;
126](https://image.slidesharecdn.com/unixadmin-1-4-pub-130107014155-phpapp02/85/Unixadmin-1-4-pub-133-320.jpg)


![VMWare ESX 3
unshift @ARGV, "s/$source/$dest/";
# default to replace in text files
if ( ! -d "$source" ) {
print "Error: Source directory '$source' does not exist.n
Please specify a relative path to CWD or the full pathn";
exit 2;
}
if ( -d "$dest" ) {
print "Error: Destination directory '$dest' already exists.n
You cannot overwrite an existing VM image with this tool.n";
exit 3;
}
my $regexwarn = 0;
foreach (@ARGV) {
if ( ! /^s/[^/]+/[^/]+/$/ ) {
$regexwarn = 1;
warn "Error: Invalid regex pattern in: $_n";
}
}
exit 4 if $regexwarn == 1;
# If we get here then $source and $dest are good
if ( ! mkdir "$dest" ) {
print "Error: Failed to create destination dir '$dest': $!n";
exit 4;
}
# Now get a list of all the files in each
# directory and copy them to dest
@files = listdir($source);
#print @files;
foreach $srcfile (@files) {
# we want to copy $srcfile from $src to $dest
# but first check if we need to rename the file
$destfile = $srcfile;
if ($destfile =~ /$source/ ) {
# source filename contains the source dir name, rename it
$destfile =~ s/$source/$dest/gi;
}
$istext = is_vmtextfile($srcfile);
printf("Copying %s: %s/%s -> %s/%sn",
($istext ? "text" : "binary"),
$source, $srcfile,
$dest, $destfile);
135](https://image.slidesharecdn.com/unixadmin-1-4-pub-130107014155-phpapp02/85/Unixadmin-1-4-pub-142-320.jpg)

![VMWare ESX 3
sub is_vmtextfile {
my $file = shift;
my $istxt = 0;
$istxt = 1 if ( $file =~ /.(vmdk|vmx|vmxf|vmsd|vmsn)$/ );
$istxt = 0 if ( $file =~ /-flat.vmdk$/ );
$istxt = 0 if ( $file =~ /-delta.vmdk$/ );
return $istxt;
}
sub listdir {
my $dir = shift;
my @nfiles = ();
opendir(FH, $dir) || warn "Can't open $dir: $!n";
@nfiles = grep { (-f "$dir/$_" && !-l "$dir/$_") } readdir(FH);
closedir(FH);
return @nfiles;
}
sub usage {
print <<EOUSAGE;
$0: Tool to "quickly" clone a VMware ESX guest OS
Usage: $0 sourcedir destdir
$0 "source dir" "dest dir"
$0 sourcedir destdir [regexreplace [...]]
e.g.
# vmclone "winxp" "uscuv-clone"
's/memsize = "512"/memsize = "256"/'
Clones a vmware image located in sourcedir to the destdir
directory. The source machine must be powered off for this
to correctly clone it.
By default, if any filenames have "sourcedir" as part of
their filename, then it is renamed to "destdir".
The optional regexreplace argument will cause that regular
expression to be performed on all the text files being
copied. A default regexreplace of s/sourcedir/destdir/
is done by default. You may use multiple regexs.
Author: Paul Gregg <pgregg@pgregg.com>
Jan 7, 2007
EOUSAGE
exit 1;
}
Clone VMWare Virtual Guests
1. Copy Directories for the master image to a second location
137](https://image.slidesharecdn.com/unixadmin-1-4-pub-130107014155-phpapp02/85/Unixadmin-1-4-pub-144-320.jpg)
![VMWare ESX 3
# cp -axvsol01 vsol02
2. In the new guest location rename the disk image
[/vsol02]# /vmware/bin/vmware-vdiskmanager-n vsol01.vmdk vsol02.vmdk
3. Update vmx file to reference new image name
[/vsol02]# mv vsol01.vmx vsol02.vmx
4. Rename virtual machine config and change disk image name in this config file
[/vsol02]#sed -i 's/vsol01.vmdk/vsol02.vmdk/' vsol02.vmx
5. Register VMWare Image
/usr/bin/vmware-cmd -s register /vmfs/volumes/<datastore>/
virtualguest.vmx
Clone VMWare Disks
1. Create directory for clone image
# mkdir /vmfs/volumes/myvmfs3/deki
2. Use vmkfstool to clone the image, options dependent on thin or zeroed-thick
a. Fully-allocated (“zeroed-thick”):
# vmkfstools –i /tmp/Deki_Wiki_Hayes_1.8_VM.vmdk /vmfs/volumes/myvmfs3/
deki/Deki_Wiki_Hayes_1.8_VM.vmdk
Destination disk format: VMFS thick
Cloning disk '/tmp/Deki_Wiki_Hayes_1.8_VM.vmdk'...
Clone: 100% done.
b. Allocate-on-use (“thin”):
# vmkfstools –i /tmp/Deki_Wiki_Hayes_1.8_VM.vmdk -d thin /vmfs/volumes/
myvmfs3/deki/Deki_Wiki_Hayes_1.8_VM.vmdk
Destination disk format: VMFS thin-provisioned
Cloning disk '/tmp/Deki_Wiki_Hayes_1.8_VM.vmdk'...
Clone: 100% done.
3. Update vmx file to reference new image name
scsi0:0.fileName = "SourceVM.vmdk"
4. Register VMWare Image
/usr/bin/vmware-cmd -s register /vmfs/volumes/<datastore>/
virtualguest.vmx
138](https://image.slidesharecdn.com/unixadmin-1-4-pub-130107014155-phpapp02/85/Unixadmin-1-4-pub-145-320.jpg)


![Chapter 14. Dtrace
Track time on each I/O
iotime.d
#pragma D option quiet
BEGIN
{
printf("%10s %58s %2s %7sn", "DEVICE", "FILE", "RW", "MS");
}
io:::start
{
start[args[0]->b_edev, args[0]->b_blkno] = timestamp;
}
io:::done
/start[args[0]->b_edev, args[0]->b_blkno]/
{
this->elapsed = timestamp - start[args[0]->b_edev, args[0]->b_blkno];
printf("%10s %58s %2s %3d.%03dn", args[1]->dev_statname,
args[2]->fi_pathname, args[0]->b_flags & B_READ ? "R" : "W",
this->elapsed / 10000000, (this->elapsed / 1000) % 1000);
start[args[0]->b_edev, args[0]->b_blkno] = 0;
}
Example run of iotime.d
# dtrace -s ./iotime.d
DEVICE FILE RW MS
cmdk0 /kernel/drv/scsa2usb R 24.781
cmdk0 /kernel/drv/scsa2usb R 25.208
cmdk0 /var/adm/messages W 25.981
cmdk0 /kernel/drv/scsa2usb R 5.448
cmdk0 <none> W 4.172
cmdk0 /kernel/drv/scsa2usb R 2.620
cmdk0 /var/adm/messages W 0.252
cmdk0 <unknown> R 3.213
cmdk0 <none> W 3.011
cmdk0 <unknown> R 2.197
cmdk0 /var/adm/messages W 2.680
cmdk0 <none> W 0.436
cmdk0 /var/adm/messages W 0.542
cmdk0 <none> W 0.339
cmdk0 /var/adm/messages W 0.414
cmdk0 <none> W 0.344
cmdk0 /var/adm/messages W 0.361
cmdk0 <none> W 0.315
cmdk0 /var/adm/messages W 0.421
cmdk0 <none> W 0.349
cmdk0 <none> R 1.524
cmdk0 <unknown> R 3.648
158](https://image.slidesharecdn.com/unixadmin-1-4-pub-130107014155-phpapp02/85/Unixadmin-1-4-pub-165-320.jpg)
![Dtrace
cmdk0 /usr/lib/librcm.so.1 R 2.553
cmdk0 /usr/lib/librcm.so.1 R 1.332
cmdk0 /usr/lib/librcm.so.1 R 0.222
cmdk0 /usr/lib/librcm.so.1 R 0.228
cmdk0 /usr/lib/librcm.so.1 R 0.927
cmdk0 <none> R 1.189
...
Track directories where writes are occurring
whowrite.d
#pragma D option quiet
io:::start
/args[0]->b_flags & B_WRITE/
{
@[execname, args[2]->fi_dirname] = count();
}
END
{
printf("%20s %51s %5sn", "WHO", "WHERE", "COUNT");
printa("%20s %51s %5@dn", @);
}
Example run of whowrite.d
# dtrace -s ./whowrite.d
^C
WHO WHERE COUNT
su /var/adm 1
fsflush /etc 1
fsflush / 1
fsflush /var/log 1
fsflush /export/bmc/lisa 1
fsflush /export/bmc/.phoenix 1
vi /var/tmp 2
vi /etc 2
cat <none> 2
bash / 2
vi <none> 3
159](https://image.slidesharecdn.com/unixadmin-1-4-pub-130107014155-phpapp02/85/Unixadmin-1-4-pub-166-320.jpg)


![Disaster Recovery
Enable Replication from Identified Production VVR Master
# vradmin –g hubdg addvol hubrvg tibcoems3
Growing an SRL for Replication
The SRL is a storage point for changes between the source and destination being replicated, there are some
cases where the SRL needs to be extended in order to allow for extended timeframes where replication
can not take place. To grow the SRL use the following procedure.
Make sure that there is enough disk space on both the Production and Disaster Recovery Clusters
# vxdg –g hubdg free
From the production cluster run the vradmin resizevol command against the rvg, diskgroup and volume
to be expanded. [+]Size is to grow the SRL [-]Size will shrink the SRL and no [-|+] will set the SRL to
that size.
# vradmin –g hubdg resizesrl hubrvg +100m
Pausing Replication between the Production and DR Clusters
Specifying the remote hostname is not necessary in this environment since there is only one secondary host.
# vradmin –g hubdg pauserep hubrvg
Restarting Replication between the Production and DR Clusters
Specifying the remote hostname is not necessary in this environment since there is only one secondary host.
# vradmin –g hubdg resumerep hubrvg
Example Failback from DR to Primary Failing due to need for fbsync
2009/08/07 15:35:04 VCS WARNING V-16-20012-82 (ncib1hubp003b1)
RVGSharedPri:hubrvg_pri:online:RVG hubrvg is acting_secondary.
Please resync from primary
2009/08/07 15:37:04 VCS ERROR V-16-2-13066 (ncib1hubp003a1) Agent
is calling clean for resource(hubrvg_pri) because the resource is not
up even after online completed.
Example disconnection due to WAN event - GCO Declaring a
Faulted Cluster
2009/08/14 12:24:18 VCS NOTICE V-16-3-18213 (ncib1hubr003a1)
Cluster ncib1hubr003 lost all heartbeats to cluster ncib1hubp003:
effecting inquiry
2009/08/14 12:24:18 VCS ERROR V-16-1-50908 Remote cluster ncib1hubp003
has faulted. Determining if global group Tibcoapps should be failed
over to local cluster
165](https://image.slidesharecdn.com/unixadmin-1-4-pub-130107014155-phpapp02/85/Unixadmin-1-4-pub-172-320.jpg)
![Disaster Recovery
Initiation of a Forced DR Takeover
Forcing a DR event from the DR cluster is possible, however it should only be executed should connectivity
between the Production Cluster and the DR Cluster be severed, and for reasons to be determined later, the
DR failover did not take place.
# haclus –declare outage –clus ncib1hubp003
# hagrp –online –force Tibcoapps –sys ncib1hubr003a1
# hagrp –online –force Tibcoapps –sys ncib1hubr003b1
Growing a Replicated Filesystems
This command grows both the volume and the filesystem, on the primary and disaster recovery clusters.
There is no need to offline or modify any VCS Resources. Note that this assumes that there is no need
to tweak the SRL logs.
Make sure that there is enough disk space on both the Production and Disaster Recovery Clusters
# vxdg –g hubdg free
From the production cluster run the vradmin resizevol command against the rvg, diskgroup and volume
to be expanded. [+]Size is to grow the volume [-]Size will shrink the volume and no [-|+] will set the
volume to that size.
# vradmin –g hubdg resizevol hubrvg tibcoems3 +100m
Here's now to resynchronize the old Primary once you bring it back
up 5.0:
1. use the migrate option with vradmin
# vradmin -g diskgroup migrate vgname hostRemoteIP
2. If the command reports back primary out of sync, use the fbsync option
# vradmin -g diskgroup fbsync vgnme
VVR and GCO v5.x Made Easy
GCO Configuration
1. Run Script to add VVR Types Definitions - repeat on all nodes in each cluster
# cd /etc/VRTSvcs/conf/sample_vvr
# ./addVVRTypes.sh
# haconf -dump -makero
2. On a node in the primary site, start the global clustering configuration wizard: or use #3 for manual
configuration.
# /opt/VRTSvcs/bin/gcoconfig
a. After discovering the NIC devices on the local node, specify or confirm the device for the cluster
joining the global cluster environment.
166](https://image.slidesharecdn.com/unixadmin-1-4-pub-130107014155-phpapp02/85/Unixadmin-1-4-pub-173-320.jpg)


![Disaster Recovery
# vxvol aslog rvgB srlB#
# vxedit set primary_datavol=sampleB sampleB
d. If the old Primary is still down, all you need to do is start the RVG#to be able to use the datavolumes:
# vxrvg start rvgB
This will allow you to keep the volumes in VVR so that once you manage#to resurrect the former
Primary, you can make the necessary VVR#commands to set it up as a secondary so it can
resynchronize from the#backup system. Once it has resynchronized, you can use the process#listed at
the beginning of section 6 (above) to fail from the Old#Secondary/New Primary back to the original
configuration.
Setting Up VVR 4.x - the hard way
1. Create VVR Setup on Secondary Node - destination
a. Creating a replicated volume on two hosts, hostA and hostB
Before configuring, you need to make sure two scripts have been run#from /etc/rc2.d: S94vxnm-
host_infod and S94vxnm-vxnetd. VVR will not#work if these scripts don't get run AFTER VVR
licenses have been#instralled. So if you install VVR licenses and don't reboot#immediately after,
run these scripts to get VVR to work.
b. Before the Primary can be set up, the Secondary must be configured.
First, use vxassist to create your datavolumes. Make sure to specify#the logtype as DCM (Data
Change Map, which keeps track of data changes#if the Storage Replicator log fills up) if your
replicated volumes are#asynchronous.
vxassist -g diskgroupB make sampleB 4g layout=log logtype=dcm
c. Then create the SRL (Storage Replicator Log) for the volume. Carefully#decide how big you want
this to be, based on available bandwidth#between your hosts and how fast your writes happen.
See pages 18-25 of the SRVM Configuration Notes for detailed#(excruciatingly) notes on selecting
your SRL size.
vxassist -g diskgroupB make srlB 500m
d. Next make the rlink object:
# vxmake -g diskgroupB rlink rlinkB remote_host=hostA#
remote_dg=diskgroupA remote_rlink=rlinkA local_host=hostB
#synchronous=[off|override|fail] srlprot=dcm
Use synchronous=off only if you can stand to lose some data.#Otherwise, set synchronize=override
or synchronize=fail. override runs#as synchronous (writes aren't committed until they reach
the#secondary) until the link dies, then it switches to asynchronous,#storing pending writes to the
secondary in the SRL. When the link#comes back, it resyncs the secondary and switches back to
Synchronous#mode. synchronize=fail fails new updates to the primary in the case of#a downed link.
In any of the above cases, you'll lose data if the link fails and,#before the secondary can catch up
to the primary, there is a failure#of the primary data volume. This is why it's important to have
both#redundant disks and redundant network paths.
178](https://image.slidesharecdn.com/unixadmin-1-4-pub-130107014155-phpapp02/85/Unixadmin-1-4-pub-185-320.jpg)
![Disaster Recovery
e. Now make the RVG, where you put together the datavolume, the SRL, and the rlink:
# vxmake -g diskgroupB rvg rvgB rlink=rlinkB
datavol=sampleB srl=srlB#primary=false
f. Attach the rlink to the rvg:
# vxrlink -g diskgroupB att rlinkB
g. Start the RVG on the Secondary:
# vxrvg -g diskgroupB start rvgB
2. Configure Primary VVR Node
a. As with the Secondary, make data#volumes, an SRL, and an rlink:
# vxassist -g diskgroupA make sampleA 4g layout=log logtype=dcm
# vxassist -g diskgroupA make srlA 500m
# vxmake -g diskgroupA rlink rlinkA remote_host=hostB#
remote_dg=diskgroupB remote_rlink=rlinkB local_host=host
A#synchronous=[off|override|fail] srlprot=dcm
b. Make the RVG for the primary. Only the last option is different:
# vxmake -g diskgroupA rvg rvgA rlink=rlinkA
datavol=sampleA srl=srlA primary=true
3. Now go back to the secondary.
When we created the secondary,#brain-dead Veritas figured the volume on the Seconday and the
Primary#would have the same name, but when we set this up, we wanted to have#the Primary
datavolume named sampleA and the Secondary datavolume be#sampleB. So we need to tell the
Secondary that the Primary is sampleA:
vxedit -g diskgroupB set primary_datavol=sampleA sampleB
4. Now you can attach the rlink to the RVG and start the RVG. On the Primary:
vxrlink -g diskgroupA att rlinkA
You should see output like this:
vxvm:vxrlink: INFO: Secondary data volumes detected
with rvg rvgB as parent:#vxvm:vxrlink:
INFO: sampleB: len=8388608 primary_datavol=sampleA
5. Finally, start I/O on the Primary:
# vxrvg -g diskgroupA start rvgA
Growing/Shrinking a Volume or SRL 4.x
This is exactly the same as in regular Veritas. However, VVR doesn't#sync the volume changes. To grow
a volume, you first need to grow the#secondary, then the primary. To shrink a volume, first the primary
179](https://image.slidesharecdn.com/unixadmin-1-4-pub-130107014155-phpapp02/85/Unixadmin-1-4-pub-186-320.jpg)


![VxVM and Storage Troubleshooting
4. Using one disk listed in /var/tmp/list re-initialize the disk group.
# vxdg init DiskGroupName DISKNAME=cXtYdZs2
Note
This will not delete existing data on the disks. All commands in this procedure interact with
the private region header information and do not re-write data.
5. Continue through the list of disks by adding them into the disk group
# vxdg -g DiskGroupName adddisk DISKNAME=cAtBdZs2
6. After all disks are added into the disk group generate the original layout by running vxmake against
the /var/tmp/maker file
# vxmake -g DiskGroupName -d /var/tmp/maker
7. At this point all volumes will be in a DISABLED ACTIVE state. Once enabling all volumes you will
have full access to the original disk group.
# vxvol -g DiskGroupName startall
Resize VxFS Volume and Filesystem
$ vxdg free | egrep ‘(D01|D02|D03|D04|D05)’
GROUP DISK DEVICE TAG OFFSET LENGTH FLAGS
datadg D01 c2t0d0s2 c2t0d0 35547981 35547981 -
datadg D02 c2t1d0s2 c2t1d0 35547981 35547981 -
datadg D03 c2t2d0s2 c2t2d0 35547981 35547981 -
datadg D04 c2t3d0s2 c2t3d0 35547981 35547981 -
datadg D05 c2t4d0s2 c2t4d0 35547981 35547981 -
datadg D06 c2t5d0s2 c2t5d0 35547981 35547981 -
$ /etc/vx/bin/vxresize -g datadg -F vxfs datavol01 +35547981
Incorrect DMP or Disk Identification
Situation: Veritas sees different paths to a LUN as unique disks, even with C-Bit turned on
# vxdisk -o alldgs list
[-cut-]
sdal auto:cdsdisk - (vxfencoorddg) online
sds auto:cdsdisk emc04 knomandg online shared
# vxdisk list sds |grep "state=enabled"
sdan state=enabled
187](https://image.slidesharecdn.com/unixadmin-1-4-pub-130107014155-phpapp02/85/Unixadmin-1-4-pub-194-320.jpg)
![VxVM and Storage Troubleshooting
sdb state=enabled
# vxdisk list sdal |grep "state=enabled"
sdax state=enabled
sds state=enabled
# vxdmpadm getsubpaths dmpnodename=sdal
NAME STATE[A] PATH-TYPE[M] CTLR-NAME ENCLR-TYPE ENCLR-NAME ATTRS
========================================================================
sdax ENABLED(A) - c1 EMC EMC2 -
sds ENABLED(A) - c0 EMC EMC2 -
# vxdmpadm getsubpaths dmpnodename=sds
NAME STATE[A] PATH-TYPE[M] CTLR-NAME ENCLR-TYPE ENCLR-NAME ATTRS
========================================================================
sdan ENABLED(A) - c1 EMC EMC2 -
sdb ENABLED(A) - c0 EMC EMC2 -
Solution
# rm /etc/vx/disk.info ; rm /etc/vx/array.info
# vxconfigd -k
Data Migration out of rootdg
Situation: disks with data are all in rootdg, need to be moved into another disk group with same data prior
to OS upgrade, or to just clean up bad deployment.
Note
In newer versions of vxvm there is a vxsplit command that can be used for this process.
## (for each vol) get the names/disks from vxdisk list
# vxprint -hmQq -g <current disk group> <volname> > /<volname>
## Next
# vxedit -g <dg> -rf rm <volname> (for each vol)
# vxdg -g <dg> rmdisk <name>
# vxdg init <newdg> <diskname>=<disk>
# vxdg -g newdg adddisk <diskname>=<disk> for each disk
# vxmake -g newdg -d /tmp/<volname> for each volume.
# vxvol -g newdg start <volname>
Recover vx Plex
# vxprint|grep DETA
pl vol01-02 vol01 DETACHED 204800 - IOFAIL - -
# vxplex -g ptpd att vol01 vol01-02 &
Shell code to get solaris disk size in GB
# ---- first, get list of disks ----
188](https://image.slidesharecdn.com/unixadmin-1-4-pub-130107014155-phpapp02/85/Unixadmin-1-4-pub-195-320.jpg)
![VxVM and Storage Troubleshooting
disks=( `ls /dev/rdsk/c*s2` )
total=0;
# ---- how many disks? ----
sz=${#disks[*]}
# ---- get disk size for each ----
n=0
echo "Disks:"
while [ $n -lt $sz ]
do
geom=( `prtvtoc ${disks[$n]} 2>/dev/null |
egrep "sector|track|cylinder" | tr -d "*" | awk '{print $1}'` )
# ---- get disk parms and calculate size ----
BperS=${geom[0]}
SperT=${geom[1]}
TperC=${geom[2]}
SperC=${geom[3]}
Cyls=${geom[4]}
AccCyls=${geom[5]}
if [ "$BperS" != "" ]; then
size=`expr $BperS * $SperC * $Cyls`
GB=`expr $size / 1024 / 1024 / 1024`
echo -n " ${disks[$n]}: "
echo $GB "Gbytes"
total=`expr $total + $GB`
fi
n=`expr $n + 1`
done
Split Root Mirror vxvm
Disks: rootdisk is c1t0d0s2 root mirror disk is c1t1d0s2
1. Install the Solaris boot block on the mirror disk:
# /usr/lib/vxvm/bin/vxbootsetup -g rootdg rootmirror
2. If you have separate volumes for opt, export, home on the root disk, it is required to define the partitions
for those volumes using vxmksdpar
# /usr/lib/vxvm/bin/vxmksdpart
Usage: vxmksdpart [-f] [-g diskgroup] subdisk sliceno [tag flags]
e.g. In following example, the opt volume subdisk is on
rootmirror-05, and slice 7 is free on the mirror disk:
# vxmksdpart -g rootdg rootmirror-05 7 0x00 0x00
>>> list of partition types
# prtvtoc -s /dev/rdsk/c2t2d0s2
189](https://image.slidesharecdn.com/unixadmin-1-4-pub-130107014155-phpapp02/85/Unixadmin-1-4-pub-196-320.jpg)


![Advanced VCS for IO Fencing
and Various Commands
vxfsckd is not running:
# mount -F vxfs -o cluster,largefiles,qio
/dev/vx/dsk/orvol_dg/orbvol /shared
UX:vxfs mount: ERROR: Cluster mount is not supported on
a non-CVM volume
on a file system layout version less than 4,
or GAB/GLM modules are not loaded,
or vxfsckd daemon is not running.
# which vxfsckd
/opt/VRTSvxfs/sbin/vxfsckd
# /opt/VRTSvxfs/sbin/vxfsckd
# ps -ef|grep vxfsckd
root 5547 1 0 23:04:43 ? 0:00 /opt/VRTSvxfs/sbin/vxfsckd
largefiles has not yet been set:
# mount -F vxfs -o cluster,largefiles,qio
/dev/vx/dsk/orvol_dg/orbvol /shared
UX:vxfs mount: ERROR: mount option(s) incompatible
with file system /dev/vx/dsk/orvol_dg/orbvol
b. Reboot command issued instead of init 6
This results in the keys from the rebooted node remaining on the disks and prevents vxfen from
starting. Easy way to fix is a reboot with init 6.
5. Adjust CFS Primary node - not master node
node 0# fsclustadm showprimary /orashared
0
node 1# fsclustadm setprimary /orashared
# fsclustadm showprimary /orashared
1
6. Coordinator Disk example with keys - note lack of reservations ; coordinator disks do not set them.
# head -1 /etc/vxfentab > /tmp/coordinator_disk
# vxfenadm -g all -f /tmp/coordinator_disk
Device Name: /dev/rdsk/c2t0d7s2
Total Number Of Keys: 2
key[0]:
Key Value [Numeric Format]: 66,45,45,45,45,45,45,45
Key Value [Character Format]: B-------
key[1]:
Key Value [Numeric Format]: 65,45,45,45,45,45,45,45
Key Value [Character Format]: A-------
# head -1 /etc/vxfentab > /tmp/coordinator_disk
197](https://image.slidesharecdn.com/unixadmin-1-4-pub-130107014155-phpapp02/85/Unixadmin-1-4-pub-204-320.jpg)
![Advanced VCS for IO Fencing
and Various Commands
# vxfenadm -r all -f /tmp/coordinator_disk ## list reservations
Device Name: /dev/rdsk/c2t0d7s2
Total Number Of Keys: 0
No keys...
7. Data Disk example with keys - should have both Reservation and Registration set.
# vxdisk -o alldgs list | awk '/shared$/ {print "/dev/rdsk/" $1 }'
| head -1 > /tmp/data_disk
# vxfenadm -g all -f /tmp/data_disk
Device Name: /dev/rdsk/c2t0d1s2
Total Number Of Keys: 2
key[0]:
Key Value [Numeric Format]: 65,80,71,82,48,48,48,49
Key Value [Character Format]: APGR0001
key[1]:
Key Value [Numeric Format]: 66,80,71,82,48,48,48,49
Key Value [Character Format]: BPGR0001
# vxfenadm -r all -f /tmp/data_disk
Device Name: /dev/rdsk/c2t0d1s2
Total Number Of Keys: 1
Key[0]:
Reservation Type: SCSI3_RESV_WRITEEXCLUSIVEREGISTRANTSONLY
Key Value [Numeric Format]: 65,80,71,82,48,48,48,49
Key Value [Character Format]: APGR0001
8. Determine the appropriate letter representing the local nodeID:
node0=A, node1=B, node2=C, ...
#!/bin/ksh "/usr/bin/echo '0$(expr $(lltstat -N) + 101)'"
B
9. Veritas SAN Serial Number
# vxfenadm -i /dev/rdsk/c2t13d0s2
Vendor id : EMC
Product id : SYMMETRIX
Revision : 5567
Serial Number : 42031000a
10.SCSI3-PGR Register Test Keys for new storage
One system; repeat with key B1 on second system
# vxfenadm -m -kA1 -f /tmp/disklist
Registration completed for disk path: /dev/rdsk/c2t0d1s2
11.SCSI3-PGR Remove Test Keys for new storage
One system; repeat with key B1 on second system
# vxfenadm -x -kA1 -f /tmp/disklist
198](https://image.slidesharecdn.com/unixadmin-1-4-pub-130107014155-phpapp02/85/Unixadmin-1-4-pub-205-320.jpg)
![Advanced VCS for IO Fencing
and Various Commands
Deleted the key : [A1------] from device /dev/rdsk/c2t0d1s2
12.Check SCSI3-PGR Keys on a list of disks
Use disk list to show keys - example only showing one disk
# vxfenadm -g all -f /tmp/disklist
Device Name: /dev/rdsk/c2t0d1s2
Total Number Of Keys: 1
key[0]:
Key Value [Numeric Format]: 65,49,45,45,45,45,45,45
Key Value [Character Format]: A1------
13.Check if IO Fencing License is enabled
vxlicrep -e | grep PGR
PGR#VERITAS Volume Manager = Enabled
PGR_TRAINING#VERITAS Volume Manager = Enabled
PGR = Enabled
PGR_TRAINING = Enabled
14.Disk Detach Policy
In VERITAS Volume Manager 3.2 and later versions, there are two detach policies for a shared disk
group, global and local. The default policy, and the way VERITAS Cluster Volume Manager (CVM) has
always worked, is global. The policy can be selected for each disk group with the vxedit set command.
The global policy will cause the disk to be detached throughout the cluster if a single node experiences
an I/O failure to that disk.
The local policy may be preferred for unmirrored volumes or in cases where availability is preferred
over redundancy of the data. It allows a disk that experiences an I/O failure to remain available if other
nodes in the cluster are still able to access it. After an I/O failure occurs, a message will be passed around
the cluster to determine if the failure is disk related or path related. If the other nodes can still write
to the disk, the mirrors are kept in sync by other nodes. The original node will fail writes. Something
similar is done for reads, but the read will succeed.
The state is not persistent. If a node has a local I/O failure, it does not remember. Any following read
or write that fails will go through the same process of passing messages around the cluster to check for
path or disk failure and repair the mirrored volume.
Disk Detach Policy has no effect on the Master node, as any IO failure will result in the plex detaching
regardless of policy. In any case, slaves that can't see the disk will still be unable to join the cluster.
vxedit man page:
Attribute Values for Disk Group Records
diskdetpolicy
Sets a disk group <detach policy>. These policies determine
the way VxVM detaches unusable disks in a shared disk group.
The diskdetpolicy attribute is ignored for private disk groups.
- global
199](https://image.slidesharecdn.com/unixadmin-1-4-pub-130107014155-phpapp02/85/Unixadmin-1-4-pub-206-320.jpg)

![Advanced VCS for IO Fencing
and Various Commands
Total Number Of Keys: 1
key[0]:
Key Value [Numeric Format]: 65,49,45,45,45,45,45,45
Key Value [Character Format]: A1------
# vxfenadm -r all -f /tmp/data_disk
Device Name: /dev/rdsk/c2t0d1s2
Total Number Of Keys: 0
No keys...
c. Set the reservation mode
Note
Even though the reservation is not a key, you must use the registration key to RESERVE
(see note above).
# vxfenadm -n -f /tmp/data_disk
VXFEN:libvxfen:1118: Reservation FAILED for: /dev/rdsk/c2t0d1s2
VXFEN:libvxfen:1133: Error returned: Error 0
# vxfenadm -n -kA1 -f /tmp/data_disk
Reservation completed for disk path: /dev/rdsk/c2t0d1s2
# vxfenadm -g all -f /tmp/data_disk
Device Name: /dev/rdsk/c2t0d1s2
Total Number Of Keys: 1
key[0]:
Key Value [Numeric Format]: 65,49,45,45,45,45,45,45
Key Value [Character Format]: A1------
# vxfenadm -r all -f /tmp/data_disk
Device Name: /dev/rdsk/c2t0d1s2
Total Number Of Keys: 1
Key[0]:
Reservation Type: SCSI3_RESV_WRITEEXCLUSIVEREGISTRANTSONLY
Key Value [Numeric Format]: 65,49,45,45,45,45,45,45
Key Value [Character Format]: A1------
d. Remove the REGISTRATION
# vxfenadm -x -kA1 -f /tmp/data_disk
Deleted the key : [A1------] from device /dev/rdsk/c2t0d1s2
# vxfenadm -g all -f /tmp/data_disk
Device Name: /dev/rdsk/c2t0d1s2
Total Number Of Keys: 0
No keys...
# vxfenadm -r all -f /tmp/data_disk
201](https://image.slidesharecdn.com/unixadmin-1-4-pub-130107014155-phpapp02/85/Unixadmin-1-4-pub-208-320.jpg)
![Advanced VCS for IO Fencing
and Various Commands
Device Name: /dev/rdsk/c2t0d1s2
Total Number Of Keys: 0
No keys...
e. Unregistering removed the RESERVATION too
# vxfenadm -m -kA1 -f /tmp/data_disk
Registration completed for disk path: /dev/rdsk/c2t0d1s2
# vxfenadm -n -kA1 -f /tmp/data_disk
Reservation completed for disk path: /dev/rdsk/c2t0d1s2
# vxfenadm -m -kB1 -f /tmp/data_disk
Registration completed for disk path: /dev/rdsk/c3t0d1s2
# vxfenadm -g all -f /tmp/data_disk
Device Name: /dev/rdsk/c3t0d1s2
Total Number Of Keys: 2
key[0]:
Key Value [Numeric Format]: 65,49,45,45,45,45,45,45
Key Value [Character Format]: A1------
key[1]:
Key Value [Numeric Format]: 66,49,45,45,45,45,45,45
Key Value [Character Format]: B1------
# vxfenadm -r all -f /tmp/data_disk
Device Name: /dev/rdsk/c3t0d1s2
Total Number Of Keys: 1
Key[0]:
Reservation Type: SCSI3_RESV_WRITEEXCLUSIVEREGISTRANTSONLY
Key Value [Numeric Format]: 65,49,45,45,45,45,45,45
Key Value [Character Format]: A1------
f. A1 Key Removal
# vxfenadm -x -kA1 -f /tmp/data_disk
Deleted the key : [A1------] from device /dev/rdsk/c2t0d1s2
# vxfenadm -g all -f /tmp/data_disk
Device Name: /dev/rdsk/c3t0d1s2
Total Number Of Keys: 1
key[0]:
Key Value [Numeric Format]: 66,49,45,45,45,45,45,45
Key Value [Character Format]: B1------
# vxfenadm -r all -f /tmp/data_disk
Device Name: /dev/rdsk/c3t0d1s2
Total Number Of Keys: 0
202](https://image.slidesharecdn.com/unixadmin-1-4-pub-130107014155-phpapp02/85/Unixadmin-1-4-pub-209-320.jpg)


![Advanced VCS for IO Fencing
and Various Commands
$ zpool import zones
$ zonecfg –z p1 create –a /zones/p1
$ zoneadm –z p1 attach [-u]
$ zooneadm –z p1 boot
REVERSE Migration of Non-Global Zone
Migration back to original host: LDOM#1 commands
$ zoneadm –z p1 halt
$ zoneadm –z p1 detach
$ zpool export zones
Migration back to original host: LDOM#0 commands
Note lack of running zonecfg –z p1 create –a /zones. This is not necessary once the zone.xml and index.xml
are updated with p1 zone information. Should this script be automated, you may want to consider adding
the force configuration into the script – just in case.
$ zpool import zones
$ zoneadm –z p1 attach [-u]
$ zoneadm –z p1 boot
Moving Configuration of Zone and ZFS Pool on iSCSI Storage into Veritas Cluster Server .50MP3.
Note
The Zpool Agent only included with VCS starting in 5.0MP3 for Solaris. There are a number of
configuration variations that could be used here, including legacy mounts with the Mount Agent.
Below is a simple layout that uses ZFS Automounting when the zpool is imported through VCS.
Example VCS 5.0MP3 main.cf configuration for Zpool and Zone Failover
$ haconf -makerw
$ hagrp –add ztest
$ hagrp –modify ztest SystemList dom2 0 dom1 1
$ hagrp –modify ztest AutoStartList dom2 dom1
$ hares -add zpool_zones Zpool ztest
$ hares -modify zpool_zones PoolName zones
$ hares -modify zpool_zones AltRootPath "/"
$ hares -modify zpool_zones ChkZFSMounts 1
$ hares -modify zpool_zones Enabled 1
$ /opt/VRTSvcs/bin/hazonesetup ztest zone_p1 p1
ems dom1 dom2
$ haconf –makerw
$ hares –link zone_p1 zpool_zones
$ haconf –dump -makero
Example main.cf: /etc/VRTSvcs/conf/config/main.cf:
include "types.cf"
205](https://image.slidesharecdn.com/unixadmin-1-4-pub-130107014155-phpapp02/85/Unixadmin-1-4-pub-212-320.jpg)


![Chapter 19. Sun Cluster 3.2
Preperation
This section covers a walkthrough configuration for Sun Cluster. General requirments include the
following:
1. Internal Hard Drive Configuration
Warning
ZFS is not supported for the /globaldevice filesystem, therefore unless you are being creative
avoid installing Solaris 10 with the ZFS Root Option. If you do not allocate a UFS filesystem
and partition for /globaldevices then a LOFI device will be used. This will reduce boot
performance.
Partition Layout - set identical between both servers where possible
Part Tag Flag Size Mount Point
0 root wm 8.00GB /
1 swap wu 8.00GB [swap]
2 backup wm 74.50GB [backup]
3 unassigned wm 8.00GB /opt
4 var wm 8.00GB /var
5 unassigned wm 1.00GB /globaldevice
6 unassigned wm 512.19MB [reserved for SVM MDB]
7 unassigned wm 40.99GB /free [remaining]
Table 19.1. Sun Cluster Filesystem Requirements
Filesystem Min Requirement
/var 100MB Free
/opt 50MB Free
/usr 50MB Free
/ 100MB Free
/globaldevices 512MB Free
2. Shared Hard Drive Configuration and Layout
3. Network Configuration
Interface Function Planned Options
----------------------------------------------------
bge0 Public IPMP Link Only Detection
bge1 Private Used for HB
bge2 Private Used for HB
bge3 Public IPMP Link Only Detection
217](https://image.slidesharecdn.com/unixadmin-1-4-pub-130107014155-phpapp02/85/Unixadmin-1-4-pub-224-320.jpg)
![Sun Cluster 3.2
Installation
This section covers a walkthrough configuration for Sun Cluster. General installation include the
following:
1. Product Installaton Location
Warning
Either untar the software on both servers under /tmp or run installer from a shared directory
such as NFS. Sun Cluster must be installed on both systems
2. Run Installer Script
/swdepot/sparc/suncluster/Solaris_sparc
$ ./installer
Unable to access a usable display on the remote system.
Continue in command-line mode?(Y/N) Y
<Press ENTER to Continue>
<Press ENTER to display the Software License Agreement>
<--[40%]--[ENTER To Continue]--[n To Finish]-->n
License Agreement [No] {"<" goes back, "!" exits}? Yes
Installation Type
-----------------
Do you want to install the full set of Sun Java(TM)
Availability Suite Products and Services? (Yes/No) [Yes]
{"<" goes back, "!" exits} Yes
Install multilingual package(s) for all selected components [Yes]
{"<" goes back, "!" exits}: No
Do you want to add multilanguage support now?
1. Yes
2. No
Enter your choice [1] {"<" goes back, "!" exits} 2
Enter 1 to upgrade these shared components and 2 to cancel [1]
{"<" goes back, "!" exits}: 1
Checking System Status
Available disk space... : Checking .... OK
Memory installed... : Checking .... OK
Swap space installed... : Checking .... OK
218](https://image.slidesharecdn.com/unixadmin-1-4-pub-130107014155-phpapp02/85/Unixadmin-1-4-pub-225-320.jpg)
![Sun Cluster 3.2
Operating system patches... : Checking .... OK
Operating system resources... : Checking .... OK
System ready for installation
Enter 1 to continue [1] {"<" goes back, "!" exits} 1
Screen for selecting Type of Configuration
1. Configure Now - Selectively override defaults or express through
2. Configure Later - Manually configure following installation
Select Type of Configuration [1] {"<" goes back, "!" exits} 2
Ready to Install
----------------
The following components will be installed.
Product: Java Availability Suite
Uninstall Location: /var/sadm/prod/SUNWentsyssc32u2
Space Required: 326.34 MB
---------------------------------------------------
Java DB
Java DB Server
Java DB Client
Sun Cluster 3.2 1/09
Sun Cluster Core
Sun Cluster Manager
Sun Cluster Agents 3.2 1/09
Sun Cluster HA for Sun Java(TM) System Application Server
Sun Cluster HA for Sun Java(TM) System Message Queue
Sun Cluster HA for Sun Java(TM) System Messaging Server
Sun Cluster HA for Sun Java(TM) System Calendar Server
Sun Cluster HA for Sun Java(TM) System Directory Server
Sun Cluster HA for Sun Java(TM) System Application Server EE (HADB)
Sun Cluster HA for Instant Messaging
Sun Cluster HA/Scalable for Sun Java(TM) System Web Server
Sun Cluster HA for Apache Tomcat
Sun Cluster HA for Apache
Sun Cluster HA for DHCP
Sun Cluster HA for DNS
Sun Cluster HA for MySQL
Sun Cluster HA for Sun N1 Service Provisioning System
Sun Cluster HA for NFS
Sun Cluster HA for Oracle
Sun Cluster HA for Samba
Sun Cluster HA for Sun N1 Grid Engine
Sun Cluster HA for Solaris Containers
Sun Cluster Support for Oracle RAC
Sun Cluster HA for Oracle E-Business Suite
Sun Cluster HA for SAP liveCache
Sun Cluster HA for WebSphere Message Broker
Sun Cluster HA for WebSphere MQ
219](https://image.slidesharecdn.com/unixadmin-1-4-pub-130107014155-phpapp02/85/Unixadmin-1-4-pub-226-320.jpg)
![Sun Cluster 3.2
Sun Cluster HA for Oracle 9iAS
Sun Cluster HA for SAPDB
Sun Cluster HA for SAP Web Application Server
Sun Cluster HA for SAP
Sun Cluster HA for PostgreSQL
Sun Cluster HA for Sybase ASE
Sun Cluster HA for BEA WebLogic Server
Sun Cluster HA for Siebel
Sun Cluster HA for Kerberos
Sun Cluster HA for Swift Alliance Access
Sun Cluster HA for Swift Alliance Gateway
Sun Cluster HA for Informix
Sun Cluster Geographic Edition 3.2 1/09
Sun Cluster Geographic Edition Core Components
Sun Cluster Geographic Edition Manager
Sun StorEdge Availability Suite Data Replication Support
Hitachi Truecopy Data Replication Support
SRDF Data Replication Support
Oracle Data Guard Data Replication Support
Quorum Server
Sun Java(TM) System High Availability Session Store 4.4.3
All Shared Components
Sun Java(TM) System Monitoring Console 1.0 Update 1
1. Install
2. Start Over
3. Exit Installation
What would you like to do [1] {"<" goes back, "!" exits}? 1
Enter 1 to view installation summary and Enter 2 to view installation logs
[1] {"!" exits} !
In order to notify you of potential updates, we need to confirm an internet
connection. Do you want to proceed [Y/N] : N
Basic Configuration
This section covers a walkthrough configuration for Sun Cluster. General configuration include the
following:
Warning
Interfaces configured for heart beats must be unplumbed and have no /etc/hostname.dev file.
Warning
During the scinstall configuration process the nodes will be rebooted
1. Product Configuration
# /usr/cluster/bin/scinstall
220](https://image.slidesharecdn.com/unixadmin-1-4-pub-130107014155-phpapp02/85/Unixadmin-1-4-pub-227-320.jpg)
![Sun Cluster 3.2
*** Main Menu ***
Please select from one of the following (*) options:
* 1) Create a new cluster or add a cluster node
2) Configure a cluster to be JumpStarted from this install server
3) Manage a dual-partition upgrade
4) Upgrade this cluster node
5) Print release information for this cluster node
* ?) Help with menu options
* q) Quit
Option: 1
*** New Cluster and Cluster Node Menu ***
Please select from any one of the following options:
1) Create a new cluster
2) Create just the first node of a new cluster on this
machine
3) Add this machine as a node in an existing cluster
?) Help with menu options
q) Return to the Main Menu
Option: 1
*** Create a New Cluster ***
This option creates and configures a new cluster.
You must use the Java Enterprise System (JES) installer to install the
Sun Cluster framework software on each machine in the new cluster
before you select this option.
If the "remote configuration" option is unselected from the JES
installer when you install the Sun Cluster framework on any of the new
nodes, then you must configure either the remote shell (see rsh(1)) or
the secure shell (see ssh(1)) before you select this option. If rsh or
ssh is used, you must enable root access to all of the new member
nodes from this node.
Press Control-d at any time to return to the Main Menu.
Do you want to continue (yes/no) [yes]?
>>> Typical or Custom Mode <<<
221](https://image.slidesharecdn.com/unixadmin-1-4-pub-130107014155-phpapp02/85/Unixadmin-1-4-pub-228-320.jpg)
![Sun Cluster 3.2
This tool supports two modes of operation, Typical mode and Custom.
For most clusters, you can use Typical mode. However, you might need
to select the Custom mode option if not all of the Typical defaults
can be applied to your cluster.
For more information about the differences between Typical and Custom
modes, select the Help option from the menu.
Please select from one of the following options:
1) Typical
2) Custom
?) Help
q) Return to the Main Menu
Option [1]: 1
>>> Cluster Name <<<
Each cluster has a name assigned to it. The name can be made up of any
characters other than whitespace. Each cluster name should be unique
within the namespace of your enterprise.
What is the name of the cluster you want to establish? SC001
>>> Cluster Nodes <<<
This Sun Cluster release supports a total of up to 16 nodes.
Please list the names of the other nodes planned for the initial
cluster configuration. List one node name per line. When finished,
type Control-D:
Node name (Control-D to finish): sysdom1
Node name (Control-D to finish): ^D
This is the complete list of nodes:
sysdom0
sysdom1
Is it correct (yes/no) [yes]? yes
>>> Cluster Transport Adapters and Cables <<<
You must identify the cluster transport adapters which attach this
node to the private cluster interconnect.
For node "sysdom0",
What is the name of the first cluster transport adapter? bge1
>>> Cluster Transport Adapters and Cables <<<
222](https://image.slidesharecdn.com/unixadmin-1-4-pub-130107014155-phpapp02/85/Unixadmin-1-4-pub-229-320.jpg)
![Sun Cluster 3.2
You must identify the cluster transport adapters which attach this
node to the private cluster interconnect.
Select the first cluster transport adapter for "sysdom0":
1) bge2
2) bge3
3) Other
Option: 1
Will this be a dedicated cluster transport adapter (yes/no) [yes]? no
What is the cluster transport VLAN ID for this adapter? 1
Searching for any unexpected network traffic on "bge1002" ... done
Verification completed. No traffic was detected over a 10 second
sample period.
Select the second cluster transport adapter for "sysdom0":
1) bge2
2) bge3
3) Other
Option:
>>> Quorum Configuration <<<
Every two-node cluster requires at least one quorum device. By
default, scinstall selects and configures a shared disk quorum device
for you.
This screen allows you to disable the automatic selection and
configuration of a quorum device.
You have chosen to turn on the global fencing. If your shared storage
devices do not support SCSI, such as Serial Advanced Technology
Attachment (SATA) disks, or if your shared disks do not support
SCSI-2, you must disable this feature.
If you disable automatic quorum device selection now, or if you intend
to use a quorum device that is not a shared disk, you must instead use
clsetup(1M) to manually configure quorum once both nodes have joined
the cluster for the first time.
Do you want to disable automatic quorum device selection (yes/no) [no]?
Cluster Creation
Log file - /var/cluster/logs/install/scinstall.log.28876
Testing for "/globaldevices" on "sysdom0" ... done
223](https://image.slidesharecdn.com/unixadmin-1-4-pub-130107014155-phpapp02/85/Unixadmin-1-4-pub-230-320.jpg)
![Sun Cluster 3.2
Testing for "/globaldevices" on "sysdom1" ... done
Starting discovery of the cluster transport configuration.
The following connections were discovered:
sysdom0:bge2 switch1 sysdom1:bge2 [VLAN ID 1]
sysdom0:bge3 switch2 sysdom1:bge3 [VLAN ID 1]
Completed discovery of the cluster transport configuration.
Started cluster check on "sysdom0".
Started cluster check on "sysdom1".
cluster check completed with no errors or warnings for "sysdom0".
cluster check completed with no errors or warnings for "sysdom1".
Configuring "sysdom1" ... done
Rebooting "sysdom1" ... done
Configuring "sysdom0" ... done
Rebooting "sysdom0" ...
Log file - /var/cluster/logs/install/scinstall.log.28876
Rebooting ...
General Commands
This section covers a walkthrough configuration for Sun Cluster. General resource configuration:
• List DID Disks for use with failover storage devices
Note
The DID ID's are under /dev/did/dsk and /dev/did/rdsk on each node in the cluster. These paths
are to be used for creating failover filesystems, zpools and storage access.
cldevice list -v
DID Device Full Device Path
---------- ----------------
d1 sysdom1:/dev/rdsk/c0t0d0
d2 sysdom1:/dev/rdsk/c1t600144F0C312030000004A3B80680017d0
d2 sysdom0:/dev/rdsk/c1t600144F0C312030000004A3B80680017d0
d3 sysdom1:/dev/rdsk/c1t600144F0C312030000004A3B80680018d0
d3 sysdom0:/dev/rdsk/c1t600144F0C312030000004A3B80680018d0
d4 sysdom1:/dev/rdsk/c1t600144F0C312030000004A3B80680019d0
d4 sysdom0:/dev/rdsk/c1t600144F0C312030000004A3B80680019d0
d5 sysdom1:/dev/rdsk/c1t600144F0C312030000004A3B8068001Ad0
d5 sysdom0:/dev/rdsk/c1t600144F0C312030000004A3B8068001Ad0
d6 sysdom1:/dev/rdsk/c1t600144F0C312030000004A3B8068001Bd0
d6 sysdom0:/dev/rdsk/c1t600144F0C312030000004A3B8068001Bd0
224](https://image.slidesharecdn.com/unixadmin-1-4-pub-130107014155-phpapp02/85/Unixadmin-1-4-pub-231-320.jpg)


![Sun Cluster 3.2
vsrv2 Yes
vsrv1 Yes
# metaset -s zora -a /dev/did/dsk/d3
# metainit -s zora d30 1 1 /dev/did/dsk/d3s0
# metainit -s zora d300 -m d30
5. Add QFS Information for Oracle Home on both systems
/etc/opt/SUNWsamfs/mcf:
RAC 5 ms RAC on shared
/dev/md/zora/dsk/d300 50 md RAC on
/etc/opt/SUNWsamfs/samfs.cmd:
fs=RAC
sync_meta=1
/etc/opt/SUNWsamfs/hosts.RAC:
vsrv1 172.16.4.2 1 0 server
vsrv2 172.16.4.1 1 0
6. Create QFS Directory on both nodes and make filesystem just from one node
# mkdir -p /localzone/sczone/root/db_qfe/oracle
# /opt/SUNWsamfs/sbin/sammkfs -S RAC
sammkfs: Configuring file system
sammkfs: Enabling the sam-fsd service.
sammkfs: Adding service tags.
Warning: Creating a new file system prevents use with 4.6 or earlier
releases.
Use the -P option on sammkfs to create a 4.6 compatible file system.
Building 'RAC' will destroy the contents of devices:
/dev/md/zora/dsk/d300
Do you wish to continue? [y/N]y
total data kilobytes = 10228928
total data kilobytes free = 10225216
7. Mount, test, and remove mount point, otherwise clzonecluster install will fail.
# mount RAC
# umount RAC
# rm -rf /localzone/sczone
8. Create the Zones using clzonecluster
230](https://image.slidesharecdn.com/unixadmin-1-4-pub-130107014155-phpapp02/85/Unixadmin-1-4-pub-237-320.jpg)


![Sun Cluster 3.2
# clzonecluster boot sczone
## On both systems finish sysidcfg:
# zlogin -C sczone
Sun Cluster RAC Framework
Setting up the Sun Cluster RAC Framework using CLI
1. Create a scalable resource group.
# clresourcegroup create -Z zcname -n nodelist
-p maximum_primaries=num-in-list
-p desired_primaries=num-in-list
[-p rg_description="description" ]
-p rg_mode=Scalable rac-fmwk-rg
2. Register the SUNW.rac_framework resource type
# clresourcetype register -Z zcname SUNW.rac_framework
3. Add an instance of the SUNW.rac_framework resource type to the resource group that you created in
Step 2.
# clresource create -Z zcname -g rac-fmwk-rg
-t SUNW.rac_framework rac-fmwk-rs
4. Register the SUNW.rac_udlm resource type.
# clresourcetype register -Z zcname SUNW.rac_udlm
5. Add an instance of the SUNW.rac_udlm resource type to the resource group that you created in Step 2.
# clresource create -Z zcname -g resource-group
-t SUNW.rac_udlm
-p resource_dependencies=rac-fmwk-rs rac-udlm-rs
6. Bring online and in a managed state the RAC framework resource group and its resources.
# clresourcegroup online -Z zcname -emM rac-fmwk-rg
233](https://image.slidesharecdn.com/unixadmin-1-4-pub-130107014155-phpapp02/85/Unixadmin-1-4-pub-240-320.jpg)


![Hardware Notes
NetMask = 255.255.255.0
Gateway = 10.13.60.1
DhcpConfigured = disable
5120 iLOM Management
• Power on via the ilom
start /SYS then switch to the console start /SP/console
• Default ilom password
root , changeme
• Changing the ilom default password
set /SP/users/root password Enter new Password: *******
• Enable/ Disable SSH
set /SP/services/ssh state=[enable|disable]
• Display information about commands
show /SP/cli/commands
• Add a local user
create /SP/users/bob password=password role=administrator|operator
• Delete a local user
delete /SP/users/fred
• change the ip address to static
cd /SP/network set pendingipdiscovery=static set pendingipaddress=xxx.xxx.xxx.xxx set
pendingipnetmask=yyy.yyy.yyy.yyy set pendingipgatwat=zzz.zzz.zzz.zzz show to verify setings set
commitpending=true
236](https://image.slidesharecdn.com/unixadmin-1-4-pub-130107014155-phpapp02/85/Unixadmin-1-4-pub-243-320.jpg)
Unixadmin 1.4-pub.
- 1. Unix Administration Guide A Quick Reference Guide for Clustering, Security, Virtualization and General Administration for Solaris and Linux Operating Systems; Private Version. Robert Bailey
- 2. Unix Administration Guide: A Quick Reference Guide for Clustering, Security, Virtualization and General Administration for Solaris and Linux Operating Systems; Private Version. Robert Bailey Version 1.4 - In Progress Abstract: Obscure UNIX Procedures and Tasks This document covers Solaris 10, RHEL 5.3, and some AIX when using advanced topics such as LDOM's, Live Upgrades with SVM Mirror Splitting, FLAR Booting, Security Hardening, VCS Application Agent for Non-Global Zones, and IO Fencing. Many procedures are my own, some from scattered internet sites, some from the Vendors documentation. You are welcome to use this document, however be advised that several sections are copied from vendor documentation and various web sites, and therefore there is a high possibility for plagiarism. In general, this document is a collection of notes collected from a number of sources and experiences, in most cases it is accurate, however you should note that typo's should be expected along with some issues with command line and file output that extends beyond the format of this document. <legalnotice> THE MATERIALS ARE PROVIDED “AS IS” WITHOUT WARRANTY OF ANY KIND, EITHER EXPRESS OR IMPLIED, INCLUDING BUT NOT LIMITED TO, THE IMPLIED WARRANTIES OF MERCHANTABILITY, FITNESS FOR A PARTICULAR PURPOSE, TITLE AND NON-INFRINGEMENT. FURTHERMORE YOU MAY NOT USE THIS DOCUMENT AS A MEANS OF PROFIT, OR FOR CORPORATE USAGE, WITHOUT THE EXPLICIT CONCENT FROM THE AUTHOR. </legalnotice>
- 3. Table of Contents 1. Security Overview .......................................................................................................... 1 Definitions and Concepts ............................................................................................. 1 2. Project Live Cycle .......................................................................................................... 7 General Project Overview ............................................................................................ 7 Pre Test Data Collection .............................................................................................. 8 Scripting Test Cases ................................................................................................... 9 3. RAID Overview ............................................................................................................ 12 Purpose and basics .................................................................................................... 12 Principles ................................................................................................................ 13 Nested levels ............................................................................................................ 13 Non-standard levels ................................................................................................... 14 4. Solaris Security ............................................................................................................. 15 BSM C2 Auditing ..................................................................................................... 15 BSM Secure Device Control ....................................................................................... 17 General Hardening .................................................................................................... 19 Destructive DTrace Examples ..................................................................................... 19 IPFilter Overview ..................................................................................................... 20 IPSec with Shared Keys ............................................................................................. 23 IPSec With 509 Certs ................................................................................................ 26 Apache2 SSL Configuration with Self-Signed Certs ........................................................ 29 RBAC and Root As a ROLE ...................................................................................... 31 Secure Non-Global Zone FTP Server ........................................................................... 32 Trusted Extensions .................................................................................................... 35 5. Solaris Virtualization ..................................................................................................... 39 Logical Domains ...................................................................................................... 39 Socket, Core and Thread Distribution ................................................................... 39 Install Domain Manager Software ........................................................................ 39 Configure Primary Domain ................................................................................. 40 Create DOM1 .................................................................................................. 40 Adding RAW Disks and ISO Images to DOM1 ...................................................... 40 Bind DOM1 and set up for booting ...................................................................... 40 Install OS Image and Clean up DOM1 ................................................................. 41 Create LDOM #2 .............................................................................................. 41 Backup or Template LDOM Configurations ........................................................... 41 Add one virtual disk to two LDOMs .................................................................... 41 Grouping VCC Console ..................................................................................... 43 LDOM Automation Script .................................................................................. 43 VCS and LDOM Failover, Features and Start and Stop ............................................ 45 VCS LDOM with ZPool Configuration ................................................................. 47 Manual LDOM and Zpool Migration .................................................................... 48 xVM (XEN) Usage on OpenSolaris 2009.06 .................................................................. 49 Quick Create for Solaris 10 HVM ....................................................................... 49 Solaris 10 Non-Global Zones ...................................................................................... 49 Comments on Zones and Live Upgrade ................................................................ 49 Comments on Zones and Veritas Control .............................................................. 51 Basic Non-Global Zone Creation SPARSE ............................................................ 52 Scripting Basic Non-Global Zone Creation SPARSE ............................................... 53 Using Dtrace to monitor non-global zones ............................................................. 54 Setup a Non-Global Zone for running Dtrace ......................................................... 55 Using Dtrace to trace an applincation in a non-global zones ...................................... 55 Using Dtrace to monitor non-global zones ............................................................. 55 iii
- 4. Unix Administration Guide Non-Global Zone Commands .............................................................................. 56 Non-Global Zones and Stock VCS Zone Agent ...................................................... 59 Non-Global Zones and Custom VCS Application Agent ........................................... 60 6. Solaris WANBoot ......................................................................................................... 64 General Overview for Dynamic Wanboot POC .............................................................. 64 POC Goals .............................................................................................................. 64 POC Out of Scope .................................................................................................... 64 Current challanges with wanboot marked for resolution ................................................... 65 POC Wanboot Configuration Highlights ....................................................................... 65 Next Steps .............................................................................................................. 65 Configuration Steps .................................................................................................. 65 7. Solaris 10 Live Upgrade ................................................................................................. 69 Solaris 8 to Solaris 10 U6 Work A Round ..................................................................... 69 Review current root disk and mirror ............................................................................. 70 Create Alternate Boot Device - ZFS ............................................................................. 71 Create Alternate Boot Device - SVM ........................................................................... 71 Patch, Adding Packages, setting boot environment and Installation examples ........................ 72 8. Solaris and Linux General Information .............................................................................. 75 Patch Database Information ........................................................................................ 75 SSH Keys ................................................................................................................ 76 RHEL 5.2 NIS Client ................................................................................................ 76 Redhat Proc FS Tricks ............................................................................................... 76 Force a panic on RHEL ..................................................................................... 76 Adjust swap of processes ................................................................................... 76 iSCSI Notes - RHEL 53 Target SOL 10U6 Initiator ........................................................ 77 Setup Linux NIC Bonding .......................................................................................... 78 Linux TCP sysctl settings .......................................................................................... 79 Linux Dynamic SAN HBA Scan ................................................................................ 80 Solaris 10 - Mapping a process to a port ....................................................................... 81 Network and Services Tasks for Linux ......................................................................... 82 Hardening Linux ....................................................................................................... 83 9. Solaris 10 Notes ........................................................................................................... 88 Link Aggregation ...................................................................................................... 88 Link Aggregation ...................................................................................................... 89 IPMP Overview ........................................................................................................ 90 IPMP Probe Based Target System Configuration ............................................................ 91 Using Service Management Facility (SMF) in the Solaris 10 OS ........................................ 92 MPXIO ................................................................................................................... 98 USB Wireless Setup WUSB54GC .............................................................................. 100 VCS MultiNICB without probe address - link only ........................................................ 101 Network IO in/out per interface ................................................................................. 101 Register Solaris CLI ................................................................................................ 102 NFS Performance .................................................................................................... 102 iSCSI Software Target Initiator .................................................................................. 103 iSCSI Target using TPGT Restrictions ........................................................................ 105 iSCSI Software Initiator ........................................................................................... 106 SVM Root Disk Mirror ............................................................................................ 106 Replace Failed SVM Mirror Drive ............................................................................. 110 ZFS Root adding a Mirror ........................................................................................ 113 Create Flar Images .................................................................................................. 114 FLAR Boot Installation ............................................................................................ 114 ZFS Notes ............................................................................................................. 121 ZFS ACL's ............................................................................................................. 123 ZFS and ARC Cache ............................................................................................... 125 iv
- 5. Unix Administration Guide 10. VMWare ESX 3 ........................................................................................................ 128 Enable iSCSI Software Initiators ................................................................................ 128 General esxcfg commands ........................................................................................ 128 General vmware-cmd commands ................................................................................ 131 Common Tasks ....................................................................................................... 132 Shared Disks with out RAW Access ........................................................................... 133 Using vmclone.pl clone script ................................................................................... 134 Clone VMWare Virtual Guests .................................................................................. 137 Clone VMWare Disks .............................................................................................. 138 LUN Path Information ............................................................................................. 139 11. AIX Notes ................................................................................................................ 141 Etherchannel ........................................................................................................... 141 12. Oracle 10g with RAC ................................................................................................. 143 Oracle General SQL Quick Reference ......................................................................... 143 Oracle 10g RAC Solaris Quick Reference ................................................................... 143 Oracle 10g R2 RAC ASM Reference .......................................................................... 145 Oracle 10g R2 RAC CRS Reference ........................................................................... 146 Oracle RAC SQL .................................................................................................... 147 13. EMC Storage ............................................................................................................ 152 PowerPath Commands ............................................................................................. 152 PowerPath Command Examples ................................................................................. 152 Disable PowerPath .................................................................................................. 153 INQ Syminq Notes .................................................................................................. 154 Brocade Switches .................................................................................................... 155 14. Dtrace ...................................................................................................................... 158 Track time on each I/O ............................................................................................ 158 Track directories where writes are occurring ................................................................ 159 15. Disaster Recovery ...................................................................................................... 160 VVR 5.0 ................................................................................................................ 160 VVR Configuration ......................................................................................... 160 General VVR Tasks using 5.0MP3 ..................................................................... 163 VVR and GCO v5.x Made Easy ...................................................................... 166 VVR 4.X ............................................................................................................... 175 Here's now to resynchronize the old Primary once you bring it back up 4.x: .............. 175 Failing Over from a Primary 4.x ....................................................................... 176 Setting Up VVR 4.x - the hard way ................................................................... 178 Growing/Shrinking a Volume or SRL 4.x ........................................................... 179 Removing a VVR volume 4.x .......................................................................... 180 16. VxVM and Storage Troubleshooting ............................................................................. 181 How to disable and re-enable VERITAS Volume Manager at boot time when the boot disk is encapsulated ........................................................................................................ 181 Replacing a failed drive ........................................................................................... 183 Storage Volume Growth and Relayout ........................................................................ 183 UDID_MISMATCH ................................................................................................ 185 VxVM Disk Group Recovery .................................................................................... 186 Resize VxFS Volume and Filesystem ......................................................................... 187 Incorrect DMP or Disk Identification .......................................................................... 187 Data Migration out of rootdg .................................................................................... 188 Recover vx Plex ..................................................................................................... 188 Shell code to get solaris disk size in GB ..................................................................... 188 Split Root Mirror vxvm ............................................................................................ 189 If VxVM Split Mirror needs post split recovery ............................................................ 190 17. Advanced VCS for IO Fencing and Various Commands .................................................... 192 General Information ................................................................................................. 192 v
- 6. Unix Administration Guide SCSI3 PGR Registration vs Reservation ...................................................................... 193 SCSI3 PGR FAQ .................................................................................................... 194 IO Fencing / CFS Information ................................................................................... 195 ISCSI Solaris software Target and Initiator Veritas Cluster Configuration with Zones ........... 203 Heart Beat Testing .................................................................................................. 206 Software Testing Heart Beats - unsupported ......................................................... 206 Heart Beat Validation ...................................................................................... 206 Using Mirroring for Storage Migration ........................................................................ 207 18. OpenSolaris 2009.06 COMSTAR ................................................................................. 213 Installation ............................................................................................................. 213 Simple Setup An iSCSI LUN .................................................................................... 213 Walkthrough of Simple iSCSI LUN Example ............................................................... 214 Setup iSCSI with ACL's ........................................................................................... 214 19. Sun Cluster 3.2 .......................................................................................................... 217 Preperation ............................................................................................................. 217 Installation ............................................................................................................. 218 Basic Configuration ................................................................................................. 220 General Commands ................................................................................................. 224 Create a Failover Apache Resource Group ................................................................... 225 Create a Failover NGZ Resource Group ...................................................................... 227 Create a Parallel NGZ Configuration ......................................................................... 227 Oracle 10g RAC for Containers ................................................................................ 229 Zone and QFS Creation and Configuration .......................................................... 229 Sun Cluster RAC Framework ............................................................................ 233 20. Hardware Notes ......................................................................................................... 234 SunFire X2200 eLOM Management ........................................................................... 234 SP General Commands ..................................................................................... 234 Connection via Serial Port ................................................................................ 234 System console ............................................................................................... 234 To Set Up Serial Over LAN With the Solaris OS .................................................. 235 Configure ELOM/SP ....................................................................................... 235 5120 iLOM Management .......................................................................................... 236 vi
- 7. List of Tables 1.1. Identifying Threats ....................................................................................................... 1 1.2. Orange Book NIST Security Levels ................................................................................. 2 1.3. EAL Security Levels ..................................................................................................... 3 1.4. EAL Security Component Acronyms ............................................................................... 5 4.1. Common IPFilter Commands ........................................................................................ 22 5.1. Coolthreads Systems ................................................................................................... 39 5.2. Incomplete IO Domain Distribution ............................................................................... 39 5.3. VCS Command Line Access - Global vs. Non-Global Zones .............................................. 59 6.1. Wanboot Server Client Details ...................................................................................... 65 10.1. esxcfg-commands .................................................................................................... 128 12.1. ASM View Table .................................................................................................... 146 13.1. PowerPath CLI Commands ....................................................................................... 152 13.2. PowerPath powermt commands .................................................................................. 152 17.1. Summary of SCSI3-PGR Keys .................................................................................. 196 19.1. Sun Cluster Filesystem Requirements .......................................................................... 217 vii
- 8. Chapter 1. Security Overview Definitions and Concepts 1. Vulnerability Is a software, hardware, or procedural weakness that may provide an attacker the open door he is looking for to enter a computer or network and have unauthorized access to resources within the environment. Vulnerability characterizes the absence or weakness of a safeguard that could be exploited. 2. Threat Is any potential danger to information or systems. The threat is that someone or something will identify a specific vulnerability and use it against the company or individual. The entity that takes advantage of a vulnerability is referred to as a threat agent. A threat agent could be an intruder accessing the network through a port on the firewall, a process accessing data in a way that violates the security policy, a tornado wiping out a facility, or an employee making an unintentional mistake that could expose confidential information or destroy a file's integrity. 3. Risk Is the likelihood of a threat agent taking advantage of a vulnerability and the corresponding business impact. If a firewall has several ports opened there is a higher likelihood that an intruder will use one to access the network in an unauthorized method. Risk ties the vulnerability, threat, and likelihood of an exploitation to the resulting business impact. 4. Exposure Is an instance of being exposed to losses from a threat agent. A vulnerability exposes an organization to possible damages. If a company does not have it's wiring inspected it exposes , and dose not put proactive fire prevention steps into place, it's self to a potentially devastating fire. 5. Countermeasures or Safeguards Is risk mitigation. A countermeasure may be a software configuration, hardware device, or a procedure that eliminates a vulnerability or reduces the likelihood a threat agent will be able to exploit a vulnerability. Examples include strong password management, BIOS password, and security awareness training. 6. Putting the concepts together Table 1.1. Identifying Threats Threat Agent Can Exploit This Resulting in This Threat Vulnerability Virus Lack of antivirus software / not Virus infection up to date definitions Hacker Powerful services running on a Unauthorized access to server confidential information Users Misconfigured parameter in the System malfunction operating system 1
- 9. Security Overview Threat Agent Can Exploit This Resulting in This Threat Vulnerability Fire Lack of fire extinguishers Facility and computer damage, and possible loss of life Employee Lack of training or standards Sharing mission-critical enforcement; Lack of auditing information; Altering data inputs and outputs from data processing applications Contractor Lax access control mechanisms Stealing trade secrets Attacker Poorly written application; Lack Conducting buffer-overflow; of stringent firewall settings Conducting a Denial-of-Service attack Intruder Lack of security guard Breaking windows and stealing computers and devices 7. Orange Book Security Levels <security, standard> A standard from the US Government National Computer Security Council (an arm of the U.S. National Security Agency), "Trusted Computer System Evaluation Criteria, DOD standard 5200.28-STD, December 1985" which defines criteria for trusted computer products. There are four levels, A, B, C, and D. Each level adds more features and requirements. Levels B and A provide mandatory control. Access is based on standard Department of Defense clearances. Orange Book n. The U.S. Government's (now obsolete) standards document "Trusted Computer System Evaluation Criteria, DOD standard 5200.28-STD, December, 1985" which characterize secure computing architectures and defines levels A1 (most secure) through D (least). Modern Unixes are roughly C2. Table 1.2. Orange Book NIST Security Levels NIST Level Description D is a non-secure system. C1 Requires user log-on, but allows group ID. C2 Requires individual log-on with password and an audit mechanism. (Most Unix implementations are roughly C1, and can be upgraded to about C2 without excessive pain). B1 Requires DOD clearance levels. B2 Guarantees the path between the user and the security system and provides assurances that the system can be tested and clearances cannot be downgraded. B3 Requires that the system is characterised by a mathematical model that must be viable. A1 Requires a system characterized by a mathematical model that can be proven. 8. Evaluation Assurance Levels 2
- 10. Security Overview The Evaluation Assurance Level (EAL1 through EAL7) of an IT product or system is a numerical grade assigned following the completion of a Common Criteria security evaluation, an international standard in effect since 1999. The increasing assurance levels reflect added assurance requirements that must be met to achieve Common Criteria certification. The intent of the higher levels is to provide higher confidence that the system's principal security features are reliably implemented. The EAL level does not measure the security of the system itself, it simply states at what level the system was tested to see if it meets all the requirements of its Protection Profile. The National Information Assurance Partnership (NIAP) is a U.S. Government initiative by the National Institute of Standards and Technology (NIST) and the National Security Agency (NSA). To achieve a particular EAL, the computer system must meet specific assurance requirements. Most of these requirements involve design documentation, design analysis, functional testing, or penetration testing. The higher EALs involve more detailed documentation, analysis, and testing than the lower ones. Achieving a higher EAL certification generally costs more money and takes more time than achieving a lower one. The EAL number assigned to a certified system indicates that the system completed all requirements for that level. Although every product and system must fulfill the same assurance requirements to achieve a particular level, they do not have to fulfill the same functional requirements. The functional features for each certified product are established in the Security Target document tailored for that product's evaluation. Therefore, a product with a higher EAL is not necessarily "more secure" in a particular application than one with a lower EAL, since they may have very different lists of functional features in their Security Targets. A product's fitness for a particular security application depends on how well the features listed in the product's Security Target fulfill the application's security requirements. If the Security Targets for two products both contain the necessary security features, then the higher EAL should indicate the more trustworthy product for that application. Table 1.3. EAL Security Levels Assurance Levels Description EAL1: Functionally Tested EAL1 is applicable where some confidence in correct operation is required, but the threats to security are not viewed as serious. It will be of value where independent assurance is required to support the contention that due care has been exercised with respect to the protection of personal or similar information. EAL1 provides an evaluation of the TOE (Target of Evaluation) as made available to the customer, including independent testing against a specification, and an examination of the guidance documentation provided. It is intended that an EAL1 evaluation could be successfully conducted without assistance from the developer of the TOE, and for minimal cost. An evaluation at this level should provide evidence that the TOE functions in a manner consistent with its documentation, and that it provides useful protection against identified threats. EAL2: Structurally Tested EAL2 requires the cooperation of the developer in terms of the delivery of design information and test results, but should not demand more effort 3
- 11. Security Overview Assurance Levels Description on the part of the developer than is consistent with good commercial practice. As such it should not require a substantially increased investment of cost or time. EAL2 is therefore applicable in those circumstances where developers or users require a low to moderate level of independently assured security in the absence of ready availability of the complete development record. Such a situation may arise when securing legacy systems. EAL3: Methodically Tested and Checked EAL3 permits a conscientious developer to gain maximum assurance from positive security engineering at the design stage without substantial alteration of existing sound development practices. EAL3 is applicable in those circumstances where developers or users require a moderate level of independently assured security, and require a thorough investigation of the TOE and its development without substantial re-engineering. EAL4: Methodically Designed, Tested, and EAL4 permits a developer to gain maximum Reviewed assurance from positive security engineering based on good commercial development practices which, though rigorous, do not require substantial specialist knowledge, skills, and other resources. EAL4 is the highest level at which it is likely to be economically feasible to retrofit to an existing product line. EAL4 is therefore applicable in those circumstances where developers or users require a moderate to high level of independently assured security in conventional commodity TOEs and are prepared to incur additional security-specific engineering costs. Commercial operating systems that provide conventional, user-based security features are typically evaluated at EAL4. Examples of such operating systems are AIX[1], HP-UX[1], FreeBSD, Novell NetWare, Solaris[1], SUSE Linux Enterprise Server 9[1][2], SUSE Linux Enterprise Server 10[3], Red Hat Enterprise Linux 5[4], Windows 2000 Service Pack 3, Windows 2003[1][5], Windows XP[1][5], Windows 2008[1], and Windows Vista[1]. Operating systems that provide multilevel security are evaluated at a minimum of EAL4. Examples include Trusted Solaris, Solaris 10 Release 11/06 Trusted Extensions,[6] an early version of the XTS-400, and VMware ESX version 3.0.2[7]. EAL5: Semiformally Designed and Tested EAL5 permits a developer to gain maximum assurance from security engineering based upon 4
- 12. Security Overview Assurance Levels Description rigorous commercial development practices supported by moderate application of specialist security engineering techniques. Such a TOE will probably be designed and developed with the intent of achieving EAL5 assurance. It is likely that the additional costs attributable to the EAL5 requirements, relative to rigorous development without the application of specialized techniques, will not be large. EAL5 is therefore applicable in those circumstances where developers or users require a high level of independently assured security in a planned development and require a rigorous development approach without incurring unreasonable costs attributable to specialist security engineering techniques. Numerous smart card devices have been evaluated at EAL5, as have multilevel secure devices such as the Tenix Interactive Link. XTS-400 (STOP 6) is a general-purpose operating system which has been evaluated at EAL5 augmented. LPAR on IBM System z is EAL5 Certified.[8] EAL6: Semiformally Verified Design and Tested EAL6 permits developers to gain high assurance from application of security engineering techniques to a rigorous development environment in order to produce a premium TOE for protecting high value assets against significant risks. EAL6 is therefore applicable to the development of security TOEs for application in high risk situations where the value of the protected assets justifies the additional costs. An example of an EAL6 certified system is the Green Hills Software INTEGRITY-178B operating system, the only operating system to achieve EAL6 thus far.[9] EAL7: Formally Verified Design and Tested EAL7 is applicable to the development of security TOEs for application in extremely high risk situations and/or where the high value of the assets justifies the higher costs. Practical application of EAL7 is currently limited to TOEs with tightly focused security functionality that is amenable to extensive formal analysis. The Tenix Interactive Link Data Diode Device has been evaluated at EAL7 augmented, the only product to do so. Table 1.4. EAL Security Component Acronyms Acronym Description TCSEC Trusted Computer System Evaluation Criteria LSPP Labelled Security Protection Profile 5
- 13. Security Overview Acronym Description CAPP Controlled Access Protection Profile RBAC Role Based Access Control Protection Profile 9. Bell-Lapadula model a. A security level is a (c, s) pair: - c = classification – E.g., unclassified, secret, top secret - s = category- set – E.g., Nuclear, Crypto b. (c1, s1) dominates (c2, s2) iff c1 ¸ c2 and s2 µ s1 c. Subjects and objects are assigned security levels - level(S), level(O) – security level of subject/object - current-level(S) – subject may operate at lower level - f = (level, level, current-level) 10.DAC vs. MAC • Most people familiar with discretionary access control (DAC); - Example: Unix user-group-other permission bits - Might set a file private so only group friends can read it • Discretionary means anyone with access can propagate information: - Mail sigint@enemy.gov < private • Mandatory access control - Security administrator can restrict propagation 6
- 14. Chapter 2. Project Live Cycle General Project Overview Projects typically are manifested through either a self initiated, top down or bottom up direction. In a Top Down project, there is a pre-stated goal and problem identified - details on solution typically get resolved at lower levels so long as the overal stated goal is met. Bottom Up is operations driven and generally as an end result goal in mind. The solution may need additional approval, however the general project already has management backing. Bottom Up can also come from general meetings with operational groups personnel and therefore need review by their management. Should the project be the result of a self initiated direction several additional steps are needed; including getting management and operations buyin; identifying budget and time allocation; and budget approval - including vendor negotiations where needed. The most important parts of any project are getting management/group buyin, and defining components such as scope, success, and timelines. • Identify demand - documentation of the problem. 1. What problem needs to be resolved 2. Who does the problem impact? 3. What is the priority of the problem? 4. Are there existing solutions in place that need to be adapted, or is this a new problem? • Collect statistics on current issue 1. Audit problem 2. Identify timelines for current actions 3. Identify groups involved • Identify preliminary options to solve the problem 1. Brainstorming sessions 2. Are there known vendor solutions - if so, who are the major players? 3. If internal solution - possible test case examples (minimal time invested) 4. Pre-project POC - if internal solution • Project initiation proposal 1. Outline Demand - what problem is to be solved 2. Identify key management players for buyin 3. Expected results from solution - will time be saved? will a major problem be avoided? 4. Overview of who will be involded - initial key technology players 7
- 15. Project Live Cycle 5. How long is the project expected to last? 6. What metrics will be needed and collected for the pre/post project analysis? 7. How is success defined? • Kickoff meeting 1. Define scope - what options and solutions are needed, what are the priorities, what items are must vs. nice to have. Also identify what is related but out of scope. If project is to be broken down into phases, that should be identified and the second phase and greater needs to be "adapted for" but not part of the success of the initial phase. It is good, when multiple groups are involded, to have each report back with their weighted options list (RFE/RFC). 2. Define ownership - including contact information 3. Milestones and Goals; including dependencies and serialized processes 4. Setup timelines and re-occuring meetings 5. Make sure there are next steps and meeting notes posted. • Handling RFE/RFC Metrics and Weighted Items 1. Should vendor solutions be needed create a weighted requirments list. Should a vendor not be needed the same items should be identified for cross-team participation; or with the impacted group. 2. Define what vendors will be sent the weighted list 3. Develop the weighted list; usually 1-10 plus N/A. Information about a feature that is only included in the next release may be presented seperatly however it should have no weight. 4. Define expected completion date of the RFC by the vendor 5. Corelate answers based on weight and identify the optimal product for evaluation. Should more than one be close in score; there is a potential for a bake-off between products. • Post Project Review and Presentation 1. Comparison of Pre/Post Project Metrics 2. Credits to all involved 3. Examples of Success - feedback from operations Pre Test Data Collection Define standard method of collecting data; this defines the audit trail of the pre-test server. Recommend new build for testing whenever possible. • Define and document baseline system • BART Manifest to track changed files • BSM Audit Enabled to track commands • Manual Documentation of Tasks with timelines 8
- 16. Project Live Cycle • Use logger to mark manual tasks and milestones • If possible, run VXexplorer or SUNexplorer and save a copy remote • Write a script to copy off key files - should be written based on test type • Define rollback method - snapshot / LU Alternate Boot Example BART Data Collection ; run copy against all necessary directories; in this example that would include /etc and /zone; if milestones are involved then frequest collections of bart may be necessary to track overall changes within different enviironment stages. Just name the manifest based on the stage. # mkdir /bart-files # bart create -R /etc > /bart-files/etc.control.manifest Scripting Test Cases Break down large tests into sub tests; such as Certifying VCS would amount to certifying each resource creation, execution, and failover response then the results are grouped together by function then product; if done well, then you only have to certify the new add-ons when expanding the test, example below: • Define Agents used on all clusters and expected response • Seperate tests unique to a specific cluster type - RAC, Oracle DB Failover, Apache, etc • Break down tasks such as Storage Allocation and Control • Adding VCS Disk Group • Adding Filesystem Mounts • Max projected number of Disk Groups and Filesystems • Include any special details such as ownership changes; largefiles; qio; ufs • Recommend scripting templates using XML into minor tasks - example shows using DITA to define a task to create a vote volume for RAC <task id = "vote_vol_reation" xmlns:ditaarch = "http://dita.oasis-open.org/architecture/2005/"> <title>Create a CFS Vote Filesystem for CRS</title> <shortdesc>Describes how to make a CFS volume for the vote filesystem for SFRAC deployments</shortdesc> <taskbody> <prereq><p>The cvm_CVMVolDg_scrsdg resource needs to be online. And all volume creation commands for CVM run on the CVM master: &CVMMaster;</p></prereq> <steps> <step><cmd>Create Vote Volume on scrsdg disk group </cmd> <stepxmp> <screen> ssh &CVMMaster; vxassist -g scrsdg make vote 1G group=dba user=oracle mode=664 mkfs -V vxfs -o largefiles /dev/vx/rdsk/scrsdg/vote 9
- 17. Project Live Cycle </screen> </stepxmp> </step> <step><cmd>Create Directories on both $Node0; and $Node1;</cmd> <stepxmp> <screen> # On &Node0; and &Node1; mkdir -p /oracle/dbdata/vote chown -R oracle:dba /oracle/dbdata chmod 774 /oracle/dbdata chmod 774 /oracle/dbdata/vote </screen> </stepxmp> </step> </steps> </taskbody> </task> • This could be broken down even further with the right processing script <task id= "T11001"> <title>Volume Creation</title> <comments>Template Creates a Veritas Volume when passed an ENTITY value for the following: Disk Group: &DG Volume Name: &VOL Volume Size: &SIZE User Owner: &USER Volume Permission Mode: &MODE </comments> <command>/usr/sbin/vxassist -g &DG; make &VOL; &SIZE; user=&USER; mode=&MODE; </command> <return>1</return> </task> • Tasks could be templated to execute as a sequence as a procedure- DITA Map is good for this, but example is just off-the-cuff xml <procedure id = "P001"> <title>Create Volume, Filesystem and add into VCS</title> <task id = "T1001"/> <task id = "T1002"/> <task id = "T1003"/> <return>1</return> </procedure> • Procedures could be grouped together as part of a certification <certification id="C001"> <title>SFRAC 5.0 MP3 Certification</title> <procedure id= "P001"/> <procedure id= "P002"/> <procedure id= "P003"/> <return>1</return> 10
- 18. Project Live Cycle </certification> • Execution Code for tasks/procedures should be able to pass back a return code for each task; probably best to return time to execute also. These numeric return codes and times would be best placed into a database with a table simular in concept to cert ( id, procedure, task , results) and cross link to a cert_info (id, description, owner, participants, BU, justification) • If all is done well, then the certification tasks are re-usable for many certifications and only need to be written once, the process is defined and can be reproduced, and every command executed is logged and could be used to generate operational procedures. 11
- 19. Chapter 3. RAID Overview Purpose and basics Note Information collected from wiki Redundancy is a way that extra data is written across the array, which are organized so that the failure of one (sometimes more) disks in the array will not result in loss of data. A failed disk may be replaced by a new one, and the data on it reconstructed from the remaining data and the extra data. A redundant array allows less data to be stored. For instance, a 2-disk RAID 1 array loses half of the total capacity that would have otherwise been available using both disks independently, and a RAID 5 array with several disks loses the capacity of one disk. Other RAID level arrays are arranged so that they are faster to write to and read from than a single disk. There are various combinations of these approaches giving different trade-offs of protection against data loss, capacity, and speed. RAID levels 0, 1, and 5 are the most commonly found, and cover most requirements. • RAID 0 (striped disks) distributes data across several disks in a way that gives improved speed and full capacity, but all data on all disks will be lost if any one disk fails. • RAID 1 (mirrored settings/disks) duplicates data across every disk in the array, providing full redundancy. Two (or more) disks each store exactly the same data, at the same time, and at all times. Data is not lost as long as one disk survives. Total capacity of the array is simply the capacity of one disk. At any given instant, each disk in the array is simply identical to every other disk in the array. • RAID 5 (striped disks with parity) combines three or more disks in a way that protects data against loss of any one disk; the storage capacity of the array is reduced by one disk. • RAID 6 (striped disks with dual parity) (less common) can recover from the loss of two disks. • RAID 10 (or 1+0) uses both striping and mirroring. "01" or "0+1" is sometimes distinguished from "10" or "1+0": a striped set of mirrored subsets and a mirrored set of striped subsets are both valid, but distinct, configurations. • RAID 53 Merges the features of RAID level 0 and RAID level 3. (Raid level 3 and Raid level 4 differs in the size of each drive.) This uses byte striping with parity merged with block striping. RAID can involve significant computation when reading and writing information. With traditional "real" RAID hardware, a separate controller does this computation. In other cases the operating system or simpler and less expensive controllers require the host computer's processor to do the computing, which reduces the computer's performance on processor-intensive tasks (see "Software RAID" and "Fake RAID" below). Simpler RAID controllers may provide only levels 0 and 1, which require less processing. RAID systems with redundancy continue working without interruption when one, or sometimes more, disks of the array fail, although they are then vulnerable to further failures. When the bad disk is replaced by a new one the array is rebuilt while the system continues to operate normally. Some systems have to be shut down when removing or adding a drive; others support hot swapping, allowing drives to be replaced without powering down. RAID with hot-swap drives is often used in high availability systems, where it is important that the system keeps running as much of the time as possible. 12
- 20. RAID Overview RAID is not a good alternative to backing up data. Data may become damaged or destroyed without harm to the drive(s) on which they are stored. For example, part of the data may be overwritten by a system malfunction; a file may be damaged or deleted by user error or malice and not noticed for days or weeks; and of course the entire array is at risk of physical damage. Principles RAID combines two or more physical hard disks into a single logical unit by using either special hardware or software. Hardware solutions often are designed to present themselves to the attached system as a single hard drive, so that the operating system would be unaware of the technical workings. For example, you might configure a 1TB RAID 5 array using three 500GB hard drives in hardware RAID, the operating system would simply be presented with a "single" 1TB disk. Software solutions are typically implemented in the operating system and would present the RAID drive as a single drive to applications running upon the operating system. There are three key concepts in RAID: mirroring, the copying of data to more than one disk; striping, the splitting of data across more than one disk; and error correction, where redundant data is stored to allow problems to be detected and possibly fixed (known as fault tolerance). Different RAID levels use one or more of these techniques, depending on the system requirements. RAID's main aim can be either to improve reliability and availability of data, ensuring that important data is available more often than not (e.g. a database of customer orders), or merely to improve the access speed to files (e.g. for a system that delivers video on demand TV programs to many viewers). The configuration affects reliability and performance in different ways. The problem with using more disks is that it is more likely that one will go wrong, but by using error checking the total system can be made more reliable by being able to survive and repair the failure. Basic mirroring can speed up reading data as a system can read different data from both the disks, but it may be slow for writing if the configuration requires that both disks must confirm that the data is correctly written. Striping is often used for performance, where it allows sequences of data to be read from multiple disks at the same time. Error checking typically will slow the system down as data needs to be read from several places and compared. The design of RAID systems is therefore a compromise and understanding the requirements of a system is important. Modern disk arrays typically provide the facility to select the appropriate RAID configuration. Nested levels Many storage controllers allow RAID levels to be nested: the elements of a RAID may be either individual disks or RAIDs themselves. Nesting more than two deep is unusual. As there is no basic RAID level numbered larger than 10, nested RAIDs are usually unambiguously described by concatenating the numbers indicating the RAID levels, sometimes with a "+" in between. For example, RAID 10 (or RAID 1+0) consists of several level 1 arrays of physical drives, each of which is one of the "drives" of a level 0 array striped over the level 1 arrays. It is not called RAID 01, to avoid confusion with RAID 1, or indeed, RAID 01. When the top array is a RAID 0 (such as in RAID 10 and RAID 50) most vendors omit the "+", though RAID 5+0 is clearer. • RAID 0+1: striped sets in a mirrored set (minimum four disks; even number of disks) provides fault tolerance and improved performance but increases complexity. The key difference from RAID 1+0 is that RAID 0+1 creates a second striped set to mirror a primary striped set. The array continues to operate with one or more drives failed in the same mirror set, but if drives fail on both sides of the mirror the data on the RAID system is lost. • RAID 1+0: mirrored sets in a striped set (minimum four disks; even number of disks) provides fault tolerance and improved performance but increases complexity. The key difference from RAID 0+1 is 13
- 21. RAID Overview that RAID 1+0 creates a striped set from a series of mirrored drives. In a failed disk situation, RAID 1+0 performs better because all the remaining disks continue to be used. The array can sustain multiple drive losses so long as no mirror loses all its drives. • RAID 5+0: stripe across distributed parity RAID systems. • RAID 5+1: mirror striped set with distributed parity (some manufacturers label this as RAID 53). Non-standard levels Many configurations other than the basic numbered RAID levels are possible, and many companies, organizations, and groups have created their own non-standard configurations, in many cases designed to meet the specialised needs of a small niche group. Most of these non-standard RAID levels are proprietary. Some of the more prominent modifications are: • Storage Computer Corporation uses RAID 7, which adds caching to RAID 3 and RAID 4 to improve I/O performance. • EMC Corporation offered RAID S as an alternative to RAID 5 on their Symmetrix systems (which is no longer supported on the latest releases of Enginuity, the Symmetrix's operating system). • The ZFS filesystem, available in Solaris, OpenSolaris, FreeBSD and Mac OS X, offers RAID-Z, which solves RAID 5's write hole problem. • NetApp's Data ONTAP uses RAID-DP (also referred to as "double", "dual" or "diagonal" parity), which is a form of RAID 6, but unlike many RAID 6 implementations, does not use distributed parity as in RAID 5. Instead, two unique parity disks with separate parity calculations are used. This is a modification of RAID 4 with an extra parity disk. • Accusys Triple Parity (RAID TP) implements three independent parities by extending RAID 6 algorithms on its FC-SATA and SCSI-SATA RAID controllers to tolerate three-disk failure. • Linux MD RAID10 (RAID10) implements a general RAID driver that defaults to a standard RAID 1+0 with 4 drives, but can have any number of drives. MD RAID10 can run striped and mirrored with only 2 drives with the f2 layout (mirroring with striped reads, normal Linux software RAID 1 does not stripe reads, but can read in parallel).[4] • Infrant (Now part of Netgear) X-RAID offers dynamic expansion of a RAID5 volume without having to backup/restore the existing content. Just add larger drives one at a time, let it resync, then add the next drive until all drives are installed. The resulting volume capacity is increased without user downtime. (It should be noted that this is also possible in Linux, when utilizing Mdadm utility. It has also been possible in the EMC Clariion for several years.) • BeyondRAID created by Data Robotics and used in the Drobo series of products, implements both mirroring and striping simultaneously or individually dependent on disk and data context. BeyondRAID is more automated and easier to use than many standard RAID levels. It also offers instant expandability without reconfiguration, the ability to mix and match drive sizes and the ability to reorder disks. It is a block-level system and thus file system agnostic although today support is limited to NTFS, HFS+, FAT32, and EXT3. It also utilizes Thin provisioning to allow for single volumes up to 16TB depending on the host operating system support. 14
- 22. Chapter 4. Solaris Security BSM C2 Auditing 1. Fundamentals The fundamental reason for implementing C2 auditing is as a response to potential security violations such as NIMDA, Satan, or other attempts to compromise the integrity of a system. Secondary to that reason, it can be used to log changes to a system, and tracking down questionable actions. BSM C2 will not prevent the server from being compromised, however it does provide a significant resource in determining if a server has been breached. Standard utilities such as “acct” cannot, nor are they intended, to identify modifications, or connections to a server. Through the limited examples described within this document it should be clear that the C2 module is capable of allowing Fidelity Investments to clearly and quickly identify any potential compromise. 2. Tradeoffs One tradeoff with running C2 as a consistent and active process is disk space consumption. The audit trail it’s self contains status, date and time, and server within the filename, and the auditreduce command allows for specifying a server name, which can be based on filename, or directory structure. This identification within the file it’s self allows for placing a rotating copy of all audit trails on a central repository server and for historical queries to be run which would not require logging in to a system, except for currently written data. Properly deployed this can aid in meeting certain S.E.C. security requirements by historically keeping audit trails on read only media once moved off of a system. Unlike “acct” which tracks a process with some arguments, CPU cycles used per user, and logged in accounts, C2 is designed to log all arguments, processes, connections, but not CPU % cycles – although this information can be gathered through auditing. In addition to login information c2 can be used to track user commands. 3. Audit Classes In order to reduce the amount of logging not all classes are automatically enabled. The current C2 build module logs all users for lo, ex, and ad. However, the audit trail can be changed. Settings are configured in the audit configuration file: /etc/security/audit_control and include success & failure, success only, and failure only setting options. Each class, however, does not include, by default, arguments or environmental variables. Environmental and argument settings are configured in /etc/system/audit_startup through the following commands: #!/bin/sh auditconfig –conf # change runtime kernel # event-to-class mappings. auditconfig -setpolicy argv # add command line arguments auditconfig –setpolicy arge # add environmental variables auditconfig -setpolicy +cnt # count how many audit records # are dropped if > 20% free Current Available Policies are as follows: # auditconfig -lspolicy policy string description: 15
- 23. Solaris Security ahlt halt machine if it can not record an async event all all policies arge include exec environment args in audit recs argv include exec command line args in audit recs cnt when no more space, drop recs and keep a cnt group include supplementary groups in audit recs none no policies path allow multiple paths per event perzone use a separate queue and auditd per zone public audit public files seq include a sequence number in audit recs trail include trailer token in audit recs windata_down include downgraded window information in audit recs windata_up include upgraded window information in audit recs zonename generate zonename token Class settings are located in /etc/security/audit_control and are in the following format: #!/bin/sh dir:/fisc/bsm # location of audit trail flags:lo,ex,ad # classes being audited for success and # failure. minfree:20 # Do not grow audit trails if less than # 20% free naflags:lo,ad # events that cannot be attributed to a # particular user. You can add the following as class attributes – be ware that more logging is more file system space used. In many cases this should be custom setup depending on the server function, such as database, application, or firewall. Class Alias Description no: nvalid class fr: file read w file write fa: file attribute access fm: file attribute modify fc: file create fd: file delete cl: file close pc: process nt: network ip: pc na non-attribute ad administrative lo: login or logout ap application io: octl ex: exec ot: other all: all classes In addition each user can have their own audit trails custom fit. This is handled through the /etc/ security/audit_user file and has the following format: # User Level Audit User File 16
- 24. Solaris Security # # # username:always:never # root:lo:no Individual users can have their audit trail adjusted to collect all possible data, but testing on each change is vital. Any typo in /etc/security/audit_user can, and will, result in that users’ inability to login. Each user can have their own audit trails custom fit. This is handled through the /etc/security/audit_user file and has the following format: # User Level Audit User File # # # username:always:never # root:lo:no myuser:lo:no Individual users can have their audit trail adjusted to collect all possible data, but testing on each change is vital. Any typo in /etc/security/audit_user can, and will, result in that users’ inability to login. BSM Secure Device Control 1. Fundamentals Integrated within the BSM auditing module is the ability to allocate and restrict specific, user definable, devices. The purpose of this level of restriction is to the following: a. Prevent simultaneous access to a device. b. Prevent a user from reading a tape just written to by another user, before the first user has removed the tape from the tape drive. c. Prevent a user from gleaning any information from the device’s or the driver’s internal storage after another user is finished with the device All descriptions below are with the default configuration. The devices configured by default can be added to or removed from control via the device_allocate and device_maps file, however adding new devices is a bit more complicated and will not be covered here. 2. Related files and commands Files: /etc/security/device_allocate /etc/security/device_maps, /etc/security/dev/* /etc/security/lib/* Commands: list_devices, dminfo, allocate, and deallocate 3. File descriptions and control features /etc/security/device_allocate is used to associate specific devices, like st0 to RBAC roles and cleanup scripts run at boot time. audio;audio;reserved;reserved;solaris.device.allocate; 17
- 25. Solaris Security /etc/security/lib/audio_clean fd0;fd;reserved;reserved;solaris.device.allocate; /etc/security/lib/fd_clean sr0;sr;reserved;reserved;solaris.device.allocate; /etc/security/lib/sr_clean /etc/security/device_maps is a listing of devices with alias names such as: audio: audio: /dev/audio /dev/audioctl /dev/sound/0 /dev/sound/0ctl: fd0: fd: /dev/diskette /dev/rdiskette /dev/fd0a /dev/rfd0a /dev/fd0b /dev/rfd0b /dev/fd0c /dev/fd0 /dev/rfd0c /dev/rfd0: sr0: sr: /dev/sr0 /dev/rsr0 /dev/dsk/c0t2d0s0 /dev/dsk/c0t2d0s1 /dev/dsk/c0t2d0s2 /dev/dsk/c0t2d0s3 /dev/dsk/c0t2d0s4 /dev/dsk/c0t2d0s5 /dev/dsk/c0t2d0s6 /dev/dsk/c0t2d0s7 /dev/rdsk/c0t2d0s0 /dev/rdsk/c0t2d0s1 /dev/rdsk/c0t2d0s2 /dev/rdsk/c0t2d0s3 /dev/rdsk/c0t2d0s4 /dev/rdsk/c0t2d0s5 /dev/rdsk/c0t2d0s6 /dev/rdsk/c0t2d0s7 4. Converting root to a role and adding access to root role to a user Fundamentals - login as a user and assume root; then modify the root account as type role and add the root role to a user; test with fresh login before logging out $ su - # usermod -K type=role root # usermod -R root useraccount remote> ssh useraccount@host_with_root_role_config $ su - root # 5. Command review, and examples Allocation is done by running specific commands, as well as deallocating the same device. Here are a few examples. # allocate –F device_special_filename # allocate –F device_special_filename –U user_id # deallocate –F device_special_filename # deallocate –I # list_devices –U username 6. Pulling it all together 18
- 26. Solaris Security When combined a user with the RBAC role of solaris.device.allocate, can allocate fd0, sr0, and audit devices – in essence hogging the device for themselves. The scripts referenced in the device_allocate file are used to deallocate the device in the event of a reboot – this way no allocation would be persistent. Since these files are customizable, it is possible to remove vold related devices such as the cdrom mounting by just deleting that section. Remember that device allocation is not needed for auditing to work, and can be set to allocate “nothing” by stripping down the device_maps and device_allocate files – however more testing should be done in this case. General Hardening 1. IP Module Control IP module can be tuned to prevent forwarding , redirecting of packets and request for information from the system . These parameters can be set using ndd with the given value to limit these features . # ndd -set /dev/ip ip_forward_directed_broadcasts 0 # ndd -set /dev/ip ip_forward_src_routed 0 # ndd -set /dev/ip ip_ignore_redirect 1 # ndd -set /dev/ip ip_ire_flush_interval 60000 # ndd -set /dev/ip ip_ire_arp_interval 60000 # ndd -set /dev/ip ip_respond_to_echo_broadcast 0 # ndd -set /dev/ip ip_respond_to_timestamp 0 # ndd -set /dev/ip ip_respond_to_timestamp_broadcast 0 # ndd -set /dev/ip ip_send_redirects 0 2. Prevent buffer overflows Add the following lines to /etc/system file to prevent the buffer overflow in a possible attack to execute some malicious code on your machine. set noexec_user_stack=1 set noexec_user_stack_log=1 Destructive DTrace Examples Add /uid==300/ after syscall::uname:entry line to make this restricted to a response from UID 300. #!/usr/sbin/dtrace -w -s syscall::uname:entry{ self->a = arg0;} syscall::uname:return{ copyoutstr("Windows", self->a,257); copyoutstr("PowerPC", self->a+257,257); copyoutstr("2010.b17", self->a(257*2),257); copyoutstr("fud:2010-10-31", self->a+(257*3), 257); copyoutstr("PPC, self->addr+(257*4),257); } Example changing uname output on a solaris system #!/usr/sbin/dtrace -s #pragma D option destructive 19
- 27. Solaris Security syscall::uname:entry { self->addr = arg0; } syscall::uname:return { copyoutstr("SunOS", self->addr, 257); copyoutstr("PowerPC", self->addr+257, 257); copyoutstr("5.5.1", self->addr+(257*2), 257); copyoutstr("gate:1996-12-01", self->addr+(257*3), 257); copyoutstr("PPC", self->addr+(257*4), 257); } Before running the dtrace script: # uname -a SunOS homer 5.10 SunOS_Development sun4u sparc SUNW,Ultra-5_10 While running the dtrace script # uname -a SunOS PowerPC 5.5.1 gate:1996-12-01 PPC sparc SUNW,Ultra-5_10 Example killing a process when it trys to read a file #cat read.d #!/usr/sbin/dtrace -ws ufs_read:entry / stringof(args[0]->v_path) == $$1 / { printf("File %s read by %dn", $$1, curpsinfo->pr_uid); raise(SIGKILL); } # more /etc/passwd Killed # ./read.d /etc/passwd dtrace: script './read.d' matched 1 probe dtrace: allowing destructive actions CPU ID FUNCTION:NAME 0 15625 ufs_read:entry File /etc/passwd read by 0 IPFilter Overview 1. Background With the release of Solaris 10, ipfilter is now supported. Before Solaris 10, EFS or SunScreen Lite was the default firewall. IPfilter is a mature product traditionally found in BSDish Operating Systems 2. Configure an ippool if list of firewalled hosts is large enough - use /etc/ipf/ippool.conf # /etc/ipf/ippool.conf # IP range for China 20
- 28. Solaris Security table role = ipf type = tree number = 5 { 219.0.0.0/8; 220.0.0.0/8; 222.0.0.0/8; 200.0.0.0/8 ; 211.0.0.0/8; }; # IP Range for proplem hosts table role = ipf type = tree number = 6 { 66.96.240.229/32; 125.65.112.217/32; 77.79.103.219/32; 61.139.105.163/32; 61.160.216.0/24; }; # IP Range for internal network table role = ipf type = tree number = 7 { 192.168.15.0/24; } ; # IP Range for known information stealers table role = ipf type = tree number = 8 { 209.67.38.99/32; 204.178.112.170/32; 205.138.3.62/32; 199.95.207.0/24; 199.95.208.0/24; 216.52.13.39/32; 216.52.13.23/32; 207.79.74.222/32; 209.204.128.0/18; 209.122.130.0/24; 195.225.177.27/32; 65.57.163.0/25; 216.251.43.11/32; 24.211.168.40/32; 58.61.164.141/32; 72.94.249.34/32; }; 3. Configuring IPF First, you will need an ipf ruleset. The Solaris default location for this file is /etc/ ipf/ipf.conf. Below is the ruleset I used for a Solaris 10 x86 workstation. Note that the public NIC is called elx10. Simply copy this ruleset to a file called /etc/ipf/ipf.conf, and edit to your needs. # /etc/ipf/ipf.conf # # IP Filter rules to be loaded during startup # # See ipf(4) manpage for more information on 21
- 29. Solaris Security # IP Filter rules syntax. # # Public Network. Block everything not explicity allowed. block in log on bge0 all block out log on bge0 all # # Allow all traffic on loopback. pass in quick on lo0 all pass out quick on lo0 all # # Allow pings out. pass out quick on bge0 proto icmp all keep state # # pass in log quick on bge0 proto tcp from any to 192.168.15.78/24 port = 8080 pass in log quick on bge0 proto tcp from any to 192.168.15.78/24 port = 443 pass in log quick on bge0 proto tcp from any to 192.168.15.78/24 port = 22 # Internal Hosts pass in quick from pool/7 to 192.168.15.78 # Blocked due to showup in IDS block in log quick from pool/6 to any # Block Asia APNIC Inbound block in log quick on bge0 proto tcp/udp from pool/5 to any # Block Asia APNIC Outbound block out log quick on bge0 proto tcp/udp from any to pool/5 # # Known information stealers block in log quick from pool/8 to any block out log quick from any to pool/8 # Allow outbound state related packets. pass out quick on bge0 proto tcp/udp from any to any keep state # Table 4.1. Common IPFilter Commands Command Line Description ipf -E Enable ipfilter when running : for the first time. : (Needed for ipf on Tru64) ipf -f /etc/ipf/ipf.conf Load rules in /etc/ipf/ipf.conf file : into the active firewall. ipf -Fa -f /etc/ipf/ipf.conf Flush all rules, then load rules in : /etc/ipf/ ipf.conf into active firwall. ipf -Fi Flush all input rules. ipf -I -f /etc/ipf/ipf.conf Load rules in /etc/ipf/ipf.conf file : into inactive firewall. ipf -V Show version info and active list. ipf -s Swap active and inactive firewalls. 22
- 30. Solaris Security Command Line Description ipfstat Show summary ipfstat -i Show input list ipfstat -o Show output list ipfstat -hio Show hits against all rules ipfstat -t -T 5 Monitor the state table and refresh every : 5 seconds. Output is similar to : 'top' monitoring the process table. ipmon -s S Watch state table. ipmon -sn Write logged entries to syslog, and : convert back to hostnames and servicenames. ipmon -s [file] Write logged entries to some file. ipmon -Ds Run ipmon as a daemon, and log to : default location. : (/var/adm/messages for Solaris) : (/var/ log/syslog for Tru64) IPSec with Shared Keys Note Information collected from http://www.cuddletech.com/ Creating Keys Using the ipsecalgs command we can see the available algorithms, including DES, 3DES, AES, Blowfish, SHA and MD5. Different alogithms require different key lengths, for instance 3DES requires a 192 bit key, whereas Blowfish can use a key anywhere from 32bits up to 448 bits. For interoperability reasons (such as OSX or Linux), you may with to create keys that are both ASCII and hex. This is done by choosing a string and converting it to hex. To know how long a string should be, divide the number of bits required by 8, this is the number of ASCII chars you need. The hex value of that ASCII string will be double the number of ASCII chars. Using the od utility we can convert ASCII- to-hex. Here I'll create 2 keys, one for AH which is a SHA1 160bit key (20 ASCII chars) and another for ESP which is a Blowfish 256bit key (32 ASCII chars): benr@ultra ~$ echo "my short ah password" | od -t x1 0000000 6d 79 20 73 68 6f 72 74 20 61 68 20 70 61 73 73 0000020 77 6f 72 64 0a 0000025 benr@ultra ~$ echo "this is my long blowfish esp pas" | od -t x1 0000000 74 68 69 73 20 69 73 20 6d 79 20 6c 6f 6e 67 20 0000020 62 6c 6f 77 66 69 73 68 20 65 73 70 20 70 61 73 0000040 0a 0000041 my short ah password 6d792073686f72742061682070617373776f7264 this is my long blowfish esp pas 23
- 31. Solaris Security 74686973206973206d79206c6f6e6720626c6f77666973682065737020706173 Configuring IPsec Policies IPsec policies are rules that the IP stack uses to determine what action should be taken. Actions include: • bypass: Do nothing, skip the remaining rules if datagram matches. drop: Drop if datagram matches. • permit: Allow if datagram matches, otherwise discard. (Only for inbound datagrams.) • ipsec: Use IPsec if the datagram matches. As you can see, this sounds similar to a firewall rule, and to some extent can be used that way, but you ultimately find IPFilter much better suited to that task. When you plan your IPsec environment consider which rules are appropriate in which place. IPsec policies are defined in the /etc/inet/ipsecinit.conf file, which can be loaded/reloaded using the ipsecconf command. Lets look at a sample configuration: benr@ultra inet$ cat /etc/inet/ipsecinit.conf ## ## IPsec Policy File: ## # Ignore SSH { lport 22 dir both } bypass { } # IPsec Encrypt telnet Connections to 8.11.80.5 { raddr 8.11.80.5 rport 23 } ipsec { encr_algs blowfish encr_auth_algs sha1 sa shared Our first policy explicitly bypasses connections in and out ("dir both", as in direction) for the local port 22 (SSH). Do I need this here? No, but I include it as an example. You can see the format, the first curly block defines the filter, the second curly block defines parameters, the keyword in between is the action. The second policy is what we're interested in, its action is ipsec, so if the filter in the first curly block matches we'll use IPsec. "raddr" defines a remote address and "rport" defines a remote port, therefore this policy applies only to outbound connections where we're telnet'ing (port 23) to 8.11.80.5. The second curly block defines parameters for the action, in this case we define the encryption algorithm (Blowfish), encryption authentication algorithm (SHA1), and state that the Security Association is "shared". This is a full ESP connection, meaning we're encrypting and encapsulating the full packet, if we were doing AH (authentication only) we would only define "auth_algs". Now, on the remote side of the connection (8.11.80.5) we create a similar policy, but rather than "raddr" and "rport" we use "laddr" (local address) and "lport" (local port). We could even go so far as to specify the remote address such that only the specified host would use IPsec to the node. Here's that configuration: ## IPsec Policy File: ## # Ignore SSH { lport 22 dir both } bypass { } # IPsec Encrypt telnet Connections to 8.11.80.5 { laddr 8.11.80.5 lport 23 } ipsec { encr_algs blowfish encr_auth_algs sha1 sa shared } 24
- 32. Solaris Security To load the new policy file you can refresh the ipsec/policy SMF service like so: svcadm refresh ipsec/ policy. I recommend avoiding the ipsecconf command except to (without arguments) display the active policy configuration. So we've defined policies that will encrypt traffic from one node to another, but we're not done yet! We need to define a Security Association that will association keys with our policy. Creating Security Associations Security Associations (SAs) can be manually created by either using the ipseckeys command or directly editing the /etc/inet/secret/ipseckeys file, I recommend the latter, I personally find the ipseckeys shell very intimidating. Lets look at a sample file and then discuss it: add esp spi 1000 src 8.15.11.17 dst 8.11.80.5 auth_alg sha1 authkey 6d792073686f72742061682070617373776f7264 encr_alg blowfish encrkey 6d792073686f72742061682070617373 add esp spi 1001 src 8.11.80.5 dst 8.15.11.17 auth_alg sha1 authkey 6d792073686f72742061682070617373776f7264 encr_alg blowfish encrkey 6d792073686f72742061682070617373 It looks more intimidating that it is. Each line is "add"ing a new static Security Association, both are for ESP. The SPI is the "Security Parameters Index", is a simple numeric value that represents the SA, nothing more, pick any value you like. The src and dst define the addresses to which this SA applies, note that you have two SA's here, one for each direction. Finally, we define the encryption and authentication algorithms and full keys. I hope that looking at this makes it more clear how policies and SA's fit together. If the IP stack matches a datagram against a policy who's action is "ipsec", it takes the packet and looks for an SA who's address pair matches, and then uses those keys for the action encryption. Note that if someone obtains your keys your hosed. If you pre-shared keys in this way, change the keys from time-to-time or consider using IKE which can negotiate keys (and thus SAs) on your behalf. To apply your new SA's, flush and then load using the ipseckeys command: $ ipseckey flush $ ipseckey -f /etc/inet/secret/ipseckeys Is it working? How to Test All this is for nothing if you don't verify that the packets are actually encrypted. Using snoop, you should see packets like this: $ snoop -d e1000g0 Using device e1000g0 (promiscuous mode) ETHER: ----- Ether Header ----- ETHER: ETHER: Packet 1 arrived at 9:52:4.58883 ETHER: Packet size = 90 bytes ETHER: Destination = xxxxxxxxxxx, ETHER: Source = xxxxxxxxxx, ETHER: Ethertype = 0800 (IP) ETHER: 25
- 33. Solaris Security IP: ----- IP Header ----- IP: IP: Version = 4 IP: Header length = 20 bytes IP: Type of service = 0x00 IP: xxx. .... = 0 (precedence) IP: ...0 .... = normal delay IP: .... 0... = normal throughput IP: .... .0.. = normal reliability IP: .... ..0. = not ECN capable transport IP: .... ...0 = no ECN congestion experienced IP: Total length = 72 bytes IP: Identification = 36989 IP: Flags = 0x4 IP: .1.. .... = do not fragment IP: ..0. .... = last fragment IP: Fragment offset = 0 bytes IP: Time to live = 61 seconds/hops IP: Protocol = 50 (ESP) IP: Header checksum = ab9c IP: Source address = XXXXXXXXX IP: Destination address = XXXXXXXXXXXX IP: No options IP: ESP: ----- Encapsulating Security Payload ----- ESP: ESP: SPI = 0x3e8 ESP: Replay = 55 ESP: ....ENCRYPTED DATA.... And there you go. You can no encrypt communication transparently in the IP stack. Its a little effort to get going, but once its running your done... just remember to rotate those keys every so often! IPSec With 509 Certs 1. first you have to ensure, that the names of the systems can be resolved. It´s a good practice to put the names of the systems into the /etc/hosts: ::1 localhost loghost 127.0.0.1 localhost loghost 10.211.55.201 gandalf 10.211.55.200 theoden 2. Okay, we don´t want manual keying or some stinking preshares keys. Thus we need to create keys. Login to gandalf and assume the root role: $ ikecert certlocal -ks -m 1024 -t rsa-md5 -D "C=de, O=moellenkamp, OU=moellenkamp-vpn, CN=gandalf" -A IP=10.211.55.201 Creating private key. Certificate added to database. -----BEGIN X509 CERTIFICATE----- 26
- 34. Solaris Security MIICOzCCAaSgAwIBAgIFAJRpUUkwDQYJKoZIhvcNAQEEBQAwTzELMAkGA1UEBhMC [ ... some lines omitted ... ] oi4dO39J7cSnooqnekHjajn7ND7T187k+f+BVcFVbSenIzblq2P0u7FIgIjdlv0= -----END X509 CERTIFICATE----- 3. Do the same on the other host. $ ikecert certlocal -ks -m 1024 -t rsa-md5 -D "C=de, O=moellenkamp, OU=moellenkamp-vpn, CN=theoden" -A IP=10.211.55.200 Creating private key. Certificate added to database. -----BEGIN X509 CERTIFICATE----- MIICOzCCAaSgAwIBAgIFAIRuR5QwDQYJKoZIhvcNAQEEBQAwTzELMAkGA1UEBhMC [ ... some lines omitted ... ] UHJ4P6Z0dtjnToQb37HNq9YWFRguSsPQvc/Lm+S9cJCLwINVg7NOXXgnSfY3k+Q= -----END X509 CERTIFICATE----- 4. Okay, now we have to tell both hosts to use IPsec when they talk to each other: $ echo "{laddr gandalf raddr theoden} ipsec {auth_algs any encr_algs any sa shared}" >> /etc/inet/ipsecinit.conf 5. This translates to: When i´m speaking to theoden, i have to encrypt the data and can use any negotiated and available encryptition algorithm and any negotiated and available authentication algorithm. Such an rule is only valid on one direction. Thus we have to define the opposite direction on the other host to enable bidirectional traffic: $ echo "{laddr theoden raddr gandalf} ipsec {auth_algs any encr_algs any sa shared}" >> /etc/inet/ipsecinit.conf 6. Okay, the next configuration is file is a little bit more complex. Go into the directory /etc/inet/ike and create a file config with the following content: cert_trust "10.211.55.200" cert_trust "10.211.55.201" p1_xform { auth_method preshared oakley_group 5 auth_alg sha encr_alg des } p2_pfs 5 { label "DE-theoden to DE-gandalf" local_id_type dn local_id "C=de, O=moellenkamp, OU=moellenkamp-vpn, CN=theoden" remote_id "C=de, O=moellenkamp, OU=moellenkamp-vpn, CN=gandalf" local_addr 10.211.55.200 remote_addr 10.211.55.201 p1_xform 27
- 35. Solaris Security {auth_method rsa_sig oakley_group 2 auth_alg md5 encr_alg 3des} } 7. Okay, we are almost done. But there is still a missing but very essential thing when you want to use certificates. We have to distribute the certificates of the systems. $ ikecert certdb -l Certificate Slot Name: 0 Key Type: rsa (Private key in certlocal slot 0) Subject Name: Key Size: 1024 Public key hash: 28B08FB404268D144BE70DDD652CB874 At the beginning there is only the local key in the system. We have to import the key of the remote system. Do you remember the output beginning with -----BEGIN X509 CERTIFICATE----- and ending with -----END X509 CERTIFICATE-----? You need this output now. 8. The next command won´t come back after you hit return. You have to paste in the key. On gandalf you paste the output of the key generation on theoden. On Theoden you paste the output of the key generation on gandalf. Let´s import the key on gandalf $ ikecert certdb -a -----BEGIN X509 CERTIFICATE----- MIICOzCCAaSgAwIBAgIFAIRuR5QwDQYJKoZIhvcNAQEEBQAwTzELMAkGA1UEBhMC UHJ4P6Z0dtjnToQb37HNq9YWFRguSsPQvc/Lm+S9cJCLwINVg7NOXXgnSfY3k+Q= -----END X509 CERTIFICATE----- [root@gandalf:/etc/inet/ike]$ 9. After pasting, you have to hit Enter once and after this you press Ctrl-D once. Now we check for the successful import. You will see two certificates now. $ ikecert certdb -l Certificate Slot Name: 0 Key Type: rsa (Private key in certlocal slot 0) Subject Name: Key Size: 1024 Public key hash: 28B08FB404268D144BE70DDD652CB874 Certificate Slot Name: 1 Key Type: rsa Subject Name: Key Size: 1024 Public key hash: 76BE0809A6CBA5E06219BC4230CBB8B8 10.Okay, switch to theoden and import the key from gandalf on this system. $ ikecert certdb -l Certificate Slot Name: 0 Key Type: rsa (Private key in certlocal slot 0) Subject Name: Key Size: 1024 Public key hash: 76BE0809A6CBA5E06219BC4230CBB8B8 $ ikecert certdb -a -----BEGIN X509 CERTIFICATE----- MIICOzCCAaSgAwIBAgIFAJRpUUkwDQYJKoZIhvcNAQEEBQAwTzELMAkGA1UEBhMC 28
- 36. Solaris Security oi4dO39J7cSnooqnekHjajn7ND7T187k+f+BVcFVbSenIzblq2P0u7FIgIjdlv0= -----END X509 CERTIFICATE----- $ ikecert certdb -l Certificate Slot Name: 0 Key Type: rsa (Private key in certlocal slot 0) Subject Name: Key Size: 1024 Public key hash: 76BE0809A6CBA5E06219BC4230CBB8B8 Certificate Slot Name: 1 Key Type: rsa Subject Name: Key Size: 1024 Public key hash: 28B08FB404268D144BE70DDD652CB874 11.Okay, now we have to activate this configuration on both systems: $ svcadm enable ike $ ipsecconf -a /etc/inet/ipsecinit.conf Apache2 SSL Configuration with Self-Signed Certs 1. Login as root su - 2. Copy the file, /etc/apache2/httpd.conf-example to /etc/apache2/httpd.conf # cp /etc/apache2/httpd.conf-example /etc/apache2/httpd.conf 3. Edit /etc/apache2/httpd.conf • Set ServerName if necessary (default is 127.0.0.1) • Set ServerAdmin to a valid email address 4. Enable Apache2 # svcadm enable apache2 5. Enable SSL Service Property if necessary. Log in as root and issue the following command: # svcprop -p httpd/ssl svc:network/http:apache2 If the response is “false”, issue these three commands: a. # svccfg -s http:apache2 setprop httpd/ssl=true b. # svcadm refresh http:apache2 c. # svcprop -p httpd/ssl svc:network/http:apache2 If the response is “true”, continue to the next step. 29
- 37. Solaris Security 6. Create a Certificate Directory and a Key Directory. # mkdir /etc/apache2/ssl.crt # mkdir /etc/apache2/ssl.key 7. Generate a RSA Key. # /usr/local/ssl/bin/openssl genrsa -des3 1024 > /etc/apache2/ssl.key/server.key Generating RSA private key, 1024 bit long modulus ……………………..++++++ ………++++++ e is 65537 (0×10001) Enter pass phrase: ******** Verifying - Enter pass phrase: ******** 8. Generate a Certificate Request. # /usr/local/ssl/bin/openssl req -new -key /etc/apache2/ssl.key/server.key > /etc/apache2/ssl.crt/server.csr Enter pass phrase for /etc/apache2/ssl.key/server.key: ******** You are about to be asked to enter information that will be incorporated into your certificate request. What you are about to enter is what is called a Distinguished Name or a DN. There are quite a few fields but you can leave some blank For some fields there will be a default value, If you enter ‘.’, the field will be left blank. —– Country Name (2 letter code) [US]::US State or Province Name (full name) [Some-State]:OR Locality Name (eg, city) []:Blodgett Organization Name (eg, company) [Unconfigd OpenSSL Installation]:DIS Organizational Unit Name (eg, section) []:IT Common Name (eg, YOUR name) []:Big Cheese Email Address []:meljr@meljr.com Please enter the following ‘extra’ attributes to be sent with your certificate request A challenge password []: ******** An optional company name []: Live Free or Die 9. Install a Self-Signed Certificate. If you are going to install a certificate from an authoritative source, follow their instructions and skip this step. # /usr/local/ssl/bin/openssl req -x509 -days 3650 -key > /etc/apache2/ssl.key/server.key > -in /etc/apache2/ssl.crt/server.csr > 30
- 38. Solaris Security > /etc/apache2/ssl.crt/server.crt Enter pass phrase for /etc/apache2/ssl.key/server.key: ******** 10.Edit the ssl.conf and change the line that begins with “ServerAdmin” to reflect an email address or alias for the Server’s Administrator. 11.Test the SSL Certificate with Apache2 If Apache2 is enabled, disable it during testing: # svcadm disable apache2 12.Enable Apache2 with SSL to be started automatically as a service. # cd /etc/apache2/ssl.key # cp server.key server.key.org # /usr/local/ssl/bin/openssl rsa -in server.key.org -out server.key Enter pass phrase for server.key.org: ******** writing RSA key # chmod 400 server.key # svcadm enable apache2 # svcs | grep -i apache2 online 4:29:01 svc:/network/http:apache2 RBAC and Root As a ROLE 1. Fundamentals /etc/security/exec_attr maps commands to a profile for execution Audit Control:suser:cmd:::/etc/security/bsmconv:uid=0 Audit Control:suser:cmd:::/etc/security/bsmunconv:uid=0 /etc/security/prof_attr defines the profile Audit Control:::Configure Solaris Auditing:auths= solaris.audit.config, solaris.jo bs.admin,solaris.admin.logsvc.purge, solaris.admin.logsvc.read;help=RtAuditCtrl.h tml Audit Review:::Review Solaris Auditing logs:auths= solaris.audit.read; help=RtAudi tReview.html /etc/security/user_attr maps profiles to users - and defines account types root::::type=role;auths=solaris.*,solaris.grant; profiles=All; lock_after_retries= no;min_label=admin_low; clearance=admin_high 2. Adding a Profile to a user # usermod -P "Audit Control" user_account 3. Adding Authorizations to a User 31
- 39. Solaris Security # usermod -A solaris.admin.logsvc.read user_account 4. Converting root to a role and adding access to root role to a user Fundamentals - login as a user and assume root; then modify the root account as type role and add the root role to a user; test with fresh login before logging out $ su - # usermod -K type=role root # usermod -R root useraccount remote> ssh useraccount@host_with_root_role_config $ su - root # Secure Non-Global Zone FTP Server Millage may vary on this one, since secure ftpd is not supported in a local zone as of Solaris 10 Update 3. Also note that this configuration uses BSM, and Roles for additional security. It is unknown to me if BSM Audit trails are supported on ZFS filesystems. If you are evaluating this for production, I would recommend not using ZFS for audit trails without confirmation from Sun Microsystems. The same basic procedures can be adapted to VxVM and VxFS or UFS Filesystems. 1. Disable Unwanted Network Services # svcadm disable sendmail # svcadm disable rusers # svcadm disable telnet # svcadm disable rlogin # svcadm disable rstat # svcadm disable finger # svcadm disable kshell # svcadm disable network/shell:default # svcadm disable snmpdx # rm /etc/rc3.d/S76snmpdx # rm /etc/rc3.d/S90samba # Review /etc/rc2.d/S90* for deletion 2. Set Up Zone and Audit ZFS Pools Unused Disk List 36GB Disk c0t2d1 36GB Disk c1t2d1 # zpool create zones c0t2d1 # zfs create zones/secftp # zfs create zones/ftp-root [Must run ftpconfig before setting mountpoint legacy] # ftpconfig -d /zones/ftp-root # mkdir /zones/ftp-root/incoming # chown go-r /zones/ftp-root/incoming # zfs set mountpoint=legacy zones/ftp-root 32
- 40. Solaris Security # chmod 700 zones/secftp # zpool create bsm c1t2d1 # zfs create bsm/audit 3. Configure Role for Primary Maintenance # mkdir /export/home # groupadd -g 2000 secadm # useradd -d /export/home/secuser -m secuser # passwd secuser # roleadd -u 2000 -g 2000 -d /export/home/secadm -m secadm # passwd secadm # rolemod -P "Primary Administrator","Basic Solaris User" secadm # usermod -R secadm secuser # svcadm restart system/name-service-cache #. logout of root, login as secuser # su - secadm 4. Change Root User to Root Role Fundamentals - login as a user and assume root; then modify the root account as type role and add the root role to a user; test with fresh login before logging out $ su - # usermod -K type=role root # useradd -d /home/padmin -m -g 2000 padmin # passwd padmin # usermod -R root padmin 5. Install BSM on Global Server # cd /etc/security ## edit audit_control and change the dir:/var/audit to /bsm/audit ## Run the following command, you will need to reboot. # ./bsmconv 6. Create Zone secftp # zonecfg -z secftp secftp: No such zone configured Use 'create' to begin configuring a new zone. zonecft:secftp> create zonecft:secftp> set zonepath=/zones/secftp zonecft:secftp> set autoboot=false zonecft:secftpt> add fs zonecft:secftp:fs> set type=zfs zonecft:secftp:fs> set special=zones/ftp-root zonecft:secftp:fs> set dir=/ftp-root zonecft:secftp:fs> end zonecft:secftp> add net zonecft:secftp:net> set address=192.168.15.97 zonecft:secftp:net> set physical=pcn0 33
- 41. Solaris Security zonecft:secftp:net> end zonecft:secftp> add attr zonecft:secftp:attr> set name=comment zonecft:secftp:attr> set type=string zonecft:secftp:attr> set value="Secure FTP Zone" zonecft:secftp:attr> end zonecft:secftp> verify zonecft:secftp> commit zonecft:secftp> exit zoneadm -z secftp verify zoneadm -z secftp install zoneadm -z secftp boot # zlogin -C secftp [Connected to zone 'secftp' ] Enter Requested Setup Information [Notice Zone Rebooting] secftp console login: root # passwd root 7. Disable Unwanted Network Services in Local Zone # svcadm disable sendmail # svcadm disable rusers # svcadm disable telnet # svcadm disable rlogin # svcadm disable rstat # svcadm disable finger # svcadm disable kshell # svcadm disable network/shell:default # svcadm disable snmpdx # rm /etc/rc3.d/S76snmpdx # rm /etc/rc3.d/S90samba ## Review /etc/rc2.d/S90* for deletion 8. Add a user for secure ftp access [create same accounts and role changes as in global - you can set these to different names if you like] /etc/passwd: secxfr:x:2002:1::/ftp-root/./incoming:/bin/true # pwconv # passwd secxfr # set ot secxfr # Add /bin/true to /etc/shells # configure /etc/ftpd/ftpaccess 34
- 42. Solaris Security Trusted Extensions 1. Fundamentals TX places classification, and compartment wrappers around Non-Global Zones and defines what systems can communicate with those zones a. Classification vs Compartment Classification is hierarchal level of security - TS , Confidential / Clearance / Sensitivity Label Compartment is sub groups - Devel, Management, b. Key Files for Trusted Extensions • Site labels: defined in /etc/security/tsol/label_encodings • Matching zones to labels: in /etc/security/tsol/tnzonecfg • Network to label matching: in /etc/security/tsol/tnrhtp • Defining network labels: in /etc/security/tsol/tnrhdb 2. Basic TX Configuration Make sure no non-global zones are configured or installed; Non-Global zones need to be mapped to a clearance and category before installation; these example content files will configure a host for three non-global zones; one for public "web like" features, one for internal host-to-host from non-labeled systems and one for secure tx to tx systems - labels are public, confidential and restricted. a. Check /etc/user_attr to make sure your root and root role account has the following access levels min_label=admin_low;clearance=admin_high b. Example label_encodings file Very primitive /etc/security/tsol/label_encodings file requiring only three non-global zones: VERSION= Sun Microsystems, Inc. Example Version - 6.0. 2/15/05 CLASSIFICATIONS: name= PUBLIC; sname= PUB; value= 2; initial compartments= 4; name= CONFIDENTIAL; sname= CNF; value= 4; initial compartments= 4; name= RESTRICTED; sname= RES; value= 10; initial compartments= 4; INFORMATION LABELS: WORDS: REQUIRED COMBINATIONS: COMBINATION CONSTRAINTS: SENSITIVITY LABELS: 35
- 43. Solaris Security WORDS: REQUIRED COMBINATIONS: COMBINATION CONSTRAINTS: CLEARANCES: WORDS: REQUIRED COMBINATIONS: COMBINATION CONSTRAINTS: CHANNELS: WORDS: PRINTER BANNERS: WORDS: ACCREDITATION RANGE: classification= PUB; all compartment combinations valid; classification= RES; all compartment combinations valid; classification= CNF; all compartment combinations valid except: CNF minimum clearance= PUB; minimum sensitivity label= PUB; minimum protect as classification= PUB; * * Local site definitions and locally configurable options. * LOCAL DEFINITIONS: Default User Sensitivity Label= PUB; Default User Clearance= PUB; Default Label View is Internal; COLOR NAMES: label= Admin_Low; color= #bdbdbd; label= PUB; color= blue violet; label= RES; color= red; label= CNF; color= yellow; label= Admin_High; color= #636363; * 36
- 44. Solaris Security * End of local site definitions * c. Set netservices to limited # netservices limited d. Update /etc/security/tsol/tnrhdb to include local interfaces as type cipso # CIPSO - who is a TX System 127.0.0.1:cipso 192.168.15.78:cipso 192.168.15.94:cipso # # ADMIN_LOW - what servers that are not TX, can talk to my global 192.168.15.1:admin_low # DNS Server 192.168.15.100:admin_low # Management Server # # SSH Allowed Remote 192.168.15.79:extranet 192.223.207.0:extranet # # All others can view my web site zone, but that is all. 0.0.0.0:world e. Update /etc/security/tsol/tnrhtb to define CIPSO connections and force a label for non-labeled host connections Note that this file uses "" to shorten the lines for pdf output; remove them before using. # Default for locally plumbed interfaces cipso:host_type=cipso;doi=1;min_sl=ADMIN_LOW;max_sl=ADMIN_HIGH; # admin_low:host_type=unlabeled;doi=1; min_sl=ADMIN_LOW;max_sl=ADMIN_HIGH;def_label=ADMIN_LOW; extranet:host_type=unlabeled;doi=1; min_sl=RESTRICTED;max_sl=ADMIN_HIGH;def_label=RESTRICTED; world:host_type=unlabeled;doi=1; min_sl=PUBLIC;max_sl=ADMIN_HIGH;def_label=PUBLIC; f. Mapping the non-global zones to a LABEL is done in /etc/security/tsol/tnzonecfg # global:ADMIN_LOW:1:111/tcp;111/udp;515/tcp; 631/tcp;2049/tcp;6000-6003/tcp:6000-6003/tcp pub-tx01:0x0002-08-08:0:: restricted-tx01:0x000a-08-08:0:: g. Enable TX Services # svcadm enable labeld # svcadm enable tnd # svcadm enable tsol-zones # svcadm enable tname h. Create Non-Global Zones 37
- 45. Solaris Security # txzonemgr 3. Permission and Access Control within TX and Non TX Zones TX places classification, and compartment wrappers around Non-Global Zones and defines what systems can communicate with those zones a. Allowing user upgrade information - should the labeled zone allow it. Information stored in /etc/ user_attr auths=solaris.label.file.upgrade defaultprivs=sys_trans_label,file_upgrade_sl b. Allowing user downgrade information - should the labeled zone allow it. Information stored in / etc/user_attr auths=solaris.label.file.downgrade defaultprivs=sys_trans_label,file_downgrade_sl c. Preventing user from seeing processes beyond the users ownership. Information stored in /etc/ user_attr defaultprivs=basic,!proc_info d. Combination of restrictions. Information stored in /etc/user_attr user::::auths=solaris.label.file.upgrade, solaris.label.file.downgrade;type=normal; defaultpriv=basic,!proc_info,sys_trans_label, file_upgrade_sl,file_downgrade_sl; clearance=admin_high;min_label=admin_low e. Paring priv limitations and expansion of features with non-global zone configuration zonecfg -z zone-name set limitpriv=default,file_downgrade_sl, file_upgrade_sl,sys_trans_label exit 38
- 46. Chapter 5. Solaris Virtualization Logical Domains Socket, Core and Thread Distribution Table 5.1. Coolthreads Systems System Processor Max Memory RU Threads Sun SPARC Enterprise T5140 Server 2 UltraSPARC T2 Plus 128 128 1 Sun SPARC Enterprise T5240 Server 2 UltraSPARC T2 Plus 128 256 2 Sun SPARC Enterprise T5440 Server 4 UltraSPARC T2 Plus 256 512 4 Sun SPARC Enterprise T5120 Server 1 UltraSPARC T2 64 128 1 Sun SPARC Enterprise T5220 Server 1 UltraSPARC T2 64 128 2 Sun Blade™ T6340 Server Module 2 UltraSPARC T2 Plus 128 256 Blade Sun Blade T6320 Server Module 1 UltraSPARC T2 64 128 Blade Sun Blade T6300 Server Module 1 UltraSPARC T1 32 32 Blade Sun SPARC Enterprise T1000 Server 1 UltraSPARC T1 32 32 1 Sun SPARC Enterprise T2000 Server 1 UltraSPARC T1 32 64 2 Sun Fire™ T1000 Server 1 UltraSPARC T1 32 32 1 Sun Fire T2000 Server 1 UltraSPARC T1 32 64 2 Table 5.2. Incomplete IO Domain Distribution Processor Generation System Max Domains Max I/O Domains UltraSPARC-T1 t1000 32 2 UltraSPARC-T1 t2000 32 2 UltraSPARC-T1 t6300 32 2 UltraSPARC-T2 t5120 64 1 UltraSPARC-T2 t5220 64 1 UltraSPARC-T2 T6320 64 1 UltraSPARC-T2 Plus t5140 128 2 UltraSPARC-T2 Plus t5240 128 2 UltraSPARC-T2 Plus t5440 128 4 UltraSPARC-T2 Plus t6340 128 2 Install Domain Manager Software # ./Install/install-ldm -d none Installing LDoms and Solaris Security Toolkit packages. pkgadd -n - d "/export/home/rlb/LDoms_Manager-1_1/Product" -a pkg_admin SUNWldm.v 39
- 47. Solaris Virtualization Copyright 2008 Sun Microsystems, Inc. All rights reserved. Use is subject to license terms. Installation of <SUNWldm> was successful. pkgadd -n -d "/export/home/rlb/LDoms_Manager-1_1/Product" -a pkg_admin SUNWjass Copyright 2005 Sun Microsystems, Inc. All rights reserved. Use is subject to license terms. Installation of <SUNWjass> was successful. Verifying that all packages are fully installed. OK. Enabling services: svc:/ ldoms/ldmd:default Solaris Security Toolkit was not applied. Bypassing the use of the Solaris Security Toolkit is _not_ recommended and should only be performed when alternative hardening steps are to be taken. You have new mail in /var/mail/root Configure Primary Domain # export PATH=/opt/SUNWldm/bin:$PATH # ldm add-vds primary-vds0 primary # ldm add-vcc port-range=5000-5100 primary-vcc0 primary # ldm add-vsw net-dev=bge0 primary-vsw0 primary # ldm set-mau 1 primary # ldm set-vcpu 8 primary # ldm set-memory 3968m primary # ldm add-config baseline # shutdown -y -g0 -i6 Create DOM1 # svcadm enable vntsd # ldm add-domain dom1 # ldm add-vcpu 8 dom1 # ldm add-memory 2048m dom1 # ldm add-vnet pub0 primary-vsw0 dom1 # ldm add-vnet isan0 primary-vsw1 dom1 Adding RAW Disks and ISO Images to DOM1 # ldm add-vdiskserverdevice /dev/rdsk/c1t65d0s2 vol1@primary-vds0 # ldm add-vdiskserverdevice /export/home/rlb/sparc-dvd.iso iso@primary-vds0 # ldm add-vdisk vdisk0 vol1@primary-vds0 dom1 # ldm add-vdisk iso iso@primary-vds0 dom1 Bind DOM1 and set up for booting # ldm bind-domain dom1 # ldm start-domain dom1 LDom dom1 started # telnet localhost 5000 Trying 127.0.0.1... Connected to localhost. Escape character is '^]'. Connecting to console "dom1" in group "dom1" .... 40
- 48. Solaris Virtualization Press ~? for control options .. {0} ok boot iso Install OS Image and Clean up DOM1 After proceeding through the SysID Configuration halt the domain and set the auto-boot varable to true, assuming that you want the domain to boot when starting it Otherwise the LDOM will wait at the ok> prompt when recieving the start command from ldm start ldom // Remove iso image for use with LDOM #2 # ldm stop dom1 # ldm rm-vdisk iso dom1 // Set the LDOM to autoboot else will boot // into ok> prompt # ldm set-variable auto-boot?=true dom1 Create LDOM #2 # ldm add-domain dom2 # ldm add-vcpu 8 dom2 # ldm add-memory 2048m dom2 # ldm add-vnet pub0 primary-vsw0 dom2 # ldm add-vdiskserverdevice /dev/rdsk/c1t66d0s2 vol2@primary-vds0 # ldm add-vdisk vdisk0 vol2@primary-vds0 dom2 # ldm add-vdisk iso iso@primary-vds0 dom2 # ldm set-variable auto-boot?=false dom2 # ldm bind dom2 # ldm start dom2 LDom dom2 started # telnet localhost 5001 Trying 127.0.0.1... Connected to localhost. Escape character is '^]'. Connecting to console "dom2" in group "dom2" .... {0} ok boot iso // Continue as with LDOM#1 Backup or Template LDOM Configurations primary# ldm list-constraints -x ldg0 > /var/tmp/ldg0.xml primary# cp /var/tmp/ldg0.xml /var/tmp/ldg1.xml primary# ldm add-domain -i /var/tmp/ldg1.xml primary primary# ldm bind ldg1 primary# ldm start ldg1 Add one virtual disk to two LDOMs A virtual disk backend can be exported multiple times either through the same or different virtual disk servers. Each exported instance of the virtual disk backend can then be assigned to either the same or 41
- 49. Solaris Virtualization different guest domains. When a virtual disk backend is exported multiple times, it should not be exported with the exclusive (excl) option. Specifying the excl option will only allow exporting the backend once. Caution - When a virtual disk backend is exported multiple times, applications running on guest domains and using that virtual disk are responsible for coordinating and synchronizing concurrent write access to ensure data coherency. Export the virtual disk backend two times from a service domain by using the following commands. Note the "-f" that forces the second device to be defined. Without the "-f" the second command will fail reporting that the share must be "read only". # ldm add-vdsdev [options={ro,slice}] backend volume1@service_name # ldm add-vdsdev -f [options={ro,slice}] backend volume2@service_name Assign the exported backend to each guest domain by using the following commands. # ldm add-vdisk [timeout=seconds] disk_name volume1@service_name ldom1 # ldm add-vdisk [timeout=seconds] disk_name volume2@service_name ldom2 Example: note that SVM was tested, but LDOM's would not recognize the disks # zfs create -V 1g shared/fence0 # zfs create -V 1g shared/fence1 # zfs create -V 1g shared/fence2 # ldm add-vdsdev /dev/zvol/rdsk/shared/fence0 vsrv1_fence0@primary-vds0 # ldm add-vdsdev -f /dev/zvol/rdsk/shared/fence0 vsrv2_fence0@primary-vds0 # ldm add-vdsdev /dev/zvol/rdsk/shared/fence1 vsrv1_fence1@primary-vds0 # ldm add-vdsdev -f /dev/zvol/rdsk/shared/fence1 vsrv2_fence1@primary-vds0 # ldm add-vdsdev /dev/zvol/rdsk/shared/fence2 vsrv1_fence2@primary-vds0 # ldm add-vdsdev -f /dev/zvol/rdsk/shared/fence2 vsrv2_fence2@primary-vds0 # ldm add-vdisk fence0 vsrv1_fence0@primary-vds0 vsrv1 # ldm add-vdisk fence1 vsrv1_fence1@primary-vds0 vsrv1 # ldm add-vdisk fence2 vsrv1_fence2@primary-vds0 vsrv1 # ldm add-vdisk fence0 vsrv2_fence0@primary-vds0 vsrv1 42
- 50. Solaris Virtualization # ldm add-vdisk fence1 vsrv2_fence1@primary-vds0 vsrv1 # ldm add-vdisk fence2 vsrv2_fence2@primary-vds0 vsrv1 # ldm bind vsrv1 # ldm bind vsrv2 # ldm list NAME STATE FLAGS CONS VCPU MEMORY UTIL UPTIME primary active -n-cv- SP 8 3968M 0.2% 47m vsrv1 bound ------ 5000 4 2G vsrv2 bound ------ 5001 4 2G Grouping VCC Console primary# ldm set-vcons group=group1 service=primary-vcc0 ldg1 primary# ldm set-vcons group=group1 service=primary-vcc0 ldg2 primary# ldm set-vcons group=group1 service=primary-vcc0 ldg3 # telnet localhost 5000 primary-vnts-group1: h, l, c{id}, n{name}, q: primary-vnts-group1: h, l, c{id}, n{name}, q: l DOMAIN ID DOMAIN NAME DOMAIN STATE 0 ldg1 online 1 ldg2 online 2 ldg3 online LDOM Automation Script Here's a no-errorchecking blaziing fast LDOM creation script. Took 7 seconds to build a new OS image. Thought you might want to check it out. I assume I don't need to say "needs error checking!" This assumes list of possible hostnames are in the primary's /etc/hosts file. Script Assumptions Script assumes that the there is an initial LDOM created on a zfs resident disk image called LDOM/dom3/ vdisk0.img, and that all potential domains will be in DOM0's local hosts table. Note that this script was written on Solaris 10 Update 4, with LDOM Manager 1.0. The basic process is to clone a known good image, mount through lofi, update key boot files, then create the ldom constraints file through command like execution; finally binding and booting the ldom. Entire process from known good image is about 7 seconds. Execution Example: Script takes about 7 seconds to create a new LDOM. # ./autodom.sh dom4 Mon May 14 20:51:47 EDT 2007 Starting AutoDom Mon May 14 20:51:53 EDT 2007 # Script Code for autodom.sh 43
- 51. Solaris Virtualization #!/bin/sh DOM=$1 date echo "Starting AutoDom" ## LDOM/dom3@primary is clean OS snapshot used as baseline ## create clone of snapshot zfs clone LDOM/dom3@primary LDOM/{$DOM} ## mount disk image for updating lofiadm -a /LDOM/$DOM/vdisk0.img mount /dev/lofi/1 /mnt ## update /etc/hosts, /etc/inet/ipnodes, ## /etc/hostname.vnet0 and /etc/nodename echo "# AutoDom Generated hosts file" >/mnt/etc/hosts echo '::1 localhost' >>/mnt/etc/hosts echo '127.0.0.1 localhost' >>/mnt/hosts grep $DOM /etc/inet/ipnodes | awk '{print $1, $2, "loghost"}' >>/mnt/etc/inet/ipnodes # updating ipnodes should be redundent, but just incase echo "# AutoDom Generated inet/ipnodes file" >/mnt/etc/inet/ipnodes echo '::1 localhost' >>/mnt/etc/inet/ipnodes echo '127.0.0.1 localhost' >>/mnt/etc/inet/ipnodes grep $DOM /etc/hosts | awk '{print $1, $2, "loghost"}' >>/mnt/etc/inet/ipnodes echo "$DOM" >/mnt/etc/nodename echo "$DOM" >/mnt/etc/hostname.vnet0 sync umount /mnt lofiadm -d /dev/lofi/1 # Create the LDOM ldm add-domain $DOM ldm add-vcpu 4 $DOM ldm add-mau 0 $DOM ldm add-memory 1G $DOM ldm add-vdiskserverdevice /LDOM/$DOM/vdisk0.img ${DOM}vdisk0@primary-vds0 ldm add-vdisk ${DOM}vdisk0 ${DOM}vdisk0@primary-vds0 $DOM ldm add-vnet vnet0 primary-vsw0 $DOM ldm set-variable auto-boot?=false $DOM ldm set-variable local-mac-address?=true $DOM ldm set-variable boot-device=/virtual-devices@100/channel-devices@200/disk@0 $DOM ldm bind-domain $DOM # All ready to boot as new image 44
- 52. Solaris Virtualization date # Done Script VCS and LDOM Failover, Features and Start and Stop VCS 5.0MP3 can be used to start and stop an LDOM on a single system, however it has a bug preventing ths use of a CfgFile. In order to use the CfgFile option, and thereby allowing failover, you must install VCS 5.0MP3RP1 Basic VCS LDOM Configuration Create a Constraints file Copy xml file to all systems that will support the failover of this LDOM. In this example they are stored in a custom /etc/ldoms/ directory. It may, however make sense to put it on shared storage. $ ldm list-constraints -x dom2 /etc/ldoms/dom2.xml Create an LDom Agent # hares -add ldom_dom2 LDom dom2 # hares -modify ldom_dom2 LDomName dom2 # hares -modify ldom_dom2 CfgFile /etc/ldoms/dom2.xml # hares -modify ldom_dom2 Enabled 1 /etc/VRTSvcs/conf/config/main.cf: group dom2 ( SystemList = { primary-dom1 = 0 } ) LDom ldom_dom2 ( LDomName = dom2 CfgFile = /etc/ldoms/dom2.xml ) View of ldm list when VCS LDOM Agent has been started bash-3.00# ldm list NAME STATE FLAGS CONS VCPU MEMORY UTIL UPTIME primary active -n-cv- SP 8 4092M 55% 15m dom1 active -t---- 5001 8 2G 12% 22s dom2 active -t---- 5000 8 1904M 12% 22s View of ldm list when VCS LDOM Agent has been stopped 45
- 53. Solaris Virtualization NAME STATE FLAGS CONS VCPU MEMORY UTIL UPTIME primary active -n-cv- SP 8 4092M 0.4% 18m dom1 inactive ------ 8 2G dom2 inactive ------ 8 1904M Adjusting Number of CPU's in LDOM via LDom Agent # ldm list NAME STATE FLAGS CONS VCPU MEMORY UTIL UPTIME primary active -n-cv- SP 8 4092M 0.4% 18m dom1 inactive ------ 8 2G dom2 inactive ------ 8 1904M # haconf -makerw # hares -modify ldom_dom1 NumCPU 4 # haconf -dump -makero # ldm list NAME STATE FLAGS CONS VCPU MEMORY UTIL UPTIME primary active -n-cv- SP 8 4092M 0.4% 18m dom1 inactive ------ 8 2G dom2 inactive ------ 8 1904M # hagrp -online dom1 -sys dom0 # ldm list NAME STATE FLAGS CONS VCPU MEMORY UTIL UPTIME primary active -n-cv- SP 8 4092M 0.4% 18m dom1 active -t---- 5000 4 2G 25% 1s dom2 inactive ------ 8 1904M Interaction between setting vCPU number in LDom Agent and CLI # ldm set-vcpu 8 dom1 # ldm list NAME STATE FLAGS CONS VCPU MEMORY UTIL UPTIME primary active -n-cv- SP 8 4092M 0.6% 26m dom1 active -n---- 5000 8 2G 19% 4m dom2 inactive ------ 8 1904M # hares -display ldom_dom1 -attribute NumCPU #Resource Attribute System Value ldom_dom1 NumCPU global 4 # hagrp -offline dom1 -sys dom0 ### Note lack of VCPU definition on dom1 ### 46
- 54. Solaris Virtualization # ldm list NAME STATE FLAGS CONS VCPU MEMORY UTIL UPTIME primary active -n-cv- SP 8 4092M 0.4% 31m dom1 inactive ------ 2G dom2 inactive ------ 8 1904M # hagrp -online dom1 -sys dom0 ### System reverts back to NumCPU set in VCS ### # ldm list NAME STATE FLAGS CONS VCPU MEMORY UTIL UPTIME primary active -n-cv- SP 8 4092M 0.4% 32m dom1 active -t---- 5000 4 2G 25% 12s dom2 inactive ------ 8 1904M ### Additional Comments - dom1.xml never gets updated, ### ### so is set to 8CPU ### VCS LDOM with ZPool Configuration ZFS Pool Agent Configuration Warning When a LDOM uses a ZFS RAW Volume instead of a mkfile image on a ZFS FS, the Zpool Agent for VCS will attempt to mount and check the volume. Being a raw volume, this will cause the Agent to fail. To avoid this use the ChkZFSMounts 0 option. Note The LDOM XML File is generated by the # ldm ls-constraints -x dom1 >/etc/ldoms/dom1.xml command; make the /etc/ldoms directory on both servers first; create the xml file, then copy to both servers. # hagrp -add LDOM # hagrp -modify LDOM SystemList sys1 0 sys2 1 # hagrp -modify LDOM AutoStartList sys1 # hares -add ldom_zp Zpool LDOM # hares -modify ldom_zp PoolName rapid_d # hares -modify ldom_zp AltRootPath / # hares -modify ldom_zp ChkZFSMounts 0 # hares -modify ldom_zp Enabled 1 LDOM Agent Configuration 47
- 55. Solaris Virtualization # hares -add wanboot_ldm LDom LDOM # hares -modify dom1_ldm CfgFile /etc/ldoms/dom1.xml # hares -modify dom1_ldm NumCPU 4 # hares -modify dom1_ldm LDomName dom1 # hares -link dom1_ldm ldom_zp Manual LDOM and Zpool Migration 1. Source Server Tasks a. Identify Current Configuration # ldm list NAME STATE FLAGS CONS VCPU MEMORY UTIL UPTIME primary active -n-cv- SP 4 1G 0.3% 2h 49m wanboot active -n---- 5000 4 1G 0.2% 3h 51m # zfs list -t volume NAME USED AVAIL REFER MOUNTPOINT rapid_d/wanboot/rootdisk 32G 135G 5.48G - b. Shutdown LDOM # ldm stop wanboot c. Generate LDOM XML Constraints File and copy to remote server # ldm ls-constraints -x wanboot >/root/wanboot.xml # scp /root/wanboot.xml root@remote:/root/ d. Unbind Source LDOM Domain # ldm unbind wanboot e. Export ZPool where LDOM resides # zpool export rapid_d 2. Source Server Tasks a. Import LDOM Zpool # zpool import rapid_d b. Create LDOM using constraints file # ldm create -i /root/wanboot.xml 48
- 56. Solaris Virtualization c. Bind LDOM # ldm bind wanboot d. Start Domain # ldm start wanboot xVM (XEN) Usage on OpenSolaris 2009.06 Commands and methods using xVM on Opensolaris 2009.06 Quick Create for Solaris 10 HVM Solaris 10 must be installed in a HVM, and use vnc; specifying nongraphics options will resulting the install providing no console Warning Documentation on opensolaris web side uses different options to the virt-install command. Options displayed on website will not work, and are not available, on 2009.06 1. Create a back end zvol for installation # zfs create -V 18g vstorage/guests/svsrv2/rootdisk0 2. Set DISPLAY for X session # export DISPLAY=123.456.789.10:0.0 3. Create the XVM HVM Image and Install # virt-install --vnc -v --ram 2048 --file-size=18 --name svsrv2 -f /dev/zvol/dsk/vstorage/guests/svsrv2/rootdisk0 --bridge=nge0 --vcpus=4 -c /vstorage/iso/sol-10-u7-ga-x86-dvd.iso root@x2200:~# virsh vncdisplay svsrv2 :0 root@x2200:~# vncviewer localhost:0 Solaris 10 Non-Global Zones Comments on Zones and Live Upgrade Starting with the Solaris Solaris 10 8/07 release, you can upgrade or patch a system that contains non- global zones with Solaris Live Upgrade. If you have a system that contains non-global zones, Solaris 49
- 57. Solaris Virtualization Live Upgrade is the recommended program to upgrade and to add patches. Other upgrade programs might require extensive upgrade time, because the time required to complete the upgrade increases linearly with the number of installed non-global zones. If you are patching a system with Solaris Live Upgrade, you do not have to take the system to single-user mode and you can maximize your system's uptime. The following list summarizes changes to accommodate systems that have non-global zones installed. • A new package, SUNWlucfg, is required to be installed with the other Solaris Live Upgrade packages, SUNWlur and SUNWluu. This package is required for any system, not just a system with non-global zones installed. • Creating a new boot environment from the currently running boot environment remains the same as in previous releases with one exception. You can specify a destination disk slice for a shared file system within a non-global zone. For more information, see Creating and Upgrading a Boot Environment When Non-Global Zones Are Installed (Tasks). • The lumount command now provides non-global zones with access to their corresponding file systems that exist on inactive boot environments. When the global zone administrator uses the lumount command to mount an inactive boot environment, the boot environment is mounted for non-global zones as well. See Using the lumount Command on a System That Contains Non-Global Zones. • Comparing boot environments is enhanced. The lucompare command now generates a comparison of boot environments that includes the contents of any non-global zone. See To Compare Boot Environments for a System With Non-Global Zones Installed. • Listing file systems with the lufslist command is enhanced to list file systems for both the global zone and the non-global zones. See To View the Configuration of a Boot Environment's Non-Global Zone File Systems. Upgrading and Patching Containers with Live Upgrade Solaris 10 8/07 adds the ability to use Live Upgrade tools on a system with Containers. This makes it possible to apply an update to a zoned system, e.g. updating from Solaris 10 11/06 to Solaris 10 8/07. It also drastically reduces the downtime necessary to apply some patches. The latter ability requires more explanation. An existing challenge in the maintenance of zones is patching - each zone must be patched when a patch is applied. If the patch must be applied while the system is down, the downtime can be significant. Fortunately, Live Upgrade can create an Alternate Boot Environment (ABE) and the ABE can be patched while the Original Boot Environment (OBE) is still running its Containers and their applications. After the patches have been applied, the system can be re-booted into the ABE. Downtime is limited to the time it takes to re-boot the system. An additional benefit can be seen if there is a problem with the patch and that particular application environment. Instead of backing out the patch, the system can be re-booted into the OBE while the problem is investigated. Understanding Solaris Zones and Solaris Live Upgrade The Solaris Zones partitioning technology is used to virtualize operating system services and provide an isolated and secure environment for running applications. A non-global zone is a virtualized operating system environment created within a single instance of the Solaris OS, the global zone. When you create a non-global zone, you produce an application execution environment in which processes are isolated from the rest of the system. 50
- 58. Solaris Virtualization Solaris Live Upgrade is a mechanism to copy the currently running system onto new slices. When non- global zones are installed, they can be copied to the inactive boot environment along with the global zone's file systems. • In this example of a system with a single disk, the root (/) file system is copied to c0t0d0s4. All non- global zones that are associated with the file system are also copied to s4. The /export and /swap file systems are shared between the current boot environment, bootenv1, and the inactive boot environment, bootenv2. The lucreate command is the following: # lucreate -c bootenv1 -m /:/dev/dsk/c0t0d0s4:ufs -n bootenv2 • In this example of a system with two disks, the root (/) file system is copied to c0t1d0s0. All non-global zones that are associated with the file system are also copied to s0. The /export and /swap file systems are shared between the current boot environment, bootenv1, and the inactive boot environment, bootenv2. The lucreate command is the following: # lucreate -c bootenv1 -m /:/dev/dsk/c0t1d0s0:ufs -n bootenv2 • In this example of a system with a single disk, the root (/) file system is copied to c0t0d0s4. All non- global zones that are associated with the file system are also copied to s4. The non-global zone, zone1, has a separate file system that was created by the zonecfg add fs command. The zone path is /zone1/ root/export. To prevent this file system from being shared by the inactive boot environment, the file system is placed on a separate slice, c0t0d0s6. The /export and /swap file systems are shared between the current boot environment, bootenv1, and the inactive boot environment, bootenv2. The lucreate command is the following: # lucreate -c bootenv1 -m /:/dev/dsk/c0t0d0s4:ufs -m /export:/dev/dsk/c0t0d0s6:ufs:zone1 -n bootenv2 • In this example of a system with two disks, the root (/) file system is copied to c0t1d0s0. All non-global zones that are associated with the file system are also copied to s0. The non-global zone, zone1, has a separate file system that was created by the zonecfg add fs command. The zone path is /zone1/root/ export. To prevent this file system from being shared by the inactive boot environment, the file system is placed on a separate slice, c0t1d0s4. The /export and /swap file systems are shared between the current boot environment, bootenv1, and the inactive boot environment, bootenv2. The lucreate command is the following: # lucreate -c bootenv1 -m /:/dev/dsk/c0t1d0s0:ufs -m /export:/dev/desk/c0t1d0s4:ufs:zone1 -n bootenv2 Comments on Zones and Veritas Control You need to keep the following items in mind when you install or upgrade VCS in a zone environment. • When you install or upgrade VCS using the installer program, all zones are upgraded (both global and non-global) unless they are detached and unmounted. • If you install VCS on Solaris 10 systems that run non-global zones, you need to make sure that non- global zones do not inherit the /opt directory. Run the following command to make sure that the /opt directory is not in the inherit-pkg-dir clause: # zonecfg -z zone_name info zonepath: /export/home/zone1 autoboot: false 51
- 59. Solaris Virtualization pool: yourpool inherit-pkg-dir: dir: /lib inherit-pkg-dir: dir: /platform inherit-pkg-dir: dir: /sbin inherit-pkg-dir: dir: /usr • Veritas Upgrading when the zone root is on Veritas File System shared storage The following procedures are to make one active non-global zone upgradeable with the zone root on shared storage. The corresponding non-global zones on the other nodes in the cluster are then detached from shared storage. They are detached to prevent them from being upgraded one at a time. 1. Stopping the cluster and upgrading nodeA # hastop -all 2. On nodeA, bring up the volumes and the file systems that are related to the zone root. Note For a faster upgrade, you can boot the zones to bring them into the running state. # hastop -all 3. Use the patchadd command to upgrade nodeA. # patchadd nnnnnn-nn # patchadd xxxxxx-xx . . 4. Detaching the zones on nodeB - nodeN Use a mount point as a temporary zone root directory. You then detach the non-global zones in the cluster that are in the installed state. Detach them to prevent the operating system from trying to upgrade these zones and failing. - this is from Veritas Docs; not sure about process; recomment detach on alternate global zones; but don't think the fake filesystem is needed as long as non-global zone is patches on the original host - more work needed should zone failover be a requirment for rolling upgrades; could be a possible "upgrade on attach" condition - not supported by VCS Zone Agent yet. Basic Non-Global Zone Creation SPARSE # zonecfg -z myzone zonecfg:myzone> set zonepath=/zones/myzone zonecfg:myzone> set autoboot=true zonecfg:myzone> add net zonecfg:myzone:net> set address=192.168.1.7/24 zonecfg:myzone:net> set physical=hme0 zonecfg:myzone:net> end zonecfg:myzone> add inherit-pkg-dir zonecfg:myzone:inherit-pkg-dir> set dir=/lib 52
- 60. Solaris Virtualization zonecfg:myzone:inherit-pkg-dir> end zonecfg:myzone> add inherit-pkg-dir zonecfg:myzone:inherit-pkg-dir> set dir=/platform zonecfg:myzone:inherit-pkg-dir> end zonecfg:myzone> add inherit-pkg-dir zonecfg:myzone:inherit-pkg-dir> set dir=/sbin zonecfg:myzone:inherit-pkg-dir> end zonecfg:myzone> add inherit-pkg-dir zonecfg:myzone:inherit-pkg-dir> set dir=/usr zonecfg:myzone:inherit-pkg-dir> end zonecfg:myzone> add inherit-pkg-dir zonecfg:myzone:inherit-pkg-dir> set dir=/opt/swf zonecfg:myzone:inherit-pkg-dir> end zonecfg:myzone> verify zonecfg:myzone> export Scripting Basic Non-Global Zone Creation SPARSE 1. Create the myzone.cfg script with the following basic information in it: create -b set zonepath=/zones/myzone set autoboot=true add inherit-pkg-dir set dir=/lib end add inherit-pkg-dir set dir=/platform end add inherit-pkg-dir set dir=/sbin end add inherit-pkg-dir set dir=/usr end add inherit-pkg-dir set dir=/opt/sfw end add net set address=192.168.1.7/24 set physical=hme0 end 2. Create the non-global zone configuration using the zone.cfg file # zonecfg -z secondzone -f /tmp/myzone.cfg 3. Install the Non-Global Zone # zoneadm -z myzone install 4. Boot then execute the sysidcfg through the non-global zone console The zlogin -e option allows for changing the ~. break sequence; I commonly change this due to layers of login sessions where ~. would drop connection on other terminals. 53
- 61. Solaris Virtualization # zoneadm -z myzone boot # zlogin -e @. -C myzone Using Dtrace to monitor non-global zones Current defined zone states from zone.h /* zone_status */ typedef enum { ZONE_IS_UNINITIALIZED = 0, ZONE_IS_READY, ZONE_IS_BOOTING, ZONE_IS_RUNNING, ZONE_IS_SHUTTING_DOWN, ZONE_IS_EMPTY, ZONE_IS_DOWN, ZONE_IS_DYING, ZONE_IS_DEAD } zone_status_t; Dtrace code - can be run via cron with output to a monitored file /usr/sbin/dtrace -qs BEGIN { state[0] = "Uninitialized"; state[1] = "Ready"; state[2] = "Booting"; state[3] = "Running"; state[4] = "Shutting down"; state[5] = "Empty"; state[6] = "Down"; state[7] = "Dying"; state[8] = "Dead"; } zone_status_set:entry { printf("Zone %s status %sn", stringof(args[0]->zone_name), state[args[1]]); } Example output of dtrace code above # ./zonestatus.d Zone aap status Ready Zone aap status Booting Zone aap status Running Zone aap status Shutting down Zone aap status Down Zone aap status Empty Zone aap status Dying 54
- 62. Solaris Virtualization Zone aap status Ready Zone aap status Dead Zone aap status Booting Zone aap status Running Zone aap status Shutting down Zone aap status Empty Zone aap status Down Zone aap status Dead Setup a Non-Global Zone for running Dtrace In future Solaris Express and Community Release builds (those based on Nevada b37 and higher), you can use a subset of DTrace functionality as follows: # zonecfg -z myzone zonecfg:myzone> set limitpriv=default,dtrace_proc,dtrace_user zonecfg:myzone> ^D # zoneadm -z myzone boot Using Dtrace to trace an applincation in a non-global zones One liner to trace application in a specific NGZI wanted to put a note here for myself, and for others who are looking for a way to get information about a particular executable running in a zone on their machine. While it is (to the best of my knowledge) not possible to do this from within the local zone itself, you can run dtrace from the global zone and specify the zone name and executable by using a logical AND in the predicate, like this: # dtrace -n ’syscall:::entry /zonename == “webserver” && execname == “httpd”/{ printf(”%S”, curpsinfo->pr_psargs); trace(pid) }’ 0 6485 write:entry /var/local/httpd/bin/httpd -DSSL0 12248 0 6779 llseek:entry /var/local/httpd/bin/httpd -DSSL0 12248 0 6489 close:entry /var/local/httpd/bin/httpd -DSSL0 12248 0 6789 pollsys:entry /var/local/httpd/bin/httpd -DSSL0 12248 Using Dtrace to monitor non-global zones Current defined zone states from zone.h /* zone_status */ typedef enum { ZONE_IS_UNINITIALIZED = 0, ZONE_IS_READY, ZONE_IS_BOOTING, ZONE_IS_RUNNING, ZONE_IS_SHUTTING_DOWN, ZONE_IS_EMPTY, ZONE_IS_DOWN, ZONE_IS_DYING, 55
- 63. Solaris Virtualization ZONE_IS_DEAD } zone_status_t; Dtrace code - can be run via cron with output to a monitored file /usr/sbin/dtrace -qs BEGIN { state[0] = "Uninitialized"; state[1] = "Ready"; state[2] = "Booting"; state[3] = "Running"; state[4] = "Shutting down"; state[5] = "Empty"; state[6] = "Down"; state[7] = "Dying"; state[8] = "Dead"; } zone_status_set:entry { printf("Zone %s status %sn", stringof(args[0]->zone_name), state[args[1]]); } Example output of dtrace code above # ./zonestatus.d Zone aap status Ready Zone aap status Booting Zone aap status Running Zone aap status Shutting down Zone aap status Down Zone aap status Empty Zone aap status Dying Zone aap status Ready Zone aap status Dead Zone aap status Booting Zone aap status Running Zone aap status Shutting down Zone aap status Empty Zone aap status Down Zone aap status Dead Non-Global Zone Commands Poor mans version of container migration between two or more systems. This article is an overview of how to migrate zones from one server to another. Examples will include how to simulate this within two servers and SAN or iSCSI sharing storage. 1. CLI Interaction with Non-Global Zones a. Force Attachment 56
- 64. Solaris Virtualization Used when a zone will not attach due to manifest incompatabilities such as missing patches. Buyer be ware. # zoneadm -z inactive_local_zonename attach -F b. Detach non-global zone # zoneadm -z inactive_local_zonename detach c. Dry Run for attach and detach # zoneadm -z my-zone detach -n # zoneadm -z my-zone attach -n d. Dry Run to see if a non-global zone can be moved from one system to another # zoneadm -z myzone detach -n | ssh remote zoneadm attach -n - e. Update on Attach Can be used durring round-robin upgrades or moving from one architecture to another. # zoneadm -z my-zone attach -u f. Verbose Non-Global Zone boot # zoneadm boot -- -m verbose g. Importing a Non-Global Zone on a host without the zone.xml/index definition Host1# zoneadm -z myzone halt Host1# zoneadm -z myzone detach [move storage to host2] Host2# zonecfg -z myzone "create -F -a /zone/myzone" Host2# zoneadm -z myzone attach -u 2. Creating the ZFS Storage Pool for local zone installation # zpool create zones c6t0d0 # zfs create zones/webzone # chmod go-rwx /zones/webzone 3. Create Zone “webzone” # zonecfg -z webzone webzone: No such zone configured Use 'create' to begin configuring a new zone zonecfg:webzone> create zonecfg:webzone> set zonepath=/zones/webzone zonecfg:webzone> exit # zoneadm -z webzone install # zoneadm -z webzone boot # zlogin -e @. -C webzone ## Finish the sysid questions 57
- 65. Solaris Virtualization 4. Defining default Non-Global Zone Boot Mode global# zonecfg -z myzone zonecfg:myzone> set bootargs="-m verbose" zonecfg:myzone> exit 5. Exclusive IP Mode global# zonecfg -z myzone zonecfg:myzone> set ip-type=exclusive zonecfg:myzone> add net zonecfg:myzone:net> set physical=bge1 zonecfg:myzone:net> end zonecfg:myzone> exit 6. Cap Memory for a Non-Global Zone global# zonecfg -z myzone zonecfg:myzone> add capped-memory zonecfg:myzone:capped-memory> set physical=500m zonecfg:myzone:capped-memory> end zonecfg:myzone> exit 7. Cap Swap for a Non-Global Zone global# zonecfg -z myzone zonecfg:myzone> add capped-memory zonecfg:myzone:capped-memory> set swap=1g zonecfg:myzone:capped-memory> end zonecfg:myzone> exit 8. Swap Cap for running Non-Global Zone global# prctl -n zone.max-swap -v 2g -t privileged -r -e deny -i zone myzone 9. Shared Memory Cap for Non-Global Zone global# zonecfg -z myzone zonecfg:myzone> set max-shm-memory=100m zonecfg:myzone> set max-shm-ids=100 zonecfg:myzone> set max-msg-ids=100 zonecfg:myzone> set max-sem-ids=100 zonecfg:myzone> exit 10.Dedicated CPUs Non-Global Zone After using that command, when that Container boots, Solaris: removes a CPU from the default pool assigns that CPU to a newly created temporary pool associates that Container with that pool, i.e. only schedules that Container's processes on that CPU Further, if the load on that CPU exceeds a default threshold and another CPU can be moved from another pool, Solaris will do that, up to the maximum configured amount of three CPUs. Finally, when the Container is stopped, the temporary pool is destroyed and its CPU(s) are placed back in the default pool. global# zonecfg -z myzone zonecfg:myzone> add dedicated-cpu zonecfg:myzone:dedicated-cpu> set ncpus=1-3 58
- 66. Solaris Virtualization zonecfg:myzone:dedicated-cpu> end zonecfg:myzone> exit 11.Migration is done in the following stages: a. Primary system - i. Halt the non-global zone # zlogin webzone init 0 ii. Detach the non-global zone # zoneadm -z webzone detach iii. Export the zfs pool used for the non-global zone # zpool export zones b. Failover System - i. Import the zfs pool for the non-global zone # zpool import -d /dev/dsk zones ii. Create the zone XML configuration file # zonecfg -z webzone ‘create -a /zones/webzone’ iii. Attach the non-global zone # zoneadm -z webzone attach iv. Boot the non-global zone # zoneadm -z webzone boot Non-Global Zones and Stock VCS Zone Agent Configuration of a Non-Global Zone into a VCS Service Group; note that if the service group does not exist, this will create it. # hazonesetup <SG> <resname> <zonename> <passwd> <systems> VCS Non-Global Zone verification This will check the following: Checks is the service group were the local zone resides is compliant; Checks if the systems hosting the service group have the required operating system to run local zones; Checks if the dependencies of the Zone resource are correct. # hazoneverify <SG> Table 5.3. VCS Command Line Access - Global vs. Non-Global Zones Common Commands Global Zone Non-Global Zone hastatus -sum yes yes hares -state yes yes 59
- 67. Solaris Virtualization Common Commands Global Zone Non-Global Zone hagrp -state yes yes halogin yes no hagrp -online/-offline yes no hares -online/-offline yes no hares -clear yes no Non-Global Zones and Custom VCS Application Agent 1. Custom Zone Agent Scripts a. Zone Monitor Script # StartProgram = "/opt/VRTSvcs/bin/myzone/start ZNAME ZHOME" # MonitorProgram = "/opt/VRTSvcs/bin/myzone/monitor ZNAME" # StopProgram = "/opt/VRTSvcs/bin/myzone/stop ZONENAME ZNAME" # Monitor Code VCSHOME="${VCS_HOME:-/opt/VRTSvcs}” . $VCSHOME/bin/ag_i18n_inc.sh ZONE=$1 SYS=`cat /var/VRTSvcs/conf/sysname` INDEX=/etc/zones/index ZONE_XML=/etc/zones/${ZONE}.xml if [ ! -f $ZONE_XML ] ; then VCSAG_LOG_MSG "N" "ZONE: $ZONE Configuration file: $ZONE_XML not found on $SYS. Must run failover test before being considered production ready" 1 "$ResName" fi STATE=`grep ^$ARG1':' $INDEX | awk '{print $2}'` if [ -z $STATE ] ; then VCSAG_LOG_MSG "N" "ZONE: $ZONE is not in $INDEX, and was never imported on $SYS. Must run failover test before being considered production ready" 1 "$ResName" # Exit offline exit 100 fi case "$STATE" in running) 60
- 68. Solaris Virtualization # Zone is running exit 110 configured) # Zone Imported but not running exit 100 installed) # Zone had been configured on this system, but is not # imported or running exit 100 *) esac b. Zone StartProgram Script ######################### ## StartProgram ######################### VCSHOME="${VCS_HOME:-/opt/VRTSvcs}” . $VCSHOME/bin/ag_i18n_inc.sh $ZONE=$1 $ZONE_HOME=$2 # This start program forces an attach on the zone, just # incase the xml file is not updated SYS=`cat /var/VRTSvcs/conf/sysname` zonecfg -z $ZONE "create -F -a $ZONE_HOME" S=$? if [ $S -eq 0 ] ; then # Creation was a success, starting zone boot VCSAG_LOG_MSG "N" "ZONE: $ZONE Success in attaching to system $SYS" 1 "$ResName" VCSAG_LOG_MSG "N" "ZONE: $ZONE Starting Boot sequence on $SYS" 1 "$ResName" zoneadm -z $ZONE boot ZB=$? if [ $ZB -eq 0 ] ; then VCSAG_LOG_MSG "N" "ZONE: $ZONE Boot command successful $SYS" 1 "$ResName" else VCSAG_LOG_MSG "N" "ZONE: $ZONE Boot command failed on $SYS" 1 "$ResName" fi else # Creation Failed VCSAG_LOG_MSG "N" "ZONE: $ZONE Attach Command failed on $SYS" 1 "$ResName" fi 61
- 69. Solaris Virtualization c. Zone StopProgram Script ########################## ## StopProgram ########################## VCSHOME="${VCS_HOME:-/opt/VRTSvcs}” . $VCSHOME/bin/ag_i18n_inc.sh SYS=`cat /var/VRTSvcs/conf/sysname` VCSAG_LOG_MSG "N" "ZONE: $ZONE Shutting down $SYS" 1 "$ResName" $ZONE=$1 $ZONE_HOME=$2 zlogin -z $ZONE init 0 ZSD=$? if [ $ZSD -eq 0 ] ; then # Shutdown command sent successful VCSAG_LOG_MSG "N" "ZONE: $ZONE Success in zlogin shutdown $SYS" 1 "$ResName" VCSAG_LOG_MSG "N" "ZONE: $ZONE Going through init 0 on $SYS, expect normal shutdown delay" 1 "$ResName" else # zlogin shutdown Failed VCSAG_LOG_MSG "N" "ZONE: $ZONE Failed zlogin shutdown command on $SYS" 1 "$ResName" fi STATE=`grep ^$ARG1':' $INDEX | awk '{print $2}'` while [ "$STATE" == "running" ] ; do sleep 4 STATE=`grep ^$ZONE':' $INDEX | awk '{print $2}'` done VCSAG_LOG_MSG "N" "ZONE: $ZONE Detach In Progress on $SYS" 1 "$ResName" zoneadm -z $ZONE detach sleep 2 while [ "$STATE" == "configured" ] ; do sleep 4 STATE=`grep ^$ZONE':' $INDEX | awk '{print $2}'` done VCSAG_LOG_MSG "N" "ZONE: $ZONE Detach Is Complete $SYS" 1 "$ResName" exit 62
- 70. Solaris Virtualization 63
- 71. Chapter 6. Solaris WANBoot General Overview for Dynamic Wanboot POC This proof of concept is designed to show how, through the use of a jumpstart dynamic profiles and Client-id wanboot parameters, client specific configurations can be pre-defined and used in a way that allows the administrator to "fire and forget". Thus avoiding the need to input frequent, redundant, system configuration information during the installation process. The intent of this lightweight proof of concept is to use a methodology that can be integrated into new builds, capturing and leveraging information on the current host during clean upgrades, and include the ability to pre-define administration and default selected product install tasks such as a select a veritas product and create a veritas response file for configuration. POC Goals • Simple, extendable, flexable • One time definition of system id information - sysidcfg • Admins ability to pre-select OS Install Disk (secondary mirror) and or ability to set based on script conditions • Configuration and Deployment condusive with management initerface • Adaptable to allow for additional install scripts and products; including configuration tasks for those products • Minimize any existing speciallized code modifications • Minimize any rules.ok generation and updates • Ability to define and pass variables set during the wanboot cliend definition process throughout different stages of the install. • Methodology that allows for 'collection' of configuration information from an existing server (can be used to upgrade to new OS version while preserving existing scripts and configurations) • Methodology that allows for additional products to be installed and configured - selection prior to install time. • Can be integrated with existing wanboot methods and scripts POC Out of Scope • Creation of GUI and CLI for sysidcgf and boot environment generation • Code Error checking • Inclusion of additional product installation and configuration scripts • Inclusion of existing pre and post jumpstart scripts 64
- 72. Solaris WANBoot Current challanges with wanboot marked for resolution • Users have to enter configuration information several times during the install process • The configuration information entered during different stages of the install process is the same as the previous stage. • The sysidcfg information is not passed from one stage to the next • SI_ variables are defined as needed and only during latter stages of the install • Because information must be re-entered at different stages the install can not currently be a "fire and forget" POC Wanboot Configuration Highlights • Use /etc/netboot/$SUBNET/$HOSTID to store the host specifc wanboot.conf and system.conf - allowing for specific host based sysidcfg • Specify client-id at OBP where Client-ID = uppercase HOSTID • Use dynamic profile that sources a boot.env file specific to each host - allows for definition of hard drive to install to • Use wget installed into miniroot to download boot.env into /tmp/install_config/ • Wanboot process should be dynamic and not needing frequent check rules generation. • Integration with current scripts after modification Next Steps 1. Develop a Client Management Interface for Product Selection and Configuration 2. Create script collections for various products selected through Client Management Interface 3. Implement a 'upgrade existing host' script process for integration Configuration Steps Table 6.1. Wanboot Server Client Details Server Value Wanboot Server 192.168.15.89 Target Client Hostname dom2 Target Client Host ID 84F8799D Target Client Install Disk c0d0 Server Side Configuration Process 65
- 73. Solaris WANBoot # cd /etc/apache2 # cp httpd.conf-example httpd.conf # svcadm enable apache2 ### Create the /etc/netboot directory structure ### # mkdir /etc/netboot # mkdir /etc/netboot/192.168.15.0 # cd /var/apache2/htdocs # mkdir config # mkdir flar # mkdir wanboot10 ### Create directory for each node to ## be booted that contains the sysidcfg ### # mkdir /var/apache2/htdocs/config/client-sysidcfg/dom2 ### Install WANBOOT ### # cd /mnt/Solaris_10/Tools # ./setup_install_server -w /var/apache2/htdocs/wanboot10/wpath /var/apache2/htdocs/wanboot10/ipath ### Copy stock jumpstart rules ### # cd /mnt/Solaris_10/Misc/jumpstart_sample/ # mkdir /var/apache2/htdocs/config/js-rules # cp -r * /var/apache2/htdocs/config/js-rules ### Install wanboot cgi to apache2 cgi-bin directory ### # cd /usr/lib/inet/wanboot/ # cp bootlog-cgi wanboot-cgi /var/apache2/cgi-bin/ # cd /var/apache2/cgi-bin # cp wanboot-cgi wanboot.cgi ### Upload wanboot and miniroot ### # cd /mnt/Solaris_10/Tools/Boot/platform/sun4v/ # cp wanboot /var/apache2/htdocs/wanboot/sun4v.wanboot # cd /var/apache2/htdocs/wanboot10/wpath # cp miniroot .. ### Add wget to /usr/sfw/bin in the miniroot # lofiadm -a /var/apache2/htdocs/wanboot10/miniroot /dev/lofi/1 # mount /dev/lofi/1 /mnt # mkdir /mnt/usr/sfw/bin # cp /usr/sfw/bin/wget /mnt/usr/sfw/bin/ 66
- 74. Solaris WANBoot # umount /mnt # lofiadm -d /dev/lofi/1 File Contents /etc/netboot/192.168.15.0/84F8799D/system.conf SsysidCF=http://192.168.15.89/config/js-rules/dom2 SjumpsCF=http://192.168.15.89/config/js-rules /etc/netboot/192.168.15.0/84F8799D/wanboot.conf boot_file=/wanboot10/sun4v.wanboot root_server=http://192.168.15.89/cgi-bin/wanboot-cgi root_file=/wanboot10/miniroot server_authentication=no client_authentication=no system_conf=system.conf boot_logger=http://192.168.15.89/cgi-bin/bootlog-cgi /var/apache2/htdocs/config/js-rules/rules karch sun4v dynamic_pre.sh = - /var/apache2/htdocs/config/js-rules/dynamic_pre.sh #!/bin/sh HOST_NAME=`hostname` /usr/sfw/bin/wget -P/tmp/install_config/ http://192.168.15.89/config/js-rules/${HOST_NAME}/boot.env sleep 2 . /tmp/install_config/boot.env echo "Installing into: ${DY_ROOTDISK}" echo "dy install_type set to: ${dy_install_type}" echo "dy archive_location set to: ${dy_archive_location}" sleep 5 echo "install_type ${dy_install_type}" > ${SI_PROFILE} echo "archive_location ${dy_archive_location}" >>${SI_PROFILE} echo "partitioning explicit">> ${SI_PROFILE} echo "filesys ${DY_ROOTDISK}.s1 1024 swap" >> ${SI_PROFILE} echo "filesys ${DY_ROOTDISK}.s0 free / logging" >> ${SI_PROFILE} /var/apache2/htdocs/config/js-rules/$HOSTNAME/boot.env DY_ROOTDISK=c0d0 dy_install_type=flash_install dy_archive_location=http://192.168.15.89/flar/sun4v_sol10u6.flar export DY_ROOTDISK dy_install_type dy_archive_location /var/apache2/htdocs/config/js-rules/$HOSTNAME/sysidcfg 67
- 75. Solaris WANBoot network_interface=vnet0 { primary hostname=dom2 ip_address=192.168.15.88 netmask=255.255.255.0 protocol_ipv6=no default_route=192.168.15.1 } timezone=US/Eastern system_locale=C terminal=dtterm root_password=pm/sEGrVL9KT6 timeserver=localhost name_service=none nfs4_domain=dynamic security_policy=none Client OBP Boot String Example ok> setenv network-boot-arguments host-ip=192.168.15.88, subnet-mask=255.255.255.0,hostname=dom2, file=http://192.168.15.89/cgi-bin/wanboot-cgi, client-id=84F8799D ok> boot net - install 68
- 76. Chapter 7. Solaris 10 Live Upgrade Solaris 8 to Solaris 10 U6 Work A Round This article describes the process for using Solaris Live Upgrade to upgrade from Solaris 8 to Solaris 10 05/08 or later releases. The Solaris 10 05/08 release media (and subsequent Solaris 10 Updates) were compressed using a different compression utility than previous Solaris 10 Releases, which all used bzip2 compression. As a result of this, in order to upgrade to Solaris 05/08 (or later Solaris Releases) using Solaris Live Upgrade, the live system (on which luupgrade is actually running), must have p7zip installed. p7zip was backported to Solaris 9 in patch format, but for Solaris 8 there is no similar patch available. To upgrade from Solaris 8 to Solaris 10 05/08 (or later Solaris Releases) using Live Upgrade, a special download (s8p7zip.tar.gz) has been made available. This file is attached to this solution (see below). The download consists of 3 Sun FreeWare packages, a wrapper script and an installer script. 1. . Download the file s8p7zip.tar.gz and uncompress # gunzip s8p7zip.tar.gz 2. Untar the file s8p7zip.tar # tar xvpfs8p7zip.tar s8p7zip/ s8p7zip/install.sh s8p7zip/p7zip s8p7zip/README s8p7zip/SMClgcc.Z s8p7zip/SMCmktemp.Z s8p7zip/SMCp7zip.Z s8p7zip/LEGAL_LICENSE.TXT 3. When s8p7zip.tar.gz is unpacked, change in to the s8p7zip directory and run the install.sh script # cd s8p7zip ; ./install.sh installing SMCp7zip installing SMClgcc installing SMCmktemp Testing p7zip utility ... Test successful. p7zip utility has been installed successfully. Three packages are installed into /opt/SMCp7zip: * SMClgcc * SMCmktemp * SMCp7zip Should the following result in error, check to make sure the packages are installed correctly. $ luupgrade -u -n sol10 -l /var/tmp/liveupgrade/LU.upgrade.error.log -o /var/tmp/liveupgrade/ LU.upgrade.out.log -s /net/114.19.9.57/jumpstart/solaris10 -a /net/114.19.9.57/jumpstart/sol10_wanboot/ htdocs/flashdir/sol10_sun4u.flar 69
- 77. Solaris 10 Live Upgrade Discovering physical storage devices Discovering logical storage devices Cross referencing storage devices with boot environment configurations Determining types of file systems supported Validating file system requests Preparing logical storage devices Preparing physical storage devices Configuring physical storage devices Configuring logical storage devices INFORMATION: Removing invalid lock file. Analyzing system configuration. No name for current boot environment. Current boot environment is named <sol8>. Creating initial configuration for primary boot environment <sol8>. WARNING: The device </dev/md/dsk/d0> for the root file system mount point </> is not a physical device. WARNING: The system boot prom identifies the physical device </dev/dsk/c1t0d0s0> as the system boot device. Is the physical device </dev/dsk/c1t0d0s0> the boot device for the logical device </dev/md/dsk/d0>? (yes or no) yes INFORMATION: Assuming the boot device </dev/dsk/c1t0d0s0> obtained from the system boot prom is the physical boot device for logical device </dev/md/dsk/d0>. The device </dev/dsk/c1t0d0s0> is not a root device for any boot environment; cannot get BE ID. PBE configuration successful: PBE name <sol8> PBE Boot Device </dev/dsk/c1t0d0s0>. Comparing source boot environment <sol8> file systems with the file system(s) you specified for the new boot environment. Determining which file systems should be in the new boot environment. Updating boot environment description database on all BEs. Searching /dev for possible boot environment filesystem devices Template entry /:/dev/dsk/c1t1d0s0:ufs skipped. Template entry /var:/dev/dsk/c1t1d0s5:ufs skipped. Template entry /opt:/dev/dsk/c1t1d0s6:ufs skipped. Template entry /opt/patrol:/dev/dsk/c1t1d0s4:ufs skipped. Template entry -:/dev/dsk/c1t1d0s1:swap skipped. luconfig: ERROR: Template filesystem definition failed for /, all devices are not applicable.. ERROR: Configuration of boot environment failed. Review current root disk and mirror Assuming that the root disk is built with SVM (Solstice Disk Suite) 1. Show metavolumes and disks # metastat -c d101 m 2.0GB d11 d21 d11 s 2.0GB c0d0s1 70
- 78. Solaris 10 Live Upgrade d21 s 2.0GB c0d1s1 d104 m 10GB d1 d24 d1 s 10GB c0d0s4 d24 s 10GB c0d1s4 d105 m 9.7GB d15 d25 d15 s 9.7GB c0d0s5 d25 s 9.7GB c0d1s5 d103 m 4.0GB d0 d23 d0 s 4.0GB c0d0s3 d23 s 4.0GB c0d1s3 d100 m 10GB d10 d20 d10 s 10GB c0d0s0 d20 s 10GB c0d1s0 2. Check mounted filesystems and swap # df -h | grep md / (/dev/md/dsk/d100 ):13535396 blocks 1096760 files /var (/dev/md/dsk/d103 ): 6407896 blocks 479598 files /export (/dev/md/dsk/d104 ):20641888 blocks 1246332 files /zones (/dev/md/dsk/d105 ):19962180 blocks 1205564 files # grep swap /etc/vfstab /dev/md/dsk/d101 - - swap - no - Create Alternate Boot Device - ZFS Note that when a filesystem is not specified in the lucreate command it is assumed shared Make sure that the alternate boot disk has the same partition layout and has been labled 1. Create a ZFS ABE on current rpool # lucreate -c svn110 -n os200906 # lustatus Boot Environment Is Active Active Can Copy Name Complete Now On Reboot Delete Status -------------------------- -------- ------ --------- ------ ---------- svn110 yes yes yes no - os200906 yes no no yes - 2. Install into new ABE # luupgrade -u -n os200906 -s /path/to/mnted/os/dvd Create Alternate Boot Device - SVM Note that when a filesystem is not specified in the lucreate command it is assumed shared Make sure that the alternate boot disk has the same partition layout and has been labled 1. Make sure that the partition layout is the same 71
- 79. Solaris 10 Live Upgrade # prtconf /dev/rdsk/c0d0s2 | fmrhard -s - /dev/rdsk/c0d1s2 2. Create OS Image with same FS Layout ; Have lucreate split mirror for you. # lucreate -n abe -m /:/dev/md/dsk/d200:ufs,mirror -m /:/dev/dsk/c0d1s0:detach,attach,preserve -m /var:/dev/md/dsk/d210:ufs,mirror -m /var:/dev/dsk/c0d1s3:detach,attach,preserve -m /zones:/dev/md/dsk/d220:ufs,mirror -m /zones:/dev/dsk/c0d1s5:detach,attach,preserve -m /export:/dev/md/dsk/d230:ufs,mirror -m /export:/dev/dsk/c0d1s4:detach,attach,preserve Patch, Adding Packages, setting boot environment and Installation examples Note that when a MD filesystem is not specified in the lucreate command it is assumed shared Make sure that the alternate boot disk has the same partition layout and has been labled Warning When adding patches to ABE bad patch script permissions could prevent the patch from being added; look for errors around permissions such as: /var/sadm/spool/lu/120273-25/postpatch - simple chmod will fix and allow for patch installation ; recommend scripting check before adding patches 1. PATCHING - For Solaris 10 '*' works out patch order - otherwise patch_order file can be passed to it. # luupgrade -t -n abe -s /var/tmp/patches '*' 2. PATCHING - For pre-solaris 10 needing patch order file # luupgrade -t -n abe -s /path/to/patches -O "-M /path/to/patch patch_order_list" 3. Adding Additional Packages to alternate boot environment # luupgrade -p -n abe -s /export/packages MYpkg 4. Removing packages from ABE # luupgrade -P -n abe MYpkg 5. Mounting Alternate Boot Environment for modifications # lumount abe /mnt 6. Unmount Alternate Boot Environment # luumount abe 7. Enable ABE 72
- 80. Solaris 10 Live Upgrade # luactivate abe 8. Show Boot Environment Status # lustatus Boot Environment Is Active Active Can Copy Name Complete Now On Reboot Delete Status ----------------- -------- ------ --------- ------ --------- disk_a_S7 yes yes yes no - disk_b_S7db yes no no no UPGRADING disk_b_S8 no no no no - S9testbed yes no no yes - 9. Filesystem merger example Instead of using the preceding command to create the alternate boot environment so it matches the current boot environment, the following command joins / and /usr, assuming that c0t3d0s0 is partitioned with sufficient space: # lucreate -c "Solaris_8" -m /:/dev/dsk/c0t3d0s0:ufs -m /usr:merged:ufs -m /var:/dev/dsk/c0t3d0s4:ufs -n "Solaris_9" 10.example patch order # luupgrade -t -n "Solaris_9" -s /install/data/patches/SunOS-5.9-sparc/recommended -O "-M /install/data/patches/SunOS-5.9-sparc/recommended patch_order" 11.Example with splitoff This next example would instead split /opt off of /, assuming that c0t3d0s5 is partitioned with sufficient space: # lucreate -c "Solaris_8" -m /:/dev/dsk/c0t3d0s0:ufs -m /usr:/dev/dsk/c0t3d0s3:ufs -m /var:/dev/dsk/c0t3d0s4:ufs -m /opt:/dev/dsk/c0t3d0s5:ufs -n "Solaris_9" 12.Using luupgrade to Upgrade from a JumpStart Server This next example shows how to upgrade from the existing Solaris 8 alternate boot environment to Solaris 9 by means of an NFS-mounted JumpStart installation. First create a JumpStart installation from CD-ROM, DVD, or an ISO image as covered in the Solaris 9 Installation Guide. The JumpStart installation in this example resides in /install on the server js-server. The OS image itself resides in / install/cdrom/SunOS-5.9-sparc. The profiles for this JumpStart installation dwell in /install/jumpstart/ profiles/ in a subdirectory called liveupgrade. Within this directory, the file js-upgrade contains the JumpStart profile to upgrade the OS and additionally install the package SUNWxwice: install_type upgrade package SUNWxwice add On the target machine, mount the /install partition from js-server and run luupgrade, specifying the Solaris_9 alternate boot environment as the target, the OS image location, and the JumpStart profile: 73
- 81. Solaris 10 Live Upgrade # mkdir /install # mount -o ro js-server:/install /install # luupgrade -u -n "Sol_9" -s /install/cdrom/SunOS-5.9-sparc - -j /install/jumpstart/profiles/liveupgrade/js-upgrade 74
- 82. Chapter 8. Solaris and Linux General Information Patch Database Information 1. Linux RPM Commands Files from what package? # rpm -qf /usr/bin/mysql mysql-3.23.52-3 Uninstall RPM Package # rpm -e ems Upgrade RPM # rpm -Uvh ems-1.0-2.i386.rpm Install RPM # rpm -ivh ems-2.0-4.i386.rpm Query all RPM packages # rpm -qa Query specific RPM package # rpm -q ems 2. Solaris pkg notes # pkgchk -l -p /path/to/file # pkgchk -l SUNWaudd | grep Pathname Pathname: /kernel Pathname: /kernel/drv Pathname: /kernel/drv/audio1575.conf Pathname: /kernel/drv/audiocs.conf Pathname: /kernel/drv/audioens.conf Pathname: /kernel/drv/audiots.conf Pathname: /kernel/drv/sparcv9 Pathname: /kernel/drv/sparcv9/audio1575 Pathname: /kernel/drv/sparcv9/audiocs Pathname: /kernel/drv/sparcv9/audioens Pathname: /kernel/drv/sparcv9/audiots Pathname: /kernel/drv/sparcv9/dbri Pathname: /kernel/misc Pathname: /kernel/misc/sparcv9 Pathname: /kernel/misc/sparcv9/amsrc1 Pathname: /kernel/misc/sparcv9/amsrc2 Pathname: /kernel/misc/sparcv9/audiosup 75
- 83. Solaris and Linux General Information Pathname: /kernel/misc/sparcv9/diaudio Pathname: /kernel/misc/sparcv9/mixer SSH Keys Common issues: 1. Permissions on .ssh 2. Hostnames for multiple interfaces ssh-keygen -t dsa scp ~/.ssh/id_dsa.pub burly:.ssh/authorized_keys2 ssh-agent sh -c 'ssh-add < /dev/null && bash' RHEL 5.2 NIS Client Common issues: 1. Edit /etc/yp.conf domain dynlab.net server infsrv 2. Update authconfig # authconfig --update --enablenis --nisdomain=dynlab.net --nisserver=infsrv Stopping portmap: [ OK ] Starting portmap: [ OK ] Binding to the NIS domain: [ OK ] 3. Update /etc/nsswitch.conf # authconfig --update --enablenis --nisdomain=dynlab.net --nisserver=infsrv Stopping portmap: [ OK ] Starting portmap: [ OK ] Binding to the NIS domain: [ OK ] Redhat Proc FS Tricks Force a panic on RHEL Used for testing H/A times. Note that there is a 10-20 second overhead. # echo c > /proc/sysrq-trigger Adjust swap of processes Default value is 60, 0 = try hard not to swap, 100 = swap everything possible # echo 60 > /proc/sys/vm/swappiness 76
- 84. Solaris and Linux General Information iSCSI Notes - RHEL 53 Target SOL 10U6 Initiator Note This example should not imply supportability by Sun Microsystems. OS: RHEL5.3 iSCSI Target; Solaris 10 U6 LDOM initiator Configuring iSCSI Target Server on RHEL 5.3 - original doc located at http://pitmanweb.com/blog/index.php? blog=2&title=linux_serve_iscsi_from_redhat_el5_rhel5&more=1&c=1&tb=1&pb=1 Side Note: RHEL 5.3 knowledge-base indicates the existence of the TGT framework and a tgtadm command. This is part of the “RHEL Cluster-Storage” Channel, which I do not have access too. Therefore I ended up using the iscsitarget-0.4.15.tar.gz referenced in the doc link above. 1. RHEL 5.3 Target Configuration Commands: # cd /usr/local/src ## wget easynews.dl.sourceforge.net/sourceforge/iscsitarget/ iscsitarget-0.4.15.tar.gz# # tar zxvf iscsitarget-0.4.15.tar.gz # # cd iscsitarget-0.4.15# # make# # make install /etc/ietd.conf iSNSServer IP_OF_INTERFACE_TO_SHARE_OVER# Target iqn.2008-02.com.domain:storage.disk2.host.domain# Lun 0 Path=/dev/sdb,Type=blockio# MaxConnections 2# /etc/initiators.deny. ALL ALL # /etc/initiators.allow iqn.2008-02.com.domain:storage.disk2.host.domain HOST_ONE_IP, HOST_TWO_IP # /etc/init.d/iscsi-target start# # chkconfig –levels 345 iscsi-target on 2. Solaris 10 U6 Initiator Configuration Commands: # svcadm enable iscsi_initiator# # iscsiadm add static-config iqn.2008-02.com.domain:storage.disk2.host.domain, IP_OF_TARGET_HOST:3260 # devfsadm -c iscsi 77
- 85. Solaris and Linux General Information Setup Linux NIC Bonding 1. Add bond0 to the /etc/modprobe conf file alias eth0 e1000 # Intel GigE (pci) port 1 alias eth1 e1000 # Intel GigE (pci) port 2 alias bond0 bonding # Kernel nic bonding driver alias bond1 bonding # Another bonded interface options bond0 max_bonds=2 miimon=100 mode=1 # 100ms fail-over timer. Mode 1 = Active/Backup options bond1 miimon=100 mode=1 # Same for bond1 2. Manually load the bond module mode= — Specifies one of four policies allowed for the bonding module. Acceptable values for this parameter are: # 1 — Sets an active-backup policy for fault tolerance. Transmissions are received and sent out via the first available bonded slave interface. Another bonded slave interface is only used if the active bonded slave interface fails. # 2 — Sets an XOR (exclusive-or) policy for fault tolerance and load balancing. Using this method, the interface matches up the incoming request's MAC address with the MAC address for one of the slave NICs. Once this link is established, transmissions are sent out sequentially beginning with the first available interface. # 3 — Sets a broadcast policy for fault tolerance. All transmissions are sent on all slave interfaces. # 4 — Sets an IEEE 802.3ad dynamic link aggregation policy. Creates aggregation groups that share the same speed and duplex settings. Transmits and receives on all slaves in the active aggregator. Requires a switch that is 802.3ad compliant. # 5 — Sets a Transmit Load Balancing (TLB) policy for fault tolerance and load balancing. The outgoing traffic is distributed according to the current load on each slave interface. Incoming traffic is received by the current slave. If the receiving slave fails, another slave takes over the MAC address of the failed slave. # 6 — Sets an Active Load Balancing (ALB) policy for fault tolerance and load balancing. Includes transmit and receive load balancing for IPV4 traffic. Receive load balancing is achieved through ARP negotiation. /sbin/insmod bond<N> <parameter=value> 3. Update /etc/sysconfig/network-scripts/ You need the following files in /etc/sysconfig/network-scripts/ : ifcfg-bond0 ifcfg-eth0 ifcfg-eth1 ifcfg-eth0 and ifcfg-eth1 should look similar to the following: DEVICE=eth0 78
- 86. Solaris and Linux General Information USERCTL=no ONBOOT=yes MASTER=bond0 SLAVE=yes BOOTPROTO=none MII_NOT_SUPPORTED=yes The DEVICE= section should reflect the interface the file relates to (ifcfg-eth1 should have DEVICE=eth1). The MASTER= section should indicate the bonded interface to be used. Assign both e1000 devices to bond0.The bond0 file contains the actual IP address information: DEVICE=bond0 IPADDR=192.168.1.1 NETMASK=255.255.255.0 ONBOOT=yes BOOTPROTO=none USERCTL=no MII_NOT_SUPPORTED=yes 4. Restart network services # service network restart Linux TCP sysctl settings Based on the settings below it would appear that the net.core.wmem_default and net.core.wmem_max values overwrite the default and max values in net.ipv4.tcp_wmem, the same can be said for net.core.rmem_default and net.core.rmem_max. So if you had defined the following (This is just hypothetical) net.core.rmem_default = 262144 net.core.rmem_max = 262144 net.core.wmem_default = 262144 net.core.wmem_max = 262144 net.ipv4.tcp_rmem = 4096 16384 131072 net.ipv4.tcp_rmem = 4096 87380 174760 The default and max settings in net.ipv4.tcp_rmem would be overwritten with 262144 and the default and max settings in net.ipv4.tcp_rmem would be overwritten with 262144. So the net.ipv4 settings are not needed unless you wanted to define higher TCP settings than what you defined in the net.core settings. This may explain why Oracle does not recommend them under normal circumstances. 1. /proc/sys/net/ipv4/tcp_wmen - net.ipv4.tcp_wmem net.ipv4.tcp_wmem deals with per socket memory usage for autotuning. The first value is the minimum number of bytes allocated for the socket's send buffer. The second value is the default (overridden by wmem_default) to which the buffer can grow under non-heavy system loads. The third value is the maximum send buffer space (overridden by wmem_max) 2. /proc/sys/net/ipv4/tcp_rmen - net.ipv4.tcp_rmem net.ipv4.tcp_rmem refers to receive buffers for autotuning and follows the same rules as tcp_wmem, meaning the second value is the default (overridden by rmem_default) The third value is the maximum (overridden by rmem_max) 79
- 87. Solaris and Linux General Information 3. /proc/sys/net/ipv4/ip_local_port_range - net.ipv4.ip_local_port_range Defines the local port range that is used by TCP and UDP to choose the local port. The first number is the first, the second the last local port number. The default value depends on the amount of memory available on the system: > 128MB 32768 - 61000, < 128MB 1024 - 4999 or even less. This number defines number of active connections, which this system can issue simultaneously to systems not supporting TCP extensions (timestamps). With tcp_tw_recycle enabled, range 1024 - 4999 is enough to issue up to 2000 connections per second to systems supporting timestamps. Linux Dynamic SAN HBA Scan The issue we find is that it scans the current channel just fine and brings in the new LUN’s but if you are adding a new array it never seems to see the new LUN’s and a reboot or reload of the driver is required. Here are the notes we use on this. Scan BUS for new LUN's echo 1 > /sys/class/fc_host/host0/issue_lip echo '- - -' > /sys/class/scsi_host/host0/scan echo 1 > /sys/class/fc_host/host1/issue_lip echo '- - -' > /sys/class/scsi_host/host1/scan partprobe cat /proc/scsi/scsi Check HBA Link state and Port state cat /sys/class/scsi_host/host*/state cat /sys/class/fc_host/host*/port_state View WWN of Adapter cat /sys/class/fc_host/host*/port_name View WWN of FA to verify you are connected to redundant FA’s cat /sys/class/fc_remote_ports/rport*/node_name cat /sys/class/fc_remote_ports/rport*/port_id Manually add and remove SCSI disks by echoing the /proc or /sys filesystem You can use the following commands to manually add and remove SCSI disk. Note In the following command examples, H, B, T, L, are the host, bus, target, and LUN IDs for the device. You can unconfigure and remove an unused SCSI disk with the following command: echo "scsi remove-single-device H B T L" > /proc/scsi/scsi 80
- 88. Solaris and Linux General Information If the driver cannot be unloaded and loaded again, and you know the host, bus, target and LUN IDs for the new devices, you can add them through the /proc/scsi/scsi file using the following command: echo "scsi add-single-device H B T L" > /proc/scsi/scsi For Linux 2.6 kernels, devices can also be added and removed through the /sys filesystem. Use the following command to remove a disk from the kernel’s recognition: echo “1” > /sys/class/scsi_host/hostH/device/H:B:T:L/delete or, as a possible variant on other 2.6 kernels, you can use the command: echo “1” > /sys/class/scsi_host/hostH/device/targetH:B:T/H:B:T:L/delete To reregister the disk with the kernel use the command echo “B T L” > /sys/class/scsi_host/hostH/scan Note The Linux kernel does not assign permanent names for the fabric devices in the /dev directory. Device file names are assigned in the order in which devices are discovered during the bus scanning. For example, a LUN might be /dev/sda. After a driver reload, the same LUN might become /dev/sdce. A fabric reconfiguration might also result in a shift in the host, bus, target and LUN IDs, which makes it unreliable to add specific devices through the /proc/scsi/scsi file. Solaris 10 - Mapping a process to a port #!/bin/ksh # # find from a port the pid that started the port # line='------------------------------------------' pids=`/usr/bin/ps -ef | sed 1d | awk '{print $2}'` # Prompt users or use 1st cmdline argument if [ $# -eq 0 ]; then read ans?"Enter port you like to know pid for: " else ans=$1 fi # Check all pids for this port, then list that process for f in $pids do /usr/proc/bin/pfiles $f 2>/dev/null | /usr/xpg4/bin/grep -q "port: $ans" if [ $? -eq 0 ] ; then echo "$linenPort: $ans is being used by PID: c" 81
- 89. Solaris and Linux General Information /usr/bin/ps -o pid -o args -p $f | sed 1d fi done exit 0 Network and Services Tasks for Linux 1. List what run levels start what services #chkconfig --list | grep on amd 0:off 1:off 2:off 3:off 4:on 5:on 6:off apmd 0:off 1:off 2:on 3:off 4:on 5:off 6:off arpwatch 0:off 1:off 2:off 3:off 4:off 5:off 6:off atd 0:off 1:off 2:off 3:on 4:on 5:on 6:off autofs 0:off 1:off 2:off 3:off 4:off 5:off 6:off named 0:off 1:off 2:off 3:off 4:off 5:off 6:off bootparamd 0:off 1:off 2:off 3:off 4:off 5:off 6:off keytable 0:off 1:off 2:on 3:on 4:on 5:on 6:off crond 0:off 1:off 2:on 3:on 4:on 5:on 6:off syslog 0:off 1:off 2:on 3:on 4:on 5:on 6:off netfs 0:off 1:off 2:off 3:on 4:on 5:on 6:off network 0:off 1:off 2:on 3:on 4:on 5:on 6:off 2. Change RedHat hostname # cd /etc/sysconfig/ # vi network HOSTNAME=newhostname # hostname newhostname # service network restart 3. Get NIC Information # ethtool eth0 Settings for eth0: Supported ports: [ TP MII ] Supported link modes: 10baseT/Half 10baseT/Full 100baseT/Half 100baseT/Full Supports auto-negotiation: Yes Advertised link modes: 10baseT/Half 10baseT/Full 100baseT/Half 100baseT/Full Advertised auto-negotiation: Yes Speed: 100Mb/s Duplex: Full Port: MII PHYAD: 32 Transceiver: internal Auto-negotiation: on 82
- 90. Solaris and Linux General Information Supports Wake-on: pumbg Wake-on: d Current message level: 0x00000007 (7) Link detected: yes 4. Change Duplex with ethtool and or mii-tool # mii-tool -F 100baseTx-HD # mii-tool -F 10baseT-HD # ethtool -s eth0 speed 100 duplex full # ethtool -s eth0 speed 10 duplex half Hardening Linux 1. Restrict SU access to accounts through PAM and Group Access # groupadd rootmembers # groupadd oraclemembers # groupadd postgresmembers # usermod -G rootmembers adminuser1 # usermod -G oraclemembers oracleuser1 # usermod -G postgresmembers postgresuser1 /etc/pam d/su auth sufficient /lib/security/$ISA/pam_stack.so service=su-root-members auth sufficient /lib/security/$ISA/pam_stack.so service=su-other-members auth required /lib/security/$ISA/pam_deny.so The file /etc/pam.d/su-root-members referenced in /etc/pam.d/su should read like: auth required /lib/security/pam_wheel.so use_uid group=rootmembers auth required /lib/security/pam_listfile.so item=user sense=allow onerr=fail file=/etc/security/su-rootmembers-access The file /etc/security/su-rootmembers-access referenced in /etc/pam.d/su-root-members should read like: root oracle postgres Next the file /etc/pam.d/su-other-members referenced in 83
- 91. Solaris and Linux General Information /etc/pam.d/su should be created and read like: auth sufficient /lib/security/pam_stack.so service=su-oracle-members auth sufficient /lib/security/pam_stack.so service=su-postgres-members auth required /lib/security/pam_deny.so If one of the two PAM services returns Success, it will return Success to the "su" PAM service configured in /etc/pam.d/su. Otherwise the last module will be invoked which will deny all further requests and the authentication fails. Next the PAM services "su-oracle-members" and "su-postgres-members" have to be created. The file /etc/pam.d/su-oracle-members referenced in /etc/pam.d/su-other-members should read like: auth required /lib/security/pam_wheel.so use_uid group=oraclemembers auth required /lib/security/pam_listfile.so item=user sense=allow onerr=fail file=/etc/security/su-oraclemembers-access The file /etc/security/su-oraclemembers-access referenced in /etc/pam.d/su-oracle-members should read like: oracle The file /etc/pam.d/su-postgres-members referenced in /etc/pam.d/su-other-members should read like: auth required /lib/security/pam_wheel.so use_uid group=postgresmembers auth required /lib/security/pam_listfile.so item=user sense=allow onerr=fail file=/etc/security/su-postgresmembers-access The file /etc/security/su-postgresmembers-access referenced in /etc/pam.d/su-postgres-members should read like: postgres 2. Detecting Listening Network Ports # netstat -tulp Active Internet connections (only servers) Proto Recv-Q Send-Q Local Foreign State PID/Program name tcp 0 0 *:auth *:* LISTEN 2328/xinetd tcp 0 0 host.domain:smtp *:* LISTEN 2360/sendmail: acce tcp 0 0 *:ssh *:* LISTEN 2317/sshd 84
- 92. Solaris and Linux General Information From the output you can see that xinetd, sendmail, and sshd are listening. On all newer Red Hat Linux distributions sendmail is configured to listen for local connections only. Sendmail should not listen for incoming network connections unless the server is a mail or relay server. Running a port scan from another server will confirm that (make sure that you have permissions to probe a machine): # nmap -sTU <remote_host> Starting nmap 3.70 ( http://www.insecure.org/nmap/ ) at 2004-12-10 22:51 CST Interesting ports on jupitor (172.16.0.1): (The 3131 ports scanned but not shown below are in state: closed) PORT STATE SERVICE 22/tcp open ssh 113/tcp open auth Nmap run completed -- 1 IP address (1 host up) scanned in 221.669 seconds # Another method to list all of the TCP and UDP sockets to which programs are listening is lsof: # lsof -i -n | egrep 'COMMAND|LISTEN|UDP' COMMAND PID USER FD TYPE DEVICE SIZE NODE NAME sshd 2317 root 3u IPv6 6579 TCP *:ssh (LISTEN) xinetd 2328 root 5u IPv4 6698 TCP *:auth (LISTEN) sendmail 2360 root 3u IPv4 6729 TCP 127.0.0.1:smtp (LISTEN) # 3. Inittab and Boot Scripts The inittab file /etc/inittab also describes which processes are started at bootup and during normal operation. For example, Oracle uses it to start cluster services at bootup. Therefore, it is recommended to ensure that all entries in /etc/inittab are legitimate in your environment. I would at least remove the CTRL-ALT-DELETE trap entry to prevent accidental reboots: The default runlevel should be set to 3 since in my opinion X11 (X Windows System) should not be running on a production server. In fact, it shouldn't even be installed. # grep ':initdefault' /etc/inittab id:3:initdefault: 4. TCP Wrappers To deny everything by default, add the following line to /etc/hosts.deny: ALL: ALL 85
- 93. Solaris and Linux General Information To accept incoming SSH connections from e.g. nodes rac1cluster, rac2cluster and rac3cluster, add the following line to /etc/hosts.allow: sshd: rac1cluster rac2cluster rac3cluster To accept incoming SSH connections from all servers from a specific network, add the name of the subnet to /etc/hosts.allow. For example: sshd: rac1cluster rac2cluster rac3cluster .subnet.example.com To accept incoming portmap connections from IP address 192.168.0.1 and subnet 192.168.5, add the following line to /etc/hosts.allow: portmap: 192.168.0.1 192.168.5. To accept connections from all servers on subnet .subnet.example.com but not from server cracker.subnet.example.com, you could add the following line to /etc/hosts.allow: ALL: .subnet.example.com EXCEPT cracker.subnet.example.com Here are other examples that show some features of TCP wrapper: If you just want to restrict ssh connections without configuring or using /etc/hosts.deny, you can add the following entries to /etc/ hosts.allow: sshd: rac1cluster rac2cluster rac3cluster sshd: ALL: DENY The version of TCP wrapper that comes with Red Hat also supports the extended options documented in the hosts_options(5) man page. Here is an example how an additional program can be spawned in e.g. the /etc/hosts.allow file: sshd: ALL : spawn echo "Login from %c to %s" | mail -s "Login Info for %s" log@loghost For information on the % expansions, see "man 5 hosts_access". The TCP wrapper is quite flexible. And xinetd provides its own set of host-based and time-based access control functions. You can even tell xinetd to limit the rate of incoming connections. I recommend reading various documentations about the Xinetd super daemon on the Internet. 5. Enable TCP SYN Cookie Protection A "SYN Attack" is a denial of service attack that consumes all the resources on a machine. Any server that is connected to a network is potentially subject to this attack. To enable TCP SYN Cookie Protection, edit the /etc/sysctl.conf file and add the following line: net.ipv4.tcp_syncookies = 1 6. Disable ICMP Redirect Acceptance ICMP redirects are used by routers to tell the server that there is a better path to other networks than the one chosen by the server. However, an intruder could potentially use ICMP redirect packets to alter the hosts's routing table by causing traffic to use a path you didn't intend. To disable ICMP Redirect Acceptance, edit the /etc/sysctl.conf file and add the following line: net.ipv4.conf.all.accept_redirects = 0 86
- 94. Solaris and Linux General Information 7. Enable IP Spoofing Protection IP spoofing is a technique where an intruder sends out packets which claim to be from another host by manipulating the source address. IP spoofing is very often used for denial of service attacks. For more information on IP Spoofing, I recommend the article IP Spoofing: Understanding the basics. To enable IP Spoofing Protection, turn on Source Address Verification. Edit the /etc/sysctl.conf file and add the following line: net.ipv4.conf.all.rp_filter = 1 8. Enable Ignoring to ICMP Requests If you want or need Linux to ignore ping requests, edit the /etc/sysctl.conf file and add the following line: This cannot be done in many environments. net.ipv4.icmp_echo_ignore_all = 1 87
- 95. Chapter 9. Solaris 10 Notes Link Aggregation 1. Show all the data-links # dladm show-link vsw0 type: non-vlan mtu: 1500 device: vsw0 e1000g0 type: non-vlan mtu: 1500 device: e1000g0 e1000g1 type: non-vlan mtu: 1500 device: e1000g1 e1000g2 type: non-vlan mtu: 1500 device: e1000g2 2. Show link properties # dladm show-linkprop LINK PROPERTY VALUE DEFAULT POSSIBLE vsw0 zone -- -- -- e1000g0 zone -- -- -- e1000g1 zone -- -- -- e1000g2 zone -- -- -- 3. Create a Link Aggregation Note Link aggregation, or IEEE 802.3ad, is a term which describes using multiple Ethernet network cables/ports in parallel to increase the link speed beyond the limits of any one single cable or port, and to increase the redundancy for higher availability. Here is the syntax to create aggr using dladm. You can use any number of data-link interfaces to create an aggr. Now this creates and aggregate called "aggr1". You can plumb this, using "ifconfig plumb" and assign IP address to it. The Link aggregation must be configured on the network switch also. The policy and and aggregated interfaces must configured identically on the other end of the ethernet cables . The example creates Link Aggregation Control Protocol (LACP) in passive mode to control simultaneous transmission on multiple interfaces. Any single stream is transmitted completely on an individual interface, but multiple simultaneous streams can be active across all interfaces. # ifconfig e1000g0 unplumb # ifconfig e1000g1 unplumb # dladm create-aggr -d e1000g0 -d e1000g1 -d e1000g2 1 4. Check properties of an aggregation # dladm show-aggr key: 1 (0x0001) policy: L4 address: XX:XX:XX:XX:XX (auto) device address speed duplex link state e1000g0 XX:XX:XX:XX:XX 0 Mbps half unknown standby e1000g1 <unknown> 0 Mbps half unknown standby e1000g2 <unknown> 0 Mbps half unknown standby 5. Check statistics of aggregati or data-link interface 88
- 96. Solaris 10 Notes # dladm show-aggr -s key: 1 ipackets rbytes opackets obytes %ipkts %opkts Total 0 0 0 0 e1000g0 0 0 0 0 - - e1000g1 0 0 0 0 - - e1000g2 0 0 0 0 - - # dladm show-link -s ipackets rbytes ierrors opackets obytes oerrors vsw0 225644 94949 0 44916 29996 0 e1000g0 0 0 0 0 0 0 e1000g1 0 0 0 0 0 0 e1000g2 0 0 0 0 0 0 Link Aggregation 1. Show all the data-links # dladm show-link vsw0 type: non-vlan mtu: 1500 device: vsw0 e1000g0 type: non-vlan mtu: 1500 device: e1000g0 e1000g1 type: non-vlan mtu: 1500 device: e1000g1 e1000g2 type: non-vlan mtu: 1500 device: e1000g2 2. Show link properties # dladm show-linkprop LINK PROPERTY VALUE DEFAULT POSSIBLE vsw0 zone -- -- -- e1000g0 zone -- -- -- e1000g1 zone -- -- -- e1000g2 zone -- -- -- 3. Create a Link Aggregation Note Link aggregation, or IEEE 802.3ad, is a term which describes using multiple Ethernet network cables/ports in parallel to increase the link speed beyond the limits of any one single cable or port, and to increase the redundancy for higher availability. Here is the syntax to create aggr using dladm. You can use any number of data-link interfaces to create an aggr. Now this creates and aggregate called "aggr1". You can plumb this, using "ifconfig plumb" and assign IP address to it. The Link aggregation must be configured on the network switch also. The policy and and aggregated interfaces must configured identically on the other end of the ethernet cables . The example creates Link Aggregation Control Protocol (LACP) in passive mode to control simultaneous transmission on multiple interfaces. Any single stream is transmitted completely on an individual interface, but multiple simultaneous streams can be active across all interfaces. # ifconfig e1000g0 unplumb # ifconfig e1000g1 unplumb # dladm create-aggr -d e1000g0 -d e1000g1 -d e1000g2 1 89
- 97. Solaris 10 Notes 4. Check properties of an aggregation # dladm show-aggr key: 1 (0x0001) policy: L4 address: XX:XX:XX:XX:XX (auto) device address speed duplex link state e1000g0 XX:XX:XX:XX:XX 0 Mbps half unknown standby e1000g1 <unknown> 0 Mbps half unknown standby e1000g2 <unknown> 0 Mbps half unknown standby 5. Check statistics of aggregati or data-link interface # dladm show-aggr -s key: 1 ipackets rbytes opackets obytes %ipkts %opkts Total 0 0 0 0 e1000g0 0 0 0 0 - - e1000g1 0 0 0 0 - - e1000g2 0 0 0 0 - - # dladm show-link -s ipackets rbytes ierrors opackets obytes oerrors vsw0 225644 94949 0 44916 29996 0 e1000g0 0 0 0 0 0 0 e1000g1 0 0 0 0 0 0 e1000g2 0 0 0 0 0 0 IPMP Overview 1. Preventing Applications From Using Test Addresses After you have configured a test address, you need to ensure that this address is not used by applications. Otherwise, if the interface fails, the application is no longer reachable because test addresses do not fail over during the failover operation. To ensure that IP does not choose the test address for normal applications, mark the test address as deprecated. IPv4 does not use a deprecated address as a source address for any communication, unless an application explicitly binds to the address. The in.mpathd daemon explicitly binds to such an address in order to send and receive probe traffic. Because IPv6 link-local addresses are usually not present in a name service, DNS and NIS applications do not use link-local addresses for communication. Consequently, you must not mark IPv6 link-local addresses as deprecated. IPv4 test addresses should not be placed in the DNS and NIS name service tables. In IPv6, link-local addresses are not normally placed in the name service tables. 2. Standby Interfaces in an IPMP Group The standby interface in an IPMP group is not used for data traffic unless some other interface in the group fails. When a failure occurs, the data addresses on the failed interface migrate to the standby interface. Then, the standby interface is treated the same as other active interfaces until the failed interface is repaired. Some failovers might not choose a standby interface. Instead, these failovers might choose an active interface with fewer data addresses that are configured as UP than the standby interface. You should configure only test addresses on a standby interface. IPMP does not permit you to add a data address to an interface that is configured through the ifconfig command as standby. Any attempt 90
- 98. Solaris 10 Notes to create this type of configuration will fail. Similarly, if you configure as standby an interface that already has data addresses, these addresses automatically fail over to another interface in the IPMP group. Due to these restrictions, you must use the ifconfig command to mark any test addresses as deprecated and -failover prior to setting the interface as standby. To configure standby interfaces, refer to How to Configure a Standby Interface for an IPMP Group. 3. Probe-Based Failure Detection The in.mpathd daemon performs probe-based failure detection on each interface in the IPMP group that has a test address. Probe-based failure detection involves the sending and receiving of ICMP probe messages that use test addresses. These messages go out over the interface to one or more target systems on the same IP link. For an introduction to test addresses, refer to Test Addresses. For information on configuring test addresses, refer to How to Configure an IPMP Group With Multiple Interfaces. The in.mpathd daemon determines which target systems to probe dynamically. Routers that are connected to the IP link are automatically selected as targets for probing. If no routers exist on the link, in.mpathd sends probes to neighbor hosts on the link. A multicast packet that is sent to the all hosts multicast address, 224.0.0.1 in IPv4 and ff02::1 in IPv6, determines which hosts to use as target systems. The first few hosts that respond to the echo packets are chosen as targets for probing. If in.mpathd cannot find routers or hosts that responded to the ICMP echo packets, in.mpathd cannot detect probe- based failures. You can use host routes to explicitly configure a list of target systems to be used by in.mpathd. For instructions, refer to Configuring Target Systems. To ensure that each interface in the IPMP group functions properly, in.mpathd probes all the targets separately through all the interfaces in the IPMP group. If no replies are made in response to five consecutive probes, in.mpathd considers the interface to have failed. The probing rate depends on the failure detection time (FDT). The default value for failure detection time is 10 seconds. However, you can tune the failure detection time in the /etc/default/mpathd file. For instructions, go to How to Configure the /etc/default/mpathd File. For a repair detection time of 10 seconds, the probing rate is approximately one probe every two seconds. The minimum repair detection time is twice the failure detection time, 20 seconds by default, because replies to 10 consecutive probes must be received. The failure and repair detection times apply only to probe-based failure detection. Note In an IPMP group that is composed of VLANs, link-based failure detection is implemented per physical-link and thus affects all VLANs on that link. Probe-based failure detection is performed per VLAN-link. For example, bge0/bge1 and bge1000/bge1001 are configured together in a group. If the cable for bge0 is unplugged, then link-based failure detection will report both bge0 and bge1000 as having instantly failed. However, if all of the probe targets on bge0 become unreachable, only bge0 will be reported as failed because bge1000 has its own probe targets on its own VLAN. IPMP Probe Based Target System Configuration Probe-based failure detection involves the use of target systems, as explained in Probe-Based Failure Detection. For some IPMP groups, the default targets used by in.mpathd is sufficient. However, for some IPMP groups, you might want to configure specific targets for probe-based failure detection. You 91
- 99. Solaris 10 Notes accomplish probe-based failure detection by setting up host routes in the routing table as probe targets. Any host routes that are configured in the routing table are listed before the default router. Therefore, IPMP uses the explicitly defined host routes for target selection. You can use either of two methods for directly specifying targets: manually setting host routes or creating a shell script that can become a startup script. Consider the following criteria when evaluating which hosts on your network might make good targets. • Make sure that the prospective targets are available and running. Make a list of their IP addresses. • Ensure that the target interfaces are on the same network as the IPMP group that you are configuring. • The netmask and broadcast address of the target systems must be the same as the addresses in the IPMP group. • The target host must be able to answer ICMP requests from the interface that is using probe-based failure detection. How to Manually Specify Target Systems for Probe-Based Failure Detection 1. Log in with your user account to the system where you are configuring probe-based failure detection 2. Add a route to a particular host to be used as a target in probe-based failure detection. Replace the values of destination-IP and gateway-IP with the IPv4 address of the host to be used as a target. For example, you would type the following to specify the target system 192.168.85.137, which is on the same subnet as the interfaces in IPMP group testgroup1. $ route add -host destination-IP gateway-IP -static $ route add -host 192.168.85.137 192.168.85.137 -static 3. Add routes to additional hosts on the network to be used as target systems. 4. Example Shell Script TARGETS="192.168.85.117 192.168.85.127 192.168.85.137" case "$1" in 'start') /usr/bin/echo "Adding static routes for use as IPMP targets" for target in $TARGETS; do /usr/sbin/route add -host $target $target done ;; 'stop') /usr/bin/echo "Removing static routes for use as IPMP targets" for target in $TARGETS; do /usr/sbin/route delete -host $target $target done ;; esac Using Service Management Facility (SMF) in the Solaris 10 OS 1. Fundamentals 92
- 100. Solaris 10 Notes After a typical software installation, there can be a half dozen or more processes that need to be started and stopped during system startup and shutdown. In addition, these processes may depend on each other and may need to be monitored and restarted if they fail. For each process, these are the logical steps that need to be done to incorporate these as services in SMF: a. Create a service manifest file. b. Create a methods script file to define the start, stop, and restart methods for the service. c. Validate and import the service manifest using svccfg(1M). d. Enable or start the service using svcadm(1M). e. Verify the service is running using svcs(1). 2. Create SMF Entry for an OMR Service a. Create Manifest for OMR Service (example). Create the manifest file according to the description in the smf_method(5) man page. For clarity, this file should be placed in a directory dedicated to files related to the application. In fact, the service will be organized into a logical folder inside SMF, so having a dedicated folder for the files related to the application makes sense. However, there is no specific directory name or location requirement enforced inside SMF. In the example, the OMR service will be organized in SMF as part of the SAS application folder. This is a logical grouping; there is no physical folder named sas associated with SMF. However, when managing the service, the service will be referred to by application/sas/metadata. Other SAS- related processes can later be added and identified under application/sas as well. For the example, the file /var/svc/manifest/application/sas/metadata.xml should be created containing the following: <?xml version="1.0"?> <!DOCTYPE service_bundle SYSTEM "/usr/share/lib/xml/dtd/service_bundle.dtd.1"> <service_bundle type='manifest' name='SAS:Metadata'> <service name='application/sas/metadata' type='service' version='1'> <create_default_instance enabled='false' /> <single_instance /> <dependency name='multi-user-server' grouping='optional_all' type='service' restart_on='none'> <service_fmri value='svc:/milestone/multi-user-server'/> </dependency> <exec_method type='method' name='start' exec='/lib/svc/method/sas/metadata %m' timeout_seconds='60'> 93
- 101. Solaris 10 Notes <method_context> <method_credential user='sas' /> </method_context> </exec_method> <exec_method type='method' name='restart' exec='/lib/svc/method/sas/metadata %m' timeout_seconds='60'> <method_context> <method_credential user='sas' /> </method_context> </exec_method> <exec_method type='method' name='stop' exec='/lib/svc/method/sas/metadata %m' timeout_seconds='60' > <method_context> <method_credential user='sas' /> </method_context> </exec_method> <property_group name='startd' type='framework'> <propval name='duration' type='astring' value='contract'/> </property_group> <template> <common_name> <loctext xml:lang='C'> SAS Metadata Service </loctext> </common_name> <documentation> <doc_link name='sas_metadata_overview' iri= 'http://www.sas.com/technologies/bi/appdev/base/metadatasrv.html' /> <doc_link name='sas_metadata_install' uri= 'http://support.sas.com/rnd/eai/openmeta/v9/setup'/> </documentation> </template> </service> </service_bundle> The manifest file basically consists of two tagged stanzas that have properties that define how the process should be started, stopped, and restarted and also define any dependencies. The first tag, <service_bundle> defines the name of the service bundle that will be used to group services and as part of the parameters in svcs commands (svcs, svcmgr, and so on). The interior tag, <service>, defines a specific process, its dependencies, and how to manipulate the process. Please see the man page for service_bundle(4) for more information on the format of manifest files. b. Create Methods scripts 94
- 102. Solaris 10 Notes Create the methods scripts. This file is analogous to the traditional rc scripts used in previous versions of the Solaris OS. This file should be a script that successfully starts, stops, and restarts the process. This script must be executable for all the users who might manage the service, and it must be placed in the directory and file name referenced in the exec properties of the manifest file. For the example in this procedure, the correct file is /lib/svc/method/sas/metadata, based on the manifest file built in Step 1. See the man page for smf_method(5) for more information on method scripts. #!/sbin/sh # Start/stop client SAS MetaData service # .. /lib/svc/share/smf_include.sh SASDIR=/d0/sas9-1205 SRVR=MSrvr CFG=$SASDIR/SASMain/"$SRVR".sh case "$1" in 'start') $CFG start sleep 2 ;; 'restart') $CFG restart sleep 2 ;; 'stop') $CFG stop ;; *) echo "Usage: $0 { start | stop }" exit 1 ;; esac exit $SMF_EXIT_OK c. Import and Validate manifest file Validate and import the manifest file into the Solaris service repository to create the service in SMF and make the service available for manipulation. The following commands shows the correct file name to use for the manifest in this example. # svccfg svc:> validate /var/svc/manifest/application/sas/metadata.xml svc:> import /var/svc/manifest/application/sas/metadata.xml svc:> quit d. Enable Service Enable the service using the svcadm command. The -t switch allows you to test the service definition without making the definition persistent. You would exclude the -t switch if you wanted the definition to be a permanent change that persists between reboots. # svcadm enable -t svc:/application/sas/metadata e. Verify Service 95
- 103. Solaris 10 Notes Verify that the service is online and verify that the processes really are running by using the svcs command. # svcs -a | grep sas online 8:44:37 svc:/application/sas/metadata:default # ps -ef | grep sas ..... sas 26791 1 0 08:44:36 ? 0:00 /bin/sh /d0/SASMain/MSrvr.sh 3. Configuring the Object Spawner Service Now, in the example, both the OMR process (above) and the Object Spawner process were to be configured. The Object Spawner is dependent on the OMR. The remainder of this document describes configuring the dependent Object Spawner process. a. Create the Manifest file The manifest file for the Object Spawner service is similar to the manifest file used for the OMR service. There are a few small changes and a different dependency. The differences are highlighted in bold in the following: <?xml version="1.0"> <!DOCTYPE service_bundle SYSTEM "/usr/share/lib/xml/dtd/service_bundle.dtd.1"> <service_bundle type='manifest' name='SAS:ObjectSpawner'> <service name='application/sas/objectspawner' type='service' version='1'> <create_default_instance enabled='false' /> <single_instance /> <dependency name='sas-metadata-server' grouping='optional_all' type='service' restart_on='none'> <service_fmri value='svc:/application/sas/metadata'/> </dependency> <exec_method type='method' name='start' exec='/lib/svc/method/sas/objectspawner %m' timeout_seconds='60'> <method_context> <method_credential user='sas' /> </method_context> </exec_method> <exec_method type='method' name='restart' exec='/lib/svc/method/sas/objectspawner %m' 96
- 104. Solaris 10 Notes timeout_seconds='60'> <method_context> <method_credential user='sas' /> </method_context> </exec_method> <exec_method type='method' name='stop' exec='/lib/svc/method/sas/ objectspawner %m' timeout_seconds='60' > <method_context> <method_credential user='sas' /> <method_context> <exec_method> <property_group name='startd' type='framework'> <propval name='duration' type='astring' value='contract'/> </property_group> <template> <common_name> <loctext xml:lang='C'> SAS Object Spawner Service </loctext> </common_name> <documentation> <doc_link name='sas_metadata_overview' iri= 'http://www.sas.com/technologies/bi/appdev/base/metadatasrv.html' /> <doc_link name='sas_metadata_install' uri= 'http://support.sas.com/rnd/eai/openmeta/v9/setup'/> </documentation> </template> </service> </service_bundle> b. Create the Methods script After creating the manifest file, create the script /lib/svc/method/sas/objectspawner: #!/sbin/sh # Start/stop client SAS Object Spawner service # .. /lib/svc/share/smf_include.sh SASDIR=/d0/sas9-1205 SRVR=ObjSpa CFG=$SASDIR/SASMain/"$SRVR".sh case "$1" in 'start') $CFG start sleep 2 ;; 97
- 105. Solaris 10 Notes 'restart') $CFG restart sleep 2 ;; 'stop') $CFG stop ;; *) echo "Usage: $0 { start | stop }" exit 1 ;; esac exit $SMF_EXIT_OK c. Import and Validate the Manifest file Validate and import the manifest file in the same manner as was used for the OMR service: Note that application shortened to appl for documentation reasons. # svccfg svc:> validate /var/svc/manifest/appl/sas/objectspawner.xml svc:> import /var/svc/manifest/appl/sas/objectspawner.xml svc:> quit d. Enable Service Enable the new service in the same manner as was used for the OMR service: # svcadm enable -t svc:/application/sas/objectspawner e. Verify Service is running Finally, verify that the service is up and running in the same manner as was used for the OMR service: # svcs -a | grep sas online 10:28:39 svc:/application/sas/metadata:default online 10:38:20 svc:/application/sas/objectspawner:default # ps -ef | grep sas ..... sas 26791 1 0 18:44:36 ? 0:00 /bin/sh /d0/SASMain/MSrvr.sh sas 26914 1 0 18:18:49 ? 0:00 /bin/sh /d0/SASMain/ObjSpa.sh MPXIO 1. Solaris 10 Configuration - CLI # stmsboot -e 2. Solaris 10 Configuration - File /kernel/drv/fp.conf mpxio-disable="no"; 3. Display Paths to LUN 98
- 106. Solaris 10 Notes # stmsboot -L non-STMS device name STMS device name ------------------------------------------------------ /dev/rdsk/c1t50060E801049CF50d0 /dev/rdsk/c2t4849544143484920373330343031383130303030d0 /dev/rdsk/c1t50060E801049CF52d0 /dev/rdsk/c2t4849544143484920373330343031383130303030d0 4. /var/adm/messages example output Dec 18 11:42:24 vampire mpxio: [ID 669396 kern.info] /scsi_vhci/ssd@g600c0ff000000000086ab238b2af0600 (ssd11) multipath status: optimal, path /pci@9,600000/SUNW,qlc@1/fp@0,0 (fp1) to target address: 216000c0ff886ab2,0 is online. Load balancing: round-robin 5. Disable MPXIO on a 880 kernel/drv/qlc.conf: name="qlc" parent="/pci@8,600000" unit-address="2" mpxio-disable="yes"; 6. Raw Mount Disk Name Example Filesystem bytes used avail capacity Mounted on /dev/dsk/c6t600C0FF000000000086AB238B2AF0600d0s5 697942398 20825341 670137634 4% /test 7. Display Properties # luxadm display /dev/rdsk/c6t600C0FF000000000086AB238B2AF0600d0s2 DEVICE PROPERTIES for disk: /dev/rdsk/c6t600C0FF000000000086AB238B2AF0600d0s2 Vendor: SUN Product ID: StorEdge 3510 Revision: 413C Serial Num: 086AB238B2AF Unformatted capacity: 1397535.000 MBytes Write Cache: Enabled Read Cache: Enabled Minimum prefetch: 0x0 Maximum prefetch: 0xffff Device Type: Disk device Path(s): /dev/rdsk/c6t600C0FF000000000086AB238B2AF0600d0s2 /devices/scsi_vhci/ssd@g600c0ff000000000086ab238b2af0600:c,raw Controller /devices/pci@9,600000/SUNW,qlc@1/fp@0,0 99
- 107. Solaris 10 Notes Device Address 216000c0ff886ab2,0 Host controller port WWN 210000e08b14cc40 Class primary State ONLINE Controller /devices/pci@9,600000/SUNW,qlc@2/fp@0,0 Device Address 266000c0fff86ab2,0 Host controller port WWN 210000e08b144540 Class primary State ONLINE USB Wireless Setup WUSB54GC Model: Link Sys WUSB54GC ; Driver: rum Operating System: Solaris Express Community Edition, B95 Additional ; Packages: SUNWrum Bugs/Features: 1. New GUI based Network utility is buggy and probably should not be used with this device. Instead use a wificonfig profile 2. If attached during boot and shutdown, I get a flood of debugging output and it will not properly start or stop. I have to detach before halting and keep disconnected during the boot. Problems during initial configuration beyond the bugs above: I had to track down the device alias and assign it to the rum driver, this did not happen automatically. 1. Here’s how to get it recognized by the OS: # prtconf -v >/tmp/prtconf.out # vi /tmp/prtconf.out [-cut-] value='Cisco-Linksys' [-cut-] name='usb-product-id' type=int items=1 value=00000020 name='usb-vendor-id' type=int items=1 value=000013b1 [-cut-] 2. Combine these two numbers with the device type in order for mapping in the /etc/driver_aliases file rum “usb13b1,20” 3. Disconnect and reboot # init 6 4. Use wificonfig to create a profile for your wireless network # wificonfig createprofile myXXXX essid=rover encryption=WEP wepkey1=12345 5. Connect to your profile # wificonfig connect myXXXX 100
- 108. Solaris 10 Notes 6. Start an IP on your device, or replace dhcp with an appropriate IP address and configuration # ifconfig rum0 dhcp 7. Note that you might want to disable svcs service physical: # svcadm disable physical:default # svcadm disable physical:nwam VCS MultiNICB without probe address - link only Link Only Probes are specific to Solaris 10 and will not work on solaris 8-9. 1. Device configuration files $ cat /etc/hostname.fjgi0 whpsedwdb2 netmask + broadcast + group ipmp0 up $ cat /etc/hostname.fjgi1 group ipmp0 standby up 2. VCS MultiNICB Resource Definition MultiNICB mnicb ( Critical = 0 UseMpathd = 1 MpathdCommand = "/usr/lib/inet/in.mpathd" Device = { fjgi0, fjgi1 } ConfigCheck = 0 GroupName = ipmp0 IgnoreLinkStatus = 0 ) 3. Move IPMP Interface # /usr/sbin/if_mpadm -d ce0# Feb 13 14:47:31 oraman in.mpathd[185]: Successfully failed over from NIC ce0 to NIC ce4 Network IO in/out per interface Roch's Bytmeter: bytemeter ce0 AWKSCRIPT=' NF == 0 {getline line;} $1 == "obytes64" { obytes = $2; } $1 == "rbytes64" { rbytes = $2; } $1 == "snaptime" { time = $2; obytes_curr = obytes - prev_obytes; rbytes_curr = rbytes - prev_rbytes; elapse = (time - prev_time)*1e6; 101
- 109. Solaris 10 Notes elapse = (elapse==0)?1:elapse; printf "Outbound %f MB/s; Inbound %f MB/sn", obytes_curr/elapse, rbytes_curr/elapse; prev_obytes = obytes; prev_rbytes = rbytes; prev_time = time; } ' Register Solaris CLI Update a registration file userName= password= hostName= subscriptionKey= portalEnabled=false proxyHostName= proxyPort= proxyUserName= proxyPassword= # /usr/sbin/sconadm register -a -r /tmp/RegistrationProfile.properties NFS Performance nfsstat -s reports server-side statistics. In particular, the following are important: • calls: Total RPC calls received. • badcalls: Total number of calls rejected by the RPC layer. • nullrecv: Number of times an RPC call was not available even though it was believed to have been received. • badlen: Number of RPC calls with a length shorter than that allowed for RPC calls. • xdrcall: Number of RPC calls whose header could not be decoded by XDR (External Data Representation). • readlink: Number of times a symbolic link was read. • getattr: Number of attribute requests. • null: Null calls are made by the automounter when looking for a server for a filesystem. • writes: Data written to an exported filesystem. Sun recommends the following tuning actions for some common conditions: • writes > 10%: Write caching (either array-based or host-based, such as a Prestoserv card) would speed up operation. 102
- 110. Solaris 10 Notes • badcalls >> 0: The network may be overloaded and should be checked out. The rsize and wsize mount options can be set on the client side to reduce the effect of a noisy network, but this should only be considered a temporary workaround. • readlink > 10%: Replace symbolic links with directories on the server. • getattr > 40%: The client attribute cache can be increased by setting the actimeo mount option. Note that this is not appropriate where the attributes change frequently, such as on a mail spool. In these cases, mount the filesystems with the noac option. nfsstat -c reports client-side statistics. The following statistics are of particular interest: • calls: Total number of calls made. • badcalls: Total number of calls rejected by RPC. • retrans: Total number of retransmissions. If this number is larger than 5%, the requests are not reaching the server consistently. This may indicate a network or routing problem. • badxid: Number of times a duplicate acknowledgement was received for a single request. If this number is roughly the same as badcalls, the network is congested. The rsize and wsize mount options can be set on the client side to reduce the effect of a noisy network, but this should only be considered a temporary workaround. If on the other hand, badxid=0, this can be an indication of a slow network connection. • timeout: Number of calls that timed out. If this is roughly equal to badxid, the requests are reaching the server, but the server is slow. • wait: Number of times a call had to wait because a client handle was not available. • newcred: Number of times the authentication was refreshed. • null: A large number of null calls indicates that the automounter is retrying the mount frequently. The timeo parameter should be changed in the automounter configuration. nfsstat -m (from the client) provides server-based performance data. • srtt: Smoothed round-trip time. If this number is larger than 50ms, the mount point is slow. • dev: Estimated deviation. • cur: Current backed-off timeout value. • Lookups: If cur>80 ms, the requests are taking too long. • Reads: If cur>150 ms, the requests are taking too long. • Writes: If cur>250 ms, the requests are taking too long. iSCSI Software Target Initiator Note If running on a Solaris AMD64 check to see if the iscsitgtd is /usr/sbin/iscsitgtd or /usr/sbin/ amd64/iscsitgtd. Looks like by default solaris starts the 32bit version in /usr/sbin/iscsitgtd. To 103
- 111. Solaris 10 Notes change on SXCE update the /lib/svc/method/svc-iscsitgt file and replace the /usr/ sbin/iscsitgtd execution with the following: /usr/bin/optisa amd64 > /dev/null 2>&1 if [ $? -eq 0 ] then /usr/sbin/amd64/iscsitgtd else /usr/sbin/iscsitgtd fi Then restart the iscsitgtd process via svcsadm restart iscsitgt. Note that opensolaris, Solaris 10 U6 and SXCE b110 all handle the start of this process differently. Performance • iSCSI performance can be quite good, especially if you follow a few basic rules • Use Enterprise class NICs (they make a HUGE difference) • Enable jumbo frames on storage ports • Use layer-2 link aggregation and IPMP to boost throughput • Ensure that you are using the performance guidance listed in bug #6457694 on opensolaris.org • Increase send and receive buffers, disable the nagle algorithm and make sure TCP window scaling is working correctly • Ttcp and netperf are awesome tools for benchmarking network throughput, and measuring the impact of a given network tunable • As with security, performance is a complete presentation in and of itself. Please see the references if your interested in learning more about tuning iSCSI communications for maximum Setting up an iscsi target on a solaris server with and without ZFS 1. Create iscsi ‘base’ directory (config store) • The base directory is used to store the iSCSI target configuration data, and needs to be defined prior to using the iSCSI target for the first time • You can create a base directory with the iscistadm utility # iscsitadm modify admin -d/etc/iscsitgt 2. Configure a backing store • The backing store contains the physical storage that is exported as a target • The Solaris target supports several types of backing stores: • Flat files • Physical devices • ZFS volumes (zvols for short) • To create a backing store from a ZFS volume, the zfs utility can be run with the create subcommand, the create zvol option (“-V”), the size of the zvol to create, and the name to associate with the zvol: 104
- 112. Solaris 10 Notes #zfs create -V 9g stripedpool/iscsivol000 3. Once a backing store has been created, it can be exported as an iSCSI target with the iscsitadm "create" command, the "target" subcommand, and by specifying the backing store type to use: # iscsitadm create target -b /fslocation -z 10g test-volume Or # iscsitadm create target -b /dev/zvol/dsk/stripedpool/iscsivol000 test-volume 4. Add an ACL to a target • Access control lists (ACLs) can be used to limit the node names that are allowed to access a target • To ease administration of ACLs, the target allows you to associate an alias with a node name (you can retrieve the node name of a Solaris initiator by running the iscsiadm utility with the “list” command, and “initiator-node” subcommand): # iscsitadm create initiator -n iqn.1986- 03.com.sun:01:0003ba0e0795.4455571f host1 • After an alias is created, it can be added to a target’s ACL by passing the alias to the “target” subcommands “-l” option: # iscsitadm modify target -l host1 host1-tgt0 iSCSI Target using TPGT Restrictions 1. Create the Target Restriction Access List # iscsitadm create tpgt 1 # iscsitadm modify tpgt -i IP 1 2. Create Target LUN # zfs create -V 18g npool/iscsitgt/ISCSI_18G_LUN6 # iscsitadm create target -b /dev/zvol/dsk/npool/iscsitgt/ISCSI_18G_LUN6 ISCSI-18G-LUN6 3. Add Target LUN into TPGT Pool # iscsitadm modify target -p 1 target-label 4. Gather Client Initiator Name # iscsiadm list initiator-node Initiator node name: iqn.1986-03.com.sun:01:ac7812f012ff.45ed6c53 5. Add Client Initiator Name to the Target Host # iscsitadm create initiator -n iqn.1986-03.com.sun:01:ac7812f012ff.45ed6c53 suit 105
- 113. Solaris 10 Notes 6. Add Client Initiator to the TPGT Access List # iscsitadm modify target -l suitable-alias target-label iSCSI Software Initiator Steps for setting up a software initiator 1. Configure a discovery method 2. Verify the targets 3. Initialize and use the new targets Configuring a discovery method • The iscsiadm utility can be used to configure a discovery method and the discovery parameters • Configuring static discovery $ iscsiadm modify discovery --sendtargets enable $ iscsiadm add discovery-address 192.168.1.13:3260 • Configuring iSNS discovery $ iscsiadm modify discovery --isns enable $ iscsiadm add isns-server 192.168.1.13:3205 Initialize and use targets • Prior to using newly discovered targets, the devfsadm utility needs to be run to create device entries: $ devfsadm -Cv -i iscsi • Once the device nodes are created, the format utility can be used to label the new targets, and your favorite file system management tool (e.g., mkfs, zpool, etc) can be used to convert the target(s) into file systems: $ zpool create iscsipool c4t0100080020A76DF400002A00458BFE9Ad0 SVM Root Disk Mirror The assumptions are following: the first disk has Solaris already installed, root slice is slice 1, and the disks are identical with the same size and geometry. There is a slice 7 with unused space for the database replicas, and a total of 2 disks to be part of the mirror. If they have different cylinder, head, sector count or different size you will have to fiddle with sizing slices more. Have a partition 256Mb ish for the state replicas database 1. The first step is to recreate the same slice arrangement on the second disk: # prtvtoc /dev/rdsk/c1t0d0s2 | fmthard -s - /dev/rdsk/c1t1d0s2 2. You can check both disks have the same VTOC using prtvtoc command 106
- 114. Solaris 10 Notes # prtvtoc /dev/rdsk/c1t0d0s2 3. Now we have to create state database replicas on slice 7. We will be adding two replicas to each slice: # metadb -a -f -c3 /dev/dsk/c1t0d0s7 # metadb -a -f -c3 /dev/dsk/c1t1d0s7 4. Since the database replicas are in place we can start creating metadevices. The following commands will create metadevice d31 from slice c1t0d0s3, and metadevice d32 from slice c1t1d0s3. Then we create mirror d30 with d31 attached as a submirror. Finally we will attach submirror d32 to mirror d30. Once d32 is attached, the mirror d30 will automatically start syncing. # metainit -f d31 1 1 c1t0d0s3 d31: Concat/Stripe is setup # metainit -f d32 1 1 c1t1d0s3 d32: Concat/Stripe is setup # metainit d30 -m d31 d30: Mirror is setup # metattach d30 d32 d30: submirror d32 is attached 5. The procedure is the same for all other mirrors you might want to create. Root filesystem is slightly different. First you will have to create your submirrors. Then you will have to attach submirror with existing root filesystem, in this case d11, to the new mirror metadevice d10. Then you will have to run metaroot command. It will alter / entry in /etc/vfstab. Finally, you flush the filesystem using lockfs command and reboot. # metainit -f d11 1 1 c1t0d0s1 d31: Concat/Stripe is setup # metainit -f d12 1 1 c1t1d0s1 d32: Concat/Stripe is setup # metainit d10 -m d11 d30: Mirror is setup # metaroot d10 # lockfs -fa # init 6 6. When the system reboots, you can attach the second submirror to d10 as follows: # metattach d10 d12 7. You can check the sync progress using metastat command. Once all mirrors are synced up the next step is to configure the new swap metadevice, in my case d0, to be crash dump device. This is done using dumpadm command: # dumpadm Dump content: kernel pages Dump device: /dev/dsk/c1t0d0s0 (dedicated) Savecore directory: /var/crash/ultra 107
- 115. Solaris 10 Notes Savecore enabled: yes # dumpadm -d /dev/md/dsk/d0 8. Next is to make sure you can boot from the mirror - SPARC ONLY a. The final step is to modify PROM. First we need to find out which two physical devices c1t0d0 and c1t1d0 refer to # ls -l /dev/dsk/c1t0d0s1 lrwxrwxrwx 1 root root 43 Mar 4 14:38 /dev/dsk/c1t0d0s1 -> ../../devices/pci@1c,600000/scsi@2/sd@0,0:b # ls -l /dev/dsk/c1t1d0s1 lrwxrwxrwx 1 root root 43 Mar 4 14:38 /dev/dsk/c1t1d0s1 -> ../../devices/pci@1c,600000/scsi@2/sd@1,0:b b. The physical device path is everything starting from /pci…. Please make a note of sd towards the end of the device string. When creating device aliases below, sd will have to be changed to disk. Now we create two device aliases called root and backup_root. Then we set boot-device to be root and backup_root. The :b refers to slice 1(root) on that particular disk. # eeprom “use-nvramrc?=true” # eeprom “nvramrc=devalias root /pci@1c,600000/scsi@2/disk@0,0 devalias backup_root /pci@1c,600000/scsi@2/disk@1,0# # eeprom “boot-device=root:b backup_root:b net” c. Enable the mirror disk to be bootable # installboot /usr/platform/`uname -i`/lib/fs/ufs/bootblk /dev/rdsk/c0t1d0s0 9. Next is to make sure you can boot from the mirror - Intel/AMD ONLY a. Enable the mirror disk to be bootable # /sbin/installgrub /boot/grub/stage1 /boot/grub/stage2 /dev/rdsk/c0d0s0 10.If you are mirroring just the two internal drives, you will want to add the following line to /etc/ system to allow it to boot from a single drive. This will bypass the SVM Quorum rule set md:mirrored_root_flag = 1 Example full run on amd system; disks are named after d[1,2-n Drive][partition number] And Metadevices for the mirrors are named d[Boot Number]0[partition number] - example disk: d10 is drive 1 partition 0, metadevice d100 is the 1st boot environment (live upgrade BE) partition 0. If applying the split mirror alternate boot environment I would have the split off ABE as d200. // Use format fdisk to label and // partition the drive # format c1t1d0 // Original Partition looks like Current partition table (original): 108
- 116. Solaris 10 Notes Total disk cylinders available: 2346 + 2 (reserved cylinders) Part Tag Flag Cylinders Size Blocks 0 root wm 1 - 1275 9.77GB (1275/0/0) 20482875 1 swap wu 1276 - 1406 1.00GB (131/0/0) 2104515 2 backup wm 0 - 2345 17.97GB (2346/0/0) 37688490 3 unassigned wm 1407 - 2312 6.94GB (906/0/0) 14554890 4 unassigned wm 0 0 (0/0/0) 0 5 unassigned wm 0 0 (0/0/0) 0 6 unassigned wm 0 0 (0/0/0) 0 7 unassigned wm 2313 - 2345 258.86MB (33/0/0) 530145 8 boot wu 0 - 0 7.84MB (1/0/0) 16065 9 unassigned wm 0 0 (0/0/0) 0 # prtvtoc /dev/rdsk/c1t0d0s2 | fmthard -s - /dev/rdsk/c1t1d0s2 # format # metadb -a -f -c3 /dev/dsk/c1t0d0s7 # metadb -a -f -c3 /dev/dsk/c1t1d0s7 # metainit -f d10 1 1 c1t0d0s0 # metainit -f d20 1 1 c1t1d0s0 # metainit -f d11 1 1 c1t0d0s1 # metainit -f d21 1 1 c1t1d0s1 # metainit -f d13 1 1 c1t0d0s3 # metainit -f d23 1 1 c1t1d0s3 # metainit d100 -m d10 # metainit d101 -m d11 # metainit d103 -m d13 # metaroot d100 # echo 'set md:mirrored_root_flag = 1' >>/etc/system # installgrub /boot/grub/stage1 /boot/grub/stage2 /dev/rdsk/c1t1d0s0 # lockfs -fa # init 6 // login post reboot # metattach d100 d20 d100: submirror d20 is attached # metattach d101 d21 d101: submirror d21 is attached # metattach d103 d23 d103: submirror d23 is attached // Replace non-md entries in /etc/vfstab where applicable. // Example as follows. # grep dsk /etc/vfstab | awk '{print $1, $2, $3, $4}' 109
- 117. Solaris 10 Notes /dev/dsk/c1t0d0s1 - - swap /dev/md/dsk/d100 /dev/md/rdsk/d100 / ufs /dev/dsk/c1t0d0s3 /dev/rdsk/c1t0d0s3 /zone ufs // Becomes the following # grep dsk /etc/vfstab | awk '{print $1, $2, $3, $4}' /dev/md/dsk/d101 - - swap /dev/md/dsk/d100 /dev/md/rdsk/d100 / ufs /dev/md/dsk/d103 /dev/md/rdsk/d103 /zone ufs // Wait for sync complete before reboot # lockfs -fa # init 6 // Setup Dump Device # dumpadm -d /dev/md/dsk/d101 Replace Failed SVM Mirror Drive So you have used SVM to mirror your disk, and one of the two drives fails. Aren’t you glad you mirrored them! You don’t have to do a restore from tape, but you are going have to replace the failed drive. Many modern RAID arrays just require you to take out the bad drive and plug in the new one, while everything else is taken care of automatically. It’s not quite that easy on a Sun server, but it’s really just a few simple steps. I just had to do this, so I thought I would write down the procedure here. Basically, the process boils down to the following steps: • Delete the meta databases from the failed drive • Unconfigure the failed drive • Remove and replace the failed drive • Configure the new drive • Copy the remaining drive’s partition table to the new drive • Re-create the meta databases on the new drive • Install the bootblocks on the new drive • Run metareplace to re-sync up the mirrored partitions Let’s look at each step individually. In my case, c1t0d0 has failed, so first, I take a look at the status of my meta databases. Below we can see the the replicas on that disk have write errors: # metadb -i flags first blk block count Wm p l 16 8192 /dev/dsk/c1t0d0s3 W p l 8208 8192 /dev/dsk/c1t0d0s3 a p luo 16 8192 /dev/dsk/c1t1d0s3 a p luo 8208 8192 /dev/dsk/c1t1d0s3 110
- 118. Solaris 10 Notes r - replica does not have device relocation information o - replica active prior to last mddb configuration change u - replica is up to date l - locator for this replica was read successfully c - replica's location was in /etc/lvm/mddb.cf p - replica's location was patched in kernel m - replica is master, this is replica selected as input W - replica has device write errors a - replica is active, commits are occurring to this replica M - replica had problem with master blocks D - replica had problem with data blocks F - replica had format problems S - replica is too small to hold current data base R - replica had device read errors The replicas on c1t0d0s3 are dead to us, so let’s wipe them out! # metadb -d c1t0d0s3 # metadb -i flags first blk block count a p luo 16 8192 /dev/dsk/c1t1d0s3 a p luo 8208 8192 /dev/dsk/c1t1d0s3 The only replicas we have left are onc1t1d0s3, so I’m all clear to unconfigure the device. I run cfgadm to get the c1 path: # cfgadm -al Ap_Id Type Receptacle Occupant Condition c1 scsi-bus connected configured unknown c1::dsk/c1t0d0 disk connected configured unknown c1::dsk/c1t1d0 disk connected configured unknown c1::dsk/c1t2d0 disk connected configured unknown c1::dsk/c1t3d0 disk connected configured unknown c1::dsk/c1t4d0 disk connected configured unknown c1::dsk/c1t5d0 disk connected configured unknown I run the following command to unconfigure the failed drive: # cfgadm -c unconfigure c1::dsk/c1t0d0 The drive light turns blue Pull the failed drive out Insert the new drive Configure the new drive: # cfgadm -c configure c1::dsk/c1t0d0 Now that the drive is configured and visible from within the format command, we can copy the partition table from the remaining mirror member: # prtvtoc /dev/rdsk/c1t0d0s2 | fmthard -s - /dev/rdsk/c1t0d0s2 Next, I install the bootblocks onto the new drive: 111
- 119. Solaris 10 Notes # installboot /usr/platform/`uname -i`/lib/fs/ufs/bootblk /dev/rdsk/c1t0d0s0 And finally, I’m ready to replace the metadevices, syncing up the mirror and making things as good as new. repeat for each mirrored partition # metareplace -e d10 c0t0d0s1 1. The first step is to recreate the same slice arrangement on the second disk: # prtvtoc /dev/rdsk/c1t0d0s2 | fmthard -s - /dev/rdsk/c1t1d0s2 2. You can check both disks have the same VTOC using prtvtoc command # prtvtoc /dev/rdsk/c1t0d0s2 3. Now we have to create state database replicas on slice 7. We will be adding two replicas to each slice: # metadb -a -f -c3 /dev/dsk/c1t0d0s7 # metadb -a -f -c3 /dev/dsk/c1t1d0s7 4. Since the database replicas are in place we can start creating metadevices. The following commands will create metadevice d31 from slice c1t0d0s3, and metadevice d32 from slice c1t1d0s3. Then we create mirror d30 with d31 attached as a submirror. Finally we will attach submirror d32 to mirror d30. Once d32 is attached, the mirror d30 will automatically start syncing. # metainit -f d31 1 1 c1t0d0s3 d31: Concat/Stripe is setup # metainit -f d32 1 1 c1t1d0s3 d32: Concat/Stripe is setup # metainit d30 -m d31 d30: Mirror is setup # metattach d30 d32 d30: submirror d32 is attached 5. The procedure is the same for all other mirrors you might want to create. Root filesystem is slightly different. First you will have to create your submirrors. Then you will have to attach submirror with existing root filesystem, in this case d11, to the new mirror metadevice d10. Then you will have to run metaroot command. It will alter / entry in /etc/vfstab. Finally, you flush the filesystem using lockfs command and reboot. # metainit -f d11 1 1 c1t0d0s1 d31: Concat/Stripe is setup # metainit -f d12 1 1 c1t1d0s1 d32: Concat/Stripe is setup # metainit d10 -m d11 d30: Mirror is setup # metaroot d10 # lockfs -fa # init 6 112
- 120. Solaris 10 Notes 6. When the system reboots, you can attach the second submirror to d10 as follows: # metattach d10 d12 7. You can check the sync progress using metastat command. Once all mirrors are synced up the next step is to configure the new swap metadevice, in my case d0, to be crash dump device. This is done using dumpadm command: # dumpadm Dump content: kernel pages Dump device: /dev/dsk/c1t0d0s0 (dedicated) Savecore directory: /var/crash/ultra Savecore enabled: yes # dumpadm -d /dev/md/dsk/d0 8. Next is to make sure you can boot from the mirror - SPARC ONLY a. The final step is to modify PROM. First we need to find out which two physical devices c1t0d0 and c1t1d0 refer to # ls -l /dev/dsk/c1t0d0s1 lrwxrwxrwx 1 root root 43 Mar 4 14:38 /dev/dsk/c1t0d0s1 -> ../../devices/pci@1c,600000/scsi@2/sd@0,0:b # ls -l /dev/dsk/c1t1d0s1 lrwxrwxrwx 1 root root 43 Mar 4 14:38 /dev/dsk/c1t1d0s1 -> ../../devices/pci@1c,600000/scsi@2/sd@1,0:b b. The physical device path is everything starting from /pci…. Please make a note of sd towards the end of the device string. When creating device aliases below, sd will have to be changed to disk. Now we create two device aliases called root and backup_root. Then we set boot-device to be root and backup_root. The :b refers to slice 1(root) on that particular disk. # eeprom “use-nvramrc?=true” # eeprom “nvramrc=devalias root /pci@1c,600000/scsi@2/disk@0,0 devalias backup_root /pci@1c,600000/scsi@2/disk@1,0# # eeprom “boot-device=root:b backup_root:b net” 9. If you are mirroring just the two internal drives, you will want to add the following line to /etc/ system to allow it to boot from a single drive. This will bypass the SVM Quorum rule set md:mirrored_root_flag = 1 10.Enable the mirror disk to be bootable - used by both sparc and x64 systems; on x64 will update grub # installboot /usr/platform/`uname -i`/lib/fs/ufs/bootblk /dev/rdsk/c0t1d0s0 ZFS Root adding a Mirror This is a simple Tutorial how you can create a bootable ZFS Root Mirror with Opensolaris. I had some help from both Opensolaris-Forums (com/org) and this Blog from Malachi. 1. Install Opensolaris to Disk A (c3d0s0). 113
- 121. Solaris 10 Notes 2. Format Disk B (c3d1s0) properly: host:# format (choose fdisk) (create 100% Standard Solaris Partition over the full Disk) 3. Overwrite the Diskformat properly: host:# prtvtoc /dev/rdsk/c3d0s2 | fmthard -s - /dev/rdsk/c3d1s2 (NOTE: s2! on BOTH Disks) 4. Attach Disk B to the ZFS Root Pool: host:# zpool attach -f rpool c3d0s0 c3d1s0 5. Install the GRUB-Stuff to Disk B: host:# installgrub -m /boot/grub/stage1 /boot/grub/stage2 /dev/rdsk/c3d1s0 Create Flar Images Creation of FLAR Images 1. Example $ flarcreate -n "Monthly B16 Snapshot" -a "benr@cuddletech.com" > -S -R / -x /flash /flash/Snapshot-`date '+%m-%d-%y'`.flar 2. Option Description • -n adds a description to the archive (this is displayed during installation later) • -a adds a string containing conact information • -S tells flarcreate to skip its size checks, normally it will estimate the size of the archive prior to creating it, which can take a really really long time, this argument just lets us speed up the process • -R specifies the root directory, by default its /, but I often supply it for completeness. • -x specifies a directory to exclude from the archive, supply one -x per directory to exclude (ie: -x / opt -x /export). NFS mounted filesystems are excluded by default, but again for completeness I tend to put them in there anyway. • (archivename).flar is the actual name of the output archive file. You can name it whatever you want, but typically its wise to put the hostname, archive creation date, and a .flar extention in the filename just to help identify it. The filename should be a absolute pathname, so since we've mounted our NFS archive repository to /flash, we'll specify that path. FLAR Boot Installation Link Only Probes are specific to Solaris 10 and will not work on solaris 8-9. 1. Create FLAR Image - flar_create.sh # flarcreate -n "Solaris 10 with SFRAC5.0MP1" -S -H -c -U 114
- 122. Solaris 10 Notes -x /export/home/flar /export/home/flar/Snapshot.flar 2. Add FLAR Image to Jumpstart - /etc/bootparams - add_client.sh ./add_install_client -e 0:14:4f:23:ab:8f -s host:/flash/boot/sol10sparc -c host:/flash/boot/Profiles/Solaris10 -p host:/flash/boot/Sysidcfg/smro204 smro204.fmr.com sun4u 3. Recover Script - recover.pl #!/usr/bin/perl use Getopt::Long ; $arch_location='/flasharchives/flar'; $boot_base='/flasharchives/boot'; GetOptions( "list" => $list, "archive=s" => $archive, "configured" => $configured, "add" => $addboot, "remove=s" => $rmboot ); # Call out the subs from options list if ($list) { &_list ; } if ($addboot) { &_build; } if ($configured) {&_list_existing;} if ($rmboot) { &_rm_existing;} sub _list { if ($archive) { &_details ; } else { system("/flasharchives/bin/list_archives.pl"); exit ; } } sub _details { &_info_collection; &_print_details; } sub _info_collection { $addto = (); @archinfo = (); $ih = (); chomp $archive; next if $archive =~ /lost/; next if $archive =~ /list/; next if $archive =~ /boot/; 115
- 123. Solaris 10 Notes @archinfo = `flar -i $arch_location/$archive` ; chomp @archinfo; foreach $x (@archinfo) { ($item, $value ) = split(/=/,$x); chomp $value; if ($item =~ /creation_node/) { $inventory{$archive}{creation_node} = $value; } if ($item =~ /creation_date/) { $inventory{$archive}{creation_date} = $value; } if ($item =~ /creation_release/) { $inventory{$archive}{creation_release} = $value;} if ($item =~ /content_name/) { $inventory{$archive}{content_name} = $value;} } } # End of info collection sub _build { &_info_collection ; # Get target host ip $target_ip_string = `getent hosts $inventory{$archive}{creation_node}`; ($inventory{$archive}{creation_node_ip}, $target_host) = split(/s+/,$target_ip_string); chomp $inventory{$archive}{creation_node_ip} ; # Set location of boot image if ($inventory{$archive}{creation_release} =~ /5.8/) { $image_base = '/flasharchives/boot/sol8sparc'; $image_tools = "$image_base/Solaris_8/Tools"; $rules_string = "hostname $inventory{$archive}{creation_node} .fmr.com - autogen_script uts_flash_finish.shn"; } if ($inventory{$archive}{creation_release} =~ /5.9/) { $image_base = '/flasharchives/boot/sol9sparc'; $image_tools = "$image_base/Solaris_9/Tools"; $rules_string = "hostname $inventory{$archive}{creation_node} .fmr.com - autogen_script uts_flash_finish.shn"; } if ($inventory{$archive}{creation_release} =~ /5.10/) { $image_base = '/flasharchives/boot/sol10sparc_bootonly'; $image_tools = "$image_base/Solaris_10/Tools"; $rules_string = "hostname $inventory{$archive}{creation_node} .fmr.com move_c3_to_c1.sh autogen_script uts_flash_finish.shn"; } 116
- 124. Solaris 10 Notes # Create the rules file $rules_base = "$boot_base/Profiles/$inventory{$archive}{creation_node}"; $rules_location = "$rules_base/rules"; open(RULESOUT, ">$rules_location"); print RULESOUT $rules_string; close RULESOUT; # Define Profile configuration $profile = "install_type flash_installn"; $profile .= "archive_location http://host:80/flar/$archiven"; $profile .= "partitioning explicitn"; $profile .= "filesys c1t0d0s0 10000 /n"; $profile .= "filesys c1t0d0s1 10000 swapn"; $profile .= "filesys c1t0d0s4 72000 /export/home loggingn"; $profile .= "filesys c1t0d0s5 free /varn"; $profile .= "filesys c1t0d0s6 34000 /fisc loggingn"; $profile .= "filesys c1t0d0s7 5n"; # Define Profile location $profile_base = "$boot_base/Profiles/$inventory{$archive}{creation_node}"; $profile_location = "$profile_base/autogen_script"; # # Create new profile open(PDUMP, ">$profile_location"); print PDUMP $profile; close PDUMP; # Set the stock and new sysid cfg information $sysid_base = "$boot_base/Sysidcfg"; $sysid_stock = "$sysid_base/stock/$inventory{$archive}{creation_release}/sysidcfg"; $sysidcfg = "$sysid_base/$inventory{$archive}{creation_node}/sysidcfg"; $dump_sysidcfg .= "network_interface=ce4 {hostname=$inventory{$archive}{creation_node}.fmr.com default_route=172.26.21.1 ip_address=$inventory{$archive}{creation_node_ip} protocol_ipv6=no netmask=255.255.255.0}n"; $dump_sysidcfg .= `cat $sysid_stock`; open(SYSIDOUT, ">$sysidcfg"); print SYSIDOUT $dump_sysidcfg; close SYSIDOUT; # Add flar statment into custom rules file # run check script 117
- 125. Solaris 10 Notes $ret=system("cd $rules_base ; ./check"); if ($ret == 0 ) { print "Rules Check was successfuln"; } else { print "Rules Check Failed - please checkn"; print "Exiting Failedn"; exit 1; } # Run the add_install_client script print "Test add_client statement n"; $add_install_string = "./add_install_client -p host:$sysid_base/$inventory{$archive}{creation_node} -s host:$image_base -c host:$profile_base $inventory{$archive}{creation_node} .fmr.com sun4u"; print "$add_install_stringn"; # print "nnBring $inventory{$archive}{creation_node} down to ok prompt and run the following command:n"; print "ok> boot net:speed=100,duplex=full - installn"; } sub _print_details { print "Details on $archive_location/$detailsn"; print "=======================================================n"; print "Server: $inventory{$archive}{creation_node} n"; print "Creation Date: $inventory{$archive}{creation_date} n"; print "Solaris Version: $inventory{$archive}{creation_release} n"; print "Comments: $inventory{$archive}{content_name} n"; } # End of sub sub _list_existing { open(BOOTP, "/etc/bootparams") || die "Bootparams does not exist, no systems set up for boot from flarn";; print "nThe following list of hosts are setup to jumpstart from this servern"; print "Systems without a flar image listed were setup without this toolkitn"; print "Validation of systems not configured with this toolkit must be donen"; print "independentlynn"; print "HostttFlar Archiven"; print "======================================================n"; while (<BOOTP>) { 118
- 126. Solaris 10 Notes ($node, @narg) = split(/s+/,$_); ($n1,@rest) = split(/W+/,$node); foreach $i (@narg) { if ($i =~ /install_config/) { ($j1, $path) = split(/:/, $i); if ( -e "$path/autogen_script" ) { $loaded_flar = `grep archive_location $path/autogen_script` ; chomp $loaded_flar ; ($lc,$lf) = split(//flar//,$loaded_flar); print "$n1tt$lfn"; } else { print "$n1ttNot setup to use flarn"; } } } } print "nn"; close BOOTP; exit; } sub _rm_existing { open(BOOTP, "/etc/bootparams") || die "Bootparams does not exist, no systems set up for boot from flarn";; while (<BOOTP>) { ($node, @narg) = split(/s+/,$_); ($n1,@rest) = split(/W+/,$node); chomp $rmboot; chomp $n1; if ($rmboot =~ /$n1/) { foreach $i (@narg) { if ($i =~ /root=/) { ($j1, $path) = split(/:/, $i); # Filter out Boot ($ipath,$Boot) =split(/Boot/, $path); chomp $ipath; print "cd $ipath ; ./rm_install_client $n1n"; } } } } print "nn"; close BOOTP; exit; } print "nn"; 4. List Archived FLAR Images 119
- 127. Solaris 10 Notes #!/usr/bin/perl $arch_location='/flasharchives/flar'; @archive_list=`ls $arch_location`; print "nn"; foreach $archive (@archive_list) { $addto = (); @archinfo = (); $ih = (); chomp $archive; next if $archive =~ /lost/; next if $archive =~ /list/; next if $archive =~ /boot/; @archinfo = `flar -i $arch_location/$archive` ; chomp @archinfo; foreach $x (@archinfo) { ($item, $value ) = split(/=/,$x); chomp $value; if ($item =~ /creation_node/) { $inventory{$archive}{creation_node} = $value; } if ($item =~ /creation_date/) { $inventory{$archive}{creation_date} = $value; } if ($item =~ /creation_release/) { $inventory{$archive}{creation_release} = $value;} if ($item =~ /content_name/) { $inventory{$archive}{content_name} = $value;} } } $h1="Archive File Name"; $h2="Hostname"; $h3="OS"; $h4="Comments"; $h5="FID"; chomp $h1; chomp $h2 ; chomp $h3 ; chomp $h4; chomp $h5; # Format modified for documentation format BOO= @<<<<<<<<<<<<< @<<<<<< @<<<< @<<<<<<<<<< @<<<<<<<<<<<<<<< $h1, $h2, $h3, $h5, $h4; ============================================================ . write BOO; format STDOUT= @<<<<<<<<<<<<< @<<<<<< @<<<< @<<<<<<<<<< @<<<<<<<<<<<<<<<< $key, $creation_node, $creation_release, $fid, $content_name . while (($key, $content) = each(%inventory)) { 120
- 128. Solaris 10 Notes $creation_node = $inventory{$key}{creation_node}; $creation_date = $inventory{$key}{creation_date}; $creation_release = $inventory{$key}{creation_release}; $content_name = $inventory{$key}{content_name}; $fid = $inventory{$key}{fid}; write; } print "nn"; 5. Code to swap Controller Numbers from Solaris 8-9 to Solaris 10 # mount -o remount,rw / # cfgadm -c unconfigure c1 # cfgadm -c unconfigure c2 # devfsadm # for dir in rdsk dsk do cd /dev/${dir} disks=`ls c3t*` for disk in $disks do newname="c1`echo $disk | awk '{print substr($1,3,6)}'`" mv $disk $newname done done ZFS Notes Quick notes for ZFS commands 1. Take a snapshot # zfs snapshot pool/filesystem@mybackup_comment 2. Scan and Import a ZFS Pool # zpool import -f npool 3. Rollback a snapshot # zfs rollback pool/filesystem@mybackup_comment 4. Use snapshot directory to view files # cat ~user/.zfs/shapshot/mybackup_comment/ems.c 5. Create a clone # zfs clone pool/filesystem@mybackup_comment pool/clonefs 6. Generate full backup # zfs send pool/filesystem@mybackup_comment > /backup/A 7. Generate incremental backup 121
- 129. Solaris 10 Notes # zfs send -i pool/filesystem@mybackup_comment1 pool/filesystem@mybackup_comment2 > /backup/A1-2 8. Generate incremental backup and send to remote host # zfs send -i tank/fs@11:31 tank/fs@11:32 | ssh host zfs receive -d /tank/fs 9. Comments on Clones A clone is a writable volume or file system whose initial contents are the same as the dataset from which it was created. As with snapshots, creating a clone is nearly instantaneous, and initially consumes no additional disk space Clones can only be created from a snapshot. When a snapshot is cloned, an implicit dependency is created between the clone and snapshot. Even though the clone is created somewhere else in the dataset hierarchy, the original snapshot cannot be destroyed as long as the clone exists. The origin property exposes this dependency, and the zfs destroy command lists any such dependencies, if they exist. Clones do not inherit the properties of the dataset from which it was created. Rather, clones inherit their properties based on where the clones are created in the pool hierarchy. Use the zfs get and zfs set commands to view and change the properties of a cloned dataset. For more information about setting ZFS dataset properties, see Setting ZFS Properties. Because a clone initially shares all its disk space with the original snapshot, its used property is initially zero. As changes are made to the clone, it uses more space. The used property of the original snapshot does not consider the disk space consumed by the clone. 10.Creating a clone To create a clone, use the zfs clone command, specifying the snapshot from which to create the clone, and the name of the new file system or volume. The new file system or volume can be located anywhere in the ZFS hierarchy. The type of the new dataset (for example, file system or volume) is the same type as the snapshot from which the clone was created. You cannot create clone of a file system in a pool that this different from where the original file system snapshot resides. In the following example, a new clone named tank/home/ahrens/bug123 with the same initial contents as the snapshot tank/ws/gate@yesterday is created. # zfs snapshot tank/ws/gate@yesterday # zfs clone tank/ws/gate@yesterday tank/home/ahrens/bug123 In the following example, a cloned workspace is created from the projects/newproject@today snapshot for a temporary user as projects/teamA/tempuser. Then, properties are set on the cloned workspace. # zfs snapshot projects/newproject@today # zfs clone projects/newproject@today projects/teamA/tempuser # zfs set sharenfs=on projects/teamA/tempuser # zfs set quota=5G projects/teamA/tempuser 11.Destroying a clone ZFS clones are destroyed by using the zfs destroy command. Clones must be destroyed before the parent snapshot can be destroyed. For example: 122
- 130. Solaris 10 Notes # zfs destroy tank/home/ahrens/bug123 12.Listing ZFS Filesystems ZFS clones are destroyed by using the zfs destroy command. Clones must be destroyed before the parent snapshot can be destroyed. For example: # zfs snapshot zfzones/zone1@presysid # zfs list NAME USED AVAIL REFER MOUNTPOINT zfzones 33.4M 7.78G 33.3M /zfzones zfzones/zone1 24.5K 7.78G 24.5K /zfzones/zone1 zfzones/zone1@presysid 0 - 24.5K - # zfs clone zfzones/zone1@preid zfzones/zone2 # zfs list NAME USED AVAIL REFER MOUNTPOINT zfzones 33.4M 7.78G 33.3M /zfzones zfzones/zone1 24.5K 7.78G 24.5K /zfzones/zone1 zfzones/zone1@preid 0 - 24.5K - zfzones/zone2 0 7.78G 24.5K /zfzones/zone2 # zpool list zfzones NAME SIZE USED AVAIL CAP HEALTH ALTROOT zfzones 7.94G 33.4M 7.90G 0% ONLINE - # zfs clone zfzones/zone1@preid zfzones/zone3 # zfs clone zfzones/zone1@preid zfzones/zone4 # zfs clone zfzones/zone1@preid zfzones/zone5 # zfs clone zfzones/zone1@preid zfzones/zone6 # zfs clone zfzones/zone1@preid zfzones/zone7 # zfs clone zfzones/zone1@preid zfzones/zone8 # zpool list zfzones NAME SIZE USED AVAIL CAP HEALTH ALTROOT zfzones 7.94G 33.5M 7.90G 0% ONLINE - # zfs list NAME USED AVAIL REFER MOUNTPOINT zfzones 33.5M 7.78G 33.3M /zfzones zfzones/zone1 24.5K 7.78G 24.5K /zfzones/zone1 zfzones/zone1@preid 0 - 24.5K - zfzones/zone2 0 7.78G 24.5K /zfzones/zone2 zfzones/zone3 0 7.78G 24.5K /zfzones/zone3 zfzones/zone4 0 7.78G 24.5K /zfzones/zone4 zfzones/zone5 0 7.78G 24.5K /zfzones/zone5 zfzones/zone6 0 7.78G 24.5K /zfzones/zone6 zfzones/zone7 0 7.78G 24.5K /zfzones/zone7 zfzones/zone8 0 7.78G 24.5K /zfzones/zone8 ZFS ACL's Quick notes for ZFS ACL commands 123
- 131. Solaris 10 Notes • List ACL's on a ZFS Filesystem $ ls -v file.1 -r--r--r-- 1 root root 206663 May 4 11:52 file.1 0:owner@:write_data/append_data/execute:deny 1:owner@:read_data/write_xattr/write_attributes /write_acl/write_owner :allow 2:group@:write_data/append_data/execute:deny 3:group@:read_data:allow 4:everyone@:write_data/append_data/write_xattr /execute/write_attributes /write_acl/write_owner:deny 5:eone@:read_data/read_xattr/read_attributes /read_acl/synchronize :allow • Setting non-trivial ACL on a file # chmod A+user:gozer:read_data/execute:allow test.dir # ls -dv test.dir drwxr-xr-x+ 2 root root 2 Feb 16 11:12 test.dir 0:user:gozer:list_directory/read_data/execute:allow 1:owner@::deny 2:owner@:list_directory/read_data/add_file/write_data/ add_subdirectory /append_data/write_xattr/execute/write_attributes/write_acl /write_owner:allow 3:group@:add_file/write_data/add_subdirectory/append_data:deny 4:group@:list_directory/read_data/execute:allow 5:eone@:add_file/write_data/add_subdirectory/append_data/ write_xattr /write_attributes/write_acl/write_owner:deny 6:eone@:list_directory/read_data/read_xattr/execute/ read_attributes /read_acl/synchronize:allow • Remove Permissions # chmod A0- test.dir # ls -dv test.dir drwxr-xr-x 2 root root 2 Feb 16 11:12 test.dir 0:owner@::deny 1:owner@:list_directory/read_data/add_file/write_data/ add_subdirectory /append_data/write_xattr/execute/write_attributes/ write_acl /write_owner:allow 2:group@:add_file/write_data/add_subdirectory/append_data:deny 3:group@:list_directory/read_data/execute:allow 4:eone@:add_file/write_data/add_subdirectory/append_data/ write_xattr /write_attributes/write_acl/write_owner:deny 124
- 132. Solaris 10 Notes 5:eone@:list_directory/read_data/read_xattr/execute/ read_attributes /read_acl/synchronize:allow ZFS and ARC Cache 1. Memory and Swap Space • One Gbyte or more of memory is recommended. • Approximately 64 Kbytes of memory is consumed per mounted ZFS file system. On systems with 1,000s of ZFS file systems, we suggest that you provision 1 Gbyte of extra memory for every 10,000 mounted file systems including snapshots. Be prepared for longer boot times on these systems as well. • Because ZFS caches data in kernel addressable memory, the kernel sizes will likely be larger than with other file systems. You may wish to configure additional disk-based swap to account for this difference for systems with limited RAM. You can use the size of physical memory as an upper bound to the extra amount of swap space that might be required. In any case, you should monitor the swap space usage to determine if swapping is occurring. 2. Memory and Dynamic Reconfiguration Recommendations The ZFS adaptive replacement cache (ARC) tries to use most of a system's available memory to cache file system data. The default is to use all of physical memory except 1 Gbyte. As memory pressure increases, the ARC relinquishes memory. Consider limiting the maximum ARC memory emstprint in the following situations: • When a known amount of memory is always required by an application. Databases often fall into this category. • On platforms that support dynamic reconfiguration of memory boards, to prevent ZFS from growing the kernel cage onto all boards. • A system that requires large memory pages might also benefit from limiting the ZFS cache, which tends to breakdown large pages into base pages. • Finally, if the system is running another non-ZFS file system, in addition to ZFS, it is advisable to leave some free memory to host that other file system's caches. The trade off is to consider that limiting this memory emstprint means that the ARC is unable to cache as much file system data, and this limit could impact performance. In general, limiting the ARC is wasteful if the memory that now goes unused by ZFS is also unused by other system components. Note that non-ZFS file systems typically manage to cache data in what is nevertheless reported as free memory by the system. For information about tuning the ARC, see the following section: http:// www.solarisinternals.com/wiki/index.php/ZFS_Evil_Tuning_Guide#Limiting_the_ARC_Cache 3. Limiting the ARC Cache The ARC is where ZFS caches data from all active storage pools. The ARC grows and consumes memory on the principle that no need exists to return data to the system while there is still plenty of free memory. When the ARC has grown and outside memory pressure exists, for example, when a new application starts up, then the ARC releases its hold on memory. ZFS is not designed to steal memory from applications. A few bumps appeared along the way, but the established mechanism works reasonably well for many situations and does not commonly warrant tuning. However, a few situations stand out. 125
- 133. Solaris 10 Notes • If a future memory requirement is significantly large and well defined, then it can be advantageous to prevent ZFS from growing the ARC into it. So, if we know that a future application requires 20% of memory, it makes sense to cap the ARC such that it does not consume more than the remaining 80% of memory. • If the application is a known consumer of large memory pages, then again limiting the ARC prevents ZFS from breaking up the pages and fragmenting the memory. Limiting the ARC preserves the availability of large pages. • If dynamic reconfiguration of a memory board is needed (supported on certain platforms), then it is a requirement to prevent the ARC (and thus the kernel cage) togrow onto all boards. For theses cases, it can be desirable to limit the ARC. This will, of course, also limit the amount of cached data and this can have adverse effects on performance. No easy way exists to foretell if limiting the ARC degrades performance. If you tune this parameter, please reference this URL in shell script or in an /etc/system comment. http://www.solarisinternals.com/wiki/ index.php/ZFS_Evil_Tuning_Guide#ARCSIZE You can also use the arcstat script available at http:// blogs.sun.com/realneel/entry/zfs_arc_statistics to check the arc size as well as other arc statistics 4. Set the ARC maximum in /etc/system This syntax is provided starting in the Solaris 10 8/07 release and Nevada (build 51) release. For example, if an application needs 5 GBytes of memory on a system with 36-GBytes of memory, you could set the arc maximum to 30 GBytes, (0x780000000 or 32212254720 bytes). Set the zfs:zfs_arc_max parameter in the /etc/system file: /etc/system: set zfs:zfs_arc_max = 0x780000000 * or set zfs:zfs_arc_max = 32212254720 5. Perl code to configure ARC cache at boot time - init script #!/bin/perl use strict; my $arc_max = shift @ARGV; if ( !defined($arc_max) ) { print STDERR "usage: arc_tune <arc max>n"; exit -1; } $| = 1; use IPC::Open2; my %syms; my $mdb = "/usr/bin/mdb"; open2(*READ, *WRITE, "$mdb -kw") || die "cannot execute mdb"; print WRITE "arc::print -an"; while(<READ>) { my $line = $_; if ( $line =~ /^ +([a-f0-9]+) (.*) =/ ) { $syms{$2} = $1; 126
- 134. Solaris 10 Notes } elsif ( $line =~ /^}/ ) { last; } } # set c & c_max to our max; set p to max/2 printf WRITE "%s/Z 0x%xn", $syms{p}, ( $arc_max / 2 ); print scalar <READ>; printf WRITE "%s/Z 0x%xn", $syms{c}, $arc_max; print scalar <READ>; printf WRITE "%s/Z 0x%xn", $syms{c_max}, $arc_max; print scalar <READ>; 127
- 135. Chapter 10. VMWare ESX 3 Enable iSCSI Software Initiators 1. Enables the software iSCSI initiator. # esxcfg-swiscsi -e 2. Configures the ESX Service Console firewall (iptables) to allow the software iSCSI traffic. # esxcfg-firewall -e swISCSIClient 3. Sets the target IP address for the vmhba40 adapter (the software iSCSI initiator). # vmkiscsi-tool -D -a 192.168.100.50 vmhba40 4. Rescans for storage devices on vmhba40. # esxcfg-rescan vmhba40 General esxcfg commands Table 10.1. esxcfg-commands ESX 3 Command Description esxcfg-advcfg The esxcfg-advcfg command is interesting as there is not a huge amount of help about this command. However, we can figure out that it is meant to do advanced configuration and we can figure out some settings that can be made. The -g switch is used to "get" settings; the -s switch is used to "set" settings. esxcfg-firewall The service console in ESX 3 now has a firewall enabled by default. We use this command to view and configure the firewall rules. The most popular switch will be the -q switch to query the firewall for its settings. The -s switch will allow you to enable or disable network services that may traverse the firewall successfully. The list of known services are shown below - very case sensitive!.... The -l switch loads the firewall and enables the IP tables. The - u switch unloads the firewall and disables the IP tables. We use the -e switch to enable a particular known service. We use the -d switch to disable a service. esxcfg-module This command produces an output similar to vmkload_mod -list esxcfg-rescan As vmkfstools -rescan esxcfg-vswitch This command allows you to list, add, modify or delete virtual Ethernet switches on an ESX host. The simplest option with this command is the -l option to list the virtual switches defined on the host. If you 128
- 136. VMWare ESX 3 ESX 3 Command Description are having problems with your ESX server after an in-place upgrade, this tool is invaluable in resolving the problems with service console networking. esxcfg-auth Configures the service console authentication options including NIS, LDAP, Kerberos and Active Directory. esxcfg-info Produces an enormous amount of information about the ESX host. You really need to pipe this to a file for closer examination! esxcfg-mpath Manages multi-pathing just as the vmkmultipath utility did in previous versions of ESX Server. esxcfg-resgrp Used to manage the new ESX feature called resource groups. This command can add, remove or modify existing resource groups. esxcfg-hbadevs esxcfg-hbadevs The esxcfg-vmhbadevs command is used to list the equivalent Linux device names for the visible disk devices that the VMkernel references using vmhba notation. If we use this command with the –m switch, then we only list the LUNs which contain VMFS partitions. Alongside the Linux device name, a long unique hexadecimal value is listed. This is the VMFS volume signature assigned by the new logical volume manager (LVM). esxcfg-boot Used to configure the GRUB options presented at boot time. One thing to note is that the new esxcfg commands will not run if you boot just into Linux. If you just want to query the boot settings, you can use the -q switch but this must be qualified with the keyword boot or vmkmod. esxcfg-nas Used to configure access to Network Attached Storage (NAS). esxcfg-route If we add an IP address to the VMkernel by adding a VMkernel port, then we can fully configure that IP stack by also assigning a default gateway. We can view (no parameters) and set (1st parameter) the VMkernel IP default gateway with the esxcfg-route command esxcfg-vmknic Used to view and set configure the VMkernel ports on virtual Ethernet switches. A VMkernel port is a special type of port group on a virtual Ethernet switch which is used to assign an IP address to the VMkernel. The VMkernel only needs an IP address for VMotion, software-initiated iSCSI or NFS access. If you need to create a VMkernel port at the command line, then you need to create a port group first and then enable it as a VMkernel port. There doesn’t appear to be a way of enabling 129
- 137. VMWare ESX 3 ESX 3 Command Description a VMkernel port for VMotion from the command line. esxcfg-dumppart Used to configure the VMkernel crash dump partition. The old ESX 2.x utility for this function (vmkdump) is still present on an ESX 3 server, but appears just to be for extracting dump files. esxcfg-linuxnet esxcfg-linuxnet --setup esxcfg-nics This tool can be used to view and configure the speed and duplex settings of the physical network cards in the ESX Server. So this tool can replace the MUI Network Connections/Physical Adapters, the mii-tool and modules.conf for network card management, esxcfg-swiscsi ESX version 3.0 supports both hardware and software iSCSI. For hardware iSCSI, we can use host bus adapters which perform the TCP offload and so the vmkernel can just pass SCSI commands to them as normal. The iSCSI hba can then wrap the SCSI command in TCP/IP and forward to the iSCSI target. However, in software iSCSI (swiscsi), the wrapping of SCSI commands in TCP/IP is performed by the VMkernel and a regular physical network card can be used to communicate with the iSCSI target. This is exposed in the VI Client as a host bus adapter called vmhba40. This will place a significant load on the VMkernel and wouldn't be that great an idea, but the feature is in ESX 3.0! So we use this tool esxcfg-swiscsi to configure it. The software iSCSI initiator in the VMkernel has a dependency upon the service console, therefore both the service console and VMkernel must have an IP route to the iSCSI target. I have found that you need this command to scan for a new iSCSI target, as the VI Client rescan of the vmhba40 adapter doesn't appear to successfully discover targets. My suggestion for getting the software iSCSI to work is as follows: 1. Add a VMkernel port to a vSwitch that has an uplink and route to iSCSI target#2. Ensure service console IP interface has a route to the same iSCSI target#3. Using either the VI Client security profile or the esxcfg-firewall, open a service console port for iSCSI (TCP:3260)#4. In the VI Client, enable the vmhab40 software iSCSI adapter and wait for the reconfiguration task to change from "In Progress" to "Completed"#5. Reboot the ESX host. This step will result in the VMkernel module for iSCSI being loaded at next boot.#6. In the VI Client, configure the vmhba40 adapter with an iSCSI target IP address#7. At the service console command line, run esxcfg-swiscsi -e#8. At the service console command line, run esxcfg-swiscsi -d#9. At the 130
- 138. VMWare ESX 3 ESX 3 Command Description service console command line, run esxcfg-swiscsi -e#10. At the service console command line, run esxcfg-swiscsi -s#11. In the VI Client, perform a rescan of the vmhba adapters and your iSCSI target should become visible. General vmware-cmd commands Connection Options # /usr/bin/vmware-cmd Connection Options: -H <host> specifies an alternative host (if set, -U and -P must also be set) -O <port> specifies an alternative port -U <username> specifies a user -P <password> specifies a password General Options: -h More detailed help. -q Quiet. Minimal output -v Verbose. Server Operations # /usr/bin/vmware-cmd -l # /usr/bin/vmware-cmd -s register <config_file_path> # /usr/bin/vmware-cmd -s unregister <config_file_path> # /usr/bin/vmware-cmd -s getresource <variable> # /usr/bin/vmware-cmd -s setresource <variable> <value> VM Operations #/usr/bin/vmware-cmd<cfg> getconnectedusers #/usr/bin/vmware-cmd<cfg> getstate #/usr/bin/vmware-cmd<cfg> start <powerop_mode> #/usr/bin/vmware-cmd<cfg> stop <powerop_mode> #/usr/bin/vmware-cmd<cfg> reset <powerop_mode> #/usr/bin/vmware-cmd<cfg> suspend <powerop_mode> #/usr/bin/vmware-cmd<cfg> setconfig <variable> <value> #/usr/bin/vmware-cmd<cfg> getconfig <variable> 131
- 139. VMWare ESX 3 #/usr/bin/vmware-cmd<cfg> setguestinfo <variable> <value> #/usr/bin/vmware-cmd<cfg> getguestinfo <variable> #/usr/bin/vmware-cmd<cfg> getproductinfo <prodinfo> #/usr/bin/vmware-cmd<cfg> connectdevice <device_name> #/usr/bin/vmware-cmd<cfg> disconnectdevice <device_name> #/usr/bin/vmware-cmd<cfg> getconfigfile #/usr/bin/vmware-cmd<cfg> getheartbeat #/usr/bin/vmware-cmd<cfg> getuptime #/usr/bin/vmware-cmd<cfg> gettoolslastactive #/usr/bin/vmware-cmd<cfg> getresource <variable> #/usr/bin/vmware-cmd<cfg> setresource <variable> <value> #/usr/bin/vmware-cmd<cfg> hassnapshot #/usr/bin/vmware-cmd<cfg> createsnapshot <name> <description> <quiesce> <memory> #/usr/bin/vmware-cmd<cfg> revertsnapshot #/usr/bin/vmware-cmd<cfg> answer Common Tasks Expand a VM Disk to 20GB #vmkfstools -X 20GB /vmfs/volumes/<datastore>/virtualguest.vmdk Register/Un-Register a VMW # /usr/bin/vmware-cmd -s register /vmfs/volumes/<datastore>/ virtualguest.vmx # /usr/bin/vmware-cmd -s unregister /vmfs/volumes/<datastore>/ virtualguest.vmx Start/Stop/Restart/Suspend a VMW # /usr/bin/vmware-cmd /vmfs/volumes/<datastore>/virtualguest.vmx start # /usr/bin/vmware-cmd /vmfs/volumes/<datastore>/virtualguest.vmx stop # /usr/bin/vmware-cmd /vmfs/volumes/<datastore>/virtualguest.vmx reset # /usr/bin/vmware-cmd /vmfs/volumes/<datastore>/virtualguest.vmx suspend 132
- 140. VMWare ESX 3 Show Disk Paths # esxcfg-mpath -l Disk vmhba0:0:0 /dev/cciss/c0d0 (69459M has 1 paths and policy of Fixed#Local 2:1.0 vmhba0:0:0 On active preferred Disk vmhba1:0:0 (0M has 1 paths and policy of Most Recently Used# FC 10:1.0 210000e08b846a72<->5006016930221397 vmhba1:0:0 On active preferred Disk vmhba1:0:6 /dev/sda (9216M has 1 paths and policy of Most Recently Used#FC 10:1.0 210000e08b846a72<->5006016930221397 vmhba1:0:6 On active preferred Disk vmhba1:0:21 /dev/sdb (10240M has 1 paths and policy of Most Recently Used#FC 10:1.0 210000e08b846a72<->5006016930221397 vmhba1:0:21 On active preferred Map Disks to HBA's # esxcfg-vmhbadevs vmhba0:0:0 /dev/sda #vmhba0:0:1 /dev/sdb# vmhba0:0:2 /dev/sdc #vmhba0:0:3 /dev/sdd# vmhba2:0:0 /dev/sde #vmhba2:1:0 /dev/sdf Map Disk Partitions to HBA's # esxcfg-vmhbadevs -m vmhba0:0:0:1 /dev/sda1 45407607-fbc43ced-94cb-00145e231ce3# vmhba0:0:2:1 /dev/sdc1 455b08a8-8af7fee3-daa9-00145e231e35# vmhba2:0:0:3 /dev/sde3 4559c75f-831d8f3e-bc81-00145e231e35 Get and Set the Default Router # esxcfg-route VMkernel default gateway is 100.100.100.254 # esxcfg-route 100.100.100.1 VMkernel default gateway set to 100.100.100.1 Shared Disks with out RAW Access 1. Building Your VMWare Shared Disk • create a empty folder on your harddisk where you will place your virtual disks. 133
- 141. VMWare ESX 3 • Create a new virtual disk. • Disk size 20Gb or less or more. (do not allocate disk now) • Define your destination path as created previously + name your disk DATA-SHARED • elect the advanced options: select the virtual device node to "SCSI 1:0" and the mode to "Independent" and "Persistent" 2. Adding Line in VMWare Configuration File Go to the bottom of the vmx file. There you will see the following lines: scsi1.present = "TRUE" scsi1.sharedBus = "none" scsi1.virtualDev = "lsilogic" scsi1:0.present = "TRUE" scsi1:0.fileName = "D:Virtual MachinesShared DiskSHARED-DISK.vmdk" Change them in the lines below: disk.locking = "FALSE" diskLib.dataCacheMaxSize = "0" #scsi1 data storage scsi1.present = "TRUE" scsi1.virtualDev = "lsilogic" scsi1.sharedbus = "none" scsi1:0.present = "TRUE" scsi1:0.fileName = "D:Virtual MachinesShared DiskSHARED-DISK.vmdk" scsi1:0.mode = "independent-persistent" scsi1:0.shared = "TRUE" scsi1:0.redo = "" Using vmclone.pl clone script Note Will need to register and create a new ID after running this script; alonw with sys-unconfig after booting if not DHCP #!/usr/bin/perl # vmclone.pl if ( $< + $> != 0 ) { print "Error: $0 needs to be run as the root user.n"; exit 1; } usage() if ($#ARGV < 1); $source = shift @ARGV; $dest = shift @ARGV; 134
- 142. VMWare ESX 3 unshift @ARGV, "s/$source/$dest/"; # default to replace in text files if ( ! -d "$source" ) { print "Error: Source directory '$source' does not exist.n Please specify a relative path to CWD or the full pathn"; exit 2; } if ( -d "$dest" ) { print "Error: Destination directory '$dest' already exists.n You cannot overwrite an existing VM image with this tool.n"; exit 3; } my $regexwarn = 0; foreach (@ARGV) { if ( ! /^s/[^/]+/[^/]+/$/ ) { $regexwarn = 1; warn "Error: Invalid regex pattern in: $_n"; } } exit 4 if $regexwarn == 1; # If we get here then $source and $dest are good if ( ! mkdir "$dest" ) { print "Error: Failed to create destination dir '$dest': $!n"; exit 4; } # Now get a list of all the files in each # directory and copy them to dest @files = listdir($source); #print @files; foreach $srcfile (@files) { # we want to copy $srcfile from $src to $dest # but first check if we need to rename the file $destfile = $srcfile; if ($destfile =~ /$source/ ) { # source filename contains the source dir name, rename it $destfile =~ s/$source/$dest/gi; } $istext = is_vmtextfile($srcfile); printf("Copying %s: %s/%s -> %s/%sn", ($istext ? "text" : "binary"), $source, $srcfile, $dest, $destfile); 135
- 143. VMWare ESX 3 if ($istext == 0) { # do binary copy - no need to check regx args copy_file_bin("$source/$srcfile", "$dest/$destfile"); } else { # text copy - need to string replace on each line. copy_file_regex("$source/$srcfile", "$dest/$destfile", @ARGV); chmod 0755, "$dest/$destfile" if ($destfile =~ /.vmx$/); # file needs to be mode 0755 } } exit 0; sub copy_file_regex { my $src = shift; my $dst = shift; my @regexs = @_; my $buf = ''; my $regex = ''; open(COPYIN, "<$src") || warn "Can't read $src: $!n"; open(COPYOUT, ">$dst") || warn "Can't write $dst: $!n"; binmode COPYIN; binmode COPYOUT; while ( read(COPYIN, $buf, 65536) ) { #while ($buf = <COPYIN>) { foreach $regex (@regexs) { (undef, $search, $replace) = split("/", $regex); $buf =~ s/$search/$replace/g; } print COPYOUT $buf; } close COPYOUT || warn "Can't close $dst: $!n"; close COPYIN || warn "Can't close $src: $!n"; } sub copy_file_bin { my ($src, $dst) = @_; my $buf; open(COPYIN, "<$src") || warn "Can't read $src: $!n"; open(COPYOUT, ">$dst") || warn "Can't write $dst: $!n"; binmode COPYIN; binmode COPYOUT; while ( read(COPYIN, $buf, 65536) and print COPYOUT $buf ) {}; warn "Could not complete copy: $!n" if $!; close COPYOUT || warn "Can't close $dst: $!n"; close COPYIN || warn "Can't close $src: $!n"; } 136
- 144. VMWare ESX 3 sub is_vmtextfile { my $file = shift; my $istxt = 0; $istxt = 1 if ( $file =~ /.(vmdk|vmx|vmxf|vmsd|vmsn)$/ ); $istxt = 0 if ( $file =~ /-flat.vmdk$/ ); $istxt = 0 if ( $file =~ /-delta.vmdk$/ ); return $istxt; } sub listdir { my $dir = shift; my @nfiles = (); opendir(FH, $dir) || warn "Can't open $dir: $!n"; @nfiles = grep { (-f "$dir/$_" && !-l "$dir/$_") } readdir(FH); closedir(FH); return @nfiles; } sub usage { print <<EOUSAGE; $0: Tool to "quickly" clone a VMware ESX guest OS Usage: $0 sourcedir destdir $0 "source dir" "dest dir" $0 sourcedir destdir [regexreplace [...]] e.g. # vmclone "winxp" "uscuv-clone" 's/memsize = "512"/memsize = "256"/' Clones a vmware image located in sourcedir to the destdir directory. The source machine must be powered off for this to correctly clone it. By default, if any filenames have "sourcedir" as part of their filename, then it is renamed to "destdir". The optional regexreplace argument will cause that regular expression to be performed on all the text files being copied. A default regexreplace of s/sourcedir/destdir/ is done by default. You may use multiple regexs. Author: Paul Gregg <pgregg@pgregg.com> Jan 7, 2007 EOUSAGE exit 1; } Clone VMWare Virtual Guests 1. Copy Directories for the master image to a second location 137
- 145. VMWare ESX 3 # cp -axvsol01 vsol02 2. In the new guest location rename the disk image [/vsol02]# /vmware/bin/vmware-vdiskmanager-n vsol01.vmdk vsol02.vmdk 3. Update vmx file to reference new image name [/vsol02]# mv vsol01.vmx vsol02.vmx 4. Rename virtual machine config and change disk image name in this config file [/vsol02]#sed -i 's/vsol01.vmdk/vsol02.vmdk/' vsol02.vmx 5. Register VMWare Image /usr/bin/vmware-cmd -s register /vmfs/volumes/<datastore>/ virtualguest.vmx Clone VMWare Disks 1. Create directory for clone image # mkdir /vmfs/volumes/myvmfs3/deki 2. Use vmkfstool to clone the image, options dependent on thin or zeroed-thick a. Fully-allocated (“zeroed-thick”): # vmkfstools –i /tmp/Deki_Wiki_Hayes_1.8_VM.vmdk /vmfs/volumes/myvmfs3/ deki/Deki_Wiki_Hayes_1.8_VM.vmdk Destination disk format: VMFS thick Cloning disk '/tmp/Deki_Wiki_Hayes_1.8_VM.vmdk'... Clone: 100% done. b. Allocate-on-use (“thin”): # vmkfstools –i /tmp/Deki_Wiki_Hayes_1.8_VM.vmdk -d thin /vmfs/volumes/ myvmfs3/deki/Deki_Wiki_Hayes_1.8_VM.vmdk Destination disk format: VMFS thin-provisioned Cloning disk '/tmp/Deki_Wiki_Hayes_1.8_VM.vmdk'... Clone: 100% done. 3. Update vmx file to reference new image name scsi0:0.fileName = "SourceVM.vmdk" 4. Register VMWare Image /usr/bin/vmware-cmd -s register /vmfs/volumes/<datastore>/ virtualguest.vmx 138
- 146. VMWare ESX 3 LUN Path Information 1. Log in to the ESX Server host console. 2. Type esxcfg-mpath -l and press Enter. The output appears similar to the following: Disk vmhba2:1:4 /dev/sdh (30720MB) has 2 paths and policy of Most Recently Used FC 10:3.0 210000e08b89a99b<->5006016130221fdd vmhba2:1:4 On active preferred FC 10:3.0 210000e08b89a99b<->5006016930221fdd vmhba2:3:4 Standby Disk vmhba2:1:1 /dev/sde (61440MB) has 2 paths and policy of Most Recently Used FC 10:3.0 210000e08b89a99b<->5006016130221fdd vmhba2:1:1 On active preferred FC 10:3.0 210000e08b89a99b<->5006016930221fdd vmhba2:3:1 Standby The following is an analysis of the first LUN: • Canonical name Disk vmhba2:1:4 /dev/sdh (30720MB) has 2 paths and policy of Most Recently Used FC 10:3.0 210000e08b89a99b<->5006016130221fdd vmhba2:1:4 On active preferred FC 10:3.0 210000e08b89a99b<->5006016930221fdd vmhba2:3:4 Standby This is the canonical device name the ESX Server host used to refer to the LUN. Note When there are multiple paths to a LUN, the canonical name is the first path that was detected for this LUN. • vmhba2:1:4 is one of the Host Bus Adapters (HBA). • vmhba2:1:4 is one of the Host Bus Adapters (HBA). • vmhba2:1:4 is the second storage target (numbering starts at 0) that was detected by this HBA. • vmhba2:1:4 is the number of the LUN on this storage target. For multipathing to work properly, each LUN must present the same LUN number to all ESX Server hosts. 139
- 147. VMWare ESX 3 If the vmhba number for the HBA is a single digit number, it is a physical adapter. If the address is vmhba40 or vmhba32, it is a software iSCSI device for ESX Server 3.0 and ESX Server 3.5 respectively. • Linux device name, Storage Capasity, LUN Type, WWPN, WWNN in order of highlights Disk vmhba2:1:4 /dev/sdh (30720MB) has 2 paths and policy of Most Recently Used FC 10:3.0 210000e08b89a99b<->5006016130221fdd vmhba2:1:4 On active preferred FC 10:3.0 210000e08b89a99b<->5006016930221fdd vmhba2:3:4 Standby This is the associated Linux device handle for the LUN. You must use this reference when using utilities like fdisk. There are three possible valuse for LUN Disk type: • FC: This LUN is presented through a fibre channel device. • iScsi: This LUN is presented through an iSCSI device. • Local: This LUN is a local disk. 140
- 148. Chapter 11. AIX Notes Etherchannel • Create etherchannels in backup mode not aggregation mode. • Identify two cards, ideally on separate PCI buses or in different PCI drawers if possible. • Each card is connected into a different network switch. • All of the Cisco CATALYST switches are paired up for resilience, so the VLAN spans both. • Aggregation mode not preferred as this only works with both cards connected the same CAT, which is a SPOF. 1. Load smitty etherchannel EtherChannel creation example: The etherchannel is made up of the ‘ent1’ and ‘ent2’ cards. # smitty etherchannel Add An Etherchannel Select only the first adapter to be added into the channel Etherchannel Adapters ent1 Enable ALTERNATE ETHERCHANNEL address no ALTERNATE ETHERCHANNEL address Enable GIGABIT ETHERNET JUMBO frames no Mode standard Hash Mode default Backup Adapter ent2 Internet Address to Ping <Default Gateway int> Number of Retries 10 Retry Timeout (sec) 1 2. Backup Adapter The default gateway should be supplied by data networks. The key entry here is the declaration of a backup adapter. This will create the next available ethernet card definition i.e. ‘ent3’. This is a logical device but is also the device on which the IP address will be bound smitty chinet en3 Network Interface Name en3 INTERNET ADDRESS (dotted decimal) <IP address> 141
- 149. AIX Notes Network MASK (hexadecimal or dotted decimal) <subnet mask> Current STATE up Use Address Resolution Protocol (ARP)? yes BROADCAST ADDRESS (dotted decimal) 3. Edit /etc/hosts Edit ‘/etc/hosts’ and set up an entry for the newly configured IP address. The format is ‘<hostname>en*’ in this case: nac001en3 Check that the IP label is being resolved locally via: netstat -i The interface card ‘en3’ will now be available as shown via : ifconfig –a The active card, by default is the first card listed in the etherchannel configuration: lsattr –El ent3 adapter_names ent1 EtherChannel Adapters alt_addr 0x000000000000 Alternate EtherChannel Address backup_adapter ent2 Adapter used when whole channel hash_mode default Determines how outgoing adapter mode standard EtherChannel mode of operation netaddr <gateway address> Address to ping num_retries 10 Times to retry ping before failing retry_time 1 Wait time (seconds) between pings use_alt_addr no Enable Alternate EtherChannel use_jumbo_frame no Enable Gigabit Ethernet Jumbo Use the etherchannel interface en3 as the Device for the NIC resource. An IP resource will depend on this NIC resource. 142
- 150. Chapter 12. Oracle 10g with RAC Oracle General SQL Quick Reference Start DB Console $ emctl start dbconsole Oracle Enterprise Manager 11g Database Control Release 11.1.0.6.0 Copyright (c) 1996, 2007 Oracle Corporation. All rights reserved. https://dom0:1158/em/console/aboutApplication Starting Oracle Enterprise Manager 11g Database Control ................ started. ------------------------------------------------------------------ Logs are generated in directory /oracle/product/11.1.0/db_1/dom0_dbdata/sysman/log Alter table ALTER TABLE cust_table ADD ( cust_sex char(1) NOT NULL, cust_credit_rating number ) create table drop table OS_VERSIONS; create table OS_VERSIONS ( os_name varchar(200), os_type varchar(10), os_update varchar(10), os_major number, os_minor number, os_vendor varchar(20)); insert into table insert into OS_LOV (os_title, os_version) VALUES ('Solaris 8', 'SOL8'); Oracle 10g RAC Solaris Quick Reference Root Memory settings for CRS /etc/system: set semsys:seminfo_semvmx=32767 set semsys:seminfo_semmns=1024 Oracle RAC UDP Settings in /etc/system for RAC /etc/system: 143
- 151. Oracle 10g with RAC set udp:xmit_hiwat=65536 set udp:udp_recv_hiwat=65536 Project Setup for Oracle User # projadd -U oracle -K "project.max-shm-memory=(privileged,21474836480,deny); project.max-shm-ids=(privileged,1024,deny); process.max-sem-ops=(privileged,4000,deny); process.max-sem-nsems=(privileged,7500,deny); project.max-sem-ids=(privileged,4198,deny); process.max-msg-qbytes=(privileged,1048576,deny); process.max-msg-messages=(privileged,65535,deny); project.max-msg-ids=(privileged,5120,deny)" oracle IPMP Public All four public IP addresses need to reside on the same network subnet. The following is the list of IP addresses that will be used in the following example. - Physical IP : 146.56.77.30 - Test IP for ce0 : 146.56.77.31 - Test IP for ce1 : 146.56.77.32 - Oracle VIP : 146.56.78.1 IPMP NIC Configuration at boot time /etc/hostname.ce0 146.56.77.30 netmask + broadcast + group orapub up addif 146.56.77.31 deprecated -failover netmask + broadcast + up /etc/hostname.ce1 146.56.77.32 netmask + broadcast + deprecated group orapub -failover standby up The VIP should now be configured to use all NIC's assigned to the same public IPMP group. By doing this Oracle will automatically choose the primary NIC within the group to configure the VIP, and IPMP will be able to fail over the VIP within the IPMP group upon a single NIC failure. When running VIPCA: At the second screen in VIPCA (VIP Configuration Assistant, 1 of 2), select all NIC's within the same IPMP group where the VIP should run at. If already running execute the following: # srvctl stop nodeapps -n node # srvctl modify nodeapps -n node -o /u01/app/oracle/product/10gdb -A 146.56.78.1/255.255.252.0/ce0|ce1 # srvctl start nodeapps -n node IPMP Private Connections Make sure IPMP is configured prior to install, with Private IP up on both nodes. The recommended solution is not to configure any private interface in oracle. The following steps need to done to use IPMP for the cluster interconnect: 144
- 152. Oracle 10g with RAC 1. If the private interface has already been configured delete the interface with 'oifcfg delif' oifcfg getif oifcfg delif -global <if_name> 2. Set the CLUSTER_INTERCONNECTS parameter in the spfile/init.ora to the physical IP which is swapped by IPMP. DO NOT ADD LINE BREAKS '' ALTER SYSTEM SET CLUSTER_INTERCONNECTS = '10.0.0.25' scope=spfile sid='nick01'; ALTER SYSTEM SET CLUSTER_INTERCONNECTS = '10.0.0.26' scope=spfile sid='nick02'; 3. Set the CLUSTER_INTERCONNECTS also for your ASM instances 4. Verify Correct Settings in use SQL> select * from gv$cluster_interconnects; SQL> show parameter cluster_interconnects; $CRS_HOME/bin/oifcfg getif bge0 170.13.76.0 global public e1000g0 170.13.76.0 global public Permissions for ASM Raw Disks # chown oracle:dba /dev/rdsk/cxtydzs6 # chmod 660 /dev/rdsk/cxtydzs6 Oratab set to use ASM # more /var/opt/oracle/oratab +ASM2:oracle_home_path Check ASM Space $ $ORACLE_HOME/bin/sqlplus "SYS/SYS_password as SYSDBA" SQL> SELECT NAME,TYPE,TOTAL_MB,FREE_MB FROM V$ASM_DISKGROUP; Oracle 10g R2 RAC ASM Reference ASM can not point to /dev/rdsk or /dev/dsk because it can not handle seeing multiple paths to the same disk. /dev/vx/rdmp and /dev/vx/dmp, or a directory with links to emc powerpath or MPXIO devices is an option. Make sure that the disk links in the directory are only to the virtual device, and not to individual paths. ASM_DISKSTRING When an ASM instance initializes, ASM is able to discover and look at the contents of all of the disks in the disk groups that are pointed to by the ASM_DISKSTRING initialization parameter. This saves you from having to specify a path for each of the disks in the disk group. Disk group mounting requires that an ASM instance doing disk discovery be able to access all the disks within the disk group that any other ASM instance having previously mounted the disk group believes are members of that disk group. It is vital that any disk configuration errors be detected before a disk group is mounted. 145
- 153. Oracle 10g with RAC SQL> alter system set "_asm_allow_only_raw_disks"=false scope=spfile; SQL> alter system set asm_diskstring='/asmdisks_file*' scope=both; SQL> shutdown SQL> startup $ mkdir /asmdisks $ cd /asmdisks $ ln -s /dev/rdsk/dev_needed _file_disk_description set oracle_sid=+ASM sqlplus "/ as sysdba" SQL> SELECT disk_number, mount_status, header_status, state, path 2 FROM v$asm_disk DISK_NUMBER MOUNT_S HEADER_STATU STATE PATH - ------ ------- ------- ------- ---------------- 0 CLOSED CANDIDATE NORMAL /ASMDISKS/_FILE_DISK1 1 CLOSED CANDIDATE NORMAL /ASMDISKS/_FILE_DISK2 2 CLOSED CANDIDATE NORMAL /ASMDISKS/_FILE_DISK3 3 CLOSED CANDIDATE NORMAL /ASMDISKS/_FILE_DISK4 Tables and Views Table 12.1. ASM View Table View Name Based on Description V$ASM_DISKGROUP X$KFGRP performs disk discovery and lists diskgroups V$ASM_DISKGROUP_STAT X$KFGRP_STAT lists diskgroups V$ASM_DISK X$KFDSK, X$KFKID perform disk discovery and lists disks + usage metrics V$ASM_DISK_STAT X$KFDSK_STAT, X$KFKID List disks + usage metrics V$ASM_FILE X$KFFIL lists ASM files (1 row per file) V$ASM_ALIAS X$KFALS lists ASM aliases (files, directories) V$ASM_CLIENT X$KFTMTA lists instances DB instances connected to ASM V$OPERATION X$KFGMG lists running rebalancing operations N.A. X$KFFXP Extent mapping table for ASM files Oracle 10g R2 RAC CRS Reference Check Nodeapps $ srvctl status nodeapps -n vm01 VIP is running on node: vm01 GSD is running on node: vm01 146
- 154. Oracle 10g with RAC Listener is running on node: vm01 ONS daemon is running on node: vm01 $ srvctl status nodeapps -n vm02 VIP is running on node: vm02 GSD is running on node: vm02 Listener is running on node: vm02 ONS daemon is running on node: vm02 Check status of ASM $ srvctl status asm -n vm01 ASM instance +ASM1 is running on node vm01. $ srvctl status asm -n vm02 ASM instance +ASM2 is running on node vm02. Check status of DB $ srvctl status database -d esxrac Instance esxrac1 is running on node vm01 Instance esxrac2 is running on node vm02 Check status of CRS Run on each node $ crsctl check crs CSS appears healthy CRS appears healthy EVM appears healthy Oracle RAC SQL Querying RAC gv$instance cluster view SQL> select instance_name, host_name, archiver, thread#, status 2 from gv$instance 3 / INSTANCE_NAME HOST_NAME ARCHIVE THREAD# STATUS -------------- ------------- ------- -------- ------ esxrac1 vm01.wolga.nl STARTED 1 OPEN esxrac2 vm02.wolga.nl STARTED 2 OPEN Querying RAC SGA SQL> show sga Total System Global Area 608174080 bytes Fixed Size 1220820 bytes Variable Size 142610220 bytes Database Buffers 457179136 bytes Redo Buffers 7163904 bytes Querying RAC for datafiles 147
- 155. Oracle 10g with RAC SQL> select file_name, bytes/1024/1024 2 from dba_data_files 3 / FILE_NAME BYTES/1024/1024 ----------------------------------------------- --------------- +ORADATA/esxrac/datafile/system.259.620732719 500 +ORADATA/esxrac/datafile/undotbs1.260.620732753 200 +ORADATA/esxrac/datafile/sysaux.261.620732767 670 +ORADATA/esxrac/datafile/example.263.620732791 150 +ORADATA/esxrac/datafile/undotbs2.264.620732801 200 +ORADATA/esxrac/datafile/users.265.620732817 5 6 rows selected. Querying RAC the status of all the groups, type, membership SQL> select group#, type, member, is_recovery_dest_file 2 from v$logfile 3 order by group# 4 / GROUP# TYPE MEMBER IS_ ------ ------- --------------------------------------------- --- 1 ONLINE +ORADATA/esxrac/onlinelog/group_1.257.620732695 NO 1 ONLINE +FLASH_RECO_AREA/esxrac/onlinelog/group_1.257.620732699 YES 2 ONLINE +ORADATA/esxrac/onlinelog/group_2.258.620732703 NO 2 ONLINE +FLASH_RECO_AREA/esxrac/onlinelog/group_2.258.620732707 YES 3 ONLINE +ORADATA/esxrac/onlinelog/group_3.266.620737527 NO 3 ONLINE +FLASH_RECO_AREA/esxrac/onlinelog/group_3.259.620737533 YES 4 ONLINE +ORADATA/esxrac/onlinelog/group_4.267.620737535 NO 4 ONLINE +FLASH_RECO_AREA/esxrac/onlinelog/group_4.260.620737539 YES Querying RAC for datafiles SQL> select file_name, bytes/1024/1024 2 from dba_data_files 3 / FILE_NAME BYTES/1024/1024 ----------------------------------------------- -------------- +ORADATA/esxrac/datafile/system.259.620732719 500 +ORADATA/esxrac/datafile/undotbs1.260.620732753 200 +ORADATA/esxrac/datafile/sysaux.261.620732767 670 +ORADATA/esxrac/datafile/example.263.620732791 150 +ORADATA/esxrac/datafile/undotbs2.264.620732801 200 +ORADATA/esxrac/datafile/users.265.620732817 5 6 rows selected. Querying RAC v$asm_diskgroup view select group_number, name,allocation_unit_size alloc_unit_size, state,type,total_mb,usable_file_mb from v$asm_diskgroup; GROUP_NUMBER NAME ALLOC_UNIT_SIZE STATE TYPE TOTAL_MB USABLE_FILE_MB ------------ ------------- ---------- -------- ------ ----- ---------- 148
- 156. Oracle 10g with RAC 1 FLASH_RECO_AREA 1048576 CONNECTED EXTERN 10236 2781 2 ORADATA 1048576 CONNECTED NORMAL 20472 8132 Querying RAC v$asm_diskgroup for our volumes select name, path, header_status, total_mb free_mb, trunc(bytes_read/1024/1024) read_mb, trunc(bytes_written/1024/1024) write_mb from v$asm_disk; NAME PATH HEADER_STATU FREE_MB READ_MB WRITE_MB ----- ---------- ------- ---------- ------ -------- VOL1 ORCL:VOL1 MEMBER 10236 39617 15816 VOL2 ORCL:VOL2 MEMBER 10236 7424 15816 VOL3 ORCL:VOL3 MEMBER 10236 1123 13059 Querying RAC All datafiles in one go SQL> select name from v$datafile 2 union 3 select name from v$controlfile 4 union 5 select name from v$tempfile 6 union 7 select member from v$logfile 8 / NAME --------------------------------------------------------- +FLASH_RECO_AREA/esxrac/controlfile/current.256.620732691 +FLASH_RECO_AREA/esxrac/onlinelog/group_1.257.620732699 +FLASH_RECO_AREA/esxrac/onlinelog/group_2.258.620732707 +FLASH_RECO_AREA/esxrac/onlinelog/group_3.259.620737533 +FLASH_RECO_AREA/esxrac/onlinelog/group_4.260.620737539 +ORADATA/esxrac/controlfile/current.256.620732689 +ORADATA/esxrac/datafile/example.263.620732791 +ORADATA/esxrac/datafile/sysaux.261.620732767 +ORADATA/esxrac/datafile/system.259.620732719 +ORADATA/esxrac/datafile/undotbs1.260.620732753 +ORADATA/esxrac/datafile/undotbs2.264.620732801 +ORADATA/esxrac/datafile/users.265.620732817 +ORADATA/esxrac/onlinelog/group_1.257.620732695 +ORADATA/esxrac/onlinelog/group_2.258.620732703 +ORADATA/esxrac/onlinelog/group_3.266.620737527 +ORADATA/esxrac/onlinelog/group_4.267.620737535 +ORADATA/esxrac/tempfile/temp.262.620732779 17 rows selected. Querying RAC Listing all the tablespaces SQL> select tablespace_name, file_name 2 from dba_data_files 3 union 4 select tablespace_name, file_name 149
- 157. Oracle 10g with RAC 5 from dba_temp_files 6 / TABLESPACE_NAME FILE_NAME ---------------- ------------------------------------ EXAMPLE +ORADATA/esxrac/datafile/example.263.620732791 SYSAUX +ORADATA/esxrac/datafile/sysaux.261.620732767 SYSTEM +ORADATA/esxrac/datafile/system.259.620732719 TEMP +ORADATA/esxrac/tempfile/temp.262.620732779 UNDOTBS1 +ORADATA/esxrac/datafile/undotbs1.260.620732753 UNDOTBS2 +ORADATA/esxrac/datafile/undotbs2.264.620732801 USERS +ORADATA/esxrac/datafile/users.265.620732817 7 rows selected. Querying ASM to list disks in use SQL> select name, header_status, path from v$asm_disk; NAME HEADER_STATUS PATH ------------ ------------- ------------------------- CANDIDATE /dev/rdsk/disk07 DISK06 MEMBER /dev/rdsk/disk06 DISK05 MEMBER /dev/rdsk/disk05 DISK04 MEMBER /dev/rdsk/disk04 DISK03 MEMBER /dev/rdsk/disk03 DISK02 MEMBER /dev/rdsk/disk02 DISK01 MEMBER /dev/rdsk/disk01 This script will give you information of the +ASM1 instance files: SQL> select group_number, file_number, bytes/1024/1024/1024 GB, type, striped, modification_date 2 from v$asm_file 3 where TYPE != 'ARCHIVELOG' 4 / GRP_NUM FILE_NUM GB TYPE STRIPE MODIFICAT ------- -------- -------- --------------- ------ --------- 1 256 .01 CONTROLFILE FINE 04-MAY-07 1 257 .05 ONLINELOG FINE 25-MAY-07 1 258 .05 ONLINELOG FINE 24-MAY-07 1 259 .05 ONLINELOG FINE 24-MAY-07 1 260 .05 ONLINELOG FINE 25-MAY-07 1 261 .00 PARAMETERFILE COARSE 24-MAY-07 2 256 .01 CONTROLFILE FINE 04-MAY-07 2 257 .05 ONLINELOG FINE 25-MAY-07 2 258 .05 ONLINELOG FINE 24-MAY-07 2 259 .49 DATAFILE COARSE 04-MAY-07 2 260 .20 DATAFILE COARSE 04-MAY-07 2 261 .65 DATAFILE COARSE 23-MAY-07 2 262 .03 TEMPFILE COARSE 04-MAY-07 2 263 .15 DATAFILE COARSE 04-MAY-07 2 264 .20 DATAFILE COARSE 04-MAY-07 2 265 .00 DATAFILE COARSE 04-MAY-07 2 266 .05 ONLINELOG FINE 24-MAY-07 2 267 .05 ONLINELOG FINE 25-MAY-07 150
- 158. Oracle 10g with RAC 18 rows selected. This script will give you information of the +ASM1 instance files: More detailed information SQL> select group_number, file_number, incarnation, block_size, bytes/1024/1024/1024 GB, type, striped, 2 creation_date 3 from v$asm_file 4 where TYPE != 'ARCHIVELOG' 5 / GRP_NUM FILE_NUM INCARNATION BLOCK_SIZE GB TYPE STRIPE CREATION_ ------- -------- ----------- ------ ------ ------ ------ --------- 1 256 620732691 16384 .01 CONTROLFILE FINE 24-APR-07 1 257 620732699 512 .05 ONLINELOG FINE 24-APR-07 1 258 620732707 512 .05 ONLINELOG FINE 24-APR-07 1 259 620737533 512 .05 ONLINELOG FINE 24-APR-07 1 260 620737539 512 .05 ONLINELOG FINE 24-APR-07 1 261 620737547 512 .00 PARAMETERFILE COARSE 24-APR-07 2 256 620732689 16384 .01 CONTROLFILE FINE 24-APR-07 2 257 620732695 512 .05 ONLINELOG FINE 24-APR-07 2 258 620732703 512 .05 ONLINELOG FINE 24-APR-07 2 259 620732719 8192 .49 DATAFILE COARSE 24-APR-07 2 260 620732753 8192 .20 DATAFILE COARSE 24-APR-07 2 261 620732767 8192 .65 DATAFILE COARSE 24-APR-07 2 262 620732779 8192 .03 TEMPFILE COARSE 24-APR-07 2 263 620732791 8192 .15 DATAFILE COARSE 24-APR-07 2 264 620732801 8192 .20 DATAFILE COARSE 24-APR-07 2 265 620732817 8192 .00 DATAFILE COARSE 24-APR-07 2 266 620737527 512 .05 ONLINELOG FINE 24-APR-07 2 267 620737535 512 .05 ONLINELOG FINE 24-APR-07 18 rows selected. 151
- 159. Chapter 13. EMC Storage PowerPath Commands Table 13.1. PowerPath CLI Commands Command Description powermt Manages a PowerPath environment powercf Configures PowerPath devices emcpreg -install Manages PowerPath liciense registration emcpminor Checks for free minor numbers emcpupgrade Converts PowerPath configuration files Table 13.2. PowerPath powermt commands Command Description powermt check Checks for and optionally removes dead paths powermt check_registration Checks the state of the PowerPath license powermt config Configures local devices as PowerPath devices powermt display Displays the state of HBA configured for PowerPath powermt display options Displays the periodic autorestore settings powermt load Loads a PowerPath configuration powermt remove Removes a path from the PowerPath configuration powermt restore Tests and restores paths powermt save Saves a custom PowerPath configuration powermt set mode Sets paths to active or standby mode powermt set Enables or disables periodic autorestore powermt set policy Changes the load balancing and failover policy powermt set priority Sets the I/O priority powermt version Returns the number of PowerPath version for which powermt was created periodic_autorestore Same as powermt set powermt watch Same as powermt display - deprecated PowerPath Command Examples # powermt check_registration Key B3P3-HB43-CFMR-Q2A6-MX9V-O9P3 Product: PowerPath Capabilities: Symmetrix CLARiiON # powermt display dev=emcpower6a 152
- 160. EMC Storage Pseudo name=emcpower6a Symmetrix ID=000184503070 Logical device ID=0021 state=alive; policy=SymmOpt; priority=0; queued-IOs=0 ----------- Host --------- - Stor - -- I/O Path - -- Stats --- ### HW Path I/O Paths Interf. Mode State Q-IOs Errors 0 sbus@2,0/fcaw@2,0 c4t25d225s0 FA 13bA active dead 0 1 1 sbus@6,0/fcaw@1,0 c5t26d225s0 FA 4bA active alive 0 0 # powermt display paths Symmetrix logical device count=20 - Host Bus Adapters - - Storage System - - I/O Paths - ### HW Path ID Interface Total Dead 0 sbus@2,0/fcaw@2,0 000184503070 FA 13bA 20 20 1 sbus@6,0/fcaw@1,0 000184503070 FA 4bA 20 0 CLARiiON logical device count=0 - Host Bus Adapters --- ---- Storage System --- - I/O Paths - ### HW Path ID Interface Total Dead # powermt display ports Storage class = Symmetrix ------ Storage System ------- -- I/O Paths -- --- Stats --- ID Interface Wt_Q Total Dead Q-IOs Errors 000184503070 FA 13bA 256 20 20 0 20 000184503070 FA 4bA 256 20 0 0 0 Storage class = CLARiiON ------ Storage System ----- -- I/O Paths -- --- Stats --- ID Interface Wt_Q Total Dead Q-IOs Errors Disable PowerPath 1. Please ensure that LUNS are available to the host from multiple paths # powermt display 2. Stop the Application so that there is no i/o issued to Powerpath devices If the application is under VCS control , please offline the service on that node # hagrp –offline <servicename> offline 3. Unmount filesystems and Stop the volumes so that there is no volumes under i/o 153
- 161. EMC Storage # umount /<mount_point #vxvol –g <dgname> stop all 4. Stop CVM and VERITAS Fencing on the node ( if part of a VCS cluster) NOTE: All nodes in VCS cluster need to be brought down if CVM / fencing are enabled. #vxclustadm stopnode # /etc/init.d/vxfen stop 5. Disable volume Manager startup #touch /etc/vx/reconfig.d/state.d/install-db 6. Reboot host #shutdown –y –i6 7. Unmanage/remove Powerpath devices #powermt remove dev=all 8. Verify that Powerpath devices have been removed #powermt display dev=all 9. Uninstall Powerpath Binaries (package) #pkgrm EMCpower 10.Run EMC Powerpath cleanup script #/etc/emcp_cleanup 11.Reboot the host only if Powerpath Uninstall requests a reboot. 12.Start VERITAS Volume Manager daemons #vxconfigd –m enable 13.Enable Volume Manager Startup ( disabled in step 5 ) #rm /etc/vx/reconfig.d/state.d/install-db 14.Update Boot alias of host if required in OBP INQ Syminq Notes 1. When running inq or syminq, you'll see a column titled Ser Num. This column has quite a bit of information hiding in it. An example syminq output is below. Your output will differ slightly as I'm creating a table from a book to show this; I don't currently have access to a system where I can get the actual output just yet. /dev/dsk/c1t0d0 EMC SYMMETRIX 5265 73009150 459840 /dev/dsk/c1t4d0 BCV EMC SYMMETRIX 5265 73010150 459840 /dev/dsk/c1t5d0 GK EMC SYMMETRIX 5265 73019150 2880 154
- 162. EMC Storage /dev/dsk/c2t6d0 GK EMC SYMMETRIX 5265 7301A281 2880 Using the first and last serial numbers as examples, the serial number is broken out as follows: 73 Last two digits of the Symmetrix serial number 009 Symmetrix device number 15 Symmetrix director number. If <= 16, using the A processor 0 Port number on the director -------------------------------------------------------- 73 Last two digits of the Symmetrix serial number 01A Symmetrix device number 28 Symmetrix director number. If > 16, using the B proccessor on board: (${brd}-16). 0 Port number on the director So, the first example, device 009 is mapped to director 15, processor A, port 0 while the second example has device 01A mapped to director 12, processor B, port 0. Even if you don't buy any of the EMC software, you can get the inq command from their web site. Understanding the serial numbers will help you get a better understanding of which ports are going to which hosts. Understanding this and documenting it will circumvent hours of rapturous cable tracings. Brocade Switches 1. Brocade Configuration Information Basic Brocade Notes DS8B_ID3:admin> switchshow switchName: DS8B_ID3 switchType: 3.4 switchState: Online switchRole: Principal switchDomain: 3 switchId: fffc03 switchWwn: 10:00:00:60:69:20:50:a9 switchBeacon: OFF port 0: id Online F-Port 50:06:01:60:20:02:f5:a1 - SPA port 1: id Online F-Port 50:06:01:68:20:02:f5:a1 - SPB port 2: id Online F-Port 10:00:00:00:c9:28:3a:fc - cdb-lpfc0 port 3: id Online F-Port 10:00:00:00:c9:28:3d:21 - cdb-lpfc1 port 4: id Online F-Port 10:00:00:00:c9:28:3d:0a - cmn-lpfc0 port 5: id Online F-Port 10:00:00:00:c9:26:ac:16 - cmn-lpfc1 port 6: id No_Light port 7: id No_Light DS8B_ID3:admin> DS8B_ID3:admin> cfgshow Defined configuration: cfg: CFG CSA_A_PATH; CSA_B_PATH 155
- 163. EMC Storage zone: CSA_A_PATH CSA_SPA; DB1_LPFC0; MN1_LPFC0 zone: CSA_B_PATH CSA_SPB; DB1_LPFC1; MN1_LPFC1 alias: CSA_SPA 50:06:01:60:20:02:f5:a1 alias: CSA_SPB 50:06:01:68:20:02:f5:a1 alias: DB1_LPFC0 10:00:00:00:c9:28:3a:fc alias: DB1_LPFC1 10:00:00:00:c9:28:3d:21 alias: MN1_LPFC0 10:00:00:00:c9:28:3d:0a alias: MN1_LPFC1 10:00:00:00:c9:26:ac:16 Effective configuration: cfg: CFG zone: CSA_A_PATH 50:06:01:60:20:02:f5:a1 10:00:00:00:c9:28:3a:fc 10:00:00:00:c9:28:3d:0a zone: CSA_B_PATH 50:06:01:68:20:02:f5:a1 10:00:00:00:c9:28:3d:21 10:00:00:00:c9:26:ac:16 DS8B_ID3:admin> 2. Brocade Configuration Walkthrough a. Basic SwitchShow DS8B_ID3:admin> switchshow switchName: DS8B_ID3 switchType: 3.4 switchState: Online switchRole: Principal switchDomain: 3 switchId: fffc03 switchWwn: 10:00:00:60:69:20:50:a9 switchBeacon: OFF port 0: id Online F-Port 50:06:01:60:20:02:f5:a1 port 1: id Online F-Port 50:06:01:68:20:02:f5:a1 port 2: id Online F-Port 10:00:00:00:c9:28:3a:fc port 3: id Online F-Port 10:00:00:00:c9:28:3d:21 port 4: id No_Light port 5: id No_Light port 6: id No_Light port 7: id No_Light b. Create Aliases DS8B_ID3:admin> alicreate "CSA_SPA", "50:06:01:60:20:02:f5:a1" 156
- 164. EMC Storage DS8B_ID3:admin> alicreate "CSA_SPB", "50:06:01:68:20:02:f5:a1" DS8B_ID3:admin> alicreate "DB1_LPFC0", "10:00:00:00:c9:28:3a:fc" DS8B_ID3:admin> alicreate "DB1_LPFC1", "10:00:00:00:c9:28:3d:21" c. Create Zones DS8B_ID3:admin> zoneCreate "CSA_A_PATH" , "CSA_SPA; DB1_LPFC0" DS8B_ID3:admin> zoneCreate "CSA_B_PATH" , "CSA_SPB; DB1_LPFC1" DS8B_ID3:admin> cfgCreate "CFG", "CSA_A_PATH; CSA_B_PATH" d. Save and Enable New Configuration DS8B_ID3:admin> cfgCreate "CFG", "CSA_A_PATH; CSA_B_PATH" DS8B_ID3:admin> cfgSave Updating flash ... DS8B_ID3:admin> cfgEnable "CFG" zone config "CFG" is in effect Updating flash ... 0x10e6e440 (tThad): Jun 21 04:26:09 Error FW-CHANGED, 4, fabricZC000 (Fabric Zoning change) value has changed. current value : 7 Zone Change(s). (info) e. Show Zone Configuration DS8B_ID3:admin> zoneshow Defined configuration: cfg: CFG CSA_A_PATH; CSA_B_PATH zone: CSA_A_PATH CSA_SPA; DB1_LPFC0 zone: CSA_B_PATH CSA_SPB; DB1_LPFC1 alias: CSA_SPA 50:06:01:60:20:02:f5:a1 alias: CSA_SPB 50:06:01:68:20:02:f5:a1 alias: DB1_LPFC0 10:00:00:00:c9:28:3a:fc alias: DB1_LPFC1 10:00:00:00:c9:28:3d:21 Effective configuration: cfg: CFG zone: CSA_A_PATH 50:06:01:60:20:02:f5:a1 10:00:00:00:c9:28:3a:fc zone: CSA_B_PATH 50:06:01:68:20:02:f5:a1 10:00:00:00:c9:28:3d:21 157
- 165. Chapter 14. Dtrace Track time on each I/O iotime.d #pragma D option quiet BEGIN { printf("%10s %58s %2s %7sn", "DEVICE", "FILE", "RW", "MS"); } io:::start { start[args[0]->b_edev, args[0]->b_blkno] = timestamp; } io:::done /start[args[0]->b_edev, args[0]->b_blkno]/ { this->elapsed = timestamp - start[args[0]->b_edev, args[0]->b_blkno]; printf("%10s %58s %2s %3d.%03dn", args[1]->dev_statname, args[2]->fi_pathname, args[0]->b_flags & B_READ ? "R" : "W", this->elapsed / 10000000, (this->elapsed / 1000) % 1000); start[args[0]->b_edev, args[0]->b_blkno] = 0; } Example run of iotime.d # dtrace -s ./iotime.d DEVICE FILE RW MS cmdk0 /kernel/drv/scsa2usb R 24.781 cmdk0 /kernel/drv/scsa2usb R 25.208 cmdk0 /var/adm/messages W 25.981 cmdk0 /kernel/drv/scsa2usb R 5.448 cmdk0 <none> W 4.172 cmdk0 /kernel/drv/scsa2usb R 2.620 cmdk0 /var/adm/messages W 0.252 cmdk0 <unknown> R 3.213 cmdk0 <none> W 3.011 cmdk0 <unknown> R 2.197 cmdk0 /var/adm/messages W 2.680 cmdk0 <none> W 0.436 cmdk0 /var/adm/messages W 0.542 cmdk0 <none> W 0.339 cmdk0 /var/adm/messages W 0.414 cmdk0 <none> W 0.344 cmdk0 /var/adm/messages W 0.361 cmdk0 <none> W 0.315 cmdk0 /var/adm/messages W 0.421 cmdk0 <none> W 0.349 cmdk0 <none> R 1.524 cmdk0 <unknown> R 3.648 158
- 166. Dtrace cmdk0 /usr/lib/librcm.so.1 R 2.553 cmdk0 /usr/lib/librcm.so.1 R 1.332 cmdk0 /usr/lib/librcm.so.1 R 0.222 cmdk0 /usr/lib/librcm.so.1 R 0.228 cmdk0 /usr/lib/librcm.so.1 R 0.927 cmdk0 <none> R 1.189 ... Track directories where writes are occurring whowrite.d #pragma D option quiet io:::start /args[0]->b_flags & B_WRITE/ { @[execname, args[2]->fi_dirname] = count(); } END { printf("%20s %51s %5sn", "WHO", "WHERE", "COUNT"); printa("%20s %51s %5@dn", @); } Example run of whowrite.d # dtrace -s ./whowrite.d ^C WHO WHERE COUNT su /var/adm 1 fsflush /etc 1 fsflush / 1 fsflush /var/log 1 fsflush /export/bmc/lisa 1 fsflush /export/bmc/.phoenix 1 vi /var/tmp 2 vi /etc 2 cat <none> 2 bash / 2 vi <none> 3 159
- 167. Chapter 15. Disaster Recovery VVR 5.0 VVR Configuration Setting up replication in a global cluster environment involves the following tasks: • Creating the SRL in the disk group for the database. • Creating the RVG on the primary site. • Setting up replication objects on the secondary site. Creating the SRL volume on the primary site Create the Storage Replicator Log (SRL), a volume in the Replicated Volume Group (RVG). The RVG also holds the data volumes for replication. • The data volume on the secondary site has the same name and the same size as the data volume on the primary site. • The SRL on the secondary site has the same name and the same size as the SRL on the primary site. • The data volume and the SRL should exist in the same disk group. • If possible, create SRLs on disks without other volumes. • Mirror SRLs and data volumes in the absence of hardware-based mirroring. After determining the size of the SRL volume, create the volume in the shared disk group for the Oracle database. If hardware-based mirroring does not exist in your setup, use the nmirror option to mirror the volume. In this example, the Oracle database is in the oradatadg shared disk group on the primary site and the size required for the SRL volume is 1.5 GB: To create the SRL volume on the primary site 1. On the primary site, determine the size of the SRL volume based on the configuration and use. 2. Determine whether a node is the master or the slave: (if on CFS Cluster) # vxdctl -c mode 3. From the master node, issue the following command: (after disk group created). Make sure that the data disk has a minimum of 500M of free space after creating the SRL volume. # vxassist -g oradatadg make rac1_srl 1500M nmirror=2 disk4 disk5 4. Start the SRL volume by starting all volumes in the disk group: # vxvol -g oradatadg startall Setting up replication objects on the primary site Before creating the RVG on the primary site, make sure the replication objects are active and online. To create the RVG 160
- 168. Disaster Recovery The command to create the primary RVG takes the form: • disk_group is the name of the disk group containing the database • rvg_name is the name for the RVG • data_volume is the volume that VVR replicates • srl_volume is the volume for the SRL vradmin -g disk_group createpri rvg_name data_volume srl_volume The command creates the RVG on the primary site and adds a Data Change Map (DCM) for each data volume. In this case, a DCM exists for rac1_vol). Configuring replication for the secondary site To create objects for replication on the secondary site, use the vradmin command with the addsec option. To set up replication on the secondary site: • Creating a disk group on the storage with the same name as the equivalent disk group on the primary site if you have not already done so. • Creating volumes for the database and SRL on the secondary site. • Editing the /etc/vx/vras/.rdg file on the secondary site. • Resolvable virtual IP addresses that set network RLINK connections as host names of the primary and secondary sites. • Creating the replication objects on the secondary site. Creating the data and SRL volumes on the secondary site To create the data and SRL volumes on the secondary site 1. In the disk group created for the Oracle database, create a volume for data; in this case, the rac_vol1 volume on the primary site is 6.6 GB: # vxassist -g oradatadg make rac_vol1 6600M nmirror=2 disk1 disk2 2. Create the volume for the SRL, using the same name and size of the equivalent volume on the primary site. Create the volume on a different disk from the disks for the database volume: # vxassist -g oradatadg make rac1_srl 1500M nmirror=2 disk4 disk6 Editing the /etc/vx/vras/.rdg files Editing the /etc/vx/vras/.rdg file on the secondary site enables VVR to replicate the disk group from the primary site to the secondary site. On each node, VVR uses the /etc/vx/vras/.rdg file to check the authorization to replicate the RVG on the primary site to the secondary site. The file on each node in the secondary site must contain the primary disk group ID, and likewise, the file on each primary system must contain the secondary disk group ID. 1. On a node in the primary site, display the primary disk group ID: # vxprint -l diskgroup 161
- 169. Disaster Recovery 2. On each node in the secondary site, edit the /etc/vx/vras/.rdg file and enter the primary disk group ID on a single line. 3. On each cluster node of the primary cluster, edit the file and enter the primary disk group ID on a single line. Setting up IP addresses for RLINKs on each cluster Creating objects with the vradmin command requires resolvable virtual IP addresses that set network RLINK connections as host names of the primary and secondary sites. To set up IP addresses for RLINKS on each cluster 1. on one of the nodes of the clusterFor each RVG running on each cluster, set up a virtual IP address on one of the nodes of the cluster. These IP addresses are part of the RLINK. The example assumes that the public network interface iseth0:1, the virtual IP address is 10.10.9.101, and the net mask is 255.255.240.0 for the cluster on the primary site: # ifconfig eth0:1 inet 10.10.9.101 netmask 255.255.240.0 up 2. Use the same commands with appropriate values for the interface, IP address, and net mask on the secondary site. The example assumes the interface is eth0:1, virtual IP address is 10.11.9.102, and the net mask is 255.255.240.0 on the secondary site. 3. Define the virtual IP addresses to correspond to a virtual cluster host name on the primary site and a virtual cluster host name on the secondary site. For example, update /etc/hosts file on all nodes in each cluster. The examples assume rac_clus101_priv has IP address 10.10.9.101 and rac_clus102_priv has IP address 10.11.9.102. 4. Use the ping command to verify the links are functional. Setting up disk group on secondary site for replication Create the replication objects on the secondary site from the master node on the primary site, using the vradmin command. To set up the disk group on the secondary site for replication 1. Issue the command in the following format from the cluster on the primary site: • dg_pri is the disk group on the primary site that VVR will replicate. For example: oradatadg • rvg_pri is the RVG on the primary site. For example: rac1_rvg • pri_host is the virtual IP address or resolvable virtual host name of the cluster on the primary site. For example: 10.10.9.101 or rac_clus101_priv • sec_host is the virtual IP address or resolvable virtual host name of the cluster on the secondary site. For example: 10.11.9.102 or rac_clus102_priv vradmin -g dg_pri addsec rvg_pri pri_host sec_host 2. On the secondary site, the command: • Creates an RVG within the specified disk group using the same name as the one for the primary site • Associates the data and SRL volumes that have the same names as the ones on the primary site with the specified RVG 162
- 170. Disaster Recovery • Adds a data change map (DCM) for the data volume • Creates cluster RLINKS for the primary and secondary sites with the default names; for example, the “primary” RLINK created for this example is rlk_rac_clus102_priv_rac1_rvg and the “secondary” RLINK created is rlk_rac_clus101_priv_rac1_rvg. 3. Verify the list of RVGs in the RDS by executing the following command. # vradmin -g oradg -l printrvg Reeplicated Data Set: rac1_rvg Primary: HostName: 10.180.88.187 <localhost> RvgName: rac1_rvg DgName: oradatadg datavol_cnt: 1 vset_cnt: 0 srl: rac1_srl RLinks: name=rlk_10.11.9.102_ rac1_rvg, detached=on, synchronous=off Secondary: HostName: 10.190.99.197 RvgName: rac1_rvg DgName: oradatadg datavol_cnt: 1 vset_cnt: 0 srl: rac1_srl RLinks: name=rlk_10.10.9.101_ rac1_rvg, detached=on, synchronous=off Starting replication using automatic synchronization From the primary site, automatically synchronize the RVG on the secondary site: vradmin -g disk_group -a startrep pri_rvg sec_host Starting replication using full synchronization with Checkpoint vradmin -g disk_group -full -c ckpt_name syncrvg pri_rvg sec_host General VVR Tasks using 5.0MP3 VVR using 5.0MP3 and RP1 or 2 Example of VVR Log Status requiring Failback Synchronization # vradmin -g hubdg repstatus hubrvg Replicated Data Set: hubrvg Primary: Host name: 167.138.164.117 RVG name: hubrvg DG name: hubdg 163
- 171. Disaster Recovery RVG state: enabled for I/O Data volumes: 3 VSets: 0 SRL name: hubsrl SRL size: 67.40 G Total secondaries: 1 Primary (acting secondary): Host name: 162.111.101.196 RVG name: hubrvg DG name: hubdg Data status: consistent, behind Replication status: logging to DCM (needs failback synchronization) Current mode: asynchronous Logging to: DCM (contains 3708448 Kbytes) (failback logging) Timestamp Information: N/A Config Errors: 162.111.101.196: Primary-Primary configuration Example of VVR Log Status Not requiring Failback Synchronization # vradmin -g hubdg repstatus hubrvg Replicated Data Set: hubrvg Primary: Host name: 167.138.164.117 RVG name: hubrvg DG name: hubdg RVG state: enabled for I/O Data volumes: 3 VSets: 0 SRL name: hubsrl SRL size: 67.40 G Total secondaries: 1 Secondary: Host name: 162.111.101.196 RVG name: hubrvg DG name: hubdg Data status: consistent, up-to-date Replication status: replicating (connected) Current mode: asynchronous Logging to: SRL Timestamp Information: behind by 0h 0m 0s Establishing Fail-back Synchronization # vradmin -g hubdg fbsync hubrvg 164
- 172. Disaster Recovery Enable Replication from Identified Production VVR Master # vradmin –g hubdg addvol hubrvg tibcoems3 Growing an SRL for Replication The SRL is a storage point for changes between the source and destination being replicated, there are some cases where the SRL needs to be extended in order to allow for extended timeframes where replication can not take place. To grow the SRL use the following procedure. Make sure that there is enough disk space on both the Production and Disaster Recovery Clusters # vxdg –g hubdg free From the production cluster run the vradmin resizevol command against the rvg, diskgroup and volume to be expanded. [+]Size is to grow the SRL [-]Size will shrink the SRL and no [-|+] will set the SRL to that size. # vradmin –g hubdg resizesrl hubrvg +100m Pausing Replication between the Production and DR Clusters Specifying the remote hostname is not necessary in this environment since there is only one secondary host. # vradmin –g hubdg pauserep hubrvg Restarting Replication between the Production and DR Clusters Specifying the remote hostname is not necessary in this environment since there is only one secondary host. # vradmin –g hubdg resumerep hubrvg Example Failback from DR to Primary Failing due to need for fbsync 2009/08/07 15:35:04 VCS WARNING V-16-20012-82 (ncib1hubp003b1) RVGSharedPri:hubrvg_pri:online:RVG hubrvg is acting_secondary. Please resync from primary 2009/08/07 15:37:04 VCS ERROR V-16-2-13066 (ncib1hubp003a1) Agent is calling clean for resource(hubrvg_pri) because the resource is not up even after online completed. Example disconnection due to WAN event - GCO Declaring a Faulted Cluster 2009/08/14 12:24:18 VCS NOTICE V-16-3-18213 (ncib1hubr003a1) Cluster ncib1hubr003 lost all heartbeats to cluster ncib1hubp003: effecting inquiry 2009/08/14 12:24:18 VCS ERROR V-16-1-50908 Remote cluster ncib1hubp003 has faulted. Determining if global group Tibcoapps should be failed over to local cluster 165
- 173. Disaster Recovery Initiation of a Forced DR Takeover Forcing a DR event from the DR cluster is possible, however it should only be executed should connectivity between the Production Cluster and the DR Cluster be severed, and for reasons to be determined later, the DR failover did not take place. # haclus –declare outage –clus ncib1hubp003 # hagrp –online –force Tibcoapps –sys ncib1hubr003a1 # hagrp –online –force Tibcoapps –sys ncib1hubr003b1 Growing a Replicated Filesystems This command grows both the volume and the filesystem, on the primary and disaster recovery clusters. There is no need to offline or modify any VCS Resources. Note that this assumes that there is no need to tweak the SRL logs. Make sure that there is enough disk space on both the Production and Disaster Recovery Clusters # vxdg –g hubdg free From the production cluster run the vradmin resizevol command against the rvg, diskgroup and volume to be expanded. [+]Size is to grow the volume [-]Size will shrink the volume and no [-|+] will set the volume to that size. # vradmin –g hubdg resizevol hubrvg tibcoems3 +100m Here's now to resynchronize the old Primary once you bring it back up 5.0: 1. use the migrate option with vradmin # vradmin -g diskgroup migrate vgname hostRemoteIP 2. If the command reports back primary out of sync, use the fbsync option # vradmin -g diskgroup fbsync vgnme VVR and GCO v5.x Made Easy GCO Configuration 1. Run Script to add VVR Types Definitions - repeat on all nodes in each cluster # cd /etc/VRTSvcs/conf/sample_vvr # ./addVVRTypes.sh # haconf -dump -makero 2. On a node in the primary site, start the global clustering configuration wizard: or use #3 for manual configuration. # /opt/VRTSvcs/bin/gcoconfig a. After discovering the NIC devices on the local node, specify or confirm the device for the cluster joining the global cluster environment. 166
- 174. Disaster Recovery b. Indicate whether the NIC you entered is for all cluster nodes. If you enter n, enter the names of NICs on each node. c. Enter or confirm the virtual IP address for the local cluster. d. When the wizard discovers the net mask associated with the virtual IP address, accept the discovered value or enter another value. With NIC and IP address values configured, the wizard creates a ClusterService group or updates an existing one. After modifying the VCS configuration file, the wizard brings the group online. e. Perform through step 1 through step 5 on the secondary cluster. 3. Modifying the global clustering configuration using the main.cf on the primary cluster include "types.cf" include "CFSTypes.cf" include "CVMTypes.cf" include "OracleTypes.cf" include "VVRTypes.cf" cluster rac_cluster101 ( UserNames = { admin = "cDRpdxPmHpzS." } ClusterAddress = "10.10.10.101" Administrators = { admin } CounterInterval = 5 UseFence = SCSI3 ) group ClusterService ( SystemList = { galaxy = 0, nebula = 0 } AutoStartList = { galaxy, nebula } OnlineRetryLimit = 3 OnlineRetryInterval = 120 ) Application wac ( StartProgram = "/opt/VRTSvcs/bin/wacstart" StopProgram = "/opt/VRTSvcs/bin/wacstop" MonitorProcesses = "/opt/VRTSvcs/bin/wac" } RestartLimit = 3 ) IP gcoip ( Device =eth1 Address = "10.10.10.101" NetMask = "255.255.240.0" ) NIC csgnic ( Device =eth1 ) gcoip requires csgnic wac requires gcoip 167
- 175. Disaster Recovery 4. Define the remotecluster and its virtual IP address. In this example, the remote cluster is rac_cluster102 and its IP address is 10.11.10.102: # haclus -add rac_cluster102 10.11.10.102 5. Complete step 3 and step 4 on the secondary site using the name and IP address of the primary cluster (rac_cluster101 and 10.10.10.101). 6. On the primary site, add the heartbeat object for the cluster. In this example, the heartbeat method is ICMP ping. # hahb -add Icmp # hahb -modify Icmp ClusterList rac_cluster102 # hahb -modify Icmp Arguments 10.11.10.102 -clus rac_cluster102 # haclus -list rac_cluster101 rac_cluster102 7. Example additions to the main.cf file on the primary site: remotecluster rac_cluster102 ( Cluster Address = "10.11.10.102" ) heartbeat Icmp ( ClusterList = { rac_cluster102 } Arguments @rac_cluster102 = { "10.11.10.102" } ) system galaxy ( ) 8. Example additions to the main.cf file on the secondary site: remotecluster rac_cluster101 ( Cluster Address = "10.190.88.188" ) heartbeat Icmp ( ClusterList = { rac_cluster101 } Arguments @rac_cluster102 = { "10.190.88.188" } ) system galaxy Combining VVR and CGO Note that when using VVR and GCO you do not need to vradmin migrate - do this task with online/offline of remove failover service groups. Setting up the rlink IP addresses for primary and secondard in their respective clusters results in a main.cf simular to the following: 168
- 176. Disaster Recovery 2x IP for GCO - one per cluster ,2x IP for VVR RLINK one per cluster Primary CFS Cluster with VVR - example main.cf include "types.cf" include "CFSTypes.cf" include "CVMTypes.cf" include "VVRTypes.cf" cluster primary003 ( UserNames = { haadmin = xxx } ClusterAddress = "162.111.101.195" Administrators = { haadmin } UseFence = SCSI3 HacliUserLevel = COMMANDROOT ) remotecluster remote003 ( ClusterAddress = "167.138.164.121" ) heartbeat Icmp ( ClusterList = { remote003 } Arguments @remote003 = { "167.138.164.121" } ) system primary003a1 ( ) system primary003b1 ( ) group ClusterService ( SystemList = { primary003a1 = 0, primary003b1 = 1 } AutoStartList = { primary003a1, primary003b1 } OnlineRetryLimit = 3 OnlineRetryInterval = 120 ) Application wac ( StartProgram = "/opt/VRTSvcs/bin/wacstart" StopProgram = "/opt/VRTSvcs/bin/wacstop" MonitorProcesses = { "/opt/VRTSvcs/bin/wac" } RestartLimit = 3 ) IP gcoip ( Device @primary003a1 = bond0 Device @primary003b1 = bond0 Address = "162.111.101.195" NetMask = "255.255.254.0" ) NIC csgnic ( 169
- 177. Disaster Recovery Device = bond0 ) NotifierMngr ntfr ( SmtpServer = "smtp.me.com" SmtpRecipients = { "sunadmin@me.com" = Warning } ) gcoip requires csgnic ntfr requires csgnic wac requires gcoip group HUBDG_RVG ( SystemList = { primary003a1 = 0, primary003b1 = 1 } Parallel = 1 AutoStartList = { primary003a1, primary003b1 } ) CVMVolDg HUB_DG ( CVMDiskGroup = hubdg CVMActivation = sw ) RVGShared HUBDG_CFS_RVG ( RVG = hubrvg DiskGroup = hubdg ) requires group cvm online local firm HUBDG_CFS_RVG requires HUB_DG group Myappsg ( SystemList = { primary003a1 = 0, primary003b1 = 1 } Parallel = 1 ClusterList = { remote003 = 1, primary003 = 0 } Authority = 1 AutoStartList = { primary003a1, primary003b1 } ClusterFailOverPolicy = Auto Administrators = { tibcoems } ) Application foo ( StartProgram = "/opt/tibco/vcs_scripts/foo start &" StopProgram = "/opt/tibco/vcs_scripts/foo stop &" MonitorProgram = "/opt/tibco/vcs_scripts/monitor_foo" ) 170
- 178. Disaster Recovery CFSMount foomnt ( MountPoint = "/opt/foo" BlockDevice = "/dev/vx/dsk/hubdg/foo" ) RVGSharedPri hubrvg_pri ( RvgResourceName = HUBDG_CFS_RVG OnlineRetryLimit = 0 ) requires group HUBDG_RVG online local firm foo requires foomnt foomnt requires hubrvg_pri group cvm ( SystemList = { primary003a1 = 0, primary003b1 = 1 } AutoFailOver = 0 Parallel = 1 AutoStartList = { primary003a1, primary003b1 } ) CFSfsckd vxfsckd ( ActivationMode @primary003a1 = { hubdg = sw } ActivationMode @primary003b1 = { hubdg = sw } ) CVMCluster cvm_clus ( CVMClustName = primary003 CVMNodeId = { primary003a1 = 0, primary003b1 = 1 } CVMTransport = gab CVMTimeout = 200 ) CVMVxconfigd cvm_vxconfigd ( Critical = 0 CVMVxconfigdArgs = { syslog } ) cvm_clus requires cvm_vxconfigd vxfsckd requires cvm_clus group rlogowner ( SystemList = { primary003a1 = 0, primary003b1 = 1 } AutoStartList = { primary003a1, primary003b1 } OnlineRetryLimit = 2 ) 171
- 179. Disaster Recovery IP vvr_ip ( Device @primary003a1 = bond1 Device @primary003b1 = bond1 Address = "162.111.101.196" NetMask = "255.255.254.0" ) NIC vvr_nic ( Device @primary003a1 = bond1 Device @primary003b1 = bond1 ) RVGLogowner logowner ( RVG = hubrvg DiskGroup = hubdg ) requires group HUBDG_RVG online local firm logowner requires vvr_ip vvr_ip requires vvr_nic Secondary CFS Cluster with VVR - example main.cf include "types.cf" include "CFSTypes.cf" include "CVMTypes.cf" include "VVRTypes.cf" cluster remote003 ( UserNames = { haadmin = xxx } ClusterAddress = "167.138.164.121" Administrators = { haadmin } UseFence = SCSI3 HacliUserLevel = COMMANDROOT ) remotecluster primary003 ( ClusterAddress = "162.111.101.195" ) heartbeat Icmp ( ClusterList = { primary003 } Arguments @primary003 = { "162.111.101.195" } ) system remote003a1 ( ) system remote003b1 ( ) group ClusterService ( SystemList = { remote003a1 = 0, remote003b1 = 1 } AutoStartList = { remote003a1, remote003b1 } 172
- 180. Disaster Recovery OnlineRetryLimit = 3 OnlineRetryInterval = 120 ) Application wac ( StartProgram = "/opt/VRTSvcs/bin/wacstart" StopProgram = "/opt/VRTSvcs/bin/wacstop" MonitorProcesses = { "/opt/VRTSvcs/bin/wac" } RestartLimit = 3 ) IP gcoip ( Device @remote003a1 = bond0 Device @remote003b1 = bond0 Address = "167.138.164.121" NetMask = "255.255.254.0" ) NIC csgnic ( Device = bond0 ) NotifierMngr ntfr ( SmtpServer = "smtp.me.com" SmtpRecipients = { "sunadmin@me.com" = Warning } ) gcoip requires csgnic ntfr requires csgnic wac requires gcoip group HUBDG_RVG ( SystemList = { remote003a1 = 0, remote003b1 = 1 } Parallel = 1 AutoStartList = { remote003a1, remote003b1 } ) CVMVolDg HUB_DG ( CVMDiskGroup = hubdg CVMActivation = sw ) RVGShared HUBDG_CFS_RVG ( RVG = hubrvg DiskGroup = hubdg ) requires group cvm online local firm HUBDG_CFS_RVG requires HUB_DG 173
- 181. Disaster Recovery group Tibcoapps ( SystemList = { remote003a1 = 0, remote003b1 = 1 } Parallel = 1 ClusterList = { remote003 = 1, primary003 = 0 } AutoStartList = { remote003a1, remote003b1 } ClusterFailOverPolicy = Auto Administrators = { tibcoems } ) Application FOO ( StartProgram = "/opt/tibco/vcs_scripts/foo start &" StopProgram = "/opt/tibco/vcs_scripts/foo stop &" MonitorProgram = "/opt/tibco/vcs_scripts/monitor_foo" ) CFSMount foomnt ( MountPoint = "/opt/foo" BlockDevice = "/dev/vx/dsk/hubdg/foo" ) RVGSharedPri hubrvg_pri ( RvgResourceName = HUBDG_CFS_RVG OnlineRetryLimit = 0 ) requires group HUBDG_RVG online local firm foo requires foomnt foomnt requires hubrvg_pri group cvm ( SystemList = { remote003a1 = 0, remote003b1 = 1 } AutoFailOver = 0 Parallel = 1 AutoStartList = { remote003a1, remote003b1 } ) CFSfsckd vxfsckd ( ActivationMode @remote003a1 = { hubdg = sw } ActivationMode @remote003b1 = { hubdg = sw } ) CVMCluster cvm_clus ( CVMClustName = remote003 CVMNodeId = { remote003a1 = 0, remote003b1 = 1 } CVMTransport = gab CVMTimeout = 200 174
- 182. Disaster Recovery ) CVMVxconfigd cvm_vxconfigd ( CVMVxconfigdArgs = { syslog } ) cvm_clus requires cvm_vxconfigd vxfsckd requires cvm_clus group rlogowner ( SystemList = { remote003a1 = 0, remote003b1 = 1 } AutoStartList = { remote003a1, remote003b1 } OnlineRetryLimit = 2 ) IP vvr_ip ( Device @remote003a1 = bond1 Device @remote003b1 = bond1 Address = "167.138.164.117" NetMask = "255.255.254.0" ) NIC vvr_nic ( Device @remote003a1 = bond1 Device @remote003b1 = bond1 ) RVGLogowner logowner ( RVG = hubrvg DiskGroup = hubdg ) requires group HUBDG_RVG online local firm logowner requires vvr_ip vvr_ip requires vvr_nic Secondary CFS Cluster with VVR - example main.cf VVR 4.X Pre 5.0 VVR does not use vradmin as much, and is kept here to show the underlying commands. Note that with 4.0 and earlier you need to detach the SRL before growth, and in 5.x that is no longer needed. Here's now to resynchronize the old Primary once you bring it back up 4.x: 1. The RVG and RLINK should be stopped and detached. If not, stop and detach # vxrvg stop rvgA # #vxrlink det rlinkA 175
- 183. Disaster Recovery 2. Disassociate the SRL and make the system a secondary: # vxvol dis srlA # #vxedit set primary=false rvgA 3. Reassociate the SRL, change the primary_datavol attribute: # vxvol aslog rvgA srlA# # vxedit set primary_datavol=sampleB sampleA 4. Attach the RLINK and then start the RVG: # vxrlink -f att rlinkA# # vxrvg start rvgA This won't do much, as the RLINK on hostB (the Primary) should still#be detached, preventing the Secondary from connecting. 5. Now go back to#the Primary to turn the RLINK on: # vxedit set remote_host=hostA local_host=hostB remote_dg=diskgroupA# remote_rlink=rlinkA# # vxrlink -a att rlinkB Giving the -a flag to vxrlink tells it to run in autosync mode. This#will automatically resync the secondary datavolumes from the Primary.#If the Primary is being updated faster than the Secondary can be#synced, the Secondary will never become synced, so this method is only#appropriate for certain implementations. Once synchronization is complete, follow the instructions above (the#beginning of section 6) to transfer the Primary role back to the#original Primary system. Failing Over from a Primary 4.x There are two situations where you would have to fail from a primary.#The first is in preparation for an outage of the Primary, in which#case you can happily turn off your app, switch the Primary to a#Secondary, switch the Secondary to a Primary, and start this up again. The second case is when your Primary goes down in flames and you need#to get your Secondary up as a Primary. 1. If your primary is still functioning: a. First, you'll need to turn off your applications, umount any#filesystems on from your datavolumes, and stop the rvg: # /etc/rc3.d/S99start-app stop # #umount /filesysA# # vxrvg stop rvgA b. Once you've stopped the RVG, you need to detach the rlink,#disassociate the SRL volume (you can't edit the PRIMARY RVG attribute#while an SRL is associated), change PRIMARY to false, and bring#everything back up: # vxrlink det rlinkA # #vxvol dis srlA 176
- 184. Disaster Recovery # #vxedit set primary=false rvgA # #vxvol aslog rvgA srlA # #vxrvg start rvgA # #vxrlink -f att rlinkA c. Now go to work on the Old Secondary to bring it up as the new Primary. i. First you need to stop the RVG, detach the rlink, disassociate the#SRL, and turn the PRIMARY attribute on: # vxrvg stop rvgB # #vxrlink det rlinkB # #vxvol dis srlB # #vxedit set primary=true rvgB ii. Veritas recommends that you use vxedit to reinitialize some values on#the RLINK to make sure you're still cool: # vxedit set remote_host=hostA local_host=hostB remote_dg=diskgroupA #remote_rlink=rlinkA rlinkB iii. Before you can attach the rlink, you need to change the#PRIMARY_DATAVOL attribute on both hosts to point the the Veritas#volume name of the NEW Primary: A. On the new primary (e.g. hostB): # vxedit set primary_datavol=sampleB sampleB B. On the new secondary (e.g. hostA): # vxedit set primary_datavol=sampleB sampleA iv. Now that you have that, go back to the new Primary, attach the RLINK,#and start the RVG: # vxrlink -f att rlinkB # #vxrvg start rvgB 2. If the Primary is down: a. First you'll need to bring up the secondary as a primary. If your#secondary datavolume is inconsistent (this is only likely if an SRL#overflow occurred and the secondary was not resynchronized before the#Primary went down) you will need to disassociate the volumes from the#RVG, fsck them if they contain filesystems, and reassociate them with#VVR. If your volumes are consistent, the task is much easier: On the secondary, first stop the RVG, detach the RLINK, and#disassociate the SRL: # vxrvg stop rvgB # #vxrlink det rlinkB # #vxvol dis srlB b. Make the Secondary the new Primary: # vxedit -g diskgroupB set primary=true rvgB c. Now reassociate the SRL and change the primary_datavol: 177
- 185. Disaster Recovery # vxvol aslog rvgB srlB# # vxedit set primary_datavol=sampleB sampleB d. If the old Primary is still down, all you need to do is start the RVG#to be able to use the datavolumes: # vxrvg start rvgB This will allow you to keep the volumes in VVR so that once you manage#to resurrect the former Primary, you can make the necessary VVR#commands to set it up as a secondary so it can resynchronize from the#backup system. Once it has resynchronized, you can use the process#listed at the beginning of section 6 (above) to fail from the Old#Secondary/New Primary back to the original configuration. Setting Up VVR 4.x - the hard way 1. Create VVR Setup on Secondary Node - destination a. Creating a replicated volume on two hosts, hostA and hostB Before configuring, you need to make sure two scripts have been run#from /etc/rc2.d: S94vxnm- host_infod and S94vxnm-vxnetd. VVR will not#work if these scripts don't get run AFTER VVR licenses have been#instralled. So if you install VVR licenses and don't reboot#immediately after, run these scripts to get VVR to work. b. Before the Primary can be set up, the Secondary must be configured. First, use vxassist to create your datavolumes. Make sure to specify#the logtype as DCM (Data Change Map, which keeps track of data changes#if the Storage Replicator log fills up) if your replicated volumes are#asynchronous. vxassist -g diskgroupB make sampleB 4g layout=log logtype=dcm c. Then create the SRL (Storage Replicator Log) for the volume. Carefully#decide how big you want this to be, based on available bandwidth#between your hosts and how fast your writes happen. See pages 18-25 of the SRVM Configuration Notes for detailed#(excruciatingly) notes on selecting your SRL size. vxassist -g diskgroupB make srlB 500m d. Next make the rlink object: # vxmake -g diskgroupB rlink rlinkB remote_host=hostA# remote_dg=diskgroupA remote_rlink=rlinkA local_host=hostB #synchronous=[off|override|fail] srlprot=dcm Use synchronous=off only if you can stand to lose some data.#Otherwise, set synchronize=override or synchronize=fail. override runs#as synchronous (writes aren't committed until they reach the#secondary) until the link dies, then it switches to asynchronous,#storing pending writes to the secondary in the SRL. When the link#comes back, it resyncs the secondary and switches back to Synchronous#mode. synchronize=fail fails new updates to the primary in the case of#a downed link. In any of the above cases, you'll lose data if the link fails and,#before the secondary can catch up to the primary, there is a failure#of the primary data volume. This is why it's important to have both#redundant disks and redundant network paths. 178
- 186. Disaster Recovery e. Now make the RVG, where you put together the datavolume, the SRL, and the rlink: # vxmake -g diskgroupB rvg rvgB rlink=rlinkB datavol=sampleB srl=srlB#primary=false f. Attach the rlink to the rvg: # vxrlink -g diskgroupB att rlinkB g. Start the RVG on the Secondary: # vxrvg -g diskgroupB start rvgB 2. Configure Primary VVR Node a. As with the Secondary, make data#volumes, an SRL, and an rlink: # vxassist -g diskgroupA make sampleA 4g layout=log logtype=dcm # vxassist -g diskgroupA make srlA 500m # vxmake -g diskgroupA rlink rlinkA remote_host=hostB# remote_dg=diskgroupB remote_rlink=rlinkB local_host=host A#synchronous=[off|override|fail] srlprot=dcm b. Make the RVG for the primary. Only the last option is different: # vxmake -g diskgroupA rvg rvgA rlink=rlinkA datavol=sampleA srl=srlA primary=true 3. Now go back to the secondary. When we created the secondary,#brain-dead Veritas figured the volume on the Seconday and the Primary#would have the same name, but when we set this up, we wanted to have#the Primary datavolume named sampleA and the Secondary datavolume be#sampleB. So we need to tell the Secondary that the Primary is sampleA: vxedit -g diskgroupB set primary_datavol=sampleA sampleB 4. Now you can attach the rlink to the RVG and start the RVG. On the Primary: vxrlink -g diskgroupA att rlinkA You should see output like this: vxvm:vxrlink: INFO: Secondary data volumes detected with rvg rvgB as parent:#vxvm:vxrlink: INFO: sampleB: len=8388608 primary_datavol=sampleA 5. Finally, start I/O on the Primary: # vxrvg -g diskgroupA start rvgA Growing/Shrinking a Volume or SRL 4.x This is exactly the same as in regular Veritas. However, VVR doesn't#sync the volume changes. To grow a volume, you first need to grow the#secondary, then the primary. To shrink a volume, first the primary 179
- 187. Disaster Recovery and#then the secondary. You always need to make sure the Secondary is#larger than or as large as the Primary, or you will get a#configuration error from VVR. You may need to grow an SRL if your pipe shrinks (more likely if your#pipe gets busier) or the amount of data you are sending increases. See#pages 18-25 of the SRVM Configuration Notes for detailed#(excruciatingly) notes on selecting your SRL size. 1. To grow an SRL, you must first stop the RVG and disassociate the SRL#from the RVG: # vxrvg stop rvgA# # vxrlink det rlinkA# # vxvol dis srlA 2. From this point, you can grow your SRL (which is now just an ordinary volume): # vxassist growto srlA 2gb 3. Once your SRL has been successfully grown, reassociate it with the#RVG, reattach the RLINK, and start the RVG: # vxvol aslog rvgA srlA# # vxrlink -f att rlinkA # #vxvg start rvgA Removing a VVR volume 4.x 1. First, detach the rlinks on the Primary and then the Secondary: primary# vxrlink -g diskgroupA det rlinkA secondary# #vxrlink -g diskgroupB det rlinkB 2. Then stop the RVG on the primary and then the secondary: primary# vxrvg -g diskgroupA stop rvgA secondary# #vxrvg -g diskgroupB stop rvgB 3. On the primary, stop the datavolumes: # vxvol -g disgroupA stop sampleA 4. If you want to keep the datavolumes, you need to disassociate them from the RVG: primary# vxvol -g diskgroupA dis sampleA secondary# #vxvol -g diskgroupB dis sampleB 5. Finally, on both the Primary and the Secondary, remove everything: primary# vxedit -rf rm rvgA secondary# #vxedit -rf rm rvgB 180
- 188. Chapter 16. VxVM and Storage Troubleshooting How to disable and re-enable VERITAS Volume Manager at boot time when the boot disk is encapsulated At times it may be necessary for debugging and/or other reasons to boot a system without starting VERITAS Volume Manager (VxVM). This is sometimes referred to as "manually unencapsulating" if the boot disk is involved. The following are the basic steps needed to disable VxVM with an encapsulated boot disk: IMPORTANT: If rootvol, usr, or var volumes are mirrored, all mirrors except for the one on the boot disk will have to be disabled before enabling VxVM once again (see below for details). Failure to do so may result in file system corruption. 1. Boot system from CD ROM or net and mount the root file system to /a 2. Modify the vfstab file. • Make a backup copy: # cp /a/etc/vfstab /a/etc/vfstab.disable • Use the preserved copy of the vfstab file from before encapsulation as base for the new file: # cp /a/etc/vfstab.prevm /a/etc/vfstab • Verify that the Solaris file system partitions listed in /a/etc/vfstab are consistent with the current boot drive and that the partitions exist. Note: Usually the partition for the /opt file system will not be present. It is not needed to bring the system up to single user mode. • Comment out any entries referring to VxVM volumes from /a/etc/vfstab. 3. Modify the system file. 4. • Make a backup copy: # cp /a/etc/system /a/etc/system.disable • Delete the following lines from /a/etc/system: rootdev:/pseudo/vxio@0:0 set vxio:vol_rootdev_is_volume=1 • The force loads for VxVM drivers (vxio, vxspec, and vxdmp) may also be deleted, but that is not usually necessary. 5. Create a file called /a/etc/vx/reconfig.d/state.d/install-db. This prevents VxVM from starting during the boot process. 181
- 189. VxVM and Storage Troubleshooting # touch /a/etc/vx/reconfig.d/state.d/install-db 6. Reboot from the disk that was just modified. 7. Once the system is booted in at least single-user mode, VxVM can be started manually with the following steps. a. Start the VxVM worker threads: # vxiod set 10 b. Start vxconfigd in disabled mode: # vxconfigd -d c. Enable vxconfigd: # vxdctl enable d. IMPORTANT: If the boot disk contains mirrored volumes, one must take all the mirrors offline for those volumes except for the one on the boot disk. Offlining a mirror prevents VxVM from ever performing a recovery on that plex. This step is critical in preventing data corruption. # vxprint -htg rootdg ... v rootvol root DISABLED ACTIVE 1026000 PREFER pl rootvol-01 rootvol DISABLED ACTIVE 1026000 CONCAT sd rootdisk-B0 rootvol-01 rootdisk 8378639 1 0 c0t0d0 sd rootdisk-02 rootvol-01 rootdisk 0 1025999 1 c0t0d0 pl rootvol-02 rootvol DISABLED ACTIVE 1027026 CONCAT sd rootmir-06 rootvol-02 rootmir 0 1027026 0 c0t1d0 ... In this case the rootvol-02 plex should be offlined as it resides on c0t1d0: # vxmend -g rootdg off rootvol-02 e. Start all volumes: # vxrecover -ns f. Start any recovery operations on volumes if needed: # vxrecover -bs Once any debugging actions and/or any other operations are completed, VxVM can be re-enabled again with the following steps. a. Undo the steps in the previous section that were taken to disable VxVM (steps 2-4): # cp /etc/vfstab.disable /etc/vfstab # cp /etc/system.disable /etc/system # rm /etc/vx/reconfig.d/state.d/install-db b. Reboot the system. c. Once the system is back up and it is verified to be running correctly, online all mirrors that were offlined in step 6 in the previous section. For example, 182
- 190. VxVM and Storage Troubleshooting # vxmend -g rootdg on rootvol-02 d. Start recovery operations on the mirrors that were just onlined. # vxrecover -bs Replacing a failed drive The following procedure replaces a failed drive that is part of a mirror. 1. Validate the disk name for the failed drive # vxdisk list DEVICE TYPE DISK GROUP STATUS c11t22d148s2 sliced c11t22d148 data20000 online - - c2t21d220 data20000 failed was:c2t21d220s2 - - c2t21d41 data20000 failed was:c2t21d41s2 2. Run vxdctl with enable option on pre 4.0 versions and vxdisk scandisks on newer versions of VxVM # vxdctl scandisks 3. Use the vxreattach command with "-c" option and accessname # /etc/vx/bin/vxreattach -c c2t21d220 # /etc/vx/bin/vxreattach -c c2t21d41 Storage Volume Growth and Relayout Veritas Relayout When provisioning storage and creating volumes, there are times when you create a volume for a specific workload, and things change after the fact. Veritas volume manager can easily deal with changing requirements, and allows you to convert between volume types ( e.g., convert a RAID5 volume to a striped mirrored volume) on the fly. Veritas performs this operation in most cases with layered volumes, and requires a chunk of free space to complete the relayout operation. The VxVM users guide describes the supported relayout operations, and also provides disk space requirements. To illustrate just how useful the relayout operation is, let's say your manager just finished reading a Gartner report that criticizes RAID5. He comes over to your desk and asks you to convert the Oracle data volume from a 4-column RAID5 volume to a 2-column striped-mirror volume. Since you despise software RAID5, you set down UNIX File systems and run vxassist(1m) with the "relayout" keyword, the "layout" to convert to, and the number of columns to use (the ncols option is only used with striped volumes): $ vxassist -g oof relayout oravol01 layout=stripe-mirror ncol=2 The relayout operation requires a temporary region to copy data to (marked with a state of TMP in vxprint) prior to migrating data it to it's final destination. If sufficent space isn't available, vxassist will display an error similar to the following and exit: VxVM vxassist ERROR V-5-1-6345 Cannot allocate 15728640 blocks of disk space 183
- 191. VxVM and Storage Troubleshooting required by the relayout operation for column addition VxVM vxassist ERROR V-5-1-4037 Relayout operation aborted. (7) Once the relayout begins, the vxrelayout(1m) and vxtask(1m) utilities can be used to monitor the progress of the relayout operations: $ vxrelayout -g oof status oravol01 RAID5, columns=4, stwidth=32 --> STRIPED-MIRROR, columns=2, stwidth=128 Relayout running, 10.02% completed. $ vxtask list TASKID PTID TYPE/STATE PCT PROGRESS 2125 RELAYOUT/R 14.45% 0/41943168/6061184 RELAYOUT oravol01 oof Veritas Resize When shrinking a volume/fs note that you can not use a -size, specify a -s, with the non-negative number that you want to reduce by # vxresize -s -g diskgroup volume 10g vxvm:vxassist: ERROR: Cannot allocate space for 1675008 block volume The most common example is in a two disk stripe as below. Here the volume is striped across disk 01 and 02. An attempt may be made to use another disk in the disk group (DG) to grow the volume and this will fail since it is necessary to grow the stripe equally. Two disks are needed to grow the stripe. dg stripedg default default 125000 1006935392.1115.sptsunvm5 dm striped01 c1t1d0s2 sliced 2159 8378640 - dm striped02 c1t3d0s2 sliced 2159 8378640 - dm striped03 c1t4d0s2 sliced 3590 17678493 - v oil - ENABLED ACTIVE 16756736 SELECT oil-01 fsgen pl oil-01 oil ENABLED ACTIVE 16757392 STRIPE 2/128 RW sd striped01-01 oil-01 striped01 0 8378640 0/0 c1t1d0 ENA sd striped02-01 oil-01 striped02 0 8378640 1/0 c1t3d0 ENA # vxassist -g stripedg maxgrow oil vxvm:vxassist: ERROR: Volume oil cannot be extended within the given constraints Another disk is then added into the configuration so there are now two spare disks. Rerun the maxgrow command, which will succeed. The resize will also succeed. dg stripedg default default 125000 1006935392.1115.sptsunvm5 dm striped01 c1t1d0s2 sliced 2159 8378640 - dm striped02 c1t3d0s2 sliced 2159 8378640 - dm striped03 c1t4d0s2 sliced 3590 17678493 - dm striped04 c1t5d0s2 sliced 2159 8378640 - v oil - ENABLED ACTIVE 16756736 SELECT oil-01 fsgen pl oil-01 oil ENABLED ACTIVE 16757392 STRIPE 2/128 RW 184
- 192. VxVM and Storage Troubleshooting sd striped01-01 oil-01 striped01 0 8378640 0/0 c1t1d0 ENA sd striped02-01 oil-01 striped02 0 8378640 1/0 c1t3d0 ENA # vxassist -g stripedg maxgrow oil Volume oil can be extended from 16756736 to 33513472 (16364Mb) Under normal circumstances, it is possible to issue the resize command and add (grow) the volume across disks 3 and 4. If only one spare disk exists, it is possible to use it. Grow the volume to use the extra space. The only option is a relayout. In the example below, the volume is on disk01/02 and the intention is to incorporate disk 03 and convert the volume into a 3 column stripe. However, the relayout is doomed to fail: dm striped01 c1t1d0s2 sliced 2159 8378640 - dm striped02 c1t3d0s2 sliced 2159 8378640 - dm striped03 c1t4d0s2 sliced 3590 17678493 - v oil - ENABLED ACTIVE 16756736 SELECT oil-01 fsgen pl oil-01 oil ENABLED ACTIVE 16757392 STRIPE 2/128 RW sd striped01-01 oil-01 striped01 0 8378640 0/0 c1t1d0 ENA sd striped02-01 oil-01 striped02 0 8378640 1/0 c1t3d0 ENA # vxassist -g stripedg relayout oil ncol=3 str01 str02 str03 vxvm:vxassist: WARNING: dm:striped01: No disk space matches spec vxvm:vxassist: WARNING: dm:striped02: No disk space matches spec vxvm:vxassist: ERROR: Cannot allocate space for 1675008 block volume vxvm:vxassist: ERROR: Relayout operation aborted. (7) This has failed because the size of the subdisks is exactly the same as that of the disks (8378640 blocks). For this procedure to work, resize (shrink) the volume by about 10% (10% of 8 gigabytes = 800 megabytes) to give VERITAS Volume Manager (VxVM) some temporary space to do the relayout: # vxresize -g stripedg oil 7382m v oil - ENABLED ACTIVE 15118336 SELECT oil-01 fsgen pl oil-01 oil ENABLED ACTIVE 15118464 STRIPE 3/128 RW sd striped01-04 oil-01 striped01 0 7559168 0/0 c1t1d0 ENA sd striped02-04 oil-01 striped02 0 7559168 1/0 c1t3d0 ENA The only other way to avoid having to shrink the volume (in the case of a UNIX File System (UFS) file system) is to add a fourth disk to the configuration just for the duration of the relayout, so VxVM would use the fourth disk as temporary space. Once the relayout is complete, the disk will be empty again. UDID_MISMATCH Volume Manager 5.0 introduced a unique identifiers for disks (UDID) which allow source and cloned (copied) disks to be differentiated. If a disk and its clone are presented to Volume Manager, devices will be flagged as udid_mismatch in vxdisk list. This typically indicates that the storage was originally cloned on the storage array; possibly a reassigned lun, or is a bcv • If you want to you remove the clone attribute from the device itself and use it as a regular diskgroup with the newly imported diskgroup name: # vxdisk set c5t2d0s2 clone=off • If wanting to import a BCV disk group 1. Verify that the cloned disk, EMC0_27, is in the "error udid_mismatch" state: 185
- 193. VxVM and Storage Troubleshooting # vxdisk -o alldgs list DEVICE TYPE DISK GROUP STATUS EMC0_1 auto:cdsdisk EMC0_1 mydg online EMC0_27 auto - - error udid_mismatch In this example, the device EMC0_27 is a clone of EMC0_1. 2. Split the BCV device that corresponds to EMC0_27 from the disk group mydg: # /usr/symcli/bin/symmir -g mydg split DEV001 3. Update the information that VxVM holds about the device: # vxdisk scandisks 4. Check that the cloned disk is now in the "online udid_mismatch" state: # vxdisk -o alldgs list DEVICE TYPE DISK GROUP STATUS EMC0_1 auto:cdsdisk EMC0_1 mydg online EMC0_27 auto:cdsdisk - - online udid_mismatch 5. Import the cloned disk into the new disk group newdg, and update the disk's UDID: # vxdg -n newdg -o useclonedev=on -o updateid import mydg 6. Check that the state of the cloned disk is now shown as "online clone_disk": # vxdisk -o alldgs list DEVICE TYPE DISK GROUP STATUS EMC0_1 auto:cdsdisk EMC0_1 mydg online EMC0_27 auto:cdsdisk EMC0_1 newdg online clone_disk VxVM Disk Group Recovery This procedure re-creates the VxVM disk group from header information stored in the private sector of each disk in the disk group. You should not need this procedure. When encountering a disk group that you cannot import, first review SCSI key locks on the drives. In most cases it was SCSI key reservations that prevented the disk group from being imported. None the less, here is the procedure for re-creating the disk group without destroying the storage in that disk group. 1. Dump the private region of one drive that was in the disk group # /etc/vx/diag.d/vxprivutil dumpconfig /dev/rdsk/cXtYdZs2 > /var/tmp/config.out 2. Process the config.out file through vxprint to get list of disk names included in that disk group # cat /var/tmp/config.out | vxprint -D - -d -F "%name=%last_da_name" > /var/tmp/list 3. Generate the necessary information to re-create the disk group layout # cat /var/tmp/config.out | vxprint -hvpsm > /var/tmp/maker 186
- 194. VxVM and Storage Troubleshooting 4. Using one disk listed in /var/tmp/list re-initialize the disk group. # vxdg init DiskGroupName DISKNAME=cXtYdZs2 Note This will not delete existing data on the disks. All commands in this procedure interact with the private region header information and do not re-write data. 5. Continue through the list of disks by adding them into the disk group # vxdg -g DiskGroupName adddisk DISKNAME=cAtBdZs2 6. After all disks are added into the disk group generate the original layout by running vxmake against the /var/tmp/maker file # vxmake -g DiskGroupName -d /var/tmp/maker 7. At this point all volumes will be in a DISABLED ACTIVE state. Once enabling all volumes you will have full access to the original disk group. # vxvol -g DiskGroupName startall Resize VxFS Volume and Filesystem $ vxdg free | egrep ‘(D01|D02|D03|D04|D05)’ GROUP DISK DEVICE TAG OFFSET LENGTH FLAGS datadg D01 c2t0d0s2 c2t0d0 35547981 35547981 - datadg D02 c2t1d0s2 c2t1d0 35547981 35547981 - datadg D03 c2t2d0s2 c2t2d0 35547981 35547981 - datadg D04 c2t3d0s2 c2t3d0 35547981 35547981 - datadg D05 c2t4d0s2 c2t4d0 35547981 35547981 - datadg D06 c2t5d0s2 c2t5d0 35547981 35547981 - $ /etc/vx/bin/vxresize -g datadg -F vxfs datavol01 +35547981 Incorrect DMP or Disk Identification Situation: Veritas sees different paths to a LUN as unique disks, even with C-Bit turned on # vxdisk -o alldgs list [-cut-] sdal auto:cdsdisk - (vxfencoorddg) online sds auto:cdsdisk emc04 knomandg online shared # vxdisk list sds |grep "state=enabled" sdan state=enabled 187
- 195. VxVM and Storage Troubleshooting sdb state=enabled # vxdisk list sdal |grep "state=enabled" sdax state=enabled sds state=enabled # vxdmpadm getsubpaths dmpnodename=sdal NAME STATE[A] PATH-TYPE[M] CTLR-NAME ENCLR-TYPE ENCLR-NAME ATTRS ======================================================================== sdax ENABLED(A) - c1 EMC EMC2 - sds ENABLED(A) - c0 EMC EMC2 - # vxdmpadm getsubpaths dmpnodename=sds NAME STATE[A] PATH-TYPE[M] CTLR-NAME ENCLR-TYPE ENCLR-NAME ATTRS ======================================================================== sdan ENABLED(A) - c1 EMC EMC2 - sdb ENABLED(A) - c0 EMC EMC2 - Solution # rm /etc/vx/disk.info ; rm /etc/vx/array.info # vxconfigd -k Data Migration out of rootdg Situation: disks with data are all in rootdg, need to be moved into another disk group with same data prior to OS upgrade, or to just clean up bad deployment. Note In newer versions of vxvm there is a vxsplit command that can be used for this process. ## (for each vol) get the names/disks from vxdisk list # vxprint -hmQq -g <current disk group> <volname> > /<volname> ## Next # vxedit -g <dg> -rf rm <volname> (for each vol) # vxdg -g <dg> rmdisk <name> # vxdg init <newdg> <diskname>=<disk> # vxdg -g newdg adddisk <diskname>=<disk> for each disk # vxmake -g newdg -d /tmp/<volname> for each volume. # vxvol -g newdg start <volname> Recover vx Plex # vxprint|grep DETA pl vol01-02 vol01 DETACHED 204800 - IOFAIL - - # vxplex -g ptpd att vol01 vol01-02 & Shell code to get solaris disk size in GB # ---- first, get list of disks ---- 188
- 196. VxVM and Storage Troubleshooting disks=( `ls /dev/rdsk/c*s2` ) total=0; # ---- how many disks? ---- sz=${#disks[*]} # ---- get disk size for each ---- n=0 echo "Disks:" while [ $n -lt $sz ] do geom=( `prtvtoc ${disks[$n]} 2>/dev/null | egrep "sector|track|cylinder" | tr -d "*" | awk '{print $1}'` ) # ---- get disk parms and calculate size ---- BperS=${geom[0]} SperT=${geom[1]} TperC=${geom[2]} SperC=${geom[3]} Cyls=${geom[4]} AccCyls=${geom[5]} if [ "$BperS" != "" ]; then size=`expr $BperS * $SperC * $Cyls` GB=`expr $size / 1024 / 1024 / 1024` echo -n " ${disks[$n]}: " echo $GB "Gbytes" total=`expr $total + $GB` fi n=`expr $n + 1` done Split Root Mirror vxvm Disks: rootdisk is c1t0d0s2 root mirror disk is c1t1d0s2 1. Install the Solaris boot block on the mirror disk: # /usr/lib/vxvm/bin/vxbootsetup -g rootdg rootmirror 2. If you have separate volumes for opt, export, home on the root disk, it is required to define the partitions for those volumes using vxmksdpar # /usr/lib/vxvm/bin/vxmksdpart Usage: vxmksdpart [-f] [-g diskgroup] subdisk sliceno [tag flags] e.g. In following example, the opt volume subdisk is on rootmirror-05, and slice 7 is free on the mirror disk: # vxmksdpart -g rootdg rootmirror-05 7 0x00 0x00 >>> list of partition types # prtvtoc -s /dev/rdsk/c2t2d0s2 189
- 197. VxVM and Storage Troubleshooting <<< 3. Disassociate the mirror plex # vxplex -g rootdg dis rootvol-02 # vxplex -g rootdg dis swapvol-02 # vxplex -g rootdg dis usr-02 # vxplex -g rootdg dis var-02 # vxplex -g rootdg dis opt-02 -------------------- if any # vxplex -g rootdg dis home-02 -------------------- if any 4. Edit the following files to make the root mirror disk bootable without VERITAS Volume Manager # mount /dev/dsk/c1t1d0s0 /mnt # cd /mnt/etc # cp -p system system.orig # cp -p vfstab vfstab.orig # cp -p vfstab.prevm vfstab 5. Change the c#t#d# number in above file to ensure the correct partitions will be referenced in the vfstab file: # touch /mnt/etc/vx/reconfig.d/state.d/install-db Edit /mnt/etc/system and comment out following lines using the "*" character: Before changes: rootdev .. set vxio .. After changes: * rootdev .. * set vxio .. 6. Unmount the root mirror's / partition # umount /mnt 7. If the upgrade or patching was successful, attach back mirror plex to root disk: # vxplex -g rootdg att rootvol rootvol-02 # vxplex -g rootdg att swapvol swapvol-02 # vxplex -g rootdg att var var-02 # vxplex -g rootdg att usr usr-02 If VxVM Split Mirror needs post split recovery Failed install, rolling back to alternate disk 1. Boot from mirror disk - Bring down the system to the OK prompt - Change the default boot device to c1t1d0 rootmirror disk 190
- 198. VxVM and Storage Troubleshooting - Boot system 2. Remove the partition having tag 14 and 15 from mirror disk using format completely. Do not just change tag type, zero out these partitions and labels before exiting from format. 3. Manually start up vxconfigd to allow for the encapsulation of the root mirror: # vxiod set 10 # vxdconfigd -m disable # vxdctl init # vxdisk -f init c1t0d0 # vxdctl enable # rm /etc/vx/reconfig.d/state.d/install-db # vxdiskadm => option 2 Encapsulate one or more disks => choose c1t1d0 (old rootmirror) => put under rootdg # shutdown -i6 -g0 -y 4. Mirror root mirror disk with original root disk: # /etc/vx/bin/vxrootmir -g rootdg rootdisk # /etc/vx/bin/vxmirror -g rootdg rootmirror rootdisk 191
- 199. Chapter 17. Advanced VCS for IO Fencing and Various Commands General Information 1. Port Definitions Port A - This is node-to-node communication. As soon as GAB starts on a node, it will look for other nodes in the cluster and establish port "a" communication Port B - This is used for IO fencing. If you use RAC or VCS 4.x, you can use IO fencing to protect data disks. In RAC, as soon as the gab port membership changes, we will have a race for the coordinator disks, and some nodes will panic when they lose the race Port D - In RAC, the different Oracle instances need to talk to each other. GAB provides port "d" for this. So, port "d" membership will statr when Oracle RAC starts Port F - This is the main communications port for cluster file system. More than 1 machine can mount the same filesystem, but they need to communicate to not update the metadata (like inodes, super-block, free inode list, free data block list, etc.....) at the same time. If they do it at the same time, you will get corruption. There is always a primary for any filesystem that controls the access to the metadata. This control (locking) is done via port "f" Port H - GAB. The different nodes in the cluster needs to know what is happening on other nodes (and on itself) It needs to know which service groups, resources are online or offline or faulted. The program that knows all this info, is the "main" vcs program called "had". So on each machine, had needs to talk to GAB. This is done via port "h" Port O - This is a port used specifically in RAC, and specifically or ODM. Let's start by saying what ODM is, and then why it is needed. Oracle (like most other database managers) will try to cache IO before writing it out to disk (raw volumes or data files on a filesystem). The biggest problem comes in when Oracle tries to write to a filesystem. Each filesystem has it's own cache. As you can think, the general purpose filesystem cache is not the same as the very specific Oracle cache. The startegy used is very different between Oracle and the filesystem. A while ago, Veritas had a close look at how the Oracle cache works and how it sends IO to the filesystem. Veritas then wrote an extension for their filesystem (called Quick IO - QIO). With QIO, they got performance very close to the performance Oracle got on raw volumes. The rest of the filesystem comunity (read SUN UFS, IBM JFS, .....) thought that Oracle gave the information to Veritas and complained about it. Oracle then sat down and actually wrote a specification. This specification allows everyone to write their own library, and the Oracle will call this library to do IO. Oracle called this specification ODM (Oracle Disk Manager). The best is, that only Veritas ever wrote their own libraries for ODM. So, getting back to port "o". Port "o" is used for ODM to ODM communication in a RAC cluster. (wow, QIO, ODM and port "o" in one go !) Port Q - This is another port used in Cluster Filesystem. VxFS is a journaled filesystem. This means that it keeps a log which it will write to, before making changes to the metadata on the filesystem. (like Oracle keeps redo logs). Normally this log is kept on the same filesystem. This means that for each access, the log has to be updated, then the metadata and then the data itself. Thus 3 different times VxFS has to access the same disk. Normally the metadata is kept close to the file, but the log is always kept in a static place (normally close to the beginning of the filesystem). This could means that there will be a lot of seeking (for the begining of the filesystem, then again to the metadata and data). As we all know, disk access time is about 100 times slower than memory, so we have a slowdown here. Veritas made a 192
- 200. Advanced VCS for IO Fencing and Various Commands plan and developed quicklog. This allows you to have the filesystem log on a different disk. This helps in speeding things up, because most disk operations can happen in parallel. OK, so now you know what quicklog is. You can have quicklog on cluster filesystems as well. Port "q" is used to coordinate access to quicklog (wow, that was a loooong one) Port U - Not a port you would normally see, but just to be complete, let's mention it here. When a Cluster Volume Manager is started, it will need to do a couple of things. The access to changing the configuration of volumes, plexes, subdisks and diskgroups, needs to be coordinated. This means that a "master" will always need to be selected in the cluster (can be checked with the "vxdctl -c mode" command). Normally the master is the first one to open port "u". Port "u" is an exclusive port for registering with the cluster volume manager "master". If no master has been established yet, the first node to open port "u" will assume the role of master. The master controls all access to changes of the cluster volume manager configuration. Each node that tries to join the cluster (CVM), will need to open (exclusively) port "u", search for the master, and make sure that the node and the master sees all the same disks for the shared diskgroups. Port V - OK, now that we've estabblished that there is a master, we need to mention that fact that each instance of volume manager running (thus on each node) keeps the configuration in memory (regardless if it is part of a cluster or not). This "memory" is is managed by the configuration daemon (vxconfigd). We will get to the vxconfigd in a minute, but first port "v". So, port "v" is actually used to register membership for the cluster volume manager. (once the node got port "u" membership, the "permanent" membership is done via port "v". Only members of the same cluster (cluster volume manager cluster that is) are allowed to import and access the (shared) disks Port W - The last port in cluster volume manager. This is the port used for the vxconfigd on each node to communicate with the vxconfigd on all the other nodes. The biggest issue is that a configuration change needs to be the same across the whole cluster (does not help that 1 node thinks we still have a mirrored volume and the others don't know a thing about the mirror) SCSI3 PGR Registration vs Reservation SCSI-3 PGR uses a concept of registration and reservation. Hosts accessing a SCSI-3 device register a key with it. Each host registers its own key. Multiple hosts registering keys form a membership. Registered hosts can then establish a reservation with the SCSI-3 device. The reservation type is set to "Exclusive Access - Registrants Only". This means that only some commands to communicate with the device are allowed, and there is only one persistent reservation holder. With SCSI-3 PGR technology, blocking write access can be done by removing a registration from a SCSI-3 device. In the SFW DMP implementation, a host registers the same key for all of its paths to the SCSI-3 device, allowing multiple paths to use it without having to make and release reservations. Note below that all paths to a LUN should have keys on them. ## Display Registration of keys vxfenadm –g /dev/rdsk/c3t24d17s2 ## Display Reservation of keys vxfenadm –r /dev/rdsk/c3t24d17s2 ## Attempt to register with disk echo “/dev/rdsk/c3t24d17s2” > /tmp/disk_list vxfenadm –m –k tmp –f /tmp/disk_list ## Attempt to set reservations on a disk vxfenadm -n -kA1 -f /tmp/disk_list 193
- 201. Advanced VCS for IO Fencing and Various Commands ## or alternative to set reservations vxfenadm -n -f /tmp/disk_list SCSI3 PGR FAQ 1. Does vxfenmode scsi3_disk_policy have any impact on data drives, or is it just on the fencing drives? The vxfenmode file controls how the vxfen module will manage the coordinator disks only. The data disks are managed by dmp exclusively, and dmp works in concert with the vxfen module for PGR iofencing arbitration. Once the coordinator disk race is decided by vxfen module (expected to be extremely fast), a message is sent over to DMP to complete the PGR preemption of data disks (could take several minutes if customer has thousands of disks). 2. Does the dmp policy have any impact to registrations or just reservations? If so, what’s impact? If the policy is set to DMP, vxfen will operate upon /dev/vx/rdmp/* dmpnodes instead of /dev/rdsk/ c_t_d devices. The number of registered keys may be slightly different for some active/passive arrays when using DMP versus using native (depends on the implementation of the relevant array policy module that is servicing those dmpnodes). Coordinator disks are not reserved, only registrations are used for PGR fencing arbitration -- no data lives on them. The removal of registrations on coordinator disks during vxfen race is merely the arbitration mechanism used to determine who won the fence race. Contrasting, data disks are both registered and reserved -- whereby the reservation is the protection mechanism that mandates all initiators who wish to write to those disks must first be registered. As stated above, once the coordinator disk race is decided -- dmp will receive notification from vxfen of the outcome and accordingly preempt the registrations from the node(s) that lost the race. The removal of the registration on data disks protects the disk from rogue writes, but this is done only after the underlying coordinator disk vxfen race has been decided. 3. Since the reservation keys are written on the sym and not the LUN, Registrations are managed in memory of the array controller, as is also the reservation mode. Irrespective of the use of dmp or raw for coordinator disks, or data disks which are always managed by dmp -- registrations (and the reservation mode) are not written to the LUN. Those requests are serviced by the array, and the array controller tracks those in its memory. "Persistent" means persistent across SCSI bus resets and host reboots, but these keys do NOT persist across array reboots (which in practice almost never happen). 4. Is it possible that a downed path during reservation writing could fail on a specific path? Reservations only happen to data disks. Data disks are exclusively managed by dmp, and if the installed array policy module (APM) is working correctly (bug free), registrations will be made to all active paths. If a new path is added, or a dead path is restored, dmp must register a key there before sending any IO to that newly added/restored path. We have seen a few Active/Passive array APM's to have bugs in this area, but in your case of a Symmetrix (mentioned above) I am not aware of any problems with path restoration with that APM (dmpaa). Registrations on coordinator disks (remember coordinator disks are never reserved) happen at host boot time. If you're using the "raw" policy, there is no mechanism to add keys to new/restored paths after the reboot. Due to this deficiency, it was decided to leverage the capabilities of dmp by telling vxfen module to use dmpnodes instead of raw paths. This avoided reinventing the wheel of adding APM-like code to the vxfen module. 194
- 202. Advanced VCS for IO Fencing and Various Commands If a registration fails down a particular path, dmp *should* prevent that path from going to an online state -- but I know that we've seen a few problems with this in the past (path goes online but the registration failed, leaving the particular subpath keyless). 5. If so, does scsi3_disk_policy=dmp result in the key being written on the bad path when it comes back online? If the dmp policy does not interact with the vxfen module and allow for placement of the keys on the previously bad path – then what is the benefit of the dmp node? Using dmp policy instructs vxfen to use dmpnode instead of raw path. When the registration is made on the dmpnode, dmp keeps track of that registration request, and will gratuitously make the same registration for any subsequent added/restored path that arrives after the original registration to the dmpnode was made -- at least that's what is supposed to happen (see above about corner case bugs that have been identified and addressed over times past). 6. Can this setting be adjusted on the fly with the cluster up? The /etc/vxfentab file is (re)created each time the vxfen start script runs. Once the file is built, "vxfenconfig -c" reads the file upon initialization only. With 50mp3 and later, there is a way to go through a "replace" procedure to replace one device with another. With a bit of careful testing, that method could be used to replace the /dev/rdsk/c_t_d with the corresponding dmpnode if desired. 7. Last, why does the registration key on a data drive only have one key when there are multiple paths? Reservations have a key per path. Is the registration written to the LUN instead of the Symm? It’s the other way actually, there are multiple registrations (one per path), and only one reservation. The reservation is not really a key itself (its a mode setting) but is made through a registration key. If you unregister the hosting key, the reservation mode is lost. But if you preempt that key using some other registration, the spec says that the preempting key will inherit the reservation. Our dmp code is paranoid here, and we try the reservation again anyway. As a result, it is expected to see failed reservations coming from CVM slave nodes given it is the CVM master that makes the initial reservation through one of its paths to the LUN and the slave's attempt to re-reserve is expected to fail if one of the paths from the CVM master still holds the reservation. If for some reason the master lost its reservation (should never happen) our extra try for reservation from all joining slaves is something like an extra insurance policy. IO Fencing / CFS Information 1. Comments on IO Fencing • coordinator disks don't set any reservation mode • coordinator registration keys use a letter to represent nodeID followed by dashes • data disks set the reservation: "SCSI3_RESV_WRITEEXCLUSIVEREGISTRANTSONLY" • data disks use a letter to represent nodeID followed by PGR0001 • Data disk keys are set upon import Also note that the *PGR0001 Key Value increments each time you deport and re-import the same shared DG several times: 2. IO Fencing driver (port b) Startup Notes The port_b IOFencing driver is configured at boot time via the /etc/rc2.d/S97vxfen start script. This script performs several steps: 195
- 203. Advanced VCS for IO Fencing and Various Commands • reads /etc/vxfendg to determine name of the diskgroup (DG) that contains the coordinator disks • parses "vxdisk -o alldgs list" output for list of disks in that DG • performs a "vxdisk list diskname" for each to determine all available paths to each coordinator disk • uses all paths to each disk in the DG to build a current /etc/vxfentab 3. Summary of keys including uncommon ones In summary, the /opt/VRTSvcs/rac/bin/vxfentsthdw is a readable shell script which performs all of these steps (it uses dd instead of format's analyze function). Note that you must REGISTER a key before you can PREEMPT other keys. The easiest way of clearing keys is the /opt/VRTSvcs/rac/bin/vxfenclearpre script but this requires all IO to stop to ALL diskgroups, and a reboot to immediatly follow running the script (to safely re-apply needed keys). Failure to reboot results in VXVM performing shared IO without keys. If an event arises that mandates fencing, winning nodes will attempt to eject the keys from losing nodes, but won't find any. VXVM will silently continue. Worse yet, because the RESERVATION isn't present, the losing nodes still have the ability to write to the data disks thereby bypassing IOfencing altogether. If a node wants to perform IO on a device which has a RESERVATION, the node must first REGISTER a key. If the RESERVATION is inadvertently cleared, there is no requirement to maintain a REGISTRATION. For this reason, keys should never be manipulated of disks actively imported in shared mode. Manually stepping through this document 3-4 times using a spare disk on your cluster is the only way to become familiar with fencing and quickly resume normal production operation after a fence operation occurs. Otherwise, you must use vxfenclearpre or call VERITAS Support at 800 342 0652, being prepared to provide your VSN contract ID. Reading over the logic of vxfentsthdw and vxfenclearpre shell scripts also are valuable training aides. In the Table below ** the SCSI3_RESV_WRITEEXCLUSIVEREGISTRANTSONLY reservation mode is also required Table 17.1. Summary of SCSI3-PGR Keys Registration Usage A------- VXFEN for coordinator disks APGR0003 VXVM for data disks ** VERITASP vxfenclearpre temp keys to preempt other keys A7777777 VXVM temp keys during shared import ZZZZZZZZ VXVM temp keys during shared import A1------ used by VERTIAS support to preempt other keys 4. Example common errors a. If activation set to off these are common errors when trying to mount the filesystem # mount -o cluster,largefiles,qio /dev/vx/dsk/orvol_dg/orbvol /shared mount: /dev/vx/dsk/orabinvol_dg/orabinvol is not this fstype. 196
- 204. Advanced VCS for IO Fencing and Various Commands vxfsckd is not running: # mount -F vxfs -o cluster,largefiles,qio /dev/vx/dsk/orvol_dg/orbvol /shared UX:vxfs mount: ERROR: Cluster mount is not supported on a non-CVM volume on a file system layout version less than 4, or GAB/GLM modules are not loaded, or vxfsckd daemon is not running. # which vxfsckd /opt/VRTSvxfs/sbin/vxfsckd # /opt/VRTSvxfs/sbin/vxfsckd # ps -ef|grep vxfsckd root 5547 1 0 23:04:43 ? 0:00 /opt/VRTSvxfs/sbin/vxfsckd largefiles has not yet been set: # mount -F vxfs -o cluster,largefiles,qio /dev/vx/dsk/orvol_dg/orbvol /shared UX:vxfs mount: ERROR: mount option(s) incompatible with file system /dev/vx/dsk/orvol_dg/orbvol b. Reboot command issued instead of init 6 This results in the keys from the rebooted node remaining on the disks and prevents vxfen from starting. Easy way to fix is a reboot with init 6. 5. Adjust CFS Primary node - not master node node 0# fsclustadm showprimary /orashared 0 node 1# fsclustadm setprimary /orashared # fsclustadm showprimary /orashared 1 6. Coordinator Disk example with keys - note lack of reservations ; coordinator disks do not set them. # head -1 /etc/vxfentab > /tmp/coordinator_disk # vxfenadm -g all -f /tmp/coordinator_disk Device Name: /dev/rdsk/c2t0d7s2 Total Number Of Keys: 2 key[0]: Key Value [Numeric Format]: 66,45,45,45,45,45,45,45 Key Value [Character Format]: B------- key[1]: Key Value [Numeric Format]: 65,45,45,45,45,45,45,45 Key Value [Character Format]: A------- # head -1 /etc/vxfentab > /tmp/coordinator_disk 197
- 205. Advanced VCS for IO Fencing and Various Commands # vxfenadm -r all -f /tmp/coordinator_disk ## list reservations Device Name: /dev/rdsk/c2t0d7s2 Total Number Of Keys: 0 No keys... 7. Data Disk example with keys - should have both Reservation and Registration set. # vxdisk -o alldgs list | awk '/shared$/ {print "/dev/rdsk/" $1 }' | head -1 > /tmp/data_disk # vxfenadm -g all -f /tmp/data_disk Device Name: /dev/rdsk/c2t0d1s2 Total Number Of Keys: 2 key[0]: Key Value [Numeric Format]: 65,80,71,82,48,48,48,49 Key Value [Character Format]: APGR0001 key[1]: Key Value [Numeric Format]: 66,80,71,82,48,48,48,49 Key Value [Character Format]: BPGR0001 # vxfenadm -r all -f /tmp/data_disk Device Name: /dev/rdsk/c2t0d1s2 Total Number Of Keys: 1 Key[0]: Reservation Type: SCSI3_RESV_WRITEEXCLUSIVEREGISTRANTSONLY Key Value [Numeric Format]: 65,80,71,82,48,48,48,49 Key Value [Character Format]: APGR0001 8. Determine the appropriate letter representing the local nodeID: node0=A, node1=B, node2=C, ... #!/bin/ksh "/usr/bin/echo '0$(expr $(lltstat -N) + 101)'" B 9. Veritas SAN Serial Number # vxfenadm -i /dev/rdsk/c2t13d0s2 Vendor id : EMC Product id : SYMMETRIX Revision : 5567 Serial Number : 42031000a 10.SCSI3-PGR Register Test Keys for new storage One system; repeat with key B1 on second system # vxfenadm -m -kA1 -f /tmp/disklist Registration completed for disk path: /dev/rdsk/c2t0d1s2 11.SCSI3-PGR Remove Test Keys for new storage One system; repeat with key B1 on second system # vxfenadm -x -kA1 -f /tmp/disklist 198
- 206. Advanced VCS for IO Fencing and Various Commands Deleted the key : [A1------] from device /dev/rdsk/c2t0d1s2 12.Check SCSI3-PGR Keys on a list of disks Use disk list to show keys - example only showing one disk # vxfenadm -g all -f /tmp/disklist Device Name: /dev/rdsk/c2t0d1s2 Total Number Of Keys: 1 key[0]: Key Value [Numeric Format]: 65,49,45,45,45,45,45,45 Key Value [Character Format]: A1------ 13.Check if IO Fencing License is enabled vxlicrep -e | grep PGR PGR#VERITAS Volume Manager = Enabled PGR_TRAINING#VERITAS Volume Manager = Enabled PGR = Enabled PGR_TRAINING = Enabled 14.Disk Detach Policy In VERITAS Volume Manager 3.2 and later versions, there are two detach policies for a shared disk group, global and local. The default policy, and the way VERITAS Cluster Volume Manager (CVM) has always worked, is global. The policy can be selected for each disk group with the vxedit set command. The global policy will cause the disk to be detached throughout the cluster if a single node experiences an I/O failure to that disk. The local policy may be preferred for unmirrored volumes or in cases where availability is preferred over redundancy of the data. It allows a disk that experiences an I/O failure to remain available if other nodes in the cluster are still able to access it. After an I/O failure occurs, a message will be passed around the cluster to determine if the failure is disk related or path related. If the other nodes can still write to the disk, the mirrors are kept in sync by other nodes. The original node will fail writes. Something similar is done for reads, but the read will succeed. The state is not persistent. If a node has a local I/O failure, it does not remember. Any following read or write that fails will go through the same process of passing messages around the cluster to check for path or disk failure and repair the mirrored volume. Disk Detach Policy has no effect on the Master node, as any IO failure will result in the plex detaching regardless of policy. In any case, slaves that can't see the disk will still be unable to join the cluster. vxedit man page: Attribute Values for Disk Group Records diskdetpolicy Sets a disk group <detach policy>. These policies determine the way VxVM detaches unusable disks in a shared disk group. The diskdetpolicy attribute is ignored for private disk groups. - global 199
- 207. Advanced VCS for IO Fencing and Various Commands For a shared disk group, if any node in the cluster reports a disk failure, the detach occurs in the entire cluster. This is the default policy. - local If a disk fails, the failure is confined to the node that detected the failure. An attempt is made to communicate with all nodes in the cluster to ascertain the failed disk's usability. If all nodes report a problem with the failed disk, the disk is detached throughout the cluster. Note: The name of the shared disk group must be specified twice; once as the argument to the -g option, and again as the name argument that specifies the record to be edited as shown in this example: vxedit -g shareddg set diskdetpolicy=local shareddg NOTE !! For cluster filesystems, if the CFS primary resides on a slave node, an IO error on that node will result in the filesystem being disabled cluster-wide. This option is primarily intended for raw volumes. See following technote where local detach policy is strongly discouraged for DBE/AC: http://support.veritas.com/docs/258677 15.Example walk through of adding SCSI3-PGR Keys Manually a. First deport the diskgroup and confirm no keys # vxdg deport orabinvol_dg # vxfenadm -g all -f /tmp/data_disk Device Name: /dev/rdsk/c2t0d1s2 Total Number Of Keys: 0 No keys... # vxfenadm -r all -f /tmp/data_disk Device Name: /dev/rdsk/c2t0d1s2 Total Number Of Keys: 0 No keys... b. Now, register with the device # vxfenadm -m -kA1 -f /tmp/data_disk Registration completed for disk path: /dev/rdsk/c2t0d1s2 # vxfenadm -g all -f /tmp/data_disk Device Name: /dev/rdsk/c2t0d1s2 200
- 208. Advanced VCS for IO Fencing and Various Commands Total Number Of Keys: 1 key[0]: Key Value [Numeric Format]: 65,49,45,45,45,45,45,45 Key Value [Character Format]: A1------ # vxfenadm -r all -f /tmp/data_disk Device Name: /dev/rdsk/c2t0d1s2 Total Number Of Keys: 0 No keys... c. Set the reservation mode Note Even though the reservation is not a key, you must use the registration key to RESERVE (see note above). # vxfenadm -n -f /tmp/data_disk VXFEN:libvxfen:1118: Reservation FAILED for: /dev/rdsk/c2t0d1s2 VXFEN:libvxfen:1133: Error returned: Error 0 # vxfenadm -n -kA1 -f /tmp/data_disk Reservation completed for disk path: /dev/rdsk/c2t0d1s2 # vxfenadm -g all -f /tmp/data_disk Device Name: /dev/rdsk/c2t0d1s2 Total Number Of Keys: 1 key[0]: Key Value [Numeric Format]: 65,49,45,45,45,45,45,45 Key Value [Character Format]: A1------ # vxfenadm -r all -f /tmp/data_disk Device Name: /dev/rdsk/c2t0d1s2 Total Number Of Keys: 1 Key[0]: Reservation Type: SCSI3_RESV_WRITEEXCLUSIVEREGISTRANTSONLY Key Value [Numeric Format]: 65,49,45,45,45,45,45,45 Key Value [Character Format]: A1------ d. Remove the REGISTRATION # vxfenadm -x -kA1 -f /tmp/data_disk Deleted the key : [A1------] from device /dev/rdsk/c2t0d1s2 # vxfenadm -g all -f /tmp/data_disk Device Name: /dev/rdsk/c2t0d1s2 Total Number Of Keys: 0 No keys... # vxfenadm -r all -f /tmp/data_disk 201
- 209. Advanced VCS for IO Fencing and Various Commands Device Name: /dev/rdsk/c2t0d1s2 Total Number Of Keys: 0 No keys... e. Unregistering removed the RESERVATION too # vxfenadm -m -kA1 -f /tmp/data_disk Registration completed for disk path: /dev/rdsk/c2t0d1s2 # vxfenadm -n -kA1 -f /tmp/data_disk Reservation completed for disk path: /dev/rdsk/c2t0d1s2 # vxfenadm -m -kB1 -f /tmp/data_disk Registration completed for disk path: /dev/rdsk/c3t0d1s2 # vxfenadm -g all -f /tmp/data_disk Device Name: /dev/rdsk/c3t0d1s2 Total Number Of Keys: 2 key[0]: Key Value [Numeric Format]: 65,49,45,45,45,45,45,45 Key Value [Character Format]: A1------ key[1]: Key Value [Numeric Format]: 66,49,45,45,45,45,45,45 Key Value [Character Format]: B1------ # vxfenadm -r all -f /tmp/data_disk Device Name: /dev/rdsk/c3t0d1s2 Total Number Of Keys: 1 Key[0]: Reservation Type: SCSI3_RESV_WRITEEXCLUSIVEREGISTRANTSONLY Key Value [Numeric Format]: 65,49,45,45,45,45,45,45 Key Value [Character Format]: A1------ f. A1 Key Removal # vxfenadm -x -kA1 -f /tmp/data_disk Deleted the key : [A1------] from device /dev/rdsk/c2t0d1s2 # vxfenadm -g all -f /tmp/data_disk Device Name: /dev/rdsk/c3t0d1s2 Total Number Of Keys: 1 key[0]: Key Value [Numeric Format]: 66,49,45,45,45,45,45,45 Key Value [Character Format]: B1------ # vxfenadm -r all -f /tmp/data_disk Device Name: /dev/rdsk/c3t0d1s2 Total Number Of Keys: 0 202
- 210. Advanced VCS for IO Fencing and Various Commands No keys... ISCSI Solaris software Target and Initiator Veritas Cluster Configuration with Zones Walkthrough configuring a iSCSI Target and Initiator for Non-Global Zone migration, using VCS 5.0MP3 for failover between two test LDOM’s. Example commands for the Target System are on a U40, Initiator Configuration between two LDOM’s. My use of LDOM’s here is for testing, Veritas Cluster Server can be used to failover LDOM’s, however it is not recommended to run VCS within an LDOM as though it is a non-virtualized system. TARGET SERVER Simple configuration, no CHAP, no real security. Buyer be ware. $ zfs create –V 16g jbod/iscsi/zlun1 $ zfs set shareiscsi=on jbod/iscsi/zlun1 $ iscsitadm list target Target: jbod/iscsi/lun0 iSCSI Name: iqn.1986-03.com.sun:02:b3d446a9-683b-615d-b5db-ff6846dbf758 Connections: 0 Target: jbod/iscsi/zlun1 iSCSI Name: iqn.1986-03.com.sun:02:633bdd37-1dfa-e1df-ee5e-91b8d29f410d Connections: 0 INITIATOR SERVER Manual Configuration – Static Entry (no auto-discover): Execute the following on LDOM#0 and LDOM#1 $ iscsiadm add static-config iqn.1986-03.com.sun: 02:633bdd37-1dfa-e1df-ee5e-91b8d29f410d,192.168.15.30 $ iscsiadm modify discovery --static enable Feb 2 18:29:50 dom1 iscsi: NOTICE: iscsi session(4) iqn.1986-03.com.sun:02:633bdd37-1dfa-e1df-ee5e-91b8d29f410d online Feb 2 18:29:52 dom1 scsi: WARNING: /scsi_vhci/ssd@g010000144f3b8d6000002a004987cb2c (ssd0): Feb 2 18:29:52 dom1 Corrupt label; wrong magic number bash-3.00# Feb 2 18:29:53 dom1 scsi: WARNING: /scsi_vhci/ssd@g010000144f3b8d6000002a004987cb2c (ssd0): Feb 2 18:29:53 dom1 Corrupt label; wrong magic number $ devfsadm -c iscsi $ format Searching for disks... 203
- 211. Advanced VCS for IO Fencing and Various Commands Feb 2 18:30:54 dom1 scsi: WARNING: /scsi_vhci/ssd@g010000144f3b8d6000002a004987cb2c (ssd0): Feb 2 18:30:54 dom1 Corrupt label; wrong magic number Feb 2 18:30:55 dom1 scsi: WARNING: /scsi_vhci/ssd@g010000144f3b8d6000002a004987cb2c (ssd0): Feb 2 18:30:55 dom1 Corrupt label; wrong magic number done c1t010000144F3B8D6000002A004987CB2Cd0: configured with capacity of 16.00GB AVAILABLE DISK SELECTIONS: 0. c0d0 <SUN-DiskImage-16GB cyl 55922 alt 2 hd 1 sec 600> /virtual-devices@100/channel-devices@200/disk@0 1. c1t010000144F3B8D6000002A004987CB2Cd0 <SUN-SOLARIS-1 cyl 32766 alt 2 hd 4 sec 256> /scsi_vhci/ssd@g010000144f3b8d6000002a004987cb2c Specify disk (enter its number): 1 LABEL Drive #1 Creation of ZPool for NGZ, and NGZ on iSCSI Storage. Creation of zpool, and non-global zone followed by deport/import and detach/attach for testing migration prior to failover configuration. LDOM#0 Only $ zpool create zones c1t010000144F3B8D6000002A004987CB2Cd0 $ zfs create zones/p1 $ chmod 700 zones/p1 $ zonecfg –z p1 zonecfg:p1> create zonecfg:p1> set zonepath=/zones/p1 zonecfg:p1> add net zonecfg:p1:net> set physical=vnet0 zonecfg:p1:net> set address=192.168.15.77/24 zonecfg:p1:net> end zonecfg:p1> exit $ zoneadm -z p1 install $ zoneadm –z p1 boot $ zlogin –C p1 // Config system’s sysidcfg $ zoneadm –z p1 halt $ zoneadm –z p1 detach $ zpool export zones LDOM#1 Only 204
- 212. Advanced VCS for IO Fencing and Various Commands $ zpool import zones $ zonecfg –z p1 create –a /zones/p1 $ zoneadm –z p1 attach [-u] $ zooneadm –z p1 boot REVERSE Migration of Non-Global Zone Migration back to original host: LDOM#1 commands $ zoneadm –z p1 halt $ zoneadm –z p1 detach $ zpool export zones Migration back to original host: LDOM#0 commands Note lack of running zonecfg –z p1 create –a /zones. This is not necessary once the zone.xml and index.xml are updated with p1 zone information. Should this script be automated, you may want to consider adding the force configuration into the script – just in case. $ zpool import zones $ zoneadm –z p1 attach [-u] $ zoneadm –z p1 boot Moving Configuration of Zone and ZFS Pool on iSCSI Storage into Veritas Cluster Server .50MP3. Note The Zpool Agent only included with VCS starting in 5.0MP3 for Solaris. There are a number of configuration variations that could be used here, including legacy mounts with the Mount Agent. Below is a simple layout that uses ZFS Automounting when the zpool is imported through VCS. Example VCS 5.0MP3 main.cf configuration for Zpool and Zone Failover $ haconf -makerw $ hagrp –add ztest $ hagrp –modify ztest SystemList dom2 0 dom1 1 $ hagrp –modify ztest AutoStartList dom2 dom1 $ hares -add zpool_zones Zpool ztest $ hares -modify zpool_zones PoolName zones $ hares -modify zpool_zones AltRootPath "/" $ hares -modify zpool_zones ChkZFSMounts 1 $ hares -modify zpool_zones Enabled 1 $ /opt/VRTSvcs/bin/hazonesetup ztest zone_p1 p1 ems dom1 dom2 $ haconf –makerw $ hares –link zone_p1 zpool_zones $ haconf –dump -makero Example main.cf: /etc/VRTSvcs/conf/config/main.cf: include "types.cf" 205
- 213. Advanced VCS for IO Fencing and Various Commands cluster LDOM_LAB ( UserNames = { admin = eLMeLGlIMhMMkUMgLJ, z_zone_p1_dom2 = bkiFksJnkHkjHpiMji, z_zone_p1_dom1 = dqrRrkQopKnsOooMqx } Administrators = { admin } ) system dom1 ( ) system dom2 ( ) group ztest ( SystemList = { dom1 = 0, dom2 = 1 } AutoStartList = { dom2, dom1 } Administrators = { z_zone_p1_dom2, z_zone_p1_dom1 } ) Zone zone_p1 ( ZoneName = p1 ) Zpool zpool_zones ( PoolName = zones AltRootPath = "/" ) zone_p1 requires zpool_zones Heart Beat Testing Software Testing Heart Beats - unsupported 1. Forcing a Heart Beat Link Down through software ## You disable the LLT link as follows: # lltconfig -t <tag> -L 0 (0 to disable the link) ## You enable the LLT link as follows: # lltconfig -t <tag> -L 3 (3 to enable the link) Heart Beat Validation Using dlpiping to validate point to point heart beats and resolve cross connections between devices 1. On Node A 206
- 214. Advanced VCS for IO Fencing and Various Commands /opt/VRTSllt/getmac /dev/hme:0 /opt/VRTSllt/dlpiping –vs /dev/hme:0 2. On Node B /opt/VRTSllt/dlpiping –vc /dev/hme:0 <mac address of node 1> Using Mirroring for Storage Migration Objective: Copy of large storage amounts from one server to another by LUN masking storage to both hosts, mirroring, breaking mirror, putting storage online on the target system as a different disk group, then isolation of data via LUN Masking/Zoning. Note This process has only been used on CONCAT volumes. You will need to convert layout to CONCAT for each volume if striped. Migration Workflow 1. Have new SAN storage allocated to target host, and the same new storage LUN Masked/Zoned to source host 2. Mirror storage on source host to the new LUNS 3. Collelct dump of vxvm database 4. Break Mirror and remove new LUNs from Source host vxvm configuration 5. Re-create new disk group on target host using modified vxvm database dump 6. Online new storage group on target system Migration Walkthrough 1. Identify source and target LUNs; and difference in device names on source and target. Also record mount points and disk sizes target_lun0 = c2t600144F04A2E74170000144F3B8D6000d0 source_lun0 = c2t600144F04A2E74150000144F3B8D6000d0 # df -h Filesystem size used avail capacity Mounted on /dev/vx/dsk/demo_orig/v01 4.0G 18M 3.7G 1% /v01 /dev/vx/dsk/demo_orig/v02 4.0G 18M 3.7G 1% /v02 /dev/vx/dsk/demo_orig/v03 2.0G 18M 1.9G 1% /v03 /etc/vfstab: /dev/vx/dsk/demo_org/v01 /dev/vx/rdsk/demo_org/v01 /v01 vxfs 2 yes - 207
- 215. Advanced VCS for IO Fencing and Various Commands /dev/vx/dsk/demo_org/v02 /dev/vx/rdsk/demo_org/v02 /v02 vxfs 2 yes - /dev/vx/dsk/demo_org/v03 /dev/vx/rdsk/demo_org/v03 /v03 vxfs 2 yes - # vxprint Disk group: demo_orig TY NAME ASSOC KSTATE LENGTH PLOFFS STATE TUTIL0 PUTIL0 dg demo_orig demo_orig - - - - - - dm target_lun0 target_lun0 - 25098496 - - - - dm orig_disk source_lun0 - 25098496 - - - - v v01 fsgen ENABLED 8388608 - ACTIVE - - pl v01-01 v01 ENABLED 8388608 - ACTIVE - - sd orig_disk-01 v01-01 ENABLED 8388608 0 - - - v v02 fsgen ENABLED 8388608 - ACTIVE - - pl v02-01 v02 ENABLED 8388608 - ACTIVE - - sd orig_disk-02 v02-01 ENABLED 8388608 0 - - - v v03 fsgen ENABLED 4194304 - ACTIVE - - pl v03-01 v03 ENABLED 4194304 - ACTIVE - - sd orig_disk-03 v03-01 ENABLED 4194304 0 - - - 2. Add disks from destination to source server and mirror to new disks # vxdg -g demo_orig adddisk target_lun0=target_lun0 # vxassist -b -g demo_orig mirror v01 target_lun0 # vxassist -b -g demo_orig mirror v02 target_lun0 # vxassist -b -g demo_orig mirror v03 target_lun0 3. Collect Data needed for vxmake # /etc/vx/diag.d/vxprivutil dumpconfig /dev/vx/dmp/source_lun0s2 >/priv_dump.out # cat /priv_dump.out|vxprint -D - -hvpsm >/maker.out # cat /priv_dump.out|vxprint -D - -d -F "%name=%last_da_name" > list 4. Copy priv_dump.out, maker.out , list and vxdisk-o-alldgs.out to target system: # scp priv_dump.out maker.out list vxdisk-o-alldgs.out a123456@target: 5. Remove target mirror for each volume on source server # vxplex -o rm dis target_lun-plex 6. Remove target disks from vx disk group on source server # vxdg -g demo_orig rmdisk target_lun0 7. Validate storage on source host 208
- 216. Advanced VCS for IO Fencing and Various Commands Storage Group Creation on Target Host 1. Update the maker.out, removing reference to source drives. Backup files before editing. Specifically removing sub disk and plex information pointing toward the source disk. Since plex v01-01 and sub disk orig_disk-01 were the original mirrors, delete references for those items in the maker.out file. Here they are highlighted. Onlyt v01 volume is shown, continue for all volumes. vol v01 use_type=fsgen fstype=" comment=" putil0=" putil1=" putil2=" state="ACTIVE writeback=on writecopy=off specify_writecopy=off pl_num=2 start_opts=" read_pol=SELECT minor=54000 user=root group=root mode=0600 log_type=REGION len=8388608 log_len=0 update_tid=0.1081 rid=0.1028 detach_tid=0.0 active=off forceminor=off badlog=off recover_checkpoint=16 sd_num=0 sdnum=0 kdetach=off storage=off readonly=off layered=off apprecover=off recover_seqno=0 recov_id=0 primary_datavol= vvr_tag=0 iscachevol=off morph=off guid={7251b03a-1dd2-11b2-ad16-00144f6ece3b} inst_invalid=off incomplete=off 209
- 217. Advanced VCS for IO Fencing and Various Commands instant=off restore=off snap_after_restore=off oldlog=off nostart=off norecov=off logmap_align=0 logmap_len=0 inst_src_guid={00000000-0000-0000-0000-000000000000} cascaded=off plex=v01-01,v01-02 export= plex v01-01 compact=on len=8388608 contig_len=8388608 comment=" putil0=" putil1=" putil2=" v_name=v01 layout=CONCAT sd_num=1 state="ACTIVE log_sd= update_tid=0.1066 rid=0.1031 vol_rid=0.1028 detach_tid=0.0 log=off noerror=off kdetach=off stale=off ncolumn=0 raidlog=off guid={7251f842-1dd2-11b2-ad16-00144f6ece3b} mapguid={00000000-0000-0000-0000-000000000000} sd=orig_disk-01:0 sd orig_disk-01 dm_name=orig_disk pl_name=v01-01 comment=" putil0=" putil1=" putil2=" dm_offset=0 pl_offset=0 len=8388608 update_tid=0.1034 rid=0.1033 guid={72523956-1dd2-11b2-ad16-00144f6ece3b} plex_rid=0.1031 dm_rid=0.1026 minor=0 210
- 218. Advanced VCS for IO Fencing and Various Commands detach_tid=0.0 column=0 mkdevice=off subvolume=off subcache=off stale=off kdetach=off relocate=off sd_name= uber_name= tentmv_src=off tentmv_tgt=off tentmv_pnd=off plex v01-02 compact=on len=8388608 contig_len=8388608 comment=" putil0=" putil1=" putil2=" v_name=v01 layout=CONCAT sd_num=1 state="ACTIVE log_sd= update_tid=0.1081 rid=0.1063 vol_rid=0.1028 detach_tid=0.0 log=off noerror=off kdetach=off stale=off ncolumn=0 raidlog=off guid={3d6ce0f2-1dd2-11b2-ad18-00144f6ece3b} mapguid={00000000-0000-0000-0000-000000000000} sd=new_disk-01:0 sd new_disk-01 dm_name=new_disk pl_name=v01-02 comment=" putil0=" putil1=" putil2=" dm_offset=0 pl_offset=0 len=8388608 update_tid=0.1066 rid=0.1065 guid={3d6d2076-1dd2-11b2-ad18-00144f6ece3b} plex_rid=0.1063 dm_rid=0.1052 211
- 219. Advanced VCS for IO Fencing and Various Commands minor=0 detach_tid=0.0 column=0 mkdevice=off subvolume=off subcache=off stale=off kdetach=off relocate=off sd_name= uber_name= tentmv_src=off tentmv_tgt=off tentmv_pnd=off 2. Create Disk Group on Target from Disks that were a mirror on source: Get the value of X from the first drive listed in "list" # vxdg init newdg $X=target_lun0 3. Rebuild volumes from maker.out .out scripts # vxmake -g newdg -d /maker.out 4. Start Volumes # vxvol -g newdg start volX ### Or # vxvol -g newdg startall 212
- 220. Chapter 18. OpenSolaris 2009.06 COMSTAR Installation 1. Install COMSTAR Server Utilities # pkg install storage-server # pkg install SUNWiscsi 2. Disable iscsitgt and physical:nwam Service - itadm gets confused with multiple physical instances; this assumes not using nwam. # svcadm disable iscsitgt # svccfg delete svc:/network/physical:nwam 3. Reboot Server # shutdown -i6 -g0 -y 4. Enable stmf service # svcadm enable stmf # svcadm enable -r svc:/network/iscsi/target:default Simple Setup An iSCSI LUN 1. Create a ZFS Volume # zfs create -V SIZE pool/volume 2. Configure iSCSI Target and LUN # sbdadm create-lu /dev/zvol/rdsk/pool/volume # stmfadm add-view <GUID> ## Create a send-target target ### # itadm create-tpg nge1 10.1.15.20 # itadm create-target -t nge1 ################################## ## OR ## Create a target for static assignment ## # itadm create-target ########################################### Walkthrough of iSCSI LUN Example # zpool create npool disk1 # zfs create npool/iscsitgt 213
- 221. OpenSolaris 2009.06 COMSTAR # zfs create -V 10g npool/iscsitgt/vdisk_dom1 # sbdadm create-lu /dev/zvol/rdsk/npool/iscsitgt/vdisk_dom1 Created the following LU: GUID DATA SIZE SOURCE ----------------- ------------------- ---------- 600144f0c312030000004a366cee0001 19327287296 /dev/zvol/rdsk/npool/iscsitgt/vdisk_dom1 # stmfadm add-view 600144f0c312030000004a366cee0001 # itadm create-target Target iqn.1986-03.com.sun:02: 278f5072-6662-e976-cc95-8116fd42c2c2 successfully created Walkthrough of Simple iSCSI LUN Example # zpool create npool disk1 # zfs create npool/iscsitgt # zfs create -V 10g npool/iscsitgt/vdisk_dom1 # sbdadm create-lu /dev/zvol/rdsk/npool/iscsitgt/vdisk_dom1 Created the following LU: GUID DATA SIZE SOURCE ----------------- ------------------- ---------- 600144f0c312030000004a366cee0001 19327287296 /dev/zvol/rdsk/npool/iscsitgt/vdisk_dom1 # stmfadm add-view 600144f0c312030000004a366cee0001 # itadm create-target Target iqn.1986-03.com.sun:02: 278f5072-6662-e976-cc95-8116fd42c2c2 successfully created Setup iSCSI with ACL's Overview - target server has two interfaces nge0 and nge1. Each inteface is setup to allow for a unique mapping of LUNs to host iscsi hba's. Some hosts are allowed to connect to nge0 and some to nge1. Access is granted by the remote host iqn number. 1. Create targets for each interface using a TPG # itadm create-tpg nge0 192.168.15.30 # itadm create-target -t nge0 # itadm create-tpg nge0 10.1.15.20 # itadm create-target -t nge1 2. Create a list of remote initiators In this case, the t1000_primary will contain a list of my T1000 primary domain iscsi iqn's generated by iscsiadm on each remote host. 214
- 222. OpenSolaris 2009.06 COMSTAR # stmfadm create-hg t1000_primary # stmfadm add-hg-member -g t1000_primary iqn.1986-03.com.sun:01:00144f6ece3a.498cfeb2 3. Create a access list for each target interface # svcadm disable stmf # stmfadm list-target # itadm list-target -v TARGET NAME STATE iqn.1986-03.com.sun:02:2be6d243-0ff9-6981-f157-eea00338d1d4 online alias: - auth: none (defaults) targetchapuser: - targetchapsecret: unset tpg-tags: nge0 = 2 iqn.1986-03.com.sun:02:1a6416d2-a260-ebe4-bbf7-d28643276f65 online alias: - auth: none (defaults) targetchapuser: - targetchapsecret: unset tpg-tags: nge1 = 2 # stmfadm create-tg iFA1 # stmfadm create-tg iFA0 # stmfadm add-tg-member -g iFA1 iqn.1986-03.com.sun:02:1a6416d2-a260-ebe4-bbf7-d28643276f65 # stmfadm add-tg-member -g iFA0 iqn.1986-03.com.sun:02:2be6d243-0ff9-6981-f157-eea00338d1d4 4. Mapping each LUN to both the Target TG access list, and the remote host HG Access list # sbdadm list-lu | awk '{print $1, $3}' Found LU(s) GUID SIZE -------------------------------- ---------------- 600144f0c312030000004a3b8068001c /dev/zvol/rdsk/npool/COMSTAR_LUN5 600144f0c312030000004a3b8068001b /dev/zvol/rdsk/npool/COMSTAR_LUN4 600144f0c312030000004a3b8068001a /dev/zvol/rdsk/npool/COMSTAR_LUN3 600144f0c312030000004a3b80680019 /dev/zvol/rdsk/npool/COMSTAR_LUN2 600144f0c312030000004a3b80680018 /dev/zvol/rdsk/npool/COMSTAR_LUN1 600144f0c312030000004a3b80680017 /dev/zvol/rdsk/npool/COMSTAR_LUN0 215
- 223. OpenSolaris 2009.06 COMSTAR ## Repeat below for each LUN to be shared over iFA1 (nge1) to remove ## iscsi addressed defined in HG t1000_primary # stmfadm add-view -h t1000_primary -t iFA1 -n 0 600144f0c312030000004a3b80680017 216
- 224. Chapter 19. Sun Cluster 3.2 Preperation This section covers a walkthrough configuration for Sun Cluster. General requirments include the following: 1. Internal Hard Drive Configuration Warning ZFS is not supported for the /globaldevice filesystem, therefore unless you are being creative avoid installing Solaris 10 with the ZFS Root Option. If you do not allocate a UFS filesystem and partition for /globaldevices then a LOFI device will be used. This will reduce boot performance. Partition Layout - set identical between both servers where possible Part Tag Flag Size Mount Point 0 root wm 8.00GB / 1 swap wu 8.00GB [swap] 2 backup wm 74.50GB [backup] 3 unassigned wm 8.00GB /opt 4 var wm 8.00GB /var 5 unassigned wm 1.00GB /globaldevice 6 unassigned wm 512.19MB [reserved for SVM MDB] 7 unassigned wm 40.99GB /free [remaining] Table 19.1. Sun Cluster Filesystem Requirements Filesystem Min Requirement /var 100MB Free /opt 50MB Free /usr 50MB Free / 100MB Free /globaldevices 512MB Free 2. Shared Hard Drive Configuration and Layout 3. Network Configuration Interface Function Planned Options ---------------------------------------------------- bge0 Public IPMP Link Only Detection bge1 Private Used for HB bge2 Private Used for HB bge3 Public IPMP Link Only Detection 217
- 225. Sun Cluster 3.2 Installation This section covers a walkthrough configuration for Sun Cluster. General installation include the following: 1. Product Installaton Location Warning Either untar the software on both servers under /tmp or run installer from a shared directory such as NFS. Sun Cluster must be installed on both systems 2. Run Installer Script /swdepot/sparc/suncluster/Solaris_sparc $ ./installer Unable to access a usable display on the remote system. Continue in command-line mode?(Y/N) Y <Press ENTER to Continue> <Press ENTER to display the Software License Agreement> <--[40%]--[ENTER To Continue]--[n To Finish]-->n License Agreement [No] {"<" goes back, "!" exits}? Yes Installation Type ----------------- Do you want to install the full set of Sun Java(TM) Availability Suite Products and Services? (Yes/No) [Yes] {"<" goes back, "!" exits} Yes Install multilingual package(s) for all selected components [Yes] {"<" goes back, "!" exits}: No Do you want to add multilanguage support now? 1. Yes 2. No Enter your choice [1] {"<" goes back, "!" exits} 2 Enter 1 to upgrade these shared components and 2 to cancel [1] {"<" goes back, "!" exits}: 1 Checking System Status Available disk space... : Checking .... OK Memory installed... : Checking .... OK Swap space installed... : Checking .... OK 218
- 226. Sun Cluster 3.2 Operating system patches... : Checking .... OK Operating system resources... : Checking .... OK System ready for installation Enter 1 to continue [1] {"<" goes back, "!" exits} 1 Screen for selecting Type of Configuration 1. Configure Now - Selectively override defaults or express through 2. Configure Later - Manually configure following installation Select Type of Configuration [1] {"<" goes back, "!" exits} 2 Ready to Install ---------------- The following components will be installed. Product: Java Availability Suite Uninstall Location: /var/sadm/prod/SUNWentsyssc32u2 Space Required: 326.34 MB --------------------------------------------------- Java DB Java DB Server Java DB Client Sun Cluster 3.2 1/09 Sun Cluster Core Sun Cluster Manager Sun Cluster Agents 3.2 1/09 Sun Cluster HA for Sun Java(TM) System Application Server Sun Cluster HA for Sun Java(TM) System Message Queue Sun Cluster HA for Sun Java(TM) System Messaging Server Sun Cluster HA for Sun Java(TM) System Calendar Server Sun Cluster HA for Sun Java(TM) System Directory Server Sun Cluster HA for Sun Java(TM) System Application Server EE (HADB) Sun Cluster HA for Instant Messaging Sun Cluster HA/Scalable for Sun Java(TM) System Web Server Sun Cluster HA for Apache Tomcat Sun Cluster HA for Apache Sun Cluster HA for DHCP Sun Cluster HA for DNS Sun Cluster HA for MySQL Sun Cluster HA for Sun N1 Service Provisioning System Sun Cluster HA for NFS Sun Cluster HA for Oracle Sun Cluster HA for Samba Sun Cluster HA for Sun N1 Grid Engine Sun Cluster HA for Solaris Containers Sun Cluster Support for Oracle RAC Sun Cluster HA for Oracle E-Business Suite Sun Cluster HA for SAP liveCache Sun Cluster HA for WebSphere Message Broker Sun Cluster HA for WebSphere MQ 219
- 227. Sun Cluster 3.2 Sun Cluster HA for Oracle 9iAS Sun Cluster HA for SAPDB Sun Cluster HA for SAP Web Application Server Sun Cluster HA for SAP Sun Cluster HA for PostgreSQL Sun Cluster HA for Sybase ASE Sun Cluster HA for BEA WebLogic Server Sun Cluster HA for Siebel Sun Cluster HA for Kerberos Sun Cluster HA for Swift Alliance Access Sun Cluster HA for Swift Alliance Gateway Sun Cluster HA for Informix Sun Cluster Geographic Edition 3.2 1/09 Sun Cluster Geographic Edition Core Components Sun Cluster Geographic Edition Manager Sun StorEdge Availability Suite Data Replication Support Hitachi Truecopy Data Replication Support SRDF Data Replication Support Oracle Data Guard Data Replication Support Quorum Server Sun Java(TM) System High Availability Session Store 4.4.3 All Shared Components Sun Java(TM) System Monitoring Console 1.0 Update 1 1. Install 2. Start Over 3. Exit Installation What would you like to do [1] {"<" goes back, "!" exits}? 1 Enter 1 to view installation summary and Enter 2 to view installation logs [1] {"!" exits} ! In order to notify you of potential updates, we need to confirm an internet connection. Do you want to proceed [Y/N] : N Basic Configuration This section covers a walkthrough configuration for Sun Cluster. General configuration include the following: Warning Interfaces configured for heart beats must be unplumbed and have no /etc/hostname.dev file. Warning During the scinstall configuration process the nodes will be rebooted 1. Product Configuration # /usr/cluster/bin/scinstall 220
- 228. Sun Cluster 3.2 *** Main Menu *** Please select from one of the following (*) options: * 1) Create a new cluster or add a cluster node 2) Configure a cluster to be JumpStarted from this install server 3) Manage a dual-partition upgrade 4) Upgrade this cluster node 5) Print release information for this cluster node * ?) Help with menu options * q) Quit Option: 1 *** New Cluster and Cluster Node Menu *** Please select from any one of the following options: 1) Create a new cluster 2) Create just the first node of a new cluster on this machine 3) Add this machine as a node in an existing cluster ?) Help with menu options q) Return to the Main Menu Option: 1 *** Create a New Cluster *** This option creates and configures a new cluster. You must use the Java Enterprise System (JES) installer to install the Sun Cluster framework software on each machine in the new cluster before you select this option. If the "remote configuration" option is unselected from the JES installer when you install the Sun Cluster framework on any of the new nodes, then you must configure either the remote shell (see rsh(1)) or the secure shell (see ssh(1)) before you select this option. If rsh or ssh is used, you must enable root access to all of the new member nodes from this node. Press Control-d at any time to return to the Main Menu. Do you want to continue (yes/no) [yes]? >>> Typical or Custom Mode <<< 221
- 229. Sun Cluster 3.2 This tool supports two modes of operation, Typical mode and Custom. For most clusters, you can use Typical mode. However, you might need to select the Custom mode option if not all of the Typical defaults can be applied to your cluster. For more information about the differences between Typical and Custom modes, select the Help option from the menu. Please select from one of the following options: 1) Typical 2) Custom ?) Help q) Return to the Main Menu Option [1]: 1 >>> Cluster Name <<< Each cluster has a name assigned to it. The name can be made up of any characters other than whitespace. Each cluster name should be unique within the namespace of your enterprise. What is the name of the cluster you want to establish? SC001 >>> Cluster Nodes <<< This Sun Cluster release supports a total of up to 16 nodes. Please list the names of the other nodes planned for the initial cluster configuration. List one node name per line. When finished, type Control-D: Node name (Control-D to finish): sysdom1 Node name (Control-D to finish): ^D This is the complete list of nodes: sysdom0 sysdom1 Is it correct (yes/no) [yes]? yes >>> Cluster Transport Adapters and Cables <<< You must identify the cluster transport adapters which attach this node to the private cluster interconnect. For node "sysdom0", What is the name of the first cluster transport adapter? bge1 >>> Cluster Transport Adapters and Cables <<< 222
- 230. Sun Cluster 3.2 You must identify the cluster transport adapters which attach this node to the private cluster interconnect. Select the first cluster transport adapter for "sysdom0": 1) bge2 2) bge3 3) Other Option: 1 Will this be a dedicated cluster transport adapter (yes/no) [yes]? no What is the cluster transport VLAN ID for this adapter? 1 Searching for any unexpected network traffic on "bge1002" ... done Verification completed. No traffic was detected over a 10 second sample period. Select the second cluster transport adapter for "sysdom0": 1) bge2 2) bge3 3) Other Option: >>> Quorum Configuration <<< Every two-node cluster requires at least one quorum device. By default, scinstall selects and configures a shared disk quorum device for you. This screen allows you to disable the automatic selection and configuration of a quorum device. You have chosen to turn on the global fencing. If your shared storage devices do not support SCSI, such as Serial Advanced Technology Attachment (SATA) disks, or if your shared disks do not support SCSI-2, you must disable this feature. If you disable automatic quorum device selection now, or if you intend to use a quorum device that is not a shared disk, you must instead use clsetup(1M) to manually configure quorum once both nodes have joined the cluster for the first time. Do you want to disable automatic quorum device selection (yes/no) [no]? Cluster Creation Log file - /var/cluster/logs/install/scinstall.log.28876 Testing for "/globaldevices" on "sysdom0" ... done 223
- 231. Sun Cluster 3.2 Testing for "/globaldevices" on "sysdom1" ... done Starting discovery of the cluster transport configuration. The following connections were discovered: sysdom0:bge2 switch1 sysdom1:bge2 [VLAN ID 1] sysdom0:bge3 switch2 sysdom1:bge3 [VLAN ID 1] Completed discovery of the cluster transport configuration. Started cluster check on "sysdom0". Started cluster check on "sysdom1". cluster check completed with no errors or warnings for "sysdom0". cluster check completed with no errors or warnings for "sysdom1". Configuring "sysdom1" ... done Rebooting "sysdom1" ... done Configuring "sysdom0" ... done Rebooting "sysdom0" ... Log file - /var/cluster/logs/install/scinstall.log.28876 Rebooting ... General Commands This section covers a walkthrough configuration for Sun Cluster. General resource configuration: • List DID Disks for use with failover storage devices Note The DID ID's are under /dev/did/dsk and /dev/did/rdsk on each node in the cluster. These paths are to be used for creating failover filesystems, zpools and storage access. cldevice list -v DID Device Full Device Path ---------- ---------------- d1 sysdom1:/dev/rdsk/c0t0d0 d2 sysdom1:/dev/rdsk/c1t600144F0C312030000004A3B80680017d0 d2 sysdom0:/dev/rdsk/c1t600144F0C312030000004A3B80680017d0 d3 sysdom1:/dev/rdsk/c1t600144F0C312030000004A3B80680018d0 d3 sysdom0:/dev/rdsk/c1t600144F0C312030000004A3B80680018d0 d4 sysdom1:/dev/rdsk/c1t600144F0C312030000004A3B80680019d0 d4 sysdom0:/dev/rdsk/c1t600144F0C312030000004A3B80680019d0 d5 sysdom1:/dev/rdsk/c1t600144F0C312030000004A3B8068001Ad0 d5 sysdom0:/dev/rdsk/c1t600144F0C312030000004A3B8068001Ad0 d6 sysdom1:/dev/rdsk/c1t600144F0C312030000004A3B8068001Bd0 d6 sysdom0:/dev/rdsk/c1t600144F0C312030000004A3B8068001Bd0 224
- 232. Sun Cluster 3.2 d7 sysdom1:/dev/rdsk/c1t600144F0C312030000004A3B8068001Cd0 d7 sysdom0:/dev/rdsk/c1t600144F0C312030000004A3B8068001Cd0 d8 sysdom1:/dev/rdsk/c1t600144F0C312030000004A4518A90001d0 d8 sysdom0:/dev/rdsk/c1t600144F0C312030000004A4518A90001d0 d9 sysdom1:/dev/rdsk/c1t600144F0C312030000004A4518BF0002d0 d9 sysdom0:/dev/rdsk/c1t600144F0C312030000004A4518BF0002d0 d10 sysdom0:/dev/rdsk/c0t0d0 • List Quorum Devices clquorum list d2 sysdom1 sysdom0 • Add a Quorum Disk vsrv2# clquorum list vsrv2 vsrv1 vsrv2# cldevice list -v DID Device Full Device Path ---------- ---------------- d1 vsrv2:/dev/rdsk/c0d0 d2 vsrv2:/dev/rdsk/c1t600144F04A4D00400000144F3B8D6000d0 d2 vsrv1:/dev/rdsk/c1t600144F04A4D00400000144F3B8D6000d0 d3 vsrv2:/dev/rdsk/c1t600144F04A53950C0000144F3B8D6000d0 d3 vsrv1:/dev/rdsk/c1t600144F04A53950C0000144F3B8D6000d0 d4 vsrv1:/dev/rdsk/c0d0 vsrv2# clquorum add -v /dev/did/rdsk/d2 Quorum device "/dev/did/rdsk/d2" is added. vsrv2# clquorum list -v Quorum Type ------ ---- d2 shared_disk vsrv2 node vsrv1 node Create a Failover Apache Resource Group This section covers a walkthrough configuration for Sun Cluster. General resource configuration: 1. Create a Zpool using the DID device # zpool create apache /dev/did/dsk/d3 2. Create a Resource Group for the Apache Failover Services # clrg create apache-rg 3. Register the HAStoragePlus agent and add it to the apache-rg resource group 225
- 233. Sun Cluster 3.2 # clrt register HAStoragePlus # clrs create -g apache-rg -t HAStoragePlus -p Zpools=apache apache-zpool-rs 4. Bring the Apache Resource Group online and status # clrg online -M apache-rg # clrg status === Cluster Resource Groups === Group Name Node Name Suspended Status ---------- --------- --------- ------ apache-rg sysdom1 No Online sysdom0 No Offline 5. Switch Apache Resource Group to alternate server # clrg switch -n sysdom0 apache-rg # clrg status === Cluster Resource Groups === Group Name Node Name Suspended Status ---------- --------- --------- ------ apache-rg sysdom1 No Offline sysdom0 No Online 6. Configure Apache to use Failover Storage Update the httpd.conf file to point to storage under /apache on both servers. # zfs create apache/htdocs # vi /etc/apache2/httpd.conf Update <Directory> amoung others. 7. Add floating IP address Make sure IP/Hostname is in both servers /etc/hosts file. In this case the server vsrvmon has an IP of 192.168.15.95 # clreslogicalhostname create -g apache-rg -h vsrvmon host-vsrvmon-rs # ifconfig -a bge0:1: flags=1001040843<UP,BROADCAST,RUNNING,MULTICAST,DEPRECATED ,IPv4,FIXEDMTU> mtu 1500 index 2 inet 192.168.15.95 netmask ffffff00 broadcast 192.168.15.255 # scstat -i -- IPMP Groups -- 226
- 234. Sun Cluster 3.2 Node Name Group Status Adapter Status --------- ----- ------ ------- ------ IPMP Group: sysdom1 isan Online bge1 Online IPMP Group: sysdom1 pub Online bge0 Online IPMP Group: sysdom0 isan Online bge1 Online IPMP Group: sysdom0 pub Online bge0 Online -- IPMP Groups in Zones -- Zone Name Group Status Adapter Status --------- ----- ------ ------- ------ 8. Update the httpd.conf on both systems to ues the floating IP as the ServerName 9. Register the Apache Agent and configure the Apache Resouruce # clrt register apache # clrs create -g apache-rg -t apache -p Bin_dir=/usr/apache2/bin -p Port_list=80/tcp -p Resource_dependencies=apache-zpool-rs, host-vsrvmon-rs apache-rs 10.Status the Apache Resource group, and switch resource through all systems Create a Failover NGZ Resource Group This section covers a walkthrough configuration for Sun Cluster. General resource configuration: 1. Create a Zpool using the DID device # zpool create zone /dev/did/dsk/d3 2. Create a Resource Group for the Zone Failover Services # clrg create zone-webzone-rg Create a Parallel NGZ Configuration This section covers a walkthrough configuration for Sun Cluster. General resource configuration: 1. Create a NGZ for each server using the following commad from one server #vsrv1# clzonecluster configure sczone sczone: No such zone cluster configured Use 'create' to begin configuring a new zone cluster. clzc:sczone> create clzc:sczone> set zonepath=/localzone/sczone 2. Add sysid Information 227
- 235. Sun Cluster 3.2 # clzc:sczone> add sysid clzc:sczone:sysid> set root_password=fubar clzc:sczone:sysid> end 3. Add the physical host information and network information for the zone on each host clzc:sczone> add node clzc:sczone:node> set physical-host=vsrv1 clzc:sczone:node> set hostname=vsrv3 clzc:sczone:node> add net clzc:sczone:node:net> set address=vsrv3 clzc:sczone:node:net> set physical=bge0 clzc:sczone:node:net> end clzc:sczone:node> end clzc:sczone> add node clzc:sczone:node> set physical-host=vsrv2 clzc:sczone:node> set hostname=vsrv4 clzc:sczone:node> add net clzc:sczone:node:net> set address=vsrv4 clzc:sczone:node:net> set physical=bge0 clzc:sczone:node:net> end clzc:sczone:node> end 4. From documents - still working on what this means - in this case, the IPs are those of vsrv3 and vssrv4 in that order clzc:sczone> add net clzc:sczone:net> set address=192.168.15.86 clzc:sczone:net> end clzc:sczone> add net clzc:sczone:net> set address=192.168.15.85 clzc:sczone:net> end 5. Commit zone configuration - saves info on both servers clzc:sczone> verify clzc:sczone> commit clzc:sczone> exit 6. Build the Non-Global Zones vsrv1# clzonecluster install sczone Waiting for zone install commands to complete on all the nodes of the zone cluster "sczone"... vsrv1# clzonecluster install sczone Waiting for zone install commands to complete on all the nodes of the zone cluster "sczone"... vsrv1# clzonecluster boot sczone Waiting for zone boot commands to complete on all the nodes of the zone cluster "sczone"... 7. Use zlogin on both global zones to finish configuring sczone 228
- 236. Sun Cluster 3.2 Oracle 10g RAC for Containers This section covers a walkthrough configuration for Sun Cluster and Oracle 10g RAC This set of examples are configured within two LDOM's on one server, therefore the network devices are in vnet# form. Replace the vnet# with your appropriate network devices and all commands should function properly on non-virtualized hardware. Zone and QFS Creation and Configuration Note Note that /opt can not be an inherited directory, and will not be by default 1. Update /etc/systems for some shared memory parameters This is needed because the CRS processes are started as root and therefore will not be impacted by the oracle project definition later on in this writeup. It is possible to make these part of a unique project and prefix the CRS start scripts with a newtask command, or to define a system or root project. The choice is up to you. /etc/system: set shmsys:shminfo_shmmax=SGA_size_in_bytes 2. Download and install SC 3.2 or greater 3. Download and install the SUN QFS Packages on all nodes in the cluster # pkgadd -d . SUNWqfsr SUNWqfsu 4. Create Meta Devices for QFS Oracle Home / CRS Home Warning Make sure that /var/run/nodelist exists on both servers. I've noticed that it might not. If not the -M metaset command will fail. Content of the file is: Node# NodeName PrivIP cat /var/run/nodelist 1 vsrv2 172.16.4.1 2 vsrv1 172.16.4.2 # metadb -a -f -c3 /dev/did/dsk/d3s7 # metaset -s zora -M -a -h vsrv2 vsrv1 # metaset Multi-owner Set name = zora, Set number = 1, Master = Host Owner Member 229
- 237. Sun Cluster 3.2 vsrv2 Yes vsrv1 Yes # metaset -s zora -a /dev/did/dsk/d3 # metainit -s zora d30 1 1 /dev/did/dsk/d3s0 # metainit -s zora d300 -m d30 5. Add QFS Information for Oracle Home on both systems /etc/opt/SUNWsamfs/mcf: RAC 5 ms RAC on shared /dev/md/zora/dsk/d300 50 md RAC on /etc/opt/SUNWsamfs/samfs.cmd: fs=RAC sync_meta=1 /etc/opt/SUNWsamfs/hosts.RAC: vsrv1 172.16.4.2 1 0 server vsrv2 172.16.4.1 1 0 6. Create QFS Directory on both nodes and make filesystem just from one node # mkdir -p /localzone/sczone/root/db_qfe/oracle # /opt/SUNWsamfs/sbin/sammkfs -S RAC sammkfs: Configuring file system sammkfs: Enabling the sam-fsd service. sammkfs: Adding service tags. Warning: Creating a new file system prevents use with 4.6 or earlier releases. Use the -P option on sammkfs to create a 4.6 compatible file system. Building 'RAC' will destroy the contents of devices: /dev/md/zora/dsk/d300 Do you wish to continue? [y/N]y total data kilobytes = 10228928 total data kilobytes free = 10225216 7. Mount, test, and remove mount point, otherwise clzonecluster install will fail. # mount RAC # umount RAC # rm -rf /localzone/sczone 8. Create the Zones using clzonecluster 230
- 238. Sun Cluster 3.2 # clzonecluster create sczone clzc:sczone> set zonepath=/localzone/sczone clzc:sczone> set autoboot=true 9. Add sysid Information - there are more options than listed here # clzc:sczone> add sysid clzc:sczone:sysid> set root_password=ENC_PW clzc:sczone:sysid> set nfs4_domain=whatever clzc:sczone:sysid> set terminal=vt100 clzc:sczone:sysid> set security_policy=NONE clzc:sczone:sysid> set system_locale=C clzc:sczone:sysid> end 10.Add the physical host information and network information for the zone on each host clzc:sczone> add node clzc:sczone:node> set physical-host=vsrv1 clzc:sczone:node> set hostname=vsrv3 clzc:sczone:node> add net clzc:sczone:node:net> set address=vsrv3 clzc:sczone:node:net> set physical=bge0 clzc:sczone:node:net> end clzc:sczone:node> end clzc:sczone> add node clzc:sczone:node> set physical-host=vsrv2 clzc:sczone:node> set hostname=vsrv4 clzc:sczone:node> add net clzc:sczone:node:net> set address=vsrv4 clzc:sczone:node:net> set physical=bge0 clzc:sczone:node:net> end clzc:sczone:node> end 11.Add floating IP addresses for RAC VIP clzc:sczone> add net clzc:sczone:net> set address=rac01 clzc:sczone:net> end clzc:sczone> add net clzc:sczone:net> set address=rac02 clzc:sczone:net> end 12.Add QFS Oracle Mount clzc:sczone> add fs clzc:sczone:fs> set dir=/db_qfs/oracle clzc:sczone:fs> set special=RAC clzc:sczone:fs> set type=samfs clzc:sczone:fs> end 13.Add Disks for use with ASM 231
- 239. Sun Cluster 3.2 Initially add the storage to the storage group with metaset -s zora, then add into the zone configuration - short example provided, repeat for each device # metastat -c -s zora zora/d500 m 980MB zora/d50 zora/d50 s 980MB d5s0 clzc:sczone> add device clzc:sczone:device> set match="/dev/md/zora/rdsk/d50" clzc:sczone:device> end clzc:sczone> add device clzc:sczone:device> set match="/dev/md/zora/rdsk/d500" clzc:sczone:device> end clzc:sczone> add device clzc:sczone:device> set match="/dev/md/shared/1/rdsk/d50" clzc:sczone:device> end clzc:sczone> add device clzc:sczone:device> set match="/dev/md/shared/1/rdsk/d500" clzc:sczone:device> end clzc:sczone> 14.Add Resource Settings to Zone Limited example, CPU and Memory can be capped in addition to limitpriv clzc:sczone> set limitpriv="default,proc_priocntl,proc_clock_highres" 15.Commit zone configuration - saves info on both servers clzc:sczone> verify clzc:sczone> commit clzc:sczone> exit 16.Build the Non-Global Zones vsrv1# clzonecluster install sczone Waiting for zone install commands to complete on all the nodes of the zone cluster "sczone"... vsrv1# clzonecluster install sczone Waiting for zone install commands to complete on all the nodes of the zone cluster "sczone"... ### On both servers: # mkdir -p /localzone/sczone/root/db_qfs/oracle ############################################### vsrv1# clzonecluster boot sczone Waiting for zone boot commands to complete on all the nodes of the zone cluster "sczone"... 17.Use zlogin on both global zones to finish configuring sczone 232
- 240. Sun Cluster 3.2 # clzonecluster boot sczone ## On both systems finish sysidcfg: # zlogin -C sczone Sun Cluster RAC Framework Setting up the Sun Cluster RAC Framework using CLI 1. Create a scalable resource group. # clresourcegroup create -Z zcname -n nodelist -p maximum_primaries=num-in-list -p desired_primaries=num-in-list [-p rg_description="description" ] -p rg_mode=Scalable rac-fmwk-rg 2. Register the SUNW.rac_framework resource type # clresourcetype register -Z zcname SUNW.rac_framework 3. Add an instance of the SUNW.rac_framework resource type to the resource group that you created in Step 2. # clresource create -Z zcname -g rac-fmwk-rg -t SUNW.rac_framework rac-fmwk-rs 4. Register the SUNW.rac_udlm resource type. # clresourcetype register -Z zcname SUNW.rac_udlm 5. Add an instance of the SUNW.rac_udlm resource type to the resource group that you created in Step 2. # clresource create -Z zcname -g resource-group -t SUNW.rac_udlm -p resource_dependencies=rac-fmwk-rs rac-udlm-rs 6. Bring online and in a managed state the RAC framework resource group and its resources. # clresourcegroup online -Z zcname -emM rac-fmwk-rg 233
- 241. Chapter 20. Hardware Notes SunFire X2200 eLOM Management SP General Commands • To power on the host, enter the following command: set /SP/SystemInfo/CtrlInfo PowerCtrl=on • To power off the host gracefully, enter the following command: set /SP/SystemInfo/CtrlInfo PowerCtrl=gracefuloff • To power off the host forcefully, enter the following command: set /SP/SystemInfo/CtrlInfo PowerCtrl=forceoff • To reset the host, enter the following command: set /SP/SystemInfo/CtrlInfo PowerCtrl=reset • To reboot and enter the BIOS automatically, enter the following command: set /SP/SystemInfo/CtrlInfo BootCtrl=BIOSSetup • To start start a session on the server console, enter this command: start /SP/AgentInfo/console • To revert to CLI once the console has been started: Press Esc-Shift-9 keys • To terminate a server console session started by another user, enter this command: stop /SP/AgentInfo/console Connection via Serial Port • On Windows, use hypertrm. The settings should be 9600, 8, N, 1 • On Solaris, issue the command tip # tip -9600 /dev/term/a System console • Use the Esc-Shift-9 key sequence to toggle back to the local console flow. Enter Ctrl-b to terminate the connection to the serial console • Connect to system console 234
- 242. Hardware Notes SP–> start /SP/AgentInfo/console To Set Up Serial Over LAN With the Solaris OS 1. Log in to the Solaris system as root (superuser). 2. Edit the /boot/solaris/bootenv.rc file to point to ttyb speed to 115200 as follows: setprop ttyb-mode 115200,8,n,1,- setprop console ‘ttyb’ 3. In the /boot/grub/menu.1st file, edit the splashimage and kernel lines to read as follows: # splashimage /boot/grub/splash.xpm.gz kernel /platform/i86pc/multiboot -B console=ttyb 4. Change the login service to listen at 115200 by making the following edits to /var/svc/manifest/system/ console-login.xml: a. Change console to 115200 in the propval line to read as follows: <propval name=’label’ type=’astring’ value=’115200’> b. Add the following text to the file /kernel/drv/asy.conf: bash-3.00# more /kernel/drv/asy.conf # # Copyright (c) 1999 by Sun Microsystems, Inc. # All rights reserved. # # pragma ident "@(#)asy.conf 1.12 99/03/18 SMI" interrupt priorities=12;name="asy" parent="isa" reg=1,0x2f8,8 interrupts=3; c. Enter the following to reboot the operating system: # reboot -- -r Configure ELOM/SP Change IP Address from DHCP to Static SP> set /SP/AgentInfo DhcpConfigured=disable SP> set /SP/AgentInfo IpAddress=ipaddress SP> set /SP/AgentInfo NetMask=netmask SP> set /SP/AgentInfo Gateway=gateway SP> show /SP/AgentInfo Properties: HWVersion = 0 FWVersion = 3.20 MacAddress = 00:16:36:5B:97:E4 IpAddress = 10.13.60.63 235
- 243. Hardware Notes NetMask = 255.255.255.0 Gateway = 10.13.60.1 DhcpConfigured = disable 5120 iLOM Management • Power on via the ilom start /SYS then switch to the console start /SP/console • Default ilom password root , changeme • Changing the ilom default password set /SP/users/root password Enter new Password: ******* • Enable/ Disable SSH set /SP/services/ssh state=[enable|disable] • Display information about commands show /SP/cli/commands • Add a local user create /SP/users/bob password=password role=administrator|operator • Delete a local user delete /SP/users/fred • change the ip address to static cd /SP/network set pendingipdiscovery=static set pendingipaddress=xxx.xxx.xxx.xxx set pendingipnetmask=yyy.yyy.yyy.yyy set pendingipgatwat=zzz.zzz.zzz.zzz show to verify setings set commitpending=true 236