SlideShare a Scribd company logo
10/23/2024 by abraham A 1
1. 1 ASSISTING A PATIENT WITH BONE MARROW
BIOPSY/PUNCTURE
Definition: A bone marrow biopsy removes a small
amount of bone and a small amount of fluid and cells
from inside the bone .
 A bone marrow aspiration removes only the marrow
which produces platelets , red and white blood cells.
10/23/2024 by abraham A
 a bone marrow biopsy is used
 to rule out or diagnose anaemia or cancers
 to evaluate the effectiveness of chemotherapy.
 The bones of the body most commonly used for
bone marrow biopsy are the iliac crest and
sternum in adults and the tibia is the preferred
site for biopsy in children.
 Bone marrow grows inside some of the larger
bones in the body.
2
10/23/2024 by abraham A
PURPOSE
A bone marrow aspiration and biopsy done to:
Look for the cause of problems with
RBCs,WBCs & Platlets in people who have conditions such
as
 thrombocytopenia,
anemia,
 malignancy of blood cells count such as leukemia,
 problems that affect the bone marrow, such as
multiple myeloma, cancer of plasma cell of WBC
 polycythemia /large amount of blood cells especially
RBC/.
3
10/23/2024 by abraham A
Purpose…
 To check if a known cancer, such as lymphoma, has spread
to the bone marrow.
 Find infections or tumors that may start in or spread to the
bone marrow.
 If there is an infection, a culture and sensitivity test of
the bone marrow sample may be used to find out which
antibiotics will work best
 Once treatment has been started, it help to see if the
leukemia cells are gone, if the treatment is working.
 Collect a sample of bone marrow for medical procedures,
such as stem cell transplantation or chromosomal analysis.
4
10/23/2024 by abraham A
Factors affecting bone marrow biopsy
 Recent blood transfusion or treatment with medication
that containing iron in them.
 Radiation treatment in the past to the site where the
bone marrow sample is removed.
 Fewer bone marrow cells or fibrous (scar) tissue may be
seen.
 Being obese
 Taking a bone marrow sample from the pelvic bone of an
obese person may not be easy so better to use the front
of the hipbone (anterior iliac crest) or the breastbone
(sternum).
5
10/23/2024 by abraham A
How to Prepare for the Test
 The health care personnel must be inform of
 taking any medicines.
allergic to any medicine, including anesthetics
Have any bleeding problems
 take blood-thinners, such as aspirin, heparin, or warfarin .
being pregnant.
Arrange for someone to drive you home after the biopsy because
you may be given a medicine (sedative) to help you relax.
6
10/23/2024 by abraham A
 How the Test is Performed
The bone marrow biopsy may be done in the health care
provider's office or in a ward
Adults usually have a sample of bone marrow fluid taken
from the back of the pelvic bone.
In rare cases, a fluid sample is removed from the
breastbone (sternum) or from the front of the pelvic
bone.
 Babies and young children may have the sample taken
from the front of the lower leg bone, just below the
knee.
The skin is cleansed, and a local anesthetic is injected to
numb the skin.
7
10/23/2024 by abraham A
 The biopsy needle is then inserted into the bone.
 The core of the needle (stylet) is removed by rotating
the needle or inserting an instrument within the needle.
 This forces a tiny sample of the bone marrow into the
needle.
 The needle is then removed & Pressure is applied to the
site
 An aspirate may also be performed, usually before the
biopsy is taken.
8
10/23/2024 by abraham A 9
 pain of different types may
be produced during:
anesthetic injection.
 the aspirate withdrawn
Introduction of biopsy
needle
Not all patients experience
these symptoms
10/23/2024 by abraham A 10
10/23/2024 by abraham A 11
10/23/2024 by abraham A
 Results
 Normal Results: correct types and numbers of cells.
 Abnormal Results
 The results may indicate different cancers
 Considerations:
 This test is often performed when there are problems with
the various types of blood cells.
 Risks of procedure
 bleeding
 infection
 needle may be broken and injuring the patient.
12
10/23/2024 by abraham A 13
Sterile set Clean equipments
 Fenestrated towel
 Hand towel
 Gloves
 Swabs and gauze in a receiver
 Dressing forceps
 Syringe and needle for local
anaesthesia
 Sternal puncture needle with
stylet
 10 ml syringe
 Sterile test tube,
 water
 Sodium oxalate solution for
preservation
 Rubber sheet and towel
for bed protection
 Antiseptic solution as
tincture of iodine, ether or
alcohol
 Local anaesthetic
 Receiver for used
instruments
 Plaster and scissors.
Equipments
10/23/2024 by abraham A
Intervention
 Pre and during procedure:
1. Do general assessment
 Take the client’s vital sign.
 Assess the client's general appearance and health status.
 Determine drug allergies (local anaesthetics and local
antiseptics).
 Determine the client's understanding of the procedure.
 Determine if appropriate consent form has been signed.
2. Explain the procedure (about pain and crunching sound while
puncturing the bone, the procedure takes 15 to 30 minutes).
3. Help the client assume a
 supine position (with one pillow if desired) for biopsy of the
sternum (sternal puncture) or
 prone position for a biopsy of either iliac crest; fold the bed
clothes back to expose the area.
14
10/23/2024 by abraham A
4. Open the bone marrow set and give sterile gloves to the physician,
pour the antiseptic solution into a container in the set or over
sterile gauze squares.
5. Open and hold the ampoule or vial of local anaesthetic if it is
not in the set.
 Wear disposable gloves.
5. Describe the steps of the procedures and provide verbal support
,observe the client for pallor, diaphoresis, and faintness.
6. Place a small dressing over the site of the puncture after the
needle is withdrawn.
15
10/23/2024 by abraham A
 Post Procedure
8. Assess for discomfort and bleeding from the site.
 The client may experience some tenderness in the area.
Provide analgesia as needed and ordered.
8. Arrange for the specimen with the completed request
and label to be transported to the laboratory.
9. Document the procedure, including the date and time of
the procedure, the name of the physician, and any
assessments and interventions.
10. Regularly assess for discomfort and bleeding.
 Bleeding and haematoma formation may occur for
several days.
16
10/23/2024 by abraham A
Lumbar puncture
Introduction of a needle into the subarachnoid space of
the spinal column.
Purpose
• To collect specimen of cerebrospinal fluid for diagnostic
purpose
• To measure and reduce CSF pressure
• To determine the presence or absence of blood in CSF
• To detect the spinal subarachnoid block
• To administer antibiotics intrathecally in certain cases of
infection.
1.2. ASSISTING A PATIENT WITH LUMBAR PUNCTURE
17
10/23/2024 by abraham A
Lumbar Puncture
Bucky Boaz,ARNP-C
18
10/23/2024 by abraham A 19
10/23/2024 by abraham A
Indications of lumbar puncture
 Infection of CNS such as suspected
 meningitis,
 encephalitis
 Brain or spinal cord tumors
 subarachnoid hemorrhage
 hydrocephalus,
 to inject medications into the cerebrospinal fluid ("intrathecally"),
Contraindications of LP
 Present or suspected epidural infection,
 Topical infections or dermatological conditions at the puncture site
 Patients with severe psychosis or neurosis(anxiety or fear) with back
pain
 Relatively contraindicated in presence of increased ICP
Precaution
 Patient anxiety during the procedure can lead to increased CSF
pressure.
20
10/23/2024 by abraham A
Sites for lumbar puncture:-
 the needle is usually inserted into the subarachnoid space
 between the third and fourth or the fourth and fifth lumbar
vertebrae and pushed in until there is a "give" that indicates
the needle is past the dura mater,
◦ because the spinal cord divides into sheaf/bundle of nerves
at the 1st
lumbar vertebrae, insertion of the needle below
the 3rd
lumbar vertebrae prevents puncture of the spinal
cord and avoids damaging major nerve roots & decrease the
risk of paralysis.
Caution
 The patient should not do any sudden movements during the
procedure.
 observe the client’s reaction, such as twitching/convulsion,
vomiting or slow pulse and in addition the client’s appearance
and respiration rate are noted
21
CSF Formation
 ~150 ml spinal and cranial CSF
 30 ml in the spinal cord
 Production is approx. 0.35 ml/min
 Net flow out of ventricles 50 –
100 ml/day
22
10/23/2024 by abraham A
10/23/2024 by abraham A 23
Sterile:
Clean
1. Gallipots
2. Sterile towel with hole
3. Hand towel
4. Sterile gloves
5. Dissecting forceps and artery forceps
6. Two lumbar puncture needle with
different size (Barker's needle) (5 to 12.5
cm long)
7. A measure for fluid to be collected
8. A short length of rubber tubing to be
attached to the needle.
9. Needle (5⁄8 to 11⁄2 inches, 21 to 25 gauge)
and syringe for local anaesthesia (3 to 5
ml).
10. Four test tubes for specimen.
11. Ten gauze sponges (4 x 4) (dressing and
tape)
1.Tray
2. Monometer with three-way
stopcock
3. local anaesthetic (lidocaine)
4. Skin cleansing lotion (ether,
povidone-iodine, saline, etc.)
5. Rubber sheet and towel.
6. Plaster and scissors,
7. Receiver for used instruments
8. Alcohol swabs
9. Straight chair
10. Pillow for placing between client’s
knees
11. Masks and goggles (optional
Equipment
Procedure
Explaining the procedure in
advance as almost all
patients are afraid of an LP.
 Inquire about allergies to
anesthetics.
 Informed consent.
 Performed with the patient in
the lateral recumbent
position.
 A line connecting the posterior
superior iliac crest will
intersect the midline at
approximately the L4 spinous
process.
 Spinal needles entering the
subarachnoid space at this
point are well below the
termination of the spinal cord.
24
10/23/2024 by abraham A
Procedure…
 In the adult, the spinal cord
extends to the lower level of
L1 or the body of L2.
 At birth, the cord ends at the
level of L3.
 LP in infant may be
performed at the L4 to L5 or
L5 to S1 interspace.
25
10/23/2024 by abraham A
Procedure…
Position the patient:
 Generally performed in the lateral decubitus position.
 A pillow is placed under the head to keep it in the same
plane as the spine.
 Shoulders and hips are positioned. perpendicular with the
table.
 Lower back should be arched toward practitioner.
26
10/23/2024 by abraham A
Procedure…
 use sterile gloves.
 Wash back with antiseptic solution.
 Sterile towel under hips.
 The skin and deeper subcutaneous tissue are infiltrated
with local anesthetic.
 Anesthetizing the deeper subcutaneous tissue significantly
reduces the procedure discomfort.
 The patient should be told to report any pain and should
be informed that he or she will feel some pressure.
 The needle is placed into the skin in the midline parallel to
the bed.
 The needle is held with both thumbs and index fingers
 After the subcutaneous tissue has been penetrated, the
needle is angled toward the umbilicus.
27
10/23/2024 by abraham A
Procedure…
 The bevel of the needle should be facing laterally (toward
patients side).
 The ligaments offer resistance to the needle,
 Clear fluid will flow from the needle when the subarachnoid
space has been penetrated.
 If bone is encountered, withdrawal into subcutaneous tissue
and redirect.
 Attach a manometer and record opening pressure.
 Turn stopcock/valve/ and collect fluid.
 Withdrawal needle and place a dressing.
 Tube 1 is used for determining protein and glucose
 Tube 2 is used for microbiologic and cytologic studies
 Tube 3 is for cell counts and serologic tests for syphilis
28
Procedure…
29
*after the needle is removed
apply on the site of puncture.
Small sterile piece of gauze
may be applied to the site
*Immediately following the
procedure the client may be
placed in the recumbent
position, preferably without
pillow and this may be by
raising the foot of the bed
and giving plenty of fluid.
to avoid post spinal
headache (the headache
is due to tear in the
durra matter made by
the needle & continuous
leakage of CSF via the
puncture site).
10/23/2024 by abraham A
Complications: Headache
Most common
Usually starts up to 48
hours after the
procedure.
Usually begins within
minutes after arising and
resolves with recumbent
position.
Pain is mild to
incapacitating and is
usually cervical and sub-
occipital, but may involve
the shoulders and the
entire cranium.
Caused by leaking of fluid
through dural puncture
site.
30
Treatment: barbiturates/sedatives/,
fluids, caffeine
10/23/2024 by abraham A
1.3. ASSISTING WITH TRACTION APPLICATION
Objective: at the end of this lesson, you will be able to:
 Define skin traction
 Describe nursing responsibilities for patient with skin
traction
 Demonstrate care of patient with skin traction
31
10/23/2024 by abraham A
SkinTraction
 Skin traction is immobilizing body part intermittently over
an extended time through direct application of a pulling
force on the skin.
Purpose
 To control muscle spasms
 To immobilize an area before surgery.
 To reduce fracture
 To treat dislocation
 To correct/prevent deformity
 To improve or correct contractures
32
10/23/2024 by abraham A
Equipment
 Pain medication, if necessary overhead traction bars if
needed
 Weights in various pounds
 Traction line and pulleys
 Skin traction device as ordered by the physician or
qualified practitioner
 Adhesive traction tape and elastic bandage if appropriate
Razor, if needed
 Benzoin solution, if needed
33
10/23/2024 by abraham A
Procedure
1. Explain the procedure to client
2. wash hands
3. Assemble equipments
4. Assessing the site of traction application.
5. Clean the skin area to which the traction will be applied
For adhesive Traction
6. Shave the area if there is a large amount of hair.
7. Apply tincture of benzoin to the area to be taped.
8. Place the adhesive traction tape on the body part to provide
the appropriate direction of pull.
9. Add spreader bars or hooks needed to attach the tape to the
traction rope and weights.
10. Wrap the body part and adhesive tape with the elastic
bandage.
34
10/23/2024 by abraham A
Procedure…
For Non-adhesive Traction
11. Apply the traction appliance to the appropriate body
part
12. Secure it with the fasteners provided (Velcro, straps
and buckles, ties) If no fastener is provided, an elastic
bandage may be wrapped around the appliance or
adhesive tape
13. Asses for pain, shifting, or slipping of the traction.
14. Comfort the patient
15. Return equipments
16. Wash hand
17. Document the procedure with patient reaction
35
10/23/2024 by abraham A 36
10/23/2024 by abraham A
Skeletal traction : procedure of immobilizing body part intermittently
over an extended time through direct application of a pulling force
on the bone.
Purpose of skeletal traction
 To control muscle spasms
 To immobilize an area before surgery.
 To reduce fracture
 To treat dislocation
 To correct/prevent deformity
 To improve or correct contractures
◦ Equipments
1. Pain medication
2. Sterile pins
3. Sterile pin insertion kit
4. Local anesthetic
5. A topical cleanser such as povidone-iodine for cleaning the
insertion site
37
10/23/2024 by abraham A 38
10/23/2024 by abraham A
Procedure:
1. Explain procedure to patient
2. Wash hands
3. Assemble all the needed equipment at the bedside.
4. Assess the client’s skin and circulation, sensation, and movement
(CSM) of extremity
5. Check orders for pain medications and local anesthetics needed
for the procedure.
6. Check for drug allergies.
7. Administer systemic pain medications.
8. Wash hands. If there is risk for contact with body fluids, gloves
should be worn.
9. Adjust the bed to a comfortable working height. If applicable,
support extremity on pillows.
10. Physician or qualified practitioner will open pin insertion kit,
administer local analgesic
39
10/23/2024 by abraham A
Procedure…
11. Assist during the pin insertion procedure.
12. Reassure the client.
13. The physician or qualified practitioner will attach the pins
to traction, if appropriate help in connecting the traction
line through the pulley and secure appropriate weights
14. Place the patient on a comfortable position
15. Assess the patient as necessary
16. Return equipments and wash hands
40
10/23/2024 by abraham A 41
3. 1.ASSISTINGWITHTHORACENTESIS
At the end of the session, you will be able to:-
Prepare patient for the procedure
Assemble necessary equipment
Monitor client after assistive procedure
Apply measures to reduce complication during and after assistive
and diagnostic procedure
10/23/2024 by abraham A 42
Defn.
thoracentesis
 the procedure in which a puncture is
made into the chest wall to withdraw
fluid or air from the pleural cavity for
diagnostic or therapeutic purposes.
10/23/2024 by abraham A 43
Indication
 When unexplained fluid or air accumulates in the chest cavity
outside lung.
 Pleural effusions
 Compromised cardiovascular status due to air, fluid or blood
outside the lung,
 Pleural fluid analysis
 Installation of medication into the pleural space
Purpose
 Removal of fluid and air from the pleural cavity
 Aspiration of pleural fluid for analysis
 Pleural biopsy
 Installation of medication into the pleural space
10/23/2024 by abraham A 44
Diagnostic methods
 Prior to thoracentesis, the location of the fluid is pinpointed
through;
X - ray
computed tomography (CT) scan
ultrasound.
 Ultrasound and CT scan are more accurate methods when the
effusion is small or walled off in a pocket.
 A sedative may be administered in some cases but is generally
not recommended.
 Oxygen may be given to the patient.
44
10/23/2024 by abraham A 45
Assisting with thoracentesis…
Contraindication
1.Absolute contraindications.
 Uncooperative patient
 Coagulation disorders that cannot be corrected
2. Relative contraindications
 the site of insertion has known bullous disease (e.g. emphysema)
 use of positive end-expiratory pressure (PEEP, see mechanical
ventilation)
 Only one functional lung (due to diminished reserve).
Precaution: The aspiration should not exceed 1L as there is a risk
of development of pulmonary edema.
10/23/2024 by abraham A 46
Equipment
Sterile:
1. 2 Gallipots
2. 1 pair of dissecting forceps
3. 1 pair of artery forceps
4. Swabs and gauze in a receiver
5. towel with a hole((fenestrated towel)
6. hand towel
7. Gloves
8. Syringe and needle for local
anesthesia
9. Rubber tube which fit the opening of
the two-way tap
10. 10 or 20 cc aspiration syringe and
needle
11. two - way tap
12. 2 glass tube for specimen
13. Receiver to collect fluid specimen
Clean
1. Rubber sheet and towel
2. Receiver for used
instrument
3. Measuring jug
4.Trolley
5. Local anesthesia
6. Cleaning lotion such as
ether, tincture of iodine
7. Plaster with scissor
8. Sputum mug
9. Lab request-form
10/23/2024 by abraham A 47
Procedure:
1. Check clinical record for order and possible allergy
2.Alert physician if any abnormal lab result
3. Explain the procedure to the patient and inform them not
to try not to cough, not to breathe deeply, and not to move
suddenly during the procedure to avoid puncture of the
visceral pleura or lung
4.Verify informed written consent
5. Wash hands
6. Collect necessary equipment and bring to patient bedside
7.Take baseline vital signs
8. Screen the patient.
10/23/2024 by abraham A 48
Procedure…
9. Remove clothes to expose chest.
10. Position the patient as directed by the physician.
The position may be either one of the following or a similar
position, as directed by the physician.
(a) Position the patient to sit on the side of the bed, facing away
from the physician, with feet supported on a chair and the head
and arms resting on table padded with pillows.
 The arms are elevated slightly to widen the intercostals spaces.
(b) If the patient is unable to sit, turn him on the
unaffected side with the arm of the affected side raised
above his head.
 Elevate the head of the bed 30 -45 degree
11. Place the thoracentesis tray on instrument table.
12. Place other supplies on adjacent bedside stand or over bed
table.
10/23/2024 by abraham A 49
Cont’d…
10/23/2024 by abraham A 50
Procedure……
13. Assist with handling of local anesthetic vial.
14. Support and help patient to avoid moving and coughing while
the thoracentesis needle is introduced.
15. Assist with collection of specimens as the physician
manipulates the syringe, the stopcock, and drainage tubing.
Be ware not to contaminate the end of the tubing, the cap, or the
open end of the specimen tubes.
16. If drainage of a large amount of accumulated fluid is necessary,
assist the doctor by placing the free end of the tubing in the
drainage bottle.
10/23/2024 by abraham A 51
Procedure…
17. Watch the patient's appearance; check pulse and
respiration.
 Immediately report any sudden change, as this may indicate
damage to the visceral pleura from a puncture by the
needle.
18. After the needle is withdrawn, apply a sterile occlusive
dressing over the puncture site.
19. Position patient comfortably (usually Fowler's position).
20. Complete entries on appropriate laboratory request
forms as directed.
21. Send properly labeled specimens with completed
request forms to laboratory immediately if required
10/23/2024 by abraham A 52
22. Measure and record amount of fluid withdrawn and
discard unless necessary
23. Return used equipment and wash hand
24. Proper documentation
Complications of thoracentesis
 Pneumothorax
 Hemorrhage into the pleural space or chest wall,
 Vasovagal syncope (fainting)
 Air emboli
 Infection
 puncture of the spleen or liver
10/23/2024 by abraham A 53
 Nursing activities and their rationale during thoracentesis
1. Ascertain in advance that a chest x-ray has been ordered and completed and
the consent form has been signed.
 Rationale: to differentiate fluid from air and to determine site of puncture.
2.Assess the patient for allergy for local anaesthetic to be used
 Rationale: to change and use a safer drug.
3. Administer sedatives if prescribed.
 Rationale: enables the patient to cooperate with the procedure and promote
relaxation.
4. Inform the pt about the nature of the procedure.
 Importance of remaining immobile
 Pressure sensation to be experienced
 Minimum discomfort after the procedure
 Rationale: to orient the client to the procedure.
5. Position the pt comfortably with adequate support.
 Rationale: a position of comfort helps the patient to relax.
53
10/23/2024 by abraham A 54
6. Support and reassure the client during the procedure &
encourage the patient to refrain from coughing.
 Rationale: sudden and unexpected movements such as
coughing by the patient can traumatize the visceral pleura and
lung.
7. Prepare equipments correctly.
 Rationale: To use appropriate equipment.
8. After the needle is withdrawn pressure is applied over the
puncture site and a small, air tight, and sterile dressing is fixed in
place.
 Rationale: to stop bleeding, dressing prevents infection of the
puncture site, and prevent air entry.
54
10/23/2024 by abraham A 55
9. Advice the patient that he/she will be on bed rest and a chest x-
ray will be obtained after the procedure.
 Rationale: a chest x-ray verifies that there is no
pneumothorax.
10. Record the amount, nature, colour, and viscosity of withdrawn
fluid.
 If indicated prepare sample for laboratory & send the specimen
container with formalin; may be needed for pleural biopsy.
 Rationale: the fluid may be clear, serous, bloody, purulent, etc.
11. Monitor the patient at intervals of time for increased
respiratory rate, asymmetry in respiratory movement, fainting,
tightness in the chest, uncontrolled cough; blood tingled sputum,
frothy mucus, rapid pulse, and signs of hypoxia.
 Rationale: for early identification of complications.
55
10/23/2024 by abraham A 56
3.2.ASSISTINGWITHWATER-SEAL CHEST
DRAINAGE SYSTEM
Objectives
 Define water seal chest drainage system
 Prepare equipment for water seal chest drainage
system
 Prepare the patient for water seal chest drainage
system
 Monitor the patient during and after the procedure
10/23/2024 by abraham A 57
10/23/2024 by abraham A 58
Water-seal chest drainage
◦ Underwater-seal chest drainage is a closed (airtight)
system for drainage of air from the chest cavity.
◦ a drainage system of three chambers consisting of a water
seal, suction control and drainage collection chamber. UWSD
are designed to allow air or fluid to be removed from the
pleural cavity, while also preventing backflow of air or fluid
into the pleural space.
Indication
◦ Pneumothorax
◦ Haemothorax
◦ Empyema
◦ Chest trauma
10/23/2024 by abraham A 59
Purpose
 To re-establish expansion of the pleural space
 To remove air or bloody fluid from pleural space and
allow for expansion of the lung (or to evacuate fluid &
blood).
 To re-establish negative intra pulmonary and
intrathoracic pressure or restoration of the normal negative
pressure in the pleural space.
Contraindications for chest tubes:
 Infection over insertion site
 Uncontrolled bleeding
10/23/2024 by abraham A 60
Patient Positioning and Insertion Sites for Chest
tubes
Pneumothorax: (AIR)
 The best position is supine or with head elevated anywhere
from low to high fowler’s.
 The chest tube will be inserted into the 2nd or 3rd
intercostal space anterior chest at the mid-clavicular line
Effusions: (FLUID)
 If possible, the best position is sitting on the side of the bed
leaning over a pillow placed on a bedside table.
 The chest tube is inserted between the 7th to 8th intercostal
space in the mid-axillary line
10/23/2024 by abraham A 61
Precaution
 The patient should be encourage to cough and deep breath
once hourly to prevent atelectasis and assist in removing air
and fluid.
 Use aseptic technique when preparing equipment and changing
the bottle.
 Make sure that the system is air tight at any time
 Keep a clamp with the pt for emergency.
10/23/2024 by abraham A 62
Equipment
1. Sterile gloves
2. suture set (or sterile scissors and sterile forceps)
3. SterileVaseline gauze
4. Sterile glass tube
5. Sterile water/saline
6. Suction machine with tube
7. Dressing material
8.Wide tape
9. Local anesthesia
10. Drainage bottle and tube
11.Vital sign equipment
10/23/2024 by abraham A 63
Procedures
1. Check if consent form is signed
2. Identify the patient and explain the procedure
3. Check vital sign
4. Collect equipment after washing your hands
5. Assist patient to the upright position, have the patient sit
upright in bed and lean forward resting on the over bed table.
6. Open the chest tube tray and assist the physician as
indicated.
Pour antiseptic over the cotton ball
Hold the vial of local anesthesia
Apply an occlusive dressing to the tube-inserting site.
10/23/2024 by abraham A 64
Procedures …
7. Reassure and observe the patient throughout the
procedure.
8. If a specimen is needed take specimen, label it and send
to the laboratory immediately.
9. Return the patient to comfortable position
10. Check vital signs
10/23/2024 by abraham A 65
Nursing intervention
1. If using a chest drainage system with a water seal, fill the
water seal chamber with sterile water to the level specified
by the manufacturer.
2.When using suction in chest drainage systems with a water
seal, fill the suction control chamber with sterile water to the
20-cm level or as prescribed.
 In systems without a water seal, set the regulator dial at the
appropriate suction level.
3.Attach the drainage catheter exiting the thoracic cavity to the
tubing coming from the collection chamber.
 Tape securely with adhesive tape.
10/23/2024 by abraham A 66
Nursing intervention…
4. If suction is used, connect the suction control chamber tubing
to the suction unit.
 If using a wet suction system, turn on the suction unit and
increase pressure slowly but until steady bubbling appears in
the suction control chamber.
 If using a chest drainage system with a dry suction control
chamber, turn the regulator dial to 20 cm H2O.
5. Mark the drainage from the collection chamber with tape on
the outside of the drainage unit.
 Mark hourly/daily increments (date and time) at the drainage
level.
6. Ensure that the drainage tubing does not kink, loop, or
interfere with the patient’s movements.
10/23/2024 by abraham A 67
Nursing intervention…
7. Encourage the patient to assume a comfortable position with
good body alignment.
 With the lateral position, make sure that the patient’s body
does not compress the tubing.
 The patient should be turned and repositioned every
1.5 to 2 hours and Provide adequate analgesia.
8.Assist the patient with range-of-motion exercises for the
affected arm and shoulder several times daily and provide
adequate analgesia.
9. Gently “milk” the tubing in the direction of the drainage
chamber as needed.
10/23/2024 by abraham A 68
10. Make sure there is fluctuation (“tidaling”) of the fluid level in
the water seal chamber (in wet systems)
 Fluid fluctuations in the water seal chamber or air leak
indicator area will stop when:
a.The lung has re-expanded
b.The tubing is obstructed by blood clots, fibrin, or kinks
c.A loop of tubing hangs below the rest of the tubing
d. Suction motor or wall suction is not working properly
10/23/2024 by abraham A 69
Nursing intervention…
11. Observe for air leaks in the drainage system; they are indicated
by constant bubbling in the water seal chamber, or by the air
leak indicator in dry systems with a one-way valve.
 Assess the chest tube system for correctable external leaks.
Notify the physician immediately of excessive bubbling in the
water seal chamber not due to external leaks.
12. Observe and immediately report rapid and shallow breathing,
cyanosis, pressure in the chest, subcutaneous emphysema,
symptoms of hemorrhage, or significant changes in vital signs.
13. Encourage the patient to breathe deeply and cough at frequent
intervals.
Provide adequate analgesia and if needed, also teach the patient how to
perform incentive spirometry.
10/23/2024 by abraham A 70
10/23/2024 by abraham A 71
Nursing intervention…
14. If the patient is lying on a stretcher and must be transported to
another area, place the drainage system below the chest level.
 If the tubing disconnects, cut off the contaminated tips of the
chest tube and tubing, insert a sterile connector in the cut ends,
and reattach to the drainage system.
 Do not clamp the chest tube during transport.
15.When assisting in the chest tube’s removal, instruct the patient
to perform a gentleValsalva maneuver or to breathe quietly.
 The chest tube is then clamped and quickly removed.
Simultaneously, a small bandage is applied and made airtight with
petrolatum gauze covered by a 4 × 4-inch gauze pad and
thoroughly covered and sealed with non porous tape.
10/23/2024 by abraham A 72
Thank you!!
10/23/2024 by abraham A 73
2.1. ASSISTING WITH
BRONCHOSCOPY
• Bronchoscopy is the direct inspection and examination of
the larynx, trachea, and bronchi through either a flexible
fiberoptic bronchoscope or a rigid bronchoscope.
10/23/2024 by abraham A 74
Purposes of bronchoscopy
A. Diagnostic:
 To determine the extent , location of the pathologic process and to
obtain a tissue sample
 To determine if a tumor can be resected surgically
 To diagnose bleeding sites (source of hemoptysis).
 To obtain secretions from lower respiratory tract
B. Therapeutic:
 Remove foreign bodies from the tracheobronchial tree
 Remove secretions obstructing the tracheobronchial tree when the
patient cannot clear them
 Treat postoperative atelectasis, and
 excise and remove lesions.
10/23/2024 by abraham A 75
Indications
 Abnormal chest x-ray:
 presence of a lesion,
 persistent atelectasis,
 infiltrates in the lung fields.
 Hemoptysis
 Unexplained cough, localized wheeze, or stridor
 Need to obtain lower respiratory tract secretions or tissue for
diagnostic purposes
 To assess and/or evaluate airways
 To perform difficult intubations
 To remove a foreign body
10/23/2024 by abraham A 76
Contraindications
 Inability to adequately oxygenate the patient during the
bronchoscopy
 patient with severe obstructive lung disease
 Unstable hemodynamic status
 Unstable angina
 Recent myocardial infarction
 Hypoxemia or hypercarbia
Precautions
1. NPO .
2. chest x-ray and blood work .
3. where to perform
4. drugs ordered:
5. client’s vital signs,
6. Informed consent
7. Assess the client’s level of understanding
10/23/2024 by abraham A 78
10/23/2024 by abraham A 79
Equipments
1. Bronchoscope
2. Light source for the bronchoscope and any related video or
photographic equipment
3. Brushes (cytology, reserved for microbiology tissue samples)
4. Specimen traps
5. Syringes of various sizes for bronchoalveolar lavage, drug delivery,
and needle aspiration
6. Bite block (to protect the scope)
7. Intubation tray
10/23/2024 by abraham A 80
Bronchoscopy complications
 Hypoxemia
 Hypercarbia
 Hypotension
 Laryngospasm
 Bradycardia
 Pneumothorax
 Hemoptysis
10/23/2024 by abraham A 81
2.2. ASSISTING WITH LIVER BIOPSY
• The largest organ in the body found high in the right upper
abdomen, behind the ribs.
 make many proteins
 eliminate waste products function of liver
 metabolism and nutrition
10/23/2024 by abraham A 82
 Regenerate itself except in
 virus infections
 reactions to drugs or alcohol,
 tumors
 hereditary conditions
 problems with the body's immune system.
10/23/2024 by abraham A 83
 Liver biopsy
 obtaining small pieces of liver tissue
 sometimes called percutaneous liver biopsies
 procedure with very low risk and little discomfort to the patient.
 Also called aspiration biopsy or fine-needle aspiration (FNA)
because it is done with a hollow needle attached to a suction
syringe.
10/23/2024 by abraham A 84
 The special needles used to perform a liver biopsy are called
Menghini or Jamshedi needles.
 The amount of specimen collected should be about 1–2 cc
 Occasionally if the blood clotting is too prolonged or in the
presence of Ascites, it may not be possible to perform a liver
biopsy by the conventional route.
 In these circumstances the liver biopsy may have to be
performed via a vein in the neck.
 This is called a Transjugular liver biopsy.
10/23/2024 by abraham A 85
10/23/2024 by abraham A 86
10/23/2024 by abraham A 87
Purpose
 To identify cellular changes within the liver.
 To asses the amount of fat in the liver.
 To diagnose different types of liver disease such as:
jaundice
cirrhosis
repeated abnormal results from liver function tests
alcoholic liver disease
unexplained swelling or enlargement of the liver (
hepatomegaly)
10/23/2024 by abraham A 88
Purpose…
suspected drug-related liver damage
Hemochromatosis(a condition of excess iron in the liver)
intrahepatic cholestasis(the build up of bile in the liver)
hepatitis
primary cancers of the liver such as hepatomas
metastatic cancers of the liver
post-liver transplant to measure graft rejection
genetic disorders such as Wilson's disease (a disorder in
which copper accumulates in the liver, brain, kidneys, and
corneas).
10/23/2024 by abraham A 90
Preparation
 Prior to liver biopsy points to consider;
 Bleeding problems.
 Blood coagulation studies to evaluate proper liver function.
 If there is increase of clotting time or prothrombin time the
physician may order vitamin-K.
 liver function tests (LFT), give an overview of the health of the
liver
 Make sure that the patient doesn’t take any medication that
increase the risk of bleeding these includes
 Aspirin, NSAID such as ibuprofen and anticoagulant or blood
thinners (such as heparin)
10/23/2024 by abraham A 91
preparation/Prior to liver biopsy points to consider…
 pt be asked to stop taking these medications a week before
the test to lower the chance of bleeding after the test.
 History of allergy to any medicines, including anesthetics.
 pregnancy.
 Have a history of fluid buildup in the belly (Ascites) which
make it hard to do this test.
 Ultrasound test or CT scan of the liver to check the best place
to insert the biopsy needle.
 empty bladder before the test.
 Do not eat or drink for 10 hours before the test.
10/23/2024 92
Equipment
Sterile
1. Gallipot
2. Fenestrated towel
3. Swabs and gauze in a receiver
4. Hand towel
5. Gloves
6. Syringes
7. Dressing forceps, scissors
8. Liver biopsy needle
9. Test tubes
Clean
• Rubber sheet and towel
• A small bottle containing formalin for the specimen
• Local anesthesia
• Cleaning solution
• Plaster and scissors
10/23/2024 by abraham A 93
Nursing consideration
Pre procedure
 Check for signed consent.
 Take the baseline vital sign
 Explain the procedure to the patient
 Ensure the client NPO at least 10 hours before the procedure.
 Give a sedative at least an hour before the biopsy that help
relaxation.
10/23/2024 by abraham A 94
During the procedure
 Positioning of the patient
 Adjust the patient supine position with right hand under the
head which is turned to the left.
 Expose the right side of the patient’s upper abdomen (right
hypochondriac)
 The needle is inserted usually between 6th
and 7th
ribs.
 The site of penetration will be cleansed and local anesthesia
will be infiltrated.
 Instruct the patient to take a deep breath and hold it for a few
second while the needle inserted
10/23/2024 by abraham A 95
During the procedure…
 The deep breath elevates the diaphragm and prevents chest
wall movement thus it minimize the risk of trauma to
diaphragm or lung and laceration of liver.
 Instruct the patient to resume breathing.
 Apply pressure to site of puncture to stop bleeding and then
apply small dressing.
 The entire procedure takes 10–15 minutes.
10/23/2024 by abraham A 96
Post procedure
 Put patient on the right side, place a pillow or folded towel under the
biopsy site and patient remain in this position for several hours.
Rationale: The right lateral position minimizes the escape of blood or bile
through the puncture site by applying pressure to the area.
 Take the vital sign for every 10-15 minutes for the first hour then every
30 minute for the next 1to 2 hour until the patient condition stabilizes.
 severe abdominal pain may indicate bile peritonitis.
 The liver tissue sample is placed in a cup with a 10% formalin solution
and sent to the laboratory immediately.
 If the patient discharges after the procedure tell the patient to avoid
heavy lifting and strenuous activity for 1 week to reduce the risk of
bleeding at the biopsy site.
 Document the procedure.
10/23/2024 by abraham A 97
Result of Percutaneous liver biopsy
 Normal:
 The liver tissue looks normal under a microscope.
 No signs of inflammation, cancer, or cirrhosis
 Abnormal:
 There are abnormal cells or liver tissue due to an infection, liver disease, or
cancer.
 If there is hepatitis , the test can be used to see the chance of developing
cirrhosis.
 Test results may also show the severity of cirrhosis.
 The most frequent complication of liver biopsy
 Bile peritonitis: - leakage of bile from the common bile duct or gallbladder
 Hemorrhage: - Excessive discharge of blood from the blood vessels; profuse
bleeding.
 Pneumothorax: - is a collection of air or gas in the chest or pleural space that
causes part or all of a lung to collapse.
10/23/2024 by abraham A 98
The signs and symptoms of potential complications of liver biopsy.
 Fever: Development of a fever following a liver biopsy may indicate the
presence of infection.
 Pain, swelling, redness or discharge around the needle insertion sites or any
incisions that were made indicate that there is infection.
 Chest pain
 Shortness of breath:
 Dizziness or fainting: These are possible signs of blood loss.
 Nausea or vomiting: Persistent nausea or vomiting needs attention to ensure
that there are no intra-abdominal complications related to your liver biopsy.
 Worsening abdominal pain: This can be caused by bleeding, leakage of bile, or
other problems that will need medical attention.
 Abdominal swelling or bloating: Intestinal problems or internal bleeding can
manifest as abdominal swelling or bloating.
10/23/2024 by abraham A 99
2.3. ASSISTING WITH AN ABDOMINAL PARACENTESIS
Paracentesis : the removal of fluid from the peritoneal cavity.
 As a result of liver damage large amount of albumin rich fluid may
accumulate in the peritoneal cavity.
 This large accumulation of fluid is called Ascites.
 Ascites may be caused by infection, inflammation, an injury, or other
conditions, such as cirrhosis or cancer
 Purpose
 To diagnose an infection in the peritoneal fluid.
 Find the cause of fluid buildup in the belly.
 Check for certain types of cancer, such as liver cancer.
 Remove a large amount of fluid that is causing pain or difficulty breathing
or that is affecting how the kidneys or the intestines (bowel) are working.
10/23/2024 by abraham A 100
Indication
 Differential diagnosis of ascites
 Intra-abdominal pressure causing respiratory distress
 Differential diagnosis of acute peritonitis
Contraindication
 Acute abdomen requiring immediate surgery (absolute
contraindication)
 Coagulopathy (relative contraindication)
 Thrombocytopenia (relative contraindication)
 Obvious infection at intended site of insertion (cellulites or abscess)
10/23/2024 by abraham A 101
10/23/2024 by abraham A 102
Equipments for paracentesis
Sterile set
1. Sterile trochar and cannula: small pieces of tubing attached to the cannula with clamp.
2. Towel with hole/ fenestrated towel
3. Hand towel
4. Gloves, swabs & gauze in a bowel
5. 2 gallipots
6. Syringe and needle for local anaesthesia
7. Dissecting forceps & artery forceps
8. Small scalpel if needed
9. 2 Test tubes
10. Cotton balls
Clean
1. Rubber sheet with cover
2. Abdominal binder with safety pin
3. Cleansing lotion and local anesthesia
4. Pail or other receiver to collect fluid
5. adhesive tape
6. Screen
10/23/2024 by abraham A 103
Preparation
 Check if the patient a have clotting problem
 Emptying of the bladder decreases accidental perforation of
bladder.
 Allergy of the medication including to anesthetisia.
 Any bleeding problems or are taking blood thinners, such as
aspirin, nonsteroidal anti-inflammatory drugs (NSAIDs), or
warfarin (Coumadin).
 pregnancy.
10/23/2024 by abraham A 104
Nursing consideration
Pre-procedure
 Check for signed consent form.
 Explain the procedure for the client.
 Keep patient privacy
 Gather appropriate sterile equipment.
 Place the patient in sitting position at the edge of the bed or in a
chair with feet supported on foot rest if the patient cannot
tolerate high fowler position in bed.
The usual site for the paracentesis is half way between the
umbilicus and the symphysis pubis on mid line of the
abdomen.
10/23/2024 by abraham A 105
Pre-procedure /Nursing consideration…
 Empty the bladder immediately before tapping
 The position results in movement of peritoneal fluid close to
the abdominal wall and promotes easier puncture and
removal of fluid.
 Place the blood pressure apparatus at the patient arm to
monitor blood pressure during the procedure.
10/23/2024 by abraham A 106
During the procedure
 Strict aseptic techniques are used to puncture the abdomen.
 Anesthetize the site usually half way between the sympsis
pubis and Umbilicus.
 The Paracentesis needle is called trocar.
 The physician insert the trocar at the puncture site below
umbilicus the needle is connected to a drainage tube which
is inserted into the collecting container.
 Monitor vital sign at frequent interval because decrease
blood pressure may occur with vascular collapse which can
result from removal of fluid from the peritoneal cavity.
10/23/2024 by abraham A 107
Post procedure
 Apply a bulky dressing at the puncture site or use abdominal binder secure it
in place with safety pin.
 Return the patient to a bed or to a comfortable sitting position.
 Measure, describe and record the fluid.
 Label sample of fluid and send to laboratory.
 Monitor vital sign every 15 minute for 1 hour, every 30 minute for 2 hour.
 Asses for hypovolemia, Check the puncture site for leakage or bleeding.
 Teach the patient importance of avoiding heavy lifting or straining, frequency
of monitoring for fever and the need to change position slowly.
 Slow change in position is recommended because of the risk of hypovolemia
related to fluid removal.
10/23/2024 by abraham A 108
Complications of Paracentesis
 Bladder perforation
 Small or large bowel perforation
 Stomach perforation
 Lacerations of major vessels (mesenteric, iliac, aorta)
 Laceration of catheter or guide wire and loss in peritoneal
 Abdominal wall hematomas
 Incisional hernias: - occurs in the abdomen in the area of an old
surgical scar.
 Wound infection
 Wound dehiscence: - is the partial or total rupturing of a wound
often involves an abdominal wound in which the layers below the
skin also separate.
10/23/2024 by abraham A 109
2.4.CARE OF CAST APPLICATION AND REMOVAL OF
CASTS
 A cast is a rigid external immobilizing device that is moulded to the counters
of the body to which it is applied.
Contraindications (relative)
Skin diseases
Peripheral vascular disease
Diabetes mellitus
Open or draining wounds
Susceptibility to skin irritations
 Types of casts :- depends on the type and thickness of the cast
1. Long or full leg cast: - Extends from above the knee to the toes.
2. Short leg cast: - Just bellow the knee and extends to the toes.
3. Long arm casts: - From the axilla to the fingers of the hand. Usually
allowing for elbow flexion.
4. Short arm cast: - Extends from below the elbow to the fingers.
10/23/2024 by abraham A 110
Cont…
5. Spica cast: - Incorporate a position of the trunk and one or two
extremities (single or double spica cast)
A. Shoulder spica cast: Extends around the chest and the entire
of one or two arms to the fingers.
B. Hip spica cast begins at waist level or above it and extends
down one or two legs.
Purpose of Application Of Cast
 To immobilize the body part so that healing can take place
with out further injury.
 To correct deformity
 To maintain correct position.
10/23/2024 by abraham A 111
Care of the patient in cast
Purpose
 To promote comfort.
 To prevent pressure sores and other complications as deformity, thrombosis,
embolic, constipation etc.
 To improve general health of the patient and speed up recovery
Equipments
1. Drape for patient
2. Knitted material (eg, stockinette)
3. Nonwoven roll padding
4. Casting material (POP)
5. Water and basin
6. Cast knife or cutter
7. Trolly
10/23/2024 by abraham A 112
Immediate care after cast is applied
Procedure
 The bed should be prepared with a board under the mattress, if
needed.
 Immediately after the completion of cast application and parts of
extremity on which the cast is applied should be observed for
symptoms such as pain, pallor, discoloration, tingling sensation,
numbness, coldness or inability to move report immediately if any
of these signs are noticed.
 Put rubber sheet under the part where the cast to protect the
bed linen until it dries.
 Keep the bed linen away from the wet plaster until dries.
10/23/2024 by abraham A 113
N.B
1. Be informed about the condition of the patient and the type of
cast applied.
2. If cast is applied around the trunk or hip, turn patient frequently
to allow even drying of the cast and to prevent fatigue of the
patient.
3. Elevation of the part may help to control swelling.
4. Heat should never be applied to the cast in attempt to dry it
quickly as it can crack and cause burning as well.
10/23/2024 by abraham A 114
Care After Cast Is Dried
 Protection of the skin and care of the cast.
 Pressure sores may develop over any bony prominence and commonly at
the buttocks.
◦ Wash, give pressure area care and change position frequently.
 Smoothen the rough edges of the cast by plaster or by pulling the
stockinet.
 massage the inside of the cast as far as you can reach.
 Protect the cast around the perennial area against excretion by water
proof material when the cast is dried.
 The skin below the cast should be inspected frequently and routinely for
signs of circulatory impairment as swelling, inability to move fingers or
toes or temperature changes.
10/23/2024 by abraham A 115
Cont…
 Prevent atrophy and maintain muscle strength by helping the
patient to contract the muscles with out moving the injured
part.
 The patient should exercise unaffected part of the body
regularly to develop the muscle tone and improve general
health.
 Elevating the head of the bed slightly when a bed pan is used;
helps to prevent soiling of the bed.
 If cast is applied to the arm the patient should wear sling to
support the full weight of the cast
Care After Cast Is Dried...
10/23/2024 by abraham A 116
Precaution
 Immediately after the completion of cast application, the end parts of the
extremity on which the cast is applied should be observed for neurovascular
status.
Such as
 Colour of the skin:- pallor, cyanosis
 Motor ability or movement: - inability to move suggests compression of
Nerves.
 Sensation: - numbness, tingling, inability to feel pain
 Temperature of the skin: - Excessive coldness can indicate circulatory
impairment, compare both extremities.
 Degree of swelling: some swelling can be expected
 Capillary refill- if it returns too slowly there must be venous congestion or
arterial insufficiency.
 Distal pulse: a weak or absent pulse may indicate decreased circulation to the
area. Compare with the pulse of normal extremity
10/23/2024 by abraham A 117
Removal of Cast
Indication
 When a fracture heals
 If it requires further manipulation.
Less common indications include:
Cast damage
Pressure ulcer under the cast
Excessive drainage or bleeding
Constrictive cast
10/23/2024 by abraham A 118
Equipments for cast removal
Cast cutter
 cast splitter
Bandage scissors
 Surgical or plaster knife
10/23/2024 by abraham A 119
Thank you

More Related Content

DOCX
Bone marrow examination, procedures,complications
DOCX
BONE MARROW ASPIRATION INDICATIONS ANDPROCEDURE
PPTX
bone marrow aspiration.pptx
PPTX
bone marrow aspiration.pptx
PPTX
Bone Marrow Examination, BMA
PDF
bonemarrowaspiration-181013111140608.pdf
PPTX
BONE MARROW ASPIRATION - nursing notes
PDF
lumbarpunctureandbonemarrowaspiration-130201002232-phpapp01_110535.pdf
Bone marrow examination, procedures,complications
BONE MARROW ASPIRATION INDICATIONS ANDPROCEDURE
bone marrow aspiration.pptx
Bone Marrow Examination, BMA
bonemarrowaspiration-181013111140608.pdf
BONE MARROW ASPIRATION - nursing notes
lumbarpunctureandbonemarrowaspiration-130201002232-phpapp01_110535.pdf

Similar to assistive advanced procedures.pptx for nirse (20)

PPTX
Bone marrow aspiration & trephine biopsy
PPTX
Bone marrow aspiration
PPTX
instruments.pptx ghvvyvyvyvyvyvyvyvvyvyvvyv
PPTX
Lumbar puncture and bone marrow aspiration
PDF
bonemarrowexamination-190709221053159.pdf
PPTX
Bone marrow examination
PPTX
Lecture 1.bone marrow
PPT
Bone marrow procedure’!!!2
PPTX
Bone marrow aspiration and biopsy ppt ..
PPT
Hema II Chapter 7_BM examination.ppt
PPT
Hema II Chapter 7_BM examination.ppt
PPTX
Bone marrow biopsy
PPTX
Bone marrow smear preparation.......pptx
PDF
bonemarrowbiopsy-170507140551.pdf
PPT
Bone marrow aspiration and biopsy
PPTX
Bone marrow biopsy in animals Veterinary Diagnostics
PPTX
Instruments revised for medical students.pptx
PPTX
bonemarrowexamination1-new-240208195249-b55c44cf.pptx
PPTX
bonemarrowexamination-190709053159 (1).pptx
PPTX
Pediatric instruments.pptx
Bone marrow aspiration & trephine biopsy
Bone marrow aspiration
instruments.pptx ghvvyvyvyvyvyvyvyvvyvyvvyv
Lumbar puncture and bone marrow aspiration
bonemarrowexamination-190709221053159.pdf
Bone marrow examination
Lecture 1.bone marrow
Bone marrow procedure’!!!2
Bone marrow aspiration and biopsy ppt ..
Hema II Chapter 7_BM examination.ppt
Bone marrow biopsy
Bone marrow smear preparation.......pptx
bonemarrowbiopsy-170507140551.pdf
Bone marrow aspiration and biopsy
Bone marrow biopsy in animals Veterinary Diagnostics
Instruments revised for medical students.pptx
bonemarrowexamination1-new-240208195249-b55c44cf.pptx
bonemarrowexamination-190709053159 (1).pptx
Pediatric instruments.pptx
Ad

More from SolomonBaro (20)

PPTX
anthropology full materialof chapter6.pptx
PPTX
anthrophology firesh man full course chap 5.pptx
PPTX
physical fitness and endurance for nursepptx
PPTX
Chapter communicable disease for nurse1.pptx
PPTX
Valvular Disorders cardiovascular disorder.pptx
PPTX
STARNES.pptx lung cancer screenng for healthy
PPT
Nsg mgt of Integumentary disorders Gen BSc nsg.ppt
PPTX
abort ass.pptxghjjjjjjjjjjjjifgjidguutyuuj
PPTX
Basic Immunology nures.pptx immunology
PPT
Nsg mgt of Integumentary disorders Gen BSc nsg.ppt
PPTX
microbiology 4.pptx microbiology includes
PDF
Chapter 5 meal planning.pdf meal planning
PPT
04. Fluid and Electrolyte-2.ppt so important
PPTX
8 HTP.pptxharmfulltraditional cultures full details
PPT
Lipid.ppt biochemistry of lipid detail science
PPTX
Trematodes.pptx trematodes detail explanation
PPT
Introduction to protozoa (2).ppt for all medicals
PPT
Blood and tissue flagellates (1).ppt full
PPTX
Diseae primarly prevented by vaccination.pptx
PPTX
hygienic care.pptx full eplanation for all
anthropology full materialof chapter6.pptx
anthrophology firesh man full course chap 5.pptx
physical fitness and endurance for nursepptx
Chapter communicable disease for nurse1.pptx
Valvular Disorders cardiovascular disorder.pptx
STARNES.pptx lung cancer screenng for healthy
Nsg mgt of Integumentary disorders Gen BSc nsg.ppt
abort ass.pptxghjjjjjjjjjjjjifgjidguutyuuj
Basic Immunology nures.pptx immunology
Nsg mgt of Integumentary disorders Gen BSc nsg.ppt
microbiology 4.pptx microbiology includes
Chapter 5 meal planning.pdf meal planning
04. Fluid and Electrolyte-2.ppt so important
8 HTP.pptxharmfulltraditional cultures full details
Lipid.ppt biochemistry of lipid detail science
Trematodes.pptx trematodes detail explanation
Introduction to protozoa (2).ppt for all medicals
Blood and tissue flagellates (1).ppt full
Diseae primarly prevented by vaccination.pptx
hygienic care.pptx full eplanation for all
Ad

Recently uploaded (20)

PDF
A systematic review of self-coping strategies used by university students to ...
PDF
OBE - B.A.(HON'S) IN INTERIOR ARCHITECTURE -Ar.MOHIUDDIN.pdf
PPTX
Lesson notes of climatology university.
PDF
Indian roads congress 037 - 2012 Flexible pavement
PPTX
Final Presentation General Medicine 03-08-2024.pptx
PPTX
Cell Types and Its function , kingdom of life
PDF
1_English_Language_Set_2.pdf probationary
PPTX
Digestion and Absorption of Carbohydrates, Proteina and Fats
PPTX
UNIT III MENTAL HEALTH NURSING ASSESSMENT
PPTX
1st Inaugural Professorial Lecture held on 19th February 2020 (Governance and...
PDF
Chinmaya Tiranga quiz Grand Finale.pdf
PDF
Classroom Observation Tools for Teachers
PDF
SOIL: Factor, Horizon, Process, Classification, Degradation, Conservation
PDF
RTP_AR_KS1_Tutor's Guide_English [FOR REPRODUCTION].pdf
PPTX
Tissue processing ( HISTOPATHOLOGICAL TECHNIQUE
PDF
What if we spent less time fighting change, and more time building what’s rig...
PDF
احياء السادس العلمي - الفصل الثالث (التكاثر) منهج متميزين/كلية بغداد/موهوبين
PPTX
Unit 4 Skeletal System.ppt.pptxopresentatiom
PDF
advance database management system book.pdf
DOC
Soft-furnishing-By-Architect-A.F.M.Mohiuddin-Akhand.doc
A systematic review of self-coping strategies used by university students to ...
OBE - B.A.(HON'S) IN INTERIOR ARCHITECTURE -Ar.MOHIUDDIN.pdf
Lesson notes of climatology university.
Indian roads congress 037 - 2012 Flexible pavement
Final Presentation General Medicine 03-08-2024.pptx
Cell Types and Its function , kingdom of life
1_English_Language_Set_2.pdf probationary
Digestion and Absorption of Carbohydrates, Proteina and Fats
UNIT III MENTAL HEALTH NURSING ASSESSMENT
1st Inaugural Professorial Lecture held on 19th February 2020 (Governance and...
Chinmaya Tiranga quiz Grand Finale.pdf
Classroom Observation Tools for Teachers
SOIL: Factor, Horizon, Process, Classification, Degradation, Conservation
RTP_AR_KS1_Tutor's Guide_English [FOR REPRODUCTION].pdf
Tissue processing ( HISTOPATHOLOGICAL TECHNIQUE
What if we spent less time fighting change, and more time building what’s rig...
احياء السادس العلمي - الفصل الثالث (التكاثر) منهج متميزين/كلية بغداد/موهوبين
Unit 4 Skeletal System.ppt.pptxopresentatiom
advance database management system book.pdf
Soft-furnishing-By-Architect-A.F.M.Mohiuddin-Akhand.doc

assistive advanced procedures.pptx for nirse

  • 1. 10/23/2024 by abraham A 1 1. 1 ASSISTING A PATIENT WITH BONE MARROW BIOPSY/PUNCTURE Definition: A bone marrow biopsy removes a small amount of bone and a small amount of fluid and cells from inside the bone .  A bone marrow aspiration removes only the marrow which produces platelets , red and white blood cells.
  • 2. 10/23/2024 by abraham A  a bone marrow biopsy is used  to rule out or diagnose anaemia or cancers  to evaluate the effectiveness of chemotherapy.  The bones of the body most commonly used for bone marrow biopsy are the iliac crest and sternum in adults and the tibia is the preferred site for biopsy in children.  Bone marrow grows inside some of the larger bones in the body. 2
  • 3. 10/23/2024 by abraham A PURPOSE A bone marrow aspiration and biopsy done to: Look for the cause of problems with RBCs,WBCs & Platlets in people who have conditions such as  thrombocytopenia, anemia,  malignancy of blood cells count such as leukemia,  problems that affect the bone marrow, such as multiple myeloma, cancer of plasma cell of WBC  polycythemia /large amount of blood cells especially RBC/. 3
  • 4. 10/23/2024 by abraham A Purpose…  To check if a known cancer, such as lymphoma, has spread to the bone marrow.  Find infections or tumors that may start in or spread to the bone marrow.  If there is an infection, a culture and sensitivity test of the bone marrow sample may be used to find out which antibiotics will work best  Once treatment has been started, it help to see if the leukemia cells are gone, if the treatment is working.  Collect a sample of bone marrow for medical procedures, such as stem cell transplantation or chromosomal analysis. 4
  • 5. 10/23/2024 by abraham A Factors affecting bone marrow biopsy  Recent blood transfusion or treatment with medication that containing iron in them.  Radiation treatment in the past to the site where the bone marrow sample is removed.  Fewer bone marrow cells or fibrous (scar) tissue may be seen.  Being obese  Taking a bone marrow sample from the pelvic bone of an obese person may not be easy so better to use the front of the hipbone (anterior iliac crest) or the breastbone (sternum). 5
  • 6. 10/23/2024 by abraham A How to Prepare for the Test  The health care personnel must be inform of  taking any medicines. allergic to any medicine, including anesthetics Have any bleeding problems  take blood-thinners, such as aspirin, heparin, or warfarin . being pregnant. Arrange for someone to drive you home after the biopsy because you may be given a medicine (sedative) to help you relax. 6
  • 7. 10/23/2024 by abraham A  How the Test is Performed The bone marrow biopsy may be done in the health care provider's office or in a ward Adults usually have a sample of bone marrow fluid taken from the back of the pelvic bone. In rare cases, a fluid sample is removed from the breastbone (sternum) or from the front of the pelvic bone.  Babies and young children may have the sample taken from the front of the lower leg bone, just below the knee. The skin is cleansed, and a local anesthetic is injected to numb the skin. 7
  • 8. 10/23/2024 by abraham A  The biopsy needle is then inserted into the bone.  The core of the needle (stylet) is removed by rotating the needle or inserting an instrument within the needle.  This forces a tiny sample of the bone marrow into the needle.  The needle is then removed & Pressure is applied to the site  An aspirate may also be performed, usually before the biopsy is taken. 8
  • 9. 10/23/2024 by abraham A 9  pain of different types may be produced during: anesthetic injection.  the aspirate withdrawn Introduction of biopsy needle Not all patients experience these symptoms
  • 12. 10/23/2024 by abraham A  Results  Normal Results: correct types and numbers of cells.  Abnormal Results  The results may indicate different cancers  Considerations:  This test is often performed when there are problems with the various types of blood cells.  Risks of procedure  bleeding  infection  needle may be broken and injuring the patient. 12
  • 13. 10/23/2024 by abraham A 13 Sterile set Clean equipments  Fenestrated towel  Hand towel  Gloves  Swabs and gauze in a receiver  Dressing forceps  Syringe and needle for local anaesthesia  Sternal puncture needle with stylet  10 ml syringe  Sterile test tube,  water  Sodium oxalate solution for preservation  Rubber sheet and towel for bed protection  Antiseptic solution as tincture of iodine, ether or alcohol  Local anaesthetic  Receiver for used instruments  Plaster and scissors. Equipments
  • 14. 10/23/2024 by abraham A Intervention  Pre and during procedure: 1. Do general assessment  Take the client’s vital sign.  Assess the client's general appearance and health status.  Determine drug allergies (local anaesthetics and local antiseptics).  Determine the client's understanding of the procedure.  Determine if appropriate consent form has been signed. 2. Explain the procedure (about pain and crunching sound while puncturing the bone, the procedure takes 15 to 30 minutes). 3. Help the client assume a  supine position (with one pillow if desired) for biopsy of the sternum (sternal puncture) or  prone position for a biopsy of either iliac crest; fold the bed clothes back to expose the area. 14
  • 15. 10/23/2024 by abraham A 4. Open the bone marrow set and give sterile gloves to the physician, pour the antiseptic solution into a container in the set or over sterile gauze squares. 5. Open and hold the ampoule or vial of local anaesthetic if it is not in the set.  Wear disposable gloves. 5. Describe the steps of the procedures and provide verbal support ,observe the client for pallor, diaphoresis, and faintness. 6. Place a small dressing over the site of the puncture after the needle is withdrawn. 15
  • 16. 10/23/2024 by abraham A  Post Procedure 8. Assess for discomfort and bleeding from the site.  The client may experience some tenderness in the area. Provide analgesia as needed and ordered. 8. Arrange for the specimen with the completed request and label to be transported to the laboratory. 9. Document the procedure, including the date and time of the procedure, the name of the physician, and any assessments and interventions. 10. Regularly assess for discomfort and bleeding.  Bleeding and haematoma formation may occur for several days. 16
  • 17. 10/23/2024 by abraham A Lumbar puncture Introduction of a needle into the subarachnoid space of the spinal column. Purpose • To collect specimen of cerebrospinal fluid for diagnostic purpose • To measure and reduce CSF pressure • To determine the presence or absence of blood in CSF • To detect the spinal subarachnoid block • To administer antibiotics intrathecally in certain cases of infection. 1.2. ASSISTING A PATIENT WITH LUMBAR PUNCTURE 17
  • 18. 10/23/2024 by abraham A Lumbar Puncture Bucky Boaz,ARNP-C 18
  • 20. 10/23/2024 by abraham A Indications of lumbar puncture  Infection of CNS such as suspected  meningitis,  encephalitis  Brain or spinal cord tumors  subarachnoid hemorrhage  hydrocephalus,  to inject medications into the cerebrospinal fluid ("intrathecally"), Contraindications of LP  Present or suspected epidural infection,  Topical infections or dermatological conditions at the puncture site  Patients with severe psychosis or neurosis(anxiety or fear) with back pain  Relatively contraindicated in presence of increased ICP Precaution  Patient anxiety during the procedure can lead to increased CSF pressure. 20
  • 21. 10/23/2024 by abraham A Sites for lumbar puncture:-  the needle is usually inserted into the subarachnoid space  between the third and fourth or the fourth and fifth lumbar vertebrae and pushed in until there is a "give" that indicates the needle is past the dura mater, ◦ because the spinal cord divides into sheaf/bundle of nerves at the 1st lumbar vertebrae, insertion of the needle below the 3rd lumbar vertebrae prevents puncture of the spinal cord and avoids damaging major nerve roots & decrease the risk of paralysis. Caution  The patient should not do any sudden movements during the procedure.  observe the client’s reaction, such as twitching/convulsion, vomiting or slow pulse and in addition the client’s appearance and respiration rate are noted 21
  • 22. CSF Formation  ~150 ml spinal and cranial CSF  30 ml in the spinal cord  Production is approx. 0.35 ml/min  Net flow out of ventricles 50 – 100 ml/day 22 10/23/2024 by abraham A
  • 23. 10/23/2024 by abraham A 23 Sterile: Clean 1. Gallipots 2. Sterile towel with hole 3. Hand towel 4. Sterile gloves 5. Dissecting forceps and artery forceps 6. Two lumbar puncture needle with different size (Barker's needle) (5 to 12.5 cm long) 7. A measure for fluid to be collected 8. A short length of rubber tubing to be attached to the needle. 9. Needle (5⁄8 to 11⁄2 inches, 21 to 25 gauge) and syringe for local anaesthesia (3 to 5 ml). 10. Four test tubes for specimen. 11. Ten gauze sponges (4 x 4) (dressing and tape) 1.Tray 2. Monometer with three-way stopcock 3. local anaesthetic (lidocaine) 4. Skin cleansing lotion (ether, povidone-iodine, saline, etc.) 5. Rubber sheet and towel. 6. Plaster and scissors, 7. Receiver for used instruments 8. Alcohol swabs 9. Straight chair 10. Pillow for placing between client’s knees 11. Masks and goggles (optional Equipment
  • 24. Procedure Explaining the procedure in advance as almost all patients are afraid of an LP.  Inquire about allergies to anesthetics.  Informed consent.  Performed with the patient in the lateral recumbent position.  A line connecting the posterior superior iliac crest will intersect the midline at approximately the L4 spinous process.  Spinal needles entering the subarachnoid space at this point are well below the termination of the spinal cord. 24 10/23/2024 by abraham A
  • 25. Procedure…  In the adult, the spinal cord extends to the lower level of L1 or the body of L2.  At birth, the cord ends at the level of L3.  LP in infant may be performed at the L4 to L5 or L5 to S1 interspace. 25 10/23/2024 by abraham A
  • 26. Procedure… Position the patient:  Generally performed in the lateral decubitus position.  A pillow is placed under the head to keep it in the same plane as the spine.  Shoulders and hips are positioned. perpendicular with the table.  Lower back should be arched toward practitioner. 26 10/23/2024 by abraham A
  • 27. 10/23/2024 by abraham A Procedure…  use sterile gloves.  Wash back with antiseptic solution.  Sterile towel under hips.  The skin and deeper subcutaneous tissue are infiltrated with local anesthetic.  Anesthetizing the deeper subcutaneous tissue significantly reduces the procedure discomfort.  The patient should be told to report any pain and should be informed that he or she will feel some pressure.  The needle is placed into the skin in the midline parallel to the bed.  The needle is held with both thumbs and index fingers  After the subcutaneous tissue has been penetrated, the needle is angled toward the umbilicus. 27
  • 28. 10/23/2024 by abraham A Procedure…  The bevel of the needle should be facing laterally (toward patients side).  The ligaments offer resistance to the needle,  Clear fluid will flow from the needle when the subarachnoid space has been penetrated.  If bone is encountered, withdrawal into subcutaneous tissue and redirect.  Attach a manometer and record opening pressure.  Turn stopcock/valve/ and collect fluid.  Withdrawal needle and place a dressing.  Tube 1 is used for determining protein and glucose  Tube 2 is used for microbiologic and cytologic studies  Tube 3 is for cell counts and serologic tests for syphilis 28
  • 29. Procedure… 29 *after the needle is removed apply on the site of puncture. Small sterile piece of gauze may be applied to the site *Immediately following the procedure the client may be placed in the recumbent position, preferably without pillow and this may be by raising the foot of the bed and giving plenty of fluid. to avoid post spinal headache (the headache is due to tear in the durra matter made by the needle & continuous leakage of CSF via the puncture site). 10/23/2024 by abraham A
  • 30. Complications: Headache Most common Usually starts up to 48 hours after the procedure. Usually begins within minutes after arising and resolves with recumbent position. Pain is mild to incapacitating and is usually cervical and sub- occipital, but may involve the shoulders and the entire cranium. Caused by leaking of fluid through dural puncture site. 30 Treatment: barbiturates/sedatives/, fluids, caffeine 10/23/2024 by abraham A
  • 31. 10/23/2024 by abraham A 1.3. ASSISTING WITH TRACTION APPLICATION Objective: at the end of this lesson, you will be able to:  Define skin traction  Describe nursing responsibilities for patient with skin traction  Demonstrate care of patient with skin traction 31
  • 32. 10/23/2024 by abraham A SkinTraction  Skin traction is immobilizing body part intermittently over an extended time through direct application of a pulling force on the skin. Purpose  To control muscle spasms  To immobilize an area before surgery.  To reduce fracture  To treat dislocation  To correct/prevent deformity  To improve or correct contractures 32
  • 33. 10/23/2024 by abraham A Equipment  Pain medication, if necessary overhead traction bars if needed  Weights in various pounds  Traction line and pulleys  Skin traction device as ordered by the physician or qualified practitioner  Adhesive traction tape and elastic bandage if appropriate Razor, if needed  Benzoin solution, if needed 33
  • 34. 10/23/2024 by abraham A Procedure 1. Explain the procedure to client 2. wash hands 3. Assemble equipments 4. Assessing the site of traction application. 5. Clean the skin area to which the traction will be applied For adhesive Traction 6. Shave the area if there is a large amount of hair. 7. Apply tincture of benzoin to the area to be taped. 8. Place the adhesive traction tape on the body part to provide the appropriate direction of pull. 9. Add spreader bars or hooks needed to attach the tape to the traction rope and weights. 10. Wrap the body part and adhesive tape with the elastic bandage. 34
  • 35. 10/23/2024 by abraham A Procedure… For Non-adhesive Traction 11. Apply the traction appliance to the appropriate body part 12. Secure it with the fasteners provided (Velcro, straps and buckles, ties) If no fastener is provided, an elastic bandage may be wrapped around the appliance or adhesive tape 13. Asses for pain, shifting, or slipping of the traction. 14. Comfort the patient 15. Return equipments 16. Wash hand 17. Document the procedure with patient reaction 35
  • 37. 10/23/2024 by abraham A Skeletal traction : procedure of immobilizing body part intermittently over an extended time through direct application of a pulling force on the bone. Purpose of skeletal traction  To control muscle spasms  To immobilize an area before surgery.  To reduce fracture  To treat dislocation  To correct/prevent deformity  To improve or correct contractures ◦ Equipments 1. Pain medication 2. Sterile pins 3. Sterile pin insertion kit 4. Local anesthetic 5. A topical cleanser such as povidone-iodine for cleaning the insertion site 37
  • 39. 10/23/2024 by abraham A Procedure: 1. Explain procedure to patient 2. Wash hands 3. Assemble all the needed equipment at the bedside. 4. Assess the client’s skin and circulation, sensation, and movement (CSM) of extremity 5. Check orders for pain medications and local anesthetics needed for the procedure. 6. Check for drug allergies. 7. Administer systemic pain medications. 8. Wash hands. If there is risk for contact with body fluids, gloves should be worn. 9. Adjust the bed to a comfortable working height. If applicable, support extremity on pillows. 10. Physician or qualified practitioner will open pin insertion kit, administer local analgesic 39
  • 40. 10/23/2024 by abraham A Procedure… 11. Assist during the pin insertion procedure. 12. Reassure the client. 13. The physician or qualified practitioner will attach the pins to traction, if appropriate help in connecting the traction line through the pulley and secure appropriate weights 14. Place the patient on a comfortable position 15. Assess the patient as necessary 16. Return equipments and wash hands 40
  • 41. 10/23/2024 by abraham A 41 3. 1.ASSISTINGWITHTHORACENTESIS At the end of the session, you will be able to:- Prepare patient for the procedure Assemble necessary equipment Monitor client after assistive procedure Apply measures to reduce complication during and after assistive and diagnostic procedure
  • 42. 10/23/2024 by abraham A 42 Defn. thoracentesis  the procedure in which a puncture is made into the chest wall to withdraw fluid or air from the pleural cavity for diagnostic or therapeutic purposes.
  • 43. 10/23/2024 by abraham A 43 Indication  When unexplained fluid or air accumulates in the chest cavity outside lung.  Pleural effusions  Compromised cardiovascular status due to air, fluid or blood outside the lung,  Pleural fluid analysis  Installation of medication into the pleural space Purpose  Removal of fluid and air from the pleural cavity  Aspiration of pleural fluid for analysis  Pleural biopsy  Installation of medication into the pleural space
  • 44. 10/23/2024 by abraham A 44 Diagnostic methods  Prior to thoracentesis, the location of the fluid is pinpointed through; X - ray computed tomography (CT) scan ultrasound.  Ultrasound and CT scan are more accurate methods when the effusion is small or walled off in a pocket.  A sedative may be administered in some cases but is generally not recommended.  Oxygen may be given to the patient. 44
  • 45. 10/23/2024 by abraham A 45 Assisting with thoracentesis… Contraindication 1.Absolute contraindications.  Uncooperative patient  Coagulation disorders that cannot be corrected 2. Relative contraindications  the site of insertion has known bullous disease (e.g. emphysema)  use of positive end-expiratory pressure (PEEP, see mechanical ventilation)  Only one functional lung (due to diminished reserve). Precaution: The aspiration should not exceed 1L as there is a risk of development of pulmonary edema.
  • 46. 10/23/2024 by abraham A 46 Equipment Sterile: 1. 2 Gallipots 2. 1 pair of dissecting forceps 3. 1 pair of artery forceps 4. Swabs and gauze in a receiver 5. towel with a hole((fenestrated towel) 6. hand towel 7. Gloves 8. Syringe and needle for local anesthesia 9. Rubber tube which fit the opening of the two-way tap 10. 10 or 20 cc aspiration syringe and needle 11. two - way tap 12. 2 glass tube for specimen 13. Receiver to collect fluid specimen Clean 1. Rubber sheet and towel 2. Receiver for used instrument 3. Measuring jug 4.Trolley 5. Local anesthesia 6. Cleaning lotion such as ether, tincture of iodine 7. Plaster with scissor 8. Sputum mug 9. Lab request-form
  • 47. 10/23/2024 by abraham A 47 Procedure: 1. Check clinical record for order and possible allergy 2.Alert physician if any abnormal lab result 3. Explain the procedure to the patient and inform them not to try not to cough, not to breathe deeply, and not to move suddenly during the procedure to avoid puncture of the visceral pleura or lung 4.Verify informed written consent 5. Wash hands 6. Collect necessary equipment and bring to patient bedside 7.Take baseline vital signs 8. Screen the patient.
  • 48. 10/23/2024 by abraham A 48 Procedure… 9. Remove clothes to expose chest. 10. Position the patient as directed by the physician. The position may be either one of the following or a similar position, as directed by the physician. (a) Position the patient to sit on the side of the bed, facing away from the physician, with feet supported on a chair and the head and arms resting on table padded with pillows.  The arms are elevated slightly to widen the intercostals spaces. (b) If the patient is unable to sit, turn him on the unaffected side with the arm of the affected side raised above his head.  Elevate the head of the bed 30 -45 degree 11. Place the thoracentesis tray on instrument table. 12. Place other supplies on adjacent bedside stand or over bed table.
  • 49. 10/23/2024 by abraham A 49 Cont’d…
  • 50. 10/23/2024 by abraham A 50 Procedure…… 13. Assist with handling of local anesthetic vial. 14. Support and help patient to avoid moving and coughing while the thoracentesis needle is introduced. 15. Assist with collection of specimens as the physician manipulates the syringe, the stopcock, and drainage tubing. Be ware not to contaminate the end of the tubing, the cap, or the open end of the specimen tubes. 16. If drainage of a large amount of accumulated fluid is necessary, assist the doctor by placing the free end of the tubing in the drainage bottle.
  • 51. 10/23/2024 by abraham A 51 Procedure… 17. Watch the patient's appearance; check pulse and respiration.  Immediately report any sudden change, as this may indicate damage to the visceral pleura from a puncture by the needle. 18. After the needle is withdrawn, apply a sterile occlusive dressing over the puncture site. 19. Position patient comfortably (usually Fowler's position). 20. Complete entries on appropriate laboratory request forms as directed. 21. Send properly labeled specimens with completed request forms to laboratory immediately if required
  • 52. 10/23/2024 by abraham A 52 22. Measure and record amount of fluid withdrawn and discard unless necessary 23. Return used equipment and wash hand 24. Proper documentation Complications of thoracentesis  Pneumothorax  Hemorrhage into the pleural space or chest wall,  Vasovagal syncope (fainting)  Air emboli  Infection  puncture of the spleen or liver
  • 53. 10/23/2024 by abraham A 53  Nursing activities and their rationale during thoracentesis 1. Ascertain in advance that a chest x-ray has been ordered and completed and the consent form has been signed.  Rationale: to differentiate fluid from air and to determine site of puncture. 2.Assess the patient for allergy for local anaesthetic to be used  Rationale: to change and use a safer drug. 3. Administer sedatives if prescribed.  Rationale: enables the patient to cooperate with the procedure and promote relaxation. 4. Inform the pt about the nature of the procedure.  Importance of remaining immobile  Pressure sensation to be experienced  Minimum discomfort after the procedure  Rationale: to orient the client to the procedure. 5. Position the pt comfortably with adequate support.  Rationale: a position of comfort helps the patient to relax. 53
  • 54. 10/23/2024 by abraham A 54 6. Support and reassure the client during the procedure & encourage the patient to refrain from coughing.  Rationale: sudden and unexpected movements such as coughing by the patient can traumatize the visceral pleura and lung. 7. Prepare equipments correctly.  Rationale: To use appropriate equipment. 8. After the needle is withdrawn pressure is applied over the puncture site and a small, air tight, and sterile dressing is fixed in place.  Rationale: to stop bleeding, dressing prevents infection of the puncture site, and prevent air entry. 54
  • 55. 10/23/2024 by abraham A 55 9. Advice the patient that he/she will be on bed rest and a chest x- ray will be obtained after the procedure.  Rationale: a chest x-ray verifies that there is no pneumothorax. 10. Record the amount, nature, colour, and viscosity of withdrawn fluid.  If indicated prepare sample for laboratory & send the specimen container with formalin; may be needed for pleural biopsy.  Rationale: the fluid may be clear, serous, bloody, purulent, etc. 11. Monitor the patient at intervals of time for increased respiratory rate, asymmetry in respiratory movement, fainting, tightness in the chest, uncontrolled cough; blood tingled sputum, frothy mucus, rapid pulse, and signs of hypoxia.  Rationale: for early identification of complications. 55
  • 56. 10/23/2024 by abraham A 56 3.2.ASSISTINGWITHWATER-SEAL CHEST DRAINAGE SYSTEM Objectives  Define water seal chest drainage system  Prepare equipment for water seal chest drainage system  Prepare the patient for water seal chest drainage system  Monitor the patient during and after the procedure
  • 58. 10/23/2024 by abraham A 58 Water-seal chest drainage ◦ Underwater-seal chest drainage is a closed (airtight) system for drainage of air from the chest cavity. ◦ a drainage system of three chambers consisting of a water seal, suction control and drainage collection chamber. UWSD are designed to allow air or fluid to be removed from the pleural cavity, while also preventing backflow of air or fluid into the pleural space. Indication ◦ Pneumothorax ◦ Haemothorax ◦ Empyema ◦ Chest trauma
  • 59. 10/23/2024 by abraham A 59 Purpose  To re-establish expansion of the pleural space  To remove air or bloody fluid from pleural space and allow for expansion of the lung (or to evacuate fluid & blood).  To re-establish negative intra pulmonary and intrathoracic pressure or restoration of the normal negative pressure in the pleural space. Contraindications for chest tubes:  Infection over insertion site  Uncontrolled bleeding
  • 60. 10/23/2024 by abraham A 60 Patient Positioning and Insertion Sites for Chest tubes Pneumothorax: (AIR)  The best position is supine or with head elevated anywhere from low to high fowler’s.  The chest tube will be inserted into the 2nd or 3rd intercostal space anterior chest at the mid-clavicular line Effusions: (FLUID)  If possible, the best position is sitting on the side of the bed leaning over a pillow placed on a bedside table.  The chest tube is inserted between the 7th to 8th intercostal space in the mid-axillary line
  • 61. 10/23/2024 by abraham A 61 Precaution  The patient should be encourage to cough and deep breath once hourly to prevent atelectasis and assist in removing air and fluid.  Use aseptic technique when preparing equipment and changing the bottle.  Make sure that the system is air tight at any time  Keep a clamp with the pt for emergency.
  • 62. 10/23/2024 by abraham A 62 Equipment 1. Sterile gloves 2. suture set (or sterile scissors and sterile forceps) 3. SterileVaseline gauze 4. Sterile glass tube 5. Sterile water/saline 6. Suction machine with tube 7. Dressing material 8.Wide tape 9. Local anesthesia 10. Drainage bottle and tube 11.Vital sign equipment
  • 63. 10/23/2024 by abraham A 63 Procedures 1. Check if consent form is signed 2. Identify the patient and explain the procedure 3. Check vital sign 4. Collect equipment after washing your hands 5. Assist patient to the upright position, have the patient sit upright in bed and lean forward resting on the over bed table. 6. Open the chest tube tray and assist the physician as indicated. Pour antiseptic over the cotton ball Hold the vial of local anesthesia Apply an occlusive dressing to the tube-inserting site.
  • 64. 10/23/2024 by abraham A 64 Procedures … 7. Reassure and observe the patient throughout the procedure. 8. If a specimen is needed take specimen, label it and send to the laboratory immediately. 9. Return the patient to comfortable position 10. Check vital signs
  • 65. 10/23/2024 by abraham A 65 Nursing intervention 1. If using a chest drainage system with a water seal, fill the water seal chamber with sterile water to the level specified by the manufacturer. 2.When using suction in chest drainage systems with a water seal, fill the suction control chamber with sterile water to the 20-cm level or as prescribed.  In systems without a water seal, set the regulator dial at the appropriate suction level. 3.Attach the drainage catheter exiting the thoracic cavity to the tubing coming from the collection chamber.  Tape securely with adhesive tape.
  • 66. 10/23/2024 by abraham A 66 Nursing intervention… 4. If suction is used, connect the suction control chamber tubing to the suction unit.  If using a wet suction system, turn on the suction unit and increase pressure slowly but until steady bubbling appears in the suction control chamber.  If using a chest drainage system with a dry suction control chamber, turn the regulator dial to 20 cm H2O. 5. Mark the drainage from the collection chamber with tape on the outside of the drainage unit.  Mark hourly/daily increments (date and time) at the drainage level. 6. Ensure that the drainage tubing does not kink, loop, or interfere with the patient’s movements.
  • 67. 10/23/2024 by abraham A 67 Nursing intervention… 7. Encourage the patient to assume a comfortable position with good body alignment.  With the lateral position, make sure that the patient’s body does not compress the tubing.  The patient should be turned and repositioned every 1.5 to 2 hours and Provide adequate analgesia. 8.Assist the patient with range-of-motion exercises for the affected arm and shoulder several times daily and provide adequate analgesia. 9. Gently “milk” the tubing in the direction of the drainage chamber as needed.
  • 68. 10/23/2024 by abraham A 68 10. Make sure there is fluctuation (“tidaling”) of the fluid level in the water seal chamber (in wet systems)  Fluid fluctuations in the water seal chamber or air leak indicator area will stop when: a.The lung has re-expanded b.The tubing is obstructed by blood clots, fibrin, or kinks c.A loop of tubing hangs below the rest of the tubing d. Suction motor or wall suction is not working properly
  • 69. 10/23/2024 by abraham A 69 Nursing intervention… 11. Observe for air leaks in the drainage system; they are indicated by constant bubbling in the water seal chamber, or by the air leak indicator in dry systems with a one-way valve.  Assess the chest tube system for correctable external leaks. Notify the physician immediately of excessive bubbling in the water seal chamber not due to external leaks. 12. Observe and immediately report rapid and shallow breathing, cyanosis, pressure in the chest, subcutaneous emphysema, symptoms of hemorrhage, or significant changes in vital signs. 13. Encourage the patient to breathe deeply and cough at frequent intervals. Provide adequate analgesia and if needed, also teach the patient how to perform incentive spirometry.
  • 71. 10/23/2024 by abraham A 71 Nursing intervention… 14. If the patient is lying on a stretcher and must be transported to another area, place the drainage system below the chest level.  If the tubing disconnects, cut off the contaminated tips of the chest tube and tubing, insert a sterile connector in the cut ends, and reattach to the drainage system.  Do not clamp the chest tube during transport. 15.When assisting in the chest tube’s removal, instruct the patient to perform a gentleValsalva maneuver or to breathe quietly.  The chest tube is then clamped and quickly removed. Simultaneously, a small bandage is applied and made airtight with petrolatum gauze covered by a 4 × 4-inch gauze pad and thoroughly covered and sealed with non porous tape.
  • 72. 10/23/2024 by abraham A 72 Thank you!!
  • 73. 10/23/2024 by abraham A 73 2.1. ASSISTING WITH BRONCHOSCOPY • Bronchoscopy is the direct inspection and examination of the larynx, trachea, and bronchi through either a flexible fiberoptic bronchoscope or a rigid bronchoscope.
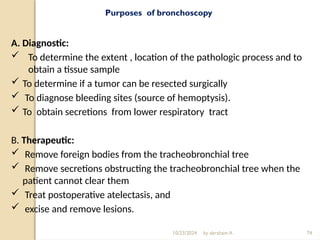
  • 74. 10/23/2024 by abraham A 74 Purposes of bronchoscopy A. Diagnostic:  To determine the extent , location of the pathologic process and to obtain a tissue sample  To determine if a tumor can be resected surgically  To diagnose bleeding sites (source of hemoptysis).  To obtain secretions from lower respiratory tract B. Therapeutic:  Remove foreign bodies from the tracheobronchial tree  Remove secretions obstructing the tracheobronchial tree when the patient cannot clear them  Treat postoperative atelectasis, and  excise and remove lesions.
  • 75. 10/23/2024 by abraham A 75 Indications  Abnormal chest x-ray:  presence of a lesion,  persistent atelectasis,  infiltrates in the lung fields.  Hemoptysis  Unexplained cough, localized wheeze, or stridor  Need to obtain lower respiratory tract secretions or tissue for diagnostic purposes  To assess and/or evaluate airways  To perform difficult intubations  To remove a foreign body
  • 76. 10/23/2024 by abraham A 76 Contraindications  Inability to adequately oxygenate the patient during the bronchoscopy  patient with severe obstructive lung disease  Unstable hemodynamic status  Unstable angina  Recent myocardial infarction  Hypoxemia or hypercarbia
  • 77. Precautions 1. NPO . 2. chest x-ray and blood work . 3. where to perform 4. drugs ordered: 5. client’s vital signs, 6. Informed consent 7. Assess the client’s level of understanding 10/23/2024 by abraham A 78
  • 78. 10/23/2024 by abraham A 79 Equipments 1. Bronchoscope 2. Light source for the bronchoscope and any related video or photographic equipment 3. Brushes (cytology, reserved for microbiology tissue samples) 4. Specimen traps 5. Syringes of various sizes for bronchoalveolar lavage, drug delivery, and needle aspiration 6. Bite block (to protect the scope) 7. Intubation tray
  • 79. 10/23/2024 by abraham A 80 Bronchoscopy complications  Hypoxemia  Hypercarbia  Hypotension  Laryngospasm  Bradycardia  Pneumothorax  Hemoptysis
  • 80. 10/23/2024 by abraham A 81 2.2. ASSISTING WITH LIVER BIOPSY • The largest organ in the body found high in the right upper abdomen, behind the ribs.  make many proteins  eliminate waste products function of liver  metabolism and nutrition
  • 81. 10/23/2024 by abraham A 82  Regenerate itself except in  virus infections  reactions to drugs or alcohol,  tumors  hereditary conditions  problems with the body's immune system.
  • 82. 10/23/2024 by abraham A 83  Liver biopsy  obtaining small pieces of liver tissue  sometimes called percutaneous liver biopsies  procedure with very low risk and little discomfort to the patient.  Also called aspiration biopsy or fine-needle aspiration (FNA) because it is done with a hollow needle attached to a suction syringe.
  • 83. 10/23/2024 by abraham A 84  The special needles used to perform a liver biopsy are called Menghini or Jamshedi needles.  The amount of specimen collected should be about 1–2 cc  Occasionally if the blood clotting is too prolonged or in the presence of Ascites, it may not be possible to perform a liver biopsy by the conventional route.  In these circumstances the liver biopsy may have to be performed via a vein in the neck.  This is called a Transjugular liver biopsy.
  • 86. 10/23/2024 by abraham A 87 Purpose  To identify cellular changes within the liver.  To asses the amount of fat in the liver.  To diagnose different types of liver disease such as: jaundice cirrhosis repeated abnormal results from liver function tests alcoholic liver disease unexplained swelling or enlargement of the liver ( hepatomegaly)
  • 87. 10/23/2024 by abraham A 88 Purpose… suspected drug-related liver damage Hemochromatosis(a condition of excess iron in the liver) intrahepatic cholestasis(the build up of bile in the liver) hepatitis primary cancers of the liver such as hepatomas metastatic cancers of the liver post-liver transplant to measure graft rejection genetic disorders such as Wilson's disease (a disorder in which copper accumulates in the liver, brain, kidneys, and corneas).
  • 88. 10/23/2024 by abraham A 90 Preparation  Prior to liver biopsy points to consider;  Bleeding problems.  Blood coagulation studies to evaluate proper liver function.  If there is increase of clotting time or prothrombin time the physician may order vitamin-K.  liver function tests (LFT), give an overview of the health of the liver  Make sure that the patient doesn’t take any medication that increase the risk of bleeding these includes  Aspirin, NSAID such as ibuprofen and anticoagulant or blood thinners (such as heparin)
  • 89. 10/23/2024 by abraham A 91 preparation/Prior to liver biopsy points to consider…  pt be asked to stop taking these medications a week before the test to lower the chance of bleeding after the test.  History of allergy to any medicines, including anesthetics.  pregnancy.  Have a history of fluid buildup in the belly (Ascites) which make it hard to do this test.  Ultrasound test or CT scan of the liver to check the best place to insert the biopsy needle.  empty bladder before the test.  Do not eat or drink for 10 hours before the test.
  • 90. 10/23/2024 92 Equipment Sterile 1. Gallipot 2. Fenestrated towel 3. Swabs and gauze in a receiver 4. Hand towel 5. Gloves 6. Syringes 7. Dressing forceps, scissors 8. Liver biopsy needle 9. Test tubes Clean • Rubber sheet and towel • A small bottle containing formalin for the specimen • Local anesthesia • Cleaning solution • Plaster and scissors
  • 91. 10/23/2024 by abraham A 93 Nursing consideration Pre procedure  Check for signed consent.  Take the baseline vital sign  Explain the procedure to the patient  Ensure the client NPO at least 10 hours before the procedure.  Give a sedative at least an hour before the biopsy that help relaxation.
  • 92. 10/23/2024 by abraham A 94 During the procedure  Positioning of the patient  Adjust the patient supine position with right hand under the head which is turned to the left.  Expose the right side of the patient’s upper abdomen (right hypochondriac)  The needle is inserted usually between 6th and 7th ribs.  The site of penetration will be cleansed and local anesthesia will be infiltrated.  Instruct the patient to take a deep breath and hold it for a few second while the needle inserted
  • 93. 10/23/2024 by abraham A 95 During the procedure…  The deep breath elevates the diaphragm and prevents chest wall movement thus it minimize the risk of trauma to diaphragm or lung and laceration of liver.  Instruct the patient to resume breathing.  Apply pressure to site of puncture to stop bleeding and then apply small dressing.  The entire procedure takes 10–15 minutes.
  • 94. 10/23/2024 by abraham A 96 Post procedure  Put patient on the right side, place a pillow or folded towel under the biopsy site and patient remain in this position for several hours. Rationale: The right lateral position minimizes the escape of blood or bile through the puncture site by applying pressure to the area.  Take the vital sign for every 10-15 minutes for the first hour then every 30 minute for the next 1to 2 hour until the patient condition stabilizes.  severe abdominal pain may indicate bile peritonitis.  The liver tissue sample is placed in a cup with a 10% formalin solution and sent to the laboratory immediately.  If the patient discharges after the procedure tell the patient to avoid heavy lifting and strenuous activity for 1 week to reduce the risk of bleeding at the biopsy site.  Document the procedure.
  • 95. 10/23/2024 by abraham A 97 Result of Percutaneous liver biopsy  Normal:  The liver tissue looks normal under a microscope.  No signs of inflammation, cancer, or cirrhosis  Abnormal:  There are abnormal cells or liver tissue due to an infection, liver disease, or cancer.  If there is hepatitis , the test can be used to see the chance of developing cirrhosis.  Test results may also show the severity of cirrhosis.  The most frequent complication of liver biopsy  Bile peritonitis: - leakage of bile from the common bile duct or gallbladder  Hemorrhage: - Excessive discharge of blood from the blood vessels; profuse bleeding.  Pneumothorax: - is a collection of air or gas in the chest or pleural space that causes part or all of a lung to collapse.
  • 96. 10/23/2024 by abraham A 98 The signs and symptoms of potential complications of liver biopsy.  Fever: Development of a fever following a liver biopsy may indicate the presence of infection.  Pain, swelling, redness or discharge around the needle insertion sites or any incisions that were made indicate that there is infection.  Chest pain  Shortness of breath:  Dizziness or fainting: These are possible signs of blood loss.  Nausea or vomiting: Persistent nausea or vomiting needs attention to ensure that there are no intra-abdominal complications related to your liver biopsy.  Worsening abdominal pain: This can be caused by bleeding, leakage of bile, or other problems that will need medical attention.  Abdominal swelling or bloating: Intestinal problems or internal bleeding can manifest as abdominal swelling or bloating.
  • 97. 10/23/2024 by abraham A 99 2.3. ASSISTING WITH AN ABDOMINAL PARACENTESIS Paracentesis : the removal of fluid from the peritoneal cavity.  As a result of liver damage large amount of albumin rich fluid may accumulate in the peritoneal cavity.  This large accumulation of fluid is called Ascites.  Ascites may be caused by infection, inflammation, an injury, or other conditions, such as cirrhosis or cancer  Purpose  To diagnose an infection in the peritoneal fluid.  Find the cause of fluid buildup in the belly.  Check for certain types of cancer, such as liver cancer.  Remove a large amount of fluid that is causing pain or difficulty breathing or that is affecting how the kidneys or the intestines (bowel) are working.
  • 98. 10/23/2024 by abraham A 100 Indication  Differential diagnosis of ascites  Intra-abdominal pressure causing respiratory distress  Differential diagnosis of acute peritonitis Contraindication  Acute abdomen requiring immediate surgery (absolute contraindication)  Coagulopathy (relative contraindication)  Thrombocytopenia (relative contraindication)  Obvious infection at intended site of insertion (cellulites or abscess)
  • 100. 10/23/2024 by abraham A 102 Equipments for paracentesis Sterile set 1. Sterile trochar and cannula: small pieces of tubing attached to the cannula with clamp. 2. Towel with hole/ fenestrated towel 3. Hand towel 4. Gloves, swabs & gauze in a bowel 5. 2 gallipots 6. Syringe and needle for local anaesthesia 7. Dissecting forceps & artery forceps 8. Small scalpel if needed 9. 2 Test tubes 10. Cotton balls Clean 1. Rubber sheet with cover 2. Abdominal binder with safety pin 3. Cleansing lotion and local anesthesia 4. Pail or other receiver to collect fluid 5. adhesive tape 6. Screen
  • 101. 10/23/2024 by abraham A 103 Preparation  Check if the patient a have clotting problem  Emptying of the bladder decreases accidental perforation of bladder.  Allergy of the medication including to anesthetisia.  Any bleeding problems or are taking blood thinners, such as aspirin, nonsteroidal anti-inflammatory drugs (NSAIDs), or warfarin (Coumadin).  pregnancy.
  • 102. 10/23/2024 by abraham A 104 Nursing consideration Pre-procedure  Check for signed consent form.  Explain the procedure for the client.  Keep patient privacy  Gather appropriate sterile equipment.  Place the patient in sitting position at the edge of the bed or in a chair with feet supported on foot rest if the patient cannot tolerate high fowler position in bed. The usual site for the paracentesis is half way between the umbilicus and the symphysis pubis on mid line of the abdomen.
  • 103. 10/23/2024 by abraham A 105 Pre-procedure /Nursing consideration…  Empty the bladder immediately before tapping  The position results in movement of peritoneal fluid close to the abdominal wall and promotes easier puncture and removal of fluid.  Place the blood pressure apparatus at the patient arm to monitor blood pressure during the procedure.
  • 104. 10/23/2024 by abraham A 106 During the procedure  Strict aseptic techniques are used to puncture the abdomen.  Anesthetize the site usually half way between the sympsis pubis and Umbilicus.  The Paracentesis needle is called trocar.  The physician insert the trocar at the puncture site below umbilicus the needle is connected to a drainage tube which is inserted into the collecting container.  Monitor vital sign at frequent interval because decrease blood pressure may occur with vascular collapse which can result from removal of fluid from the peritoneal cavity.
  • 105. 10/23/2024 by abraham A 107 Post procedure  Apply a bulky dressing at the puncture site or use abdominal binder secure it in place with safety pin.  Return the patient to a bed or to a comfortable sitting position.  Measure, describe and record the fluid.  Label sample of fluid and send to laboratory.  Monitor vital sign every 15 minute for 1 hour, every 30 minute for 2 hour.  Asses for hypovolemia, Check the puncture site for leakage or bleeding.  Teach the patient importance of avoiding heavy lifting or straining, frequency of monitoring for fever and the need to change position slowly.  Slow change in position is recommended because of the risk of hypovolemia related to fluid removal.
  • 106. 10/23/2024 by abraham A 108 Complications of Paracentesis  Bladder perforation  Small or large bowel perforation  Stomach perforation  Lacerations of major vessels (mesenteric, iliac, aorta)  Laceration of catheter or guide wire and loss in peritoneal  Abdominal wall hematomas  Incisional hernias: - occurs in the abdomen in the area of an old surgical scar.  Wound infection  Wound dehiscence: - is the partial or total rupturing of a wound often involves an abdominal wound in which the layers below the skin also separate.
  • 107. 10/23/2024 by abraham A 109 2.4.CARE OF CAST APPLICATION AND REMOVAL OF CASTS  A cast is a rigid external immobilizing device that is moulded to the counters of the body to which it is applied. Contraindications (relative) Skin diseases Peripheral vascular disease Diabetes mellitus Open or draining wounds Susceptibility to skin irritations  Types of casts :- depends on the type and thickness of the cast 1. Long or full leg cast: - Extends from above the knee to the toes. 2. Short leg cast: - Just bellow the knee and extends to the toes. 3. Long arm casts: - From the axilla to the fingers of the hand. Usually allowing for elbow flexion. 4. Short arm cast: - Extends from below the elbow to the fingers.
  • 108. 10/23/2024 by abraham A 110 Cont… 5. Spica cast: - Incorporate a position of the trunk and one or two extremities (single or double spica cast) A. Shoulder spica cast: Extends around the chest and the entire of one or two arms to the fingers. B. Hip spica cast begins at waist level or above it and extends down one or two legs. Purpose of Application Of Cast  To immobilize the body part so that healing can take place with out further injury.  To correct deformity  To maintain correct position.
  • 109. 10/23/2024 by abraham A 111 Care of the patient in cast Purpose  To promote comfort.  To prevent pressure sores and other complications as deformity, thrombosis, embolic, constipation etc.  To improve general health of the patient and speed up recovery Equipments 1. Drape for patient 2. Knitted material (eg, stockinette) 3. Nonwoven roll padding 4. Casting material (POP) 5. Water and basin 6. Cast knife or cutter 7. Trolly
  • 110. 10/23/2024 by abraham A 112 Immediate care after cast is applied Procedure  The bed should be prepared with a board under the mattress, if needed.  Immediately after the completion of cast application and parts of extremity on which the cast is applied should be observed for symptoms such as pain, pallor, discoloration, tingling sensation, numbness, coldness or inability to move report immediately if any of these signs are noticed.  Put rubber sheet under the part where the cast to protect the bed linen until it dries.  Keep the bed linen away from the wet plaster until dries.
  • 111. 10/23/2024 by abraham A 113 N.B 1. Be informed about the condition of the patient and the type of cast applied. 2. If cast is applied around the trunk or hip, turn patient frequently to allow even drying of the cast and to prevent fatigue of the patient. 3. Elevation of the part may help to control swelling. 4. Heat should never be applied to the cast in attempt to dry it quickly as it can crack and cause burning as well.
  • 112. 10/23/2024 by abraham A 114 Care After Cast Is Dried  Protection of the skin and care of the cast.  Pressure sores may develop over any bony prominence and commonly at the buttocks. ◦ Wash, give pressure area care and change position frequently.  Smoothen the rough edges of the cast by plaster or by pulling the stockinet.  massage the inside of the cast as far as you can reach.  Protect the cast around the perennial area against excretion by water proof material when the cast is dried.  The skin below the cast should be inspected frequently and routinely for signs of circulatory impairment as swelling, inability to move fingers or toes or temperature changes.
  • 113. 10/23/2024 by abraham A 115 Cont…  Prevent atrophy and maintain muscle strength by helping the patient to contract the muscles with out moving the injured part.  The patient should exercise unaffected part of the body regularly to develop the muscle tone and improve general health.  Elevating the head of the bed slightly when a bed pan is used; helps to prevent soiling of the bed.  If cast is applied to the arm the patient should wear sling to support the full weight of the cast Care After Cast Is Dried...
  • 114. 10/23/2024 by abraham A 116 Precaution  Immediately after the completion of cast application, the end parts of the extremity on which the cast is applied should be observed for neurovascular status. Such as  Colour of the skin:- pallor, cyanosis  Motor ability or movement: - inability to move suggests compression of Nerves.  Sensation: - numbness, tingling, inability to feel pain  Temperature of the skin: - Excessive coldness can indicate circulatory impairment, compare both extremities.  Degree of swelling: some swelling can be expected  Capillary refill- if it returns too slowly there must be venous congestion or arterial insufficiency.  Distal pulse: a weak or absent pulse may indicate decreased circulation to the area. Compare with the pulse of normal extremity
  • 115. 10/23/2024 by abraham A 117 Removal of Cast Indication  When a fracture heals  If it requires further manipulation. Less common indications include: Cast damage Pressure ulcer under the cast Excessive drainage or bleeding Constrictive cast
  • 116. 10/23/2024 by abraham A 118 Equipments for cast removal Cast cutter  cast splitter Bandage scissors  Surgical or plaster knife
  • 117. 10/23/2024 by abraham A 119 Thank you

Editor's Notes

  • #45: Auto (intrinsic) PEEP — Incomplete expiration prior to the initiation of the next breath causes progressive air trapping (hyperinflation). This accumulation of air increases alveolar pressure at the end of expiration, which is referred to as auto-PEEP. Auto-PEEP develops commonly in high minute ventilation (hyperventilation), expiratory flow limitation (obstructed airway) and expiratory resistance (narrow airway). Once auto-PEEP is identified, steps should be taken to stop or reduce the pressure build-up.[2] When auto-PEEP persists despite management of its underlying cause, applied PEEP may be helpful if the patient has an expiratory flow limitation (obstruction).[3][4] Applied (extrinsic) PEEP — is usually one of the first ventilator settings chosen when mechanical ventilation is initiated. It is set directly on the ventilator. A small amount of applied PEEP (4 to 5 cmH2O) is used in most mechanically ventilated patients to mitigate end-expiratory alveolar collapse.[5] A higher level of applied PEEP (>5 cmH2O) is sometimes used to improve hypoxemia or reduce ventilator-associated lung injury in patients with acute lung injury, acute respiratory distress syndrome, or other types of hypoxemic respiratory failure.[6]
  • #61: Chest drains also known as under water sealed drains (UWSD) are inserted to allow draining of the pleural spaces of air, blood or fluid, allowing expansion of the lungs and restoration of negative pressure in the thoracic cavity. The underwater seal also prevents backflow of air or fluid into the pleural cavity. Appropriate chest drain management is required to maintain respiratory function and haemodynamic Aim To describe safe and competent management of (UWSD) chest drainsby the health care team Definition of terms Chylothorax: Collection of lymph fluid in the pleural space Haemothorax:  Collection of blood in the pleural space Pneumothorax :Collection of air in the pleural space Tension Pneumothorax:One way valve effect allowing air to enter the pleural space, but not to leave. Air builds up forcing a mediastinal shift. This leads to decreased venous return to the heart and lung collapse/compression causing acute life-threatening respiratory and cardiovascular compromise. Ventilated patients are particularly high risk due to the positive pressure forcing more air into the pleural space. Tension pneumothorax can result in rapid clinical deterioration and is an emergency situation Pleural effusion: Exudate or transudate in the pleural space Under Water Seal Drain (UWSD):Drainage system of 3 chambers consisting of a water seal, suction control & drainage collection chamber. UWSD are designed to allow air or fluid to be removed from the pleural cavity, while also preventing backflow of air or fluid into the pleural space. Flutter valve (e.g. pneumostat, Heimlich valve):One way valve system that is small & portable for transport or ambulant patients. Allows air or fluid to drain, but not to backflow into pleural cavity.
  • #108: Precaution During and after the procedure watch patient carefully for signs of shock Precaution During and after the procedure watch patient carefully for signs of shock