SlideShare a Scribd company logo
Basics of
Amazon Web Services (AWS)
PREPARED BY:
Piyush Agrawal
Sr. Server Administrator
Ebizon Netinfo Pvt. Ltd.
What is Amazon Web Services (AWS)?
• A virtual platform on Clouds:
• Provides a robust, scalable and affordable infrastructure for cloud
computing
• AWS cloud computing model allows you to pay for services on-demand
• Amazon Web Services (AWS) delivers a set of services that together
form a reliable, scalable, and inexpensive computing platform “in the
cloud”
What is Cloud Computing?What is Cloud Computing?
• Its a Service over the Internet, which provide flexible, secure, and cost
effective IT infrastructure
• Computing Resources like hardware and Software can be delivered as a
service.
• Cloud based applications are accessible through a web-browser or desktop
• Reduced upfront cost of IT Infrastructure
• Improved Manageability & less Maintenance
Why Amazon Web Services (AWS)?
• Flexible, Cost-Effective, Scalable, and easy-to-use cloud computing platform
• Provides AWS cloud services which can be easily accessible via the
Internet.
• Service On Demand and pay for only what you use.
• Variety of Services like EC2, S3 etc.
• Instant Scalability with full control over the machine
Challenges
There are few limitations as well:
• No dedicated technical support, though free forums and paid support is
available.
• Also AWS have a vast online documentation for any technical support.
– Online Documentation: http://docs.aws.amazon.com/
– AWS Blogs: http://aws.typepad.com/
Get Started
Amazon Ec2 is a web service that provide resizable computing capacity in
the cloud.
To get started using Amazon Elastic Compute Cloud (Amazon EC2) Linux
instances, we need to do:
1. Sign-Up for Amazon EC2
2. Launch an EC2 Instance
3. Connect to the Instance
4. Explore the Instance
5. Clean UP
Sign UP at Amazon
• Create an AWS account, if you haven't done so already.
• Once you create an AWS account, AWS automatically signs up the account
for all AWS services, including Amazon EC2.
• To create an AWS account
1. Go to http://aws.amazon.com and click Sign Up Now.
2. Follow the on-screen instructions.
Amazon AMIs
• An AMI is a template of machine's root volume, contains information to boot
an EC2 instance.
• Any number of instances can be launched by a single AMI.
• Amazon provides large number of public AMIs and for no cost.
Launch an Amazon EC2 Instance (Part1)
• An instance is a virtual server in the Cloud.
• Sign in to the AWS Management Console and open the Amazon EC2
console at https://console.aws.amazon.com/ec2/.
• From the navigation bar, select the region for the instance.
Launch an Amazon EC2 Instance (Part-2)
From the Amazon EC2 console dashboard, click Launch Instance.
The Create a New Instance page includes these ways to launch an
instance:
• The Classic Wizard offers you precise control and advanced settings for
configuring your instance.
• The Quick Launch Wizard automatically configures many selections for you,
so that you can get started quickly. This tutorial guides you through the Quick
Launch Wizard.
Launch an Amazon EC2 Instance (Part-3)
Here, we will look at the steps to create an instance using Classic Wizard
Click on Continue button to reach at Choose AN AMI Page.
Launch an Amazon EC2 Instance (Part-4)
On Choose An AMI page, click on tab Community AMIs, select EBS
Images from the image type list, and also search for the OS version in
search space, then click on Select button in front of the desired AMI, it will
take to Instance Details Page.
Launch an Amazon EC2 Instance (Part-5)
On Instance Details page select the Instance Type, you want to create, and
let the rest of entries remains default and click on Continue button. It will take
you to Advance Instance Options Page.
Launch an Amazon EC2 Instance (Part-6)
On Advance Instance Options page check on Enable CloudWatch detailed
monitoring for this instance for enabling server monitoring, check on base64
encoded option, and also check on Prevention against accidental termination,
and let the other options remain as default. Click on Continue button which will
take you to Storage Device Configuration page.
Launch an Amazon EC2 Instance (Part-7)
On Storage Device Configuration page, click on Edit button to change the
default size of the root volume and save it and click on Continue button to
reach at next page, It is the Tag Entry page.
Launch an Amazon EC2 Instance (Part-8)
On Tag Entry Page, Create a Tag and its value and click on Continue button,
it will take you to Create Key Pair page.
Launch an Amazon EC2 Instance (Part-9)
Create a new public key for this instance to connect it securely. Download the
key files from here and save it at a secure place. It can't be downloaded
again. It will take you to Configure Firewall Page.
Launch an Amazon EC2 Instance (Part-10)
On Security Firewall page, create a Security Group (It determine whether a
network port is open or blocked), and immediately add a security rule to open
port 22 to connect it through SSH, rest desired ports can be configured later.
Now click on Continue button to reach at Review page.
Launch an Amazon EC2 Instance (Part-11)
Finally at Review page, verify all the settings before pressing Continue button.
Click on Continue button, it will start to save your configuration and build an
instance.
Launch an Amazon EC2 Instance (Part-12)
Once you launch the instance it will prompt a Launch Instance Wizard
Screen, close this screen. Its just informational.
Launch an Amazon EC2 Instance (Part-13)
Click on Launch button will take you to EC2 Instances page, where all the
available instances are listed. Here it will take few minutes to establish a newly
created instance.
Launch an Amazon EC2 Instance (Part-14)
Now create a name for this newly created instance to distinguish it from
other listed.
Launch an Amazon EC2 Instance (Part-15)
When you check the checkbox in front of this instance, it will show you all
the configurationally details for this instance.
Amazon EC2 Functionality
Presents a virtual computing environment, allowing us, to use web service
interfaces to launch instances with a variety of operating systems, to load them
with custom application environment, and to manage network’s access
permissions.
To use EC2:
• Create an AMI containing application and its associated configurations
• Choose the correct instance type and monitor it.
• Configure Security & Network Access on EC2
• Connect it with static IP, to use it globally.
Firewall Configuration
• Each EC2 instance is associated with a specific Security Group.
• The rules of a security group control the inbound traffic, outbound traffic is
allowed by default. Outbound behaviour can't be changed.
• In each security group max 100 rules can be added, for more rules,
multiple security groups can be assigned to an instance
• Rules of a security group can't be modified, only can be added or removed
• Security Group acts as a firewall that controls the traffic allowed to reach to
the instance.
• When multiple security groups applied to an instance, then a virtual
security group comes into action with the effective aggregated rules of all
the security groups.
Creating a Security Group
To create a security group for EC2
1. Open the Amazon EC2 console at https://console.aws.amazon.com/ec2/.
2. In the navigation pane, click Security Groups.
3. Click Create Security Group.
4. Specify a name and description for the security group. Select No VPC for
VPC, and then click Yes, Create.
5. To view your security groups
6. Open the Amazon EC2 console at https://console.aws.amazon.com/ec2/.
7. In the navigation pane, click Security Groups.
8. To view more information about a security group, including its rules, select
it. The information is displayed in the details pane.
Adding A Rule to Security Group (Part-1)
When you add a rule to a security group, the new rule is automatically applied
to any instances in the group.
To add a rule to a security group
• Open the Amazon EC2 console at https://console.aws.amazon.com/ec2/.
• In the navigation pane, click Security Groups.
• Select a security group.
• Select the Inbound tab and add one or more inbound rules.
1. Select an option from the Create a new rule list.
2. [Custom protocol rule only] Specify a port or port range.
Adding A Rule to Security Group (Part-2)
3. In the Source field, specify one of the following:
An IP address range in CIDR notation (to allow access from that IP address range). OR the name or
ID of a security group (to allow access based on that security group). If the security belongs to
another AWS account, add the AWS account ID and a forward slash as a prefix (for
example, 111122223333/OtherSecurityGroup).
4. Click Add Rule.
• After adding all the rules for inbound traffic that you need, click Apply Rule
Changes.
Deleting a Security Group Rule
To delete a security group rule
1. Open the Amazon EC2 console at https://console.aws.amazon.com/ec2/.
2. In the navigation pane, click Security Groups.
3. Select a security group.
4. On the Inbound tab in the details pane, click the Delete button next to each
rule to delete.
5. An asterisk appears on the Inbound tab to indicate that there are changes
that have not been applied.
6. Click Apply Rule Changes.
Deleting a Security Group
The security group must not be assigned to any instances. You can't delete
the default security group.
To delete a security group
1. Open the Amazon EC2 console at
https://console.aws.amazon.com/ec2/.
2. In the navigation pane, click Security Groups.
3. Select a security group and click Delete.
4. Click Yes, Delete.
Elastic IPAddress (EIP)
• A static IP Address, designed for dynamic cloud computing.
• EIP is default associated with AWS account, not with any instance.
• EIP remains associated with AWS account until explicitly released.
• EIP can be associated to an instance and can be remap to another
instance at any point of time.
• An EIP can be associated with a single instance at a time
• Stopping the instance can disassociate the EIP from it.
• An AWS accounts can hold max 5 EIPs
EIPAllocation
To allocate an EIP for use with EC2-Classic
1. Open the Amazon EC2 console at https://console.aws.amazon.com/ec2/.
2. Click Elastic IPs in the navigation pane.
3. Click Allocate New Address.
4. Select EC2 from the EIP list, and then click Yes, Allocate.
To view your Elastic IP addresses
1. Open the Amazon EC2 console at https://console.aws.amazon.com/ec2/.
2. Click Elastic IPs in the navigation pane.
3. To filter the displayed list, start typing part of the EIP or the ID of the
instance to which it is assigned in the search box.
EIPAssociation to an Instance
To associate an Elastic IP address with a running instance
1. Open the Amazon EC2 console at https://console.aws.amazon.com/ec2/.
2. Click Elastic IPs in the navigation pane.
3. Select an EIP and click Associate Address.
4. In the Associate Address dialog box, select the instance from the Instance list box
and click Yes, Associate.
Associating an Elastic IP Address with a Different Running Instance
1. Open the Amazon EC2 console at https://console.aws.amazon.com/ec2/.
2. Click Elastic IPs in the navigation pane.
3. Select the EIP, and then click the Disassociate button.
4. Click Yes, Disassociate when prompted.
5. Select the EIP, and then click Associate.
6. In the Associate Address dialog box, select the new instance from the Instance ID
list, and then click Yes, Associate.
Releasing an Elastic IPAddress
If an EIP is no longer in use then it should be released.
To release an Elastic IP address
1. Open the Amazon EC2 console at
https://console.aws.amazon.com/ec2/.
2. Click Elastic IPs in the navigation pane.
3. Select the Elastic IP address, and then click the Release Address
button.
Connect to an Instance (Part-1)
To connect to your instance through a web browser
• You must have Java installed and enabled in the browser. If you don't have Java
already, you can contact your system administrator to get it installed, or follow the
steps outlined in these pages:
o Install Java
o Enable Java in your web browser
• Sign in to the AWS Management Console and open the Amazon EC2 console at
https://console.aws.amazon.com/ec2/.
• Click Instances in the navigation pane.
• Right-click your instance, and then click Connect.
• Click Connect from your browser using the Java SSH client (Java Required). AWS
automatically detects the public DNS address of your instance and the key pair
name you launched the instance with.
Connect to an Instance (Part-2)
• In User name, enter the user name to log in to your instance.
• Note: For an Amazon Linux instance, the default user name is ec2-user. for
Ubuntu, the default user name is ubuntu. Some AMIs allow you to log in as
root. So in this example, you may need to change the user name from ec2-
user to the appropriate user name.
• The Key name field is automatically populated for you.
• In Private key path, enter the fully qualified path to your .pem private key
file.
• Click Save key location, and then click Stored in browser cache to store
the key location in your browser cache. This ensures that the key location
will be detected in subsequent browser sessions, until your clear your
browser’s cache.
Connect to an Instance (Part-3)
To connect an Instance using Linux Terminal
• Keep the server key (.pem) file at a secure location of the machine
• Make it inaccessible to public
• # chmod 400 serverkey.pem
• Connect it through
# ssh -i /path/serverkey.pem ubuntu@public-IP
To Create an EBS Volume (Part-1)
To create and attach an Amazon EBS volume
• Open the Amazon EC2 console at https://console.aws.amazon.com/ec2/.
• Select the region in which you created your instance in the navigation bar,
and then click Instances in the navigation pane.
• The console displays the list of current instances in that region. Select your
Linux instance. In the Description tab in the bottom pane note the Zone for
the instance.
• In the navigation pane, in Elastic Block Store, click Volumes.
• The console displays a list of current EBS volumes in that region. (You
should see the EBS volume that serves as the root device volume for your
instance.)
• Click Create Volume.
To Create an EBS Volume (Part-2)
• In the Create Volume dialog box, configure the following settings:
o Leave the volume size blank. (We'll let the snapshot we select determine the size
of the volume.)
o Select the same Availability Zone that you used when you created your
instance. Otherwise, you can't attach the volume to your instance.
o Select a snapshot that contains a public data set hosted by AWS. This enables
us to quickly and easily create a volume that is formatted and contains data.
o Select the Standard volume type. This creates a standard EBS volume.
• Now click Yes, Create. This creates a new volume
• Right-click the newly created volume and select Attach Volume.
• In the Attach Volume dialog box, click the following settings:
o Select your Linux instance from the list.
o Specify the device name /dev/sdf. (It is the device name where you
want to attach it)
Storage (Part-1)
Storage options include the following:
o Amazon Elastic Block Store (Amazon EBS)
o Amazon EC2 instance store
o Amazon Simple Storage Service (Amazon S3)
The following figure shows the relationship between these types of storage.
Storage (Part-2)
Amazon EBS
• All Amazon EBS volumes offer the following features:
• Data availability from replication across an Availability Zone
• Data persistence independent of the life of the instance
• The ability to create snapshots and incremental backups
Amazon EC2 Instance Store
• Instance store provides temporary block-level storage for Amazon EC2
instances. The data on an instance store volume persists only during the life
of the associated Amazon EC2 instance.
Storage (Part-3)
Amazon Simple Storage Service (Amazon S3)
• Amazon S3 is a repository for Internet data.
• Amazon S3 provides access to reliable, fast, and inexpensive data storage
infrastructure.
• Objects are the fundamental entities stored in Amazon S3. Objects consist
of object data and metadata.
• Every object stored in Amazon S3 is contained in a bucket. Buckets
organize the Amazon S3 namespace at the highest level and identify the
account responsible for that storage.
Creating Snapshots
• Amazon provides a facility to create Snapshots of running volume, it can be
stored as a backup of that volume for further use.
• These snapshots are kind of restore point which can be used for data
recovery.
• Amazon EBS Snapshots are incremental backups
To create a snapshot
1. Open the Amazon EC2 console at https://console.aws.amazon.com/ec2/.
2. Click Snapshots in the navigation pane.The console displays a list of current
snapshots.
3. Click Create Snapshot. The Create Snapshot dialog box appears.
4. Select the volume to create a snapshot for and click Create. Amazon EC2 begins
creating the snapshot.
Create an AMI (Part-1)
To create an AMI from a running Amazon EBS-backed instance
• Open the Amazon EC2 console at https://console.aws.amazon.com/ec2/.
• In the navigation pane, click Instances to view a list of your instances.
Right-click your running instance and select Create Image (EBS AMI).
• The Create Image dialog box appears.
Create an AMI (Part-2)
Fill in the requested information as follows, and click Yes, Create.
• A unique name for the image.
• [Optional] A description of the image (up to 255 characters).
• By default, Amazon EC2 shuts down the instance, takes snapshots of any
attached volumes, creates and registers the AMI, and then reboots the
instance. Select No Reboot if you don't want your instance to be shut down.
Warning
• If you select the No Reboot option, the file system integrity of the created
image can't be guaranteed.
Create an AMI (Part-3)
• Click AMIs in the navigation pane to view the AMI's status. While the new
AMI is being created, its status is pending. It takes a few minutes for the
whole process to finish.
• After your new AMI's status is available, go to the Snapshots page and
view the new snapshot that was created for the new AMI. Any instance you
launch from the new AMI uses this snapshot for its root device volume.
• Go back to the AMIs page, select the image, and click Launch.
• The launch wizard opens.
• Walk through the wizard to launch an instance of your new AMI.
• You now have a new AMI and snapshot that you just created.
Delete an AMI and Snapshot
To delete an AMI and a snapshot
1. Go to the AMIs page. Select the AMI, click Actions, then select
Deregister. When asked for confirmation, click Continue.
2. The image is deregistered, which means it is deleted and can no longer
be launched.
3. Go to the Snapshots page. Right-click the snapshot and select Delete
Snapshot. When asked for confirmation, click Yes, Delete.
4. The snapshot is deleted.
Clean UP
To terminate an instance
• Sign in to the AWS Management Console and open the Amazon EC2
console at https://console.aws.amazon.com/ec2/.
• Locate your instance in the list of instances on the Instances page.
• Right-click the instance, and then click Terminate.
• Click Yes, Terminate when prompted for confirmation.
• Amazon EC2 begins terminating the instance.
• Amazon EBS volumes can persist even after your instance goes away. you
must delete the volume.
Types of Instances
Amazon EC2 Instances has been categorized into three types:
On-Demand Instances – Pay for compute capacity by the hour with no
long-term commitments.
Reserved Instances – One-time payment for each instance you want to
reserve and in turn receive a significant discount on the hourly charge for
that instance.
Spot Instances – Allow customers to bid on unused Amazon EC2 capacity
and run those instances for as long as their bid exceeds the current Spot
Price.
IAM enables you to securely control access to AWS services and
resources, using IAM you can create and manage AWS users and groups.
IAM Allows you to:
• Manage IAM users and their access
• Manage IAM roles and their permissions
• Manage federated users and their permissions
Identity Access Management (IAM)
Instance Monitoring (Part-1)
• Amazon EC2 performs automated checks on every running Amazon EC2
instance to identify hardware and software issues.
• Status checks are performed every five minutes and each returns a pass
or a fail status
• If all checks pass, the overall status of the instance is OK. If one or more
checks fail, the overall status is impaired.
• Status checks are built into Amazon EC2, so they cannot be disabled or
deleted
• There are two types of status checks: system status checks and
instance status checks.
Instance Monitoring (Part-2)
System status checks
These checks detect problems with your instance that require AWS
involvement to repair. When a system status check fails, you can choose
to wait for AWS to fix the issue or you can resolve it yourself (for example,
by stopping and restarting or terminating and replacing an instance).
Examples of problems that cause system status checks to fail include:
• Loss of network connectivity
• Loss of system power
• Software issues on the physical host
• Hardware issues on the physical host
Instance Monitoring (Part-3)
Instance status checks
Monitor the software and network configuration of your individual instance.
When an instance status check fails, typically you will need to address the
problem yourself (for example by rebooting the instance or by making
modifications in your operating system). Examples of problems that may
cause instance status checks to fail include:
• Failed system status checks
• Misconfigured networking or startup configuration
• Exhausted memory
• Corrupted file system
• Incompatible kernel
Instance Monitoring (Part-4)
To view status checks
• Open the Amazon EC2 console at https://console.aws.amazon.com/ec2/.
• In the Navigation pane, click Instances.
• On the Instances page, the Status Checks column lists the operational
status of each instance.
• To view an individual instance’s status, select the instance, and then click
the Status Checks tab.
Instance Monitoring (Part-5)
page, click on the instance on which you want to report status.
Click the Status Checks tab and then click the Submit Feedback buttTo report
status feedback using the management console
1. Open the Amazon EC2 console at https://console.aws.amazon.com/ec2/.
2. In the Navigation pane, click Instances.
3. On the Instances on.
1. Complete the information on the Report Instance Status page.
• Enables real-time monitoring of AWS resources
• Few free metrics are auto enabled, custom metrics can be added
• Basic Monitoring is already enabled automatically for all Amazon EC2
instances
To enable detailed monitoring of an existing EC2 instance
Provides data about your instance in 1-minute periods..
1. Open the Amazon EC2 console at https://console.aws.amazon.com/ec2/.
2. In the Navigation pane, click Instances.
3. In My Instances, select a running or stopped instance, click Instance Actions, and
then click Enable Detailed Monitoring.
4. In the Enable Detailed Monitoring dialog box, click Yes, Enable.
5. In the Enable Detailed Monitoring confirmation dialog box, click Close.
Amazon CloudWatch
Create Status Check Alarm
To create a status check alarm
• Open the Amazon EC2 console at https://console.aws.amazon.com/ec2/.
• In the Navigation pane, click Instances.
• In My Instances, select an instance, and then on the Status Checks tab, click
Create Status Check Alarm.
• In the Create Alarm for dialog box, select the Send a notification to check
box, and then choose an existing Amazon Simple Notification Service (SNS)
topic or create a new SNS topic to use for this alarm.
http://docs.aws.amazon.com/
http://aws.typepad.com/aws/
Reference & Help

More Related Content

PPTX
Creating and managing amazon ec2 instances(linux)
PDF
EasiShare AWS Setup Guide
PDF
Awsgsg computebasics
PDF
[WordPress on AWS] AMIMOTO Hands-On Seminar
PDF
AWS CodeDeploy
PPT
GigaSpaces CCF Quick Tour - 2.3.6
PPT
How to begin with Amazon EC2?
PPTX
5 modern desktop - windows autopilot
Creating and managing amazon ec2 instances(linux)
EasiShare AWS Setup Guide
Awsgsg computebasics
[WordPress on AWS] AMIMOTO Hands-On Seminar
AWS CodeDeploy
GigaSpaces CCF Quick Tour - 2.3.6
How to begin with Amazon EC2?
5 modern desktop - windows autopilot

What's hot (16)

PPTX
A step by step guide to develop temperature sensor io t application using ibm...
PPTX
Module 1 introduction to aws demo 4
PPT
How to install WordPress on AWS EC2 via Deploy4Me
PPTX
Microsoft Windows Shared Storage on AWS
PPSX
Aws public cloud deployment
DOCX
V mware view 4
PDF
DOCX
Internet explorer setting for oracle hyperion products
PDF
Multi-Cloud testing
PDF
How to set up a Windows Domain on AWS
DOCX
AWS virtual private clould
PDF
Awsgsg intro
PDF
PPTX
Sexy, Powerful, Exciting
PDF
Elastix 2.4 vm ware appliance deployment guide
PDF
McrUmbMeetup 22 May 14: Umbraco and Amazon
A step by step guide to develop temperature sensor io t application using ibm...
Module 1 introduction to aws demo 4
How to install WordPress on AWS EC2 via Deploy4Me
Microsoft Windows Shared Storage on AWS
Aws public cloud deployment
V mware view 4
Internet explorer setting for oracle hyperion products
Multi-Cloud testing
How to set up a Windows Domain on AWS
AWS virtual private clould
Awsgsg intro
Sexy, Powerful, Exciting
Elastix 2.4 vm ware appliance deployment guide
McrUmbMeetup 22 May 14: Umbraco and Amazon
Ad

Similar to AWS Instance Preparation (20)

PDF
Module-2 compute (2).pdf AWS FIRST MODULE
PPTX
AWS_EC2_Instance_Bharathiyaruniversity.pptx
PPTX
AWS compute Services
PDF
Security compute services_whitepaper
PPTX
Elastic Compute Cloud (EC2) on AWS Presentation
PPTX
AWS Compute Services
PDF
AWS Certified Solutions Architect Associate Notes.pdf
PPT
sfdx continuous Integration with Jenkins on aws (Part I)
PPT
Cloud ppt
PDF
Amazon cloud intance launch3
PDF
Amazon cloud intance launch3
PDF
Amazon cloud intance launch
PPTX
AWSome Day Digital LATAM
PPTX
CC ppt.pptx
PDF
20 MUST KNOW things about Amazon EC2.pdf
PDF
Amazon EC2
PPTX
AWS SSA Webinar 7 - Getting Started on AWS
PPTX
Pitt Immersion Day Module 2 - ec2 overview
PDF
Moving Drupal to the Cloud
PPTX
Amazon cloudtutorial
Module-2 compute (2).pdf AWS FIRST MODULE
AWS_EC2_Instance_Bharathiyaruniversity.pptx
AWS compute Services
Security compute services_whitepaper
Elastic Compute Cloud (EC2) on AWS Presentation
AWS Compute Services
AWS Certified Solutions Architect Associate Notes.pdf
sfdx continuous Integration with Jenkins on aws (Part I)
Cloud ppt
Amazon cloud intance launch3
Amazon cloud intance launch
AWSome Day Digital LATAM
CC ppt.pptx
20 MUST KNOW things about Amazon EC2.pdf
Amazon EC2
AWS SSA Webinar 7 - Getting Started on AWS
Pitt Immersion Day Module 2 - ec2 overview
Moving Drupal to the Cloud
Amazon cloudtutorial
Ad

More from Ebizon (14)

PDF
Meeting etiquettes
PDF
Drupal 6 to 7 migration guide
PPT
Is Wordpress a threat to Drupal
PDF
About Ebizon and Portfolio
PDF
Open Source Learning Management System - Canvas
PDF
Practically painless drupal project outsourcing
PDF
Ebizon capability
PDF
The true story about a norfolk based agency that saved cost by outsourcing
PDF
What is an open badging system and how to implement it
PDF
5 tricks to know before you outsource your drupal project
PDF
Using badges on your site
PDF
How to integrate Open Badging with your Site
PPT
Single Sign On - Case Study
PPT
How Society for Science & the Public digitize their accreditation system
Meeting etiquettes
Drupal 6 to 7 migration guide
Is Wordpress a threat to Drupal
About Ebizon and Portfolio
Open Source Learning Management System - Canvas
Practically painless drupal project outsourcing
Ebizon capability
The true story about a norfolk based agency that saved cost by outsourcing
What is an open badging system and how to implement it
5 tricks to know before you outsource your drupal project
Using badges on your site
How to integrate Open Badging with your Site
Single Sign On - Case Study
How Society for Science & the Public digitize their accreditation system

Recently uploaded (20)

PPTX
Final Presentation General Medicine 03-08-2024.pptx
PDF
Anesthesia in Laparoscopic Surgery in India
PPTX
The Healthy Child – Unit II | Child Health Nursing I | B.Sc Nursing 5th Semester
PDF
Basic Mud Logging Guide for educational purpose
PPTX
Cell Structure & Organelles in detailed.
PDF
2.FourierTransform-ShortQuestionswithAnswers.pdf
PDF
Insiders guide to clinical Medicine.pdf
PDF
Supply Chain Operations Speaking Notes -ICLT Program
PDF
Saundersa Comprehensive Review for the NCLEX-RN Examination.pdf
PDF
Microbial disease of the cardiovascular and lymphatic systems
PDF
O7-L3 Supply Chain Operations - ICLT Program
PDF
The Lost Whites of Pakistan by Jahanzaib Mughal.pdf
PDF
01-Introduction-to-Information-Management.pdf
PPTX
Microbial diseases, their pathogenesis and prophylaxis
PPTX
Introduction_to_Human_Anatomy_and_Physiology_for_B.Pharm.pptx
PDF
TR - Agricultural Crops Production NC III.pdf
PDF
102 student loan defaulters named and shamed – Is someone you know on the list?
PDF
BÀI TẬP BỔ TRỢ 4 KỸ NĂNG TIẾNG ANH 9 GLOBAL SUCCESS - CẢ NĂM - BÁM SÁT FORM Đ...
PDF
Pre independence Education in Inndia.pdf
PPTX
Cell Types and Its function , kingdom of life
Final Presentation General Medicine 03-08-2024.pptx
Anesthesia in Laparoscopic Surgery in India
The Healthy Child – Unit II | Child Health Nursing I | B.Sc Nursing 5th Semester
Basic Mud Logging Guide for educational purpose
Cell Structure & Organelles in detailed.
2.FourierTransform-ShortQuestionswithAnswers.pdf
Insiders guide to clinical Medicine.pdf
Supply Chain Operations Speaking Notes -ICLT Program
Saundersa Comprehensive Review for the NCLEX-RN Examination.pdf
Microbial disease of the cardiovascular and lymphatic systems
O7-L3 Supply Chain Operations - ICLT Program
The Lost Whites of Pakistan by Jahanzaib Mughal.pdf
01-Introduction-to-Information-Management.pdf
Microbial diseases, their pathogenesis and prophylaxis
Introduction_to_Human_Anatomy_and_Physiology_for_B.Pharm.pptx
TR - Agricultural Crops Production NC III.pdf
102 student loan defaulters named and shamed – Is someone you know on the list?
BÀI TẬP BỔ TRỢ 4 KỸ NĂNG TIẾNG ANH 9 GLOBAL SUCCESS - CẢ NĂM - BÁM SÁT FORM Đ...
Pre independence Education in Inndia.pdf
Cell Types and Its function , kingdom of life

AWS Instance Preparation

  • 1. Basics of Amazon Web Services (AWS) PREPARED BY: Piyush Agrawal Sr. Server Administrator Ebizon Netinfo Pvt. Ltd.
  • 2. What is Amazon Web Services (AWS)? • A virtual platform on Clouds: • Provides a robust, scalable and affordable infrastructure for cloud computing • AWS cloud computing model allows you to pay for services on-demand • Amazon Web Services (AWS) delivers a set of services that together form a reliable, scalable, and inexpensive computing platform “in the cloud”
  • 3. What is Cloud Computing?What is Cloud Computing? • Its a Service over the Internet, which provide flexible, secure, and cost effective IT infrastructure • Computing Resources like hardware and Software can be delivered as a service. • Cloud based applications are accessible through a web-browser or desktop • Reduced upfront cost of IT Infrastructure • Improved Manageability & less Maintenance
  • 4. Why Amazon Web Services (AWS)? • Flexible, Cost-Effective, Scalable, and easy-to-use cloud computing platform • Provides AWS cloud services which can be easily accessible via the Internet. • Service On Demand and pay for only what you use. • Variety of Services like EC2, S3 etc. • Instant Scalability with full control over the machine
  • 5. Challenges There are few limitations as well: • No dedicated technical support, though free forums and paid support is available. • Also AWS have a vast online documentation for any technical support. – Online Documentation: http://docs.aws.amazon.com/ – AWS Blogs: http://aws.typepad.com/
  • 6. Get Started Amazon Ec2 is a web service that provide resizable computing capacity in the cloud. To get started using Amazon Elastic Compute Cloud (Amazon EC2) Linux instances, we need to do: 1. Sign-Up for Amazon EC2 2. Launch an EC2 Instance 3. Connect to the Instance 4. Explore the Instance 5. Clean UP
  • 7. Sign UP at Amazon • Create an AWS account, if you haven't done so already. • Once you create an AWS account, AWS automatically signs up the account for all AWS services, including Amazon EC2. • To create an AWS account 1. Go to http://aws.amazon.com and click Sign Up Now. 2. Follow the on-screen instructions.
  • 8. Amazon AMIs • An AMI is a template of machine's root volume, contains information to boot an EC2 instance. • Any number of instances can be launched by a single AMI. • Amazon provides large number of public AMIs and for no cost.
  • 9. Launch an Amazon EC2 Instance (Part1) • An instance is a virtual server in the Cloud. • Sign in to the AWS Management Console and open the Amazon EC2 console at https://console.aws.amazon.com/ec2/. • From the navigation bar, select the region for the instance.
  • 10. Launch an Amazon EC2 Instance (Part-2) From the Amazon EC2 console dashboard, click Launch Instance. The Create a New Instance page includes these ways to launch an instance: • The Classic Wizard offers you precise control and advanced settings for configuring your instance. • The Quick Launch Wizard automatically configures many selections for you, so that you can get started quickly. This tutorial guides you through the Quick Launch Wizard.
  • 11. Launch an Amazon EC2 Instance (Part-3) Here, we will look at the steps to create an instance using Classic Wizard Click on Continue button to reach at Choose AN AMI Page.
  • 12. Launch an Amazon EC2 Instance (Part-4) On Choose An AMI page, click on tab Community AMIs, select EBS Images from the image type list, and also search for the OS version in search space, then click on Select button in front of the desired AMI, it will take to Instance Details Page.
  • 13. Launch an Amazon EC2 Instance (Part-5) On Instance Details page select the Instance Type, you want to create, and let the rest of entries remains default and click on Continue button. It will take you to Advance Instance Options Page.
  • 14. Launch an Amazon EC2 Instance (Part-6) On Advance Instance Options page check on Enable CloudWatch detailed monitoring for this instance for enabling server monitoring, check on base64 encoded option, and also check on Prevention against accidental termination, and let the other options remain as default. Click on Continue button which will take you to Storage Device Configuration page.
  • 15. Launch an Amazon EC2 Instance (Part-7) On Storage Device Configuration page, click on Edit button to change the default size of the root volume and save it and click on Continue button to reach at next page, It is the Tag Entry page.
  • 16. Launch an Amazon EC2 Instance (Part-8) On Tag Entry Page, Create a Tag and its value and click on Continue button, it will take you to Create Key Pair page.
  • 17. Launch an Amazon EC2 Instance (Part-9) Create a new public key for this instance to connect it securely. Download the key files from here and save it at a secure place. It can't be downloaded again. It will take you to Configure Firewall Page.
  • 18. Launch an Amazon EC2 Instance (Part-10) On Security Firewall page, create a Security Group (It determine whether a network port is open or blocked), and immediately add a security rule to open port 22 to connect it through SSH, rest desired ports can be configured later. Now click on Continue button to reach at Review page.
  • 19. Launch an Amazon EC2 Instance (Part-11) Finally at Review page, verify all the settings before pressing Continue button. Click on Continue button, it will start to save your configuration and build an instance.
  • 20. Launch an Amazon EC2 Instance (Part-12) Once you launch the instance it will prompt a Launch Instance Wizard Screen, close this screen. Its just informational.
  • 21. Launch an Amazon EC2 Instance (Part-13) Click on Launch button will take you to EC2 Instances page, where all the available instances are listed. Here it will take few minutes to establish a newly created instance.
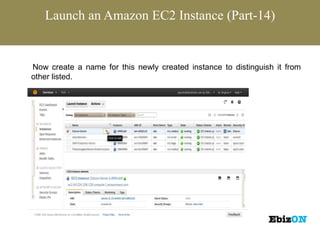
  • 22. Launch an Amazon EC2 Instance (Part-14) Now create a name for this newly created instance to distinguish it from other listed.
  • 23. Launch an Amazon EC2 Instance (Part-15) When you check the checkbox in front of this instance, it will show you all the configurationally details for this instance.
  • 24. Amazon EC2 Functionality Presents a virtual computing environment, allowing us, to use web service interfaces to launch instances with a variety of operating systems, to load them with custom application environment, and to manage network’s access permissions. To use EC2: • Create an AMI containing application and its associated configurations • Choose the correct instance type and monitor it. • Configure Security & Network Access on EC2 • Connect it with static IP, to use it globally.
  • 25. Firewall Configuration • Each EC2 instance is associated with a specific Security Group. • The rules of a security group control the inbound traffic, outbound traffic is allowed by default. Outbound behaviour can't be changed. • In each security group max 100 rules can be added, for more rules, multiple security groups can be assigned to an instance • Rules of a security group can't be modified, only can be added or removed • Security Group acts as a firewall that controls the traffic allowed to reach to the instance. • When multiple security groups applied to an instance, then a virtual security group comes into action with the effective aggregated rules of all the security groups.
  • 26. Creating a Security Group To create a security group for EC2 1. Open the Amazon EC2 console at https://console.aws.amazon.com/ec2/. 2. In the navigation pane, click Security Groups. 3. Click Create Security Group. 4. Specify a name and description for the security group. Select No VPC for VPC, and then click Yes, Create. 5. To view your security groups 6. Open the Amazon EC2 console at https://console.aws.amazon.com/ec2/. 7. In the navigation pane, click Security Groups. 8. To view more information about a security group, including its rules, select it. The information is displayed in the details pane.
  • 27. Adding A Rule to Security Group (Part-1) When you add a rule to a security group, the new rule is automatically applied to any instances in the group. To add a rule to a security group • Open the Amazon EC2 console at https://console.aws.amazon.com/ec2/. • In the navigation pane, click Security Groups. • Select a security group. • Select the Inbound tab and add one or more inbound rules. 1. Select an option from the Create a new rule list. 2. [Custom protocol rule only] Specify a port or port range.
  • 28. Adding A Rule to Security Group (Part-2) 3. In the Source field, specify one of the following: An IP address range in CIDR notation (to allow access from that IP address range). OR the name or ID of a security group (to allow access based on that security group). If the security belongs to another AWS account, add the AWS account ID and a forward slash as a prefix (for example, 111122223333/OtherSecurityGroup). 4. Click Add Rule. • After adding all the rules for inbound traffic that you need, click Apply Rule Changes.
  • 29. Deleting a Security Group Rule To delete a security group rule 1. Open the Amazon EC2 console at https://console.aws.amazon.com/ec2/. 2. In the navigation pane, click Security Groups. 3. Select a security group. 4. On the Inbound tab in the details pane, click the Delete button next to each rule to delete. 5. An asterisk appears on the Inbound tab to indicate that there are changes that have not been applied. 6. Click Apply Rule Changes.
  • 30. Deleting a Security Group The security group must not be assigned to any instances. You can't delete the default security group. To delete a security group 1. Open the Amazon EC2 console at https://console.aws.amazon.com/ec2/. 2. In the navigation pane, click Security Groups. 3. Select a security group and click Delete. 4. Click Yes, Delete.
  • 31. Elastic IPAddress (EIP) • A static IP Address, designed for dynamic cloud computing. • EIP is default associated with AWS account, not with any instance. • EIP remains associated with AWS account until explicitly released. • EIP can be associated to an instance and can be remap to another instance at any point of time. • An EIP can be associated with a single instance at a time • Stopping the instance can disassociate the EIP from it. • An AWS accounts can hold max 5 EIPs
  • 32. EIPAllocation To allocate an EIP for use with EC2-Classic 1. Open the Amazon EC2 console at https://console.aws.amazon.com/ec2/. 2. Click Elastic IPs in the navigation pane. 3. Click Allocate New Address. 4. Select EC2 from the EIP list, and then click Yes, Allocate. To view your Elastic IP addresses 1. Open the Amazon EC2 console at https://console.aws.amazon.com/ec2/. 2. Click Elastic IPs in the navigation pane. 3. To filter the displayed list, start typing part of the EIP or the ID of the instance to which it is assigned in the search box.
  • 33. EIPAssociation to an Instance To associate an Elastic IP address with a running instance 1. Open the Amazon EC2 console at https://console.aws.amazon.com/ec2/. 2. Click Elastic IPs in the navigation pane. 3. Select an EIP and click Associate Address. 4. In the Associate Address dialog box, select the instance from the Instance list box and click Yes, Associate. Associating an Elastic IP Address with a Different Running Instance 1. Open the Amazon EC2 console at https://console.aws.amazon.com/ec2/. 2. Click Elastic IPs in the navigation pane. 3. Select the EIP, and then click the Disassociate button. 4. Click Yes, Disassociate when prompted. 5. Select the EIP, and then click Associate. 6. In the Associate Address dialog box, select the new instance from the Instance ID list, and then click Yes, Associate.
  • 34. Releasing an Elastic IPAddress If an EIP is no longer in use then it should be released. To release an Elastic IP address 1. Open the Amazon EC2 console at https://console.aws.amazon.com/ec2/. 2. Click Elastic IPs in the navigation pane. 3. Select the Elastic IP address, and then click the Release Address button.
  • 35. Connect to an Instance (Part-1) To connect to your instance through a web browser • You must have Java installed and enabled in the browser. If you don't have Java already, you can contact your system administrator to get it installed, or follow the steps outlined in these pages: o Install Java o Enable Java in your web browser • Sign in to the AWS Management Console and open the Amazon EC2 console at https://console.aws.amazon.com/ec2/. • Click Instances in the navigation pane. • Right-click your instance, and then click Connect. • Click Connect from your browser using the Java SSH client (Java Required). AWS automatically detects the public DNS address of your instance and the key pair name you launched the instance with.
  • 36. Connect to an Instance (Part-2) • In User name, enter the user name to log in to your instance. • Note: For an Amazon Linux instance, the default user name is ec2-user. for Ubuntu, the default user name is ubuntu. Some AMIs allow you to log in as root. So in this example, you may need to change the user name from ec2- user to the appropriate user name. • The Key name field is automatically populated for you. • In Private key path, enter the fully qualified path to your .pem private key file. • Click Save key location, and then click Stored in browser cache to store the key location in your browser cache. This ensures that the key location will be detected in subsequent browser sessions, until your clear your browser’s cache.
  • 37. Connect to an Instance (Part-3) To connect an Instance using Linux Terminal • Keep the server key (.pem) file at a secure location of the machine • Make it inaccessible to public • # chmod 400 serverkey.pem • Connect it through # ssh -i /path/serverkey.pem ubuntu@public-IP
  • 38. To Create an EBS Volume (Part-1) To create and attach an Amazon EBS volume • Open the Amazon EC2 console at https://console.aws.amazon.com/ec2/. • Select the region in which you created your instance in the navigation bar, and then click Instances in the navigation pane. • The console displays the list of current instances in that region. Select your Linux instance. In the Description tab in the bottom pane note the Zone for the instance. • In the navigation pane, in Elastic Block Store, click Volumes. • The console displays a list of current EBS volumes in that region. (You should see the EBS volume that serves as the root device volume for your instance.) • Click Create Volume.
  • 39. To Create an EBS Volume (Part-2) • In the Create Volume dialog box, configure the following settings: o Leave the volume size blank. (We'll let the snapshot we select determine the size of the volume.) o Select the same Availability Zone that you used when you created your instance. Otherwise, you can't attach the volume to your instance. o Select a snapshot that contains a public data set hosted by AWS. This enables us to quickly and easily create a volume that is formatted and contains data. o Select the Standard volume type. This creates a standard EBS volume. • Now click Yes, Create. This creates a new volume • Right-click the newly created volume and select Attach Volume. • In the Attach Volume dialog box, click the following settings: o Select your Linux instance from the list. o Specify the device name /dev/sdf. (It is the device name where you want to attach it)
  • 40. Storage (Part-1) Storage options include the following: o Amazon Elastic Block Store (Amazon EBS) o Amazon EC2 instance store o Amazon Simple Storage Service (Amazon S3) The following figure shows the relationship between these types of storage.
  • 41. Storage (Part-2) Amazon EBS • All Amazon EBS volumes offer the following features: • Data availability from replication across an Availability Zone • Data persistence independent of the life of the instance • The ability to create snapshots and incremental backups Amazon EC2 Instance Store • Instance store provides temporary block-level storage for Amazon EC2 instances. The data on an instance store volume persists only during the life of the associated Amazon EC2 instance.
  • 42. Storage (Part-3) Amazon Simple Storage Service (Amazon S3) • Amazon S3 is a repository for Internet data. • Amazon S3 provides access to reliable, fast, and inexpensive data storage infrastructure. • Objects are the fundamental entities stored in Amazon S3. Objects consist of object data and metadata. • Every object stored in Amazon S3 is contained in a bucket. Buckets organize the Amazon S3 namespace at the highest level and identify the account responsible for that storage.
  • 43. Creating Snapshots • Amazon provides a facility to create Snapshots of running volume, it can be stored as a backup of that volume for further use. • These snapshots are kind of restore point which can be used for data recovery. • Amazon EBS Snapshots are incremental backups To create a snapshot 1. Open the Amazon EC2 console at https://console.aws.amazon.com/ec2/. 2. Click Snapshots in the navigation pane.The console displays a list of current snapshots. 3. Click Create Snapshot. The Create Snapshot dialog box appears. 4. Select the volume to create a snapshot for and click Create. Amazon EC2 begins creating the snapshot.
  • 44. Create an AMI (Part-1) To create an AMI from a running Amazon EBS-backed instance • Open the Amazon EC2 console at https://console.aws.amazon.com/ec2/. • In the navigation pane, click Instances to view a list of your instances. Right-click your running instance and select Create Image (EBS AMI). • The Create Image dialog box appears.
  • 45. Create an AMI (Part-2) Fill in the requested information as follows, and click Yes, Create. • A unique name for the image. • [Optional] A description of the image (up to 255 characters). • By default, Amazon EC2 shuts down the instance, takes snapshots of any attached volumes, creates and registers the AMI, and then reboots the instance. Select No Reboot if you don't want your instance to be shut down. Warning • If you select the No Reboot option, the file system integrity of the created image can't be guaranteed.
  • 46. Create an AMI (Part-3) • Click AMIs in the navigation pane to view the AMI's status. While the new AMI is being created, its status is pending. It takes a few minutes for the whole process to finish. • After your new AMI's status is available, go to the Snapshots page and view the new snapshot that was created for the new AMI. Any instance you launch from the new AMI uses this snapshot for its root device volume. • Go back to the AMIs page, select the image, and click Launch. • The launch wizard opens. • Walk through the wizard to launch an instance of your new AMI. • You now have a new AMI and snapshot that you just created.
  • 47. Delete an AMI and Snapshot To delete an AMI and a snapshot 1. Go to the AMIs page. Select the AMI, click Actions, then select Deregister. When asked for confirmation, click Continue. 2. The image is deregistered, which means it is deleted and can no longer be launched. 3. Go to the Snapshots page. Right-click the snapshot and select Delete Snapshot. When asked for confirmation, click Yes, Delete. 4. The snapshot is deleted.
  • 48. Clean UP To terminate an instance • Sign in to the AWS Management Console and open the Amazon EC2 console at https://console.aws.amazon.com/ec2/. • Locate your instance in the list of instances on the Instances page. • Right-click the instance, and then click Terminate. • Click Yes, Terminate when prompted for confirmation. • Amazon EC2 begins terminating the instance. • Amazon EBS volumes can persist even after your instance goes away. you must delete the volume.
  • 49. Types of Instances Amazon EC2 Instances has been categorized into three types: On-Demand Instances – Pay for compute capacity by the hour with no long-term commitments. Reserved Instances – One-time payment for each instance you want to reserve and in turn receive a significant discount on the hourly charge for that instance. Spot Instances – Allow customers to bid on unused Amazon EC2 capacity and run those instances for as long as their bid exceeds the current Spot Price.
  • 50. IAM enables you to securely control access to AWS services and resources, using IAM you can create and manage AWS users and groups. IAM Allows you to: • Manage IAM users and their access • Manage IAM roles and their permissions • Manage federated users and their permissions Identity Access Management (IAM)
  • 51. Instance Monitoring (Part-1) • Amazon EC2 performs automated checks on every running Amazon EC2 instance to identify hardware and software issues. • Status checks are performed every five minutes and each returns a pass or a fail status • If all checks pass, the overall status of the instance is OK. If one or more checks fail, the overall status is impaired. • Status checks are built into Amazon EC2, so they cannot be disabled or deleted • There are two types of status checks: system status checks and instance status checks.
  • 52. Instance Monitoring (Part-2) System status checks These checks detect problems with your instance that require AWS involvement to repair. When a system status check fails, you can choose to wait for AWS to fix the issue or you can resolve it yourself (for example, by stopping and restarting or terminating and replacing an instance). Examples of problems that cause system status checks to fail include: • Loss of network connectivity • Loss of system power • Software issues on the physical host • Hardware issues on the physical host
  • 53. Instance Monitoring (Part-3) Instance status checks Monitor the software and network configuration of your individual instance. When an instance status check fails, typically you will need to address the problem yourself (for example by rebooting the instance or by making modifications in your operating system). Examples of problems that may cause instance status checks to fail include: • Failed system status checks • Misconfigured networking or startup configuration • Exhausted memory • Corrupted file system • Incompatible kernel
  • 54. Instance Monitoring (Part-4) To view status checks • Open the Amazon EC2 console at https://console.aws.amazon.com/ec2/. • In the Navigation pane, click Instances. • On the Instances page, the Status Checks column lists the operational status of each instance. • To view an individual instance’s status, select the instance, and then click the Status Checks tab.
  • 55. Instance Monitoring (Part-5) page, click on the instance on which you want to report status. Click the Status Checks tab and then click the Submit Feedback buttTo report status feedback using the management console 1. Open the Amazon EC2 console at https://console.aws.amazon.com/ec2/. 2. In the Navigation pane, click Instances. 3. On the Instances on. 1. Complete the information on the Report Instance Status page.
  • 56. • Enables real-time monitoring of AWS resources • Few free metrics are auto enabled, custom metrics can be added • Basic Monitoring is already enabled automatically for all Amazon EC2 instances To enable detailed monitoring of an existing EC2 instance Provides data about your instance in 1-minute periods.. 1. Open the Amazon EC2 console at https://console.aws.amazon.com/ec2/. 2. In the Navigation pane, click Instances. 3. In My Instances, select a running or stopped instance, click Instance Actions, and then click Enable Detailed Monitoring. 4. In the Enable Detailed Monitoring dialog box, click Yes, Enable. 5. In the Enable Detailed Monitoring confirmation dialog box, click Close. Amazon CloudWatch
  • 57. Create Status Check Alarm To create a status check alarm • Open the Amazon EC2 console at https://console.aws.amazon.com/ec2/. • In the Navigation pane, click Instances. • In My Instances, select an instance, and then on the Status Checks tab, click Create Status Check Alarm. • In the Create Alarm for dialog box, select the Send a notification to check box, and then choose an existing Amazon Simple Notification Service (SNS) topic or create a new SNS topic to use for this alarm.