SlideShare a Scribd company logo
INTRODUCTION TO ANDROID AND JAVA
Prepared by: Dr. Gandhimathi
Android API
Introduction to Android and Java.pptx
Setting up Android Studio
Step 1: Head over to https://developer.android.com/studio/#downloads to get the Android Studio
executable or zip file.
Step 2: Click on the Download Android Studio Button.
Step 3: After the downloading has finished, open the file from downloads and run it. It will prompt the
dialog box. Click on next. In the next prompt, it’ll ask for a path for installation. Choose a path and hit next.
Step 4: It will start the installation, and once it is completed, Click on next.
Step 5: Once “Finish” is clicked, it will ask whether the previous settings need to be imported [if the android
studio had been installed earlier], or not. It is better to choose the ‘Don’t import Settings option’. Click
the OK button.
Step 6: This will start the Android Studio. Meanwhile, it will be finding the available SDK components.
Step 7: After it has found the SDK components, it will redirect to the Welcome dialog box. Click on next
Choose Standard and click on Next. Now choose the theme, whether the Light theme or the Dark one. The
light one is called the IntelliJ theme whereas the dark theme is called Dracula. Choose as required. Click on
the Next button.
Step 8: Now it is time to download the SDK components. Click on Finish. Components begin to download let
it complete. The Android Studio has been successfully configured. Now it’s time to launch and build
apps. Click on the Finish button to launch it.
Step 9: Click on Start a new Android Studio project to build a new app.
Structure of Android Java Code
Basic Android project structure
Every Android project contains several folders:
•src: This folder contains the Java source files.
•gen: Generated Java library, this library is for Android internal use only.
•Res: Here we can store resource files such as pictures, XML files for defining layouts, and so forth. Within this
folder there are additional folders such as Drawable, Layout, and Values.
•Drawable: Here we store the various graphic files. We can see three types of drawable folders. This is because
there are many Android devices with different screen resolutions. By default, there are several versions of this
folder such as: Drawable-mdpi, drawable-hdpi, and so forth. This is required in order to adapt to different screen
resolutions.
•Layout: This is the place for XML layout files. Layout files are XML files which define how various Android
objects (such as textboxes, buttons, etc.) are organized on the screen.
•Values: XML files which store various string values (titles, labels, etc.).
Major files in the Android project:
AndroidManifest.xml: This is the Android definition file. It contains information about the
Android application such as minimum Android version, permission to access Android device
capabilities such as internet access permission, ability to use phone permission, etc.
MainLayout.xml: This file describes the layout of the page. This means the placement of
every component (such as textboxes, labels, radio buttons, user defined components, etc.) on
the app screen.
Activity class: Every application that occupies the entire device screen needs at least one
class which inherits from the Activity class. One major method is called OnCreate. This
method initiates the app and loads the layout page.
Some important definitions in this file:
• Android:versionCode: This is a numerical value. This is an important attribute because that is
how the Android device knows when to alert the user to upgrade the application to a newer
version.
• Android:sdkMinVersion: Defines what is the earliest version of the Android operating system
available to this application.
• Activity element: Defines what the activities available in this application are and which activity
has to be loaded at startup.
The Android manifest file: A typical Android.Manifest file looks like this:
Layout file
A typical layout file looks like this:
This layout defines one object, a TextView. This is a text label and it is used when a programmer wants to
place a text title in your application.
• One major class is the Activity class. We already defined this class in the android.manifest file as the main
activity class. Which is the first class to be loaded and executed right after the Android application will be
launched:
Activity class
We can see here one major method called "onCreate" which is called when the Activity class is activated.
In our specific example, we define a layout file by the line setContentView(R.layout.main).
• You can create an Android app with the Empty Activity project template provided by
Android Studio.
• To create a project in Android Studio:
1. Double click the Android Studio icon to launch Android Studio.
2. In the Welcome to Android Studio dialog, click New Project. The New Project window
opens with a list of templates provided by Android Studio.
In Android Studio, a project template is an Android project that provides the blueprint for a
certain type of app. Templates create the structure of the project and the files needed for
Android Studio to build your project. The template that you choose provides starter code to
get you going faster.
3. Make sure the Phone and Tablet tab is selected.
4. Click the Empty Activity template to select it as the template for your project. The Empty
Activity template is the template to create a simple project that you can use to build a
Compose app. It has a single screen and displays the text "Hello Android!".
5. Click Next. The New Project dialog opens. This has some fields to configure your project.
Building and Developing the Android Application
6. Configure your project as follows:
• The Name field is used to enter the name of your project, for this codelab type
"Greeting Card".
• Leave the Package name field as is. This is how your files will be organized in the file
structure. In this case, the package name will be com.example.greetingcard.
• Leave the Save location field as is. It contains the location where all the files related to
your project are saved. Take a note of where that is on your computer so that you can
find your files.
• Select API 24: Android 7.0 (Nougat) from the menu in the Minimum SDK field.
Minimum SDK indicates the minimum version of Android that your app can run on.
7. Click Finish. This may take a while.
8. You may see a What's New pane which contains updates on new features in Android
Studio. Close it for now.
9. Click Split on the top right of Android Studio, this allows you to view both code and
design. You can also click Code to view code only or click Design to view design only.
10. Click Build & Refresh. It may take a while to build but when it is done the preview
shows a text box that says "Hello Android!". Empty Compose activity contains all the
code necessary to create this app.
Introduction to Android and Java.pptx
THANK YOU

More Related Content

PPTX
Creating the first app with android studio
PDF
Homework seriesandroidworkshop JUly 12th
PPT
Getting started with android studio
PPTX
Introduction & App Structure
PPTX
Android Studio development model and.pptx
PPTX
Mobile Application Slide Chapter 2 - Make First App
PDF
Android application development
PPTX
Android app development lesson 1
Creating the first app with android studio
Homework seriesandroidworkshop JUly 12th
Getting started with android studio
Introduction & App Structure
Android Studio development model and.pptx
Mobile Application Slide Chapter 2 - Make First App
Android application development
Android app development lesson 1

Similar to Introduction to Android and Java.pptx (20)

PDF
Android Application Development - Level 1
PPTX
Android
PPTX
Android Basic
PPTX
this is PPT for mobail application development
PPTX
Android app development ppt
PDF
How to Create Your First Android App Step by Step.pdf
PDF
Android session 1
PPT
Android project architecture
PPTX
Android
PPT
Android activity, service, and broadcast recievers
PPT
Synapseindia android apps application
PDF
Android Development Primer - GDG Los Angeles
PDF
Android studio
PPTX
androidstudio.pptx
KEY
Android momobxl
PPT
Part 2 android application development 101
PPT
Day: 2 Environment Setup for Android Application Development
PPTX
Module-I_Introduction-to-Android.pptx
PPTX
this is PPT for mobail application development
PPTX
Android Workshop: Day 1 Part 3
Android Application Development - Level 1
Android
Android Basic
this is PPT for mobail application development
Android app development ppt
How to Create Your First Android App Step by Step.pdf
Android session 1
Android project architecture
Android
Android activity, service, and broadcast recievers
Synapseindia android apps application
Android Development Primer - GDG Los Angeles
Android studio
androidstudio.pptx
Android momobxl
Part 2 android application development 101
Day: 2 Environment Setup for Android Application Development
Module-I_Introduction-to-Android.pptx
this is PPT for mobail application development
Android Workshop: Day 1 Part 3
Ad

Recently uploaded (20)

PDF
BÀI TẬP BỔ TRỢ 4 KỸ NĂNG TIẾNG ANH 9 GLOBAL SUCCESS - CẢ NĂM - BÁM SÁT FORM Đ...
PDF
Physiotherapy_for_Respiratory_and_Cardiac_Problems WEBBER.pdf
PDF
Insiders guide to clinical Medicine.pdf
PPTX
Pharmacology of Heart Failure /Pharmacotherapy of CHF
PDF
Supply Chain Operations Speaking Notes -ICLT Program
PDF
Module 4: Burden of Disease Tutorial Slides S2 2025
PDF
2.FourierTransform-ShortQuestionswithAnswers.pdf
PDF
01-Introduction-to-Information-Management.pdf
PPTX
Cell Types and Its function , kingdom of life
PPTX
The Healthy Child – Unit II | Child Health Nursing I | B.Sc Nursing 5th Semester
PDF
Origin of periodic table-Mendeleev’s Periodic-Modern Periodic table
PPTX
Institutional Correction lecture only . . .
PDF
Chapter 2 Heredity, Prenatal Development, and Birth.pdf
PDF
FourierSeries-QuestionsWithAnswers(Part-A).pdf
PPTX
Cell Structure & Organelles in detailed.
PDF
Saundersa Comprehensive Review for the NCLEX-RN Examination.pdf
PPTX
Introduction_to_Human_Anatomy_and_Physiology_for_B.Pharm.pptx
PPTX
Renaissance Architecture: A Journey from Faith to Humanism
PPTX
IMMUNITY IMMUNITY refers to protection against infection, and the immune syst...
PDF
Classroom Observation Tools for Teachers
BÀI TẬP BỔ TRỢ 4 KỸ NĂNG TIẾNG ANH 9 GLOBAL SUCCESS - CẢ NĂM - BÁM SÁT FORM Đ...
Physiotherapy_for_Respiratory_and_Cardiac_Problems WEBBER.pdf
Insiders guide to clinical Medicine.pdf
Pharmacology of Heart Failure /Pharmacotherapy of CHF
Supply Chain Operations Speaking Notes -ICLT Program
Module 4: Burden of Disease Tutorial Slides S2 2025
2.FourierTransform-ShortQuestionswithAnswers.pdf
01-Introduction-to-Information-Management.pdf
Cell Types and Its function , kingdom of life
The Healthy Child – Unit II | Child Health Nursing I | B.Sc Nursing 5th Semester
Origin of periodic table-Mendeleev’s Periodic-Modern Periodic table
Institutional Correction lecture only . . .
Chapter 2 Heredity, Prenatal Development, and Birth.pdf
FourierSeries-QuestionsWithAnswers(Part-A).pdf
Cell Structure & Organelles in detailed.
Saundersa Comprehensive Review for the NCLEX-RN Examination.pdf
Introduction_to_Human_Anatomy_and_Physiology_for_B.Pharm.pptx
Renaissance Architecture: A Journey from Faith to Humanism
IMMUNITY IMMUNITY refers to protection against infection, and the immune syst...
Classroom Observation Tools for Teachers
Ad

Introduction to Android and Java.pptx

  • 1. INTRODUCTION TO ANDROID AND JAVA Prepared by: Dr. Gandhimathi
  • 14. Setting up Android Studio Step 1: Head over to https://developer.android.com/studio/#downloads to get the Android Studio executable or zip file. Step 2: Click on the Download Android Studio Button. Step 3: After the downloading has finished, open the file from downloads and run it. It will prompt the dialog box. Click on next. In the next prompt, it’ll ask for a path for installation. Choose a path and hit next. Step 4: It will start the installation, and once it is completed, Click on next. Step 5: Once “Finish” is clicked, it will ask whether the previous settings need to be imported [if the android studio had been installed earlier], or not. It is better to choose the ‘Don’t import Settings option’. Click the OK button. Step 6: This will start the Android Studio. Meanwhile, it will be finding the available SDK components. Step 7: After it has found the SDK components, it will redirect to the Welcome dialog box. Click on next Choose Standard and click on Next. Now choose the theme, whether the Light theme or the Dark one. The light one is called the IntelliJ theme whereas the dark theme is called Dracula. Choose as required. Click on the Next button. Step 8: Now it is time to download the SDK components. Click on Finish. Components begin to download let it complete. The Android Studio has been successfully configured. Now it’s time to launch and build apps. Click on the Finish button to launch it. Step 9: Click on Start a new Android Studio project to build a new app.
  • 15. Structure of Android Java Code Basic Android project structure Every Android project contains several folders: •src: This folder contains the Java source files. •gen: Generated Java library, this library is for Android internal use only. •Res: Here we can store resource files such as pictures, XML files for defining layouts, and so forth. Within this folder there are additional folders such as Drawable, Layout, and Values. •Drawable: Here we store the various graphic files. We can see three types of drawable folders. This is because there are many Android devices with different screen resolutions. By default, there are several versions of this folder such as: Drawable-mdpi, drawable-hdpi, and so forth. This is required in order to adapt to different screen resolutions. •Layout: This is the place for XML layout files. Layout files are XML files which define how various Android objects (such as textboxes, buttons, etc.) are organized on the screen. •Values: XML files which store various string values (titles, labels, etc.).
  • 16. Major files in the Android project: AndroidManifest.xml: This is the Android definition file. It contains information about the Android application such as minimum Android version, permission to access Android device capabilities such as internet access permission, ability to use phone permission, etc. MainLayout.xml: This file describes the layout of the page. This means the placement of every component (such as textboxes, labels, radio buttons, user defined components, etc.) on the app screen. Activity class: Every application that occupies the entire device screen needs at least one class which inherits from the Activity class. One major method is called OnCreate. This method initiates the app and loads the layout page.
  • 17. Some important definitions in this file: • Android:versionCode: This is a numerical value. This is an important attribute because that is how the Android device knows when to alert the user to upgrade the application to a newer version. • Android:sdkMinVersion: Defines what is the earliest version of the Android operating system available to this application. • Activity element: Defines what the activities available in this application are and which activity has to be loaded at startup. The Android manifest file: A typical Android.Manifest file looks like this:
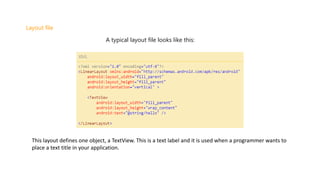
  • 18. Layout file A typical layout file looks like this: This layout defines one object, a TextView. This is a text label and it is used when a programmer wants to place a text title in your application.
  • 19. • One major class is the Activity class. We already defined this class in the android.manifest file as the main activity class. Which is the first class to be loaded and executed right after the Android application will be launched: Activity class We can see here one major method called "onCreate" which is called when the Activity class is activated. In our specific example, we define a layout file by the line setContentView(R.layout.main).
  • 20. • You can create an Android app with the Empty Activity project template provided by Android Studio. • To create a project in Android Studio: 1. Double click the Android Studio icon to launch Android Studio. 2. In the Welcome to Android Studio dialog, click New Project. The New Project window opens with a list of templates provided by Android Studio. In Android Studio, a project template is an Android project that provides the blueprint for a certain type of app. Templates create the structure of the project and the files needed for Android Studio to build your project. The template that you choose provides starter code to get you going faster. 3. Make sure the Phone and Tablet tab is selected. 4. Click the Empty Activity template to select it as the template for your project. The Empty Activity template is the template to create a simple project that you can use to build a Compose app. It has a single screen and displays the text "Hello Android!". 5. Click Next. The New Project dialog opens. This has some fields to configure your project. Building and Developing the Android Application
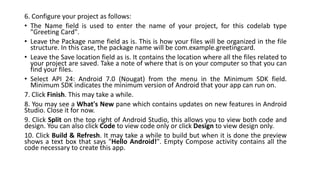
  • 21. 6. Configure your project as follows: • The Name field is used to enter the name of your project, for this codelab type "Greeting Card". • Leave the Package name field as is. This is how your files will be organized in the file structure. In this case, the package name will be com.example.greetingcard. • Leave the Save location field as is. It contains the location where all the files related to your project are saved. Take a note of where that is on your computer so that you can find your files. • Select API 24: Android 7.0 (Nougat) from the menu in the Minimum SDK field. Minimum SDK indicates the minimum version of Android that your app can run on. 7. Click Finish. This may take a while. 8. You may see a What's New pane which contains updates on new features in Android Studio. Close it for now. 9. Click Split on the top right of Android Studio, this allows you to view both code and design. You can also click Code to view code only or click Design to view design only. 10. Click Build & Refresh. It may take a while to build but when it is done the preview shows a text box that says "Hello Android!". Empty Compose activity contains all the code necessary to create this app.