


![2. Download the corresponding ChromeDriver:
https://sites.google.com/chromium.org/driver/
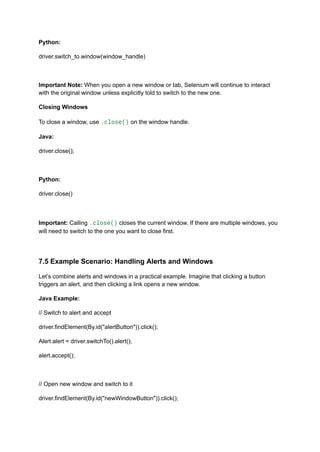
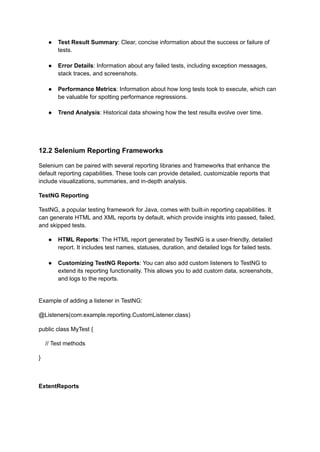
3. Extract and place the executable in a known directory.
4. Add it to your system’s PATH or specify its location in your script.
GeckoDriver (Firefox)
1. Download from: https://github.com/mozilla/geckodriver/releases
2. Unzip and add to system PATH.
EdgeDriver
1. Check your Edge version.
2. Download from:
https://developer.microsoft.com/en-us/microsoft-edge/tools/webdriver/
2.5 Setting Up a Java Project with Selenium
Here’s how to create a basic Selenium project in Java using Eclipse:
1. Open Eclipse and create a new Java Project.
2. Add Selenium libraries:
○ Download the Selenium Java client from:
https://www.selenium.dev/downloads/
○ Include the .jar files in your project’s Build Path.
3. Write a simple script:
import org.openqa.selenium.WebDriver;
import org.openqa.selenium.chrome.ChromeDriver;
public class FirstTest {
public static void main(String[] args) {
System.setProperty("webdriver.chrome.driver", "path/to/chromedriver");
WebDriver driver = new ChromeDriver();](https://image.slidesharecdn.com/seleniumwebdrivertutorialpdf-250509153300-5b72bcc6/85/Mastering-Selenium-WebDriver-A-Comprehensive-Tutorial-with-Real-World-Examples-11-320.jpg)


![Chapter 3: First Selenium Script
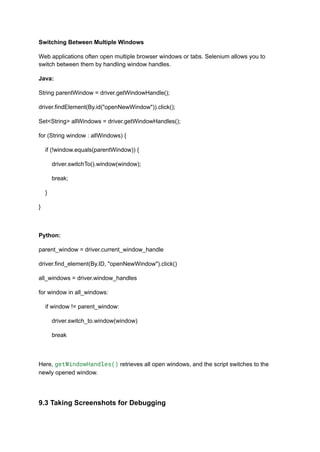
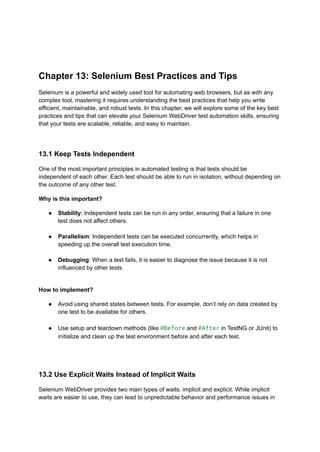
With your environment set up, it’s time to write your first Selenium test. This chapter walks
you through writing and executing a simple script in both Java and Python, explaining each
line along the way.
3.1 What This Script Will Do
We’ll create a simple script that:
1. Opens a browser
2. Navigates to https://example.com
3. Fetches the page title
4. Prints the title in the console
5. Closes the browser
3.2 Writing the First Script in Java
Let’s start with Java, using ChromeDriver.
Prerequisites:
● Java installed
● Chrome browser installed
● Selenium .jar files added to the project
● ChromeDriver in your system PATH or specified in your script
Java Code:
import org.openqa.selenium.WebDriver;
import org.openqa.selenium.chrome.ChromeDriver;
public class FirstTest {
public static void main(String[] args) {
// Set path to chromedriver if not added to PATH](https://image.slidesharecdn.com/seleniumwebdrivertutorialpdf-250509153300-5b72bcc6/85/Mastering-Selenium-WebDriver-A-Comprehensive-Tutorial-with-Real-World-Examples-14-320.jpg)


![driver.findElement(By.tagName("input"));
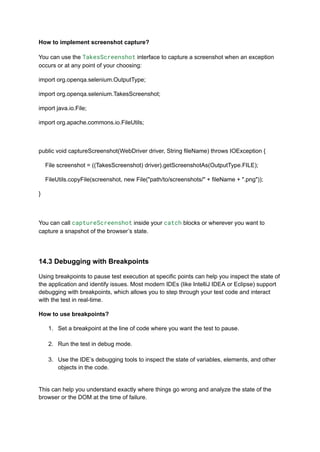
driver.find_element(By.TAG_NAME, "input")
When to use:
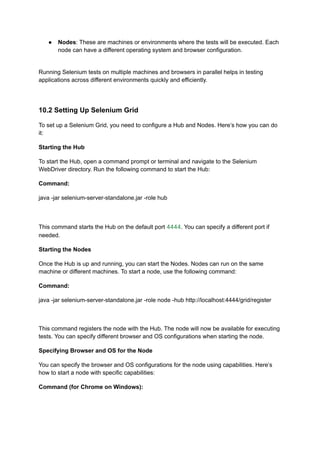
Use sparingly; mostly helpful when you're looking for all inputs, images, or links.
Pros: Good for finding groups of similar elements.
Cons: Usually not specific enough alone.
5. Link Text and Partial Link Text
driver.findElement(By.linkText("Login"));
driver.find_element(By.LINK_TEXT, "Login")
When to use:
When you're interacting with hyperlinks and the text is visible and unique.
Partial Link Text allows matching just a part of the visible link:
driver.find_element(By.PARTIAL_LINK_TEXT, "Log")
Pros: Good for navigation.
Cons: Breaks if link text changes or is localized.
6. CSS Selector
driver.findElement(By.cssSelector("input[type='text']"));
driver.find_element(By.CSS_SELECTOR, "input[type='text']")
When to use:
CSS Selectors are highly flexible and powerful for complex DOM structures.
Pros: Precise and concise.
Cons: Slightly harder to read and learn for beginners.
7. XPath
driver.findElement(By.xpath("//input[@id='username']"));
driver.find_element(By.XPATH, "//input[@id='username']")](https://image.slidesharecdn.com/seleniumwebdrivertutorialpdf-250509153300-5b72bcc6/85/Mastering-Selenium-WebDriver-A-Comprehensive-Tutorial-with-Real-World-Examples-20-320.jpg)
![When to use:
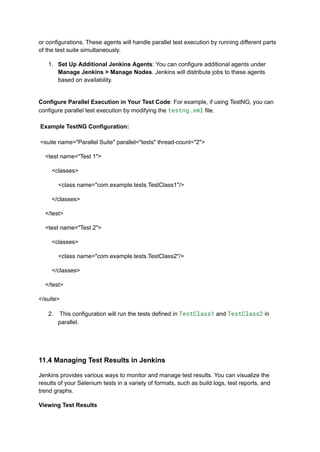
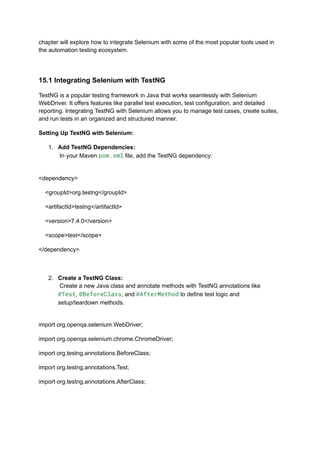
XPath is the most powerful locator strategy and can traverse the entire DOM.
Pros: Can find deeply nested elements, supports complex queries.
Cons: Can become long and brittle if not used wisely.
4.4 Understanding XPath in Detail
XPath is like a map through the HTML structure of a page. It supports two styles:
● Absolute XPath (not recommended):
/html/body/div[2]/form/input[1]
● Relative XPath (preferred):
//input[@id='email']
Common XPath patterns:
Pattern Meaning
//tagname Selects all elements with the given
tag
//div[@class='login-box'] Selects div with a specific class
//input[@type='text'] Input elements of type text
//a[contains(text(),
'Register')]
Links containing "Register"
//button[@disabled] Buttons with disabled attribute
//div[@class='menu']//a Nested anchors inside menu div
4.5 Which Locator Should You Use?
Recommended Priority:
1. id
2. name](https://image.slidesharecdn.com/seleniumwebdrivertutorialpdf-250509153300-5b72bcc6/85/Mastering-Selenium-WebDriver-A-Comprehensive-Tutorial-with-Real-World-Examples-21-320.jpg)
![3. cssSelector
4. xpath
5. className
6. linkText
Use XPath or CSS Selectors only when simpler locators like ID and Name are not
available or reliable.
4.6 Practical Examples
Let’s use a sample login form:
<form id="loginForm">
<input type="text" id="username" name="user">
<input type="password" name="pass">
<button class="btn login">Login</button>
</form>
Example locators:
● By ID: By.id("username")
● By Name: By.name("pass")
● By Class: By.className("login")
● By XPath: //button[@class='btn login']
● By CSS: form#loginForm input[name='user']
4.7 Locating Multiple Elements
Sometimes you need to capture all matching elements:
links = driver.find_elements(By.TAG_NAME, "a")
for link in links:
print(link.text)](https://image.slidesharecdn.com/seleniumwebdrivertutorialpdf-250509153300-5b72bcc6/85/Mastering-Selenium-WebDriver-A-Comprehensive-Tutorial-with-Real-World-Examples-22-320.jpg)


![country.selectByIndex(2);
Python also provides a Select class:
from selenium.webdriver.support.ui import Select
select = Select(driver.find_element(By.ID, "country"))
select.select_by_visible_text("Canada")
select.select_by_value("CA")
select.select_by_index(2)
Methods:
● .selectByVisibleText(String) — matches what the user sees.
● .selectByValue(String) — matches the value attribute.
● .selectByIndex(int) — selects by order (starts at 0).
Custom Dropdowns
Custom dropdowns (often using <div> or <li>) require you to click to open the menu and
click again to select the item.
driver.find_element(By.ID, "dropdownMenu").click()
driver.find_element(By.XPATH, "//li[text()='Canada']").click()
Use developer tools to inspect such elements and write a reliable locator strategy.
5.6 Handling Text, Attributes, and State
Getting Text:
String message = driver.findElement(By.id("msg")).getText();](https://image.slidesharecdn.com/seleniumwebdrivertutorialpdf-250509153300-5b72bcc6/85/Mastering-Selenium-WebDriver-A-Comprehensive-Tutorial-with-Real-World-Examples-27-320.jpg)


![from selenium.webdriver.common.desired_capabilities import DesiredCapabilities
capabilities = DesiredCapabilities.CHROME
capabilities['goog:loggingPrefs'] = {'browser': 'ALL'}
driver = webdriver.Chrome(desired_capabilities=capabilities)
Once logging is enabled, you can retrieve logs from the browser:
Java:
LogEntries logs = driver.manage().logs().get(LogEntries.Type.BROWSER);
for (LogEntry entry : logs) {
System.out.println(entry.getMessage());
}
Python:
logs = driver.get_log("browser")
for log in logs:
print(log)
Logs will include various browser events, such as JavaScript errors, which can help pinpoint
issues during test execution.
9.5 Debugging Failed Tests
When your tests fail, it's important to have a strategy for identifying the cause. Here are
some useful techniques:
1. Reviewing Logs
Check the browser logs for any JavaScript errors or network issues that might have caused
the failure.
2. Screenshot on Failure](https://image.slidesharecdn.com/seleniumwebdrivertutorialpdf-250509153300-5b72bcc6/85/Mastering-Selenium-WebDriver-A-Comprehensive-Tutorial-with-Real-World-Examples-57-320.jpg)


![],
"configuration": {
"hubHost": "localhost",
"hubPort": 4444
}
}
Command:
java -jar selenium-server-standalone.jar -role node -hub http://localhost:4444/grid/register
-nodeConfig node-config.json
Now, the node can handle tests on both Chrome and Firefox.
10.4 Parallel Test Execution with Selenium Grid
Running tests in parallel using Selenium Grid can save a significant amount of time,
especially when testing against multiple browsers or operating systems. Selenium Grid
makes it easy to distribute tests across various nodes and execute them simultaneously.
Configuring Your Tests for Parallel Execution
In your test code, you need to configure Selenium to run tests in parallel. You can do this by
configuring the WebDriver to send requests to the Grid Hub instead of using a local
WebDriver.
Example (Java with TestNG):
TestNG XML Configuration (testng.xml):
<suite name="Parallel Tests" parallel="tests" thread-count="2">
<test name="Chrome Test">
<parameter name="browser" value="chrome"/>
<classes>
<class name="com.example.tests.TestClass"/>](https://image.slidesharecdn.com/seleniumwebdrivertutorialpdf-250509153300-5b72bcc6/85/Mastering-Selenium-WebDriver-A-Comprehensive-Tutorial-with-Real-World-Examples-62-320.jpg)


![By usernameField = By.id("username");
// Avoid using complex XPath expressions
By usernameField = By.xpath("//div[@class='form']/input[@name='username']");
13.5 Parameterize Tests to Increase Coverage
Parameterization allows you to run the same test with different sets of data. This increases
the coverage of your test suite, as you can verify that your application behaves correctly with
a variety of input values.
Why is this important?
● Coverage: Running the same test with different data ensures that you cover a wide
range of scenarios.
● Efficiency: Instead of writing multiple similar tests, parameterized tests allow you to
run a single test method with different input values.
How to implement?
In TestNG, you can use the @DataProvider annotation to pass data to your test methods.
Example of a parameterized test with TestNG:
@DataProvider(name = "loginData")
public Object[][] createLoginData() {
return new Object[][] {
{ "user1", "pass1" },
{ "user2", "pass2" },
{ "user3", "pass3" }
};
}](https://image.slidesharecdn.com/seleniumwebdrivertutorialpdf-250509153300-5b72bcc6/85/Mastering-Selenium-WebDriver-A-Comprehensive-Tutorial-with-Real-World-Examples-80-320.jpg)


![docker pull selenium/standalone-chrome
2. Start the Docker Container:
Run the Docker container to start a Selenium Grid with a standalone Chrome
instance:
docker run -d -p 4444:4444 selenium/standalone-chrome
3. Configure Selenium to Connect to Docker:
In your Selenium tests, configure the WebDriver to connect to the Docker container:
import org.openqa.selenium.remote.DesiredCapabilities;
import org.openqa.selenium.remote.RemoteWebDriver;
import java.net.URL;
public class SeleniumDockerExample {
public static void main(String[] args) throws Exception {
DesiredCapabilities capabilities = DesiredCapabilities.chrome();
WebDriver driver = new RemoteWebDriver(new URL("http://localhost:4444/wd/hub"),
capabilities);
driver.get("https://www.example.com");
// Interact with the page
driver.quit();
}
}
4. Run Tests in Docker:
You can now run your Selenium tests in the Docker container as if they were running
on a local machine.](https://image.slidesharecdn.com/seleniumwebdrivertutorialpdf-250509153300-5b72bcc6/85/Mastering-Selenium-WebDriver-A-Comprehensive-Tutorial-with-Real-World-Examples-93-320.jpg)


Mastering Selenium WebDriver: A Comprehensive Tutorial with Real-World Examples
- 2. Selenium WebDriver Tutorial - Outline 1. Introduction to Selenium ● What is Selenium? ● History and Evolution ● Components of Selenium Suite ● Advantages and Limitations 2. Setting Up the Environment ● Installing Java/Python ● Installing IDE (Eclipse, IntelliJ, VS Code) ● Downloading and Configuring WebDriver ● Setting Up Browsers (Chrome, Firefox, Edge) 3. First Selenium Script ● Writing Your First Test ● Explaining WebDriver Methods ● Running Tests on Different Browsers 4. Locating Web Elements ● By ID, Name, Class, Tag, Link Text ● XPath and CSS Selectors ● Dynamic Locators ● Best Practices 5. WebDriver Commands ● Browser Commands
- 3. ● Navigation Commands ● WebElement Commands (Click, SendKeys, etc.) ● Handling Waits (Implicit, Explicit, Fluent) 6. Advanced User Interactions ● Handling Alerts ● Working with Frames and Windows ● Drag & Drop, Mouse Hover, Keyboard Actions 7. Handling Web Forms and Tables ● Input Fields, Dropdowns, Checkboxes ● Reading Web Tables ● Form Submission Scenarios 8. Page Object Model (POM) ● What is POM? ● Benefits of POM ● Implementing POM in Framework 9. Data-Driven Testing ● Reading Data from Excel or CSV ● Using TestNG or PyTest Data Providers ● Parameterization 10. Framework Development ● TestNG/JUnit Integration ● Logging with Log4j
- 4. ● Reporting with Extent Reports/Allure 11. Parallel and Cross-Browser Testing ● Introduction to Grid ● Selenium Grid Setup ● Running Tests in Parallel 12. Continuous Integration with Selenium ● Integrating with Jenkins ● Triggering Tests from CI/CD Pipelines ● Reporting and Notifications 13. Troubleshooting and Best Practices ● Debugging Selenium Tests ● Common Errors and Fixes ● Optimizing Test Performance 14. Selenium with Other Languages (Optional) ● Selenium with Python/Ruby/C# ● Language-Specific Nuances 15. Real-Time Project ● End-to-End Test Case ● Folder Structure ● Code Walkthrough Appendices ● Selenium WebDriver API Reference
- 5. ● Useful Tools & Browser Add-ons ● Interview Questions & Answers Chapter 1: Introduction to Selenium
- 6. 1.1 What is Selenium? Selenium is a powerful, open-source framework for automating web browsers. Primarily used for testing web applications, Selenium lets testers simulate user interactions such as clicking buttons, entering text, and navigating between pages—just as a real user would do in a browser. Unlike many tools tied to a specific browser or operating system, Selenium supports multiple browsers (Chrome, Firefox, Safari, Edge) and cross-platform execution (Windows, macOS, Linux). This flexibility makes it a preferred choice for UI automation in web development and QA. 1.2 Evolution of Selenium Selenium has come a long way since its inception. Here's a brief timeline: ● Selenium Core (2004): The original JavaScript-based framework developed by Jason Huggins. Limited due to same-origin policy restrictions. ● Selenium RC (Remote Control): Introduced to bypass same-origin issues using a server as a proxy. ● Selenium WebDriver (2008): A complete rewrite, WebDriver directly controls the browser, providing more native support and better performance. ● Selenium Grid: Allows running tests in parallel across different browsers and systems. ● Selenium 4 (Latest major release): Includes W3C WebDriver standard support, better debugging tools, relative locators, and enhanced documentation. Today, Selenium WebDriver is the core component used for browser automation, and it integrates well with modern CI/CD tools and frameworks. 1.3 Components of the Selenium Suite Selenium is not a single tool but a suite of tools: Component Description Selenium IDE A record-and-playback tool; great for quick demos or prototypes. Not suited for complex testing. Selenium RC Now deprecated. Allowed writing test scripts in various languages but required a proxy server.
- 7. Selenium WebDriver Most widely used; allows test scripts in Java, Python, C#, Ruby, and more. Controls browsers natively. Selenium Grid Supports distributed test execution across multiple environments. Useful for large-scale testing. 1.4 Why Selenium? Open Source and Free There’s no licensing cost involved. Anyone can download, use, or even contribute to its source code. Language Flexibility You can write Selenium tests in Java, Python, C#, Ruby, JavaScript, and more—whichever language best suits your team or project. Cross-Browser and Cross-Platform Supports all major browsers and works on Windows, Linux, and macOS. This makes it a strong choice for testing web apps with broad user bases. Integration Friendly Easily integrates with tools like: ● TestNG / JUnit / PyTest for unit testing ● Maven / Gradle for build management ● Jenkins / GitHub Actions for CI/CD ● ExtentReports / Allure for test reporting Scalable Selenium Grid and third-party platforms like Testgrid, BrowserStack, or Sauce Labs allow scaling up test runs across multiple machines and browsers. 1.5 Limitations of Selenium Despite its strengths, Selenium has some limitations: ● Only for Web Applications: Cannot test desktop or mobile native apps directly.
- 8. ● No Built-in Reporting: Requires third-party libraries or frameworks for test result visualization. ● Steep Learning Curve: Beginners may need time to grasp concepts like locators, synchronization, and framework integration. ● Flaky Tests: Tests may occasionally fail due to timing issues, requiring robust wait strategies. These challenges can be mitigated with best practices, reusable frameworks, and reliable infrastructure. 1.6 Who Uses Selenium? Selenium is widely adopted by companies across industries for functional, regression, and smoke testing of web apps. Common user groups include: ● QA Engineers and Automation Testers ● Software Developers in Test (SDET) ● DevOps Engineers (in CI/CD workflows) ● Technical Leads for validation at scale Popular companies that rely on Selenium include Netflix, LinkedIn, Salesforce, and Amazon. 1.7 Real-World Example Imagine you’re testing an e-commerce website. You might want to verify: ● A user can search for a product ● The product details page loads correctly ● The user can add the product to cart ● Checkout functionality redirects to payment gateway Selenium allows you to write automated test scripts that simulate all of the above actions, speeding up testing and reducing manual effort. For a comprehensive guide on using Selenium WebDriver effectively, Testgrid offers valuable insights through its Selenium WebDriver tutorial on their blog. It’s a great resource to enhance your automation testing knowledge and improve your Selenium workflows.
- 9. Chapter 2: Setting Up the Environment Before writing Selenium tests, we need to prepare the development environment. This involves installing programming languages, selecting an IDE, and configuring browser drivers. The setup process may vary slightly based on whether you're using Java, Python, or another language, but the overall structure remains consistent. 2.1 Choosing the Programming Language Selenium supports multiple languages, including Java, Python, C#, Ruby, and JavaScript. The most commonly used languages for Selenium automation are Java and Python, due to their community support and extensive documentation. For this book, we'll demonstrate examples in both Java and Python, so you can follow along with the language of your choice. 2.2 Installing the Prerequisites Java Setup If you're using Java: 1. Install JDK (Java Development Kit): ○ Download from the Oracle or OpenJDK site. ○ Set the JAVA_HOME environment variable. ○ Add %JAVA_HOME%bin to the system PATH. Verify installation: java -version ○ 2. Install an IDE: ○ Recommended: Eclipse or IntelliJ IDEA ○ Download and install the IDE from the official site. Python Setup
- 10. If you're using Python: 1. Install Python: ○ Download the latest version from python.org. ○ During installation, check the option “Add Python to PATH”. Verify installation: python --version ○ 2. Install an IDE or Code Editor: ○ Recommended: PyCharm, VS Code, or Jupyter Notebook 3. Install Selenium Library: pip install selenium 2.3 Installing Web Browsers Selenium interacts directly with browsers. Install the latest stable versions of at least two major browsers (e.g., Google Chrome and Mozilla Firefox) for testing. ● Google Chrome: https://www.google.com/chrome/ ● Mozilla Firefox: https://www.mozilla.org/firefox/ ● Microsoft Edge: https://www.microsoft.com/edge 2.4 Downloading WebDriver Executables Each browser needs a WebDriver executable, which acts as a bridge between Selenium and the browser. Make sure to download a version that matches your browser version. ChromeDriver 1. Find your Chrome version: Go to chrome://settings/help
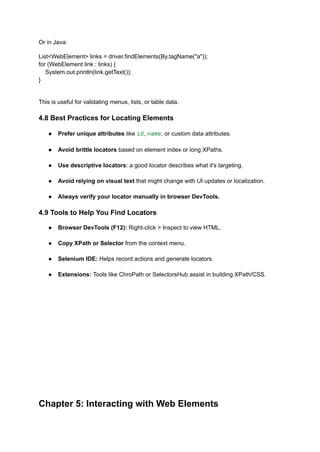
- 11. 2. Download the corresponding ChromeDriver: https://sites.google.com/chromium.org/driver/ 3. Extract and place the executable in a known directory. 4. Add it to your system’s PATH or specify its location in your script. GeckoDriver (Firefox) 1. Download from: https://github.com/mozilla/geckodriver/releases 2. Unzip and add to system PATH. EdgeDriver 1. Check your Edge version. 2. Download from: https://developer.microsoft.com/en-us/microsoft-edge/tools/webdriver/ 2.5 Setting Up a Java Project with Selenium Here’s how to create a basic Selenium project in Java using Eclipse: 1. Open Eclipse and create a new Java Project. 2. Add Selenium libraries: ○ Download the Selenium Java client from: https://www.selenium.dev/downloads/ ○ Include the .jar files in your project’s Build Path. 3. Write a simple script: import org.openqa.selenium.WebDriver; import org.openqa.selenium.chrome.ChromeDriver; public class FirstTest { public static void main(String[] args) { System.setProperty("webdriver.chrome.driver", "path/to/chromedriver"); WebDriver driver = new ChromeDriver();
- 12. driver.get("https://example.com"); System.out.println("Title: " + driver.getTitle()); driver.quit(); } } 4. Run the program. The browser should launch and load the URL. 2.6 Setting Up a Python Project with Selenium For Python, use VS Code or PyCharm: 1. Create a new Python file, e.g., test_example.py 2. Add the following code: from selenium import webdriver driver = webdriver.Chrome(executable_path="path/to/chromedriver") driver.get("https://example.com") print("Title:", driver.title) driver.quit() Run the script: python test_example.py 3. If your chromedriver is in the system PATH, you can omit executable_path. 2.7 Folder Structure (Best Practice) As your project grows, organize it well: selenium_project/ │ ├── drivers/ # WebDriver executables ├── tests/ # Test scripts ├── pages/ # Page Object classes
- 13. ├── data/ # Test data files (Excel, JSON, CSV) ├── reports/ # Test reports └── utils/ # Helper functions This structure is scalable and supports long-term maintenance. 2.8 Common Issues During Setup ● Driver Version Mismatch: Always match WebDriver with your browser version. ● PATH Errors: If you get “driver not found” errors, confirm that PATH is correctly set. ● Permissions: On Linux/macOS, give executable permission using chmod +x chromedriver.
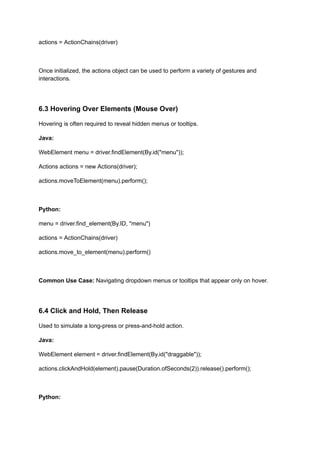
- 14. Chapter 3: First Selenium Script With your environment set up, it’s time to write your first Selenium test. This chapter walks you through writing and executing a simple script in both Java and Python, explaining each line along the way. 3.1 What This Script Will Do We’ll create a simple script that: 1. Opens a browser 2. Navigates to https://example.com 3. Fetches the page title 4. Prints the title in the console 5. Closes the browser 3.2 Writing the First Script in Java Let’s start with Java, using ChromeDriver. Prerequisites: ● Java installed ● Chrome browser installed ● Selenium .jar files added to the project ● ChromeDriver in your system PATH or specified in your script Java Code: import org.openqa.selenium.WebDriver; import org.openqa.selenium.chrome.ChromeDriver; public class FirstTest { public static void main(String[] args) { // Set path to chromedriver if not added to PATH
- 15. System.setProperty("webdriver.chrome.driver", "C:driverschromedriver.exe"); // Initialize WebDriver WebDriver driver = new ChromeDriver(); // Navigate to the website driver.get("https://example.com"); // Get and print the title String title = driver.getTitle(); System.out.println("Page Title: " + title); // Close the browser driver.quit(); } } Explanation: ● System.setProperty(...): Sets the path for the ChromeDriver executable. ● new ChromeDriver(): Launches a new Chrome browser window. ● get(): Navigates to the provided URL. ● getTitle(): Returns the page title. ● quit(): Closes all browser windows and ends the session. 3.3 Writing the First Script in Python If you’re using Python, the process is very similar.
- 16. Prerequisites: ● Python and pip installed ● Selenium installed via pip install selenium ● Chrome browser and ChromeDriver installed Python Code: from selenium import webdriver # Create a new Chrome browser instance driver = webdriver.Chrome(executable_path="C:/drivers/chromedriver.exe") # Open the target website driver.get("https://example.com") # Print the title print("Page Title:", driver.title) # Close the browser driver.quit() Note: If chromedriver is in your system PATH, you can simply use webdriver.Chrome() without the executable_path. 3.4 Running the Script In Java (Eclipse or IntelliJ): ● Right-click on the file and select Run As > Java Application.
- 17. ● You should see a browser window open, load the page, and then close after printing the title in the console. In Python (VS Code or terminal): Run the file in your terminal: python first_test.py ● The browser should launch, display the page, and then close. 3.5 Tips for First-Time Execution ● Browser Closes Too Fast: If your browser closes too quickly to see anything, insert time.sleep(5) (Python) or Thread.sleep(5000) (Java) before quit(). ● Driver Exceptions: Make sure the version of ChromeDriver matches your installed browser version. Permission Issues: On macOS/Linux, make the driver executable: chmod +x chromedriver ● 3.6 Customizing the Script You can expand your basic script by: ● Navigating to a different site ● Extracting text using locators (we’ll cover these in the next chapter) ● Taking screenshots with driver.get_screenshot_as_file() (Python) or TakesScreenshot in Java Example (Python): driver.save_screenshot("screenshot.png") Example (Java): File screenshot = ((TakesScreenshot)driver).getScreenshotAs(OutputType.FILE);FileUtils.copyFile(screenshot, new File("screenshot.png"));
- 18. Chapter 4: Locating Web Elements Automated testing with Selenium isn't just about opening a browser and visiting pages. The real power comes from interacting with elements on those pages—buttons, text fields, links, dropdowns, and more. To interact with any web element, Selenium first needs to locate it. This chapter focuses on one of the most critical aspects of Selenium automation: locating web elements reliably. We'll explore all major locator strategies, how and when to use them, and what best practices to follow to avoid flaky tests. 4.1 What Are Web Elements? In a web application, a web element is any component you can interact with in a browser: ● Buttons ● Links ● Input fields ● Checkboxes ● Drop-down menus ● Images ● Tables ● Alerts Selenium allows you to identify these elements using attributes in their underlying HTML code. Once an element is located, you can perform actions such as clicking, entering text, selecting options, etc. 4.2 The Importance of Locators Think of locators as the address of a house. If your address is precise, the mail gets delivered to the right door. If not, it gets lost. The same principle applies to element locators in Selenium. Poorly chosen locators are the number one cause of test failures in UI automation. Well-crafted locators ensure that your tests are: ● Accurate (point to the right element)
- 19. ● Stable (not easily broken by small UI changes) ● Maintainable (easy to update if needed) 4.3 Types of Locator Strategies Selenium provides multiple methods to locate elements on a webpage. Each comes with its strengths and ideal use cases. 1. ID driver.findElement(By.id("username")); driver.find_element(By.ID, "username") When to use: Use this if the element has a unique and static id attribute. Pros: Fast and reliable (ID is supposed to be unique). Cons: Sometimes developers use dynamic IDs that change each session. 2. Name driver.findElement(By.name("email")); driver.find_element(By.NAME, "email") When to use: When the element has a name attribute and it's unique on the page. Pros: Readable and easy to use. Cons: Not always unique; less reliable than ID. 3. Class Name driver.findElement(By.className("btn-primary")); driver.find_element(By.CLASS_NAME, "btn-primary") When to use: Use when the class is specific to that element or uniquely identifies it. Pros: Convenient for buttons and styling elements. Cons: Avoid if the class is shared among multiple elements. 4. Tag Name
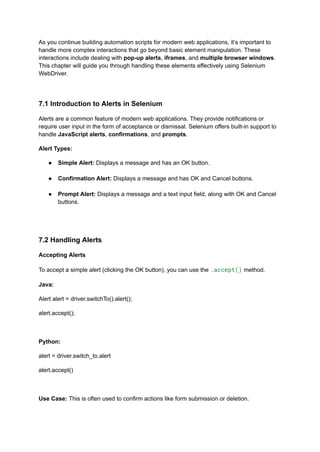
- 20. driver.findElement(By.tagName("input")); driver.find_element(By.TAG_NAME, "input") When to use: Use sparingly; mostly helpful when you're looking for all inputs, images, or links. Pros: Good for finding groups of similar elements. Cons: Usually not specific enough alone. 5. Link Text and Partial Link Text driver.findElement(By.linkText("Login")); driver.find_element(By.LINK_TEXT, "Login") When to use: When you're interacting with hyperlinks and the text is visible and unique. Partial Link Text allows matching just a part of the visible link: driver.find_element(By.PARTIAL_LINK_TEXT, "Log") Pros: Good for navigation. Cons: Breaks if link text changes or is localized. 6. CSS Selector driver.findElement(By.cssSelector("input[type='text']")); driver.find_element(By.CSS_SELECTOR, "input[type='text']") When to use: CSS Selectors are highly flexible and powerful for complex DOM structures. Pros: Precise and concise. Cons: Slightly harder to read and learn for beginners. 7. XPath driver.findElement(By.xpath("//input[@id='username']")); driver.find_element(By.XPATH, "//input[@id='username']")
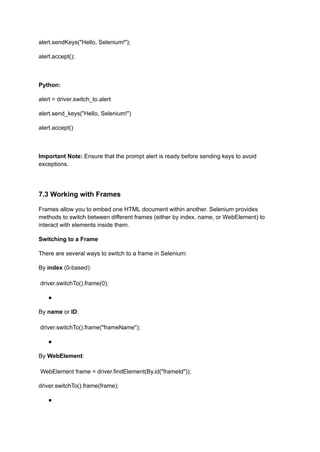
- 21. When to use: XPath is the most powerful locator strategy and can traverse the entire DOM. Pros: Can find deeply nested elements, supports complex queries. Cons: Can become long and brittle if not used wisely. 4.4 Understanding XPath in Detail XPath is like a map through the HTML structure of a page. It supports two styles: ● Absolute XPath (not recommended): /html/body/div[2]/form/input[1] ● Relative XPath (preferred): //input[@id='email'] Common XPath patterns: Pattern Meaning //tagname Selects all elements with the given tag //div[@class='login-box'] Selects div with a specific class //input[@type='text'] Input elements of type text //a[contains(text(), 'Register')] Links containing "Register" //button[@disabled] Buttons with disabled attribute //div[@class='menu']//a Nested anchors inside menu div 4.5 Which Locator Should You Use? Recommended Priority: 1. id 2. name
- 22. 3. cssSelector 4. xpath 5. className 6. linkText Use XPath or CSS Selectors only when simpler locators like ID and Name are not available or reliable. 4.6 Practical Examples Let’s use a sample login form: <form id="loginForm"> <input type="text" id="username" name="user"> <input type="password" name="pass"> <button class="btn login">Login</button> </form> Example locators: ● By ID: By.id("username") ● By Name: By.name("pass") ● By Class: By.className("login") ● By XPath: //button[@class='btn login'] ● By CSS: form#loginForm input[name='user'] 4.7 Locating Multiple Elements Sometimes you need to capture all matching elements: links = driver.find_elements(By.TAG_NAME, "a") for link in links: print(link.text)
- 23. Or in Java: List<WebElement> links = driver.findElements(By.tagName("a")); for (WebElement link : links) { System.out.println(link.getText()); } This is useful for validating menus, lists, or table data. 4.8 Best Practices for Locating Elements ● Prefer unique attributes like id, name, or custom data attributes. ● Avoid brittle locators based on element index or long XPaths. ● Use descriptive locators: a good locator describes what it's targeting. ● Avoid relying on visual text that might change with UI updates or localization. ● Always verify your locator manually in browser DevTools. 4.9 Tools to Help You Find Locators ● Browser DevTools (F12): Right-click > Inspect to view HTML. ● Copy XPath or Selector from the context menu. ● Selenium IDE: Helps record actions and generate locators. ● Extensions: Tools like ChroPath or SelectorsHub assist in building XPath/CSS. Chapter 5: Interacting with Web Elements
- 24. In the previous chapter, we explored how to locate web elements using various strategies such as ID, name, XPath, and CSS selectors. Now that we can accurately find elements on a page, the next step is to interact with them. This chapter covers the most common and essential types of user interactions in Selenium: clicking buttons, entering text, selecting from dropdowns, checking boxes, and handling dynamic user events. Each interaction will be explained with detailed examples in both Java and Python. 5.1 Introduction to WebElement Interface When you use a locator to find an element in Selenium, what you get is a WebElement object. This object serves as the interface to interact with that element—whether it's a button, text field, checkbox, or link. Example in Java: WebElement loginButton = driver.findElement(By.id("login")); loginButton.click(); Example in Python: login_button = driver.find_element(By.ID, "login") login_button.click() Almost all interactions start with locating the element and then calling a method on the resulting WebElement. 5.2 Clicking Elements The .click() method simulates a mouse click on elements like buttons, links, and checkboxes. Java: WebElement submit = driver.findElement(By.id("submitBtn")); submit.click(); Python: submit = driver.find_element(By.ID, "submitBtn")
- 25. submit.click() Important Notes: ● The element must be visible and enabled. ● If an element is hidden or not interactable, .click() will throw an exception. ● Always ensure page loading or animations are completed before clicking. 5.3 Typing Text into Input Fields Use the .sendKeys() method to simulate keyboard input. Java: WebElement username = driver.findElement(By.name("user")); username.sendKeys("myUsername"); Python: username = driver.find_element(By.NAME, "user") username.send_keys("myUsername") To clear an input field before typing: username.clear(); username.sendKeys("newUser"); username.clear() username.send_keys("newUser") Tip: Always use .clear() if there's a chance the field contains pre-filled values. 5.4 Handling Checkboxes and Radio Buttons
- 26. Checkboxes and radio buttons are also handled using .click(). Before clicking, you might want to check whether they’re already selected. Java: WebElement checkbox = driver.findElement(By.id("subscribe")); if (!checkbox.isSelected()) { checkbox.click(); } Python: checkbox = driver.find_element(By.ID, "subscribe") if not checkbox.is_selected(): checkbox.click() Common Methods: ● .isSelected() — returns true if the box is checked. ● .click() — toggles the checked state. 5.5 Selecting from Dropdown Menus There are two types of dropdowns: standard HTML <select> dropdowns and custom dropdowns created with JavaScript. Let’s start with standard ones. Standard <select> Dropdown Java provides a Select class: import org.openqa.selenium.support.ui.Select; Select country = new Select(driver.findElement(By.id("country"))); country.selectByVisibleText("Canada"); country.selectByValue("CA");
- 27. country.selectByIndex(2); Python also provides a Select class: from selenium.webdriver.support.ui import Select select = Select(driver.find_element(By.ID, "country")) select.select_by_visible_text("Canada") select.select_by_value("CA") select.select_by_index(2) Methods: ● .selectByVisibleText(String) — matches what the user sees. ● .selectByValue(String) — matches the value attribute. ● .selectByIndex(int) — selects by order (starts at 0). Custom Dropdowns Custom dropdowns (often using <div> or <li>) require you to click to open the menu and click again to select the item. driver.find_element(By.ID, "dropdownMenu").click() driver.find_element(By.XPATH, "//li[text()='Canada']").click() Use developer tools to inspect such elements and write a reliable locator strategy. 5.6 Handling Text, Attributes, and State Getting Text: String message = driver.findElement(By.id("msg")).getText();
- 28. message = driver.find_element(By.ID, "msg").text Getting Attributes: String type = driver.findElement(By.id("email")).getAttribute("type"); type = driver.find_element(By.ID, "email").get_attribute("type") Checking State: ● isDisplayed() – is the element visible? ● isEnabled() – can the user interact with it? ● isSelected() – for checkboxes/radios. 5.7 Submitting Forms Some forms submit when you press Enter or click a button. You can also explicitly submit them: Java: driver.findElement(By.id("loginForm")).submit(); Python: driver.find_element(By.ID, "loginForm").submit() Note: .submit() only works on form elements or their children. 5.8 Waiting for Elements (Implicit & Explicit Waits) Real-world web apps are often slow to load elements. Selenium offers two waiting strategies.
- 29. Implicit Wait: Sets a default delay for locating elements. driver.manage().timeouts().implicitlyWait(10, TimeUnit.SECONDS); driver.implicitly_wait(10) Explicit Wait: Waits for a specific condition. Java: WebDriverWait wait = new WebDriverWait(driver, Duration.ofSeconds(10)); WebElement element = wait.until(ExpectedConditions.visibilityOfElementLocated(By.id("login"))); Python: from selenium.webdriver.support.ui import WebDriverWait from selenium.webdriver.support import expected_conditions as EC wait = WebDriverWait(driver, 10) element = wait.until(EC.visibility_of_element_located((By.ID, "login"))) Use explicit waits for dynamic elements that load after an AJAX call. 5.9 Real-World Example: Login Script Let’s put it all together in a login automation scenario. Python: from selenium import webdriver from selenium.webdriver.common.by import By
- 30. driver = webdriver.Chrome() driver.get("https://example.com/login") driver.find_element(By.ID, "username").send_keys("testuser") driver.find_element(By.ID, "password").send_keys("securepass") driver.find_element(By.ID, "loginButton").click() # Optional wait and validation print("Title after login:", driver.title) driver.quit()
- 31. Chapter 6: Advanced User Interactions with the Actions Class So far, we've explored basic interactions with web elements—clicks, typing, selecting, and reading values. However, many modern web applications use advanced UI features like drag-and-drop, hover menus, right-click context menus, and keyboard shortcuts. Selenium provides the Actions class to simulate these more complex interactions. This chapter covers how to use it for building robust, human-like behavior in your automated tests. 6.1 What is the Actions Class? The Actions class (in Java) or ActionChains (in Python) enables you to chain together multiple low-level input events like: ● Mouse movements (hover, click and hold, release) ● Composite gestures (drag-and-drop) ● Double-click, right-click ● Keyboard input (press, hold, release) These are especially useful when testing modern JavaScript-heavy UI components that respond to hover states or gesture-like behavior. 6.2 Setting Up Actions in Selenium Java Example: import org.openqa.selenium.interactions.Actions; Actions actions = new Actions(driver); Python Example: from selenium.webdriver.common.action_chains import ActionChains
- 32. actions = ActionChains(driver) Once initialized, the actions object can be used to perform a variety of gestures and interactions. 6.3 Hovering Over Elements (Mouse Over) Hovering is often required to reveal hidden menus or tooltips. Java: WebElement menu = driver.findElement(By.id("menu")); Actions actions = new Actions(driver); actions.moveToElement(menu).perform(); Python: menu = driver.find_element(By.ID, "menu") actions = ActionChains(driver) actions.move_to_element(menu).perform() Common Use Case: Navigating dropdown menus or tooltips that appear only on hover. 6.4 Click and Hold, Then Release Used to simulate a long-press or press-and-hold action. Java: WebElement element = driver.findElement(By.id("draggable")); actions.clickAndHold(element).pause(Duration.ofSeconds(2)).release().perform(); Python:
- 33. element = driver.find_element(By.ID, "draggable") actions.click_and_hold(element).pause(2).release().perform() This can simulate holding a mouse button or preparing for drag-and-drop. 6.5 Drag and Drop Many web UIs support dragging elements to reorder items or move between lists. Selenium handles this smoothly using Actions. Java: WebElement source = driver.findElement(By.id("source")); WebElement target = driver.findElement(By.id("target")); actions.dragAndDrop(source, target).perform(); Python: source = driver.find_element(By.ID, "source") target = driver.find_element(By.ID, "target") actions.drag_and_drop(source, target).perform() You can also build it step-by-step: actions.click_and_hold(source).move_to_element(target).release().perform() 6.6 Right-Click (Context Click) Context menus often require a right-click to reveal additional options.
- 34. Java: WebElement element = driver.findElement(By.id("contextMenu")); actions.contextClick(element).perform(); Python: element = driver.find_element(By.ID, "contextMenu") actions.context_click(element).perform() Tip: After right-clicking, you may need to send keyboard keys or click a menu item. 6.7 Double-Click Some UI components trigger actions on double-clicks (e.g., edit mode in table rows). Java: WebElement row = driver.findElement(By.className("editable")); actions.doubleClick(row).perform(); Python: row = driver.find_element(By.CLASS_NAME, "editable") actions.double_click(row).perform() 6.8 Keyboard Interactions To simulate keyboard input like pressing Tab, Enter, or combinations (e.g., Ctrl+C), you can use sendKeys() in combination with Keys. Java: import org.openqa.selenium.Keys;
- 35. WebElement input = driver.findElement(By.id("search")); input.sendKeys("Selenium" + Keys.ENTER); Python: from selenium.webdriver.common.keys import Keys input = driver.find_element(By.ID, "search") input.send_keys("Selenium" + Keys.ENTER) You can also use Actions for complex sequences: Java: actions.keyDown(Keys.CONTROL).sendKeys("a").keyUp(Keys.CONTROL).perform(); Python: actions.key_down(Keys.CONTROL).send_keys("a").key_up(Keys.CONTROL).perform() Common Keys: ● Keys.ENTER, Keys.TAB, Keys.ESCAPE ● Keys.CONTROL, Keys.SHIFT, Keys.ALT ● Arrow keys: Keys.ARROW_UP, Keys.ARROW_DOWN 6.9 Combining Actions You can chain multiple actions to simulate realistic user flows. Example in Python: actions.move_to_element(menu)
- 36. .click() .send_keys("search term") .send_keys(Keys.ENTER) .perform() Example in Java: actions.moveToElement(menu) .click() .sendKeys("search term") .sendKeys(Keys.ENTER) .perform(); This is useful for simulating user flows like menu navigation, typing, and submitting—all in one gesture. 6.10 Limitations and Troubleshooting ● Timing issues: Ensure elements are visible and stable before interaction. Use WebDriverWait if needed. ● Overlapping elements: Sometimes hover or click may fail if another element is on top. ● Non-standard UIs: Some JS-based UI frameworks don't behave like standard HTML. In such cases, JavaScriptExecutor might be needed. ● Test flakiness: Avoid hardcoded waits. Prefer explicit waits and consistent interaction timing. Chapter 7: Handling Alerts, Frames, and Windows
- 37. As you continue building automation scripts for modern web applications, it’s important to handle more complex interactions that go beyond basic element manipulation. These interactions include dealing with pop-up alerts, iframes, and multiple browser windows. This chapter will guide you through handling these elements effectively using Selenium WebDriver. 7.1 Introduction to Alerts in Selenium Alerts are a common feature of modern web applications. They provide notifications or require user input in the form of acceptance or dismissal. Selenium offers built-in support to handle JavaScript alerts, confirmations, and prompts. Alert Types: ● Simple Alert: Displays a message and has an OK button. ● Confirmation Alert: Displays a message and has OK and Cancel buttons. ● Prompt Alert: Displays a message and a text input field, along with OK and Cancel buttons. 7.2 Handling Alerts Accepting Alerts To accept a simple alert (clicking the OK button), you can use the .accept() method. Java: Alert alert = driver.switchTo().alert(); alert.accept(); Python: alert = driver.switch_to.alert alert.accept() Use Case: This is often used to confirm actions like form submission or deletion.
- 38. Dismissing Alerts To dismiss a confirmation alert (clicking the Cancel button), you can use the .dismiss() method. Java: Alert alert = driver.switchTo().alert(); alert.dismiss(); Python: alert = driver.switch_to.alert alert.dismiss() Use Case: You might use this for canceling an operation, like deleting an item. Retrieving Alert Text You can retrieve the message text from an alert using .getText(). Java: String alertText = driver.switchTo().alert().getText(); System.out.println(alertText); Python: alert_text = driver.switch_to.alert.text print(alert_text) Sending Text to Prompt Alerts For prompt alerts, where you are asked to enter text, you can send input using .sendKeys(). Java: Alert alert = driver.switchTo().alert();
- 39. alert.sendKeys("Hello, Selenium!"); alert.accept(); Python: alert = driver.switch_to.alert alert.send_keys("Hello, Selenium!") alert.accept() Important Note: Ensure that the prompt alert is ready before sending keys to avoid exceptions. 7.3 Working with Frames Frames allow you to embed one HTML document within another. Selenium provides methods to switch between different frames (either by index, name, or WebElement) to interact with elements inside them. Switching to a Frame There are several ways to switch to a frame in Selenium: By index (0-based): driver.switchTo().frame(0); ● By name or ID: driver.switchTo().frame("frameName"); ● By WebElement: WebElement frame = driver.findElement(By.id("frameId")); driver.switchTo().frame(frame); ●
- 40. Python: driver.switch_to.frame(0) # By index driver.switch_to.frame("frameName") # By name frame_element = driver.find_element(By.ID, "frameId") driver.switch_to.frame(frame_element) # By WebElement Interacting Inside a Frame Once switched to a frame, you can interact with elements inside it just as you would with elements on the main page. Example: WebElement button = driver.findElement(By.id("buttonInFrame")); button.click(); Python: button = driver.find_element(By.ID, "buttonInFrame") button.click() Switching Back to the Default Content To interact with elements outside of the frame, you need to switch back to the default page context. Java: driver.switchTo().defaultContent(); Python: driver.switch_to.default_content() Tip: If you have nested frames, you will need to switch through each frame in the hierarchy.
- 41. 7.4 Working with Multiple Browser Windows Web applications often open new browser windows or tabs. Selenium provides tools to handle multiple windows by using window handles. Getting the Current Window Handle The current window handle is used to interact with the window in focus. Java: String mainWindowHandle = driver.getWindowHandle(); Python: main_window_handle = driver.current_window_handle Getting All Window Handles To get a list of all open window handles, use the .getWindowHandles() method. This will return a set of window handles, which you can iterate over to switch between windows. Java: Set<String> allWindowHandles = driver.getWindowHandles(); for (String windowHandle : allWindowHandles) { driver.switchTo().window(windowHandle); } Python: all_window_handles = driver.window_handles for window_handle in all_window_handles: driver.switch_to.window(window_handle) Switching Between Windows
- 42. After obtaining all the window handles, you can switch between windows using .switchTo().window() (Java) or .switch_to.window() (Python) with the desired window handle. Java: driver.switchTo().window(windowHandle); Python: driver.switch_to.window(window_handle) Important Note: When you open a new window or tab, Selenium will continue to interact with the original window unless explicitly told to switch to the new one. Closing Windows To close a window, use .close() on the window handle. Java: driver.close(); Python: driver.close() Important: Calling .close() closes the current window. If there are multiple windows, you will need to switch to the one you want to close first. 7.5 Example Scenario: Handling Alerts and Windows Let’s combine alerts and windows in a practical example. Imagine that clicking a button triggers an alert, and then clicking a link opens a new window. Java Example: // Switch to alert and accept driver.findElement(By.id("alertButton")).click();
- 43. Alert alert = driver.switchTo().alert(); alert.accept(); // Open new window and switch to it driver.findElement(By.id("newWindowButton")).click(); String mainWindow = driver.getWindowHandle(); Set<String> allWindows = driver.getWindowHandles(); for (String window : allWindows) { if (!window.equals(mainWindow)) { driver.switchTo().window(window); break; } } driver.findElement(By.id("windowElement")).click(); Python Example: # Handle alert driver.find_element(By.ID, "alertButton").click() alert = driver.switch_to.alert alert.accept() # Open new window and switch to it driver.find_element(By.ID, "newWindowButton").click() main_window = driver.current_window_handle all_windows = driver.window_handles for window in all_windows:
- 44. if window != main_window: driver.switch_to.window(window) break driver.find_element(By.ID, "windowElement").click() Chapter 7: Handling Alerts, Frames, and Windows As you continue building automation scripts for modern web applications, it’s important to handle more complex interactions that go beyond basic element manipulation. These interactions include dealing with pop-up alerts, iframes, and multiple browser windows. This chapter will guide you through handling these elements effectively using Selenium WebDriver.
- 45. 7.1 Introduction to Alerts in Selenium Alerts are a common feature of modern web applications. They provide notifications or require user input in the form of acceptance or dismissal. Selenium offers built-in support to handle JavaScript alerts, confirmations, and prompts. Alert Types: ● Simple Alert: Displays a message and has an OK button. ● Confirmation Alert: Displays a message and has OK and Cancel buttons. ● Prompt Alert: Displays a message and a text input field, along with OK and Cancel buttons. 7.2 Handling Alerts Accepting Alerts To accept a simple alert (clicking the OK button), you can use the .accept() method. Java: Alert alert = driver.switchTo().alert(); alert.accept(); Python: alert = driver.switch_to.alert alert.accept() Use Case: This is often used to confirm actions like form submission or deletion. Dismissing Alerts To dismiss a confirmation alert (clicking the Cancel button), you can use the .dismiss() method. Java: Alert alert = driver.switchTo().alert();
- 46. alert.dismiss(); Python: alert = driver.switch_to.alert alert.dismiss() Use Case: You might use this for canceling an operation, like deleting an item. Retrieving Alert Text You can retrieve the message text from an alert using .getText(). Java: String alertText = driver.switchTo().alert().getText(); System.out.println(alertText); Python: alert_text = driver.switch_to.alert.text print(alert_text) Sending Text to Prompt Alerts For prompt alerts, where you are asked to enter text, you can send input using .sendKeys(). Java: Alert alert = driver.switchTo().alert(); alert.sendKeys("Hello, Selenium!"); alert.accept(); Python: alert = driver.switch_to.alert
- 47. alert.send_keys("Hello, Selenium!") alert.accept() Important Note: Ensure that the prompt alert is ready before sending keys to avoid exceptions. 7.3 Working with Frames Frames allow you to embed one HTML document within another. Selenium provides methods to switch between different frames (either by index, name, or WebElement) to interact with elements inside them. Switching to a Frame There are several ways to switch to a frame in Selenium: By index (0-based): driver.switchTo().frame(0); ● By name or ID: driver.switchTo().frame("frameName"); ● By WebElement: WebElement frame = driver.findElement(By.id("frameId")); driver.switchTo().frame(frame); ● Python: driver.switch_to.frame(0) # By index driver.switch_to.frame("frameName") # By name frame_element = driver.find_element(By.ID, "frameId") driver.switch_to.frame(frame_element) # By WebElement
- 48. Interacting Inside a Frame Once switched to a frame, you can interact with elements inside it just as you would with elements on the main page. Example: WebElement button = driver.findElement(By.id("buttonInFrame")); button.click(); Python: button = driver.find_element(By.ID, "buttonInFrame") button.click() Switching Back to the Default Content To interact with elements outside of the frame, you need to switch back to the default page context. Java: driver.switchTo().defaultContent(); Python: driver.switch_to.default_content() Tip: If you have nested frames, you will need to switch through each frame in the hierarchy. 7.4 Working with Multiple Browser Windows Web applications often open new browser windows or tabs. Selenium provides tools to handle multiple windows by using window handles. Getting the Current Window Handle
- 49. The current window handle is used to interact with the window in focus. Java: String mainWindowHandle = driver.getWindowHandle(); Python: main_window_handle = driver.current_window_handle Getting All Window Handles To get a list of all open window handles, use the .getWindowHandles() method. This will return a set of window handles, which you can iterate over to switch between windows. Java: Set<String> allWindowHandles = driver.getWindowHandles(); for (String windowHandle : allWindowHandles) { driver.switchTo().window(windowHandle); } Python: all_window_handles = driver.window_handles for window_handle in all_window_handles: driver.switch_to.window(window_handle) Switching Between Windows After obtaining all the window handles, you can switch between windows using .switchTo().window() (Java) or .switch_to.window() (Python) with the desired window handle. Java: driver.switchTo().window(windowHandle);
- 50. Python: driver.switch_to.window(window_handle) Important Note: When you open a new window or tab, Selenium will continue to interact with the original window unless explicitly told to switch to the new one. Closing Windows To close a window, use .close() on the window handle. Java: driver.close(); Python: driver.close() Important: Calling .close() closes the current window. If there are multiple windows, you will need to switch to the one you want to close first. 7.5 Example Scenario: Handling Alerts and Windows Let’s combine alerts and windows in a practical example. Imagine that clicking a button triggers an alert, and then clicking a link opens a new window. Java Example: // Switch to alert and accept driver.findElement(By.id("alertButton")).click(); Alert alert = driver.switchTo().alert(); alert.accept(); // Open new window and switch to it driver.findElement(By.id("newWindowButton")).click();
- 51. String mainWindow = driver.getWindowHandle(); Set<String> allWindows = driver.getWindowHandles(); for (String window : allWindows) { if (!window.equals(mainWindow)) { driver.switchTo().window(window); break; } } driver.findElement(By.id("windowElement")).click(); Python Example: # Handle alert driver.find_element(By.ID, "alertButton").click() alert = driver.switch_to.alert alert.accept() # Open new window and switch to it driver.find_element(By.ID, "newWindowButton").click() main_window = driver.current_window_handle all_windows = driver.window_handles for window in all_windows: if window != main_window: driver.switch_to.window(window) break driver.find_element(By.ID, "windowElement").click()
- 52. 7.6 Summary In this chapter, we have learned how to: ● Handle various types of alerts (simple, confirmation, and prompt). ● Switch between frames and interact with elements inside them. ● Manage multiple browser windows and tabs effectively. ● Use window handles to switch between windows and perform actions in each. Mastering these advanced interactions is crucial for automating complex web applications, especially those with dynamic pop-ups, iframes, and multi-window interfaces. Chapter 9: Advanced Selenium Features and Debugging As you gain more experience with Selenium, you’ll encounter situations that require advanced features and debugging techniques. In this chapter, we will explore some of the most powerful tools that Selenium offers, including actions like mouse movements and keyboard inputs, advanced browser interaction techniques, and strategies for debugging test failures. 9.1 Advanced User Interactions Selenium provides the Actions class for simulating more complex user interactions, such as mouse movements, hovering, right-clicking, dragging and dropping, and more. These
- 53. actions are important for dealing with modern web interfaces that involve hover states, drag-and-drop functionality, or multi-step gestures. Performing Mouse Hover and Click To simulate a mouse hover, use the moveToElement() method. This is often useful for hovering over dropdown menus or tooltips. Java: Actions actions = new Actions(driver); WebElement menu = driver.findElement(By.id("menu")); actions.moveToElement(menu).perform(); Python: from selenium.webdriver.common.action_chains import ActionChains actions = ActionChains(driver) menu = driver.find_element(By.ID, "menu") actions.move_to_element(menu).perform() In the example above, the moveToElement() method simulates hovering over the element identified by menu. You can extend this by chaining actions such as clicking or selecting items from a dropdown. Dragging and Dropping Elements Selenium's dragAndDrop() method allows you to simulate dragging an element and dropping it onto another. Java: WebElement source = driver.findElement(By.id("dragElement")); WebElement target = driver.findElement(By.id("dropTarget")); Actions actions = new Actions(driver); actions.dragAndDrop(source, target).perform();
- 54. Python: source = driver.find_element(By.ID, "dragElement") target = driver.find_element(By.ID, "dropTarget") actions = ActionChains(driver) actions.drag_and_drop(source, target).perform() This can be especially useful when automating tests on web apps that involve interactive UI components. 9.2 Working with Frames and Windows Web applications often use iframes (inline frames) to embed external content. Handling frames in Selenium requires switching between different contexts: the main page and the iframe. Switching to an iFrame To interact with elements inside an iframe, you must switch the driver's context to the iframe. Java: WebElement iframe = driver.findElement(By.id("iframeElement")); driver.switchTo().frame(iframe); WebElement button = driver.findElement(By.id("buttonInsideIframe")); button.click(); Python: iframe = driver.find_element(By.ID, "iframeElement") driver.switch_to.frame(iframe) button = driver.find_element(By.ID, "buttonInsideIframe") button.click()
- 55. Switching Between Multiple Windows Web applications often open multiple browser windows or tabs. Selenium allows you to switch between them by handling window handles. Java: String parentWindow = driver.getWindowHandle(); driver.findElement(By.id("openNewWindow")).click(); Set<String> allWindows = driver.getWindowHandles(); for (String window : allWindows) { if (!window.equals(parentWindow)) { driver.switchTo().window(window); break; } } Python: parent_window = driver.current_window_handle driver.find_element(By.ID, "openNewWindow").click() all_windows = driver.window_handles for window in all_windows: if window != parent_window: driver.switch_to.window(window) break Here, getWindowHandles() retrieves all open windows, and the script switches to the newly opened window. 9.3 Taking Screenshots for Debugging
- 56. Selenium provides the ability to capture screenshots, which can be very useful for debugging test failures. This allows you to understand the state of the application when a test fails. Taking a Screenshot Java: File screenshot = ((TakesScreenshot) driver).getScreenshotAs(OutputType.FILE); FileUtils.copyFile(screenshot, new File("screenshot.png")); Python: driver.save_screenshot("screenshot.png") The screenshot will capture the current state of the webpage and save it to the specified file. You can also capture screenshots in specific cases, such as when a test fails. 9.4 Using Logs for Debugging Logs are an essential part of debugging any application. Selenium provides a logging mechanism that can capture important events and errors, which can be helpful in troubleshooting. Enabling Browser Logs To enable browser logs in Selenium, you need to use the LoggingPreferences class in Java or a DesiredCapabilities object in Python. Java: LoggingPreferences logs = new LoggingPreferences(); logs.enable(LogEntries.Type.BROWSER, Level.ALL); Capabilities capabilities = DesiredCapabilities.chrome(); capabilities.setCapability(CapabilityType.LOGGING_PREFS, logs); WebDriver driver = new ChromeDriver(capabilities); Python:
- 57. from selenium.webdriver.common.desired_capabilities import DesiredCapabilities capabilities = DesiredCapabilities.CHROME capabilities['goog:loggingPrefs'] = {'browser': 'ALL'} driver = webdriver.Chrome(desired_capabilities=capabilities) Once logging is enabled, you can retrieve logs from the browser: Java: LogEntries logs = driver.manage().logs().get(LogEntries.Type.BROWSER); for (LogEntry entry : logs) { System.out.println(entry.getMessage()); } Python: logs = driver.get_log("browser") for log in logs: print(log) Logs will include various browser events, such as JavaScript errors, which can help pinpoint issues during test execution. 9.5 Debugging Failed Tests When your tests fail, it's important to have a strategy for identifying the cause. Here are some useful techniques: 1. Reviewing Logs Check the browser logs for any JavaScript errors or network issues that might have caused the failure. 2. Screenshot on Failure
- 58. Capture a screenshot at the point of failure to understand what went wrong. You can use a try-catch block in Java or a try-except block in Python to automate this. Java: try { WebElement element = driver.findElement(By.id("nonExistentElement")); element.click(); } catch (NoSuchElementException e) { File screenshot = ((TakesScreenshot) driver).getScreenshotAs(OutputType.FILE); FileUtils.copyFile(screenshot, new File("failureScreenshot.png")); } Python: try: element = driver.find_element(By.ID, "nonExistentElement") element.click() except NoSuchElementException: driver.save_screenshot("failureScreenshot.png") 3. Using Breakpoints For more advanced debugging, use breakpoints in your code to pause execution and inspect the state of your driver and web elements. This can be done using a debugger in your development environment or by adding manual pauses (e.g., Thread.sleep() in Java or time.sleep() in Python) to inspect the page manually. 9.6 Summary In this chapter, we've covered advanced Selenium features and debugging techniques: ● Advanced user interactions using the Actions class, including mouse hover, clicking, and drag-and-drop.
- 59. ● Working with iframes and windows, handling dynamic content embedded in frames and switching between multiple browser windows or tabs. ● Taking screenshots to capture the state of the application for debugging. ● Using logs to gather useful information about JavaScript errors and network issues. ● Debugging failed tests, including using screenshots on failure, reviewing logs, and employing breakpoints. Mastering these advanced techniques will make you more effective in handling complex web applications and debugging challenging issues in your tests. Chapter 10: Selenium Grid and Parallel Execution As your test suite grows, running tests sequentially can become time-consuming. Selenium Grid allows you to scale your testing process by distributing tests across multiple machines or environments. This chapter will cover the concepts of Selenium Grid, how to set it up, and how to execute tests in parallel, significantly reducing test execution time. 10.1 Introduction to Selenium Grid Selenium Grid is a tool that allows you to run tests on different machines and browsers in parallel. It consists of two main components: the Hub and the Nodes. ● Hub: The central server that receives the test requests and distributes them to the available nodes.
- 60. ● Nodes: These are machines or environments where the tests will be executed. Each node can have a different operating system and browser configuration. Running Selenium tests on multiple machines and browsers in parallel helps in testing applications across different environments quickly and efficiently. 10.2 Setting Up Selenium Grid To set up a Selenium Grid, you need to configure a Hub and Nodes. Here’s how you can do it: Starting the Hub To start the Hub, open a command prompt or terminal and navigate to the Selenium WebDriver directory. Run the following command to start the Hub: Command: java -jar selenium-server-standalone.jar -role hub This command starts the Hub on the default port 4444. You can specify a different port if needed. Starting the Nodes Once the Hub is up and running, you can start the Nodes. Nodes can run on the same machine or different machines. To start a node, use the following command: Command: java -jar selenium-server-standalone.jar -role node -hub http://localhost:4444/grid/register This command registers the node with the Hub. The node will now be available for executing tests. You can specify different browser and OS configurations when starting the node. Specifying Browser and OS for the Node You can specify the browser and OS configurations for the node using capabilities. Here’s how to start a node with specific capabilities: Command (for Chrome on Windows):
- 61. java -Dwebdriver.chrome.driver="path_to_chromedriver" -jar selenium-server-standalone.jar -role node -hub http://localhost:4444/grid/register -browser "browserName=chrome,platform=WINDOWS" Command (for Firefox on Linux): java -Dwebdriver.gecko.driver="path_to_geckodriver" -jar selenium-server-standalone.jar -role node -hub http://localhost:4444/grid/register -browser "browserName=firefox,platform=LINUX" The node will now be able to run tests on the specified browser and platform. 10.3 Configuring Selenium Grid Nodes (Optional) You can also configure multiple capabilities on a single node. For example, a single node can run both Chrome and Firefox on different platforms. To do this, create a JSON configuration file with the capabilities you want to support, then start the node with the following command: Example Node Configuration (JSON): { "capabilities": [ { "browserName": "chrome", "platform": "LINUX", "maxInstances": 5 }, { "browserName": "firefox", "platform": "LINUX", "maxInstances": 5 }
- 62. ], "configuration": { "hubHost": "localhost", "hubPort": 4444 } } Command: java -jar selenium-server-standalone.jar -role node -hub http://localhost:4444/grid/register -nodeConfig node-config.json Now, the node can handle tests on both Chrome and Firefox. 10.4 Parallel Test Execution with Selenium Grid Running tests in parallel using Selenium Grid can save a significant amount of time, especially when testing against multiple browsers or operating systems. Selenium Grid makes it easy to distribute tests across various nodes and execute them simultaneously. Configuring Your Tests for Parallel Execution In your test code, you need to configure Selenium to run tests in parallel. You can do this by configuring the WebDriver to send requests to the Grid Hub instead of using a local WebDriver. Example (Java with TestNG): TestNG XML Configuration (testng.xml): <suite name="Parallel Tests" parallel="tests" thread-count="2"> <test name="Chrome Test"> <parameter name="browser" value="chrome"/> <classes> <class name="com.example.tests.TestClass"/>
- 63. </classes> </test> <test name="Firefox Test"> <parameter name="browser" value="firefox"/> <classes> <class name="com.example.tests.TestClass"/> </classes> </test> </suite> In this example, TestNG will run tests in parallel across the Chrome and Firefox browsers. Setting Up the WebDriver for Parallel Execution To configure WebDriver for Selenium Grid, specify the Hub URL in your test setup. This ensures that the test will run on a remote node managed by the Hub. Example (Java): DesiredCapabilities capabilities = DesiredCapabilities.chrome(); capabilities.setPlatform(Platform.WINDOWS); RemoteWebDriver driver = new RemoteWebDriver(new URL("http://localhost:4444/wd/hub"), capabilities); In this example, the test will execute on a Chrome browser running on a Windows node. 10.5 Handling Failures in Parallel Tests Running tests in parallel can sometimes lead to test failures due to resource contention, synchronization issues, or other challenges. Here are some strategies to handle parallel test failures: 1. Use Test Retries
- 64. Sometimes tests might fail intermittently. Implementing a retry mechanism can help ensure that these tests pass on subsequent attempts. Many test frameworks, such as TestNG or JUnit, support retrying failed tests. TestNG Retry Example: public class TestRetry implements IRetryAnalyzer { private int count = 0; private static final int maxCount = 3; @Override public boolean retry(ITestResult result) { if (count < maxCount) { count++; return true; } return false; } } 2. Use Thread-Safe Data When running tests in parallel, ensure that your test data is thread-safe. Use data structures that are designed for concurrent access or synchronize access to shared resources. 3. Proper Synchronization Ensure that your tests don’t conflict with one another by accessing shared resources at the same time. Use proper synchronization techniques, such as locks or semaphores, to manage concurrent access.
- 65. Chapter 11: Continuous Integration with Selenium Continuous Integration (CI) is a practice in software development where code changes are frequently integrated into a shared repository. These changes are then automatically tested to detect any issues early in the development process. When coupled with Selenium WebDriver, CI enables you to run automated tests every time you push changes to your version control system, ensuring that your application remains stable as it evolves. In this chapter, we will explore how to integrate Selenium WebDriver with popular Continuous Integration (CI) tools, such as Jenkins, to run automated tests on every commit or pull request. We will also discuss best practices for configuring CI pipelines, running tests in parallel, and managing test results effectively. 11.1 Introduction to Continuous Integration Continuous Integration is a key aspect of modern DevOps practices. By integrating automated testing into the CI pipeline, you can ensure that: ● Code Quality: New changes don’t break existing functionality. ● Faster Feedback: Developers receive immediate feedback on their code changes.
- 66. ● Early Bug Detection: Issues are caught early in the development process, reducing the cost of fixing them. ● Automated Testing: Tests are run automatically with every code change, improving test coverage and reliability. Selenium WebDriver plays a crucial role in this process by automating web application tests, and CI systems provide the infrastructure to trigger and manage these tests in an automated manner. 11.2 Setting Up Jenkins for Selenium Tests Jenkins is one of the most widely used CI tools. It allows you to automate various tasks, such as running Selenium tests, building applications, and deploying them. In this section, we will walk through setting up Jenkins to run Selenium tests. Installing Jenkins To begin, you’ll need to install Jenkins on a server. You can install Jenkins either on a local machine or a dedicated server. Here’s a brief overview of the installation steps: 1. Download Jenkins: Go to Jenkins' official website and download the installer for your operating system. 2. Install Jenkins: Follow the installation instructions based on your OS. On most systems, this will involve running an installer and starting the Jenkins service. 3. Access Jenkins: After installation, you can access Jenkins by opening a browser and navigating to http://localhost:8080. Configuring Jenkins to Run Selenium Tests Once Jenkins is installed and running, you can configure it to execute Selenium WebDriver tests automatically. Here are the steps: 1. Create a New Job: ○ Go to Jenkins Dashboard. ○ Click on New Item. ○ Select Freestyle project. ○ Enter a name for your project and click OK.
- 67. 2. Configure Source Code Management (SCM): ○ In the project configuration, under the Source Code Management section, select your version control system (e.g., Git). ○ Provide the repository URL and credentials, if necessary. 3. Add Build Steps: ○ Under Build, click Add Build Step. ○ Choose Invoke top-level Maven targets or Execute shell depending on your build tool (e.g., Maven, Gradle, or simply a script). ○ For a Maven project, you can specify the goals like clean test to run your Selenium tests. 4. Configure Test Reporting: ○ Under Post-build Actions, select Publish JUnit test result report to publish the results of your Selenium tests. ○ Enter the path to the test result XML files (e.g., target/test-*.xml for Maven projects). Running Tests in Jenkins Once your job is set up, you can trigger builds manually, or Jenkins can automatically trigger builds when changes are pushed to your repository. To trigger tests manually, simply click Build Now in the Jenkins job dashboard. Jenkins will then run the Selenium tests and provide feedback in the form of logs and test reports. 11.3 Running Selenium Tests in Parallel with Jenkins To speed up test execution, Selenium tests can be run in parallel. This is especially useful when dealing with large test suites or multiple browser configurations. Jenkins can manage parallel test execution using various methods, such as using multiple agents or integrating with Selenium Grid. Using Multiple Jenkins Agents Jenkins allows you to run builds on multiple agents (machines). You can set up multiple Jenkins agents with different environments, such as different browsers, operating systems,
- 68. or configurations. These agents will handle parallel test execution by running different parts of the test suite simultaneously. 1. Set Up Additional Jenkins Agents: You can configure additional agents under Manage Jenkins > Manage Nodes. Jenkins will distribute jobs to these agents based on availability. Configure Parallel Execution in Your Test Code: For example, if using TestNG, you can configure parallel test execution by modifying the testng.xml file. Example TestNG Configuration: <suite name="Parallel Suite" parallel="tests" thread-count="2"> <test name="Test 1"> <classes> <class name="com.example.tests.TestClass1"/> </classes> </test> <test name="Test 2"> <classes> <class name="com.example.tests.TestClass2"/> </classes> </test> </suite> 2. This configuration will run the tests defined in TestClass1 and TestClass2 in parallel. 11.4 Managing Test Results in Jenkins Jenkins provides various ways to monitor and manage test results. You can visualize the results of your Selenium tests in a variety of formats, such as build logs, test reports, and trend graphs. Viewing Test Results
- 69. After running tests, Jenkins provides a detailed report of test results. You can view: ● Build Logs: Displays detailed output of the test execution. ● Test Reports: Jenkins can automatically display a summary of the test results, including the number of passed, failed, and skipped tests. ● Test Trend Graphs: Jenkins can show the historical trends of your tests, allowing you to track the stability of your tests over time. Handling Test Failures When a test fails in Jenkins, the build will be marked as failed. You can configure Jenkins to take additional actions in case of test failures, such as sending notifications or triggering other jobs (e.g., deploying a failed build to a testing environment). 11.5 Integrating Selenium with Other CI Tools While Jenkins is one of the most popular CI tools, Selenium can also be integrated with other CI tools such as GitLab CI, Travis CI, CircleCI, and Bamboo. The integration process is similar to Jenkins: ● Configure SCM: Set up your repository to link with the CI tool. ● Configure Build Steps: Set up your build tool (e.g., Maven, Gradle) to run tests. ● Configure Test Reports: Ensure the test results are collected and displayed by the CI tool. Each CI tool has its own configuration process, but the overall principles of running Selenium tests in an automated pipeline remain the same. 11.6 Best Practices for CI with Selenium Here are some best practices for integrating Selenium tests into your CI pipeline: 1. Run Tests on Every Commit: Make sure that your tests run automatically whenever code is pushed to the repository. This ensures that issues are detected as soon as possible. 2. Keep Tests Independent: Make sure that each test can run independently of others. Tests should not rely on shared state or global variables. This makes it easier to run
- 70. them in parallel. 3. Optimize Test Execution: Run only the necessary tests in CI pipelines to save time. You can use tags or groups to run different sets of tests based on the circumstances. 4. Use Parallel Execution: Running tests in parallel reduces the time needed to execute your test suite, especially when testing across multiple browsers and environments. 5. Keep the CI Environment Clean: Ensure that the CI environment is properly cleaned up between builds to prevent interference between tests. This includes clearing cache, resetting test data, and managing session states. 6. Fail Fast: If a critical test fails, fail the build immediately to prevent further unnecessary testing. 7. Monitor Test Performance: Track test execution times over time to identify performance regressions or flaky tests that need to be addressed. Chapter 12: Advanced Reporting with Selenium In automated testing, reporting is crucial for understanding test results, tracking failures, and ensuring the quality of your application. Selenium WebDriver provides several ways to gather test execution data and present it in an organized, informative manner. Advanced reporting techniques can improve the visibility of test results, help in the identification of flaky tests, and allow teams to gain better insights into the performance and stability of their applications. In this chapter, we will explore various advanced reporting methods, including integration with reporting frameworks, visual reports, email notifications, and test dashboards. By the end of this chapter, you'll have a solid understanding of how to implement professional-level reporting in your Selenium test suite. 12.1 Introduction to Selenium Test Reports When running Selenium tests, it's essential to capture detailed logs and metrics that can help diagnose failures, monitor test execution, and maintain test quality. Selenium provides basic reporting features, such as generating logs of executed tests and saving results to a file. However, more advanced reporting mechanisms offer more detailed insights and enable teams to make more informed decisions. Effective test reports should include:
- 71. ● Test Result Summary: Clear, concise information about the success or failure of tests. ● Error Details: Information about any failed tests, including exception messages, stack traces, and screenshots. ● Performance Metrics: Information about how long tests took to execute, which can be valuable for spotting performance regressions. ● Trend Analysis: Historical data showing how the test results evolve over time. 12.2 Selenium Reporting Frameworks Selenium can be paired with several reporting libraries and frameworks that enhance the default reporting capabilities. These tools can provide detailed, customizable reports that include visualizations, summaries, and in-depth analysis. TestNG Reporting TestNG, a popular testing framework for Java, comes with built-in reporting capabilities. It can generate HTML and XML reports by default, which provide insights into passed, failed, and skipped tests. ● HTML Reports: The HTML report generated by TestNG is a user-friendly, detailed report. It includes test names, statuses, duration, and detailed logs for failed tests. ● Customizing TestNG Reports: You can also add custom listeners to TestNG to extend its reporting functionality. This allows you to add custom data, screenshots, and logs to the reports. Example of adding a listener in TestNG: @Listeners(com.example.reporting.CustomListener.class) public class MyTest { // Test methods } ExtentReports
- 72. ExtentReports is a popular open-source reporting library for Java, designed to create detailed and visually appealing reports. It integrates seamlessly with Selenium WebDriver and can be used to generate HTML reports with rich features, such as: ● Test Step Details: Each test step can be logged with detailed descriptions, statuses, and screenshots. ● Customization: You can customize the report to display various levels of information, from high-level summaries to detailed test steps. ● Graphs and Charts: ExtentReports can display graphical representations of test results, such as pie charts showing the percentage of passed, failed, and skipped tests. Here's an example of using ExtentReports: ExtentReports extent = new ExtentReports(); ExtentTest test = extent.createTest("Login Test"); test.pass("Login successful"); test.fail("Login failed", MediaEntityBuilder.createScreenCaptureFromPath("screenshot.png").build()); extent.flush(); Allure Framework Allure is another popular reporting framework that provides visually appealing and detailed test reports. It is compatible with Selenium WebDriver and supports multiple programming languages. Key features of Allure include: ● Test History: Track the status of tests over time. ● Step-level Reporting: Break down tests into steps, with detailed reports on each step. ● Attachments: You can attach screenshots, logs, and other files to each test. To integrate Allure with Selenium, you can use Maven or Gradle dependencies to include the necessary plugins and report generation steps.
- 73. Example Maven dependency: <dependency> <groupId>io.qameta.allure</groupId> <artifactId>allure-java-commons</artifactId> <version>2.13.8</version> </dependency> 12.3 Visual Reports and Screenshots Capturing screenshots during test execution is one of the most effective ways to debug failures and generate informative reports. Selenium allows you to take screenshots at any point during the test, which can be embedded into your test reports to show exactly what the application looked like at the time of failure. Taking Screenshots in Selenium You can capture screenshots using Selenium’s TakesScreenshot interface. Here’s an example of how to capture a screenshot in Selenium: File screenshot = ((TakesScreenshot) driver).getScreenshotAs(OutputType.FILE); FileUtils.copyFile(screenshot, new File("path/to/screenshot.png")); This screenshot can then be added to your report to provide visual context for test failures. Embedding Screenshots in Reports When using reporting libraries like TestNG, ExtentReports, or Allure, you can add screenshots to your test reports to better understand the state of the application during test execution. Example with ExtentReports: test.fail("Test failed", MediaEntityBuilder.createScreenCaptureFromPath("path/to/screenshot.png").build());
- 74. 12.4 Email Notifications and Alerts One of the most important aspects of test reporting is notifying team members about the results of automated tests. Email notifications are the most common way to alert stakeholders about test results, especially when a build fails or tests don't pass. Most CI tools, such as Jenkins, integrate with email services to automatically send notifications after test executions. You can configure Jenkins to send detailed email reports with attached logs and screenshots. Configuring Email Notifications in Jenkins To send email notifications after a test run in Jenkins: 1. Install the Email Extension Plugin: Go to Jenkins > Manage Jenkins > Manage Plugins and install the Email Extension Plugin. 2. Configure Email Settings: Under Jenkins > Manage Jenkins > Configure System, set up the SMTP server and email notifications. 3. Post-build Actions: In your Jenkins job configuration, under Post-build Actions, select Editable Email Notification. You can customize the content of the email to include the build status, test results, and any relevant logs or files. 12.5 Integrating with Test Dashboards For large teams with complex test suites, having a centralized test dashboard can be extremely useful. A test dashboard aggregates results from multiple test runs and provides a graphical overview of the health of your project. Tools like Allure Test Reporting, TestRail, and Zephyr can be used to integrate your Selenium WebDriver tests with centralized dashboards. Using Allure for Dashboards Once Allure is integrated into your project, you can generate a rich, interactive test report that includes detailed information about each test execution. Allure allows you to: ● View test trends over time. ● Filter tests by status, severity, or test environment. ● Visualize test steps, logs, and attachments.
- 75. 12.6 Best Practices for Reporting To get the most out of your Selenium reports, consider the following best practices: 1. Clear, Actionable Reports: Ensure that your reports provide useful information to both developers and QA engineers. Avoid clutter and focus on data that will help troubleshoot issues. 2. Capture Context: Include detailed information like the browser type, operating system, and any custom configurations that might affect test results. 3. Automate Reporting: Automate the generation and delivery of test reports, either by integrating with a CI tool like Jenkins or using test reporting frameworks. 4. Add Visual Elements: Use screenshots, graphs, and charts to make the reports more visually appealing and easier to understand. 5. Track Historical Data: Keep track of past test results to identify trends, performance issues, or flaky tests. 6. Include Logs and Artifacts: Include detailed logs and any additional artifacts (like stack traces) in the reports to provide complete context when investigating test failures.
- 76. Chapter 13: Selenium Best Practices and Tips Selenium is a powerful and widely used tool for automating web browsers, but as with any complex tool, mastering it requires understanding the best practices that help you write efficient, maintainable, and robust tests. In this chapter, we will explore some of the key best practices and tips that can elevate your Selenium WebDriver test automation skills, ensuring that your tests are scalable, reliable, and easy to maintain. 13.1 Keep Tests Independent One of the most important principles in automated testing is that tests should be independent of each other. Each test should be able to run in isolation, without depending on the outcome of any other test. Why is this important? ● Stability: Independent tests can be run in any order, ensuring that a failure in one test does not affect others. ● Parallelism: Independent tests can be executed concurrently, which helps in speeding up the overall test execution time. ● Debugging: When a test fails, it is easier to diagnose the issue because it is not influenced by other tests. How to implement? ● Avoid using shared states between tests. For example, don’t rely on data created by one test to be available for others. ● Use setup and teardown methods (like @Before and @After in TestNG or JUnit) to initialize and clean up the test environment before and after each test. 13.2 Use Explicit Waits Instead of Implicit Waits Selenium WebDriver provides two main types of waits: implicit and explicit. While implicit waits are easier to use, they can lead to unpredictable behavior and performance issues in
- 77. complex tests. Explicit waits offer more control and flexibility, which is essential for writing reliable tests. Why is this important? ● Precision: Explicit waits wait for a specific condition (e.g., an element to be clickable) to be true, which makes the test more stable and less likely to fail due to timing issues. ● Performance: Implicit waits apply globally and can introduce delays even when they are not needed, while explicit waits target specific conditions, making tests faster and more efficient. How to implement? Example of an explicit wait in Selenium WebDriver: WebDriverWait wait = new WebDriverWait(driver, Duration.ofSeconds(10)); WebElement element = wait.until(ExpectedConditions.elementToBeClickable(By.id("submitButton"))); element.click(); In this example, the test will wait for up to 10 seconds for the "submitButton" to become clickable. If the element is not clickable within that time frame, a TimeoutException will be thrown. 13.3 Use Page Object Model (POM) for Better Test Organization The Page Object Model (POM) is a design pattern that encourages the separation of test logic from the user interface. By implementing POM, you create a class for each page of your web application, encapsulating the interaction logic with the page's elements. Why is this important? ● Maintainability: If the UI changes (e.g., an element’s locator changes), you only need to update the corresponding page object class, not all the tests. ● Reusability: Page objects can be reused across multiple tests, reducing code duplication and improving test efficiency. ● Readability: POM makes the test code cleaner and easier to understand, as the test focuses on high-level actions rather than UI-specific details.
- 78. How to implement? 1. Create a page object class: Define the elements and actions for a specific page in your application. 2. Use the page object in your tests: Interact with the page object methods in your tests rather than directly using WebDriver commands. Example of a page object class: public class LoginPage { WebDriver driver; By usernameField = By.id("username"); By passwordField = By.id("password"); By loginButton = By.id("loginButton"); public LoginPage(WebDriver driver) { this.driver = driver; } public void enterUsername(String username) { driver.findElement(usernameField).sendKeys(username); } public void enterPassword(String password) { driver.findElement(passwordField).sendKeys(password); } public HomePage submitLogin() { driver.findElement(loginButton).click(); return new HomePage(driver);
- 79. } } In your test class: LoginPage loginPage = new LoginPage(driver); loginPage.enterUsername("testuser"); loginPage.enterPassword("password123"); HomePage homePage = loginPage.submitLogin(); 13.4 Keep Locators Simple and Robust Locators are a critical part of Selenium tests, as they are used to find elements on the web page. It is important to choose locators that are simple, unique, and resilient to changes in the UI. Why is this important? ● Stability: Complex and brittle locators may break easily when the UI changes. ● Efficiency: Simple locators tend to be faster and more reliable than complex ones. ● Maintainability: Using meaningful locators makes it easier to identify elements and maintain the tests. How to implement? ● Use ID or Name attributes: These are typically the most stable and fast locators. ● Avoid using complex XPath expressions: While XPath is powerful, it can be slow and break easily when the DOM structure changes. ● Use CSS selectors: CSS selectors are often more robust and efficient compared to XPath. Example of a robust locator: // Best practice: use the ID attribute
- 80. By usernameField = By.id("username"); // Avoid using complex XPath expressions By usernameField = By.xpath("//div[@class='form']/input[@name='username']"); 13.5 Parameterize Tests to Increase Coverage Parameterization allows you to run the same test with different sets of data. This increases the coverage of your test suite, as you can verify that your application behaves correctly with a variety of input values. Why is this important? ● Coverage: Running the same test with different data ensures that you cover a wide range of scenarios. ● Efficiency: Instead of writing multiple similar tests, parameterized tests allow you to run a single test method with different input values. How to implement? In TestNG, you can use the @DataProvider annotation to pass data to your test methods. Example of a parameterized test with TestNG: @DataProvider(name = "loginData") public Object[][] createLoginData() { return new Object[][] { { "user1", "pass1" }, { "user2", "pass2" }, { "user3", "pass3" } }; }
- 81. @Test(dataProvider = "loginData") public void testLogin(String username, String password) { LoginPage loginPage = new LoginPage(driver); loginPage.enterUsername(username); loginPage.enterPassword(password); HomePage homePage = loginPage.submitLogin(); Assert.assertTrue(homePage.isLoggedIn()); } 13.6 Use a Continuous Integration (CI) Tool Integrating Selenium WebDriver tests with a Continuous Integration (CI) tool like Jenkins, Travis CI, or CircleCI allows you to automatically run your tests every time there is a change to your codebase. This ensures that issues are detected early in the development process. Why is this important? ● Automation: CI tools automate the process of running tests, making it easier to detect issues and regressions. ● Speed: CI tools can run tests in parallel, reducing the time it takes to get feedback on code changes. ● Consistency: With automated CI pipelines, tests are always run in the same environment, ensuring consistency in test results. How to implement? ● Configure your CI pipeline to trigger Selenium WebDriver tests after each build or deployment. ● Use Docker or virtual machines to run tests in a clean, consistent environment.
- 82. Chapter 14: Troubleshooting and Debugging Selenium Tests While Selenium WebDriver is a powerful tool for browser automation, it can sometimes be challenging to troubleshoot issues that arise during test execution. Whether your tests are failing intermittently or not running as expected, knowing how to debug and resolve issues efficiently is an essential skill for every automation engineer. In this chapter, we’ll explore various strategies and tools for troubleshooting and debugging your Selenium tests. 14.1 Understanding Common Selenium Errors Before diving into debugging techniques, it’s important to recognize the common errors that you may encounter while working with Selenium WebDriver. Common Selenium Errors: ● NoSuchElementException: Raised when an element cannot be found using the specified locator. ● ElementNotVisibleException: Occurs when an element is present in the DOM but is not visible or interactable. ● TimeoutException: Happens when WebDriver exceeds the specified timeout while waiting for an element to be found or a condition to be met. ● StaleElementReferenceException: Thrown when an element becomes stale (i.e., no longer exists in the DOM) before an interaction can occur. ● WebDriverException: A generic error that covers various issues such as problems with the WebDriver instance or the browser itself. By understanding these errors and their causes, you can focus your debugging efforts more effectively. 14.2 Logging and Screenshots for Debugging When debugging Selenium tests, logging and screenshots can be invaluable in understanding what went wrong. Let’s look at how to use them effectively. Logging
- 83. WebDriver provides logging functionality that allows you to capture detailed logs of the test execution. These logs can include information about browser commands, element interactions, and any errors that occurred. How to implement logging in Selenium? 1. Enable logging in WebDriver: ○ You can enable logging in WebDriver to capture detailed browser activity. Selenium provides the LoggingPreferences class, which can be used to configure logging for different log types. import org.openqa.selenium.logging.LogEntries; import org.openqa.selenium.logging.LogEntry; import org.openqa.selenium.logging.LogLevel; import org.openqa.selenium.chrome.ChromeDriver; import org.openqa.selenium.chrome.ChromeOptions; ChromeOptions options = new ChromeOptions(); options.setCapability("loggingPrefs", ImmutableMap.of("browser", LogLevel.ALL)); WebDriver driver = new ChromeDriver(options); driver.get("http://example.com"); LogEntries logs = driver.manage().logs().get("browser"); for (LogEntry entry : logs) { System.out.println(entry.getMessage()); } Screenshots Capturing screenshots at various points during test execution can help you visualize what the browser looked like at the time of failure.
- 84. How to implement screenshot capture? You can use the TakesScreenshot interface to capture a screenshot when an exception occurs or at any point of your choosing: import org.openqa.selenium.OutputType; import org.openqa.selenium.TakesScreenshot; import java.io.File; import org.apache.commons.io.FileUtils; public void captureScreenshot(WebDriver driver, String fileName) throws IOException { File screenshot = ((TakesScreenshot) driver).getScreenshotAs(OutputType.FILE); FileUtils.copyFile(screenshot, new File("path/to/screenshots/" + fileName + ".png")); } You can call captureScreenshot inside your catch blocks or wherever you want to capture a snapshot of the browser’s state. 14.3 Debugging with Breakpoints Using breakpoints to pause test execution at specific points can help you inspect the state of the application and identify issues. Most modern IDEs (like IntelliJ IDEA or Eclipse) support debugging with breakpoints, which allows you to step through your test code and interact with the test in real-time. How to use breakpoints? 1. Set a breakpoint at the line of code where you want the test to pause. 2. Run the test in debug mode. 3. Use the IDE’s debugging tools to inspect the state of variables, elements, and other objects in the code. This can help you understand exactly where things go wrong and analyze the state of the browser or the DOM at the time of failure.
- 85. 14.4 Waits and Timeouts One of the most common sources of Selenium test failures is timing-related issues. These typically occur when WebDriver tries to interact with an element before it’s ready (e.g., before it’s visible or clickable). Best practices for handling waits: ● Explicit Waits: These waits allow you to wait for a specific condition (like element visibility or clickability) before interacting with it. Explicit waits are more reliable than implicit waits and help prevent unnecessary delays. ● Implicit Waits: Implicit waits are applied globally and make WebDriver wait for a certain amount of time when searching for elements. However, they can lead to unwanted delays if not used correctly. To avoid timing issues, always use explicit waits when necessary. Example of an explicit wait: WebDriverWait wait = new WebDriverWait(driver, Duration.ofSeconds(10)); WebElement element = wait.until(ExpectedConditions.visibilityOfElementLocated(By.id("submitButton"))); element.click(); This ensures that the element is visible before WebDriver clicks on it. 14.5 Using Browser Developer Tools for Debugging Modern browsers like Chrome and Firefox come with built-in developer tools that can be helpful when debugging Selenium tests. Chrome Developer Tools (DevTools) ● Network Tab: Allows you to inspect network requests and responses, which can be useful for testing APIs or verifying that resources are loading correctly. ● Elements Tab: Lets you inspect the DOM and view the attributes and styles of elements, which can help you troubleshoot issues related to element visibility or layout.
- 86. ● Console Tab: Displays JavaScript errors or warnings that can provide valuable clues when debugging issues with page scripts. How to use DevTools in Selenium? You can access browser developer tools programmatically using Selenium's ChromeDevTools interface: import org.openqa.selenium.chrome.ChromeDriver; import org.openqa.selenium.chrome.ChromeOptions; import org.openqa.selenium.devtools.DevTools; import org.openqa.selenium.devtools.v109.network.Network; ChromeOptions options = new ChromeOptions(); WebDriver driver = new ChromeDriver(options); DevTools devTools = ((ChromeDriver) driver).getDevTools(); devTools.createSession(); devTools.send(Network.enable()); This allows you to interact with the browser’s network activities and other developer tools features directly within your test scripts. 14.6 Debugging StaleElementReferenceException The StaleElementReferenceException occurs when an element in the DOM becomes stale, meaning it is no longer present or valid for interaction. This typically happens when the page has been refreshed or updated after an element was located. How to handle StaleElementReferenceException? ● Re-locate the element: Whenever you encounter this exception, the best approach is to re-locate the element. try { WebElement element = driver.findElement(By.id("someElement"));
- 87. element.click(); } catch (StaleElementReferenceException e) { WebElement element = driver.findElement(By.id("someElement")); element.click(); } ● Avoid storing elements for too long: It’s better to always locate the element just before you interact with it to avoid dealing with stale references. Chapter 15: Integrating Selenium with Other Testing Tools Selenium WebDriver excels at automating browsers, but in real-world testing environments, it often needs to work alongside other tools to ensure comprehensive test coverage. Integration with tools for test management, reporting, continuous integration, and even performance testing can significantly enhance your Selenium automation workflows. This
- 88. chapter will explore how to integrate Selenium with some of the most popular tools used in the automation testing ecosystem. 15.1 Integrating Selenium with TestNG TestNG is a popular testing framework in Java that works seamlessly with Selenium WebDriver. It offers features like parallel test execution, test configuration, and detailed reporting. Integrating TestNG with Selenium allows you to manage test cases, create suites, and run tests in an organized and structured manner. Setting Up TestNG with Selenium: 1. Add TestNG Dependencies: In your Maven pom.xml file, add the TestNG dependency: <dependency> <groupId>org.testng</groupId> <artifactId>testng</artifactId> <version>7.4.0</version> <scope>test</scope> </dependency> 2. Create a TestNG Class: Create a new Java class and annotate methods with TestNG annotations like @Test, @BeforeClass, and @AfterMethod to define test logic and setup/teardown methods. import org.openqa.selenium.WebDriver; import org.openqa.selenium.chrome.ChromeDriver; import org.testng.annotations.BeforeClass; import org.testng.annotations.Test; import org.testng.annotations.AfterClass;
- 89. public class SeleniumTestNGExample { WebDriver driver; @BeforeClass public void setUp() { driver = new ChromeDriver(); } @Test public void testGoogleSearch() { driver.get("https://www.google.com"); // Add assertions to validate the test } @AfterClass public void tearDown() { driver.quit(); } } 3. Running TestNG Tests: You can run your TestNG tests via the IDE or through a Maven command: mvn test TestNG provides detailed reports of each test's execution, including passed, failed, and skipped tests.
- 90. 15.2 Integrating Selenium with JUnit JUnit is another widely-used testing framework in Java that works well with Selenium WebDriver. JUnit offers a range of features such as assertions, annotations for test setup and teardown, and execution ordering. Setting Up JUnit with Selenium: 1. Add JUnit Dependencies: In your Maven pom.xml file, include the JUnit dependency: <dependency> <groupId>org.junit.jupiter</groupId> <artifactId>junit-jupiter-api</artifactId> <version>5.7.1</version> <scope>test</scope> </dependency> 2. Create a JUnit Test Class: import org.openqa.selenium.WebDriver; import org.openqa.selenium.chrome.ChromeDriver; import org.junit.jupiter.api.BeforeAll; import org.junit.jupiter.api.Test; import org.junit.jupiter.api.AfterAll; public class SeleniumJUnitExample { static WebDriver driver; @BeforeAll public static void setUp() {
- 91. driver = new ChromeDriver(); } @Test public void testAmazon() { driver.get("https://www.amazon.com"); // Perform actions and assertions } @AfterAll public static void tearDown() { driver.quit(); } } 3. Running JUnit Tests: You can execute JUnit tests from your IDE or via Maven: mvn test JUnit provides a clean and simple way to write and execute tests, with detailed results in the console. 15.3 Continuous Integration with Jenkins Jenkins is one of the most popular continuous integration (CI) tools that automates the testing and deployment process. By integrating Selenium with Jenkins, you can ensure that your tests are executed automatically whenever there is a change in the codebase. Setting Up Jenkins for Selenium Tests: 1. Install Jenkins: Install Jenkins on your local machine or on a server. You can follow the installation
- 92. instructions on the Jenkins website. 2. Install Necessary Plugins: Jenkins provides many plugins to support Selenium integration. Install the following plugins: ○ Maven Integration Plugin (if you’re using Maven) ○ Git Plugin (for GitHub repositories) ○ XUnit Plugin (for displaying test results) 3. Create a Jenkins Job: ○ Go to the Jenkins dashboard and click “New Item.” ○ Create a new “Freestyle project” or “Pipeline project.” ○ Under “Build” steps, add the command to run your Maven tests: mvn clean test 4. Set Up Triggers: Configure Jenkins to trigger the tests when code is committed to the repository. This can be done by setting up a GitHub webhook or using other version control systems like Bitbucket or GitLab. 5. View Test Results: After running the tests, Jenkins will show a detailed report of the execution, including success and failure counts. The XUnit plugin can be used to show the results of your Selenium tests in a user-friendly format. 15.4 Integrating Selenium with Docker Docker allows you to containerize your Selenium WebDriver tests, enabling you to run tests in isolated environments without worrying about dependencies or browser configurations. Docker simplifies running tests across multiple environments and operating systems. Setting Up Docker for Selenium Tests: 1. Pull the Selenium Docker Image: Selenium provides official Docker images for running tests in different browsers. For example, to run tests in a Chrome container, you can pull the following image:
- 93. docker pull selenium/standalone-chrome 2. Start the Docker Container: Run the Docker container to start a Selenium Grid with a standalone Chrome instance: docker run -d -p 4444:4444 selenium/standalone-chrome 3. Configure Selenium to Connect to Docker: In your Selenium tests, configure the WebDriver to connect to the Docker container: import org.openqa.selenium.remote.DesiredCapabilities; import org.openqa.selenium.remote.RemoteWebDriver; import java.net.URL; public class SeleniumDockerExample { public static void main(String[] args) throws Exception { DesiredCapabilities capabilities = DesiredCapabilities.chrome(); WebDriver driver = new RemoteWebDriver(new URL("http://localhost:4444/wd/hub"), capabilities); driver.get("https://www.example.com"); // Interact with the page driver.quit(); } } 4. Run Tests in Docker: You can now run your Selenium tests in the Docker container as if they were running on a local machine.
- 94. 15.5 Integrating Selenium with Allure for Test Reporting Allure is a flexible and attractive framework for generating test reports. When integrated with Selenium, Allure provides rich, informative, and customizable test reports with detailed information about each test case. Setting Up Allure with Selenium: 1. Add Allure Dependencies: Add the following dependency to your pom.xml file: <dependency> <groupId>io.qameta.allure</groupId> <artifactId>allure-java-commons</artifactId> <version>2.13.9</version> <scope>test</scope> </dependency> 2. Configure TestNG or JUnit to Use Allure: ○ For TestNG: Add the Allure TestNG listener to your test class. import io.qameta.allure.Description; import org.testng.annotations.Test; public class AllureTestNGExample { @Test @Description("Test case for Google search") public void testGoogle() { // Selenium code to interact with Google
- 95. } } ● For JUnit: Add Allure JUnit annotations similarly. 3. Generate Allure Reports: After running your tests, generate the Allure report by running the following command: mvn allure:serve This command will generate an interactive report that displays the results of your Selenium tests in a browser. Chapter 16: Popular Tools for Selenium Automation While Selenium WebDriver is a powerful tool for automating browser interactions, it works even better when combined with other specialized tools. These tools help in areas like test management, reporting, performance testing, continuous integration, and parallel execution. This chapter explores a curated list of popular tools that complement Selenium and enhance the efficiency of automation testing workflows.
- 96. Testgrid Testgrid is a robust cloud-based test automation platform designed for efficient test management, execution, and reporting. It allows you to run Selenium WebDriver tests across a wide range of browsers, devices, and environments, offering scalability and flexibility in test execution. Testgrid seamlessly integrates with CI/CD pipelines and other automation tools, making it a powerful addition to your Selenium testing suite. ● Key Features: ○ Cloud-based platform for scalable test execution ○ Supports multiple browsers and environments ○ Integration with CI/CD tools like Jenkins, GitLab, and CircleCI ○ Advanced test reporting and analytics ○ Parallel test execution for faster feedback cycles Other Popular Tools 1. TestRail TestRail is a test management tool that supports the organization, execution, and reporting of automated and manual tests. It integrates seamlessly with Selenium, providing detailed insights into test cases and test results. 2. Jenkins Jenkins is a widely used continuous integration tool that automates test execution and integration processes. With its support for Selenium, Jenkins can run tests as part of the build process, ensuring automated testing in every pipeline. 3. CircleCI CircleCI is a cloud-based CI tool that accelerates test execution with parallelism and integration with version control systems. It supports Selenium WebDriver tests and integrates easily into automated workflows. 4. Allure Allure is a reporting tool that generates detailed and interactive test reports. It integrates seamlessly with Selenium, providing rich, visually appealing test result reports for easy analysis. 5. Sauce Labs Sauce Labs is a cloud platform for cross-browser and mobile device testing. It allows you to run Selenium tests on real devices, ensuring your web applications work across multiple environments.
- 97. 6. Applitools Applitools offers visual testing, allowing you to validate the appearance of web applications across browsers and devices. With its AI-powered visual regression testing, Applitools helps to detect UI inconsistencies during Selenium test execution. 7. qTest qTest is a test management tool that helps manage test case execution, bug tracking, and reporting. It supports integration with Selenium, allowing for automated execution of test cases with real-time feedback. 8. Selenium Grid Selenium Grid enables the parallel execution of tests across different machines, browsers, and platforms. It allows for distributed testing, making it a great tool for scaling Selenium tests. 9. Docker Docker can be used to containerize Selenium WebDriver tests. It provides isolated environments, which makes running tests in parallel and scaling automation much easier. 10.Cucumber Cucumber is a BDD tool that integrates with Selenium to automate acceptance tests. It allows writing tests in Gherkin syntax, making tests more readable and understandable for non-technical stakeholders.