SlideShare a Scribd company logo
18. Python - GUI Programming (Tkinter)
Python provides various options for developing graphical user
interfaces (GUIs). Most important are listed below:
• Tkinter: Tkinter is the Python interface to the Tk GUI toolkit shipped
with Python. We would look this option in this tutorial.
• wxPython: This is an open-source Python interface for wxWindows
http://wxpython.org.
• JPython: JPython is a Python port for Java, which gives Python scripts
seamless access to Java class libraries on the local machine
http://www.jython.org.
Tkinter Programming:
• Tkinter is the standard GUI library for Python. Python when
combined with Tkinter provides a fast and easy way to create GUI
applications. Tkinter provides a powerful object-oriented interface
to the Tk GUI toolkit.
• Creating a GUI application using Tkinter is an easy task. All you
need to do is perform the following steps:
– Example:Import the Tkinter module.
– Create the GUI application main window.
– Add one or more of the above mentioned widgets to the GUI
application.
– Enter the main event loop to take action against each event
triggered by the user.
import Tkinter
top = Tkinter.Tk()
# Code to add widgets will go here...
top.mainloop()
Python - Tkinter Button
The Button widget is used to add buttons in a Python application.
These buttons can display text or images that convey the purpose
of the buttons. You can attach a function or a method to a button,
which is called automatically when you click the button.
Syntax:
w = Button ( master, option=value, ... )
Parameters:
– master: This represents the parent window.
– options: Here is the list of most commonly used options for this
widget. These options can be used as key-value pairs separated
by commas.
Example:
import Tkinter
import tkMessageBox
top = Tkinter.Tk()
def helloCallBack():
tkMessageBox.showinfo( "Hello Python", "Hello World")
B = Tkinter.Button(top, text ="Hello", command =
helloCallBack)
B.pack()
top.mainloop()
Python - Tkinter Canvas
The Canvas is a rectangular area intended for drawing pictures or
other complex layouts. You can place graphics, text, widgets, or
frames on a Canvas.
Syntax:
w = Canvas ( master, option=value, ... )
• Parameters:
– master: This represents the parent window.
– options: Here is the list of most commonly used options for this
widget. These options can be used as key-value pairs separated
by commas.
The Canvas widget can support the following standard items:
• arc . Creates an arc item.
coord = 10, 50, 240, 210
arc = canvas.create_arc(coord, start=0, extent=150,
fill="blue")
• image . Creates an image item, which can be an instance of either
the BitmapImage or the PhotoImage classes.
filename = PhotoImage(file = "sunshine.gif")
image = canvas.create_image(50, 50, anchor=NE,
image=filename)
• line . Creates a line item.
line = canvas.create_line(x0, y0, x1, y1, ..., xn, yn,
options)
• oval . Creates a circle or an ellipse at the given coordinates. oval =
canvas.create_oval(x0, y0, x1, y1, options)
• polygon . Creates a polygon item that must have at least three
vertices.
oval = canvas.create_polygon(x0, y0, x1, y1,...xn, yn,
options)
Example:
import Tkinter
import tkMessageBox
top = Tkinter.Tk()
C = Tkinter.Canvas(top, bg="blue", height=250,
width=300)
coord = 10, 50, 240, 210
arc = C.create_arc(coord, start=0, extent=150,
fill="red")
C.pack()
top.mainloop()
Example:
import Tkinter
import tkMessageBox
top = Tkinter.Tk()
C = Tkinter.Canvas(top, bg="blue", height=250,
width=300)
coord = 10, 50, 240, 210
arc = C.create_arc(coord, start=0, extent=150,
fill="red")
C.pack()
top.mainloop()
Python - Tkinter Checkbutton
The Checkbutton widget is used to display a number of options to a
user as toggle buttons. The user can then select one or more
options by clicking the button corresponding to each option.
You can also display images in place of text.
Syntax:
w = Checkbutton ( master, option, ... )
• Parameters:
– master: This represents the parent window.
– options: Here is the list of most commonly used options for this
widget. These options can be used as key-value pairs separated
by commas.
Example:
from Tkinter import *
import tkMessageBox
import Tkinter
top = Tkinter.Tk()
CheckVar1 = IntVar()
CheckVar2 = IntVar()
C1 = Checkbutton(top, text = "Music", variable =
CheckVar1, 
onvalue = 1, offvalue = 0, height=5, width = 20)
C2 = Checkbutton(top, text = "Video", variable =
CheckVar2, 
onvalue = 1, offvalue = 0, height=5, width = 20)
C1.pack()
C2.pack()
top.mainloop()
Python - Tkinter Entry:
• The Entry widget is used to accept single-line text strings from a
user.
• If you want to display multiple lines of text that can be edited, then
you should usethe Text widget.
• If you want to display one or more lines of text that cannot be
modified by the user then you should use the Label widget.
Syntax:
Here is the simple syntax to create this widget:
w = Entry( master, option, ... )
Parameters:
– master: This represents the parent window.
– options: Here is the list of most commonly used options for this
widget. These options can be used as key-value pairs separated
by commas.
Example:
from Tkinter import *
top = Tk()
L1 = Label(top, text="User Name")
L1.pack( side = LEFT)
E1 = Entry(top, bd =5)
E1.pack(side = RIGHT)
top.mainloop()
Python - Tkinter Frame
• The Frame widget is very important for the process of grouping and
organizing other widgets in a somehow friendly way. It works like a
container, which is responsible for arranging the position of other
widgets.
• It uses rectangular areas in the screen to organize the layout and to
provide padding of these widgets. A frame can also be used as a
foundation class to implement complex widgets.
Syntax:
Here is the simple syntax to create this widget:
w = Frame ( master, option, ... )
Parameters:
– master: This represents the parent window.
– options: Here is the list of most commonly used options for this
widget. These options can be used as key-value pairs separated
by commas.
Example:
from Tkinter import *
root = Tk()
frame = Frame(root)
frame.pack()
bottomframe = Frame(root)
bottomframe.pack( side = BOTTOM )
redbutton = Button(frame, text="Red", fg="red")
redbutton.pack( side = LEFT)
greenbutton = Button(frame, text="Brown", fg="brown")
greenbutton.pack( side = LEFT )
bluebutton = Button(frame, text="Blue", fg="blue")
bluebutton.pack( side = LEFT )
blackbutton = Button(bottomframe, text="Black",
fg="black")
blackbutton.pack( side = BOTTOM)
root.mainloop()
Python - Tkinter Label
• This widget implements a display box where you can place text or
images. The text displayed by this widget can be updated at any
time you want.
• It is also possible to underline part of the text (like to identify a
keyboard shortcut), and span the text across multiple lines.
Syntax:
Here is the simple syntax to create this widget:
w = Label ( master, option, ... )
Parameters:
– master: This represents the parent window.
– options: Here is the list of most commonly used options for this
widget. These options can be used as key-value pairs separated
by commas.
Example:
from Tkinter import *
root = Tk()
var = StringVar()
label = Label( root, textvariable=var, relief=RAISED )
var.set("Hey!? How are you doing?")
label.pack()
root.mainloop()
Python - Tkinter Listbox
• The Listbox widget is used to display a list of items from which a
user can select a number of items
Syntax:
• Here is the simple syntax to create this widget:
w = Listbox ( master, option, ... )
Parameters:
– master: This represents the parent window.
– options: Here is the list of most commonly used options for this
widget. These options can be used as key-value pairs separated
by commas.
Example:
from Tkinter import *
import tkMessageBox
import Tkinter
top = Tk()
Lb1 = Listbox(top)
Lb1.insert(1, "Python")
Lb1.insert(2, "Perl")
Lb1.insert(3, "C")
Lb1.insert(4, "PHP")
Lb1.insert(5, "JSP")
Lb1.insert(6, "Ruby")
Lb1.pack()
top.mainloop()
Python - Tkinter Menubutton
• A menubutton is the part of a drop-down menu that stays on the
screen all the time. Every menubutton is associated with a Menu
widget that can display the choices for that menubutton when the
user clicks on it.
Syntax:
Here is the simple syntax to create this widget:
w = Menubutton ( master, option, ... )
Parameters:
– master: This represents the parent window.
– options: Here is the list of most commonly used options for this
widget. These options can be used as key-value pairs separated
by commas.
Example:
from Tkinter import *
import tkMessageBox
import Tkinter
top = Tk()
mb= Menubutton ( top, text="condiments", relief=RAISED )
mb.grid()
mb.menu = Menu ( mb, tearoff = 0 )
mb["menu"] = mb.menu
mayoVar = IntVar()
ketchVar = IntVar()
mb.menu.add_checkbutton ( label="mayo“, variable=mayoVar )
mb.menu.add_checkbutton ( label="ketchup“,
variable=ketchVar )
mb.pack()
top.mainloop()
Python - Tkinter Message
• This widget provides a multiline and noneditable object that
displays texts, automatically breaking lines and justifying their
contents.
• Its functionality is very similar to the one provided by the Label
widget, except that it can also automatically wrap the text,
maintaining a given width or aspect ratio.
Syntax:
Here is the simple syntax to create this widget:
w = Message ( master, option, ... )
Parameters:
– master: This represents the parent window.
– options: Here is the list of most commonly used options for this
widget. These options can be used as key-value pairs separated
by commas.
Example:
from Tkinter import *
root = Tk()
var = StringVar()
label = Message( root, textvariable=var, relief=RAISED )
var.set("Hey!? How are you doing?")
label.pack()
root.mainloop()
Python - Tkinter Radiobutton
• This widget implements a multiple-choice button, which is a way to
offer many possible selections to the user, and let user choose only
one of them.
• In order to implement this functionality, each group of radiobuttons
must be associated to the same variable, and each one of the
buttons must symbolize a single value. You can use the Tab key to
switch from one radionbutton to another.
Syntax:
Here is the simple syntax to create this widget:
w = Radiobutton ( master, option, ... )
Parameters:
– master: This represents the parent window.
– options: Here is the list of most commonly used options for this
widget. These options can be used as key-value pairs separated
by commas.
Example:
from Tkinter import *
def sel():
selection = "You selected the option " + str(var.get())
label.config(text = selection)
root = Tk()
var = IntVar()
R1 = Radiobutton(root, text="Option 1", variable=var,
value=1, command=sel)
R1.pack( anchor = W )
R2 = Radiobutton(root, text="Option 2", variable=var,
value=2,command=sel)
R2.pack( anchor = W )
R3 = Radiobutton(root, text="Option 3", variable=var,
value=3,command=sel)
R3.pack( anchor = W)
label = Label(root)
label.pack()
root.mainloop()
Python - Tkinter Scale
• The Scale widget provides a graphical slider object that allows you
to select values from a specific scale.
Syntax:
Here is the simple syntax to create this widget:
w = Scale ( master, option, ... )
Parameters:
– master: This represents the parent window.
– options: Here is the list of most commonly used options for this
widget. These options can be used as key-value pairs separated
by commas.
Example:
from Tkinter import *
def sel():
selection = "Value = " + str(var.get())
label.config(text = selection)
root = Tk()
var = DoubleVar()
scale = Scale( root, variable = var )
scale.pack(anchor=CENTER)
button = Button(root, text="Get Scale Value", command=sel)
button.pack(anchor=CENTER)
label = Label(root)
label.pack()
root.mainloop()
Python - Tkinter Scrollbar
• This widget provides a slide controller that is used to implement
vertical scrolled widgets, such as Listbox, Text, and Canvas. Note
that you can also create horizontal scrollbars on Entry widgets.
Syntax:
Here is the simple syntax to create this widget:
w = Scrollbar ( master, option, ... )
Parameters:
– master: This represents the parent window.
– options: Here is the list of most commonly used options for this
widget. These options can be used as key-value pairs separated
by commas.
Example:
from Tkinter import *
root = Tk()
scrollbar = Scrollbar(root)
scrollbar.pack( side = RIGHT, fill=Y )
mylist = Listbox(root, yscrollcommand = scrollbar.set )
for line in range(100):
mylist.insert(END, "This is line number " + str(line))
mylist.pack( side = LEFT, fill = BOTH )
scrollbar.config( command = mylist.yview )
mainloop()
Python - Tkinter Text
• Text widgets provide advanced capabilities that allow you to edit a
multiline text and format the way it has to be displayed, such as
changing its color and font.
• You can also use elegant structures like tabs and marks to locate
specific sections of the text, and apply changes to those areas.
Moreover, you can embed windows and images in the text because
this widget was designed to handle both plain and formatted text.
Syntax:
Here is the simple syntax to create this widget:
w = Text ( master, option, ... )
Parameters:
– master: This represents the parent window.
– options: Here is the list of most commonly used options for this
widget. These options can be used as key-value pairs separated
by commas.
Example:
from Tkinter import *
def onclick():
pass
root = Tk()
text = Text(root)
text.insert(INSERT, "Hello.....")
text.insert(END, "Bye Bye.....")
text.pack()
text.tag_add("here", "1.0", "1.4")
text.tag_add("start", "1.8", "1.13")
text.tag_config("here", background="yellow",
foreground="blue")
text.tag_config("start", background="black",
foreground="green")
root.mainloop()
Python - Tkinter Toplevel
• Toplevel widgets work as windows that are directly managed by the
window manager. They do not necessarily have a parent widget on
top of them.
• Your application can use any number of top-level windows.
Syntax:
Here is the simple syntax to create this widget:
w = Toplevel ( option, ... )
Parameters:
– options: Here is the list of most commonly used options for this
widget. These options can be used as key-value pairs separated
by commas.
Example:
from Tkinter import *
root = Tk()
top = Toplevel()
top.mainloop()
Python - Tkinter Spinbox
• The Spinbox widget is a variant of the standard Tkinter Entry
widget, which can be used to select from a fixed number of values.
Syntax:
Here is the simple syntax to create this widget:
w = Spinbox( master, option, ... )
Parameters:
– master: This represents the parent window.
– options: Here is the list of most commonly used options for this
widget. These options can be used as key-value pairs separated
by commas.
Example:
from Tkinter import *
master = Tk()
w = Spinbox(master, from_=0, to=10)
w.pack()
mainloop()
Python - Tkinter PanedWindow
• A PanedWindow is a container widget that may contain any number
of panes, arranged horizontally or vertically.
• Each pane contains one widget, and each pair of panes is separated
by a moveable (via mouse movements) sash. Moving a sash causes
the widgets on either side of the sash to be resized.
Syntax:
Here is the simple syntax to create this widget:
w = PanedWindow( master, option, ... )
Parameters:
– master: This represents the parent window.
– options: Here is the list of most commonly used options for this
widget. These options can be used as key-value pairs separated
by commas.
Example:
from Tkinter import *
m1 = PanedWindow()
m1.pack(fill=BOTH, expand=1)
left = Label(m1, text="left pane")
m1.add(left)
m2 = PanedWindow(m1, orient=VERTICAL)
m1.add(m2)
top = Label(m2, text="top pane")
m2.add(top)
bottom = Label(m2, text="bottom pane")
m2.add(bottom)
mainloop()
Python - Tkinter LabelFrame
• A labelframe is a simple container widget. Its primary purpose is to
act as a spacer or container for complex window layouts.
• This widget has the features of a frame plus the ability to display a
label.
Syntax:
Here is the simple syntax to create this widget:
w = LabelFrame( master, option, ... )
Parameters:
– master: This represents the parent window.
– options: Here is the list of most commonly used options for this
widget. These options can be used as key-value pairs separated
by commas.
Example:
from Tkinter import *
root = Tk()
labelframe = LabelFrame(root, text="This is a LabelFrame")
labelframe.pack(fill="both", expand="yes")
left = Label(labelframe, text="Inside the LabelFrame")
left.pack()
root.mainloop()

More Related Content

PPT
Python.pdf textbooks content Artificical
PPT
tkinter final ppt.ppt
PPTX
Tkinter_GUI_Programming_in_Pythovvn.pptx
PDF
Tkinter_GUI_Programming_in_ Python.pdf
PDF
Tkinter_GUI_Programming_in_Python.pdf
PPTX
lec 9.pptx
PPTX
tkinterpptxguipythonImport it is named ‘tkinter
PDF
GUI In Python.pdf By : Sangeeta M Chauhan , Gwalior
Python.pdf textbooks content Artificical
tkinter final ppt.ppt
Tkinter_GUI_Programming_in_Pythovvn.pptx
Tkinter_GUI_Programming_in_ Python.pdf
Tkinter_GUI_Programming_in_Python.pdf
lec 9.pptx
tkinterpptxguipythonImport it is named ‘tkinter
GUI In Python.pdf By : Sangeeta M Chauhan , Gwalior

Similar to Python Programming (20)

PPTX
PYTHON - EXTRA Chapter GUI - MAULIK BORSANIYA
PDF
Unit 5-Introduction of GUI Programming-Part2.pdf
PPT
PYTHON - TKINTER - GUI - PART 1.ppt
PDF
GUI Programming with TKinter and Tkinter Widgets.pdf
PPT
graphical user interface using python easy
PPT
Graphical Programming in Python Using Tkinter
PDF
Unit 5-Introduction of GUI Programming-Part1.pdf
PPTX
Python Graphical User Interface and design
PPTX
d1c70870-58fb-4da8-ae54-28d1c44a7347.pptx
PPTX
Gui programming
PPTX
Chapter - 6.pptx
PPTX
ITS-16163-Module 8-Graphic User Interface (GUI)
PDF
A Complete seminar on GUI Development in python
PDF
PDF
Python - gui programming (tkinter)
PPTX
GUI Programming using Tkinter-converted.pptx
PPTX
Introduction to Graphics
PDF
Tkinter Python Tutorial | Python GUI Programming Using Tkinter Tutorial | Pyt...
PDF
Python GUI
PPTX
Day 18.pptx
PYTHON - EXTRA Chapter GUI - MAULIK BORSANIYA
Unit 5-Introduction of GUI Programming-Part2.pdf
PYTHON - TKINTER - GUI - PART 1.ppt
GUI Programming with TKinter and Tkinter Widgets.pdf
graphical user interface using python easy
Graphical Programming in Python Using Tkinter
Unit 5-Introduction of GUI Programming-Part1.pdf
Python Graphical User Interface and design
d1c70870-58fb-4da8-ae54-28d1c44a7347.pptx
Gui programming
Chapter - 6.pptx
ITS-16163-Module 8-Graphic User Interface (GUI)
A Complete seminar on GUI Development in python
Python - gui programming (tkinter)
GUI Programming using Tkinter-converted.pptx
Introduction to Graphics
Tkinter Python Tutorial | Python GUI Programming Using Tkinter Tutorial | Pyt...
Python GUI
Day 18.pptx
Ad

Recently uploaded (20)

PDF
III.4.1.2_The_Space_Environment.p pdffdf
PPTX
MET 305 2019 SCHEME MODULE 2 COMPLETE.pptx
PDF
The CXO Playbook 2025 – Future-Ready Strategies for C-Suite Leaders Cerebrai...
PPTX
Information Storage and Retrieval Techniques Unit III
PPT
INTRODUCTION -Data Warehousing and Mining-M.Tech- VTU.ppt
PPT
Total quality management ppt for engineering students
PDF
UNIT no 1 INTRODUCTION TO DBMS NOTES.pdf
PPTX
Fundamentals of safety and accident prevention -final (1).pptx
PPT
introduction to datamining and warehousing
PPTX
introduction to high performance computing
PDF
null (2) bgfbg bfgb bfgb fbfg bfbgf b.pdf
PPTX
Current and future trends in Computer Vision.pptx
PPT
Occupational Health and Safety Management System
PPTX
Fundamentals of Mechanical Engineering.pptx
PPT
A5_DistSysCh1.ppt_INTRODUCTION TO DISTRIBUTED SYSTEMS
PDF
EXPLORING LEARNING ENGAGEMENT FACTORS INFLUENCING BEHAVIORAL, COGNITIVE, AND ...
PDF
Abrasive, erosive and cavitation wear.pdf
PDF
Unit I ESSENTIAL OF DIGITAL MARKETING.pdf
PDF
Exploratory_Data_Analysis_Fundamentals.pdf
PDF
BIO-INSPIRED ARCHITECTURE FOR PARSIMONIOUS CONVERSATIONAL INTELLIGENCE : THE ...
III.4.1.2_The_Space_Environment.p pdffdf
MET 305 2019 SCHEME MODULE 2 COMPLETE.pptx
The CXO Playbook 2025 – Future-Ready Strategies for C-Suite Leaders Cerebrai...
Information Storage and Retrieval Techniques Unit III
INTRODUCTION -Data Warehousing and Mining-M.Tech- VTU.ppt
Total quality management ppt for engineering students
UNIT no 1 INTRODUCTION TO DBMS NOTES.pdf
Fundamentals of safety and accident prevention -final (1).pptx
introduction to datamining and warehousing
introduction to high performance computing
null (2) bgfbg bfgb bfgb fbfg bfbgf b.pdf
Current and future trends in Computer Vision.pptx
Occupational Health and Safety Management System
Fundamentals of Mechanical Engineering.pptx
A5_DistSysCh1.ppt_INTRODUCTION TO DISTRIBUTED SYSTEMS
EXPLORING LEARNING ENGAGEMENT FACTORS INFLUENCING BEHAVIORAL, COGNITIVE, AND ...
Abrasive, erosive and cavitation wear.pdf
Unit I ESSENTIAL OF DIGITAL MARKETING.pdf
Exploratory_Data_Analysis_Fundamentals.pdf
BIO-INSPIRED ARCHITECTURE FOR PARSIMONIOUS CONVERSATIONAL INTELLIGENCE : THE ...
Ad

Python Programming

  • 1. 18. Python - GUI Programming (Tkinter) Python provides various options for developing graphical user interfaces (GUIs). Most important are listed below: • Tkinter: Tkinter is the Python interface to the Tk GUI toolkit shipped with Python. We would look this option in this tutorial. • wxPython: This is an open-source Python interface for wxWindows http://wxpython.org. • JPython: JPython is a Python port for Java, which gives Python scripts seamless access to Java class libraries on the local machine http://www.jython.org.
  • 2. Tkinter Programming: • Tkinter is the standard GUI library for Python. Python when combined with Tkinter provides a fast and easy way to create GUI applications. Tkinter provides a powerful object-oriented interface to the Tk GUI toolkit. • Creating a GUI application using Tkinter is an easy task. All you need to do is perform the following steps: – Example:Import the Tkinter module. – Create the GUI application main window. – Add one or more of the above mentioned widgets to the GUI application. – Enter the main event loop to take action against each event triggered by the user. import Tkinter top = Tkinter.Tk() # Code to add widgets will go here... top.mainloop()
  • 3. Python - Tkinter Button The Button widget is used to add buttons in a Python application. These buttons can display text or images that convey the purpose of the buttons. You can attach a function or a method to a button, which is called automatically when you click the button. Syntax: w = Button ( master, option=value, ... ) Parameters: – master: This represents the parent window. – options: Here is the list of most commonly used options for this widget. These options can be used as key-value pairs separated by commas.
  • 4. Example: import Tkinter import tkMessageBox top = Tkinter.Tk() def helloCallBack(): tkMessageBox.showinfo( "Hello Python", "Hello World") B = Tkinter.Button(top, text ="Hello", command = helloCallBack) B.pack() top.mainloop()
  • 5. Python - Tkinter Canvas The Canvas is a rectangular area intended for drawing pictures or other complex layouts. You can place graphics, text, widgets, or frames on a Canvas. Syntax: w = Canvas ( master, option=value, ... ) • Parameters: – master: This represents the parent window. – options: Here is the list of most commonly used options for this widget. These options can be used as key-value pairs separated by commas.
  • 6. The Canvas widget can support the following standard items: • arc . Creates an arc item. coord = 10, 50, 240, 210 arc = canvas.create_arc(coord, start=0, extent=150, fill="blue") • image . Creates an image item, which can be an instance of either the BitmapImage or the PhotoImage classes. filename = PhotoImage(file = "sunshine.gif") image = canvas.create_image(50, 50, anchor=NE, image=filename) • line . Creates a line item. line = canvas.create_line(x0, y0, x1, y1, ..., xn, yn, options) • oval . Creates a circle or an ellipse at the given coordinates. oval = canvas.create_oval(x0, y0, x1, y1, options) • polygon . Creates a polygon item that must have at least three vertices. oval = canvas.create_polygon(x0, y0, x1, y1,...xn, yn, options)
  • 7. Example: import Tkinter import tkMessageBox top = Tkinter.Tk() C = Tkinter.Canvas(top, bg="blue", height=250, width=300) coord = 10, 50, 240, 210 arc = C.create_arc(coord, start=0, extent=150, fill="red") C.pack() top.mainloop()
  • 8. Example: import Tkinter import tkMessageBox top = Tkinter.Tk() C = Tkinter.Canvas(top, bg="blue", height=250, width=300) coord = 10, 50, 240, 210 arc = C.create_arc(coord, start=0, extent=150, fill="red") C.pack() top.mainloop()
  • 9. Python - Tkinter Checkbutton The Checkbutton widget is used to display a number of options to a user as toggle buttons. The user can then select one or more options by clicking the button corresponding to each option. You can also display images in place of text. Syntax: w = Checkbutton ( master, option, ... ) • Parameters: – master: This represents the parent window. – options: Here is the list of most commonly used options for this widget. These options can be used as key-value pairs separated by commas.
  • 10. Example: from Tkinter import * import tkMessageBox import Tkinter top = Tkinter.Tk() CheckVar1 = IntVar() CheckVar2 = IntVar() C1 = Checkbutton(top, text = "Music", variable = CheckVar1, onvalue = 1, offvalue = 0, height=5, width = 20) C2 = Checkbutton(top, text = "Video", variable = CheckVar2, onvalue = 1, offvalue = 0, height=5, width = 20) C1.pack() C2.pack() top.mainloop()
  • 11. Python - Tkinter Entry: • The Entry widget is used to accept single-line text strings from a user. • If you want to display multiple lines of text that can be edited, then you should usethe Text widget. • If you want to display one or more lines of text that cannot be modified by the user then you should use the Label widget. Syntax: Here is the simple syntax to create this widget: w = Entry( master, option, ... ) Parameters: – master: This represents the parent window. – options: Here is the list of most commonly used options for this widget. These options can be used as key-value pairs separated by commas.
  • 12. Example: from Tkinter import * top = Tk() L1 = Label(top, text="User Name") L1.pack( side = LEFT) E1 = Entry(top, bd =5) E1.pack(side = RIGHT) top.mainloop()
  • 13. Python - Tkinter Frame • The Frame widget is very important for the process of grouping and organizing other widgets in a somehow friendly way. It works like a container, which is responsible for arranging the position of other widgets. • It uses rectangular areas in the screen to organize the layout and to provide padding of these widgets. A frame can also be used as a foundation class to implement complex widgets. Syntax: Here is the simple syntax to create this widget: w = Frame ( master, option, ... ) Parameters: – master: This represents the parent window. – options: Here is the list of most commonly used options for this widget. These options can be used as key-value pairs separated by commas.
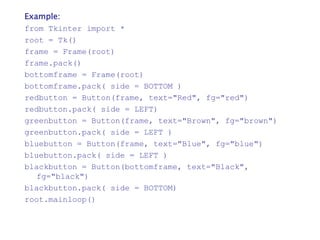
  • 14. Example: from Tkinter import * root = Tk() frame = Frame(root) frame.pack() bottomframe = Frame(root) bottomframe.pack( side = BOTTOM ) redbutton = Button(frame, text="Red", fg="red") redbutton.pack( side = LEFT) greenbutton = Button(frame, text="Brown", fg="brown") greenbutton.pack( side = LEFT ) bluebutton = Button(frame, text="Blue", fg="blue") bluebutton.pack( side = LEFT ) blackbutton = Button(bottomframe, text="Black", fg="black") blackbutton.pack( side = BOTTOM) root.mainloop()
  • 15. Python - Tkinter Label • This widget implements a display box where you can place text or images. The text displayed by this widget can be updated at any time you want. • It is also possible to underline part of the text (like to identify a keyboard shortcut), and span the text across multiple lines. Syntax: Here is the simple syntax to create this widget: w = Label ( master, option, ... ) Parameters: – master: This represents the parent window. – options: Here is the list of most commonly used options for this widget. These options can be used as key-value pairs separated by commas.
  • 16. Example: from Tkinter import * root = Tk() var = StringVar() label = Label( root, textvariable=var, relief=RAISED ) var.set("Hey!? How are you doing?") label.pack() root.mainloop()
  • 17. Python - Tkinter Listbox • The Listbox widget is used to display a list of items from which a user can select a number of items Syntax: • Here is the simple syntax to create this widget: w = Listbox ( master, option, ... ) Parameters: – master: This represents the parent window. – options: Here is the list of most commonly used options for this widget. These options can be used as key-value pairs separated by commas.
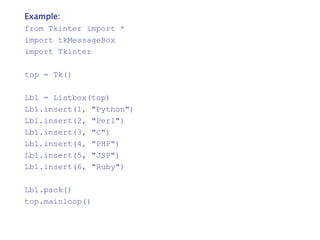
  • 18. Example: from Tkinter import * import tkMessageBox import Tkinter top = Tk() Lb1 = Listbox(top) Lb1.insert(1, "Python") Lb1.insert(2, "Perl") Lb1.insert(3, "C") Lb1.insert(4, "PHP") Lb1.insert(5, "JSP") Lb1.insert(6, "Ruby") Lb1.pack() top.mainloop()
  • 19. Python - Tkinter Menubutton • A menubutton is the part of a drop-down menu that stays on the screen all the time. Every menubutton is associated with a Menu widget that can display the choices for that menubutton when the user clicks on it. Syntax: Here is the simple syntax to create this widget: w = Menubutton ( master, option, ... ) Parameters: – master: This represents the parent window. – options: Here is the list of most commonly used options for this widget. These options can be used as key-value pairs separated by commas.
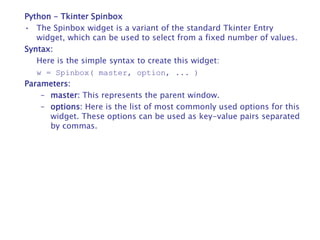
  • 20. Example: from Tkinter import * import tkMessageBox import Tkinter top = Tk() mb= Menubutton ( top, text="condiments", relief=RAISED ) mb.grid() mb.menu = Menu ( mb, tearoff = 0 ) mb["menu"] = mb.menu mayoVar = IntVar() ketchVar = IntVar() mb.menu.add_checkbutton ( label="mayo“, variable=mayoVar ) mb.menu.add_checkbutton ( label="ketchup“, variable=ketchVar ) mb.pack() top.mainloop()
  • 21. Python - Tkinter Message • This widget provides a multiline and noneditable object that displays texts, automatically breaking lines and justifying their contents. • Its functionality is very similar to the one provided by the Label widget, except that it can also automatically wrap the text, maintaining a given width or aspect ratio. Syntax: Here is the simple syntax to create this widget: w = Message ( master, option, ... ) Parameters: – master: This represents the parent window. – options: Here is the list of most commonly used options for this widget. These options can be used as key-value pairs separated by commas.
  • 22. Example: from Tkinter import * root = Tk() var = StringVar() label = Message( root, textvariable=var, relief=RAISED ) var.set("Hey!? How are you doing?") label.pack() root.mainloop()
  • 23. Python - Tkinter Radiobutton • This widget implements a multiple-choice button, which is a way to offer many possible selections to the user, and let user choose only one of them. • In order to implement this functionality, each group of radiobuttons must be associated to the same variable, and each one of the buttons must symbolize a single value. You can use the Tab key to switch from one radionbutton to another. Syntax: Here is the simple syntax to create this widget: w = Radiobutton ( master, option, ... ) Parameters: – master: This represents the parent window. – options: Here is the list of most commonly used options for this widget. These options can be used as key-value pairs separated by commas.
  • 24. Example: from Tkinter import * def sel(): selection = "You selected the option " + str(var.get()) label.config(text = selection) root = Tk() var = IntVar() R1 = Radiobutton(root, text="Option 1", variable=var, value=1, command=sel) R1.pack( anchor = W ) R2 = Radiobutton(root, text="Option 2", variable=var, value=2,command=sel) R2.pack( anchor = W ) R3 = Radiobutton(root, text="Option 3", variable=var, value=3,command=sel) R3.pack( anchor = W) label = Label(root) label.pack() root.mainloop()
  • 25. Python - Tkinter Scale • The Scale widget provides a graphical slider object that allows you to select values from a specific scale. Syntax: Here is the simple syntax to create this widget: w = Scale ( master, option, ... ) Parameters: – master: This represents the parent window. – options: Here is the list of most commonly used options for this widget. These options can be used as key-value pairs separated by commas.
  • 26. Example: from Tkinter import * def sel(): selection = "Value = " + str(var.get()) label.config(text = selection) root = Tk() var = DoubleVar() scale = Scale( root, variable = var ) scale.pack(anchor=CENTER) button = Button(root, text="Get Scale Value", command=sel) button.pack(anchor=CENTER) label = Label(root) label.pack() root.mainloop()
  • 27. Python - Tkinter Scrollbar • This widget provides a slide controller that is used to implement vertical scrolled widgets, such as Listbox, Text, and Canvas. Note that you can also create horizontal scrollbars on Entry widgets. Syntax: Here is the simple syntax to create this widget: w = Scrollbar ( master, option, ... ) Parameters: – master: This represents the parent window. – options: Here is the list of most commonly used options for this widget. These options can be used as key-value pairs separated by commas.
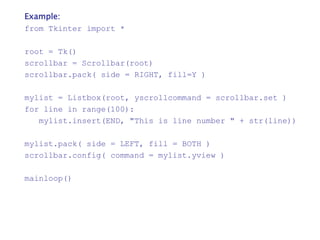
  • 28. Example: from Tkinter import * root = Tk() scrollbar = Scrollbar(root) scrollbar.pack( side = RIGHT, fill=Y ) mylist = Listbox(root, yscrollcommand = scrollbar.set ) for line in range(100): mylist.insert(END, "This is line number " + str(line)) mylist.pack( side = LEFT, fill = BOTH ) scrollbar.config( command = mylist.yview ) mainloop()
  • 29. Python - Tkinter Text • Text widgets provide advanced capabilities that allow you to edit a multiline text and format the way it has to be displayed, such as changing its color and font. • You can also use elegant structures like tabs and marks to locate specific sections of the text, and apply changes to those areas. Moreover, you can embed windows and images in the text because this widget was designed to handle both plain and formatted text. Syntax: Here is the simple syntax to create this widget: w = Text ( master, option, ... ) Parameters: – master: This represents the parent window. – options: Here is the list of most commonly used options for this widget. These options can be used as key-value pairs separated by commas.
  • 30. Example: from Tkinter import * def onclick(): pass root = Tk() text = Text(root) text.insert(INSERT, "Hello.....") text.insert(END, "Bye Bye.....") text.pack() text.tag_add("here", "1.0", "1.4") text.tag_add("start", "1.8", "1.13") text.tag_config("here", background="yellow", foreground="blue") text.tag_config("start", background="black", foreground="green") root.mainloop()
  • 31. Python - Tkinter Toplevel • Toplevel widgets work as windows that are directly managed by the window manager. They do not necessarily have a parent widget on top of them. • Your application can use any number of top-level windows. Syntax: Here is the simple syntax to create this widget: w = Toplevel ( option, ... ) Parameters: – options: Here is the list of most commonly used options for this widget. These options can be used as key-value pairs separated by commas.
  • 32. Example: from Tkinter import * root = Tk() top = Toplevel() top.mainloop()
  • 33. Python - Tkinter Spinbox • The Spinbox widget is a variant of the standard Tkinter Entry widget, which can be used to select from a fixed number of values. Syntax: Here is the simple syntax to create this widget: w = Spinbox( master, option, ... ) Parameters: – master: This represents the parent window. – options: Here is the list of most commonly used options for this widget. These options can be used as key-value pairs separated by commas.
  • 34. Example: from Tkinter import * master = Tk() w = Spinbox(master, from_=0, to=10) w.pack() mainloop()
  • 35. Python - Tkinter PanedWindow • A PanedWindow is a container widget that may contain any number of panes, arranged horizontally or vertically. • Each pane contains one widget, and each pair of panes is separated by a moveable (via mouse movements) sash. Moving a sash causes the widgets on either side of the sash to be resized. Syntax: Here is the simple syntax to create this widget: w = PanedWindow( master, option, ... ) Parameters: – master: This represents the parent window. – options: Here is the list of most commonly used options for this widget. These options can be used as key-value pairs separated by commas.
  • 36. Example: from Tkinter import * m1 = PanedWindow() m1.pack(fill=BOTH, expand=1) left = Label(m1, text="left pane") m1.add(left) m2 = PanedWindow(m1, orient=VERTICAL) m1.add(m2) top = Label(m2, text="top pane") m2.add(top) bottom = Label(m2, text="bottom pane") m2.add(bottom) mainloop()
  • 37. Python - Tkinter LabelFrame • A labelframe is a simple container widget. Its primary purpose is to act as a spacer or container for complex window layouts. • This widget has the features of a frame plus the ability to display a label. Syntax: Here is the simple syntax to create this widget: w = LabelFrame( master, option, ... ) Parameters: – master: This represents the parent window. – options: Here is the list of most commonly used options for this widget. These options can be used as key-value pairs separated by commas.
  • 38. Example: from Tkinter import * root = Tk() labelframe = LabelFrame(root, text="This is a LabelFrame") labelframe.pack(fill="both", expand="yes") left = Label(labelframe, text="Inside the LabelFrame") left.pack() root.mainloop()