Useful linux-commands
Download as RTF, PDF3 likes933 views

This document provides an extensive list of useful Linux commands, primarily for Ubuntu, covering various operations including managing network routes, processes, and files. It includes instructions for package management, system monitoring, and utilizing tools like curl, iptables, and tcpdump. Additionally, it features examples for file manipulation and command usage for both terminal operations and system configuration.

![• Static IP that last with reboot
Add the route on interface,
vi /etc/networks/interface
Give the IP:
iface eth0 inet static
address 10.10.10.107
netmask 255.255.255.0
gateway 10.10.10.1
• Give multiple address to one interface
sudo ip addr add 192.168.10.15/24 dev eth0
sudo ifconfig eth0:1 192.168.10.10 netmask 255.255.255.0 up
To Check all IP address belongs to an interface.
ip addr list dev eth0 ==> will list all the addresses.
Scsi+process on top system partition run out of space
Before it totally goes a thread called scsi_eh_0 appears(using top).
cat /var/log/dmesg | egrep scsi[0-9]+ :
• Check the CPU and memory used by process:
top : Display and update sorted information about processes.
atop : Advanced System & Process Monitor.
htop : Interactive process viewer.
• Check running process
• ps -aux | less
• Options:
-a list of all process runing by all user on the system
-u default info like PID, TTY, TIME and CMD
-x add list of processer that has no controlling terminal ( program
lunched during bootup)
• ps -ef | less
-e list of information about every process currently running
-f contains fewer items of information
• ps -axjf | less
print the process tree
• $ps -axjf | head -n 6
PPID PID PGID SID TTY TPGID STAT UID TIME COMMAND
0 2 0 0 ? -1 S 0 0:00 [kthreadd]
2 3 0 0 ? -1 S 0 0:00 _ [ksoftirqd/0]
• Process information about thread](https://image.slidesharecdn.com/useful-linux-commands-161101035458/85/Useful-linux-commands-2-320.jpg)
![$ ps -eLf | head -n 6
UID PID PPID LWP C NLWP STIME TTY TIME CMD
root 1 0 1 0 1 Oct24 ? 00:00:12 /sbin/init splash
root 2 0 2 0 1 Oct24 ? 00:00:00 [kthreadd]
• List the process run by user root
ps -U root -u root u | head -n 5
USER PID %CPU %MEM VSZ RSS TTY STAT START TIME COMMAND
root 1 0.0 0.0 185240 5972 ? Ss Oct24 0:12 /sbin/init splash
root 2 0.0 0.0 0 0 ? S Oct24 0:00 [kthreadd]
• Process
• Send process in background processname : & or bg
• Bring process in forgound fg
• Set up VNC in linux:
• go to the file /vnc/sysconfig /vnc server
• Add your name for desktop –and give the password
• Vncserver “-gebmetrt 8008600 –n listen tcp –local host “
• /home/.vnc/xstatup file
• Add statx
• Fador14” : VNC
• For login as root, change permissions
• /etc/pam.d= commont on auth required – pam service ! = root qws
• And gdm-password
• Pam-success if != root..
• Check the Disk Usage, du
• du is to check disk usaged
• h_. human readable, S deapth, n number, S subdirectory , --max-deapth ==1
• du -s /home ====> summarized the disk data in the home directory
• du -a /etc ====> every level of directory
• nfree Space in the drive: df
• root@kali:/etc# df -h
Filesystem Size Used Avail Use% Mounted on
rootfs 504M 5.3M 499M 2% /
udev 10M 0 10M 0% /dev
tmpfs 101M 528K 101M 1% /run
/dev/sr0 3.0G 3.0G 0 100% /lib/live/mount/medium
/dev/loop0 2.7G 2.7G 0 100% /lib/live/mount/rootfs/filesystem.squashfs
tmpfs 504M 0 504M 0% /lib/live/mount/overlay](https://image.slidesharecdn.com/useful-linux-commands-161101035458/85/Useful-linux-commands-3-320.jpg)


![curl --referer http://10.1.1.13 http://10.1.1.13
Accept: */*
Referer: http://10.1.1.5
curl --data "abc.com" http://192.168.22.13 -vv
* About to connect() to 192.168.22.13 port 80 (#0)
* Trying 192.168.22.13... connected
* Connected to 192.168.22.13 (192.168.22.13) port 80 (#0)
POST / HTTP/1.1
• TCPDUMP:
• URGENT (URG) packets...
# tcpdump 'tcp[13] & 32!=0'
• ACKNOWLEDGE (ACK) packets...
# tcpdump 'tcp[13] & 16!=0'
• PUSH (PSH) packets...
# tcpdump 'tcp[13] & 8!=0'
• Show me all RESET (RST) packets...
# tcpdump 'tcp[13] & 4!=0'
• Show me all SYNCHRONIZE (SYN) packets...
# tcpdump 'tcp[13] & 2!=0'
• Show me all FINISH (FIN) packets...
# tcpdump 'tcp[13] & 1!=0'
• # tcpdump ip6
• Packets with both the RST and SYN flags set
# tcpdump 'tcp[13] = 6 & tcp[13]= 2’
• Traffic with the 'Evil Bit' Set
• # tcpdump 'ip[6] & 128 != 0'
• TCP traffic from 10.5.2.3 destined for port 3389
• tcpdump -nnvvS and src 10.5.2.3 and dst port 3389
• Traffic originating from the 192.168 network headed for the 10 or 172.16
networks
• tcpdump -nvX src net 192.168.0.0/16 and dst net 10.0.0.0/8 or
172.16.0.0/16
• tcpdump src 10.0.2.4 and (dst port 3389 or 22)
• Show me all ACKNOWLEDGE (ACK) packets...
• IPTables
• IPtable --flush
• Iptables --list
• Simulate Drop some packet(as root):](https://image.slidesharecdn.com/useful-linux-commands-161101035458/85/Useful-linux-commands-6-320.jpg)
![• # for randomly dropping 10% of incoming packets:
• iptables -A INPUT -m statistic --mode random --probability 0.1 -j DROP
• # and for dropping 10% of outgoing packets:
• iptables -A OUTPUT -m statistic --mode random --probability 0.1 -j DROP
• Once done, you can use the following for removing these packet-drops:
• $ for the incoming packets:
• iptables -D INPUT -m statistic --mode random --probability 0.1 -j DROP
• # and for the outgoing packets
• iptables -D OUTPUT -m statistic --mode random --probability 0.1 -j DROP
• Check the sockets using netstat:
Check the routing table:
• netstat -nr ==>print kernel routing tables with IP address
• netstat -r ==>print kernel routing tables with symbolic host
• Interface status
• netstat -i
• all tcp sockets and active internet connection
• Netstat –atn
• all udp sockets and active internet connection
• Netstat -aun
• –t, –u, –w, –x show active TCP, UDP, RAW, or Unix socket connections
• If -a is added, the socket in listing mode will also display.
• Buffer to the kernel Dmesg
Print message buffer of the kernel
• dmesg | tail -n 10
• Print last 10 line
• Dmesg –c ============> clean dmesg
• check the hard drive detected
• dmesg | grep sda
• Grep any string
• dmesg | grep memory
• dmesg | grep usb
• dmesg ] grep error
• Check dmesg in real time
• watch " demesg | tail -10"
• tar
• Create a new tar archive.
• $ tar cvf archive_name.tar dirname/
• Extract from an existing tar archive.
• $ tar xvf archive_name.tar](https://image.slidesharecdn.com/useful-linux-commands-161101035458/85/Useful-linux-commands-7-320.jpg)

![• $ awk '!($0 in array) { array[$0]; print }' temp
• Print all lines from /etc/passwd that has the same uid and gid
• $awk -F ':' '$3==$4' passwd.txt
• Print only specific field from a file.
• $ awk '{print $2,$5;}' employee.txt
• vim
• open and close a file
• $ vim filename
• press :wq! or wq
• Go to the 143rd line of file
• $ vim +143 filename.txt
• Go to the first match of the specified
• $ vim +/search-term filename.txt
• Open the file in read only mode.
• $ vim -R /etc/passwd
• diff
• Ignore white space while comparing.
• # diff -w name_list.txt name_list_new.txt
• sort
• Sort a file in ascending order
• $ sort names.txt
• Sort a file in descending order
• $ sort -r names.txt
• Sort passwd file by 3rd field.
• $ sort -t: -k 3n /etc/passwd | more
• xargs
• Copy all images to external hard-drive
• # ls *.jpg | xargs -n1 -i cp {} /external-hard-drive/directory
• Search all jpg images in the system and archive it.
• # find / -name *.jpg -type f -print | xargs tar -cvzf images.tar.gz
• Download all the URLs mentioned in the url-list.txt file
• # cat url-list.txt | xargs wget –c
• ls
• Display filesize in human readable format (e.g. KB, MB etc.,)
• $ ls -lh
• Order Files Based on Last Modified Time (In Reverse Order)
• $ ls -ltr](https://image.slidesharecdn.com/useful-linux-commands-161101035458/85/Useful-linux-commands-9-320.jpg)


![• Packet table summary for Fedora and Ubuntu
Ubuntu Red hat/fedora
Package file extension .deb .rpm
Repository location
configuration
/etc/apt/sources.list /etc/yum.conf
Install a package from repository apt-get install your_package yum install your_package
Install a package file dpkg --install package.deb yum install your_package.rpm
rpm -i package.rpm
Update a package apt-get upgrade yum update
rpm -Uvh [args]
Upgrade the entire system apt-get dist-upgrade Yum upgrade
Remove a package apt-get remove your-
package
rpm –e your-package
List the package apt-get –list yum list installed
rpm –qa
List files in an installed package dpkg --listfiles your-package rpm -ql your-package
Get information about an
installed package
dpkg --status your-package rpm -qi your-package
List files in a package file dpkg --contents
package.deb
rpm -qpl package.rpm
Extract files in a package dpkg –extract filename Rpm2cpio package.rpm | cpio-vid
Find package that installed a file dpkg –serch filename rpm –qf filename
Remove a file from local cache
directory
apt-get clean yum clean package
Start/stop a service invoke-rc.d apache start
Or
Service apache start (with
sysVconfig)
Service https start
Enable a service at boot update-rc.d apache defaults
Or
sysv-rc-conf apache on
( with sysv-rc-conf )
chkconfig httpd on
Disable a service at boot update-rc.d apache purge
Or
sysv-rc-conf apache off
Chkconfig httpd off
• ping
Ping a host to check availability
• $ ping -c 5 google.com
• Options
• -l size
• -f Find the PMTU. Prevent ICMP request being fragment by the in-between
router.
• -i TTL Time to live
• -v TOS type of service](https://image.slidesharecdn.com/useful-linux-commands-161101035458/85/Useful-linux-commands-18-320.jpg)


![Disk partition commands
Ubuntu file system is name with alphabetical such as /dev/sda is first drive (primary)and
/dev/sdb second and so on.
The numbers refer to partitions, so /dev/sda1 is the first partition of the first drive.
fdisk can list the partition, crate and delete one.
hs@ubuntu:~$ sudo fdisk -l | grep dev
/dev/sda1 * 2048 81788927 81786880 39G 83 Linux
/dev/sda2 81790974 83884031 2093058 1022M 5 Extended
/dev/sda5 81790976 83884031 2093056 1022M 82 Linux swap / Solaris
Disk /dev/sdb: 7.5 GiB, 8053063680 bytes, 15728640 sectors
/dev/sdb1 * 64 6136319 6136256 2.9G c W95 FAT32 (LBA)
hs@ubuntu:~$
popular commands are
sudo fdisk /dev/sdb(partition you wants to work on)
m for list, d for delete
Change will not save until you use “w” for write
hs@ubuntu:/mnt/hgfs$ lsblk
NAME MAJ:MIN RM SIZE RO TYPE MOUNTPOINT
fd0 2:0 1 4K 0 disk
sda 8:0 0 40G 0 disk
─├ sda1 8:1 0 39G 0 part /
─├ sda2 8:2 0 1K 0 part
─└ sda5 8:5 0 1022M 0 part [SWAP]
sdb 8:16 1 7.5G 0 disk===============> This is USB
─└ sdb1 8:17 1 2.9G 0 part
sr0 11:0 1 1024M 0 rom
sr1 11:1 1 1024M 0 rom
hs@ubuntu:/mnt/hgfs$
parted : also describe the partition,
parted print
Number Start End Size Type File system Flags
1 1049kB 41.9GB 41.9GB primary ext4 boot
2 41.9GB 42.9GB 1072MB extended
5 41.9GB 42.9GB 1072MB logical linux-swap(v1)
quit
mkfs.ext3 /dev/sdb1 will change the file system to ext3 in /dev/sdb1 partition
send a process in backgroup ^z
bring it back fg and pid
apt-cache command line tool is used for searching apt software package cache.](https://image.slidesharecdn.com/useful-linux-commands-161101035458/85/Useful-linux-commands-21-320.jpg)

Useful linux-commands
- 1. Following contains some most use commands Linux( mostly based on ubuntu). This document also contains the package install, update comparison for fedora and Ubuntu. • Add default gateway route add default gw 10.1.1.1 dev eth0 Delete default gateway. route del default. • Add ip route or static IP ip route add 192.168.22.1 dev eth0 ip route add 192.168.0.0/24 dev eth0 • Del ip route ip route del 192.168.0.0/16 ip route del 192.168.22.1 • Add IPv6 route cat /proc/net/if_inet6 ip -6 route show dev eth0 ip -6 route add 9234::1001:0:0:0/80 dev p4p1 metric 256 ifconfig eth0 inet6 add 2001:0db8:0:f101::1/64 /sbin/ip -6 addr add <ipv6address>/<prefixlength> dev <interface> • Ping Ipv6 route $ ping6 localhost $ ping6 host.domain.com $ ping6 IPv6-address $ ping6 2001:4860:b002::68 • Addr Sudo ip addr shows all the address holds by the interface • Show Ipv6 route /sbin/ip -6 addr show dev eth0 • Wlan address Auto wlan0 Iface wlan0 inet dhcp WPA-SSID wireless123 WPA-PSK <key value>
- 2. • Static IP that last with reboot Add the route on interface, vi /etc/networks/interface Give the IP: iface eth0 inet static address 10.10.10.107 netmask 255.255.255.0 gateway 10.10.10.1 • Give multiple address to one interface sudo ip addr add 192.168.10.15/24 dev eth0 sudo ifconfig eth0:1 192.168.10.10 netmask 255.255.255.0 up To Check all IP address belongs to an interface. ip addr list dev eth0 ==> will list all the addresses. Scsi+process on top system partition run out of space Before it totally goes a thread called scsi_eh_0 appears(using top). cat /var/log/dmesg | egrep scsi[0-9]+ : • Check the CPU and memory used by process: top : Display and update sorted information about processes. atop : Advanced System & Process Monitor. htop : Interactive process viewer. • Check running process • ps -aux | less • Options: -a list of all process runing by all user on the system -u default info like PID, TTY, TIME and CMD -x add list of processer that has no controlling terminal ( program lunched during bootup) • ps -ef | less -e list of information about every process currently running -f contains fewer items of information • ps -axjf | less print the process tree • $ps -axjf | head -n 6 PPID PID PGID SID TTY TPGID STAT UID TIME COMMAND 0 2 0 0 ? -1 S 0 0:00 [kthreadd] 2 3 0 0 ? -1 S 0 0:00 _ [ksoftirqd/0] • Process information about thread
- 3. $ ps -eLf | head -n 6 UID PID PPID LWP C NLWP STIME TTY TIME CMD root 1 0 1 0 1 Oct24 ? 00:00:12 /sbin/init splash root 2 0 2 0 1 Oct24 ? 00:00:00 [kthreadd] • List the process run by user root ps -U root -u root u | head -n 5 USER PID %CPU %MEM VSZ RSS TTY STAT START TIME COMMAND root 1 0.0 0.0 185240 5972 ? Ss Oct24 0:12 /sbin/init splash root 2 0.0 0.0 0 0 ? S Oct24 0:00 [kthreadd] • Process • Send process in background processname : & or bg • Bring process in forgound fg • Set up VNC in linux: • go to the file /vnc/sysconfig /vnc server • Add your name for desktop –and give the password • Vncserver “-gebmetrt 8008600 –n listen tcp –local host “ • /home/.vnc/xstatup file • Add statx • Fador14” : VNC • For login as root, change permissions • /etc/pam.d= commont on auth required – pam service ! = root qws • And gdm-password • Pam-success if != root.. • Check the Disk Usage, du • du is to check disk usaged • h_. human readable, S deapth, n number, S subdirectory , --max-deapth ==1 • du -s /home ====> summarized the disk data in the home directory • du -a /etc ====> every level of directory • nfree Space in the drive: df • root@kali:/etc# df -h Filesystem Size Used Avail Use% Mounted on rootfs 504M 5.3M 499M 2% / udev 10M 0 10M 0% /dev tmpfs 101M 528K 101M 1% /run /dev/sr0 3.0G 3.0G 0 100% /lib/live/mount/medium /dev/loop0 2.7G 2.7G 0 100% /lib/live/mount/rootfs/filesystem.squashfs tmpfs 504M 0 504M 0% /lib/live/mount/overlay
- 4. • largest file in linux root@kali:~# du -lh | sort -r -h | head -n 5 4.5M . 3.9M ./.cache 3.8M ./.cache/tracker 544K ./.local/share 544K ./.local • Find larger file in window dir c: -recurse -erroraction silentlycontinue | sort length -descending | select -first 20 • Files that modified in last certain time: • files changed in last 24 hours in home directory • find /home -mtime -1 -ls • files changed in last two hours • find /home -mmin -120 -ls • root@kali:/etc# find -type f -iname "*" -mtime -60 -exec ls -l {} ; • -rw-r--r-- 1 root root 1502 Oct 25 03:19 ./last30days • -rw-r--r-- 1 root root 128 Oct 25 02:45 ./resolv.conf • find -mtime ========> last days • -60 in last 60 days • +60 60 days before • 60 exectly 60 day • -type == > file type f for file, d for directory • -daystart ===> begging of the current day • files between a time set • find /python -mtime 8 -mtime 10 -daystart -iname "*.py" • files that are newer between two directory • find /etc -newer /etc/abc • runlevel What is the current run level, most common is 3 and 1 is for super level ( single user mode) Change the run level by telinit 1( DO NOT DO IT) • Find options • find | wc -l • find . -name "mailcap" • find . -name "*.old" • find . -iname "*.old" • find . -iname 1 "*.old" • find . -maxdepth 1 -name "*.old"
- 5. • find . -maxdepth 2 -name "*.old" • find . -maxdepth 2 -not -name "*.menu" | head -n 7 • find . -maxdepth 2 -name "*.menu" -o -name "*.old" | head -n 7 • find / -type d | head -n 7 • find / -type f ".*" | head -n 7 • find / -type f -name ".*" | head -n 7 • find / -type f -perm 0655 | head -n 7 • find / -type f -perm 0664 | head -n 7 • find / -type f -perm /u=s | head -n -5 • find / -type f -perm /u=s | head -n 5 • find / -maxdepth 2 -perm /u=s 2>/dev/null • find ~ -empty • cURL • curl --trace-assci file-name http:// address -trace-time -> will give the time -v verbose --> will print more information • curl -u user:password http://example.org/ • Post = Data curl --data "birthyear=1905&press=%20OK%20" http://www.example.com/when.cgi • put: curl --upload-file uploadfile http://www.example.com/receive.cgi • cookies curl --cookie "name=user1" http://10.1.1.13 -vv * About to connect() to 10.1.1.13 port 80 (#0) * Trying 10.1.1.13... connected * Connected to 10.1.1.13 (10.1.1.13) port 80 (#0) > GET / HTTP/1.1 > User-Agent: curl/7.19.7 (i486-pc-linux-gnu) libcurl/7.19.7 OpenSSL/0.9.8k zlib/1.2.3.3 libidn/1.15 > Host: 10.1.1.13 > Accept: */* > Cookie: name=user1 • curl -I ==> only header • curl -I http://10.1.1.13 -vv • curl --verbose --cookie "cookieName=$tedr" --header 'Host:$tedr' --user- agent "$tedr" --referer "$tedr" --header "Accept-Encoding: gzip,deflate" --header "Accept-Charset""Accept-Charset: ISO-8859-1,utf-8i" --data "<xml>" --header "Content-Type: text/xml" 'http://10.255.0.253/$tedr' • curl refere:
- 6. curl --referer http://10.1.1.13 http://10.1.1.13 Accept: */* Referer: http://10.1.1.5 curl --data "abc.com" http://192.168.22.13 -vv * About to connect() to 192.168.22.13 port 80 (#0) * Trying 192.168.22.13... connected * Connected to 192.168.22.13 (192.168.22.13) port 80 (#0) POST / HTTP/1.1 • TCPDUMP: • URGENT (URG) packets... # tcpdump 'tcp[13] & 32!=0' • ACKNOWLEDGE (ACK) packets... # tcpdump 'tcp[13] & 16!=0' • PUSH (PSH) packets... # tcpdump 'tcp[13] & 8!=0' • Show me all RESET (RST) packets... # tcpdump 'tcp[13] & 4!=0' • Show me all SYNCHRONIZE (SYN) packets... # tcpdump 'tcp[13] & 2!=0' • Show me all FINISH (FIN) packets... # tcpdump 'tcp[13] & 1!=0' • # tcpdump ip6 • Packets with both the RST and SYN flags set # tcpdump 'tcp[13] = 6 & tcp[13]= 2’ • Traffic with the 'Evil Bit' Set • # tcpdump 'ip[6] & 128 != 0' • TCP traffic from 10.5.2.3 destined for port 3389 • tcpdump -nnvvS and src 10.5.2.3 and dst port 3389 • Traffic originating from the 192.168 network headed for the 10 or 172.16 networks • tcpdump -nvX src net 192.168.0.0/16 and dst net 10.0.0.0/8 or 172.16.0.0/16 • tcpdump src 10.0.2.4 and (dst port 3389 or 22) • Show me all ACKNOWLEDGE (ACK) packets... • IPTables • IPtable --flush • Iptables --list • Simulate Drop some packet(as root):
- 7. • # for randomly dropping 10% of incoming packets: • iptables -A INPUT -m statistic --mode random --probability 0.1 -j DROP • # and for dropping 10% of outgoing packets: • iptables -A OUTPUT -m statistic --mode random --probability 0.1 -j DROP • Once done, you can use the following for removing these packet-drops: • $ for the incoming packets: • iptables -D INPUT -m statistic --mode random --probability 0.1 -j DROP • # and for the outgoing packets • iptables -D OUTPUT -m statistic --mode random --probability 0.1 -j DROP • Check the sockets using netstat: Check the routing table: • netstat -nr ==>print kernel routing tables with IP address • netstat -r ==>print kernel routing tables with symbolic host • Interface status • netstat -i • all tcp sockets and active internet connection • Netstat –atn • all udp sockets and active internet connection • Netstat -aun • –t, –u, –w, –x show active TCP, UDP, RAW, or Unix socket connections • If -a is added, the socket in listing mode will also display. • Buffer to the kernel Dmesg Print message buffer of the kernel • dmesg | tail -n 10 • Print last 10 line • Dmesg –c ============> clean dmesg • check the hard drive detected • dmesg | grep sda • Grep any string • dmesg | grep memory • dmesg | grep usb • dmesg ] grep error • Check dmesg in real time • watch " demesg | tail -10" • tar • Create a new tar archive. • $ tar cvf archive_name.tar dirname/ • Extract from an existing tar archive. • $ tar xvf archive_name.tar
- 8. • View an existing tar archive. • $ tar tvf archive_name.tar • grep • Search for a given string in a file (case in-sensitive search). • $ grep -i "the" demo_file • Print the matched line, along with the 3 lines after it. • $ ls -l | grep -A 3 -i "abc" demo_text • Search for a given string in all files recursively • $ grep -r "mthread" * • Matching the pattern in string • grep -e patten • grep -v ( avoid those line) • grep -w match whole word • -x whole line • -i ignore case • Find the string in file • ls -lt | grep -r "check_drop" • ssh • Login to remote host • ssh -l user1 remotehost.example.com • Debug ssh client • ssh -v -l user1 remotehost.example.com • Display ssh client version • $ ssh -V • sed When you copy a DOS file to Unix, you could find rn in the end of each line. This example converts the DOS file format to Unix file format using sed command. • $sed 's/.$//' filename • Print file content in reverse order • $ sed -n '1!G;h;$p' thegeekstuff.txt • Add line number for all non-empty-lines in a file • $ sed '/./=' thegeekstuff.txt | sed 'N; s/n/ /' • awk (text processing and data extraction) • Remove duplicate lines using awk
- 9. • $ awk '!($0 in array) { array[$0]; print }' temp • Print all lines from /etc/passwd that has the same uid and gid • $awk -F ':' '$3==$4' passwd.txt • Print only specific field from a file. • $ awk '{print $2,$5;}' employee.txt • vim • open and close a file • $ vim filename • press :wq! or wq • Go to the 143rd line of file • $ vim +143 filename.txt • Go to the first match of the specified • $ vim +/search-term filename.txt • Open the file in read only mode. • $ vim -R /etc/passwd • diff • Ignore white space while comparing. • # diff -w name_list.txt name_list_new.txt • sort • Sort a file in ascending order • $ sort names.txt • Sort a file in descending order • $ sort -r names.txt • Sort passwd file by 3rd field. • $ sort -t: -k 3n /etc/passwd | more • xargs • Copy all images to external hard-drive • # ls *.jpg | xargs -n1 -i cp {} /external-hard-drive/directory • Search all jpg images in the system and archive it. • # find / -name *.jpg -type f -print | xargs tar -cvzf images.tar.gz • Download all the URLs mentioned in the url-list.txt file • # cat url-list.txt | xargs wget –c • ls • Display filesize in human readable format (e.g. KB, MB etc.,) • $ ls -lh • Order Files Based on Last Modified Time (In Reverse Order) • $ ls -ltr
- 10. • Visual Classification of Files With Special Characters Using ls -F • $ ls -F • pwd command pwd is Print working directory. • cd Change directory Use “shopt -s cdspell” to automatically correct mistyped directory names on cd • gzip • $ gzip test.txt ======> create the *.gz compressed file • $ gzip -d test.txt.gz =======> To uncompress a *.gz file • Display compression ratio of the compressed file using gzip -l $ gzip -l *.gz • bzip2 comma • To create a *.bz2 compressed file: • $ bzip2 test.txt • To uncompress a *.bz2 file: • bzip2 -d test.txt.bz2 • unzip • To extract a *.zip compressed file: • $ unzip test.zip • View the contents of *.zip file (Without unzipping it): • $ unzip -l tests.zip • shutdown • Shutdown the system and turn the power off immediately. • shutdown -h now • Shutdown the system after 10 minutes. • shutdown -h +10 • Reboot the system using shutdown command. • shutdown -r now • Force the filesystem check during reboot. • shutdown -Fr now • ftp • Both ftp and secure ftp (sftp) has similar commands. To connect to a remote server and download multiple files, do the following. • $ ftp IP/hostname
- 11. • ftp> mget *.html • View the file names located on the remote server before downloading, • mls ftp *.txt • crontab • Crontab commands Schedules a command to run periodically. • To check which commands are running currently • corntab –l • To list what you can run, and edit the cornjob file. Open the file will following command and edit with your editor. • corntab -e • You can add a job in following format, where “*” indicates the min/hour/day of the month/month/day in the week. • The following script will run every min, every hour, every day, every week, every month ***** /bin/execute/this/script.sh • The script will run on 5AM, on every Monday 05**1 /bin/execute/this/script.sh Format • Use – sign to give the range, so ****1-5 means Monday to Friday. • Use “,” for the range 0,15,30,45***1-5 means Monday to Friday for every fifteen minutes. • Special words • @reboot Run once, at startup • @yearly Run once a year "0 0 1 1 *" • @monthly Run once a month "0 0 1 * *" • @weekly Run once a week "0 0 * * 0" • @daily Run once a day "0 0 * * *"
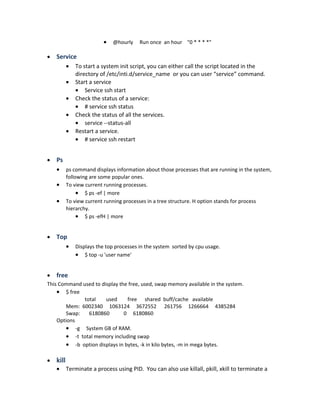
- 12. • @hourly Run once an hour "0 * * * *" • Service • To start a system init script, you can either call the script located in the directory of /etc/inti.d/service_name or you can user “service” command. • Start a service • Service ssh start • Check the status of a service: • # service ssh status • Check the status of all the services. • service --status-all • Restart a service. • # service ssh restart • Ps • ps command displays information about those processes that are running in the system, following are some popular ones. • To view current running processes. • $ ps -ef | more • To view current running processes in a tree structure. H option stands for process hierarchy. • $ ps -efH | more • Top • Displays the top processes in the system sorted by cpu usage. • $ top -u 'user name' • free This Command used to display the free, used, swap memory available in the system. • $ free total used free shared buff/cache available Mem: 6002340 1063124 3672552 261756 1266664 4385284 Swap: 6180860 0 6180860 Options • -g System GB of RAM. • -t total memory including swap • -b option displays in bytes, -k in kilo bytes, -m in mega bytes. • kill • Terminate a process using PID. You can also use killall, pkill, xkill to terminate a
- 13. Linux/unix process. $ ps -ef | grep ssh --- 28200 26104 0 11:28 pts/19 00:00:00 grep --color=auto ssh $ kill -9 28200 $killall " process name ' • rm • remove a file or a directory • $ rm -i filename.txt • Print the filename and get conformation before printing. • $ rm -i file* • Remove a directory and recursively removes all files and directories under the example directory. • $ rm -r example • cp • Copy file1 to file2 preserving the mode, ownership and timestamp. • $ cp -p file1 file2 • Copy file1 to file2. if file2 exists prompt for confirmation before overwritting it. • $ cp -i file1 file2 • mv • Rename file1 to file2. if file2 exists prompt for confirmation before overwritting it. • $ mv -i file1 file2 • $mv -f file1 file2 It will overwritte • mv -v will print what is happening during file rename • $ mv -v file1 file2 • cat • view multiple files on stdout. • $ cat file1 file2 • view file with numbers. • $cat -n /var/abc.log • mount • With mount, one can’t read and write on the disk. It may or may not service from the power boot. Mount an external file system to your local disk. In this case /dev/sdb( notice b) is the USB drive. • Check if the external storage detectable like USB sudo fdisk -l will list the usb, that is sdb in our case • Create a directory to connect sudo mkdir /mnt/sdb_mount
- 14. sudo mount -t ext3 /dev/sdb1 /mnt/sdb_mount, where ext3 is the file system on remote disk • Check the mount hs@ubuntu:/mnt$ df -h Filesystem Size Used Avail Use% Mounted on /dev/sdb1 2.9G 4.5M 2.7G 1% /mnt/sdb_mount • UUID and bikid hs@ubuntu:/mnt$ sudo blkid /dev/sdb1: UUID="bd82eb66-d1ad-4e58-9cea-aef3bde1ca1b" TYPE="ext4" PARTUUID="080be413-01" You can add UUID in /etc/fstab file, so mount will be easy next time. • To mount a file system, you should first create a directory and mount it as shown below. • # mkdir /u1 • # mount /dev/sdb1 /u1 • view mount: • #mount • chmod chmod is used to change the permissions for a file or directory. • Permissions are: • read, write and access that is r,w,a • In the binary representations: • read, write, access as 4,2,1 • level are • Owner(u), group (g) and others ( a or a) • Full access to user, group and read access to other • chmod ug+rwx file.txt and chmod a+r file.txt • chmod 644 file.txt • remove the access from group • chmod g-rwx file.txt • Change file's permissions recursively in a sub-directories. • $ chmod -R ug+rwx file.txt • chown Change the owner and group of a file. • Change the owner of file.txt to user1. • $ chown user1 file.txt • Change the file.txt to owner user1 and group u_group
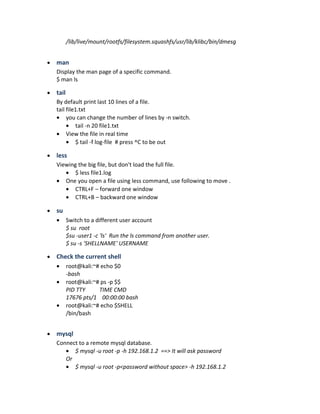
- 15. • $ chown user1:u_group file.txt • -R to change the ownership recursively. • $ chown -R user1:u_group /home/user1 • passwd • $ passwd ===> for current user • Super user can use passwd can reset others password. • $ passwd USERNAME • root user or admin can Remove password for a specific user, once removed the user can login without password. • $ passwd -d USERNAME • mkdir • $ mkdir ~/temp • $ mkdir -p dir1/dir2/dir3/dir4/ • ifconfig To view or configure a network interface on the Linux system. • View all the interfaces along with status. • $ ifconfig -a • Start or stop a specific interface using up and down • $ ifconfig eth0 up • $ ifconfig eth0 down • uname Displays important information about the system such as — Kernel name, Host name, Kernel release number,Processor type $ uname -a Linux 4.4.0-31-generic #50-Ubuntu SMP Wed Jul 13 00:07:12 UTC 2016 x86_64 x86_64 x86_64 GNU/Linux • whereis Where is spacific service or lib exists • root@kali:~# whereis ftp • ftp: /usr/bin/ftp /usr/bin/X11/ftp /usr/share/man/man1/ftp.1..gz • locate Search to locate a specfic file. • # locate dmesg /bin/dmesg /lib/live/mount/rootfs/filesystem.squashfs/bin/dmesg
- 16. /lib/live/mount/rootfs/filesystem.squashfs/usr/lib/klibc/bin/dmesg • man Display the man page of a specific command. $ man ls • tail By default print last 10 lines of a file. tail file1.txt • you can change the number of lines by -n switch. • tail -n 20 file1.txt • View the file in real time • $ tail -f log-file # press ^C to be out • less Viewing the big file, but don't load the full file. • $ less file1.log • One you open a file using less command, use following to move . • CTRL+F – forward one window • CTRL+B – backward one window • su • Switch to a different user account $ su root $su -user1 -c 'ls' Run the ls command from another user. $ su -s 'SHELLNAME' USERNAME • Check the current shell • root@kali:~# echo $0 -bash • root@kali:~# ps -p $$ PID TTY TIME CMD 17676 pts/1 00:00:00 bash • root@kali:~# echo $SHELL /bin/bash • mysql Connect to a remote mysql database. • $ mysql -u root -p -h 192.168.1.2 ==> It will ask password Or • $ mysql -u root -p<password without space> -h 192.168.1.2
- 17. • Connect to a local mysql database. • $ mysql -u root -p • Packet management for fedora and Ubuntu • Fedora install a service(Yum) The most common way to install a service in Fedora is Yum command. Yum take care of dependencies. Install a service in Fedora • $ yum install httpd • To remove • $ yum remove httpd • Fedora packet rpm (Redhat packet manager) RPM is another way to install a package but user needs to take care of dependency and find a correct version depending on hardware and match the Linux kernel distribution. Most common commands are following. • Install apache using rpm. # rpm -ivh httpd-2.2.3-22.0.1.el8.i386.rpm • Upgrade apache using rpm. # rpm -uvh httpd-2.2.3-22.0.1.el5.i386.rpm • To uninstall/remove apache using rpm. # rpm -ev httpd • Ubuntu service install ( apt-get ) Install a service in Ubuntu • apt-get install https • ubuntu packet Package files typically have the extension '.deb' and package manager is dpkg. • To list all packages installed on the system: $dpkg -l • To list the files installed by a package, in this case the ufw package, enter: $dpkg -L ufw • To check which packet installed a file, dpkg -S can tell $dpkg -S /etc/host.conf base-files: /etc/host.conf The output shows that the /etc/host.conf belongs to the base-files package. • open a package: • sudo dpkg -i unknown_3.0-4_i386.deb • Uninstalling a package: • sudo dpkg -r uninstall.pkg
- 18. • Packet table summary for Fedora and Ubuntu Ubuntu Red hat/fedora Package file extension .deb .rpm Repository location configuration /etc/apt/sources.list /etc/yum.conf Install a package from repository apt-get install your_package yum install your_package Install a package file dpkg --install package.deb yum install your_package.rpm rpm -i package.rpm Update a package apt-get upgrade yum update rpm -Uvh [args] Upgrade the entire system apt-get dist-upgrade Yum upgrade Remove a package apt-get remove your- package rpm –e your-package List the package apt-get –list yum list installed rpm –qa List files in an installed package dpkg --listfiles your-package rpm -ql your-package Get information about an installed package dpkg --status your-package rpm -qi your-package List files in a package file dpkg --contents package.deb rpm -qpl package.rpm Extract files in a package dpkg –extract filename Rpm2cpio package.rpm | cpio-vid Find package that installed a file dpkg –serch filename rpm –qf filename Remove a file from local cache directory apt-get clean yum clean package Start/stop a service invoke-rc.d apache start Or Service apache start (with sysVconfig) Service https start Enable a service at boot update-rc.d apache defaults Or sysv-rc-conf apache on ( with sysv-rc-conf ) chkconfig httpd on Disable a service at boot update-rc.d apache purge Or sysv-rc-conf apache off Chkconfig httpd off • ping Ping a host to check availability • $ ping -c 5 google.com • Options • -l size • -f Find the PMTU. Prevent ICMP request being fragment by the in-between router. • -i TTL Time to live • -v TOS type of service
- 19. • ping6 IPv6 address • date Set the system date: • # date -s "mm/dd/yyyy hh:dd:ss" • # hwclock –systohc • # hwclock --systohc –utc • wget Download any resource that is available by web server. $ wget http://example.com/resource.html -O new.name Differences between grep, pgrep, egrep, and fgrep (Linux): • grep Scans file/files line by line and return the lines that contains the pattern on screen and it returns • >1 A syntax error was found or a file was inaccessible (even if matches were found). • Lines if the match found • Null if no match found • grep <flags> <regular expression> <filename> • Grep flags -c count the numbers -n print the number of lines before match -i case senstive -l print the file names that matches the expression • egrep egrep (which is the same as grep -E) treats +, ?, |, (, and ) as meta-characters. For example, • grep "+" test-file.txt will returen any line that has + sign • egrep "+" test-file.txt will return every line • fgrep It will search for simple string rather than a complex pattern; in this case search is faster. fgrap "*" test-file.txt will return every line that has * in it. • Pgrep Process-ID Global Regular Expressions Print will return the process ID of a process. root@kali:/var/log# pgrep ssh 3082 6478 18268
- 20. Group, sudoer and user and groups What sudo can do : /etc/sudoer sudo adduser testgroup1 sudo adduser testuser1 testgroup1 groups testuser1 : will show the testuser and its group Files with user and group info cat /etc/group : will show groups cat /etc/passwd: will show user and its group and shell Upgrade the system sudo do-release-upgrade Access Control Apt-get install acl getfacl : list the current ACL getfacl /home/ setfacl : to set the ACL for a file Add a group: sudo setfacl -m group:group1:rwx /home/ Remove a grop sudo setfacl -m group:group1: /home/ sudo setfacl -m user:test1:--- file.txtize Disk partition Windows has two file system NTFS( new technology file system) and FAT(File allocated table). NTFS have 4.1K block size can support very large file upto 2 to the power of 16. FAT system is window 95 based. Ubuntu can read and write file from both system. Ubuntu file systems are four main file systems: Ext2/Ext3/Ext4 and Btrfs(b-tree), called a extentded file system 2. It depends what size of file system can be installed. • auto - this is a special one. It will try to guess the fs type when you use this. • ext4 - this is probably the most common Linux fs type of the last few years • ext3 - this is the most common Linux fs type from a couple years back • ntfs - this is the most common Windows fs type or larger external hard drives • vfat - this is the most common fs type used for smaller external hard drives • exfat - is also a file system option commonly found on USB flash drives and other external drives
- 21. Disk partition commands Ubuntu file system is name with alphabetical such as /dev/sda is first drive (primary)and /dev/sdb second and so on. The numbers refer to partitions, so /dev/sda1 is the first partition of the first drive. fdisk can list the partition, crate and delete one. hs@ubuntu:~$ sudo fdisk -l | grep dev /dev/sda1 * 2048 81788927 81786880 39G 83 Linux /dev/sda2 81790974 83884031 2093058 1022M 5 Extended /dev/sda5 81790976 83884031 2093056 1022M 82 Linux swap / Solaris Disk /dev/sdb: 7.5 GiB, 8053063680 bytes, 15728640 sectors /dev/sdb1 * 64 6136319 6136256 2.9G c W95 FAT32 (LBA) hs@ubuntu:~$ popular commands are sudo fdisk /dev/sdb(partition you wants to work on) m for list, d for delete Change will not save until you use “w” for write hs@ubuntu:/mnt/hgfs$ lsblk NAME MAJ:MIN RM SIZE RO TYPE MOUNTPOINT fd0 2:0 1 4K 0 disk sda 8:0 0 40G 0 disk ─├ sda1 8:1 0 39G 0 part / ─├ sda2 8:2 0 1K 0 part ─└ sda5 8:5 0 1022M 0 part [SWAP] sdb 8:16 1 7.5G 0 disk===============> This is USB ─└ sdb1 8:17 1 2.9G 0 part sr0 11:0 1 1024M 0 rom sr1 11:1 1 1024M 0 rom hs@ubuntu:/mnt/hgfs$ parted : also describe the partition, parted print Number Start End Size Type File system Flags 1 1049kB 41.9GB 41.9GB primary ext4 boot 2 41.9GB 42.9GB 1072MB extended 5 41.9GB 42.9GB 1072MB logical linux-swap(v1) quit mkfs.ext3 /dev/sdb1 will change the file system to ext3 in /dev/sdb1 partition send a process in backgroup ^z bring it back fg and pid apt-cache command line tool is used for searching apt software package cache.