2. CSS
• CSS stands for Cascading Style Sheets. It is the
language for describing the presentation of Web
pages, including colours, layout, and fonts, thus
making our web pages presentable to the users.
• CSS is designed to make style sheets for the web. It is
independent of HTML and can be used with any XML-
based markup language.
• Cascading: Falling of Styles
• Style: Adding designs/Styling our HTML tags
• Sheets: Writing our style in different documents
3. Advantages of CSS
• CSS saves time − You can write CSS once and then reuse same sheet in
multiple HTML pages.
• Pages load faster − If you are using CSS, you do not need to write HTML
tag attributes every time. Just write one CSS rule of a tag and apply it to all
the occurrences of that tag. So less code means faster download times.
• Easy maintenance − To make a global change, simply change the style,
and all elements in all the web pages will be updated automatically.
• Superior styles to HTML − CSS has a much wider array of attributes than
HTML, so you can give a far better look to your HTML page in comparison
to HTML attributes.
• Multiple Device Compatibility − Style sheets allow content to be
optimized for more than one type of device.
• Global web standards − Now HTML attributes are being deprecated and it
is being recommended to use CSS.
4. CSS Syntax
Selector {
Property 1 : value;
Property 2 : value;
Property 3 : value;
}
For example:
h1
{
Color: red;
Text-align: center;
}
• Selector: selects the element you want to target
• Always remains the same whether we apply internal or external styling
• There are few basic selectors like tags, id’s, and classes
• All forms this key-value pair
• Keys: properties(attributes) like color, font-size, background, width, height,etc
• Value: values associated with these properties
5. CSS Comment
• Comments don’t render on the browser
• Helps to understand our code better and makes it readable.
• Helps to debug our code
Two ways to comment:
Single line
/*<h6> This represents the most/ least important line of the doc. </h6>*/
Here is how to comment out multiple lines:
/*
h1
{
color: red;
text-align: center;
}
*/
6. Ways to write CSS
• There are 3 ways to write CSS in our HTML file.
• Inline CSS
• Internal CSS
• External CSS
7. Inline CSS
• Self-contained
• Uniquely applied on each element
• Before CSS this was the only way to apply styles
• Not an efficient way to write as it has a lot of redundancy
• The idea of separation of concerns was lost
Example:
<h3 style=” color:red” “align-text:center”;> Have a great
day </h3>
<p style=” color: green”> Have a nice day </p>
8. Internal CSS
• With the help of style tag, we can apply styles
within the HTML file
• Code will appear in the head section using the
style tag
• Redundancy is removed
• But the idea of separation of concerns still lost
• Uniquely applied on a single document
9. Internal CSS (Code has to come inside head section)
Example:
<html>
<head>
<style>
body {
background-color: linen;
}
h1 {
color: maroon;
margin-left: 40px; }
</style>
</head>
<body>
<h1>This is a heading</h1>
<p>This is a paragraph.</p>
</body>
</html>
10. External CSS
• With the help of <link> tag in the head tag, we can apply styles
• Reference is added
• File saved with .css extension
• Redundancy is removed
• The idea of separation of concerns is maintained
• Uniquely applied to each document
Example:
"mystyle.css"
body {
background-color: lightblue;
}
h1 {
color: navy;
margin-left: 20px;
}
12. External CSS
Implementation of all the three types of CSS:
<html>
<head>
<title>HTML</title>
<link rel="stylesheet" type="text/css" href="first.css">
<style>
h1
{
color:green;
}
</style>
</head>
<body>
<h1>This heading will be green</h1>
<p style="color:Red">This paragraph will be red</p>
<p id="center">This paragraph will be pink and center-aligned</p>
</body>
</html>
first.css
#center {
text-align: center;
color:pink;
}
13. CSS Selector
• CSS selectors are used to select the content you want
to style.
• Selectors are the part of CSS rule set.
• CSS selectors select HTML elements according to its
id, class, type, attribute etc.
• There are several different types of selectors in CSS.
CSS Element Selector
CSS Id Selector
CSS Class Selector
CSS Universal Selector
CSS Group Selector
Pseudo class selector
14. 1) CSS Element Selector
• The element selector selects the HTML element by name.
• Similar to internal css
<html>
<head>
<title>element selector</title>
<style>
/* h1 element selected here */
h1 {
color:green;
text-align:center;
}
/* h2 element selected here */
h2 {
text-align:center;
}
</style>
</head>
<body>
<h1>sample CSS</h1>
<h2>element Selector</h2>
</body>
</html>
15. 2) CSS Id Selector
• The id selector selects the id attribute of an HTML element to select a
specific element.
• An id is always unique within the page so it is chosen to select a single,
unique element.
• It is written with the hash character (#), followed by the id(user defined
name ) of the element.
<html>
<head>
<style>
#para1 {
text-align: center;
color: blue;
}
</style>
</head>
<body>
<p id="para1">CSS Sample program</p>
<p>This paragraph will not be affected.</p>
</body>
</html>
16. 3) CSS Class Selector
• The class selector selects HTML elements with a specific
class attribute.
• It is used with a period character . (dot symbol) followed
by the class name.
• A class name cannot start with a number.
<html>
<head>
<style>
.center1 {
text-align: center;
color: blue;
font-style: italic;
}
</style>
</head>
17. 3) CSS Class Selector
<body>
<h1 class="center1“ id= “head1”>This heading is
blue and center-aligned.</h1>
<p class="center1“ id=“para1”>This paragraph is
blue and center-aligned.</p>
</body>
</html>
• Both tags h1 and p tag will be affected as
class= center1
18. 3) CSS Class Selector
• If you want to specify that only one specific HTML element should be
affected then you should use the element name with class selector.
<html>
<head>
<style>
p.center {
text-align: center;
color: blue;
}
</style>
</head>
<body>
<h1 class="center">This heading is not affected</h1>
<p class="center">This paragraph is blue and center-aligned.</p>
</body>
</html>
19. 4) CSS Universal Selector
• The universal selector is used as a wildcard character. It
selects all the elements on the page.
<html>
<head>
<style>
* {
color: green;
font-size: 20px;
}
</style>
</head>
<body>
<h2>This is heading</h2>
<p>This style will be applied on every paragraph.</p>
</body>
</html>
20. 5) CSS Group Selector
• You can apply a style to many selectors if you like.
• Just separate the selectors with a comma.
• The grouping selector is used to select all the elements with the same style definitions.
• Grouping selector is used to minimize the code.
• Commas are used to separate each selector in grouping.
<html>
<head>
<style>
h1, h2, p {
text-align: center;
color: blue;
letter-spacing: .4em;
margin-bottom: 1em;
text-transform: lowercase;
}
</style>
21. 5) CSS Group Selector
<html> <head> <style>
h1, h2, p {
text-align: center;
color: blue;
letter-spacing: .4em;
margin-bottom: 1em;
text-transform: lowercase;
}
</style> </head>
<body>
<h1>CSS program</h1>
<h2>CSS program (In smaller font)</h2>
<p>This is a paragraph.</p>
</body>
</html>
22. 6) Pseudo-classes
• What are Pseudo-classes?
• A pseudo-class is used to define a special state of
an element.
For example, it can be used to:
– Style an element when a user mouses over it
– Style visited and unvisited links differently
– Style an element when it gets focus
Syntax:
selector:pseudo-class
{
property: value;
}
23. 6) Pseudo-classes
<!DOCTYPE html>
<html> <head> <style>
/* unvisited link */
a:link {
color: red;
}
/* visited link */
a:visited {
color: green;
}
/* mouse over link */
a:hover {
color: hotpink;
}
/* selected link */
a:active {
color: blue;
}
</style> </head><body>
<h2>Styling a link depending on state</h2>
<p><b><a href="default.asp" target="_blank">This is a link</a></b></p>
<p><b>Note:</b> a:hover MUST come after a:link and a:visited in the CSS definition in order to be effective.</p>
<p><b>Note:</b> a:active MUST come after a:hover in the CSS definition in order to be
effective.</p></body></html>
24. CSS Properties
• CSS properties are the styles used on specified
selectors.
• Here are some basic CSS properties to work with.
– Text Properties
– List Properties
– Border Properties
– Font Properties
– Background image properties
– Table properties
25. Text Properties
Property Description Values
color Sets the color of a text RGB, hex, keyword
line-height Sets the distance between lines normal, number, length, %
letter-spacing Increase or decrease the space between
characters
normal, length
text-align Aligns the text in an element left, right, center, justify
text-
decoration
Adds decoration to text none, underline, overline,
line-through
text-indent Indents the first line of text in an
element
length, %
text-transform Controls the letters in an element none, capitalize, uppercase,
lowercase
27. <body>
<div>
<h1>text formatting</h1>
<p>Unlike paragraph formatting, which determines the type of
text in an HTML document (body text, headings, captions,
etc.), text formatting determines its style, color, alignment, etc.
<a target="_blank" href="tryit.asp?filename=trycss_text">"Try it
Yourself"</a> link.</p>
</div>
<p> Unlike paragraph formatting, which determines the type of
text in an HTML document (body text, headings, captions,
etc.), text formatting determines its style, color, alignment, etc.
</p>
29. List Properties
Property Description Values
list-style Sets all the properties for a list in
one declaration
list-style-type, list-style-position,
list-style-image, inherit
list-style-image Specifies an image as the list-item
marker
URL, none, inherit
list-style-position Specifies where to place the list-
item marker
inside, outside, inherit
list-style-type Specifies the type of list-item
marker
none, disc, circle, square, decimal,
decimal-leading-zero,
Armenian, georgian,
lower-alpha, upper-alpha, lower-
greek, lower-latin, upper-latin,
lower-roman, upper-roman,
inherit
33. Border Properties
Property Description Values
border Sets all the border properties in one
declaration
border-width, border-style, border-color
border-bottom Sets all the bottom border
properties in one declaration
border-bottom-width, border-bottom-
style, border-bottom-color
border-bottom-color Sets the color of the bottom border border-color
border-bottom-style Sets the style of the bottom border border-style
border-bottom-width Sets the width of the bottom border border-width
border-color Sets the color of the four borders color_name, hex_number, rgb_number,
transparent, inherit
border-left Sets all the left border properties in
one declaration
border-left-width, border-left-style,
border-left-color
border-left-color Sets the color of the left border border-color
border-left-style Sets the style of the left border border-style
border-left-width Sets the width of the left border border-width
34. Property Description Values
border-right Sets all the right border
properties in one
declaration
border-right-width, border-right-style,
border-right-color
border-right-color Sets the color of the right
border
border-color
border-right-style Sets the style of the right
border
border-style
border-right-width Sets the width of the right
border
border-width
border-style Sets the style of the four
borders
none, hidden, dotted, dashed, solid,
double, groove, ridge, inset, outset,
inherit
35. border-top Sets all the top border
properties in one
declaration
border-top-width, border-top-style,
border-top-color
border-top-color Sets the color of the top
border
border-color
border-top-style Sets the style of the top
border
border-style
border-top-width Sets the width of the top
border
border-width
border-width Sets the width of the four
borders
thin, medium, thick, length, inherit
37. <body>
<p class="ex1">
All borders in different colors.
</p>
<p class="example2">
Border in green color with radius attribute
</p>
<p style = "border-width:4px;
border-top-style:solid;
border-bottom-style:dashed;
border-left-style:groove;
border-right-style:ridge;">
Border with four different styles.
</p>
<p style = "border-bottom-width:4px;border-top-width:10px;
border-left-width: 2px;border-right-width:15px;border-style:solid;">
Border with four different width.
</p>
</body>
</html>
39. Font Properties
Property Description Values
font Sets all the font properties in one
declaration
font-style, font-variant, font-weight, font-size/line-
height, font-family, caption, icon, menu, message-
box, small-caption, status-bar, inherit
font-family Specifies the font family for text family-name, generic-family, inherit
font-size Specifies the font size of text xx-small, x-small, small, medium, large, x-large,
xx-large, smaller, larger, length, %, inherit
font-style Specifies the font style for text normal, italic, oblique, inherit
font-variant Specifies whether or not a text
should be displayed in a small-caps
font
normal, small-caps, inherit
font-weight Specifies the weight of a font normal, bold, bolder, lighter,
100, 200, 300, 400, 500, 600, 700, 800, 900, inherit
(many of these are not supported!)
40. <html>
<head>
<style>
body {
font-size: larger;
font-style: oblique;
color:rgb(10, 220, 20);
font-variant: small-caps;
font-weight: bold;
font-family: cursive;
}
}
</style>
</head>
<body>
Sample program for font properties
</body>
</html>
41. CSS Background images
• The background-image property sets one or
more background images for an element.
• By default, a background-image is placed at the
top-left corner of an element, and repeated
both vertically and horizontally.
• Always set a background-color to be used if the
image is unavailable.
• The background-image property sets one or
more background images for an element.By
default, a background-image is placed at the
top-left corner of an element, and repeated
both vertically and horizontally.
42. Syntax:
1) background-image: url|none|initial|inherit;
2) background-color
3) background-repeat: repeat,no-repeat, repeat-x,repeat-y
4) To Set Background Position
section {
background-position: 20px 30px;
}
5) To Resize a Background Image
section {
background-size: 20px 40px;
}
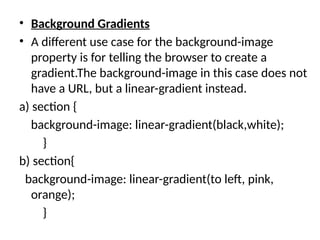
43. • Background Gradients
• A different use case for the background-image
property is for telling the browser to create a
gradient.The background-image in this case does not
have a URL, but a linear-gradient instead.
a) section {
background-image: linear-gradient(black,white);
}
b) section{
background-image: linear-gradient(to left, pink,
orange);
}
44. Styling Tables
• A table in CSS is used to apply the various styling properties to the
HTML Table elements to arrange the data in rows and columns, or
possibly in a more complex structure in a properly organized manner.
There are some CSS properties that are widely used in designing
table using CSS:
Border - It is used for specifying borders in the table.
Border-collapse(collapse/separate) - The border-collapse property
tells us whether the browser should control the appearance of the
adjacent borders that touch each other or whether each cell should
maintain its style.
Padding
width
height
text-align
color
Background-color
45. Styling Tables
Caption -Side(top/bottom) - Caption side property is
used for controlling the placement of caption in the
table. By default, captions are placed above the table.
Border Spacing: This property specifies the space
between the borders of the adjacent cells.
Empty cells(show/hide): This property specifies
whether or not to display borders and background on
empty cells in a table.
Table layout(auto/fixed): The table layout property is
used to set up the layout algorithm used for the table.
Hoverable Table - Use the :hover selector on <tr> to
highlight table rows on mouse
48. <span>
• The HTML span element is a generic inline
container for inline elements and content.
• It is used to group elements for styling purposes
(by using the class or id attributes).
• The span tag is used for the grouping of inline
elements & this tag does not make any visual
change by itself.
• span is very similar to the div tag, but div is a
block-level tag and span is an inline tag.
51. • The CSS box model is essentially a box that
wraps around every HTML element. It consists
of: margins, borders, padding, and the actual
content as shown in figure.
• Content - The content of the box, where text
and images appear
• Padding - Clears an area around the content.
The padding is transparent
• Border - A border that goes around the
padding and content
• Margin - Clears an area outside the border.
The margin is transparent
52. Audio Tag
Definition and Usage
• The <audio> tag is used to embed sound content in a
document, such as music or other audio streams.
• The <audio> tag contains one or more <source> tags
with different audio sources. The browser will choose
the first source it supports.
• The text between the <audio> and </audio> tags will
only be displayed in browsers that do not support
the <audio> element.
• There are three supported audio formats in HTML:
MP3, WAV, and OGG.
53. • Attributes
• Autoplay: (autoplay)Specifies that the audio will start
playing as soon as it is ready
• Controls :(controls)Specifies that audio controls
should be displayed (such as a play/pause button etc)
• Loop :(loop) Specifies that the audio will start over
again, every time it is finished
• Muted(muted)Specifies that the audio output should
be muted
• Preload (auto/ metadata/none)Specifies if and how
the author thinks the audio should be loaded when
the page loads
• Src(URL)Specifies the URL of the audio file
54. <!DOCTYPE html>
<html>
<body>
<h1>The audio element</h1>
<p>Click on the play button to play a sound:</p>
<audio controls>
<source src="horse.ogg" type="audio/ogg">
<source src="horse.mp3" type="audio/mpeg">
Your browser does not support the audio element.
</audio>
</body>
</html>
55. Video Tag
Definition and Usage
• The <video> tag is used to embed video content in a
document, such as a movie clip or other video streams.
• The <video> tag contains one or more <source> tags with
different video sources. The browser will choose the first
source it supports.
• The text between the <video> and </video> tags will only be
displayed in browsers that do not support the <video>
element.
• There are three supported video formats in HTML: MP4,
WebM, and OGG.
56. Video Tag
Attributes:
• Autoplay(autoplay)Specifies that the video will start playing as
soon as it is ready
• Controls(controls)Specifies that video controls should be displayed
(such as a play/pause button etc).
• Height(pixels)Sets the height of the video player
• Loop(loop)Specifies that the video will start over again, every time
it is finished
• Muted(muted)Specifies that the audio output of the video should
be muted
• Poster(URL)Specifies an image to be shown while the video is
downloading, or until the user hits the play button
• Preload(auto, metadata,none)Specifies if and how the author
thinks the video should be loaded when the page loads
• Src (URL)Specifies the URL of the video file
• Width(pixels)Sets the width of the video player
57. Video Tag
<!DOCTYPE html>
<html>
<body>
<h1>The video element</h1>
<video width="320" height="240" controls>
<source src="movie.mp4" type="video/mp4">
<source src="movie.ogg" type="video/ogg">
Your browser does not support the video tag.
</video>
</body>
</html>