SlideShare a Scribd company logo
UNIT 0 :: REFLECTION & INTROSPECTION
learningthroughimprovementandevaluation
tutorials: step by step procedures for using computer programs
Re-editing five old photos from last year using new skills and new
techniques.
Reflection & Introspection are key concepts which help artists grow by looking at their
previous work, analyzing it for successes and failures, and then improving this work.
Reflection is the act of mental concentration and careful consideration of the past.
Introspection is an observation or examination of one's own mental and emotional state,
mental processes, etc.; the act of looking within oneself..
Use these ideas to think about how you create art, why you create art and what it is you
are trying to portray. Then apply these ideas to your first project.
• Collect ten photos from last year. Find the unedited versions of these photos. Decide
how you can tie these photos together to form a message, story, purpose, idea, or
overall theme. Then decide how you could represent this visually. Think about color,
contrast, composition and other editing techniques which you could use to show UNITY
between these ten photos.
<<application: actions in reflection & introspection
STEP 1: Edit one of these photos using various tools and
techniques learned last year. Remember you are
going to create UNITY through the elements and
principles
of design. As you are editing try to remember what
you
have done, what has worked and what didn’t.
STEP 2: Open a second picture.
STEP 3: WINDOW  ACTION  click on the TAB and
SELECT NEW ACTION  RECORD
STEP 4: Try to edit this second picture the same way you
edited
the first. Use the same filters, crops, adjustments
etc.
STEP 5: When you are done editing, click the STOP button
in
the actions menu.
STEP 6: Open a SECOND PHOTO. In the ACTIONS
WINDOW press PLAY. You should see all of your
“mouse clicks” replay on this new photo. This is a
simple way to recreate edits on batches of photos.
STEP 7: This function is not flawless. You may are may not
be
able to use it on all of your photos. Edit 10 photos
using this concept of applying similar effects to
each of
the photos to create unity.

More Related Content

DOCX
Photoshop
PPTX
Rights and Responsibilities 4
DOCX
Title.docx
PPTX
7. evaluation (2)
PPTX
DOCX
Mandala team vision and strategy
PDF
Reflective Writing In The Art Room - Kari Lomax
PPTX
Photoshop Lesson 7
Photoshop
Rights and Responsibilities 4
Title.docx
7. evaluation (2)
Mandala team vision and strategy
Reflective Writing In The Art Room - Kari Lomax
Photoshop Lesson 7

Similar to Unit 1 creating unity (20)

PDF
Use Your 5 Eyes for Better Photography
PPTX
Adobe Lightroom Training Workshop Slides
PPTX
EMTECH-GROUP1.pptx.......................
PDF
Introduction Insighting
PPTX
[Pro forma] experimental photography
PPTX
What’s up close
PPTX
Task 6 evaluations rotation
PPTX
Pink and Blue Modern Virtual Reality Presentation (1).pptx
PDF
Photography as a Creative Outlet_ Techniques and Inspirations by Toby Wagstaf...
PDF
Photoshop7
PPTX
[Pro forma] experimental photography
DOCX
Digital Photo#7 Principles In Photography
PPT
Tag digital creativity
PPTX
Building Creative Teams: Motivation Engagement and Retrospectives
PDF
Insighting introduction
PDF
Consumers insights
PPT
Decisions in the darkroom
PPTX
Unit 21 proposal document
KEY
Right Brain vs. Left Brain: Crossing the Lines Between Technical and Creative...
PPTX
Chap40
Use Your 5 Eyes for Better Photography
Adobe Lightroom Training Workshop Slides
EMTECH-GROUP1.pptx.......................
Introduction Insighting
[Pro forma] experimental photography
What’s up close
Task 6 evaluations rotation
Pink and Blue Modern Virtual Reality Presentation (1).pptx
Photography as a Creative Outlet_ Techniques and Inspirations by Toby Wagstaf...
Photoshop7
[Pro forma] experimental photography
Digital Photo#7 Principles In Photography
Tag digital creativity
Building Creative Teams: Motivation Engagement and Retrospectives
Insighting introduction
Consumers insights
Decisions in the darkroom
Unit 21 proposal document
Right Brain vs. Left Brain: Crossing the Lines Between Technical and Creative...
Chap40
Ad

More from MrLawler (20)

PPTX
Final project (pbl)
PDF
Hum 201 microlesson mod 2
PDF
Hum 201 microlesson mod 1
PPTX
History of Animation
PPTX
Final Review
PPTX
Cultural study
PPTX
Tips on taking good photos
PPTX
Alyson Martinez
PPTX
DID/COMM: URBAN TOY
PPTX
DID/COMM: URBAN TOY
PPTX
You Pick-Three Part 2
PPTX
YOU PICK THREE
PPTX
DPI 1 and DPI 2 Texture Mapping
PPTX
DID Children's Book
PPTX
Case Study and Tutorials
PPT
Origins of photography
PPTX
DPI 2: Final
PPTX
DPI Final Instructions
PPTX
Digital illustration final
PPTX
Case Studies - Masters
Final project (pbl)
Hum 201 microlesson mod 2
Hum 201 microlesson mod 1
History of Animation
Final Review
Cultural study
Tips on taking good photos
Alyson Martinez
DID/COMM: URBAN TOY
DID/COMM: URBAN TOY
You Pick-Three Part 2
YOU PICK THREE
DPI 1 and DPI 2 Texture Mapping
DID Children's Book
Case Study and Tutorials
Origins of photography
DPI 2: Final
DPI Final Instructions
Digital illustration final
Case Studies - Masters
Ad

Unit 1 creating unity

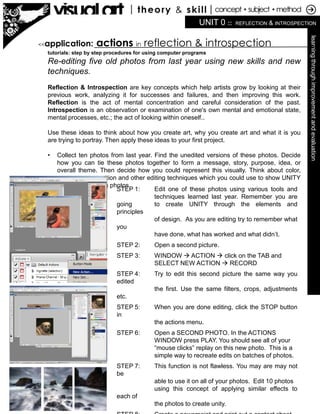
  • 1. UNIT 0 :: REFLECTION & INTROSPECTION learningthroughimprovementandevaluation tutorials: step by step procedures for using computer programs Re-editing five old photos from last year using new skills and new techniques. Reflection & Introspection are key concepts which help artists grow by looking at their previous work, analyzing it for successes and failures, and then improving this work. Reflection is the act of mental concentration and careful consideration of the past. Introspection is an observation or examination of one's own mental and emotional state, mental processes, etc.; the act of looking within oneself.. Use these ideas to think about how you create art, why you create art and what it is you are trying to portray. Then apply these ideas to your first project. • Collect ten photos from last year. Find the unedited versions of these photos. Decide how you can tie these photos together to form a message, story, purpose, idea, or overall theme. Then decide how you could represent this visually. Think about color, contrast, composition and other editing techniques which you could use to show UNITY between these ten photos. <<application: actions in reflection & introspection STEP 1: Edit one of these photos using various tools and techniques learned last year. Remember you are going to create UNITY through the elements and principles of design. As you are editing try to remember what you have done, what has worked and what didn’t. STEP 2: Open a second picture. STEP 3: WINDOW  ACTION  click on the TAB and SELECT NEW ACTION  RECORD STEP 4: Try to edit this second picture the same way you edited the first. Use the same filters, crops, adjustments etc. STEP 5: When you are done editing, click the STOP button in the actions menu. STEP 6: Open a SECOND PHOTO. In the ACTIONS WINDOW press PLAY. You should see all of your “mouse clicks” replay on this new photo. This is a simple way to recreate edits on batches of photos. STEP 7: This function is not flawless. You may are may not be able to use it on all of your photos. Edit 10 photos using this concept of applying similar effects to each of the photos to create unity.