SlideShare a Scribd company logo
4
Most read
5
Most read
7
Most read
Sanjivani Rural Education Society’s
Sanjivani College of Engineering, Kopargaon-423 603
(An Autonomous Ins tute, Affiliated to Savitribai Phule Pune University, Pune)
NACC ‘A’ Grade Accredited, ISO 9001:2015 Certified
Department of Computer Engineering
(NBA Accredited)
Programming for IOT
Subject- Internet of Things (CO312)
Unit No: -2 Programming for IOT
Programming for IOT
Contents:
Introduction to Arduino Programming: Features of Arduino, Board details, Setup and IDE.
Introduction to Python programming: Python IDE, Basic programs on Raspberry Pi, Setup
and Installation of OS, Pin Configuration,
Implementation of IoT Applications with Raspberry Pi.
Programming for IOT
Introduction to Arduino Programming: Features of Arduino, Board details, Setup and
IDE: -
Arduino is a software as well as hardware platform that helps in making electronic projects. It is an
opensource platform and has a variety of controllers and microprocessors. There are various types of
Arduino boards used for various purposes.
The Arduino is a single circuit board, which consists of different interfaces or parts. The board consists of
the set of digital and analog pins that are used to connect various devices and components, which we want to
use for the functioning of the electronic devices.
Programming for IOT
Features of Arduino:
1.Microcontroller-based: Arduino boards are equipped with microcontrollers from the Atmel AVR or
ARM families, providing computational capabilities for controlling electronic circuits and interfacing
with sensors, actuators, and other peripherals.
2.Open-source Hardware and Software: Arduino hardware designs are open-source, allowing users to
study, modify, and manufacture their own boards. Additionally, the Arduino software platform, including
the IDE and libraries, is open-source and freely available for download and modification.
3.Versatility: Arduino boards support a wide range of input and output options, including digital and
analog pins, serial communication interfaces (UART, SPI, I2C), PWM (Pulse Width Modulation) outputs,
and more, making them suitable for diverse projects and applications.
Programming for IOT
4.Expandability: Arduino boards can be expanded with shields, which are add-on modules that provide
additional functionality such as wireless connectivity (Wi-Fi, Bluetooth), motor control, GPS, display
interfaces, and sensor integration.
5.Community Support: Arduino boasts a large and active community of users, developers, and enthusiasts
who contribute to forums, tutorials, projects, and libraries, providing valuable resources for learning and
troubleshooting.
Arduino Board Details:
Programming for IOT
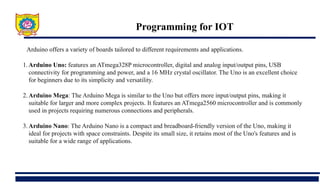
Arduino offers a variety of boards tailored to different requirements and applications.
1.Arduino Uno: features an ATmega328P microcontroller, digital and analog input/output pins, USB
connectivity for programming and power, and a 16 MHz crystal oscillator. The Uno is an excellent choice
for beginners due to its simplicity and versatility.
2.Arduino Mega: The Arduino Mega is similar to the Uno but offers more input/output pins, making it
suitable for larger and more complex projects. It features an ATmega2560 microcontroller and is commonly
used in projects requiring numerous connections and peripherals.
3.Arduino Nano: The Arduino Nano is a compact and breadboard-friendly version of the Uno, making it
ideal for projects with space constraints. Despite its small size, it retains most of the Uno's features and is
suitable for a wide range of applications.
Programming for IOT
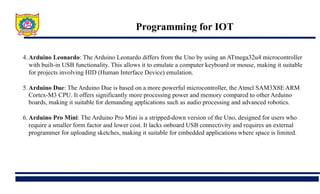
4.Arduino Leonardo: The Arduino Leonardo differs from the Uno by using an ATmega32u4 microcontroller
with built-in USB functionality. This allows it to emulate a computer keyboard or mouse, making it suitable
for projects involving HID (Human Interface Device) emulation.
5.Arduino Due: The Arduino Due is based on a more powerful microcontroller, the Atmel SAM3X8E ARM
Cortex-M3 CPU. It offers significantly more processing power and memory compared to other Arduino
boards, making it suitable for demanding applications such as audio processing and advanced robotics.
6.Arduino Pro Mini: The Arduino Pro Mini is a stripped-down version of the Uno, designed for users who
require a smaller form factor and lower cost. It lacks onboard USB connectivity and requires an external
programmer for uploading sketches, making it suitable for embedded applications where space is limited.
Programming for IOT
Setup and IDE: -
1. Download the Arduino IDE:
• Visit the official Arduino website (https://www.arduino.cc/en/software) and navigate to the
"Software" section.
• Download the appropriate version of the Arduino IDE for your operating system (Windows, macOS,
or Linux).
2. Install the Arduino IDE:
• Once the download is complete, locate the downloaded file and run the installer.
• Follow the on-screen instructions to complete the installation process. This typically involves
selecting the installation directory and agreeing to the license terms.
Programming for IOT
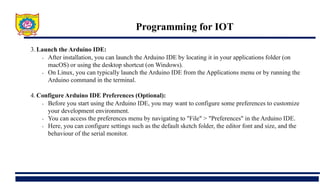
3. Launch the Arduino IDE:
• After installation, you can launch the Arduino IDE by locating it in your applications folder (on
macOS) or using the desktop shortcut (on Windows).
• On Linux, you can typically launch the Arduino IDE from the Applications menu or by running the
Arduino command in the terminal.
4. Configure Arduino IDE Preferences (Optional):
• Before you start using the Arduino IDE, you may want to configure some preferences to customize
your development environment.
• You can access the preferences menu by navigating to "File" > "Preferences" in the Arduino IDE.
• Here, you can configure settings such as the default sketch folder, the editor font and size, and the
behaviour of the serial monitor.
Programming for IOT
5. Install Board Support for Arduino Boards:
• If you're using an official Arduino board (such as Arduino Uno, Arduino Mega, etc.), you don't need
to install additional board support as it comes pre-installed.
• However, if you're using a third-party board or a different hardware platform (e.g., ESP8266,
ESP32), you'll need to install the appropriate board support package.
• You can install board support packages by navigating to "Tools" > "Board" > "Boards Manager..." in
the Arduino IDE, searching for the desired board, and clicking the "Install" button.
6. Connect Your Arduino Board:
• Before you can upload sketches to your Arduino board, you need to connect it to your computer
using a USB cable.
• Make sure your Arduino board is properly connected and recognized by your computer. You may
need to install drivers for your Arduino board, depending on your operating system.
Programming for IOT
7. Upload a Sketch:
• Now that your Arduino IDE is set up and your board is connected, you can upload a sketch
(program) to your Arduino board.
• Open a sample sketch or write your own code in the Arduino IDE.
• Click the "Upload" button (a right-pointing arrow icon) in the IDE toolbar to compile and upload the
sketch to your Arduino board.
Programming for IOT
Introduction to Python programming: Python IDE, Raspberry Pi, Setup and
Installation of OS, Pin Configuration.
Python programming is a popular and versatile programming language known for its simplicity,
readability, and vast ecosystem of libraries and frameworks. It's widely used for web development, data
analysis, machine learning, automation, and more. When working with Python on a Raspberry Pi, you
have access to a powerful combination of hardware and software for building various projects.
Programming for IOT
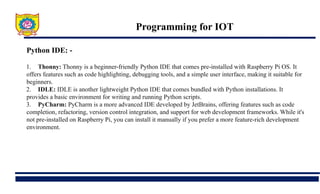
Python IDE: -
1. Thonny: Thonny is a beginner-friendly Python IDE that comes pre-installed with Raspberry Pi OS. It
offers features such as code highlighting, debugging tools, and a simple user interface, making it suitable for
beginners.
2. IDLE: IDLE is another lightweight Python IDE that comes bundled with Python installations. It
provides a basic environment for writing and running Python scripts.
3. PyCharm: PyCharm is a more advanced IDE developed by JetBrains, offering features such as code
completion, refactoring, version control integration, and support for web development frameworks. While it's
not pre-installed on Raspberry Pi, you can install it manually if you prefer a more feature-rich development
environment.
Programming for IOT
Raspberry Pi: -
The Raspberry Pi is a series of small single-board computers developed in the United Kingdom by the
Raspberry Pi Foundation to promote teaching of basic computer science in schools and in developing
countries. It does not include peripherals (such as keyboards and mice). The Raspberry Pi is a low cost,
credit-card sized computer that plugs into a computer monitor or TV, and uses a standard keyboard and
mouse. It is a capable little device that enables people of all ages to explore computing, and to learn how to
program in languages like Scratch and Python. The Raspberry Pi is a credit-card-sized computer that costs
between $5 and $35. It's available anywhere in the world, and can function as a proper desktop computer or
be used to build smart devices. A Raspberry Pi is a general-purpose computer, usually with a Linux operating
system, and the ability to run multiple programs. Raspberry Pi is like the brain. Its primary advantage comes
in processing higher level processing capability. It’s a single board computer.
Programming for IOT
1.Setup and Installation of OS:
a. Download Raspberry Pi OS (formerly Raspbian):
• Visit the official Raspberry Pi website (https://www.raspberrypi.org/downloads/) and download the latest
version of Raspberry Pi OS.
• Choose the appropriate version based on your Raspberry Pi model (e.g., Raspberry Pi OS with Desktop,
Raspberry Pi OS Lite).
b.Flash the OS Image onto an SD Card:
• Use a tool like Raspberry Pi Imager (available for Windows, macOS, and Linux) to flash the
downloaded OS image onto an SD card.
• Insert the SD card into your computer's SD card reader.
• Open Raspberry Pi Imager and choose the downloaded OS image file, select the SD card as the
destination, and click "Write."
Programming for IOT
c. Boot Raspberry Pi:
• Once the flashing process is complete, safely eject the SD card from your computer and insert it into the
SD card slot on your Raspberry Pi.
• Connect peripherals such as a keyboard, mouse, monitor, and power supply to the Raspberry Pi.
• Power on the Raspberry Pi, and it should boot into the Raspberry Pi OS desktop environment.
d.Follow Setup Wizard:
• The first time you boot into Raspberry Pi OS, you'll be prompted to go through a setup wizard to
configure language, timezone, keyboard layout, password, and other settings.
• Follow the on-screen instructions to complete the setup process.
Programming for IOT
2.Pin Configuration:
• Raspberry Pi boards feature General Purpose Input/Output (GPIO) pins, which can be used to interface
with external electronic components such as LEDs, buttons, sensors, and more.
• GPIO pins are numbered and labeled on the Raspberry Pi board. Pin configuration can vary depending
on the Raspberry Pi model, so refer to the documentation for your specific model.
• GPIO pins can be accessed and controlled programmatically using libraries such as RPi.GPIO in Python
or WiringPi in C/C++.
• It's important to understand the pin numbering scheme used by Raspberry Pi (e.g., BCM numbering or
physical pin numbering) when working with GPIO pins in your projects.
• Additionally, some GPIO pins may have special functions or restrictions, so refer to the Raspberry Pi
documentation for guidance on pin usage and capabilities.
Programming for IOT
Implementation of IoT Applications with Raspberry Pi: -
1. Selecting Hardware Components:
• Choose the appropriate Raspberry Pi model based on your project requirements, considering factors
such as processing power, memory, connectivity options, and form factor.
• Select sensors, actuators, and communication modules based on the specific application requirements.
Common components include temperature sensors, motion sensors, cameras, motors, LED displays,
and wireless communication modules (e.g., Wi-Fi, Bluetooth, LoRa).
2. Setting Up Raspberry Pi:
• Install the operating system (e.g., Raspberry Pi OS) on the Raspberry Pi board following the setup and
installation instructions provided earlier.
• Connect peripherals such as keyboard, mouse, monitor, and power supply to the Raspberry Pi.
• Ensure that the Raspberry Pi is connected to the internet, either via Ethernet or Wi-Fi.
Programming for IOT
3. Writing Software Code:
• Develop software code to interact with sensors, process data, and control actuators using
programming languages such as Python, C/C++, or Java.
Utilize GPIO libraries (e.g., RPi.GPIO for Python) to interface with GPIO pins and communicate with
external hardware components.
• Implement logic for data acquisition, processing, and decision-making based on sensor readings and
application requirements.
• Incorporate libraries and APIs for communication with external services, cloud platforms, or other IoT
devices.
4. Connecting Sensors and Actuators:
• Wire sensors and actuators to the GPIO pins of the Raspberry Pi according to the pin configuration
and electrical specifications provided in the component datasheets.
Programming for IOT
• Ensure proper power supply and grounding for reliable operation of connected components.
• Use appropriate resistors, capacitors, and other electronic components as necessary to protect the
Raspberry Pi and connected devices from overvoltage, overcurrent, and other electrical hazards.
5. Testing and Debugging:
• Test the IoT application on the Raspberry Pi to verify sensor data acquisition, actuator control, and
communication functionalities.
• Monitor system behaviour, troubleshoot any issues or errors, and optimize code and hardware
configurations for performance and reliability.
6. Integration with Cloud Services:
• Integrate the Raspberry Pi-based IoT application with cloud services or platforms for data storage,
visualization, analytics, and remote management.
Programming for IOT
• Use protocols such as MQTT, HTTP, or WebSocket for communication between the Raspberry Pi and
cloud services.
• Implement security measures such as encryption, authentication, and access control to protect data and
ensure the integrity and confidentiality of IoT communications.
7. Deployment and Maintenance:
• Deploy the Raspberry Pi-based IoT solution in the target environment, whether it's a home, office,
industrial facility, or outdoor location.
• Monitor system performance, conduct periodic maintenance, and update software and firmware as
needed to address security vulnerabilities, add new features, or improve functionality.
Programming for IOT
THANK YOU
Introduction to Arduino Programming: Features of Arduino

More Related Content

PDF
IoT Programming on the Raspberry Pi
PDF
IoT Arduino UNO, RaspberryPi with Python, RaspberryPi Programming using Pytho...
PPTX
Arduino vs Raspberry Pi
PDF
ESP32 WiFi & Bluetooth Module - Getting Started Guide
PPTX
Basic Building Blocks of Internet of Things.
PPTX
Introduction to Internet of Things Hardware
PPTX
Internet of things using Raspberry Pi
PDF
Internet of Things: A Hands-On Approach
IoT Programming on the Raspberry Pi
IoT Arduino UNO, RaspberryPi with Python, RaspberryPi Programming using Pytho...
Arduino vs Raspberry Pi
ESP32 WiFi & Bluetooth Module - Getting Started Guide
Basic Building Blocks of Internet of Things.
Introduction to Internet of Things Hardware
Internet of things using Raspberry Pi
Internet of Things: A Hands-On Approach

What's hot (20)

PPT
Presentation On RAID(Redundant Array Of Independent Disks) Basics
PPTX
Performance analysis(Time & Space Complexity)
PPTX
Pci,usb,scsi bus
PPTX
Stack organization
PPTX
Forward and Backward chaining in AI
PPTX
Modes of transfer - Computer Organization & Architecture - Nithiyapriya Pasav...
PPTX
DBMS - RAID
PPTX
Computer Organization and Architecture.pptx
PPTX
Integration of Sensors & Actuators With Arduino.pptx
PPTX
PCI BUS
PDF
Embedded Firmware Design and Development, and EDLC
PPTX
8251 USART
PPTX
Register transfer and micro-operation
PPTX
Arduino and its hw architecture
PPTX
ARM Processor
PPT
CPU Scheduling Algorithms
PPT
Microprocessor 80386
PDF
Syntax Directed Definition and its applications
PPT
Intel 64bit Architecture
PPTX
File system structure
Presentation On RAID(Redundant Array Of Independent Disks) Basics
Performance analysis(Time & Space Complexity)
Pci,usb,scsi bus
Stack organization
Forward and Backward chaining in AI
Modes of transfer - Computer Organization & Architecture - Nithiyapriya Pasav...
DBMS - RAID
Computer Organization and Architecture.pptx
Integration of Sensors & Actuators With Arduino.pptx
PCI BUS
Embedded Firmware Design and Development, and EDLC
8251 USART
Register transfer and micro-operation
Arduino and its hw architecture
ARM Processor
CPU Scheduling Algorithms
Microprocessor 80386
Syntax Directed Definition and its applications
Intel 64bit Architecture
File system structure
Ad

Similar to Introduction to Arduino Programming: Features of Arduino (20)

DOCX
Interoperability in Internet of Things (IOT)
PPT
Arduino presentation by_warishusain
PDF
Introduction to Arduino
PPT
ARDUINO_presentation
PPT
ARDUINO_presentation_by_Ravishankar_Pati.ppt
PPTX
Internet of Things prescribed by University
PDF
Download full ebook of Arduino In Easy Steps Stuart Yarnold instant download pdf
PPTX
PPTX
Arduino
PPTX
Q2 Arduino Draft Q2 Arduino Draft Q2 Arduino Draft
PDF
Oop 2014 embedded systems with open source hardware v2
DOCX
Winter traning arduino report final
PPTX
SHIVAM RANA.pptx base ojn ghjhgytrdudurytygt
PDF
IOT and embaded_Internship final Report-2.pdf
PPTX
INTRODUCTION_TO_ARDUINO uno, applications
PDF
4 Introduction to Arduino.pdf
PPTX
M.Tech Internet of Things Unit - III.pptx
PPTX
Embedded L1_notes_unit2_architecture.pptx
PDF
manual Internet of ThingsArduino_IOTArdu
PPTX
Arduino and c programming
Interoperability in Internet of Things (IOT)
Arduino presentation by_warishusain
Introduction to Arduino
ARDUINO_presentation
ARDUINO_presentation_by_Ravishankar_Pati.ppt
Internet of Things prescribed by University
Download full ebook of Arduino In Easy Steps Stuart Yarnold instant download pdf
Arduino
Q2 Arduino Draft Q2 Arduino Draft Q2 Arduino Draft
Oop 2014 embedded systems with open source hardware v2
Winter traning arduino report final
SHIVAM RANA.pptx base ojn ghjhgytrdudurytygt
IOT and embaded_Internship final Report-2.pdf
INTRODUCTION_TO_ARDUINO uno, applications
4 Introduction to Arduino.pdf
M.Tech Internet of Things Unit - III.pptx
Embedded L1_notes_unit2_architecture.pptx
manual Internet of ThingsArduino_IOTArdu
Arduino and c programming
Ad

Recently uploaded (20)

PPT
Mechanical Engineering MATERIALS Selection
PPTX
CYBER-CRIMES AND SECURITY A guide to understanding
PPTX
Recipes for Real Time Voice AI WebRTC, SLMs and Open Source Software.pptx
PPTX
web development for engineering and engineering
PDF
PPT on Performance Review to get promotions
PPTX
M Tech Sem 1 Civil Engineering Environmental Sciences.pptx
PDF
July 2025 - Top 10 Read Articles in International Journal of Software Enginee...
PDF
Mohammad Mahdi Farshadian CV - Prospective PhD Student 2026
PDF
Digital Logic Computer Design lecture notes
PPT
Project quality management in manufacturing
PDF
SM_6th-Sem__Cse_Internet-of-Things.pdf IOT
PDF
composite construction of structures.pdf
PDF
R24 SURVEYING LAB MANUAL for civil enggi
PPTX
bas. eng. economics group 4 presentation 1.pptx
PDF
Evaluating the Democratization of the Turkish Armed Forces from a Normative P...
PDF
Enhancing Cyber Defense Against Zero-Day Attacks using Ensemble Neural Networks
PPTX
OOP with Java - Java Introduction (Basics)
PPTX
Construction Project Organization Group 2.pptx
PPTX
Sustainable Sites - Green Building Construction
PPTX
Lecture Notes Electrical Wiring System Components
Mechanical Engineering MATERIALS Selection
CYBER-CRIMES AND SECURITY A guide to understanding
Recipes for Real Time Voice AI WebRTC, SLMs and Open Source Software.pptx
web development for engineering and engineering
PPT on Performance Review to get promotions
M Tech Sem 1 Civil Engineering Environmental Sciences.pptx
July 2025 - Top 10 Read Articles in International Journal of Software Enginee...
Mohammad Mahdi Farshadian CV - Prospective PhD Student 2026
Digital Logic Computer Design lecture notes
Project quality management in manufacturing
SM_6th-Sem__Cse_Internet-of-Things.pdf IOT
composite construction of structures.pdf
R24 SURVEYING LAB MANUAL for civil enggi
bas. eng. economics group 4 presentation 1.pptx
Evaluating the Democratization of the Turkish Armed Forces from a Normative P...
Enhancing Cyber Defense Against Zero-Day Attacks using Ensemble Neural Networks
OOP with Java - Java Introduction (Basics)
Construction Project Organization Group 2.pptx
Sustainable Sites - Green Building Construction
Lecture Notes Electrical Wiring System Components

Introduction to Arduino Programming: Features of Arduino

  • 1. Sanjivani Rural Education Society’s Sanjivani College of Engineering, Kopargaon-423 603 (An Autonomous Ins tute, Affiliated to Savitribai Phule Pune University, Pune) NACC ‘A’ Grade Accredited, ISO 9001:2015 Certified Department of Computer Engineering (NBA Accredited)
  • 2. Programming for IOT Subject- Internet of Things (CO312) Unit No: -2 Programming for IOT
  • 3. Programming for IOT Contents: Introduction to Arduino Programming: Features of Arduino, Board details, Setup and IDE. Introduction to Python programming: Python IDE, Basic programs on Raspberry Pi, Setup and Installation of OS, Pin Configuration, Implementation of IoT Applications with Raspberry Pi.
  • 4. Programming for IOT Introduction to Arduino Programming: Features of Arduino, Board details, Setup and IDE: - Arduino is a software as well as hardware platform that helps in making electronic projects. It is an opensource platform and has a variety of controllers and microprocessors. There are various types of Arduino boards used for various purposes. The Arduino is a single circuit board, which consists of different interfaces or parts. The board consists of the set of digital and analog pins that are used to connect various devices and components, which we want to use for the functioning of the electronic devices.
  • 5. Programming for IOT Features of Arduino: 1.Microcontroller-based: Arduino boards are equipped with microcontrollers from the Atmel AVR or ARM families, providing computational capabilities for controlling electronic circuits and interfacing with sensors, actuators, and other peripherals. 2.Open-source Hardware and Software: Arduino hardware designs are open-source, allowing users to study, modify, and manufacture their own boards. Additionally, the Arduino software platform, including the IDE and libraries, is open-source and freely available for download and modification. 3.Versatility: Arduino boards support a wide range of input and output options, including digital and analog pins, serial communication interfaces (UART, SPI, I2C), PWM (Pulse Width Modulation) outputs, and more, making them suitable for diverse projects and applications.
  • 6. Programming for IOT 4.Expandability: Arduino boards can be expanded with shields, which are add-on modules that provide additional functionality such as wireless connectivity (Wi-Fi, Bluetooth), motor control, GPS, display interfaces, and sensor integration. 5.Community Support: Arduino boasts a large and active community of users, developers, and enthusiasts who contribute to forums, tutorials, projects, and libraries, providing valuable resources for learning and troubleshooting. Arduino Board Details:
  • 7. Programming for IOT Arduino offers a variety of boards tailored to different requirements and applications. 1.Arduino Uno: features an ATmega328P microcontroller, digital and analog input/output pins, USB connectivity for programming and power, and a 16 MHz crystal oscillator. The Uno is an excellent choice for beginners due to its simplicity and versatility. 2.Arduino Mega: The Arduino Mega is similar to the Uno but offers more input/output pins, making it suitable for larger and more complex projects. It features an ATmega2560 microcontroller and is commonly used in projects requiring numerous connections and peripherals. 3.Arduino Nano: The Arduino Nano is a compact and breadboard-friendly version of the Uno, making it ideal for projects with space constraints. Despite its small size, it retains most of the Uno's features and is suitable for a wide range of applications.
  • 8. Programming for IOT 4.Arduino Leonardo: The Arduino Leonardo differs from the Uno by using an ATmega32u4 microcontroller with built-in USB functionality. This allows it to emulate a computer keyboard or mouse, making it suitable for projects involving HID (Human Interface Device) emulation. 5.Arduino Due: The Arduino Due is based on a more powerful microcontroller, the Atmel SAM3X8E ARM Cortex-M3 CPU. It offers significantly more processing power and memory compared to other Arduino boards, making it suitable for demanding applications such as audio processing and advanced robotics. 6.Arduino Pro Mini: The Arduino Pro Mini is a stripped-down version of the Uno, designed for users who require a smaller form factor and lower cost. It lacks onboard USB connectivity and requires an external programmer for uploading sketches, making it suitable for embedded applications where space is limited.
  • 9. Programming for IOT Setup and IDE: - 1. Download the Arduino IDE: • Visit the official Arduino website (https://www.arduino.cc/en/software) and navigate to the "Software" section. • Download the appropriate version of the Arduino IDE for your operating system (Windows, macOS, or Linux). 2. Install the Arduino IDE: • Once the download is complete, locate the downloaded file and run the installer. • Follow the on-screen instructions to complete the installation process. This typically involves selecting the installation directory and agreeing to the license terms.
  • 10. Programming for IOT 3. Launch the Arduino IDE: • After installation, you can launch the Arduino IDE by locating it in your applications folder (on macOS) or using the desktop shortcut (on Windows). • On Linux, you can typically launch the Arduino IDE from the Applications menu or by running the Arduino command in the terminal. 4. Configure Arduino IDE Preferences (Optional): • Before you start using the Arduino IDE, you may want to configure some preferences to customize your development environment. • You can access the preferences menu by navigating to "File" > "Preferences" in the Arduino IDE. • Here, you can configure settings such as the default sketch folder, the editor font and size, and the behaviour of the serial monitor.
  • 11. Programming for IOT 5. Install Board Support for Arduino Boards: • If you're using an official Arduino board (such as Arduino Uno, Arduino Mega, etc.), you don't need to install additional board support as it comes pre-installed. • However, if you're using a third-party board or a different hardware platform (e.g., ESP8266, ESP32), you'll need to install the appropriate board support package. • You can install board support packages by navigating to "Tools" > "Board" > "Boards Manager..." in the Arduino IDE, searching for the desired board, and clicking the "Install" button. 6. Connect Your Arduino Board: • Before you can upload sketches to your Arduino board, you need to connect it to your computer using a USB cable. • Make sure your Arduino board is properly connected and recognized by your computer. You may need to install drivers for your Arduino board, depending on your operating system.
  • 12. Programming for IOT 7. Upload a Sketch: • Now that your Arduino IDE is set up and your board is connected, you can upload a sketch (program) to your Arduino board. • Open a sample sketch or write your own code in the Arduino IDE. • Click the "Upload" button (a right-pointing arrow icon) in the IDE toolbar to compile and upload the sketch to your Arduino board.
  • 13. Programming for IOT Introduction to Python programming: Python IDE, Raspberry Pi, Setup and Installation of OS, Pin Configuration. Python programming is a popular and versatile programming language known for its simplicity, readability, and vast ecosystem of libraries and frameworks. It's widely used for web development, data analysis, machine learning, automation, and more. When working with Python on a Raspberry Pi, you have access to a powerful combination of hardware and software for building various projects.
  • 14. Programming for IOT Python IDE: - 1. Thonny: Thonny is a beginner-friendly Python IDE that comes pre-installed with Raspberry Pi OS. It offers features such as code highlighting, debugging tools, and a simple user interface, making it suitable for beginners. 2. IDLE: IDLE is another lightweight Python IDE that comes bundled with Python installations. It provides a basic environment for writing and running Python scripts. 3. PyCharm: PyCharm is a more advanced IDE developed by JetBrains, offering features such as code completion, refactoring, version control integration, and support for web development frameworks. While it's not pre-installed on Raspberry Pi, you can install it manually if you prefer a more feature-rich development environment.
  • 15. Programming for IOT Raspberry Pi: - The Raspberry Pi is a series of small single-board computers developed in the United Kingdom by the Raspberry Pi Foundation to promote teaching of basic computer science in schools and in developing countries. It does not include peripherals (such as keyboards and mice). The Raspberry Pi is a low cost, credit-card sized computer that plugs into a computer monitor or TV, and uses a standard keyboard and mouse. It is a capable little device that enables people of all ages to explore computing, and to learn how to program in languages like Scratch and Python. The Raspberry Pi is a credit-card-sized computer that costs between $5 and $35. It's available anywhere in the world, and can function as a proper desktop computer or be used to build smart devices. A Raspberry Pi is a general-purpose computer, usually with a Linux operating system, and the ability to run multiple programs. Raspberry Pi is like the brain. Its primary advantage comes in processing higher level processing capability. It’s a single board computer.
  • 16. Programming for IOT 1.Setup and Installation of OS: a. Download Raspberry Pi OS (formerly Raspbian): • Visit the official Raspberry Pi website (https://www.raspberrypi.org/downloads/) and download the latest version of Raspberry Pi OS. • Choose the appropriate version based on your Raspberry Pi model (e.g., Raspberry Pi OS with Desktop, Raspberry Pi OS Lite). b.Flash the OS Image onto an SD Card: • Use a tool like Raspberry Pi Imager (available for Windows, macOS, and Linux) to flash the downloaded OS image onto an SD card. • Insert the SD card into your computer's SD card reader. • Open Raspberry Pi Imager and choose the downloaded OS image file, select the SD card as the destination, and click "Write."
  • 17. Programming for IOT c. Boot Raspberry Pi: • Once the flashing process is complete, safely eject the SD card from your computer and insert it into the SD card slot on your Raspberry Pi. • Connect peripherals such as a keyboard, mouse, monitor, and power supply to the Raspberry Pi. • Power on the Raspberry Pi, and it should boot into the Raspberry Pi OS desktop environment. d.Follow Setup Wizard: • The first time you boot into Raspberry Pi OS, you'll be prompted to go through a setup wizard to configure language, timezone, keyboard layout, password, and other settings. • Follow the on-screen instructions to complete the setup process.
  • 18. Programming for IOT 2.Pin Configuration: • Raspberry Pi boards feature General Purpose Input/Output (GPIO) pins, which can be used to interface with external electronic components such as LEDs, buttons, sensors, and more. • GPIO pins are numbered and labeled on the Raspberry Pi board. Pin configuration can vary depending on the Raspberry Pi model, so refer to the documentation for your specific model. • GPIO pins can be accessed and controlled programmatically using libraries such as RPi.GPIO in Python or WiringPi in C/C++. • It's important to understand the pin numbering scheme used by Raspberry Pi (e.g., BCM numbering or physical pin numbering) when working with GPIO pins in your projects. • Additionally, some GPIO pins may have special functions or restrictions, so refer to the Raspberry Pi documentation for guidance on pin usage and capabilities.
  • 19. Programming for IOT Implementation of IoT Applications with Raspberry Pi: - 1. Selecting Hardware Components: • Choose the appropriate Raspberry Pi model based on your project requirements, considering factors such as processing power, memory, connectivity options, and form factor. • Select sensors, actuators, and communication modules based on the specific application requirements. Common components include temperature sensors, motion sensors, cameras, motors, LED displays, and wireless communication modules (e.g., Wi-Fi, Bluetooth, LoRa). 2. Setting Up Raspberry Pi: • Install the operating system (e.g., Raspberry Pi OS) on the Raspberry Pi board following the setup and installation instructions provided earlier. • Connect peripherals such as keyboard, mouse, monitor, and power supply to the Raspberry Pi. • Ensure that the Raspberry Pi is connected to the internet, either via Ethernet or Wi-Fi.
  • 20. Programming for IOT 3. Writing Software Code: • Develop software code to interact with sensors, process data, and control actuators using programming languages such as Python, C/C++, or Java. Utilize GPIO libraries (e.g., RPi.GPIO for Python) to interface with GPIO pins and communicate with external hardware components. • Implement logic for data acquisition, processing, and decision-making based on sensor readings and application requirements. • Incorporate libraries and APIs for communication with external services, cloud platforms, or other IoT devices. 4. Connecting Sensors and Actuators: • Wire sensors and actuators to the GPIO pins of the Raspberry Pi according to the pin configuration and electrical specifications provided in the component datasheets.
  • 21. Programming for IOT • Ensure proper power supply and grounding for reliable operation of connected components. • Use appropriate resistors, capacitors, and other electronic components as necessary to protect the Raspberry Pi and connected devices from overvoltage, overcurrent, and other electrical hazards. 5. Testing and Debugging: • Test the IoT application on the Raspberry Pi to verify sensor data acquisition, actuator control, and communication functionalities. • Monitor system behaviour, troubleshoot any issues or errors, and optimize code and hardware configurations for performance and reliability. 6. Integration with Cloud Services: • Integrate the Raspberry Pi-based IoT application with cloud services or platforms for data storage, visualization, analytics, and remote management.
  • 22. Programming for IOT • Use protocols such as MQTT, HTTP, or WebSocket for communication between the Raspberry Pi and cloud services. • Implement security measures such as encryption, authentication, and access control to protect data and ensure the integrity and confidentiality of IoT communications. 7. Deployment and Maintenance: • Deploy the Raspberry Pi-based IoT solution in the target environment, whether it's a home, office, industrial facility, or outdoor location. • Monitor system performance, conduct periodic maintenance, and update software and firmware as needed to address security vulnerabilities, add new features, or improve functionality.